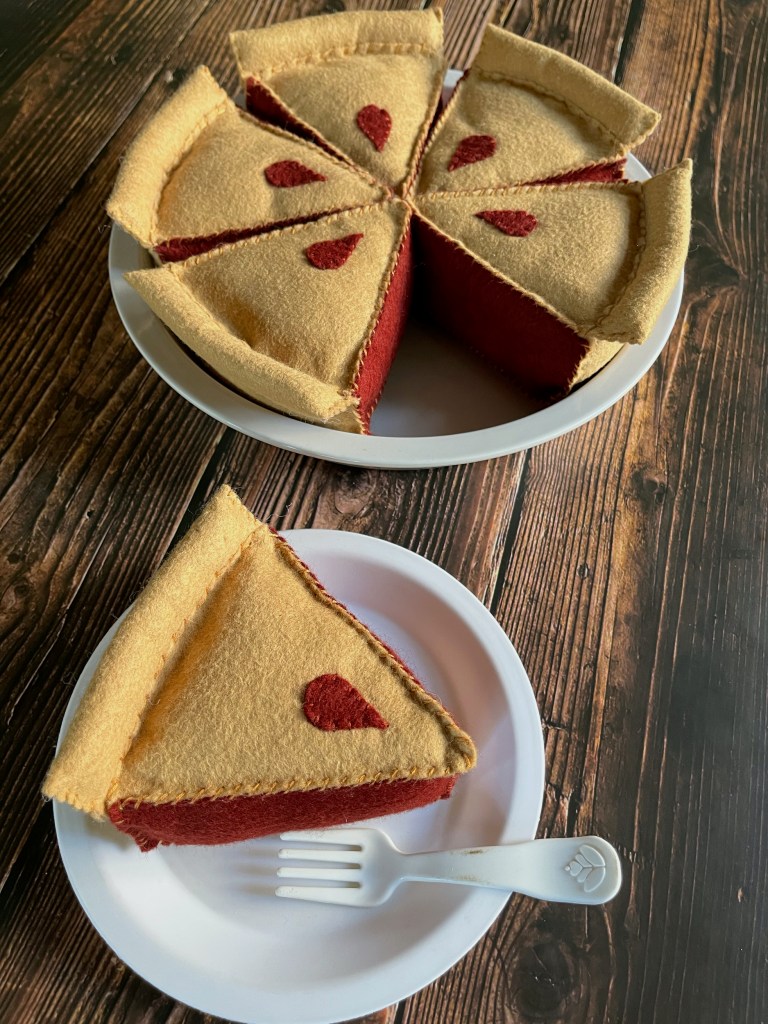
What child (or inner child) doesn’t love preparing toy food in a play kitchen?
I had a play kitchen when I was a little girl and loved preparing pie for myself, my sister and my parents. Now that I’m grown and have a daughter of my own, I want to make her some handcrafted play food so she can enjoy making meals for everyone during play, or while we cook in the kitchen next to her!
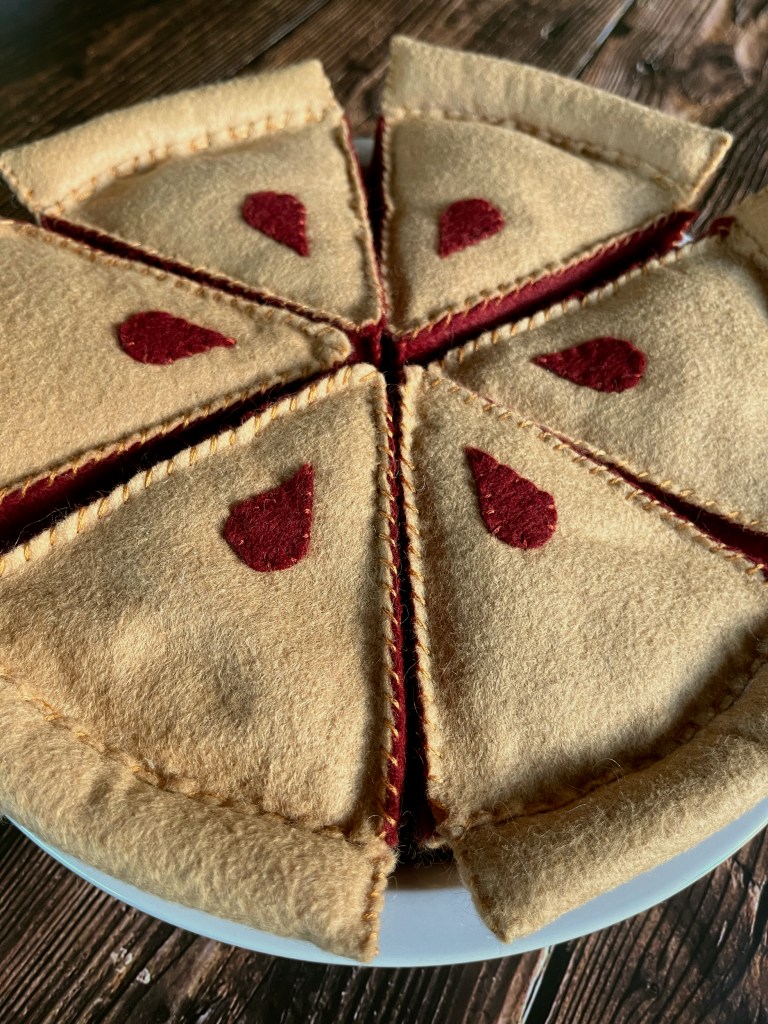
Please feel free to use these patterns to create some play food for you and yours! This pattern will make one slice of pie. I made 6 slices total to create a whole pie. You can duplicate it as much as you want to make multiple pieces of each food!
SUPPLIES
- Pie patterns (see above)
- Paper scissors
- Light tan felt material
- Red felt material (or whichever color you want for the pie’s interior)
- Fiberfill stuffing
- Sewing pins
- Sewing scissors
- Sewing needle
- Embroidery floss (light tan and red or whichever color you choose for the pie’s interior)
INSTRUCTIONS
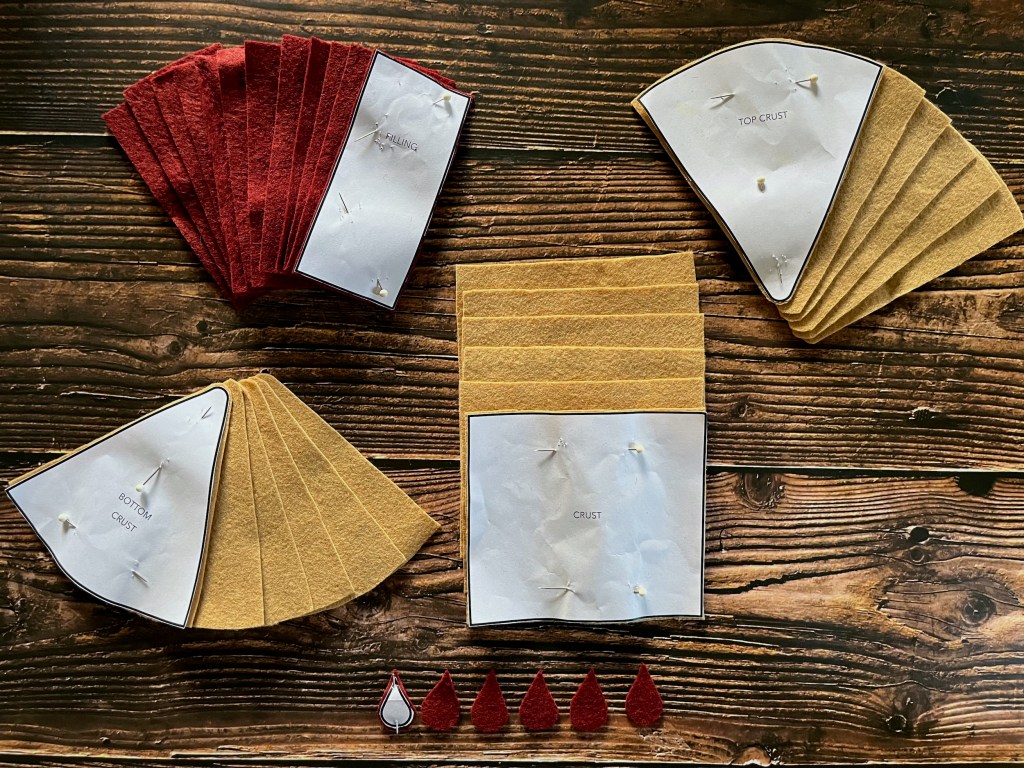


- Print out the pie pattern I’ve provided, then cut the patterns from the paper.
- Pin the patterns on the appropriate colored felt, then use sewing scissors to cut the felt.
- Thread a sewing needle with red embroidery floss to sew the pie filling together.
- Using a whipstitch, begin sewing along one of the short edges of the pie filling, conceal the knots in between the two pieces of felt.
- Pin the red vent piece to the top crust piece and use red embroidery floss to whipstitch the vent “hole” in place.
- Thread a sewing needle with light tan embroidery floss and whipstitch the triangular shape of the pie filling to the triangular shape of the bottom crust. Conceal the knots inside.
- Continue using light tan embroidery floss to whipstitch the triangular shape of the top crust to the triangular other side of the pie filling. Conceal the knots inside.
- Align the back crust to the open back end of the pie we’ve already stitched together. This piece will be taller than the main pie structure and that’s perfect! We are going to fold the excess down to create the edge of the crust!
- Beginning at the top of one side of the filling, whipstitch down the filling, along the bottom crust then up the other side of the filling. Stop here to stuff the pie.
- Stuff the inside of the pie with fiberfill, then continue stitching the back crust to the top crust. Conceal the knots inside.
- Fold the extra felt down to create the edge of the crust and stitch along where the end meets the back of the pie. Conceal the knots inside.
- Stuff the edge of the crust with fiberfill and then sew the sides shut to keep the stuffing in. Conceal the knots inside.
- Repeat steps 2 through 12 five more times for a full pie!
- Enjoy!