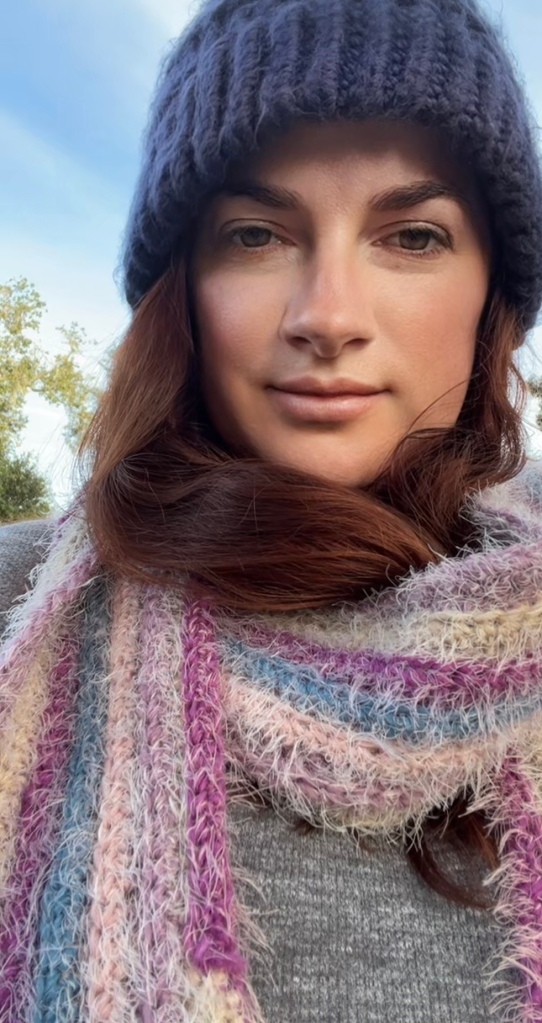
DIY Knit Loom Hat for Beginners

Welcome back friends! Do you have or have you heard of knit looms? They are fantastic! Whether you’re a beginner or not, it is cozy and comforting, sitting and creating items for yourself and/or loved ones!

I have a set of knit looms with four different sizes. I’ve recently been experimenting with different hat knits and patterns! Let’s create one of my favorites!

This pattern is pretty straight forward and easy to handle for any beginner! If you have any questions, please let me know!

SUPPLIES

  • Extra Large Knit loom XL gauge (41 pegs)
  • Bulky yarn (weight #5)
  • Loom hook
  • Scissors
  • Yarn needle

INSTRUCTIONS

  1. Create a slip-knot and cast it over the first vertical peg to the left of the horizontal anchor peg, with the tail of yarn draped within the loom.
  2. Working counter-clockwise, wrap the next peg twice, then use the loom hook to pull the bottom loop over the top loop and off the peg. Do this for each peg until you’ve completed the “cast-on” round.
  3. Now we’ll work on the brim! Continuing to work counter-clockwise, e-wrap each peg once and pull the bottom loops from the previous row over the new top loops and off the pegs. Repeat this step for at least 18 rounds.
  4. Once you’ve completed 18 rounds, find your original slip-knot and place its loop back on the first peg. Continue replacing the loops of the “cast-on” round back on to the loom, then tuck the tail of yarn from the knot into the folded brim.
  5. To anchor the brim, pull the loops from the previous round over the top “cast-on” round loops and off the pegs.
  6. Now we will work on the main part of the hat! Begin with a round of e-wrapping each peg once and pulling the bottom loops from the previous round over the new top loops and off the pegs.
  7. The next round will consist of alternating e-wrap pegs and purl pegs all the way around. To purl, stick your pick underneath the center of yarn on a peg, use it to grab ahold of the new yarn and pull it up under the existing yarn to make a loop. Carefully take the whole stitch off of the peg and loop this new loop of yarn on to the peg and pull it tight.
  8. Repeat steps 6 and 7 for as many times as you’d like the hat to be long. I did 14 e-wrap rounds and 14 e-wrap and purl rounds for a total of 28.
  9. When finished, take your yarn and wrap it around the outside edge of the loom until it touches back on itself and cut it here for extra yarn.
  10. Thread the extra yarn on to the yarn needle and stitch it upward through each loop, then you can remove that loop off of its peg. Once all of the loops have been stitched through with the needle, you can pull the string to begin forming the top of the hat.
  11. Turn the hat inside out and pull the needle and extra yarn through the still existing hole at the top of the hat, then pull the drawstring as tight as possible to close the hole completely.
  12. Stitch around the edges of where the hole was and tie it in knots to secure it. Then stitch the rest of the end into the inner stitches of the hat to hide it.
  13. Turn the hat right side out and if you have a patch (like my nifty Super Mario star) stitch that patch onto the brim.
  14. Enjoy!
Advertisement

DIY – Tissue Paper Flowers

Part of the fun in raising Zoey is making things that delight her; I want to create fun, educational crafts for her that are made with love and will be loved! 

This week we’ll be creating paper marigolds in honor of their color and beauty, but also to begin educating Zoey on their significance this time of year. 

These supplies and instructions create two large paper flowers, but you can multiply and create as many as you like in as many color variations as you like!

SUPPLIES
  • 4 green pipe cleaners
  • 5 sheets of 20” x 20” gift-wrapping tissue paper (or similar)
  • Scissors
INSTRUCTIONS
  1. Layer and align the 5 sheets of tissue paper, then fold them in half and crease.
  2. Cut along the crease line so you now have two groups of tissue sheets, 10” by 20” each.
  3. Keeping each group of tissue sheets layered and aligned, pleat the paper in an accordion fold.
  4. Holding the accordion fold closed, cut a half-circle shape from each end. (You could also cut a point or zig-zag)
  5. Holding the accordion fold closed, wrap the top of a pipe cleaner around the middle of the paper and twist it around itself to hold it in place. This will also act as the stem.
  6. Fan out the paper, then gently separate the first layer of paper from the rest, and move it up to form the top layer of petals.
  7. Gently separate the rest of the paper layers and fluff out your flower.
  8. To bolster the stem a bit more: Secure a second pipe cleaner around the existing pipe cleaner where it meets the flower, and wrap it around the existing pipe cleaner down to the base (start back up if you have extra).
  9. Repeat steps 3 through 8 with the second group of tissue sheets.
  10. Enjoy!

DIY – Paper Bat Halloween Decorations

I am so bad at decorating my house for the holidays! I want to be better about it, but I’d like to create and/or collect decorations that are my vibe and that I’m proud of!

One of the looks I’ve always loved are colonies of bats flying across doorways and walls of a home. I’ve created my own bat pattern, so let’s create!

SUPPLIES
  • Bat pattern (see above)
  • 8.5 x 11 black cardstock paper
  • Scotch tape (or similar)
  • Scissors
INSTRUCTIONS
  1. Print and cut out these bat patterns I’ve created, then cut each bat shape in half!
  2. Fold each piece of cardstock paper in half horizontally and lightly tape the body of the bat patterns to the fold of the cardstock paper.
  3. Cut out as many bat shapes as you like and attach them to the wall or walls around your home. **For added texture you can fold some or all of the wings up so they aren’t flat against the wall!
  4. Enjoy!

DIY – Sensory Slime

Part of the fun in raising Zoey is making things that delight her; I want to create fun, educational activities for her that are made with love and will be loved!

I don’t believe I ever played with slime as a child, but it is super fascinating and fun to play with even as an adult! Adults should mix the slime, or supervise while a child over the age of 6 mixes. This recipe is safer for children to handle, but if they are younger than the age of 6 please supervise and please do not let them eat any!

Let’s make some slime!

SUPPLIES
  • 8 oz of washable school glue (i.e. Elmer’s)
  • 1 to 2 drops of liquid food coloring (optional)
  • 1/4 cup glitter (optional)
  • 1 teaspoons of baking soda
  • 2 tablespoons of saline solution (contact lens solution)
INSTRUCTIONS
  1. Squeeze the glue into a medium bowl, then stir in the food coloring and glitter if desired.
  2. Add the baking soda to the glue mixture and stir until smooth.
  3. Add 2 tablespoons of the saline solution and stir slowly until the mixture forms into a blob and becomes stringy.
  4. Pick up the slime and work it between your hands, until smooth.
  5. Enjoy and store in an airtight container so you can enjoy again!

Transformed Power Wheels – Barbie to Jurassic Park Jeep

Part of the fun in raising Zoey is making things that delight her; I want to create fun, educational toys for her that are made with love and will be loved! I loved dinosaurs as a child and quite honestly I still do! I see that interest piquing in Zoey too and of course I’m going to encourage it!

I was always fascinated by power wheels as a child and envious of any of my friends who owned one! When my parents found this one at a thrift store, I jumped at the chance to get one for Zoey, but it needed a little work! As you can see it started out as Barbie themed, and while I loved Barbies too this was the opportunity to try something new!

Let’s create a Jurassic Park themed power wheels! Please feel free to use this information to breathe new life into an old toy and, if you have any new tips, please feel free to share!

SUPPLIES
INSTRUCTIONS
  1. Using a screwdriver, dismantle the toy as much as possible without breaking anything. If a piece is not coming off and you’re worried it will break if you force it, don’t force it, and don’t worry! Painter’s tape and paper are your friends!
  2. Remove any old stickers and completely wash/clean the plastic toy and it’s pieces, then allow to dry.
  3. Wipe the toy down with rubbing alcohol to prepare the surfaces before painting, then allow to dry.
  4. Spread flattened cardboard (or something similar) in a well ventilated space to protect the floor.
  5. Paint the removed items first, taking care not to pile the paint on too thickly, instead try misting it on and applying multiple layers.
  6. Tape and paper the wheels surrounding the hubcaps, then paint the hubcaps red in layers.
  7. Once you’re satisfied with the hubcaps, and they are fully dried, you can cover each whole wheel with a disposable bag.
  8. Flip the car over and paint the undercarriage first with whichever color you choose.
  9. Once you’re satisfied with the undercarriage and it is fully dried, you can flip the car back over and place it on the cardboard directly or place it on a couple of sawhorses.
  10. Tape up anything you do not want painted, i.e. the pedal and shifter.
  11. Paint the base layers first (where any surrounding paint can be covered with top layers) and allow to dry completely. This may take a few layers so be patient and wait for each coat to dry a bit before painting another. I started with the red of the dashboard/windshield piece, then the gray of the front bumper.
  12. Using painter’s tape, bags and/or paper, cover the painted items that cannot be removed once they are completely dried. I covered the dashboard/windshield piece, but left the steering wheel exposed. I also covered the front bumper.
  13. Once these layers are covered, paint the next layer up and allow to dry completely. This may take a few layers so be patient and wait for each coat to dry a bit before painting another. For me, this was painting the steering wheel gray.
  14. Using painter’s tape, bags and/or paper, cover everything painted that cannot be removed. In addition to the previously covered items, I also covered the steering wheel with a disposable bag after it was completely dry.
  15. Once everything is covered, paint the body of the toy and allow it to dry completely. This may take a few layers so be patient and wait for each coat to dry a bit before painting another.
  16. Gently remove all of the coverings and reassemble the Power Wheels Ride On Jeep.
  17. Carefully peel and stick the Jurassic Park Jeep Wrangler decals to your Jeep.
  18. Let’s go find some Dinosaurs!

DIY – Dinosaur Eggs with Toy Dinosaurs inside

Part of the fun in raising Zoey is making things that delight her; I want to create fun, educational toys for her that are made with love and will be loved! I loved dinosaurs as a child and quite honestly I still do! I see that interest piquing in Zoey too and of course I’m going to encourage it!

Let’s create some dinosaur eggs! We can hide them for the kids to find, and then they can excavate them for a small dinosaur toy inside!

SUPPLIES
INSTRUCTIONS
  1. Add the cornstarch and sand to a mixing bowl and stir until incorporated.
  2. Stir in a little water at a time until the “dough” forms.
  3. Take a small  handful of the “dough”, place a toy dinosaur inside, then add some more “dough” over the dinosaur to cover it.
  4. Work the sand mixture (with the dinosaur inside) in your hands to form an egg shape, then place it on a clean surface to dry.
  5. Repeat this process until all of the “dough” has been utilized. 
  6. Place the dinosaur eggs outside to dry for about 2 days, or until completely hardened.
  7. Hide, discover and excavate! Enjoy!

These eggs can be opened with small tools, hands or dissolved in water.

DIY Red and White Striped Christmas Box

Christmas is nearly here and we love celebrating every moment!

What better way to celebrate than having a Christmas box! Now when I first heard of these, they were and are referred to as Christmas Eve boxes and presented on Christmas Eve for the family to enjoy, but then some of the items can only be enjoyed for one to two nights before Christmas is technically over, so I’ve decided to just call it a Christmas box and we can present it a week before Christmas to really enjoy its contents!

SUPPLIES
  • Wood crate
  • White acrylic paint
  • Red acrylic paint
  • Foam paint brushes
  • Painter’s tape
  • Matte varnish
  • Embellishments (optional)
  • Hot glue (optional)
INSTRUCTIONS
  1. Paint every other beam of the crate (outside and inside) with white paint and then allow it to dry.
  2. Repeat step 1 until the desired brightness of the paint is reached.
  3. Once the paint is dry, use painters tape to tape up and protect the edges of the white beams or anywhere else where the red paint may drip or bleed.
  4. Paint the remaining beams and the sides of the crate (outside and inside) with red paint and then allow it to dry.
  5. Repeat step 4 until the desired brightness of the paint is reached.
  6. Carefully peel off the painter’s tape and coat the whole crate with varnish, this may take two coats to reach the desired coverage.
  7. If you have any embellishments like an ornament or two, carefully glue them on with a hot glue gun and allow it to dry.
  8. Fill it up and enjoy!

If you’re looking for ideas to fill your new Christmas box with here are a few to spark your imagination!

  • Candy
  • Cookie mix
  • Festive hat(s)
  • Festive pajamas
  • Festive plushies
  • Festive socks or slippers
  • Gingerbread kit
  • Holiday-themed books
  • Holiday-themed movies
  • Hot Apple Cider mix
  • Hot Cocoa mix
  • Mug(s)
  • Ornament(s)
  • Savory snacks
  • Sweet snacks

DIY Felt Pumpkin

It is Autumn, my favorite season of the year!

I want to begin creating well-made decorations that mean something to us and will last. What better way to start than by something that will go great with Halloween and Thanksgiving, pumpkins! I’ve created a pattern for fabric pumpkins and you’re welcome to use it to create your own! This will work to create either felt or regular fabric pumpkins, I’m excited to create a few different colors and sizes!

SUPPLIES
  • Pumpkin patterns (see above)
  • Paper scissors
  • Felt fabric
  • Sewing pins
  • Sewing scissors
  • Embroidery floss
  • Sewing needle
  • Stuffing
INSTRUCTIONS
  1. Print out the pumpkin patterns I’ve provided, then cut the patterns from the paper.
  2. Pin the patterns on the appropriate colored felt, then use sewing scissors to cut the felt.
  3. Thread orange embroidery floss onto your sewing needle.
  4. Align two of the pumpkin pieces and whip stitch along one side, from one point to the next, concealing the first and ending knot underneath so that the stitching will be exposed.
  5. Repeat step 3 to continue adding pieces of the pumpkin.
  6. Once you’ve stitched the last piece on, join the two ends together with a whip stitch to complete the pumpkin body.
  7. Stuff the pumpkin, then place the circles on the top and bottom of the pumpkin and secure them with sewing pins.
  8. Using a whip stitch, attach the circles to the pumpkin, concealing the first and ending knots underneath. Then remove the sewing pins.
  9. Thread green embroidery floss on your sewing needle and stitch the veins onto one side of each leaf.
  10. Once done with the veins, align the two halves of each leaf (concealing the stitching in between) and whipstitch around the edges of the leaves to make them whole.
  11. Thread brown embroidery floss onto your sewing needle and whipstitch around the outside edges of the stem, leaving the bottom of the stem open. At this point you can leave the stem as it is or turn it around to conceal the stitching.
  12. Stuff the stem, then place it on top of the pumpkin and secure it with sewing pins. 
  13. Using a whip stitch, attach the stem to the body of the pumpkin.
  14. Enjoy!

DIY – Felt Cookies

DIY Felt Cookies

What child (or inner child) doesn’t love preparing toy food in a play kitchen? 

I had a play kitchen when I was a little girl and loved baking cookies for myself, my sister and my parents. Now that I’m grown and have a daughter of my own, I want to make her some handcrafted play food so she can enjoy making meals for everyone during play, or while we cook in the kitchen next to her!

Please feel free to use these patterns to create some play food for you and yours! This pattern will make one circle cookie, one heart cookie, one star cookie, one triangle cookie, one square cookie and one rectangle cookie, each with frosting. I made one extra of each cookie shape so Zoey will have two of each. You can duplicate it as much as you want to make multiple pieces of each food!

SUPPLIES
  • Cookie patterns (see above) 
  • Paper scissors
  • Pale tan felt material
  • Pale blue felt material
  • Pale brown felt material
  • Dark brown felt material
  • Pale pink felt material
  • White felt material
  • Pale yellow felt material
  • Scissors
  • Pins
  • Embroidery floss (pale tan, pale blue, light brown, dark brown, pale pink, white)
  • Sewing needle
INSTRUCTIONS
  1. Print out the cookie pattern I’ve provided, then cut the patterns from the paper.
  2. Pin the patterns on the appropriate colored felt, then use sewing scissors to cut the felt.
  3. Align and pin the pale blue circle of frosting to one half of the circle of pale tan felt, then thread pale blue embroidery floss onto your sewing needle.
  4. Begin sewing around the outer edges of the frosting using a whipstitch, concealing the first and ending knots underneath the layer of cookie.
  5. One at a time, thread three of the other colors of embroidery floss onto your needle and create randomized stitches within the frosting to make sprinkles. Conceal the first and ending knots of each color underneath the layer of cookie.
  6. Thread a sewing needle with pale tan embroidery floss and pin the bottom cookie layer over the stitching on the back of the frosted top half. 
  7. Using a whipstitch, begin sewing around the edges of the circle cookie, concealing the first knot and end knot in between the layers.
  8. Align and pin the pale pink heart of frosting to one half of the heart of pale tan felt, then thread pale pink embroidery floss onto your sewing needle.
  9. Begin sewing around the outer edges of the frosting using a whipstitch, concealing the first and ending knots underneath the layer of cookie.
  10. One at a time, thread three of the other colors of embroidery floss onto your needle and create randomized stitches within the frosting to make sprinkles. Conceal the first and ending knots of each color underneath the layer of cookie.
  11. Thread a sewing needle with pale tan embroidery floss and pin the bottom cookie layer over the stitching on the back of the frosted top half. 
  12. Using a whipstitch, begin sewing around the edges of the heart cookie, concealing the first knot and end knot in between the layers.
  13. Align and pin the pale yellow star of frosting to one half of the star of pale tan felt, then thread pale yellow embroidery floss onto your sewing needle.
  14. Begin sewing around the outer edges of the frosting using a whipstitch, concealing the first and ending knots underneath the layer of cookie.
  15. One at a time, thread three of the other colors of embroidery floss onto your needle and create randomized stitches within the frosting to make sprinkles. Conceal the first and ending knots of each color underneath the layer of cookie.
  16. Thread a sewing needle with pale tan embroidery floss and pin the bottom cookie layer over the stitching on the back of the frosted top half. 
  17. Using a whipstitch, begin sewing around the edges of the star cookie, concealing the first knot and end knot in between the layers.
  18. Align and pin the white triangle of frosting to one half of the triangle of pale tan felt, then thread white embroidery floss onto your sewing needle.
  19. Begin sewing around the outer edges of the frosting using a whipstitch, concealing the first and ending knots underneath the layer of cookie.
  20. One at a time, thread three of the other colors of embroidery floss onto your needle and create randomized stitches within the frosting to make sprinkles. Conceal the first and ending knots of each color underneath the layer of cookie.
  21. Thread a sewing needle with pale tan embroidery floss and pin the bottom cookie layer over the stitching on the back of the frosted top half. 
  22. Using a whipstitch, begin sewing around the edges of the triangle cookie, concealing the first knot and end knot in between the layers.
  23. Align and pin the dark brown square of frosting to one half of the square of pale tan felt, then thread dark brown embroidery floss onto your sewing needle.
  24. Begin sewing around the outer edges of the frosting using a whipstitch, concealing the first and ending knots underneath the layer of cookie.
  25. One at a time, thread three of the other colors of embroidery floss onto your needle and create randomized stitches within the frosting to make sprinkles. Conceal the first and ending knots of each color underneath the layer of cookie.
  26. Thread a sewing needle with pale tan embroidery floss and pin the bottom cookie layer over the stitching on the back of the frosted top half. 
  27. Using a whipstitch, begin sewing around the edges of the square cookie, concealing the first knot and end knot in between the layers.
  28. Align and pin the pale brown rectangle of frosting to one half of the rectangle of pale tan felt, then thread pale brown embroidery floss onto your sewing needle.
  29. Begin sewing around the outer edges of the frosting using a whipstitch, concealing the first and ending knots underneath the layer of cookie.
  30. One at a time, thread three of the other colors of embroidery floss onto your needle and create randomized stitches within the frosting to make sprinkles. Conceal the first and ending knots of each color underneath the layer of cookie.
  31. Thread a sewing needle with pale tan embroidery floss and pin the bottom cookie layer over the stitching on the back of the frosted top half. 
  32. Using a whipstitch, begin sewing around the edges of the rectangle cookie, concealing the first knot and end knot in between the layers.
  33. Enjoy!

DIY – Felt Pizza

DIY Felt Pizza

What child (or inner child) doesn’t love preparing toy food in a play kitchen? 

I had a play kitchen when I was a little girl and loved preparing pizza for myself, my sister and my parents. Now that I’m grown and have a daughter of my own, I want to make her some handcrafted play food so she can enjoy making meals for everyone during play, or while we cook in the kitchen next to her!

Please feel free to use these patterns to create some play food for you and yours! This pattern will make four slices of pizza with sauce and cheese. Toppings include 4 slices of bell pepper, 4 slices of mushroom, 12 slices of pepperoni, and 6 slices of olives. You can duplicate it as much as you want to make multiple pieces of each food!

SUPPLIES
  • Pizza patterns (see above) 
  • Paper scissors
  • Light tan felt material
  • Red felt material
  • Dark red felt material
  • White felt material
  • Off-white felt material
  • Green felt material
  • Black felt material
  • Stuffing
  • Sewing pins
  • Sewing scissors
  • Sewing needle
  • Embroidery floss (light tan, red, dark red, white, off-white, green, and black)
INSTRUCTIONS
  1. Print out the pizza patterns I’ve provided and cut them from the paper.
  2. Place the patterns on the appropriate colored felt and pin them in place, then use sewing scissors to cut out the felt pieces.
  3. Align and pin the two halves of pizza crust together and thread light tan embroidery floss onto your sewing needle. Then, with a pencil, lightly sketch a curved line along and about 1/2 inch in from the arc of the crust.
  4. Starting to one side of the pizza slice’s point, whipstitch along that edge and the top arc of the crust, stopping at the far end of the arc and setting that thread aside for a moment.
  5. From the open edge of the pizza slice, use a running stitch along the pencil line to seal off the crust, concealing the first and ending knot between the layers, then use a little stuffing to inflate. 
  6. Pick up the previous thread and continue stitching down the remaining side of the pizza slice, concealing the end knot in between the layers.
  7. Repeat steps 3 through 6 to create the three other pizza slices.
  8. Align and pin the two halves of pizza sauce together and thread red embroidery floss onto your sewing needle.
  9. Begin sewing around the edges of your pizza sauce using a whipstitch, concealing the first knot and ending knot in between the layers.
  10. Repeat steps 8 and 9 to create the three other pizza sauces.
  11. Align and pin the two halves of cheese together and thread off-white embroidery floss onto your sewing needle.
  12. Begin sewing around the edges of your cheese using a whipstitch, concealing the first knot and ending knot in between the layers.
  13. Repeat steps 11 and 12 to create the three other cheeses.
  14. Align and pin the two halves of bell pepper together and thread green embroidery floss onto your sewing needle.
  15. Begin sewing around the outer and then inner edges of your bell pepper using a whipstitch, concealing the first knot and ending knot in between the layers.
  16. Repeat steps 14 and 15 to create the rest of the bell pepper pieces.
  17. Align and pin the two halves of mushroom together and thread white embroidery floss onto your sewing needle.
  18. Begin sewing around the edges of your mushroom using a whipstitch, concealing the first knot and ending knot in between the layers.
  19. Repeat steps 17 and 18 to create the rest of the mushroom pieces.
  20. Align and pin the two halves of pepperoni together and thread dark red embroidery floss onto your sewing needle.
  21. Begin sewing around the edges of your pepperoni using a whipstitch, concealing the first knot and ending knot in between the layers.
  22. Repeat steps 20 and 21 to create the rest of the pepperoni pieces.
  23. Align and pin the two halves of olive together and thread black embroidery floss onto your sewing needle.
  24. Begin sewing around the outer and then inner edges of your olive using a whipstitch, concealing the first knot and ending knot in between the layers.
  25. Repeat steps 23 and 24 to create the rest of the olive pieces.
  26. Enjoy!
DIY Felt Pizza
DIY Felt Pizza