Valentines can be a big deal in Kindergarten, heck everything is a big deal in Kindergarten. There is so much joy in everything they celebrate, and they celebrate everything!
I wanted to put something special together for the class, and as soon as I saw these 3D printed baby dinosaurs I knew what I wanted to do!
I ordered enough baby Dinos for the whole class and designed these Dino-Mite Valentine cards to go with (feel free to download and use the cards too (for personal use only, not for resale)! After printing the sheets, I cut out each card and hole punched the sides. Then I tied each dinosaur in place.
Feel free to download and use the cards too (for personal use only, not for resale)!
Welcome back friends! Do you crochet? I dabbled in crochet off and on for a few years, always fascinated, but never fully catching on. I kept at it, and suddenly, it clicked! I feel calm and cozy when I’m crocheting, and fiercely proud whenever I complete a project.
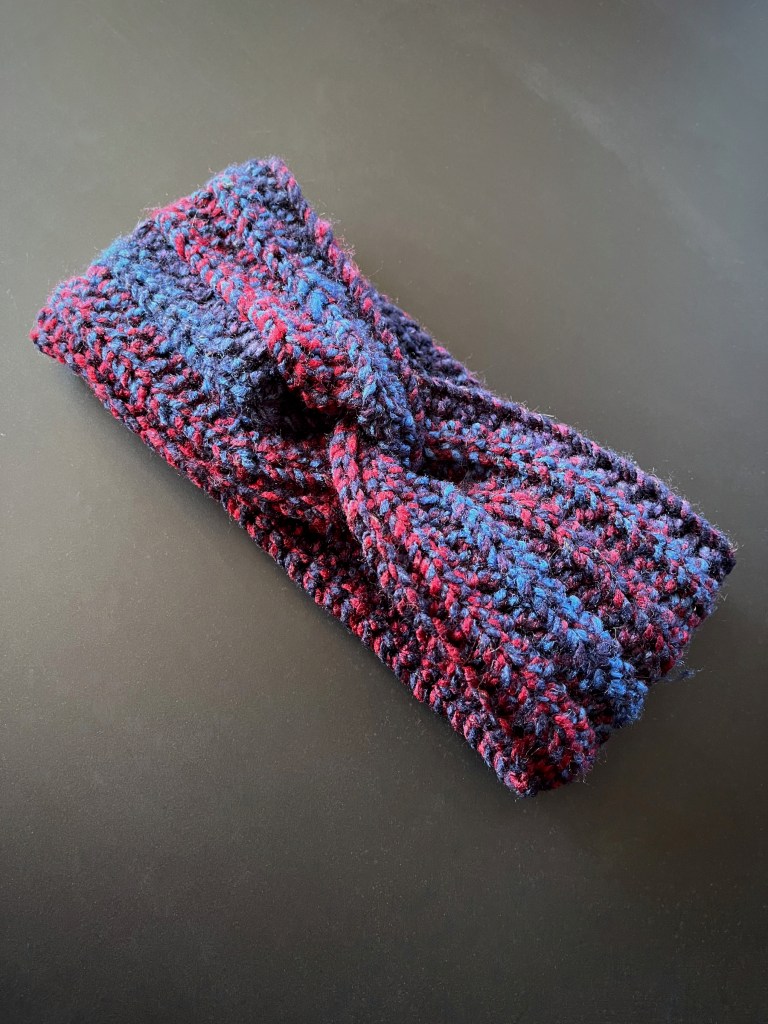
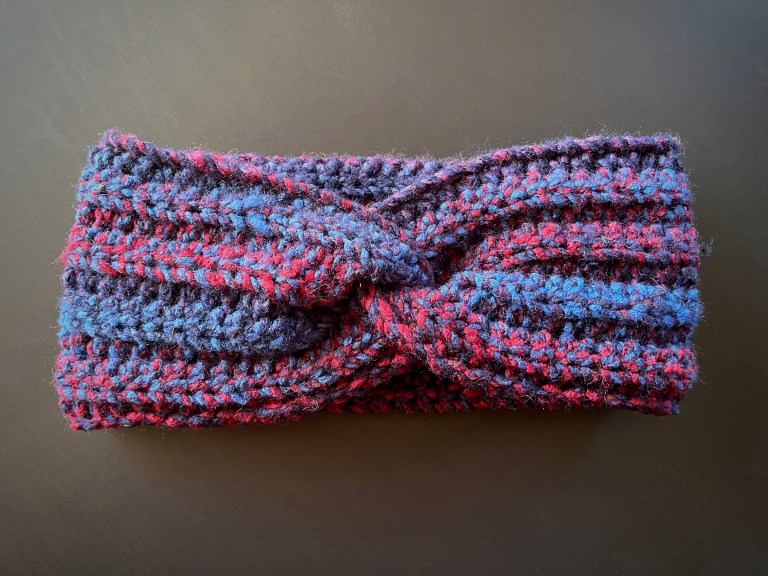
It’s that time of year for keeping warm! Whether you’d like to create a ear-warmer headband for yourself or to gift to a friend, I’m here to help!
This headband is cozy, classic and ideal for any level of crocheter (beginners included)! Any bulky size 5 yarn can be used in this pattern.
SUPPLIES
Crochet hook (size 6mm)
Yarn (size 5)
Scissors
Yarn needle
INSTRUCTIONS
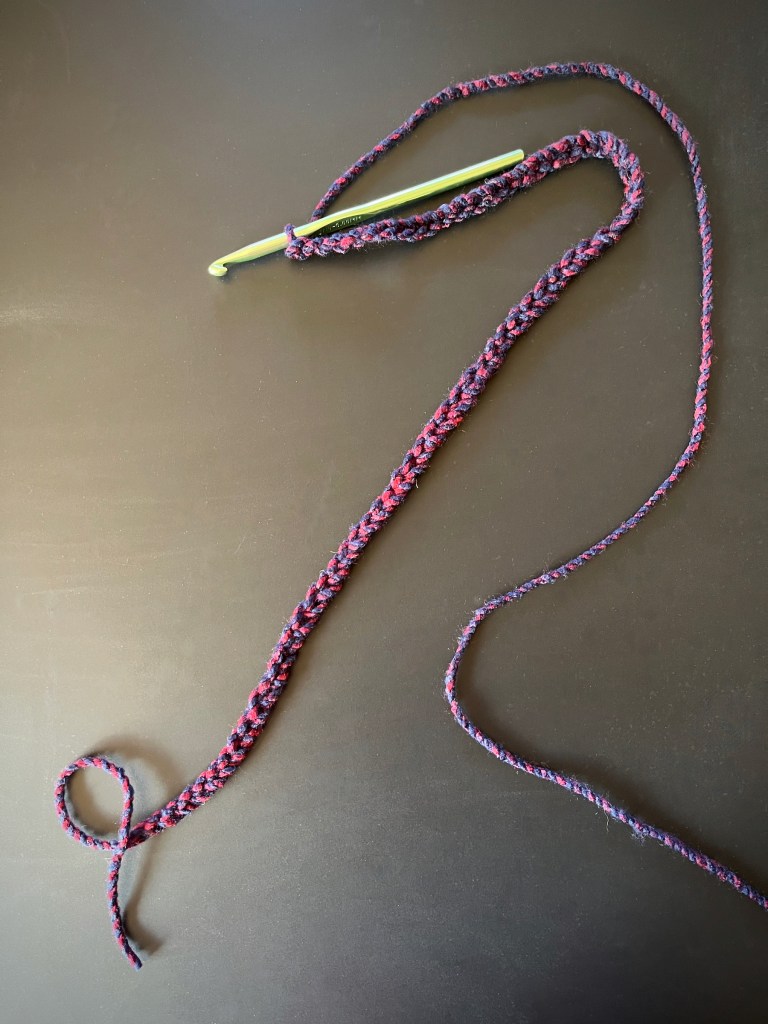
Create a slip knot and then 64 chain stitches. The chain number may vary a bit depending on the head size you are creating the headband for. If possible, hold the chain around your head or theirs to measure.
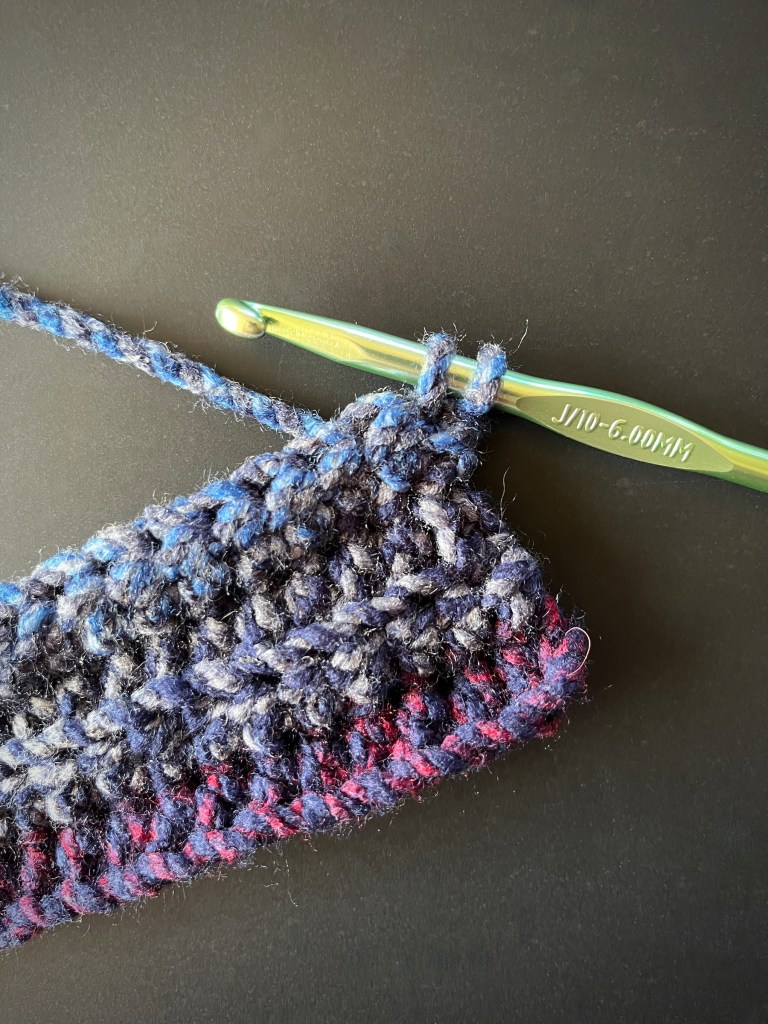
Turn your chain around and half double crochet (hdc) into the back loop of the second stitch from the hook, then continue to hdc in the back loops of each stitch all the way across your chain.
Turn your work. Insert your hook under both loops of the first stitch, yarn over and pull through. Then insert your hook behind the second vertical loop of the stitch you just created, yarn over and pull through. This create a smoother/ straighter finish along the sides of the project.
In the next stitch, hdc into the back loop and then continue to hdc in the back loops of each stitch all the way across your project.
Repeat steps 3 and 4 for the next 8 rows for a total of 9 hdc rows. You are welcome increase or decrease the amount of rows if you’d prefer a thinner or wider headband.
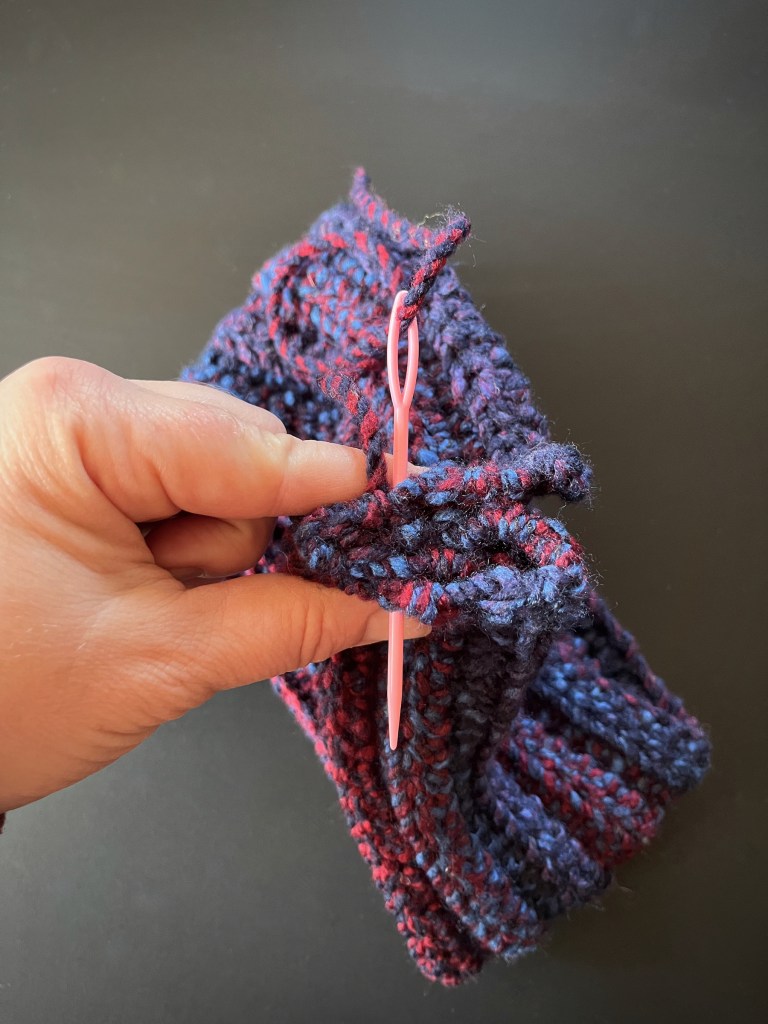
After the last hdc of your last row, use the scissors to disconnect the yarn from the skein and pull the loose in through your crochet loop, leaving a good length to sew the headband together.
Taking each end of the project, pinch the corners in towards each other to create a C and a backwards C, then bring the C’s together to interlink. Using a yarn needle, stitch the remaining yarn back and forth through all 4 layers of the interlinked ends.
Turn the headband right-side out and there’s your twist!
Welcome back friends! Do you crochet? I dabbled in crochet off and on for a few years, always fascinated, but never fully catching on. I kept at it, and suddenly, it clicked! I feel calm and cozy when I’m crocheting, and fiercely proud whenever I complete a project.
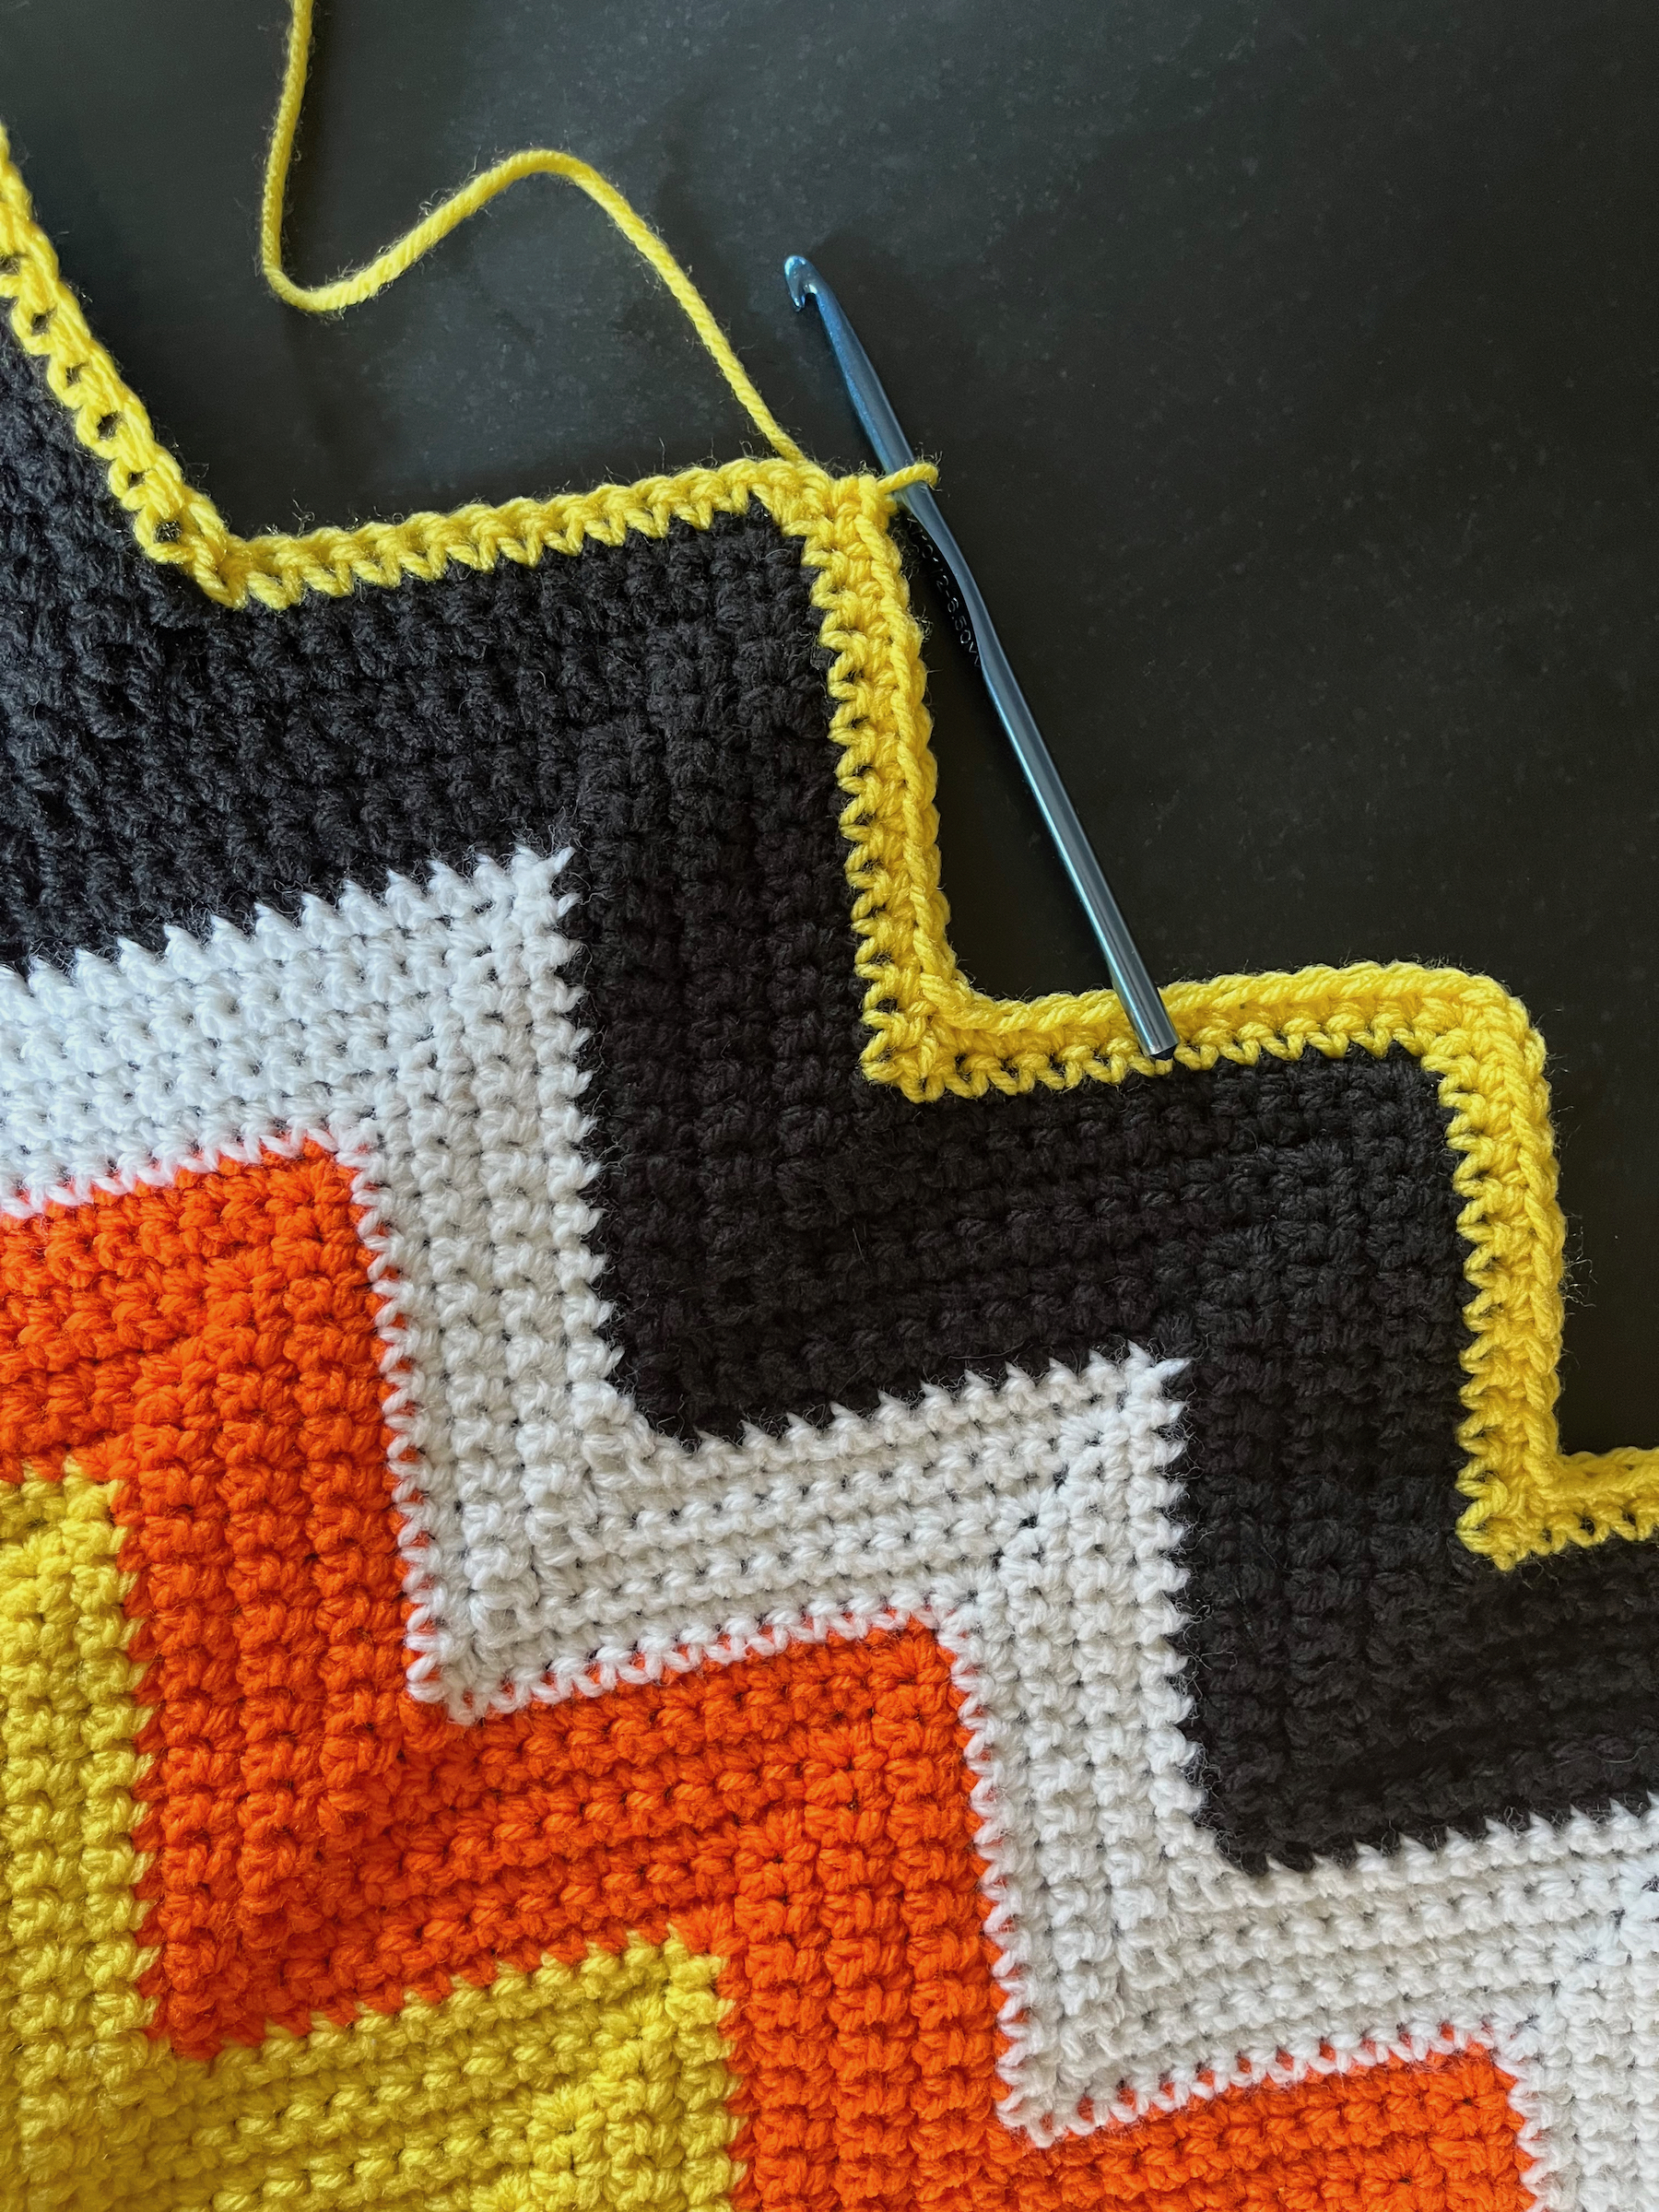
It’s that time of year for autumn and Halloween decor, so let’s create a chevron Halloween blanket! I thought it would be creative to make a candy corn color pattern framed by black on either side. Mine is the size of a lap blanket, but you can use this pattern to create any size you choose!
SUPPLIES
Crochet hook (size 6.5mm)
Medium yarn (size 4) in black, yellow, orange and white
Scissors
Yarn needle or small crochet hook
INSTRUCTIONS
Starting with the black yarn, create a slip knot and then chain stitches in increments of 27, then add 5 extra stitches to whatever amount you choose. I chained 216, plus five came to a total of 221 stitches.
Turn your chain around and single crochet (sc) into the back-loops of the second and third stitch from the hook, then skip the next stitch.
Single crochet into the back-loops of the next 12 stitches.
After completing the 12th sc, put three single crochets together into the back-loop of the next stitch (this will create the peak of our chevron).
Single crochet into back-loops of the next 12 stitches, then skip the following two stitches after that (this will create the valley of our chevron).
Now we’ve reached the start of our next chevron and we are going to repeat steps 3 through 5 until we have 3 stitches left in our chain.
When you have 3 stitches left in the chain, skip the next stitch after your hook and sc into the last two stitches in the chain. Chain 1 and turn your blanket around.
For the rest of the blanket, we will be working in both loops.
Repeat steps 2 through 7, for the next 6 rows, then we’ll change colors.
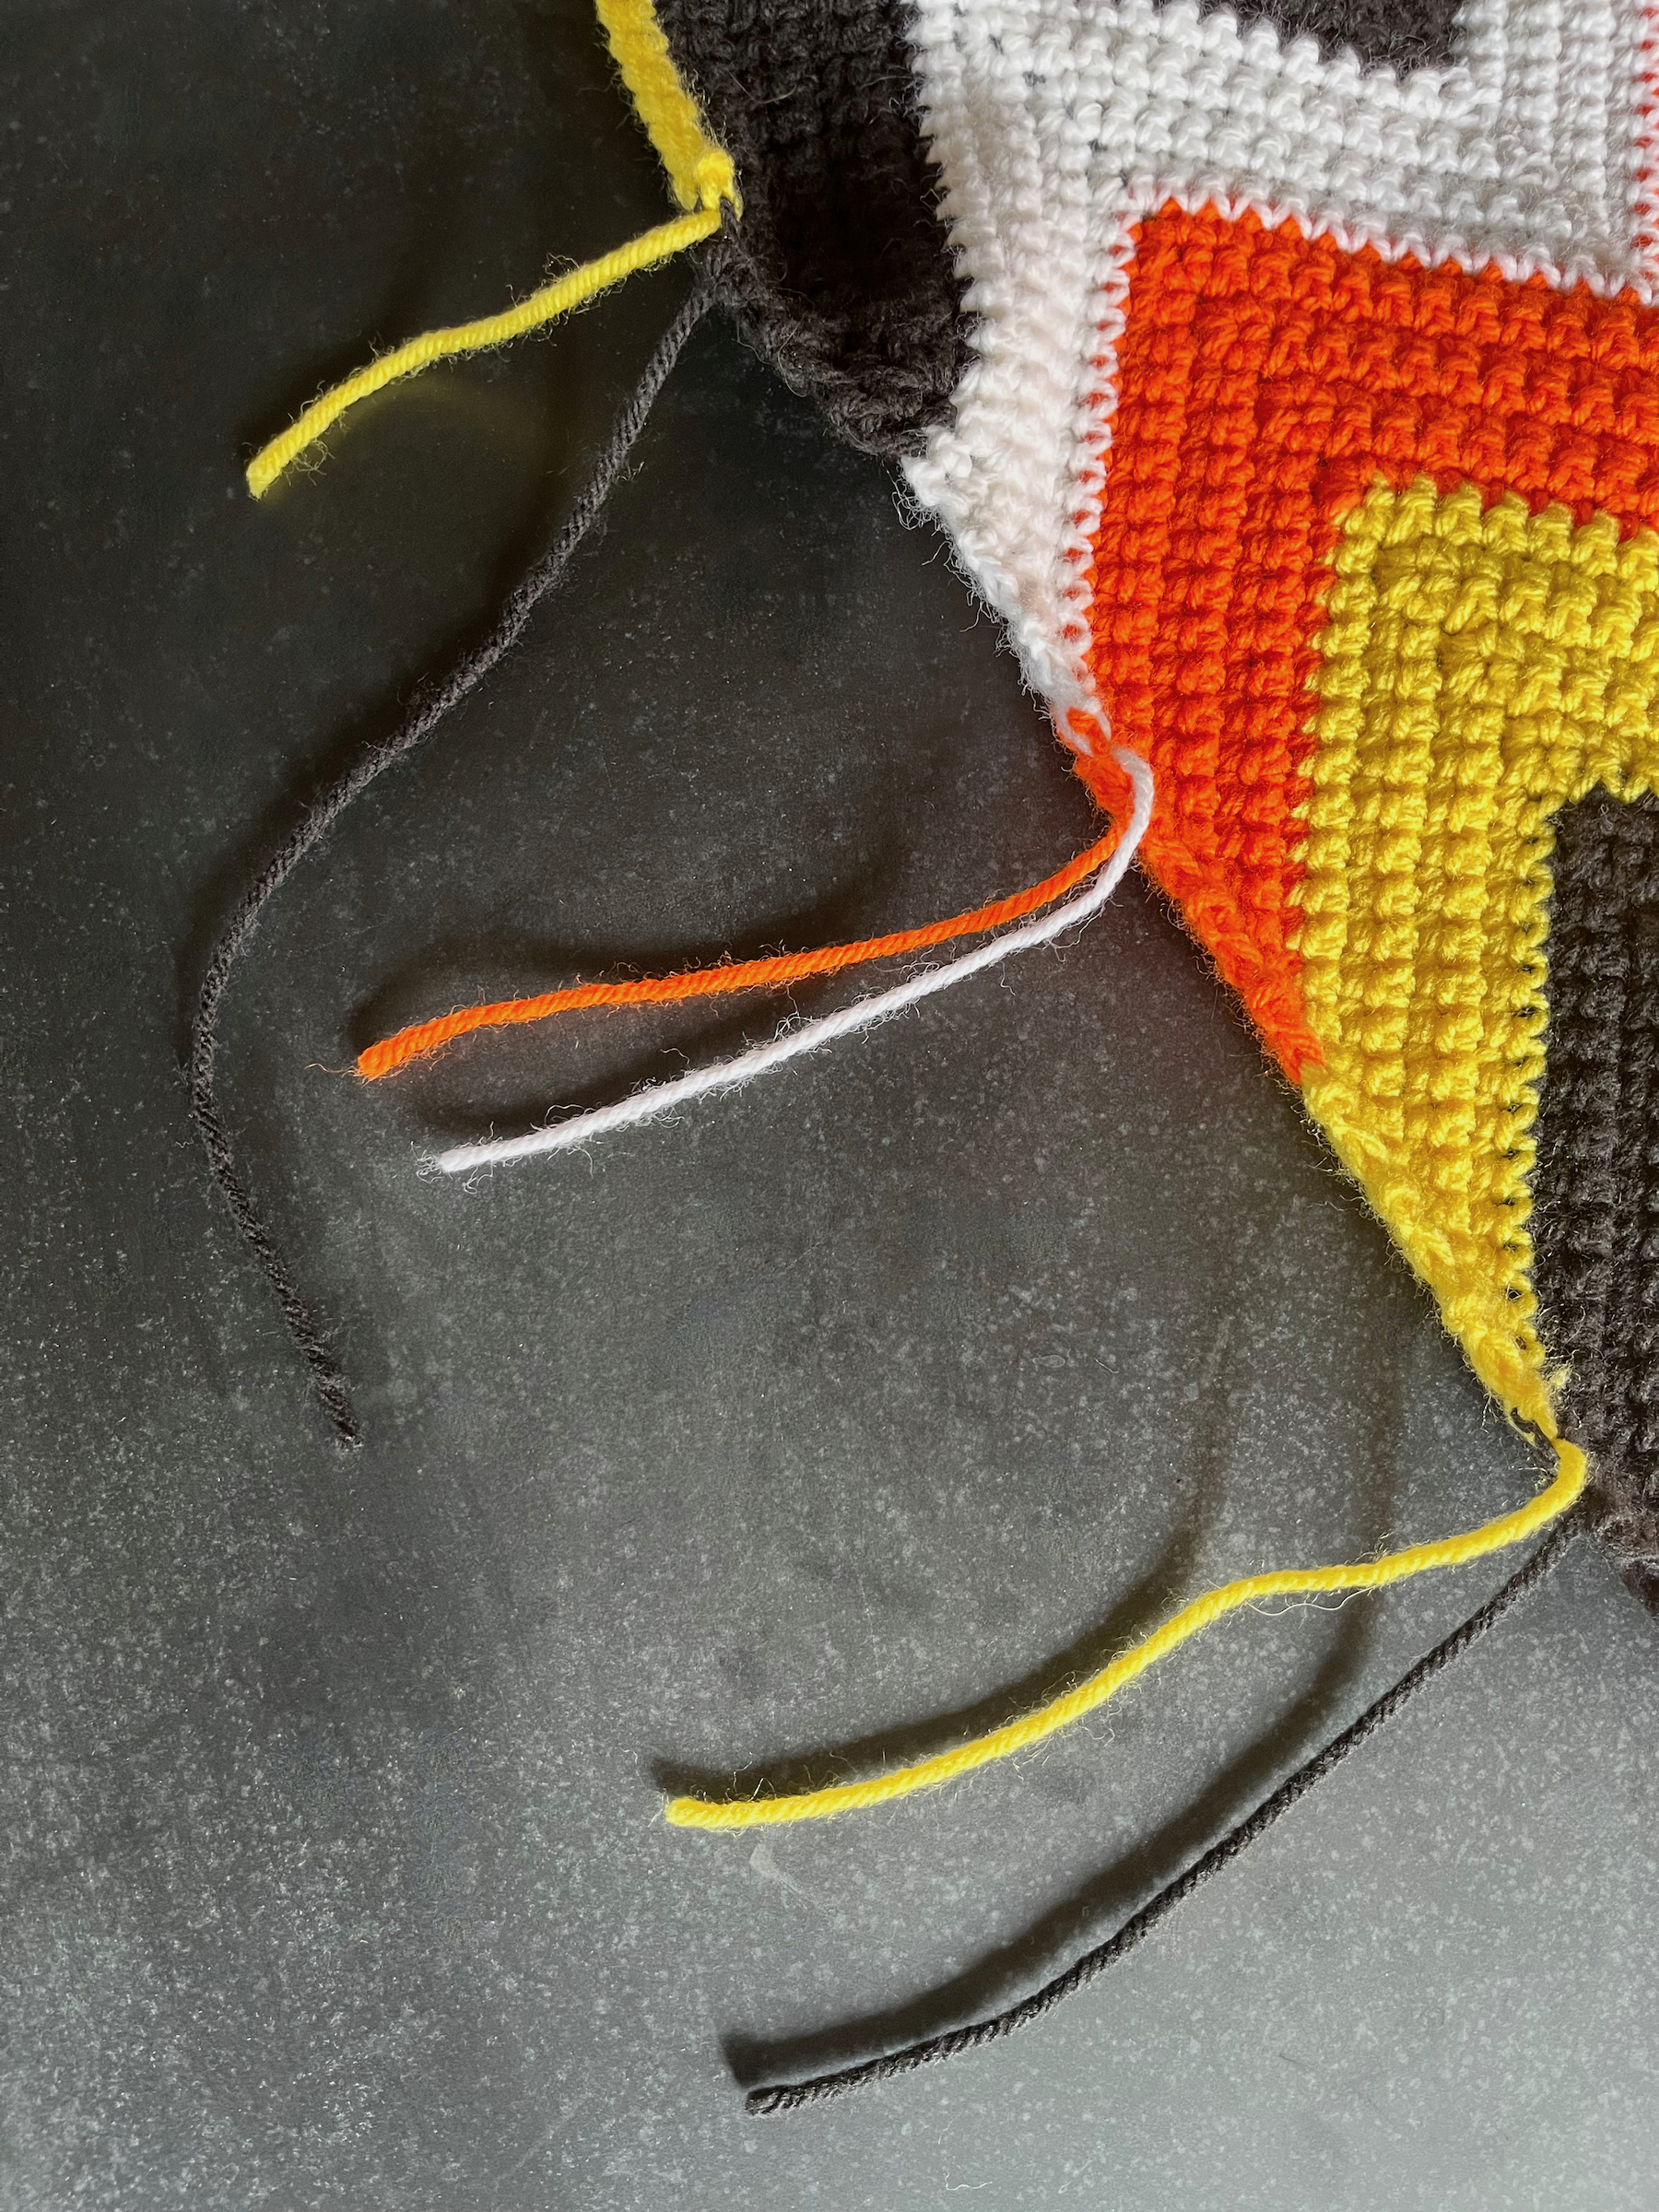
To change colors, halt halfway through your final single crochet of the row when two loops are over your hook, hook onto your new color (yellow), and pull it through. Cut off the previous color of yarn and weave the tail into the blanket with a yarn needle or small crochet hook to secure it.
Chain 1 with the new color and turn your blanket around.
Repeat steps 2 through 7, for the next 7 rows, then we’ll change colors to orange and do seven rows, then white and then back to black. We’ll keep going in this pattern until we’ve created the length of blanket we desire.
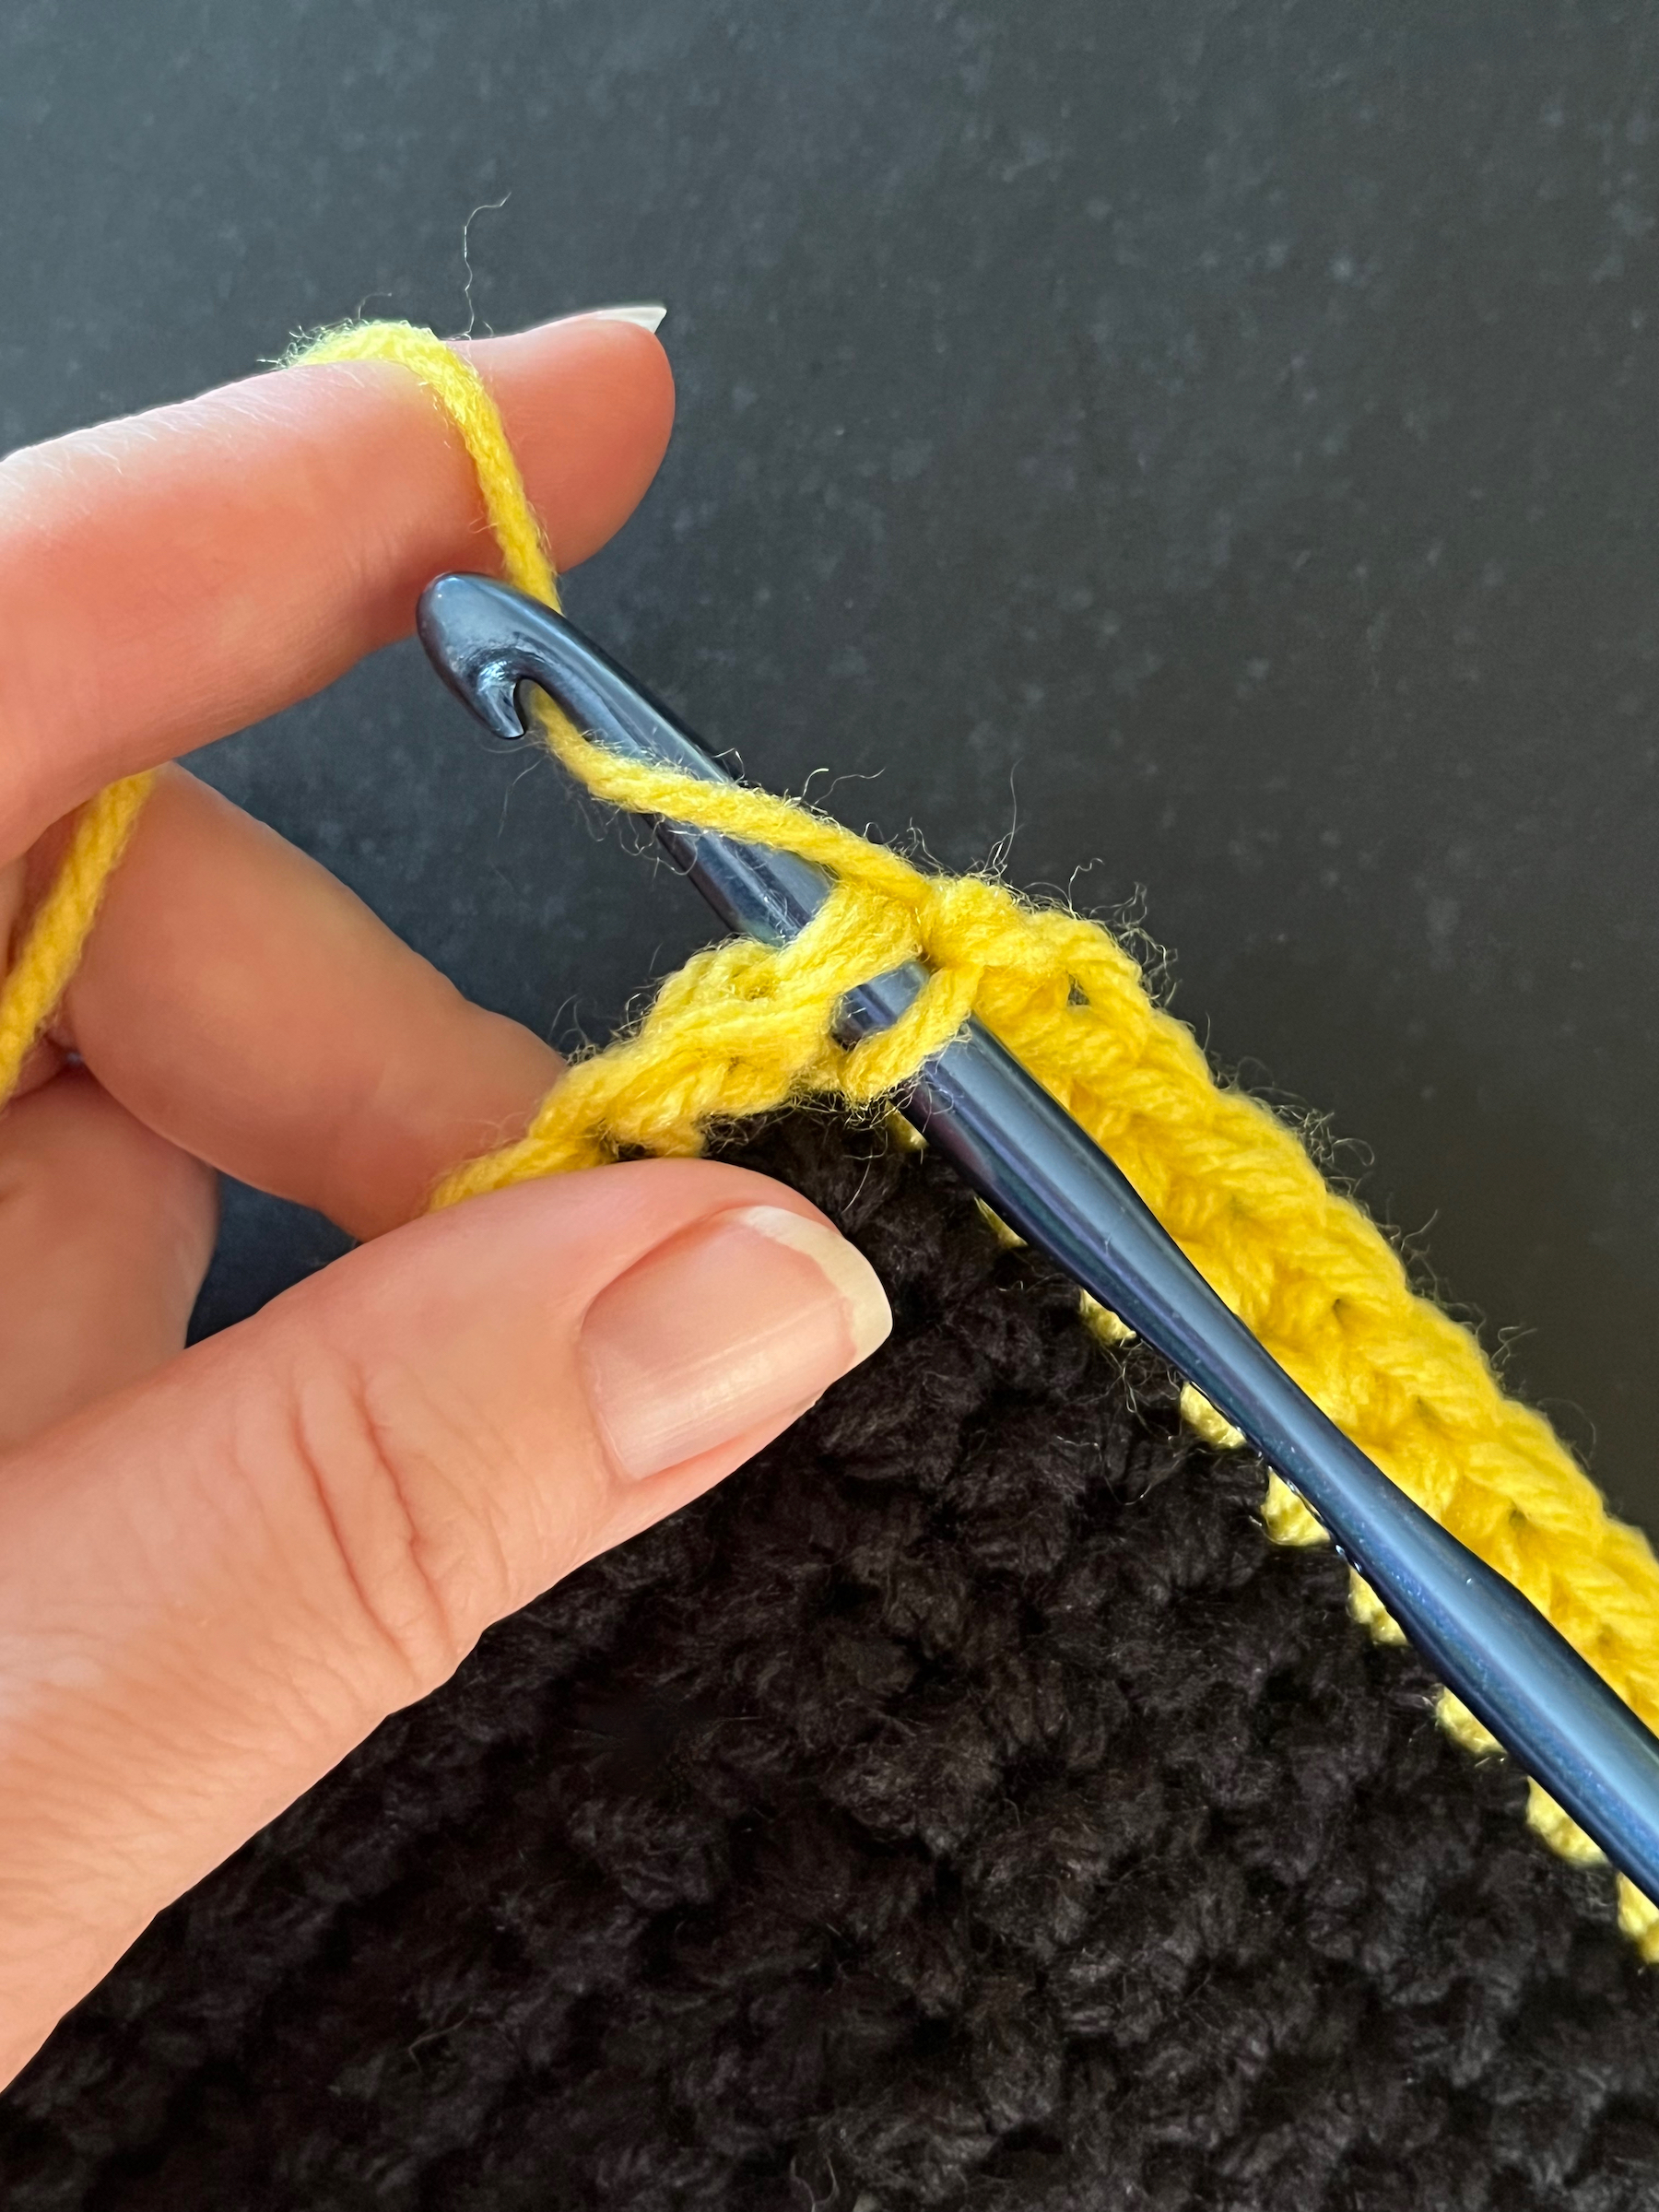
When you’ve reached the end of your last black row, chain two and rotate the blanket 90 degrees. Begin single crocheting down the side of the blanket.
At the end of this side of the blanket, chain 2 and rotate the blanket 90 degrees. Single crochet along the starting chain of the blanket, following the chevron rules from above (steps 3 through 5) over the peaks and valleys.
At the end of the starting chain of the blanket, chain 2 and rotate the blanket 90 degrees. Single crochet down this side of the blanket.
At the end of this side of the blanket, chain 2 and rotate the blanket 90 degrees. Single crochet along the top row of the blanket, following the chevron rules from above (steps 3 through 5) over the peaks and valleys.
Repeat steps 13 through 16 until you are happy with the width of the blanket’s borders (I did 6 passes around).
Cut the yarn and pull the loose end through your last loop, then weave the tail into the blanket with a yarn needle or small crochet hook.
Place in your house, cuddle up under it and enjoy!
Welcome back friends! Do you crochet? I do! I feel calm and cozy when I’m crocheting, and fiercely proud whenever I complete a project.
My daughter is entering Kindergarten this year and, while I’m sure she’ll love it, I believe she’ll need a little comfort while she’s away. Pocket hugs are a small token that can be tucked into a pocket to remind someone we love that we care for them, even if we’re apart. Zoey carries hers in a pocket of her backpack.
I created two different sized pocket hugs and when I held them together, I admired how much they looked like a cookie with frosting so I had the idea to attach them together. Et voila! Now we have a double pocket hug that looks like a cookie! You could use any color of yarn for this, the possibilities are endless!
Let’s get started!
SUPPLIES
Two different crochet hooks (I used sizes 3.75mm and 4.50mm)
Two different yarns (I used sizes 2 and 4)
Scissors
Yarn needle or small crochet hook
Hot glue gun
INSTRUCTIONS
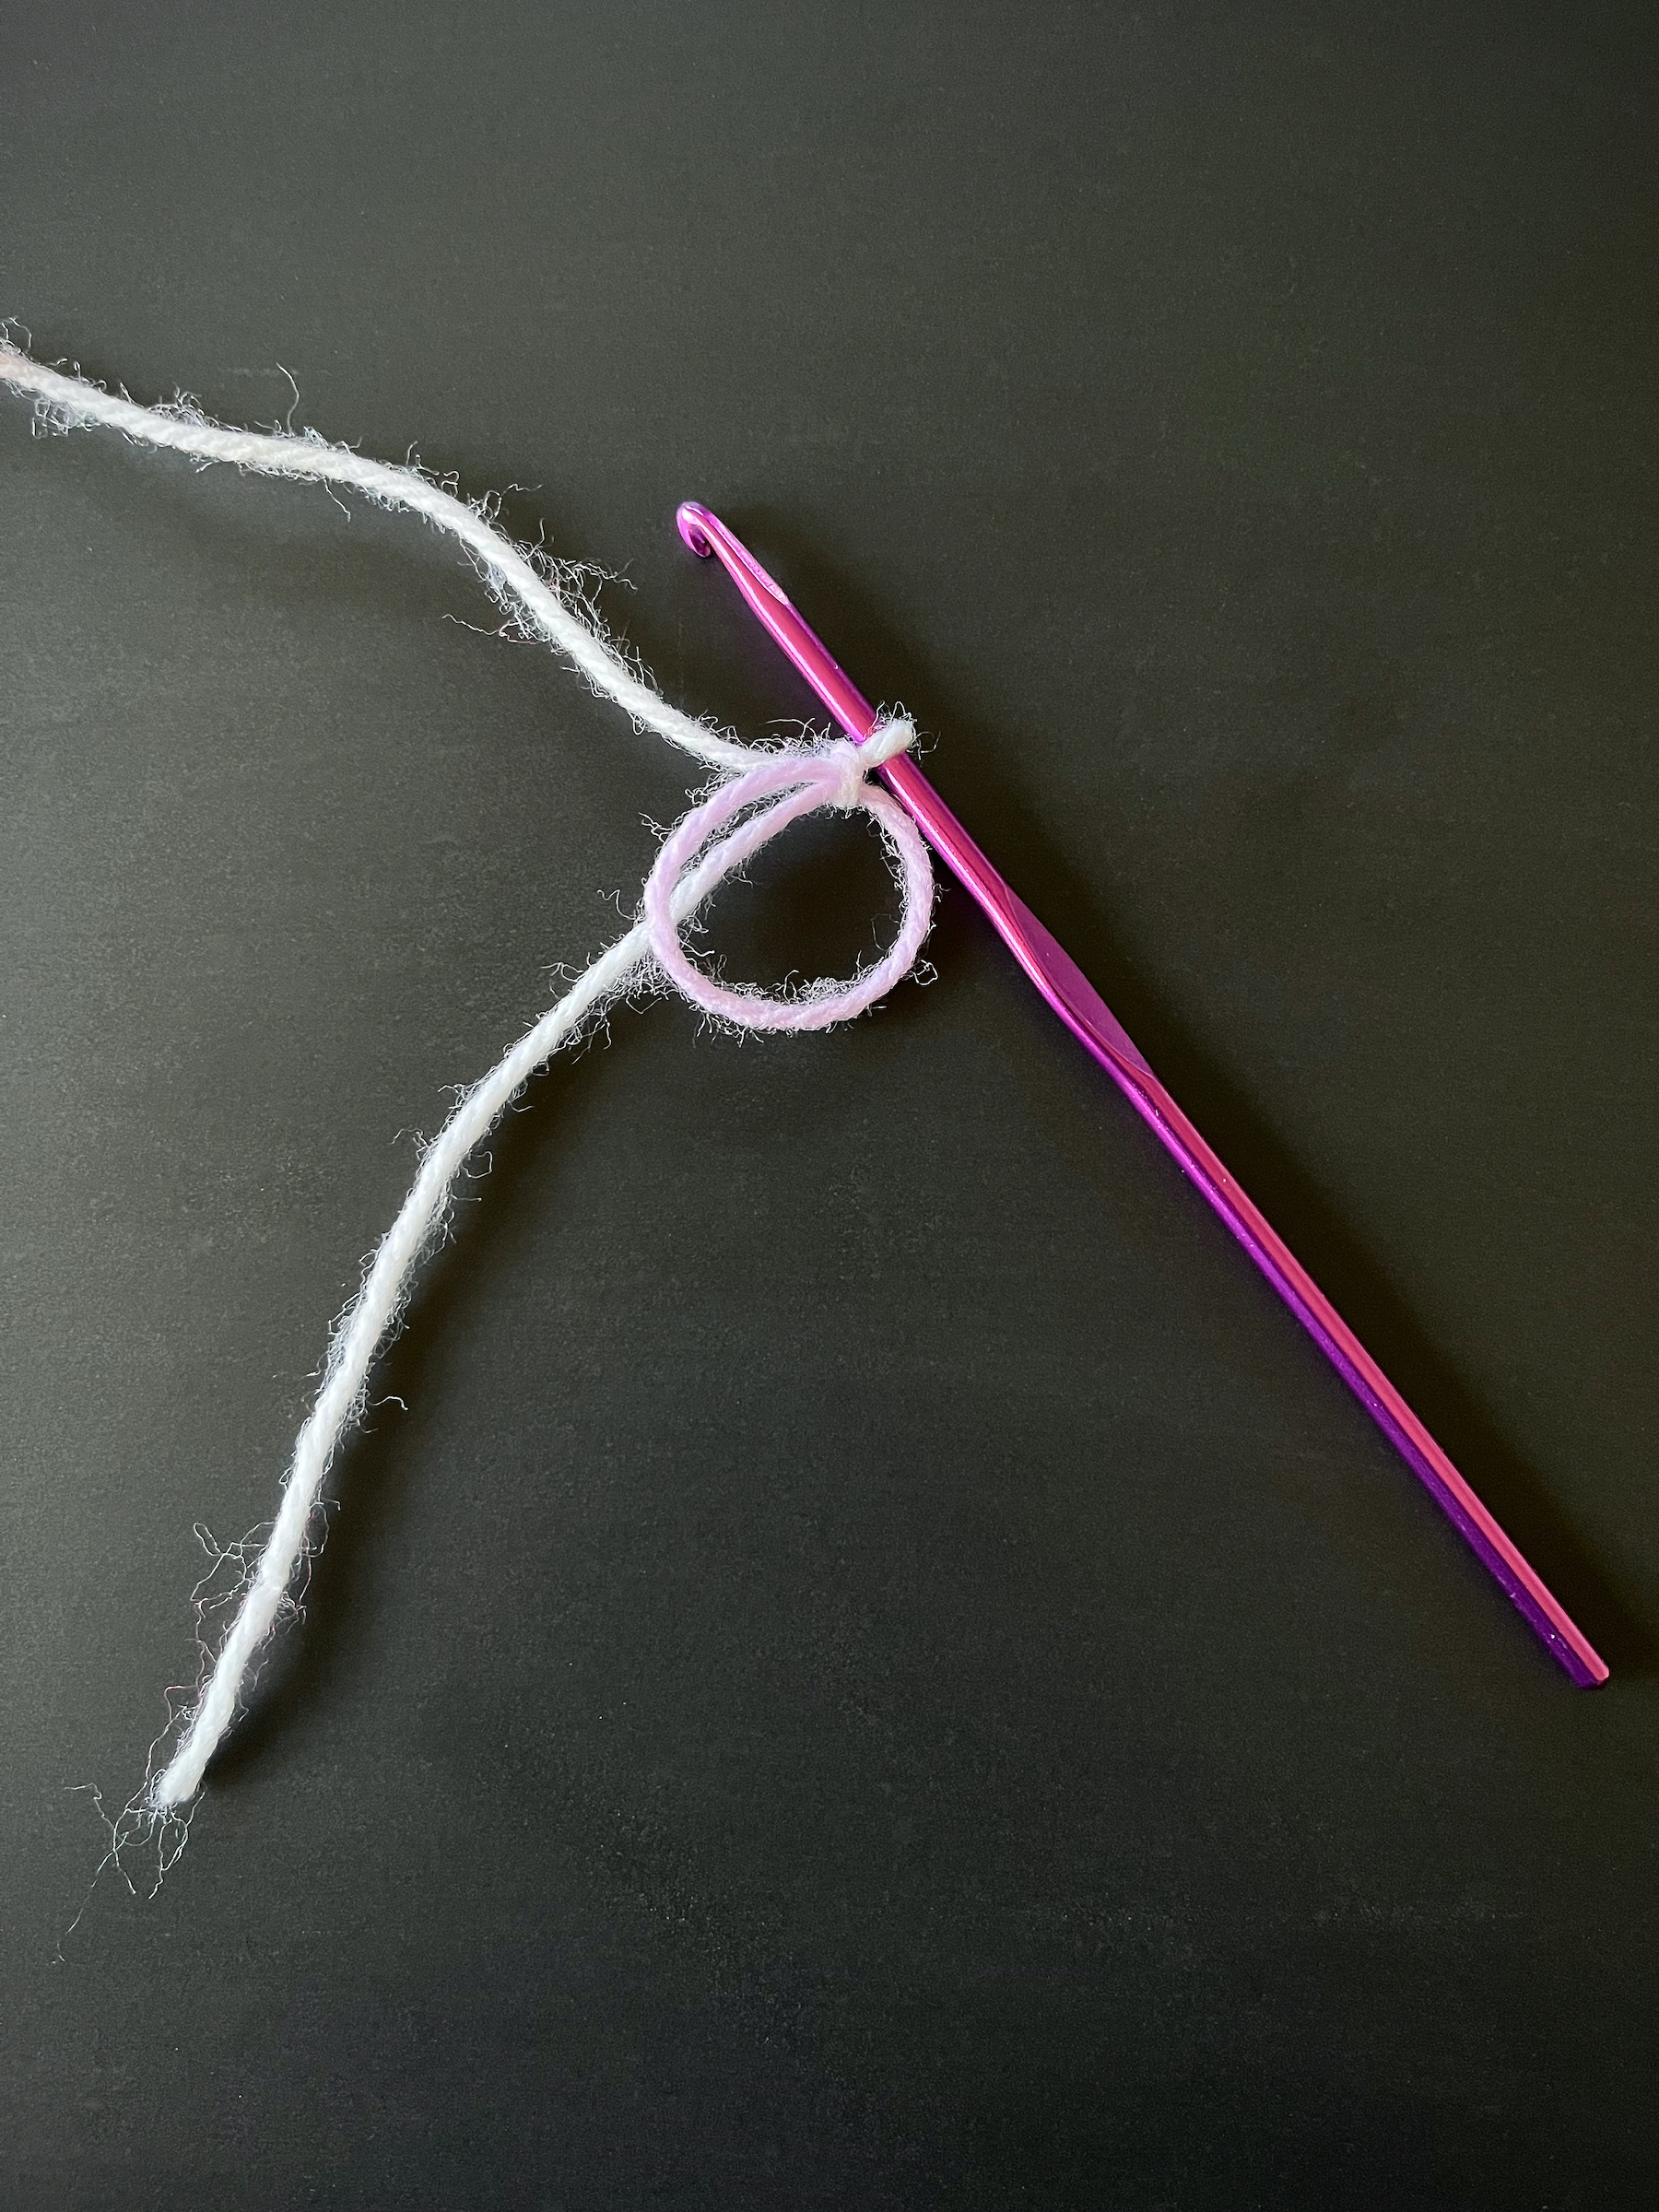
Using the smaller yarn and hook create a magic ring and chain two.
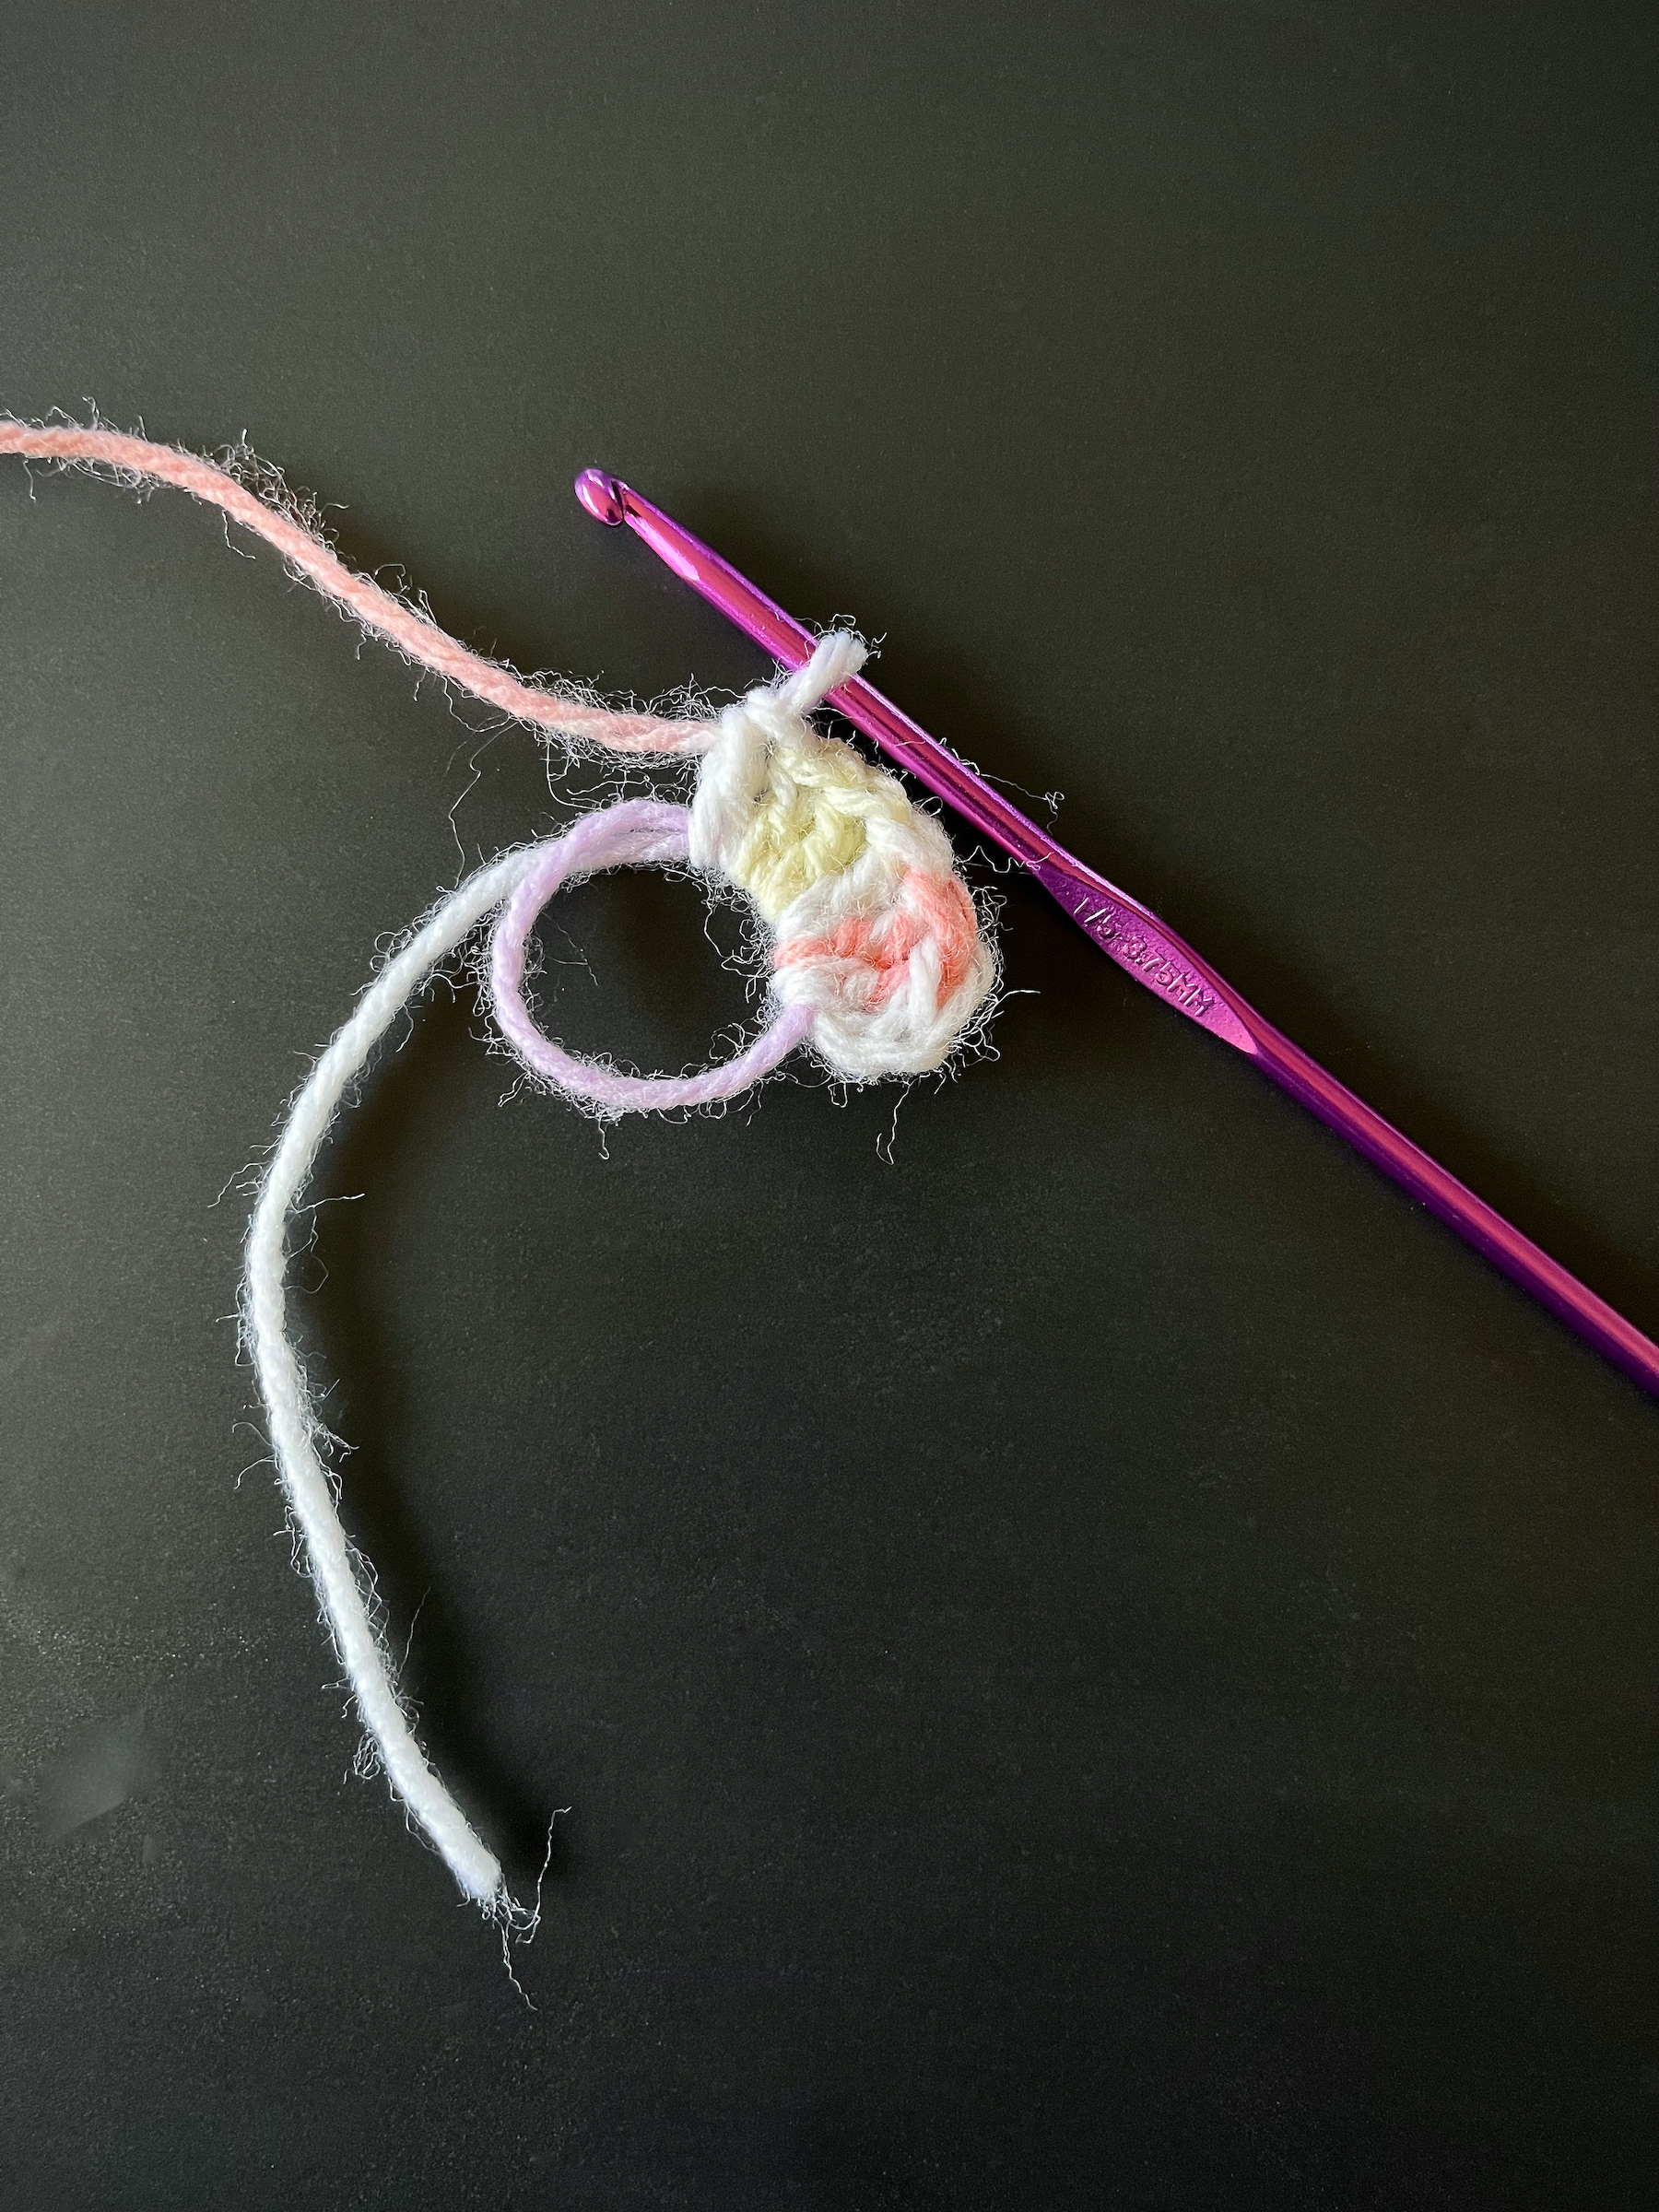
Stitch one triple crochet into the magic ring, then repeat twice more for a total of three triple crochets.
Stitch one double crochet into the magic ring, then repeat twice more for a total of three double crochets.
Chain one, then stitch one triple crochet into the magic ring for the heart’s point, then chain one again.
Stitch one double crochet into the magic ring, then repeat twice more for a total of three double crochets.
Stitch one triple crochet into the magic ring, then repeat twice more for a total of three triple crochets.
Chain three and slipstitch into the magic ring.
Slipstitch into the back loop of the beginning three chains of the heart.
Single crochet under both loops of the first triple crochet from the first round, then single crochet again into the same stitch.
Repeat step 9 on the second and third triple crochets of the first round.
Single crochet under both loops of the first double crochet of the first round.
Repeat step 11 on the second and third double crochets of the first round.
Single crochet under the chain.
Single crochet under both loops of the triple crochet, chain one and then single crochet back into the same stitch.
Single crochet under the chain
Single crochet under both loops of the double crochet.
Repeat step 16 on the next two double crochets of the first round.
Single crochet under both loops of the triple crochet from the first round, then single crochet again into the same stitch.
Repeat step 18 on the next two triple crochets of the first round.
Slipstitch into the back loop of the ending three chains of the heart.
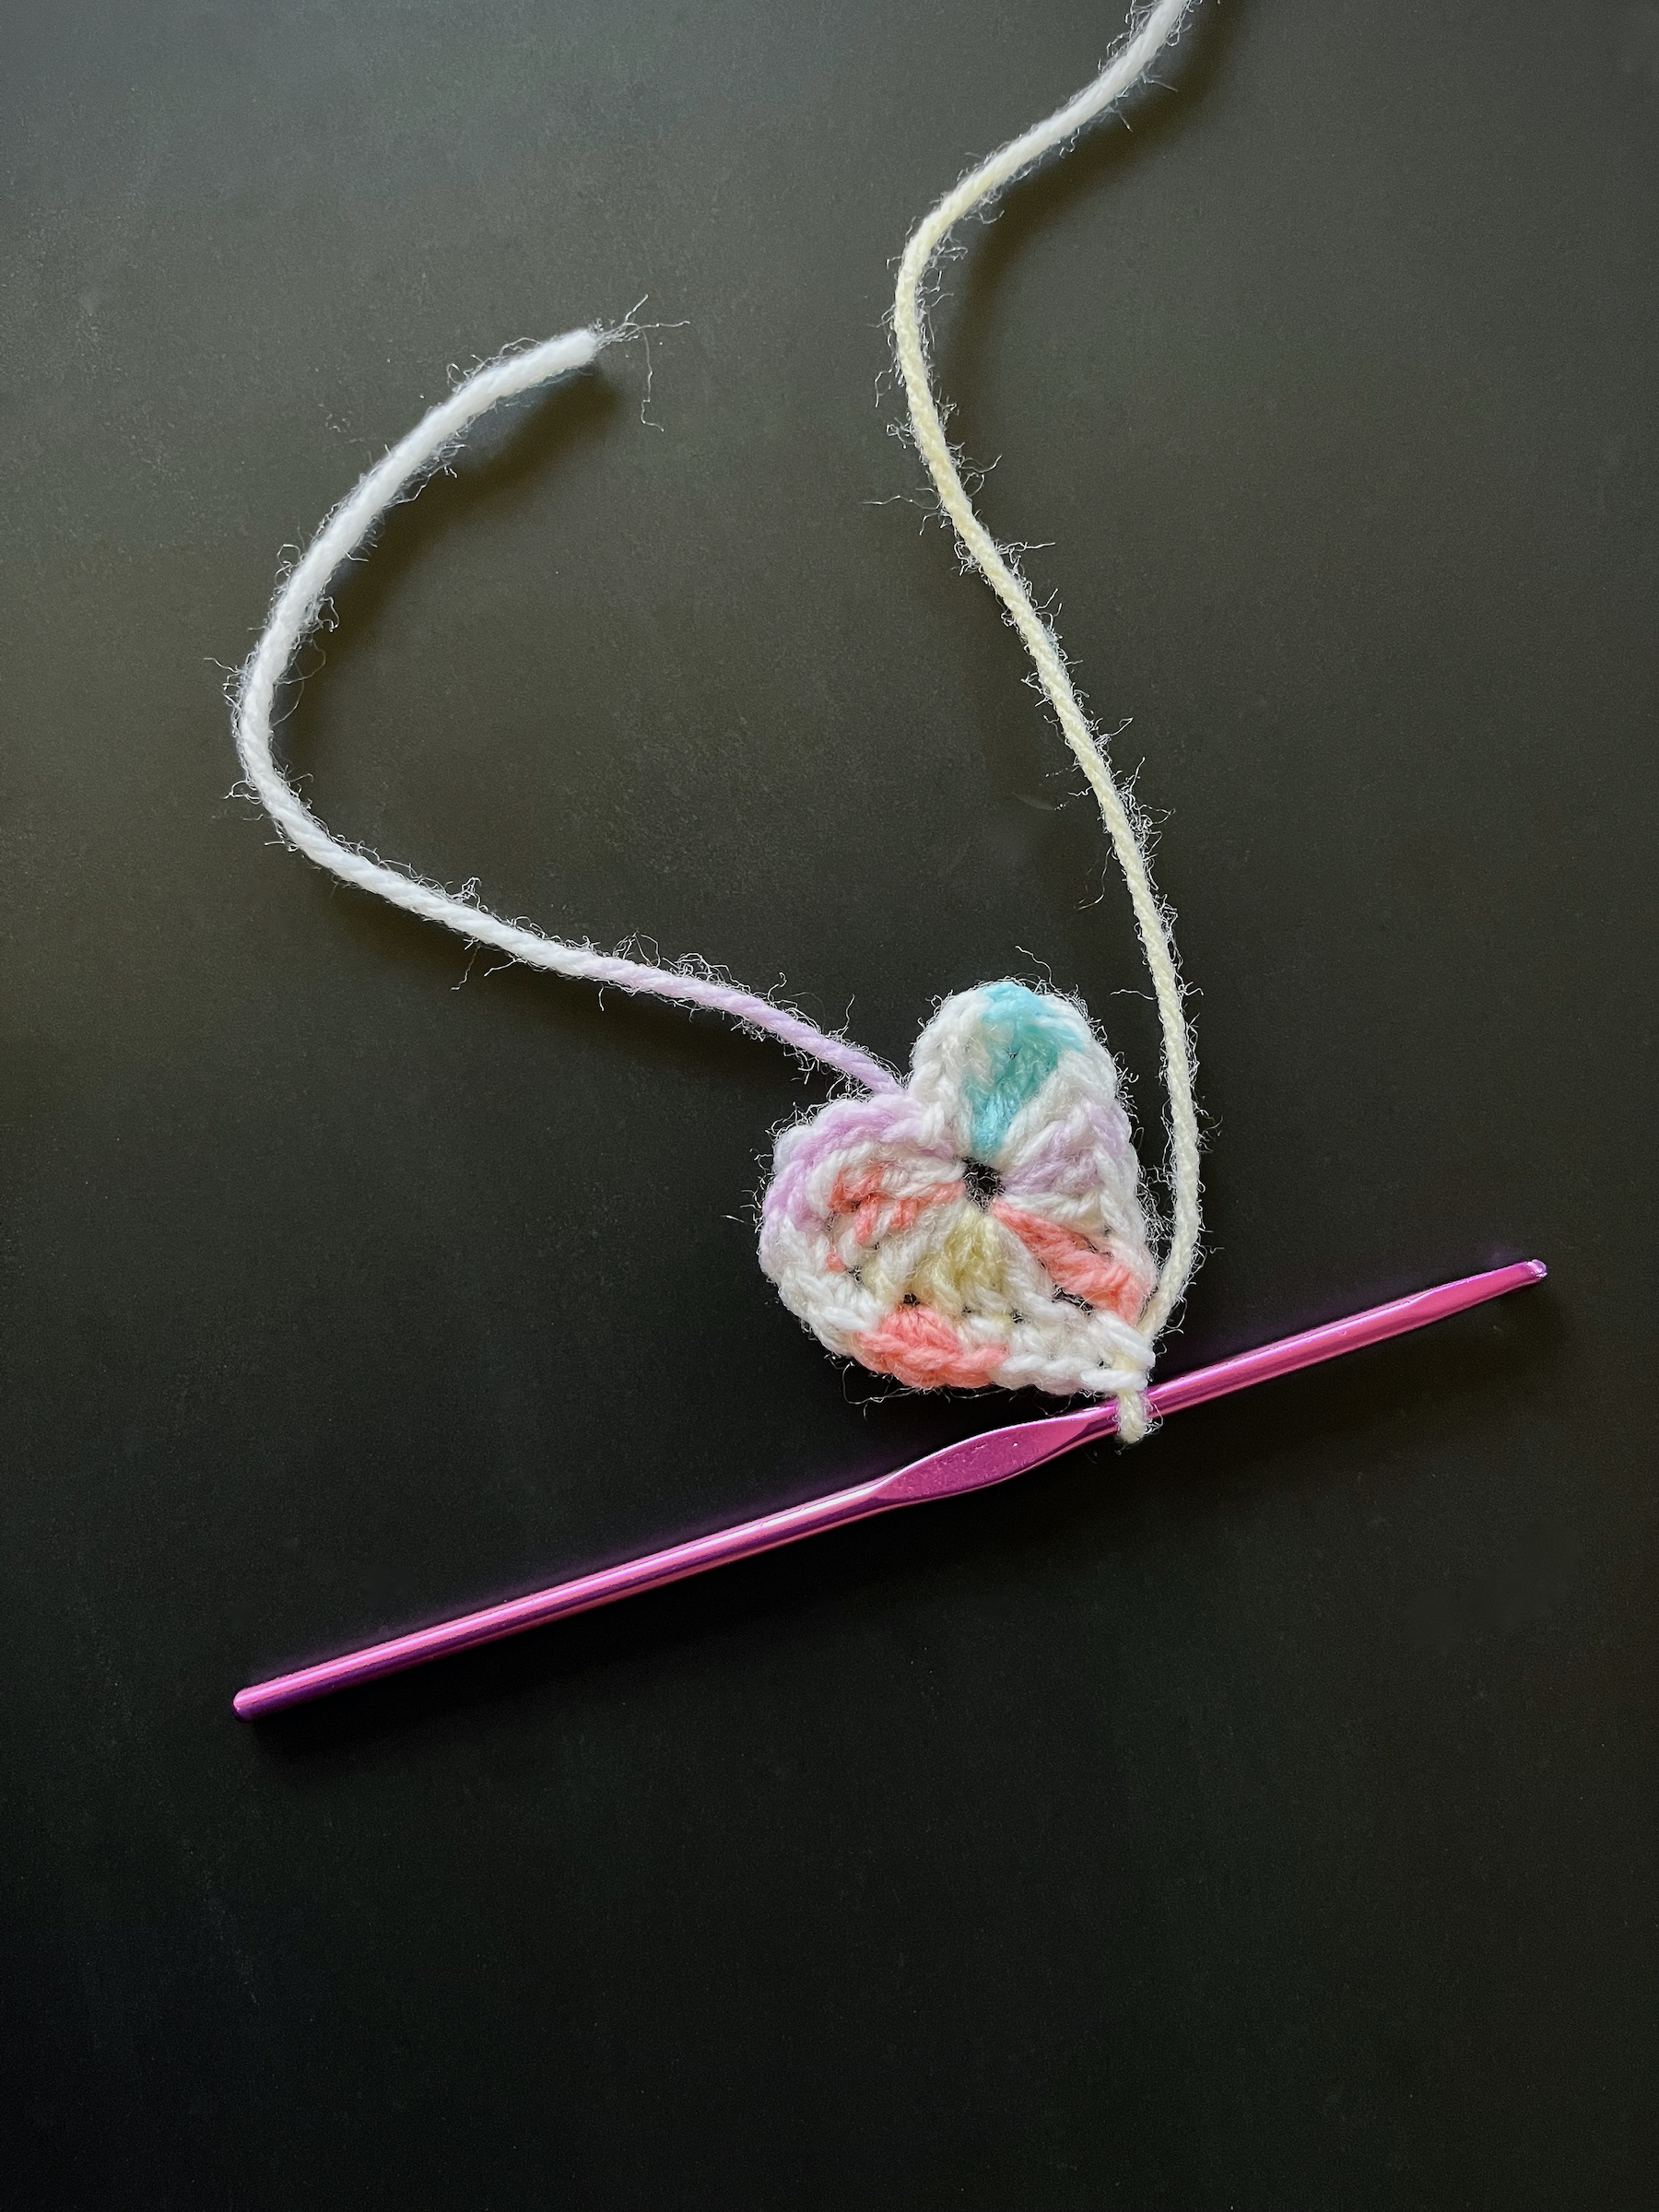
Slipstitch into the magic ring one more time, snip off the yarn and pull the loose end through the final stitch tightly to secure it.
Pull the loose end of the starting yarn to pull the center of the heart in tightly.
Using a smaller crochet hook, weave the starting yarn and ending yarn into the heart.
Repeat steps 1 through 23 again with the larger yarn and hook.
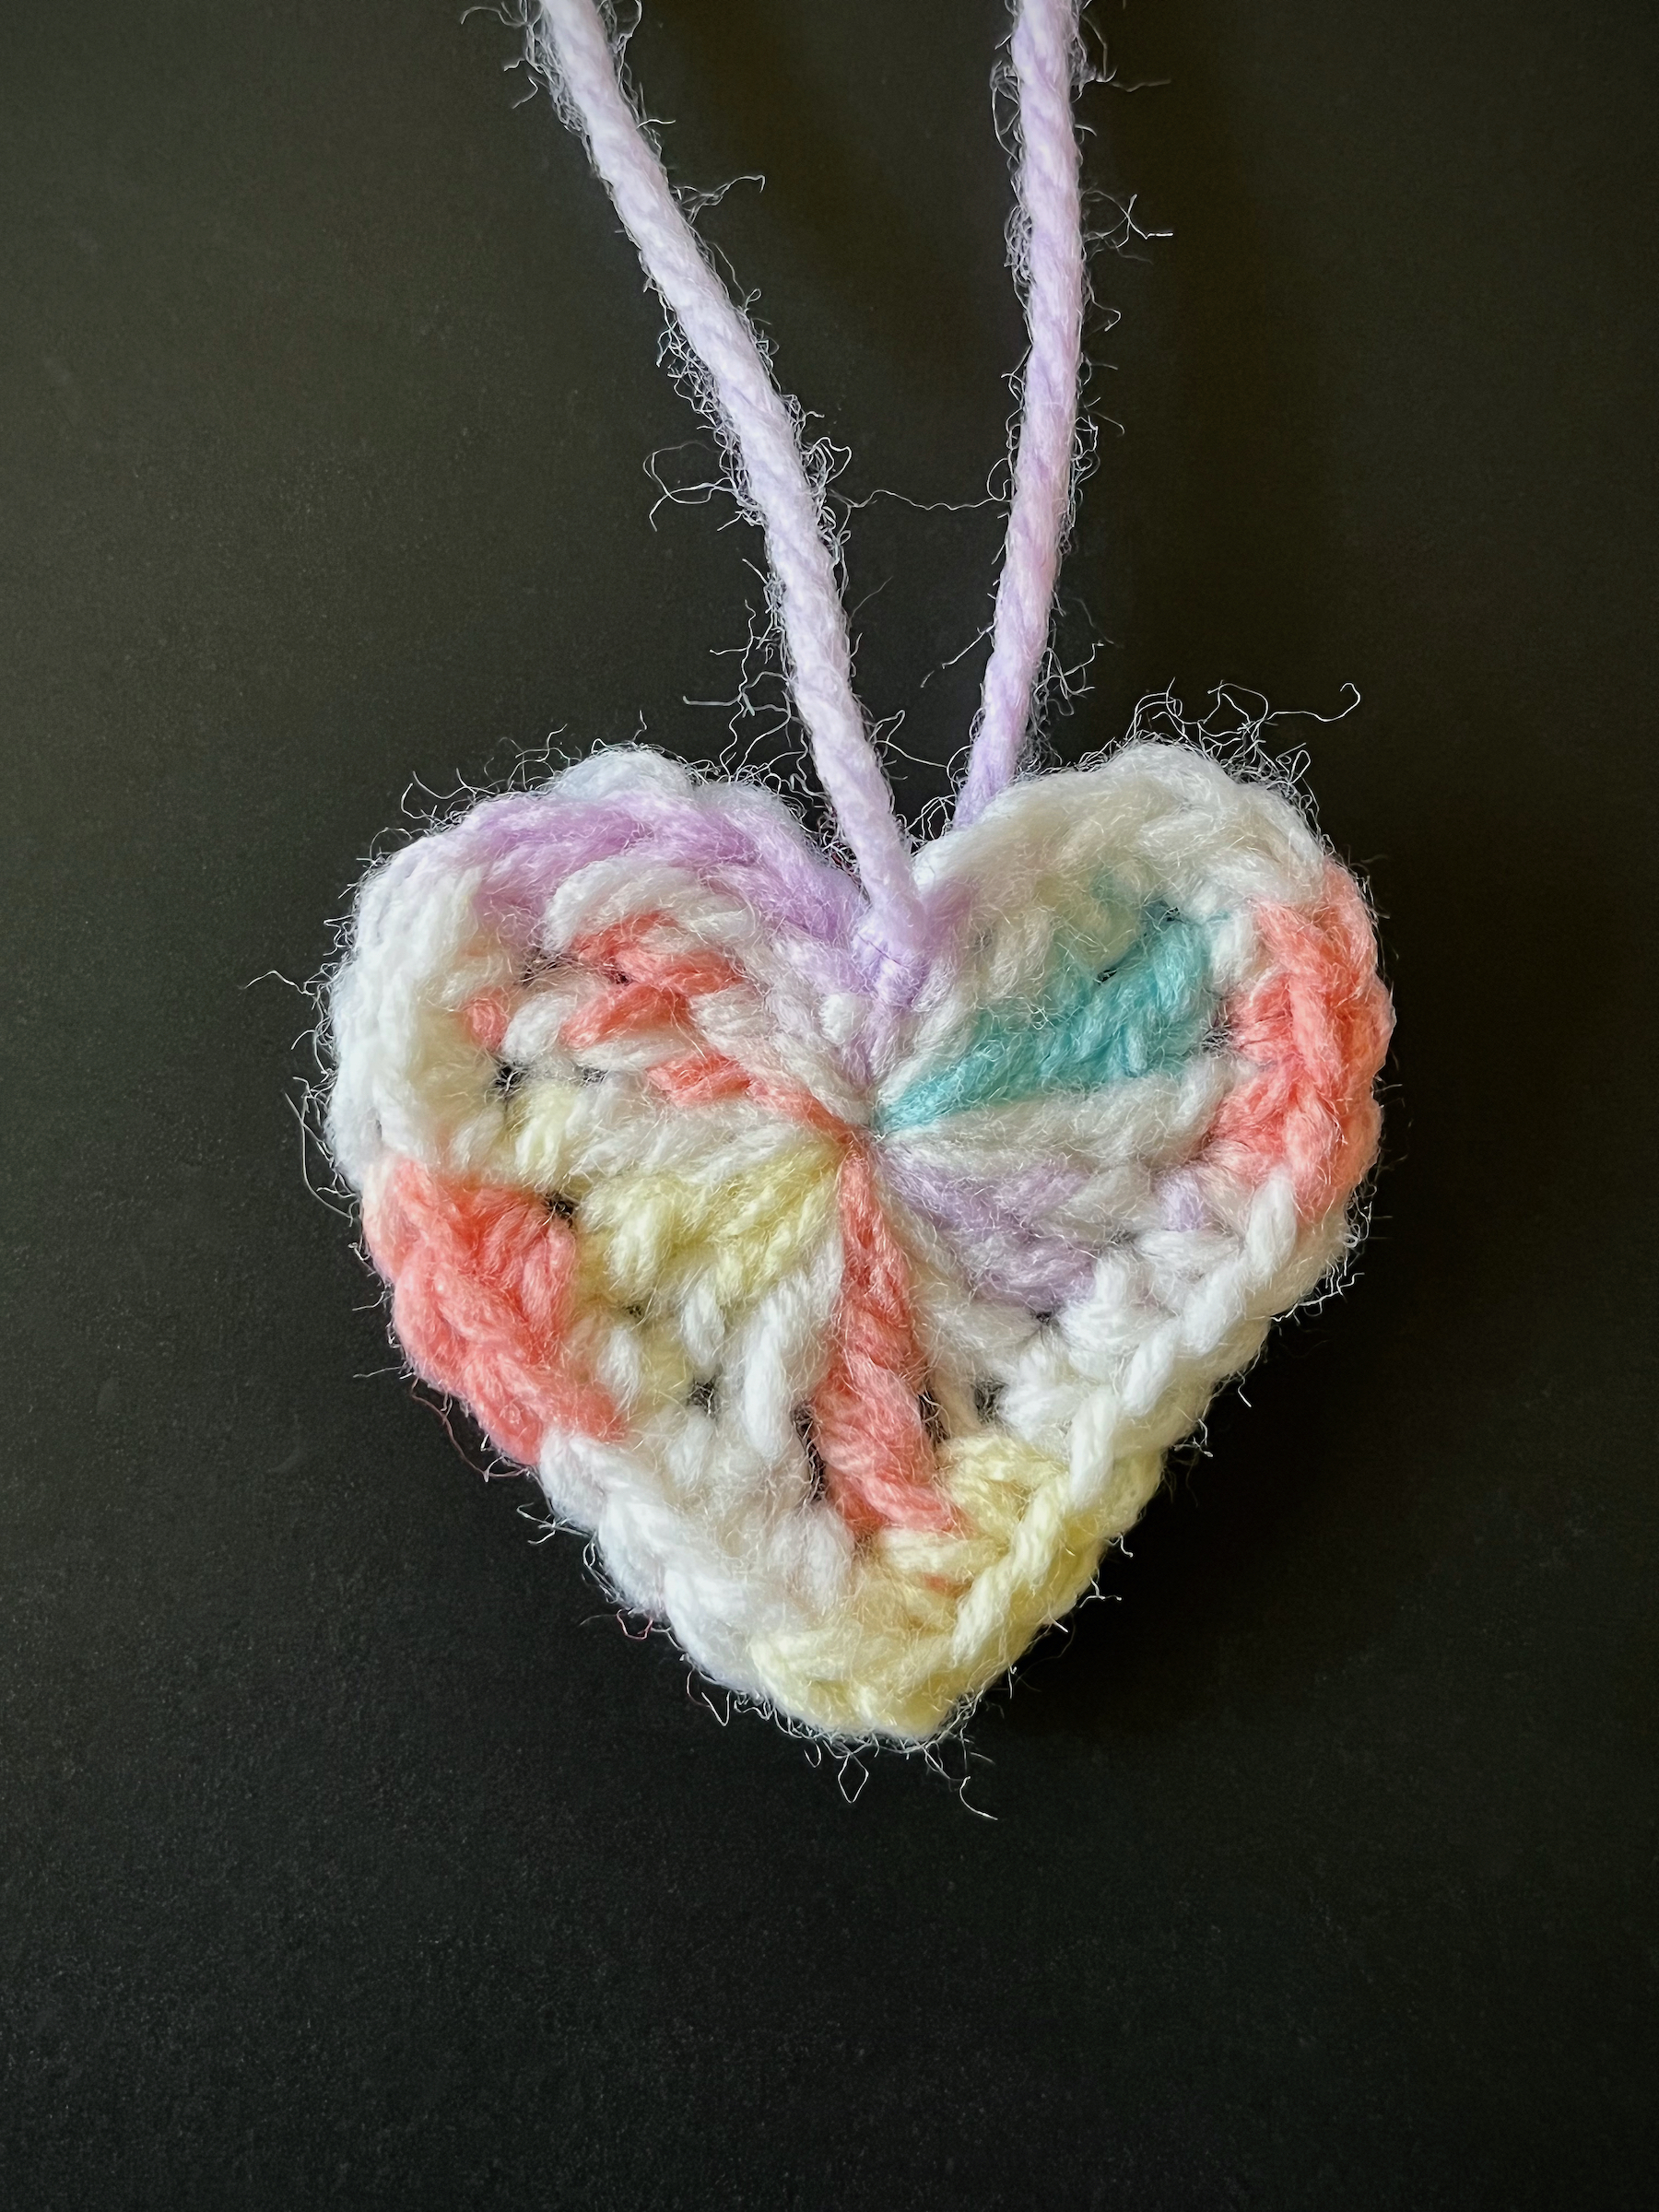
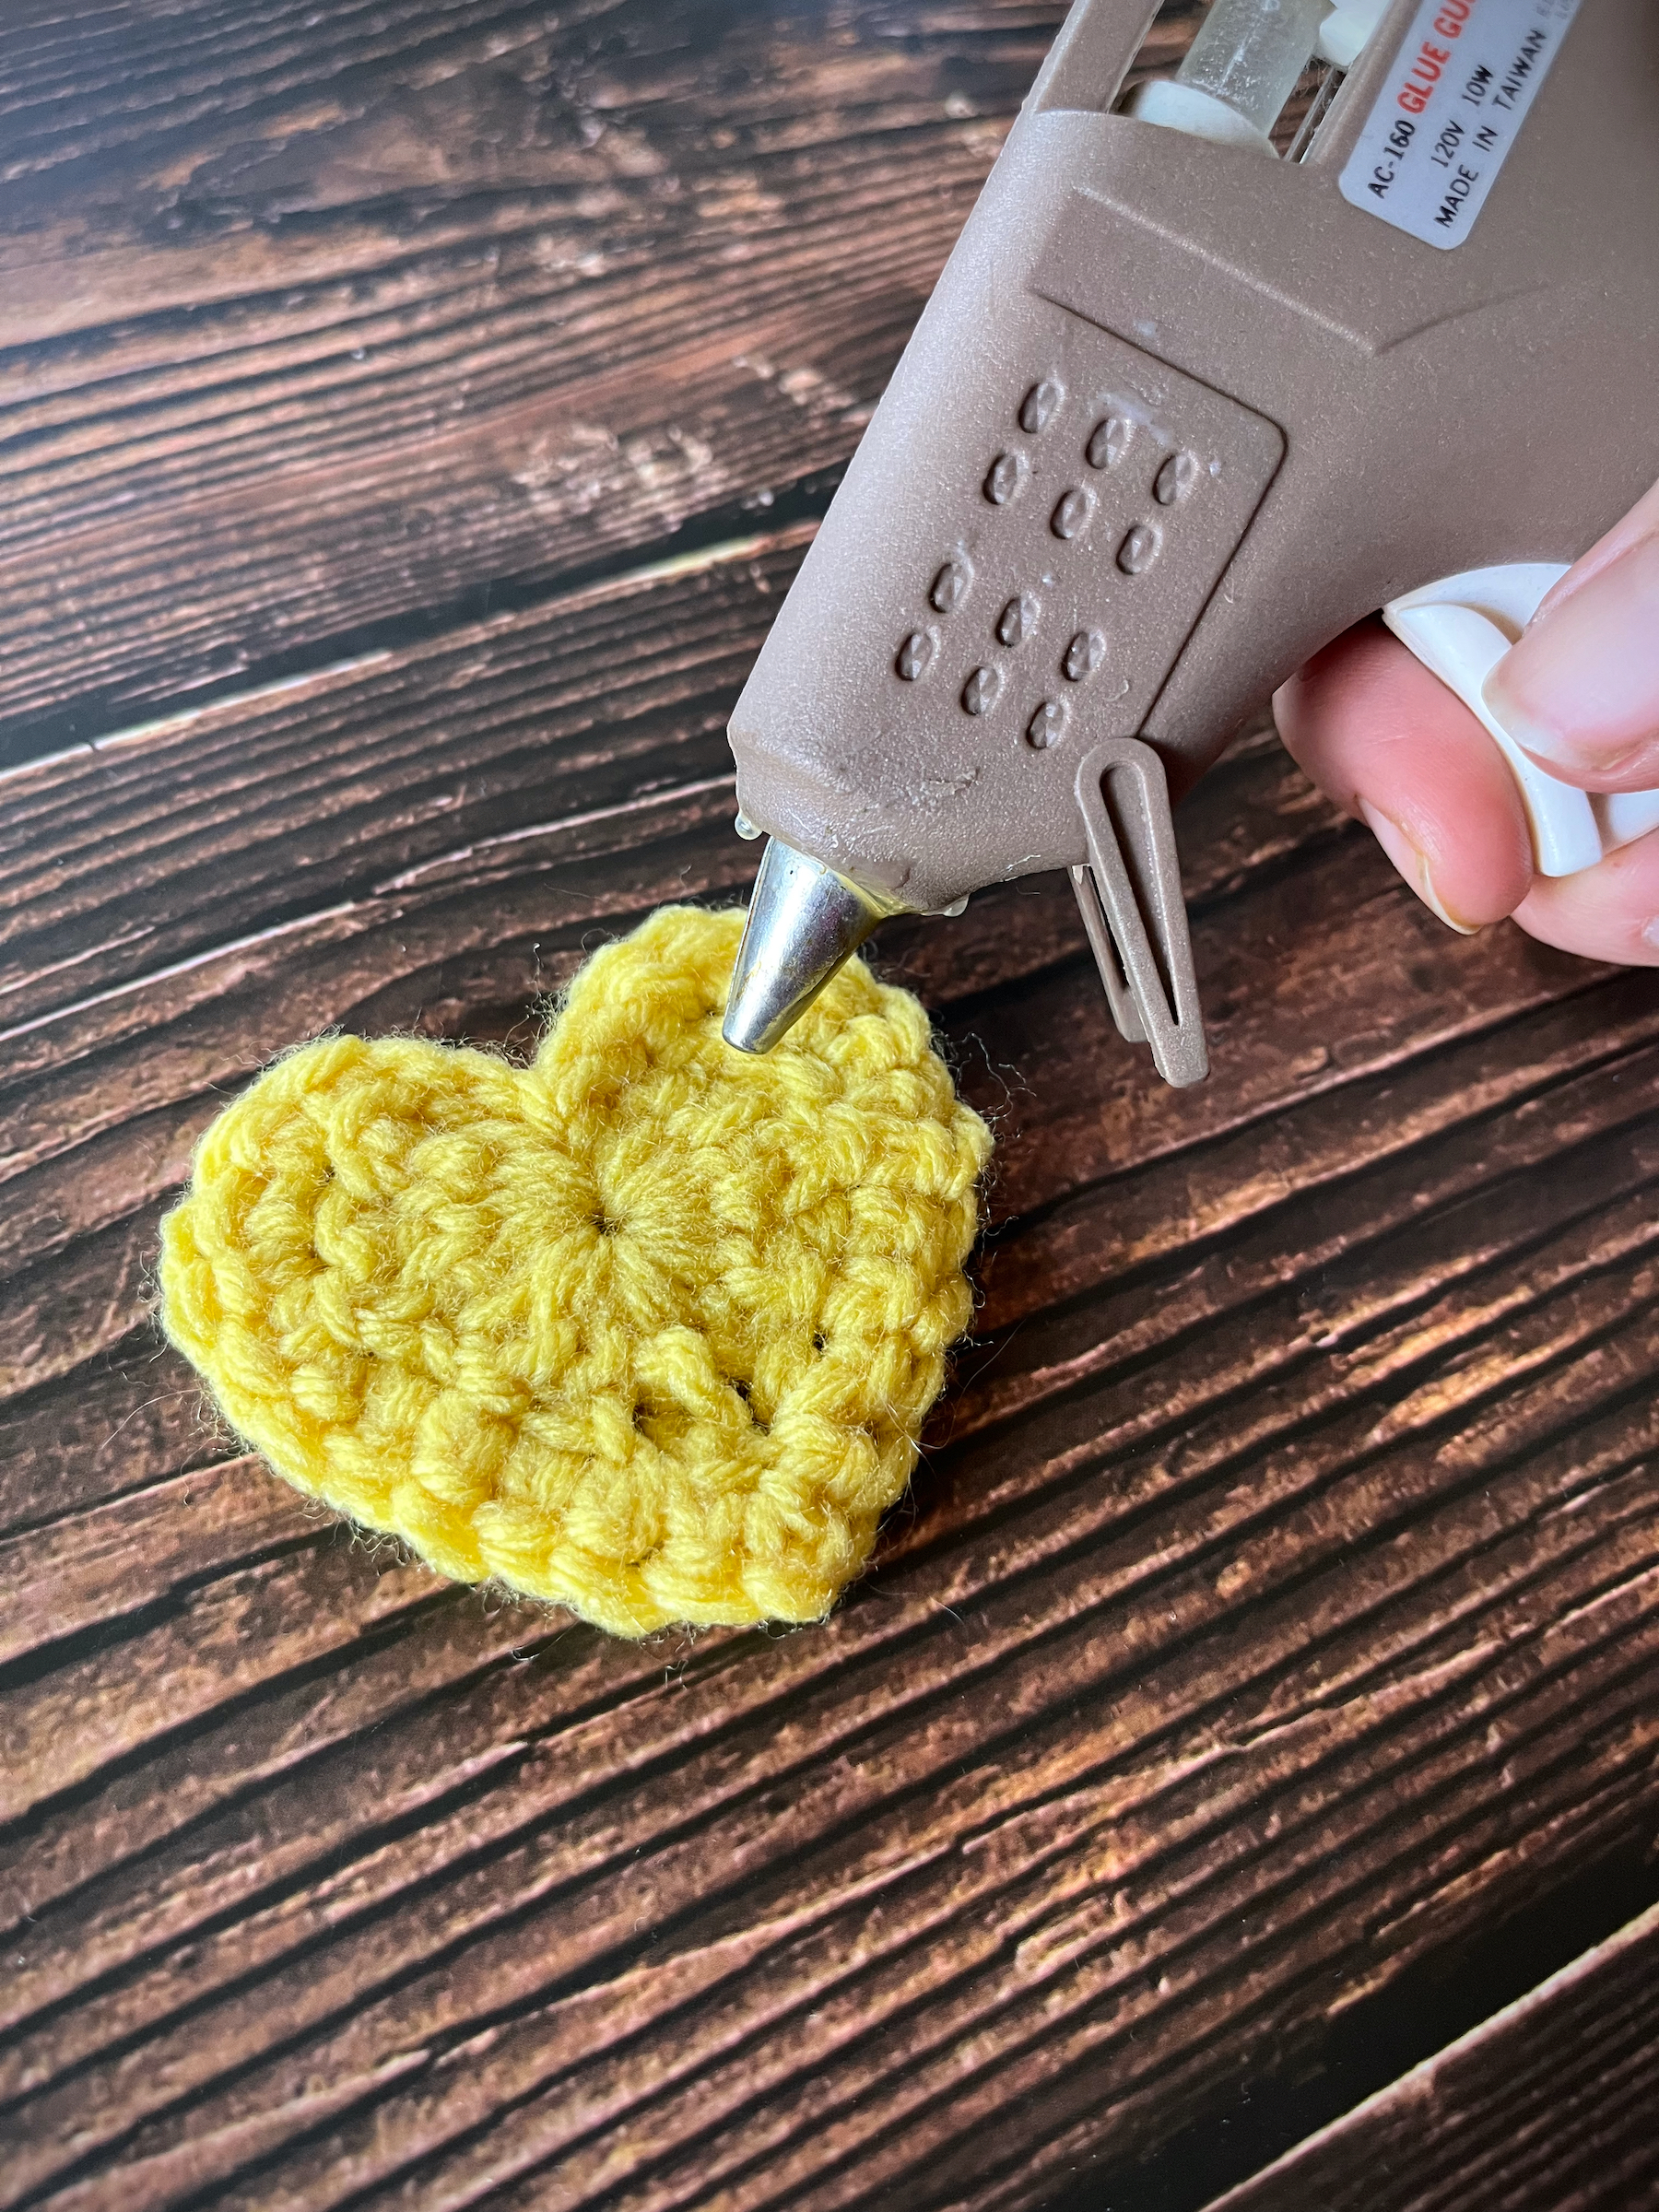
Once both hearts are done, heat up your glue gun and apply a steady amount of glue to the back of the larger heart, within the confines of where the smaller heart will lay, then press the back of the smaller heart to it. If there are any loose edges gently lift them up, apply glue underneath and press it back.
Once cool, give your pocket hug to someone who needs it!
Welcome back friends! Do you crochet? I do! I feel calm and cozy when I’m crocheting, and fiercely proud whenever I complete a project.
I’ve always wanted to crochet some of my own dish cloths and now is the perfect time! This pattern is simple, textured and ideal for any level of crocheter (beginners included)! Any cotton yarn can be used for this dish cloth.
Let’s get started!
SUPPLIES
Crochet hook (size 5 mm)
Cotton yarn
Scissors
Yarn needle or small crochet hook
INSTRUCTIONS
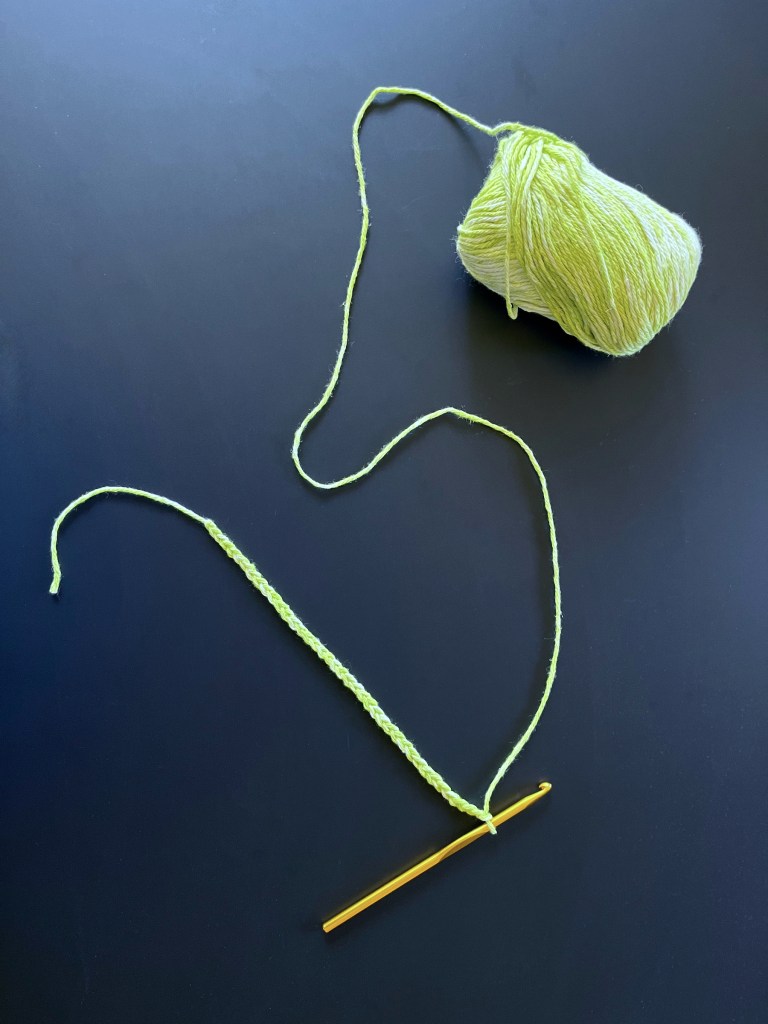
Create a slip knot and then 30 chain stitches.
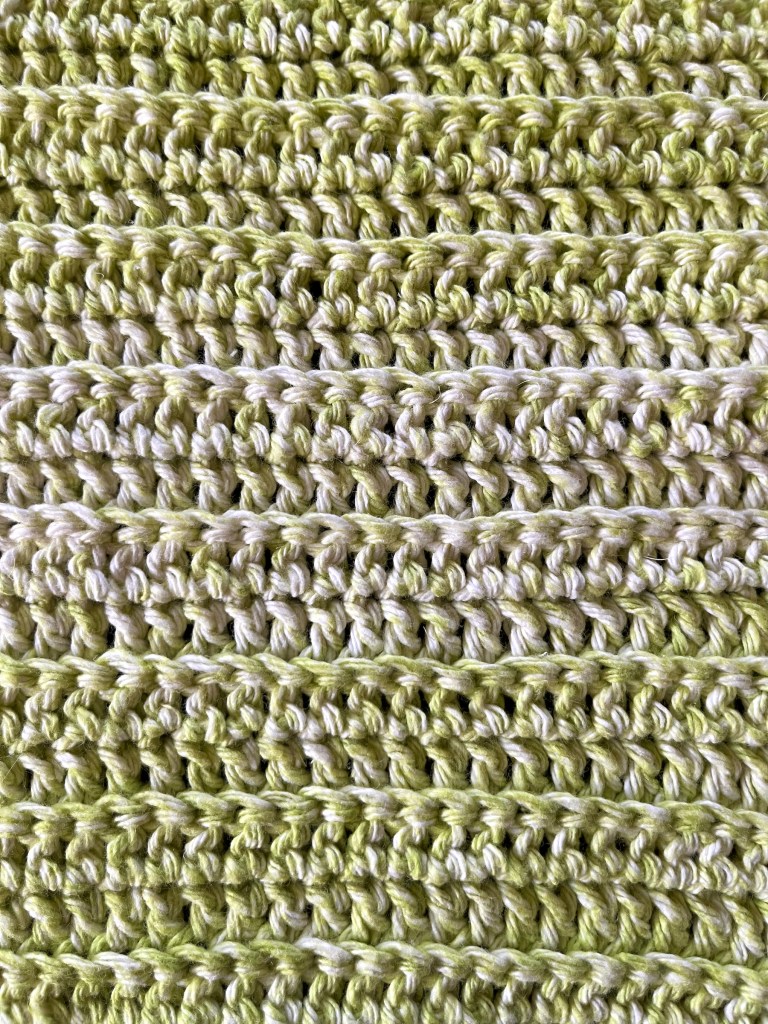
Turn your chain around and double crochet (dc) into the third stitch from the hook, then continue to dc all the way across your chain.
Chain 2 and turn your work. Dc into the back loop of the third stitch from the hook, then continue to dc in the back loops of each stitch all the way across your project.
Repeat step 3 for the next fourteen rows for a total of 16 dc rows.
After the last dc of your last row, chain 1 and rotate the dish cloth 90 degrees to the right.
Single crochet across this side of the dish cloth to give it a more finished look. There will be no distinct loops to follow, but try to stitch in regular intervals, your hook will know where to go!
Chain 1 and rotate the dish cloth 90 degrees to the right again, lay the original tail along the original chain, then single crochet around it (to weave it in) as we single crochet all the way down the original chain.
Chain 1 and rotate the dish cloth 90 degrees to the right again, then single crochet across this side of the dish cloth to give it a more finished look. There will be no distinct loops to follow, but try to stitch in regular intervals, your hook will know where to go!
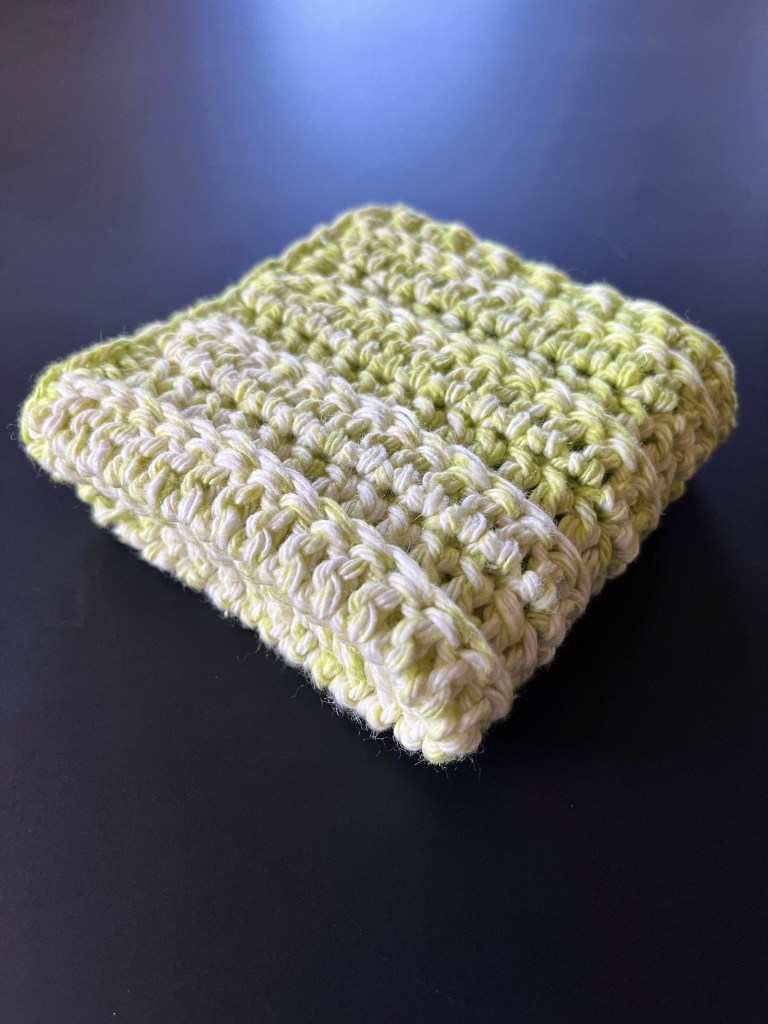
After the last single crochet, use the scissors to disconnect the yarn from the skein and pull the loose end in through your crochet loop.
Using the yarn needle, weave the loose end into the dish cloth and cut off any extra.
Welcome back friends! Do you still have a VCR? Not many people have VCRs anymore. We do, although we don’t really use it anymore.
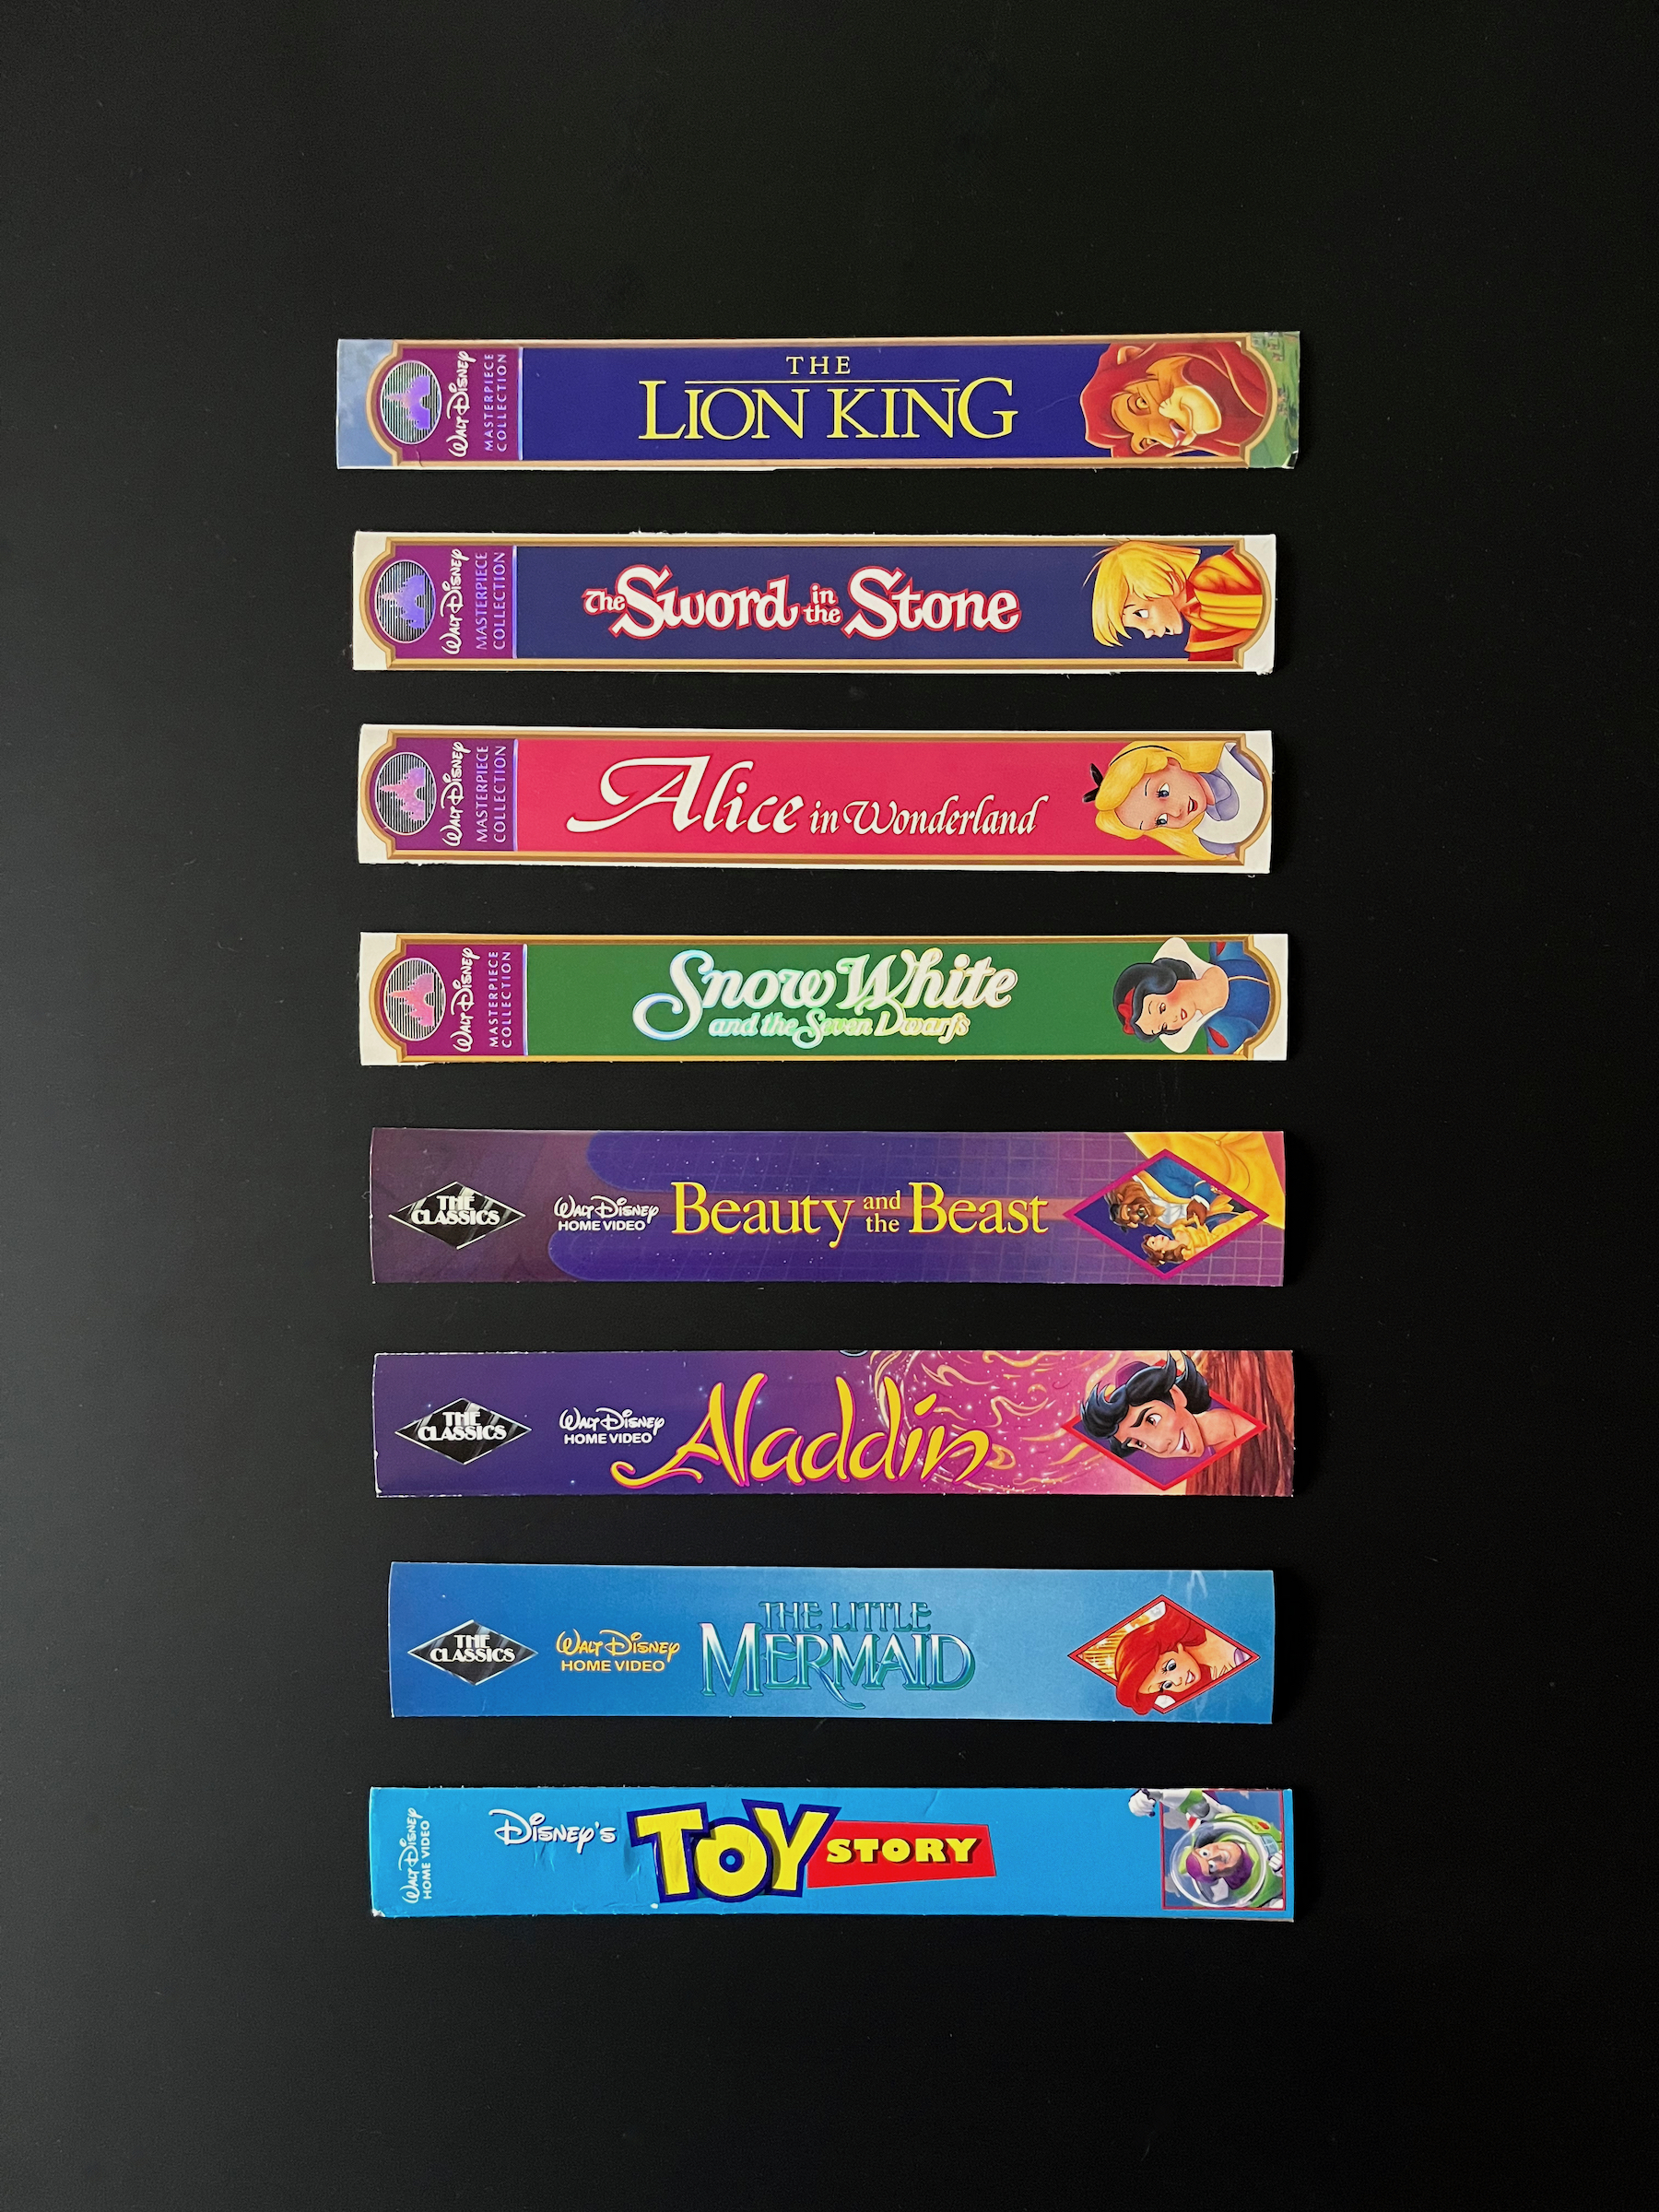
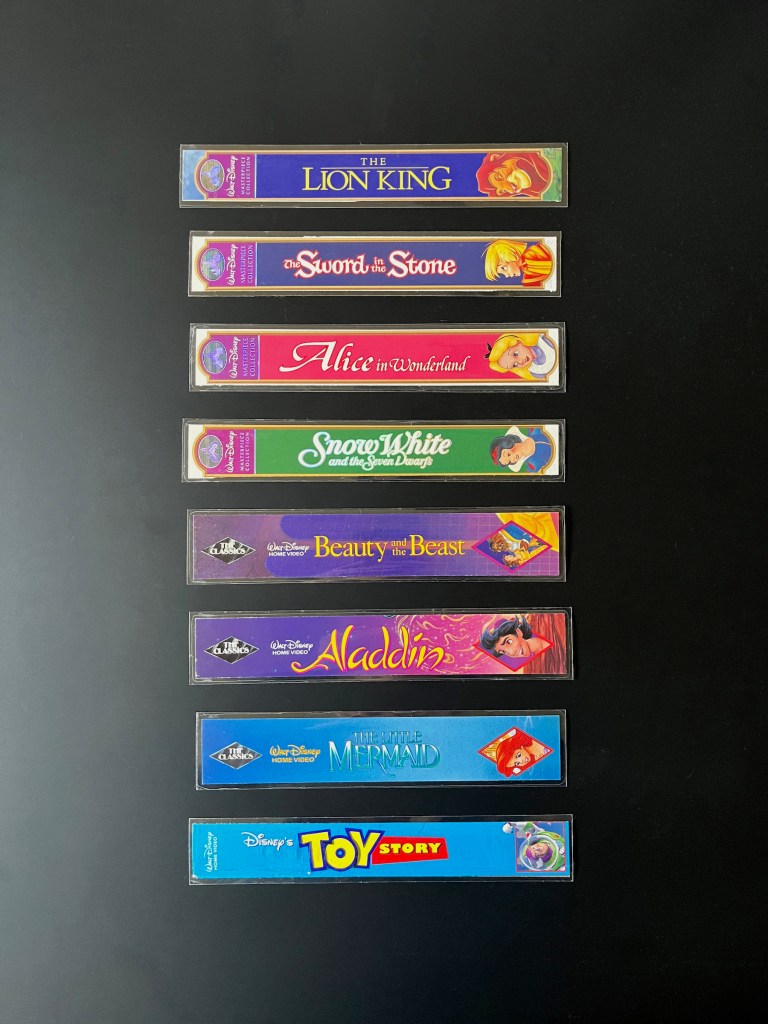
If you don’t have a VCR anymore, what should you do with all your old VHS, including all those Disney films you grew up with? You could collect them, donate them, or recycle them. But wait! If you decide to recycle them, let’s remove the spines and use them to create bookmarks!
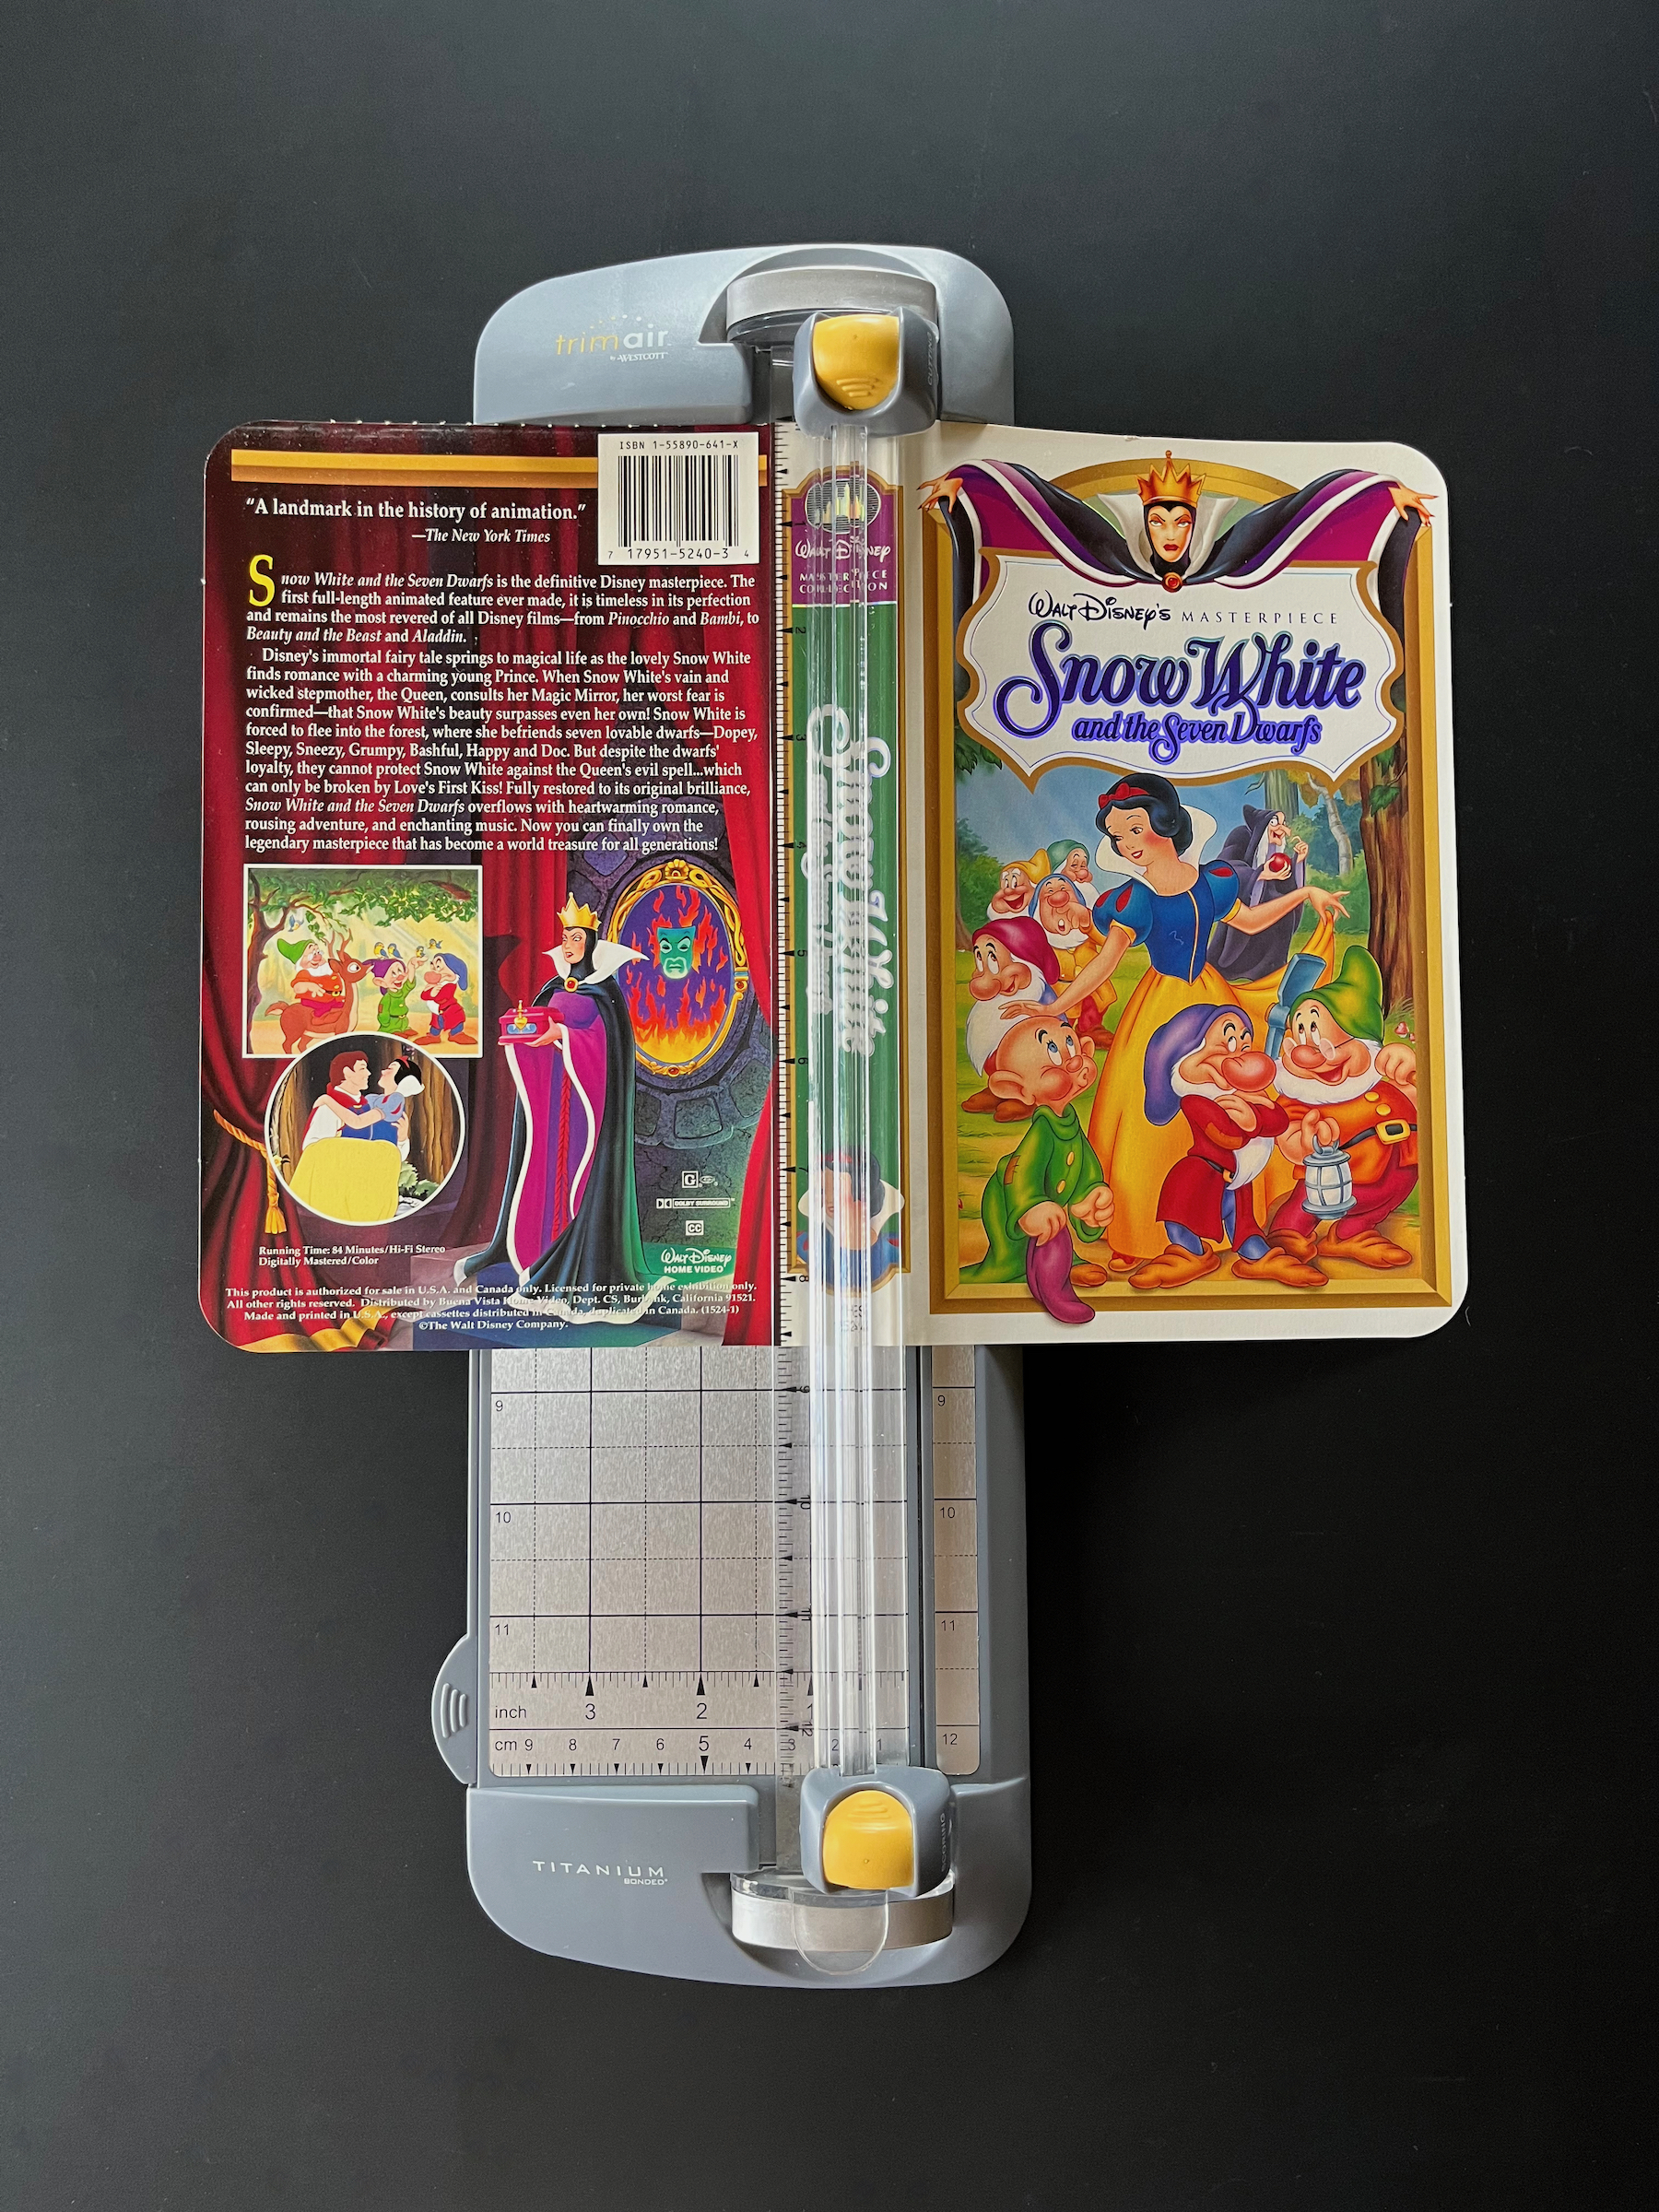
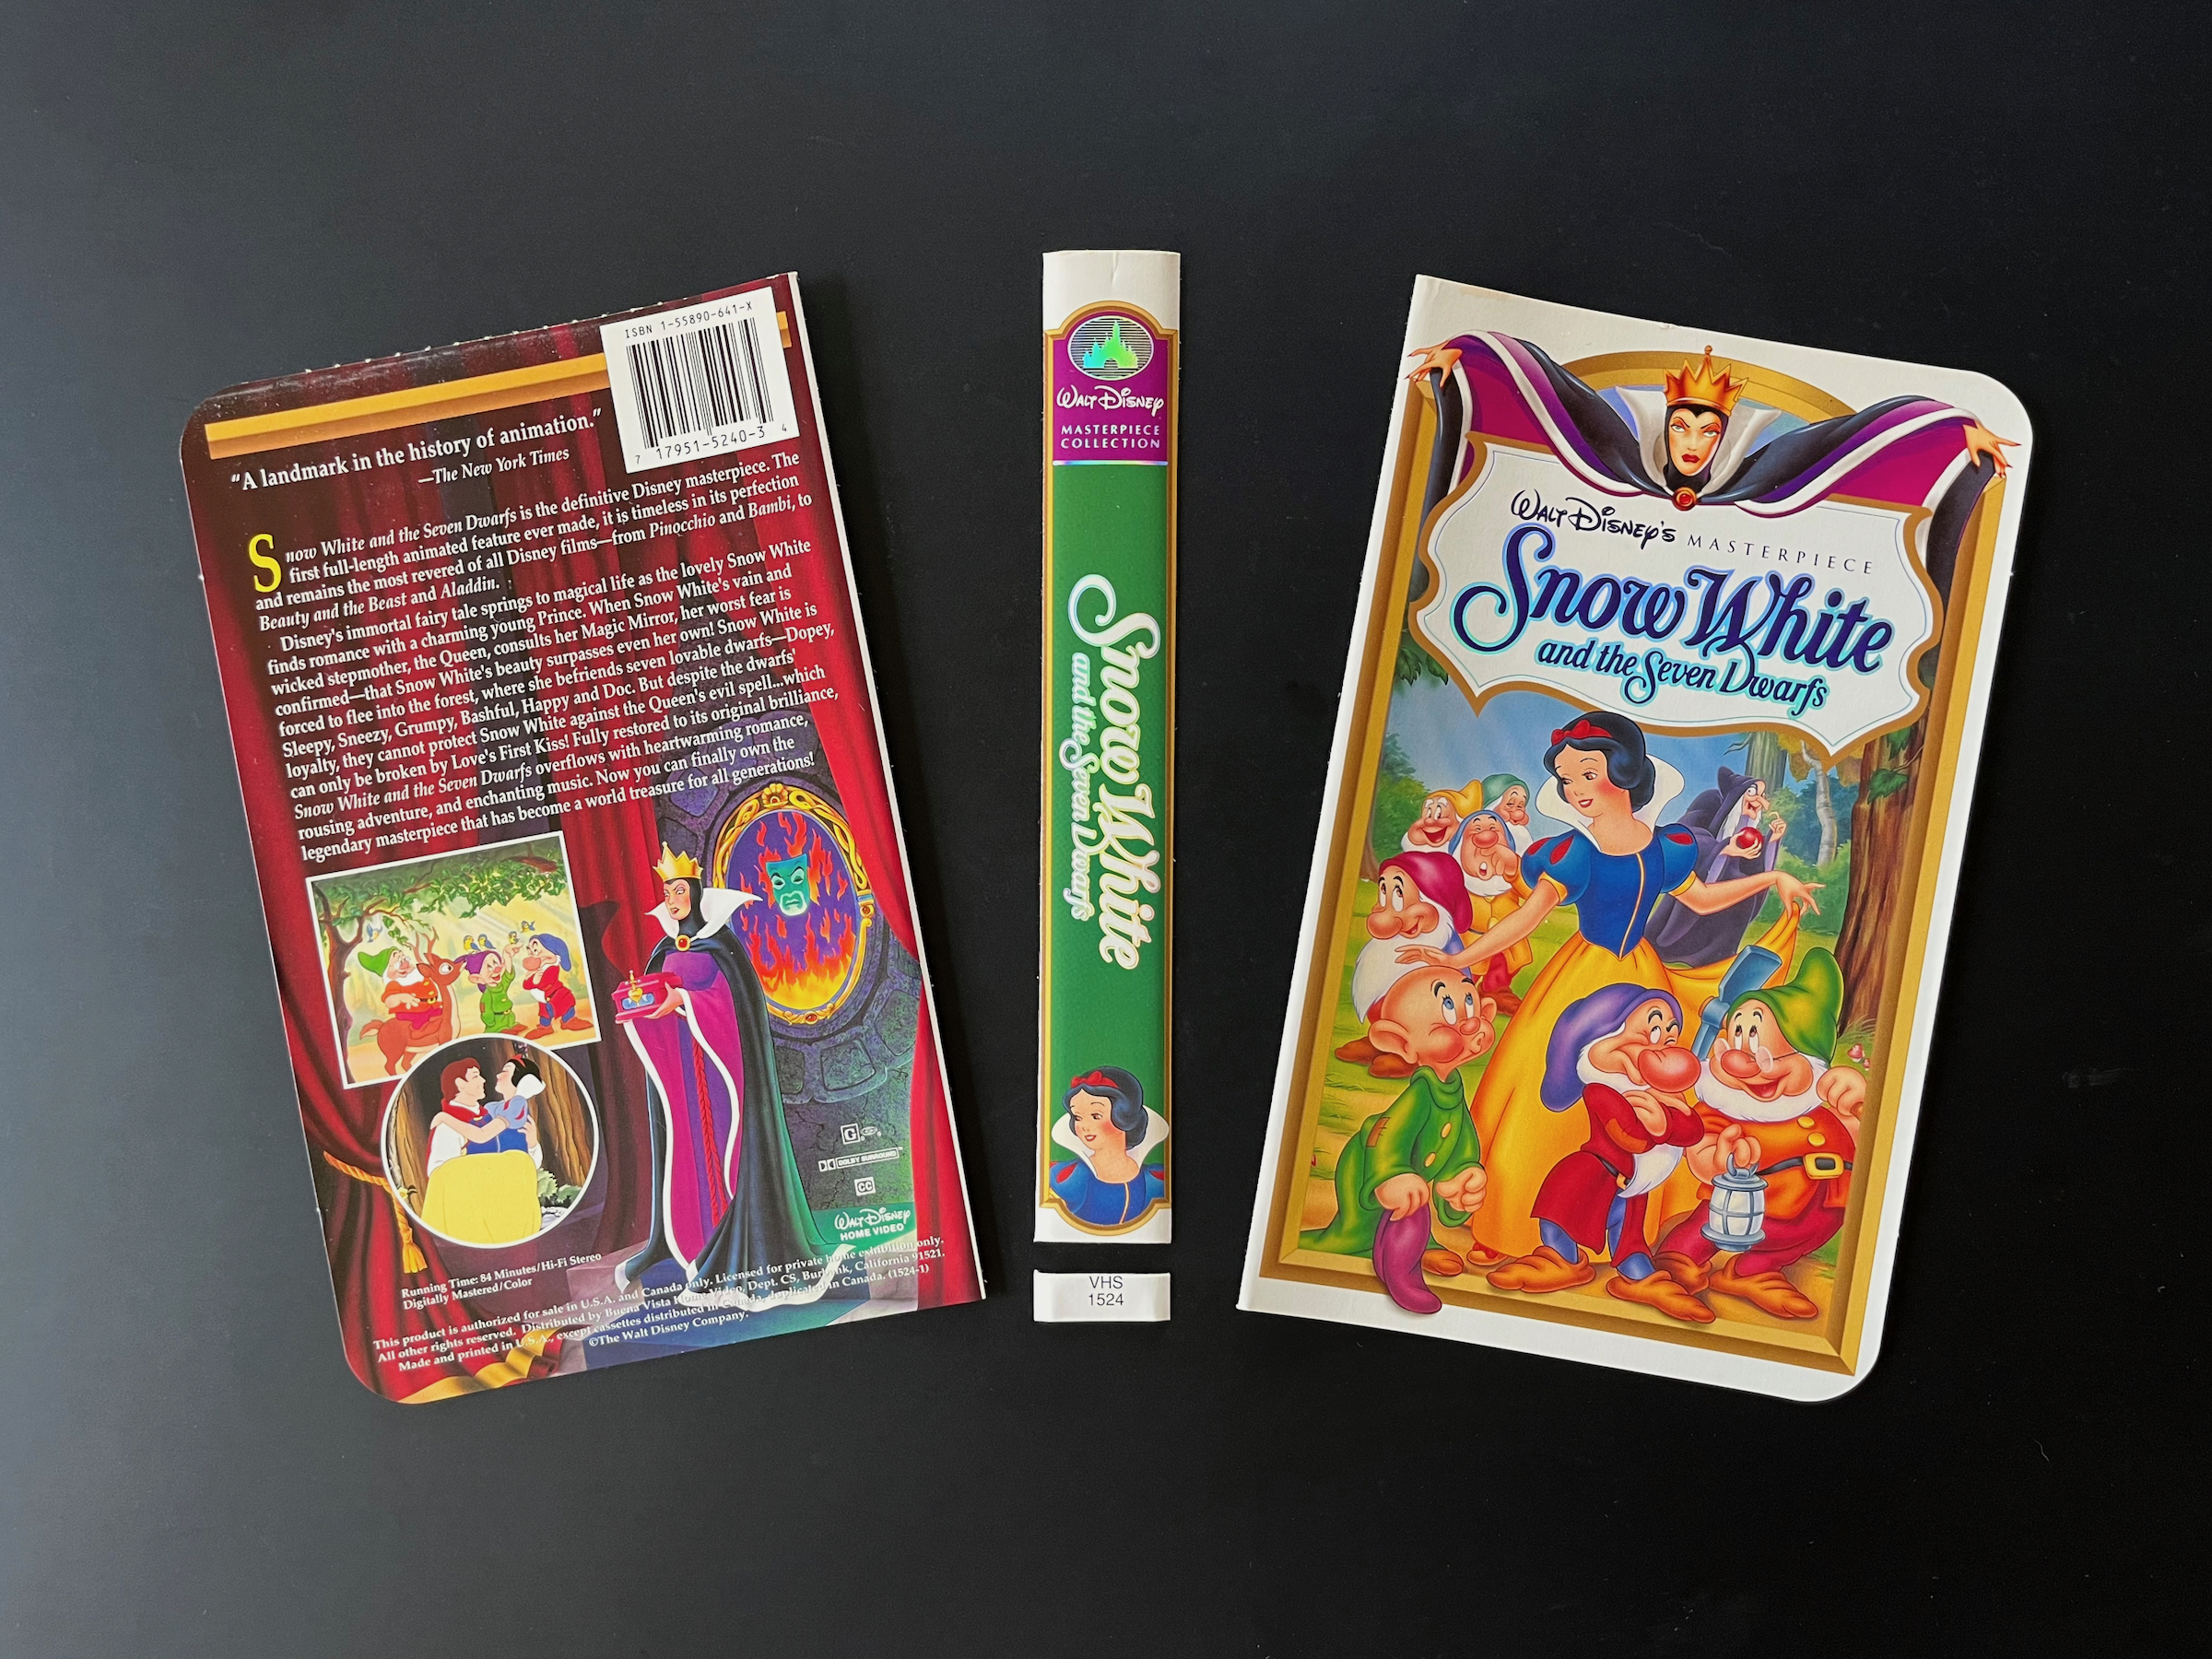
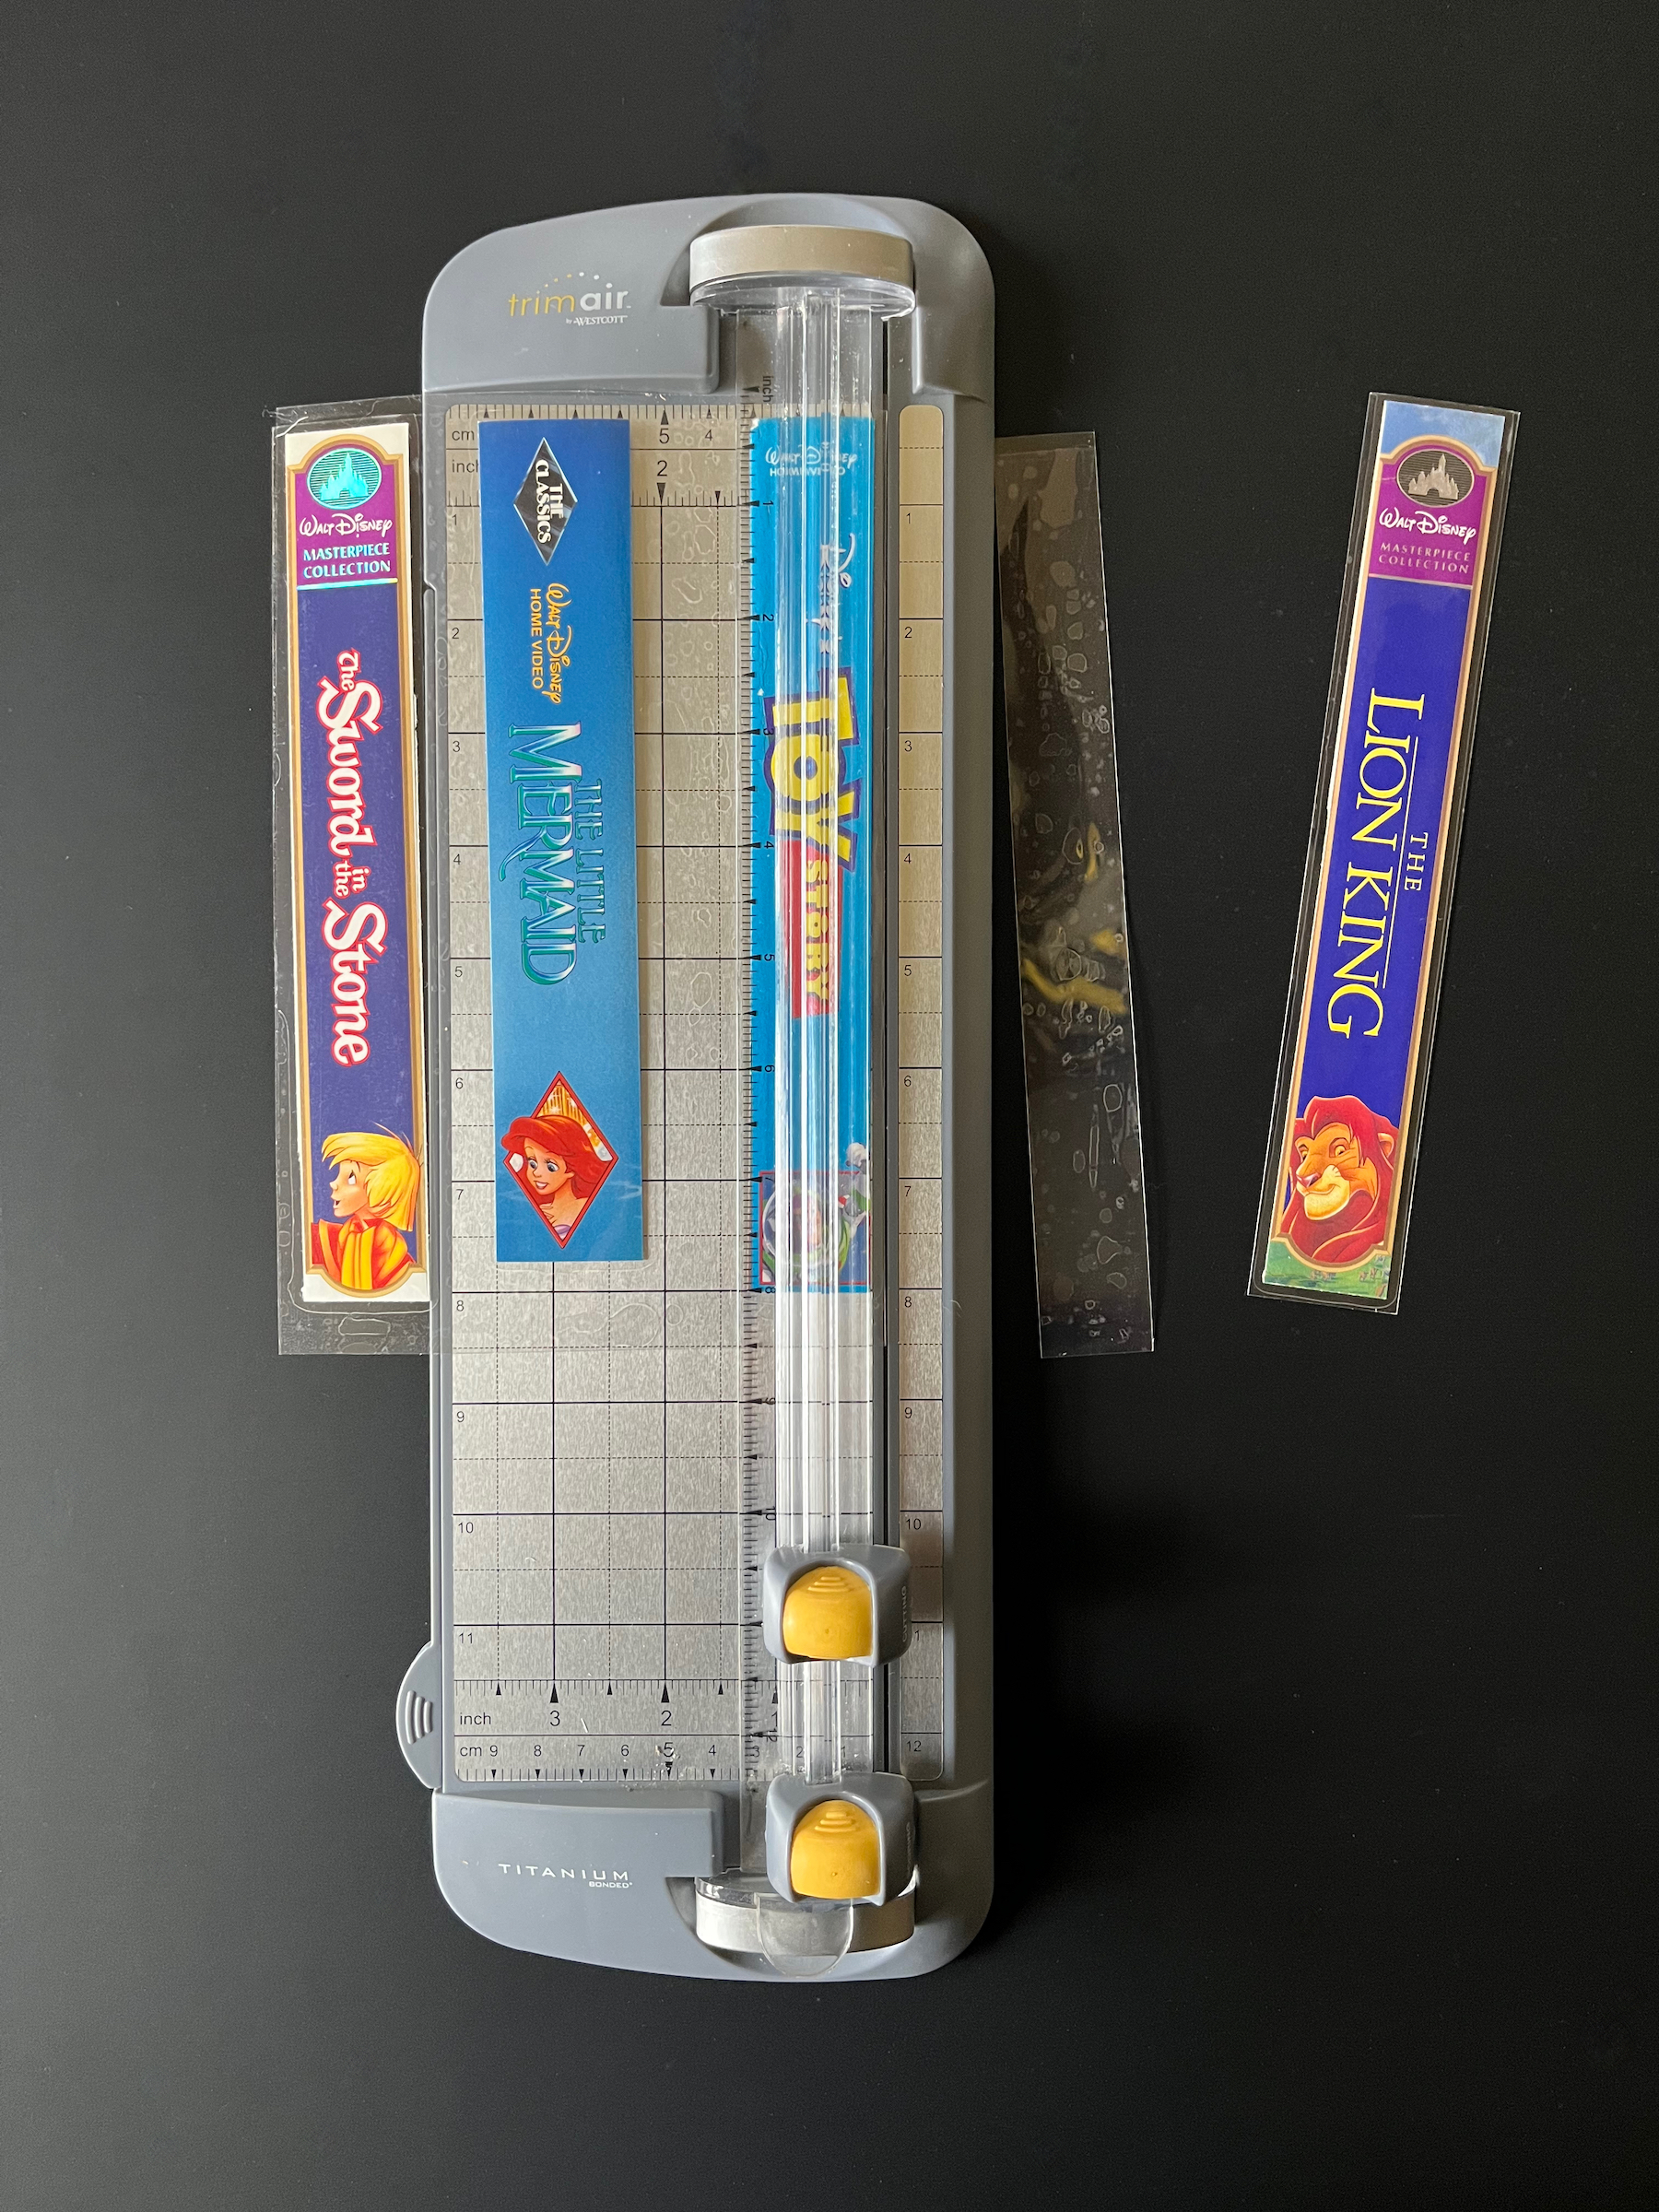
Use a guillotine paper trimmer to cut the spine from the cover art in straight, smooth edges
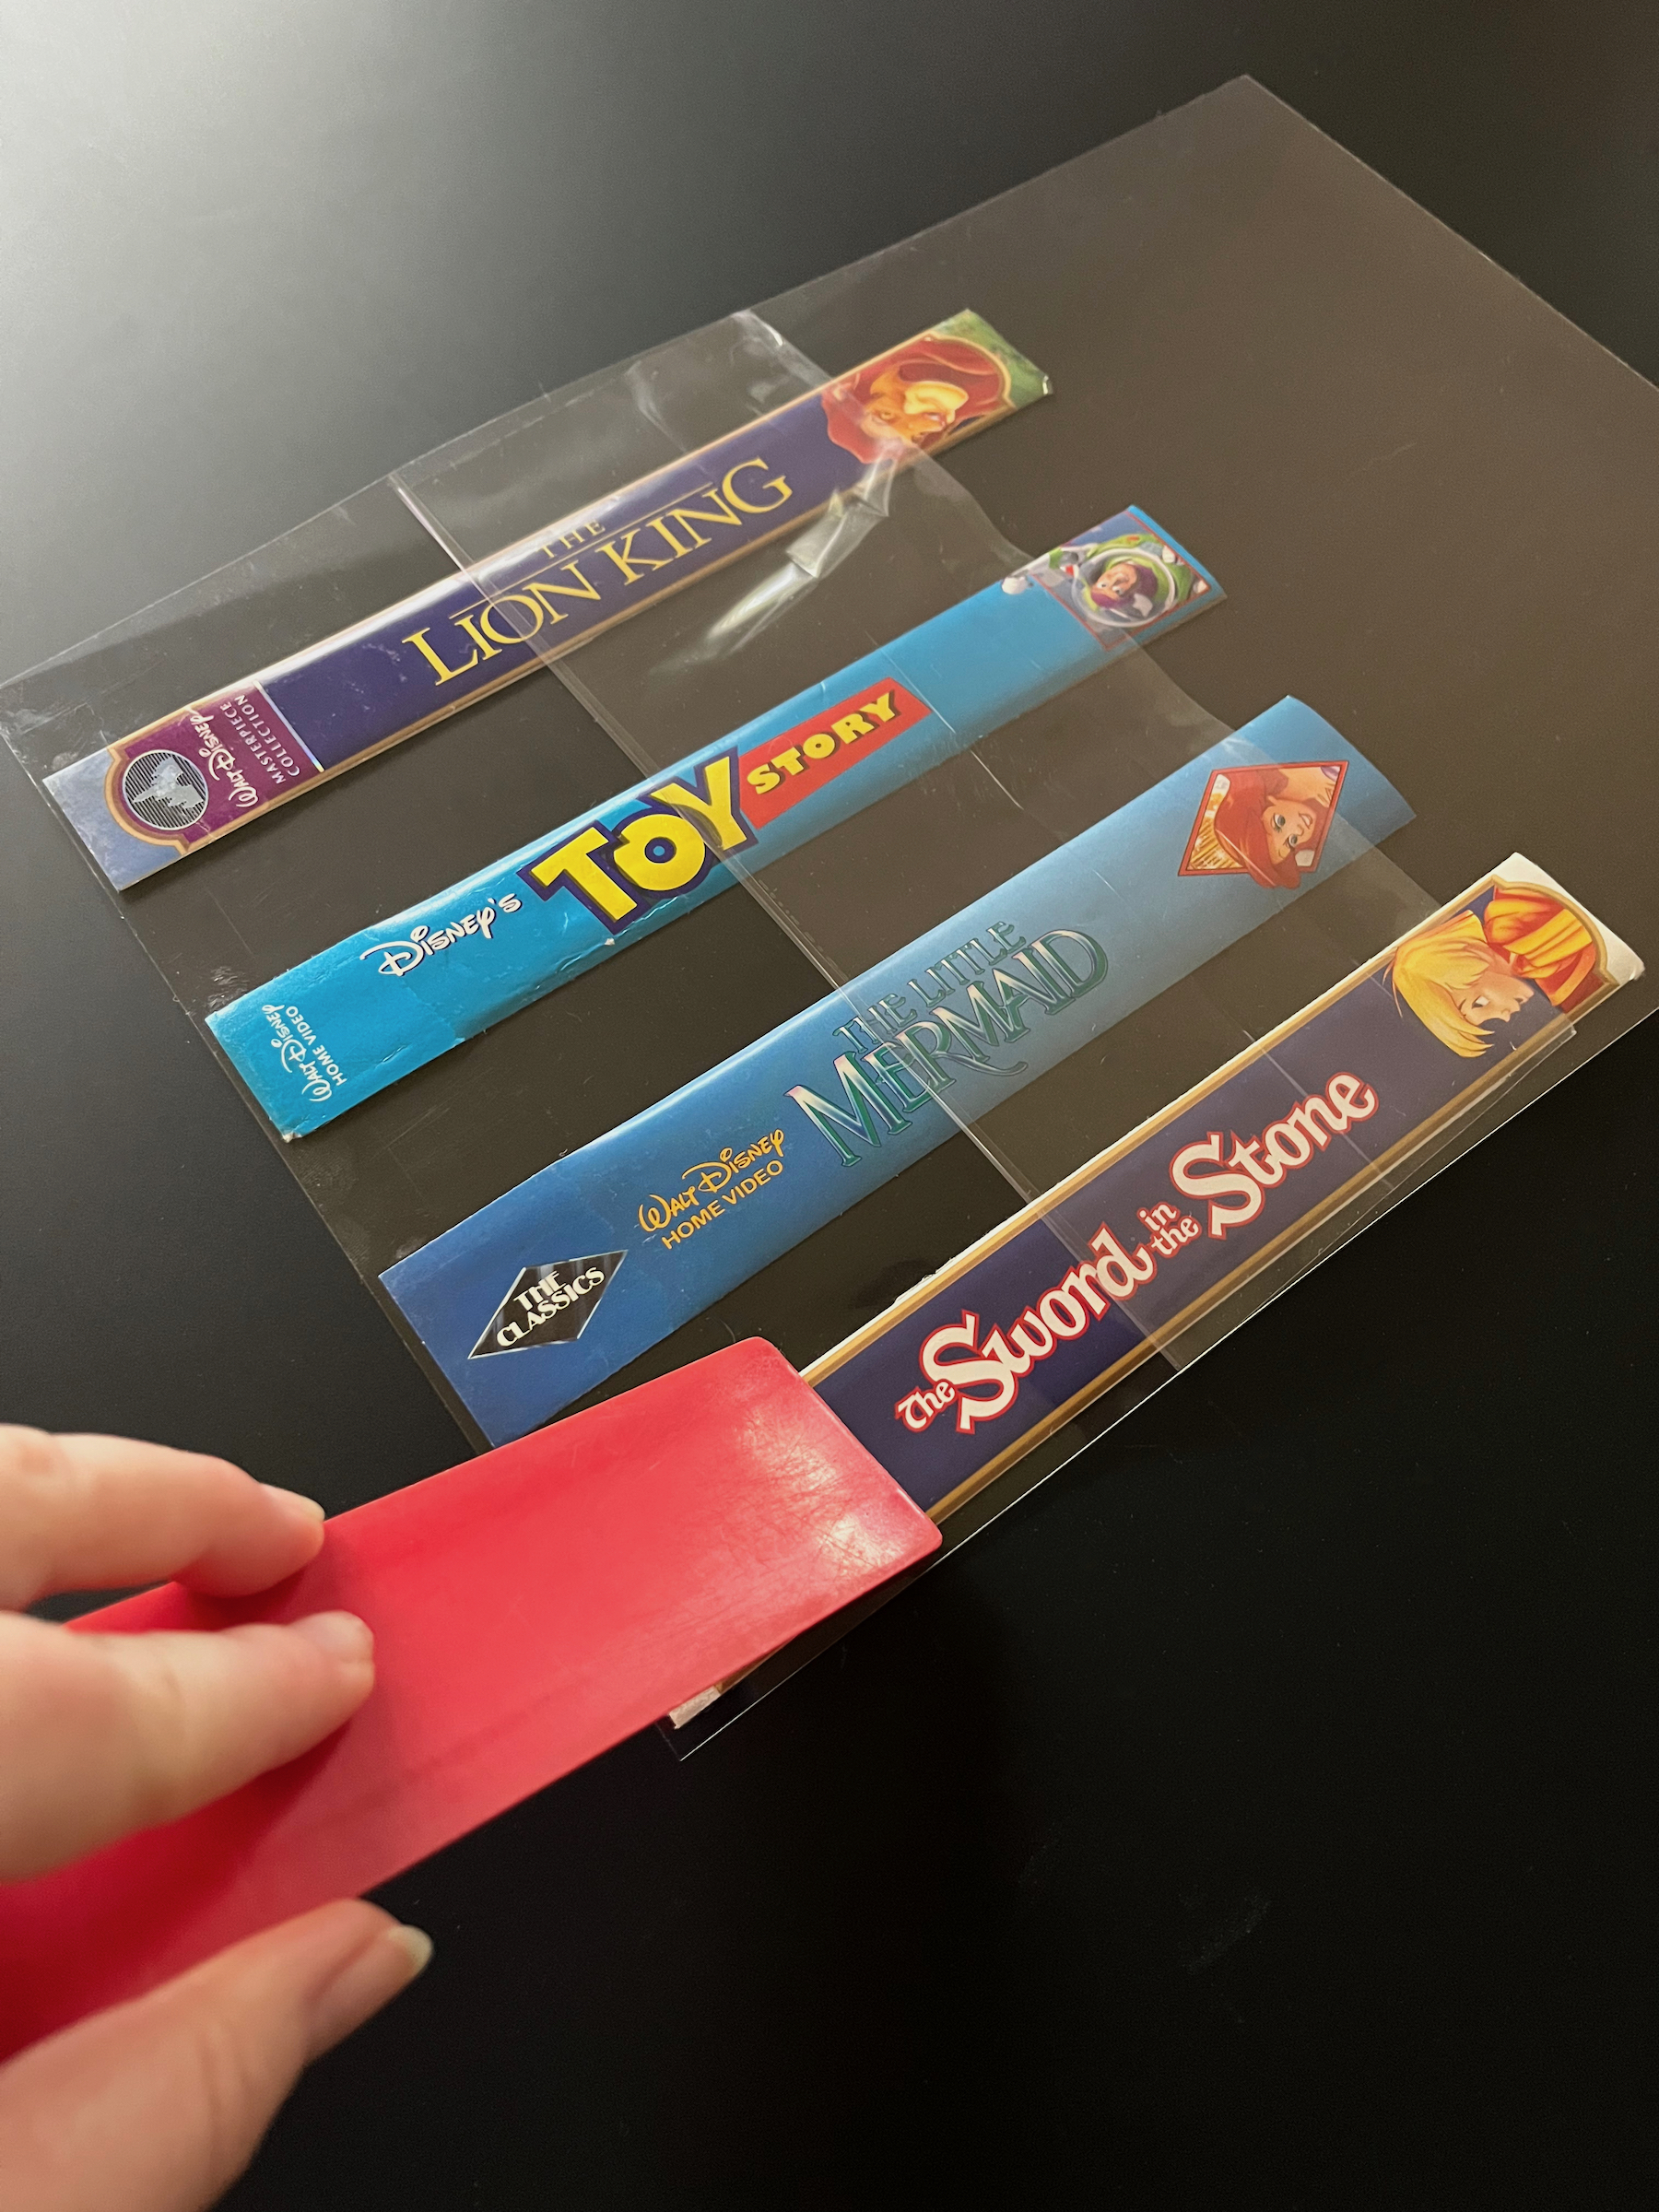
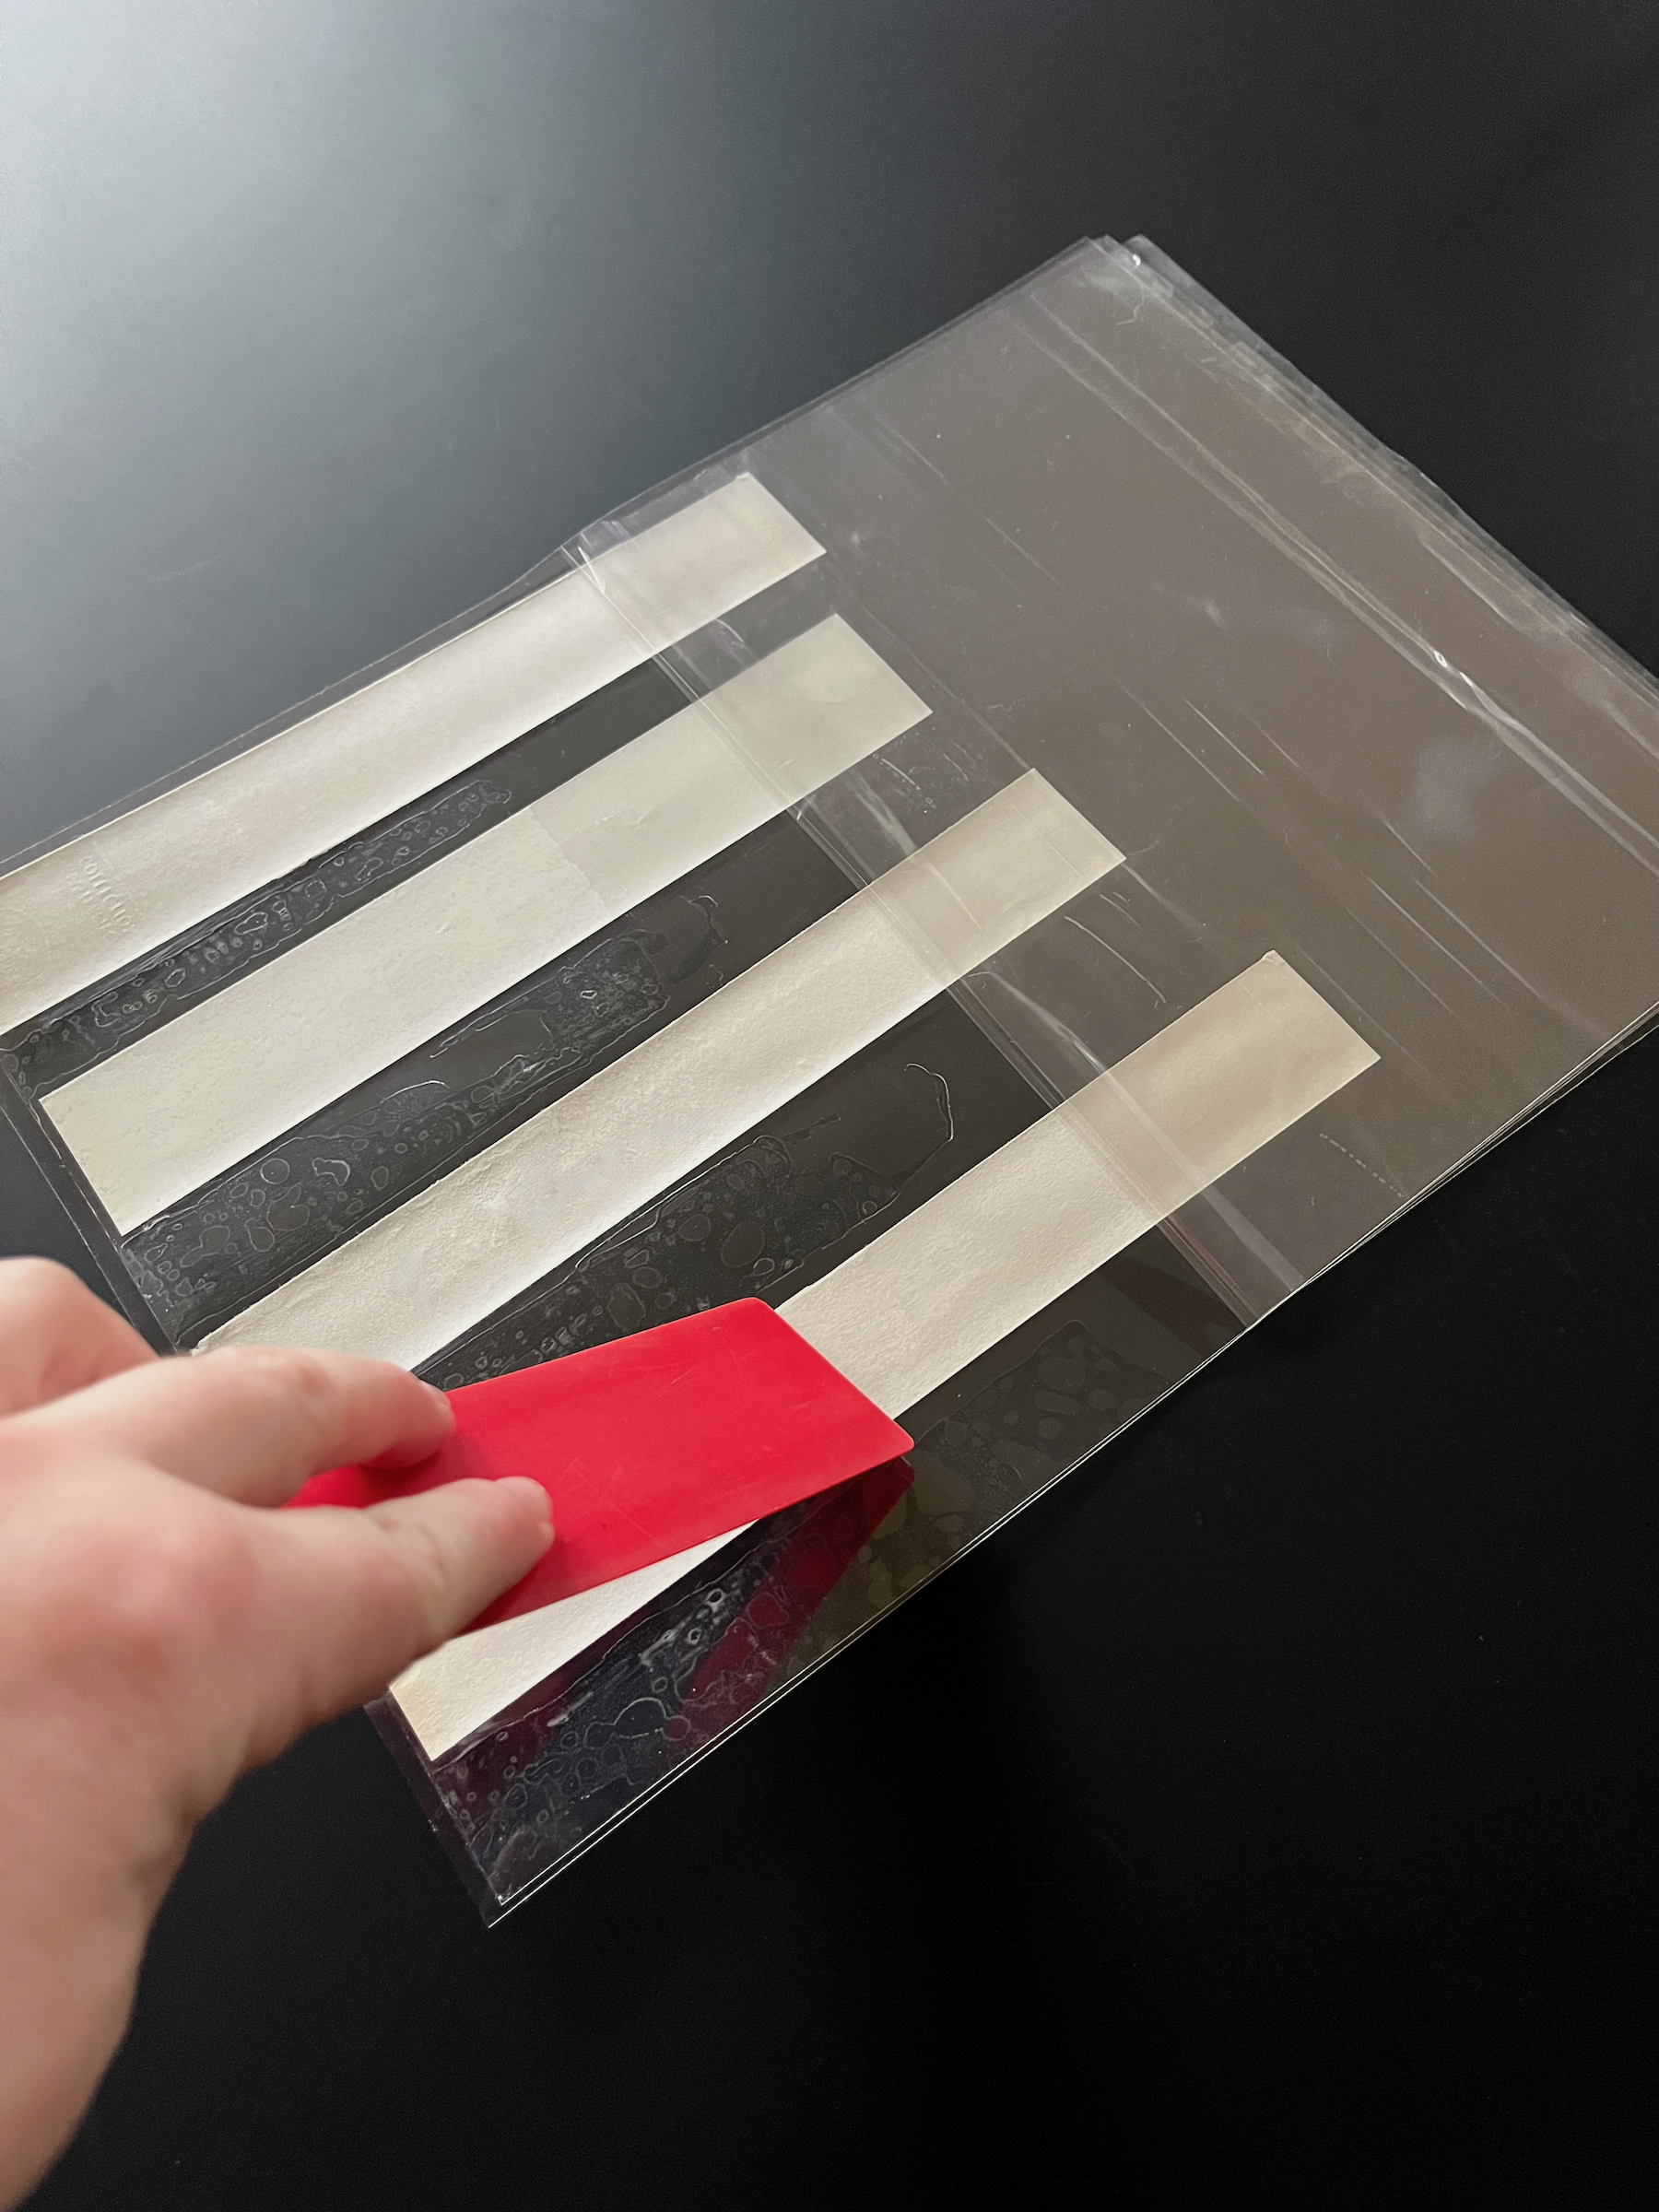
Make sure the spines and surface you’ll be working on are clean and free of lint, then place a laminate page on your working surface with the adhesive side face-up.
Peel back about an inch and a half of the release liner and place the spines (artwork side down) on the adhesive, leaving about a half inch above the spine for sealing and trimming.
Turn the laminate page over and use a plastic ruler to smooth the laminate onto the artwork, removing any air bubbles.
Gently peel back the release liner about an inch at a time, using the ruler to smooth the laminate all the way down until the artwork is completely adhered. Leave the release paper attached at the bottom for now and flip the page back over (the artwork facing down again).
Take another laminate page and peel back about an inch and half worth of the release liner, then align the top of this page (adhesive side down) with the top of the first page (adhesive side up).
Pull the release liner from the first page up to meet the new release liner between the two laminate pages, this will keep the pages from sticking to to the wrong places while you work.
Using the plastic ruler, smooth the laminate all the way down (peeling both release liners back together a little at a time) until the bookmarks are completely laminated between the two pages.
Allow for a little space so the laminate remains sealed (but less conspicuous), use the guillotine trimmer to trim down the bookmark edges.
Welcome back friends! I found this really wonderful Disney fabric at Joann’s Fabric and Craft Store nearly a year ago and I’ve finally created envelope throw pillow covers!
Envelope throw pillow covers are the perfect solution if you ever need to replace the pillow insert, or wash the pillow and/or cover separately.
This project is a good project for beginners; with this one piece of fabric folding method, there are less seams to stitch!
Let’s get started!
SUPPLIES
2 yards of fabric (your choice)
Cutting mat
Quilting ruler
Rotary cutter
Sewing pins
Sewing machine
Sewing thread (in a color that compliments your fabric choice)
Sewing scissors
Pillow inserts (16×16)
INSTRUCTIONS
Firstly, I recommend ironing your fabric to smooth out any folds or creases.
Using your cutting mat, quilting ruler and rotary cutter, measure and cut a 17” wide by 20” tall rectangle of fabric.
Keeping the 20” sides vertical, spread the rectangle of fabric out face-down then fold the bottom edge up by half an inch and then once more by half an inch. Pin the fabric into place using the sewing pins.
Fold the top edge down by half an inch and then once more by 2 inches. Pin the fabric into place using the sewing pins.
After preparing your sewing machine with the sewing thread of your choice, sew the bottom 1/2” hem, removing the sewing pins as you proceed. Then sew the top 2” hem (see photo above for the placement of this seam).
Spread the rectangle of fabric out face-up this time (now with the top and bottom hemmed). Fold the bottom hem up and the top hem down until they overlap, with the 2” top hem covering the bottom 1/2” hem. When folded this way, the cover should now measure 17” wide and 16” tall, check with your quilting ruler and/or cutting mat, then pin the sides.
Using the sewing machine, sew the two sides of the pillow cover with 1/2 seam allowance on either side, removing the sewing pins as you go!
With your sewing scissors, snip off the corners at a diagonal, but do not cut through the seams!
Turn the pillow cover right-side out and insert your pillow.
Repeat steps 2 through 9 for the second pillow cover!
Welcome back friends! Do you crochet? I do! I feel calm and cozy when I’m crocheting, and fiercely proud whenever I complete a project.
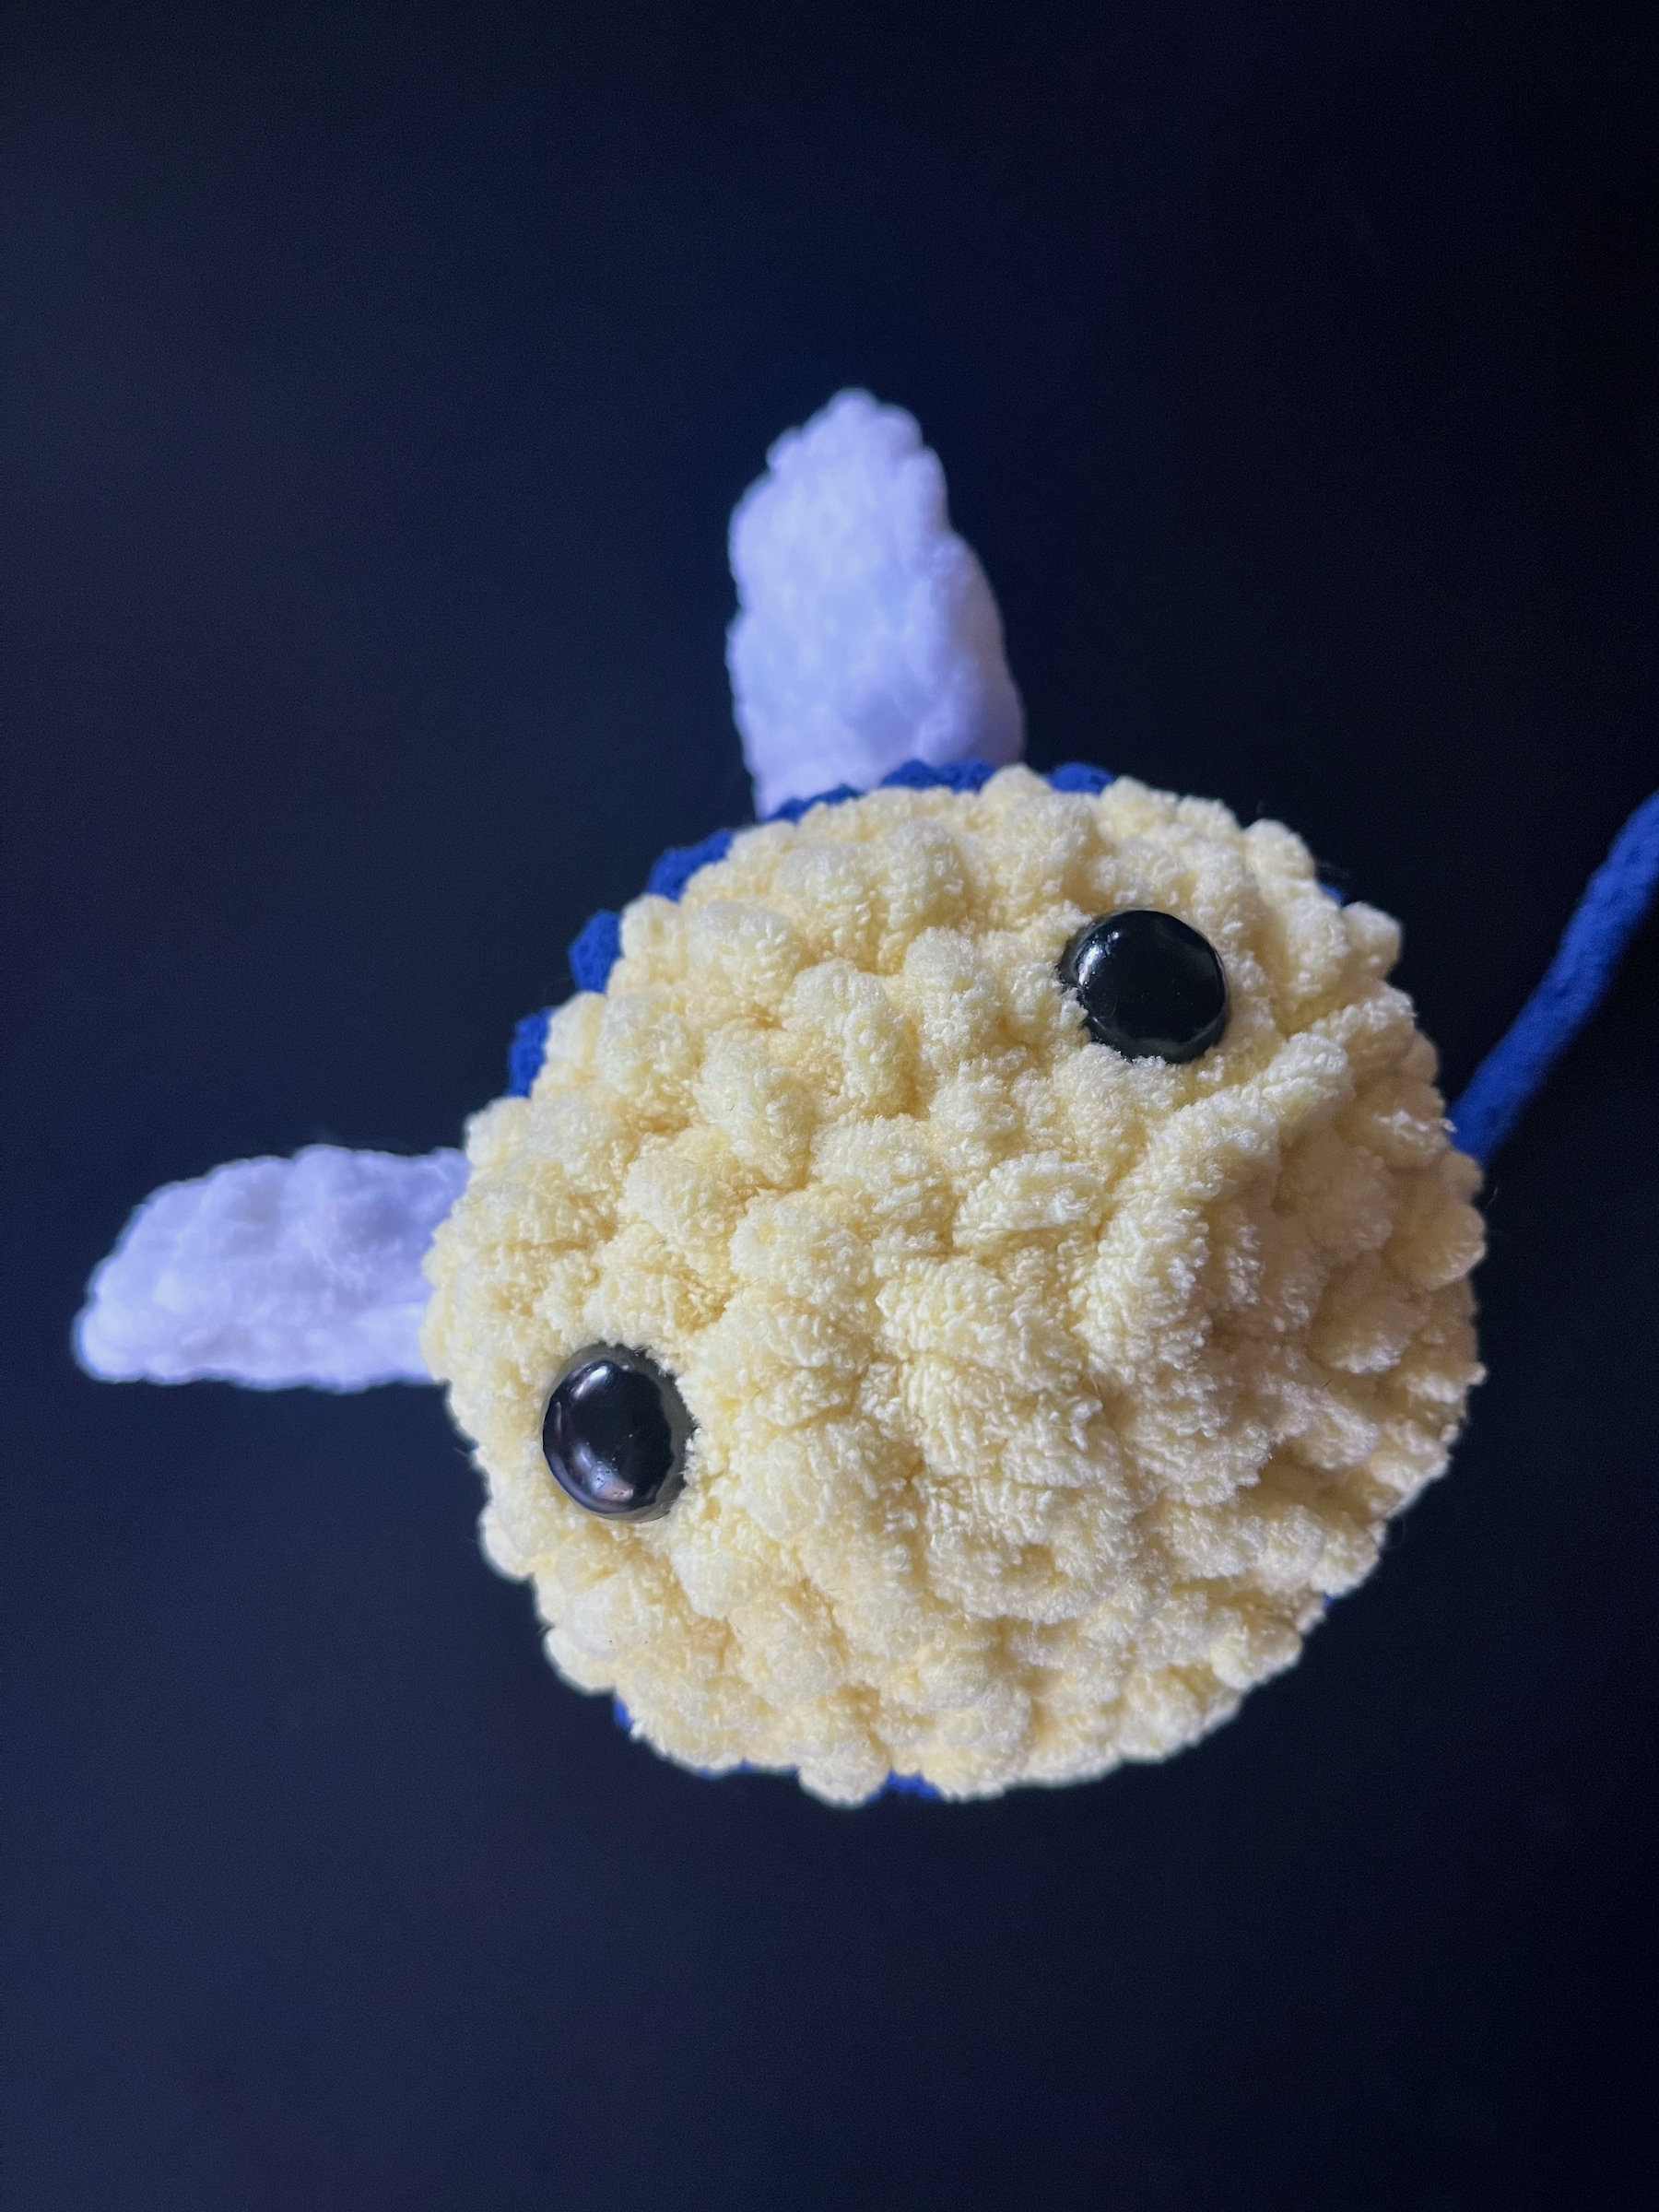
I’ve seen some adorable bee plushies in the animated shows my daughter watches, and I wanted to create one for her!
This bee is soft and cuddly! The pattern is easy, and ideal for any level of crocheter (beginners included)! Any size 6 chenille-style yarn can be used in this pattern, but I used Bernat Baby in buttercup yellow and lapis blue, and for the white of the wings. You can use whatever color combination you prefer!
Let’s get started!
SUPPLIES
Crochet hook (size 6.50 mm)
Chenille-style yarn (size 6)
Scissors
Yarn needle or small crochet hook
Fiber fill
INSTRUCTIONS
Round 1: With the yellow yarn, create a magic ring with 6 single crochets (total of 6 stitches). Place a stitch marker in the last stitch of this round.
Round 2: Increase in each stitch around (total of 12 stitches). Place a stitch marker in the last stitch of this round (henceforth remove it and move it up to the last stitch in each round after this one).
Round 3: 1 single crochet, 1 increase, alternating around the round (18).
Round 4: 2 single crochet, 1 increase, alternating around the round (24).
Round 5: Single crochet in each stitch around (24).
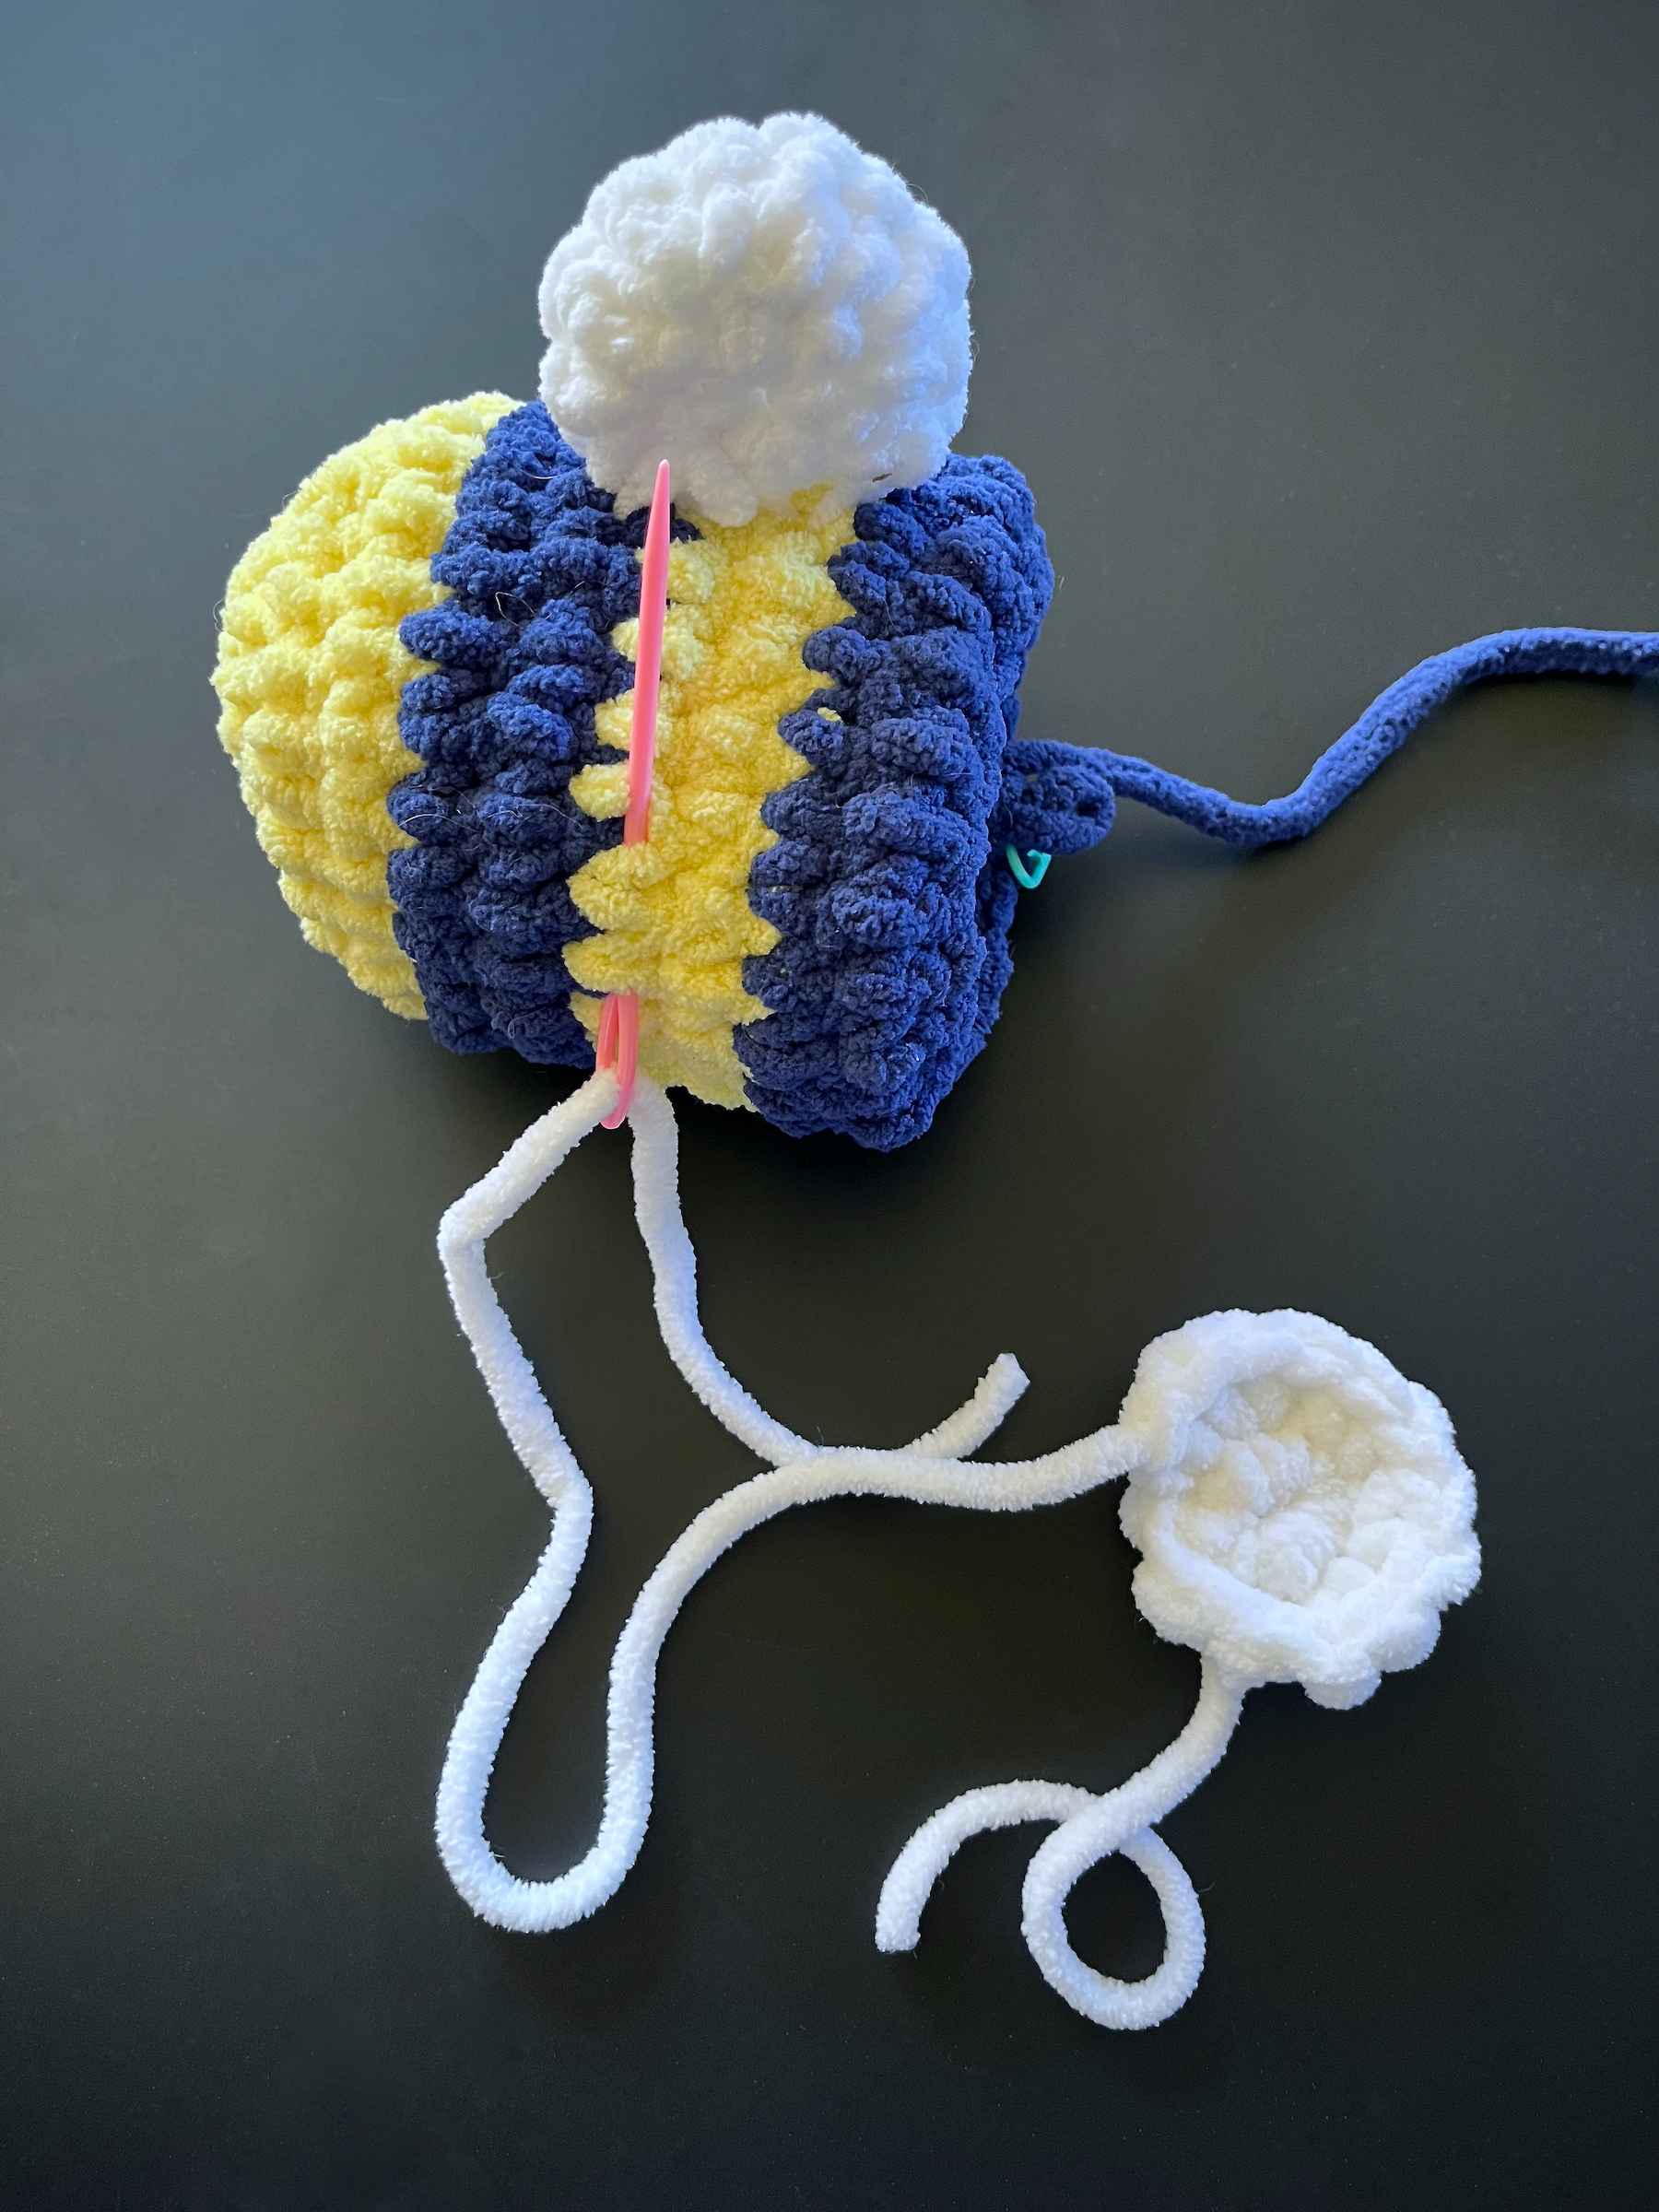
Round 6: Switch colors to blue (or whatever color you choose for the bee’s stripes), then single crochet in each stitch around (24).
To switch colors insert your hook into the first stitch, yarn over and pull through so there are two loops of yellow on your hook. Hook onto the blue and pull in through the two loops of yellow to create the first stitch of Round 6 (for extra security, bring the two loose ends together inside the project and double knot).
Round 7: Single crochet in each stitch around (24).
Round 8: Switch colors back to yellow then single crochet in each stitch around (24).
Round 9: Single crochet in each stitch around (24).
Round 10: Switch colors back to blue then single crochet in each stitch around (24).
Round 11: Single crochet in each stitch around (24).
Set the main body aside for now and begin the wings.
Wings Round 1: With the white yarn, create a magic ring with 6 single crochets (total of 6 stitches). Place a stitch marker in the last stitch of this round.
Wings Round 2: Increase in each stitch around (total of 12 stitches). Place a stitch marker in the last stitch of this round.
Cut the yarn about 8 to 10 inches from your hook and pull the loose end through the last stitch, then set it aside.
Repeat steps 13 through 15 to create a second wing.
Thread your yarn needle with the loose end of one wing, position it where you would like (somewhere on the band of yellow between the two black stripes), and insert your needle through one of the stitches. Pull through until the wing stops at the body of the bee. Position wing and stitch through the bottom of the wing where it comes into contact with the body of the bee. Repeat this stitching process along the bottom of the wing.
If there is a tail from creating the magic ring, conceal it by stitching it into the wing and/or into the body of the bee.
Repeat for the second wing.
Attach the safety eyes.
Body Round 12: Switch colors back to yellow, then 2 single crochet, 1 decrease, alternating around the round (18).
Body Round 13: 1 single crochet, 1 decrease, alternating around the round (12).
Begin stuffing the bee to your preference.
Body Round 14: 6 decreases around (6).
Cut the yarn off 8 to 10 inches from the project and pull it through the last stitch.
Stuff the bee a little more if necessary.
Thread the needle and insert the needle through each stitch, then pull tight.
Knot and sew the remaining tail of yarn into the yellow stitches around.
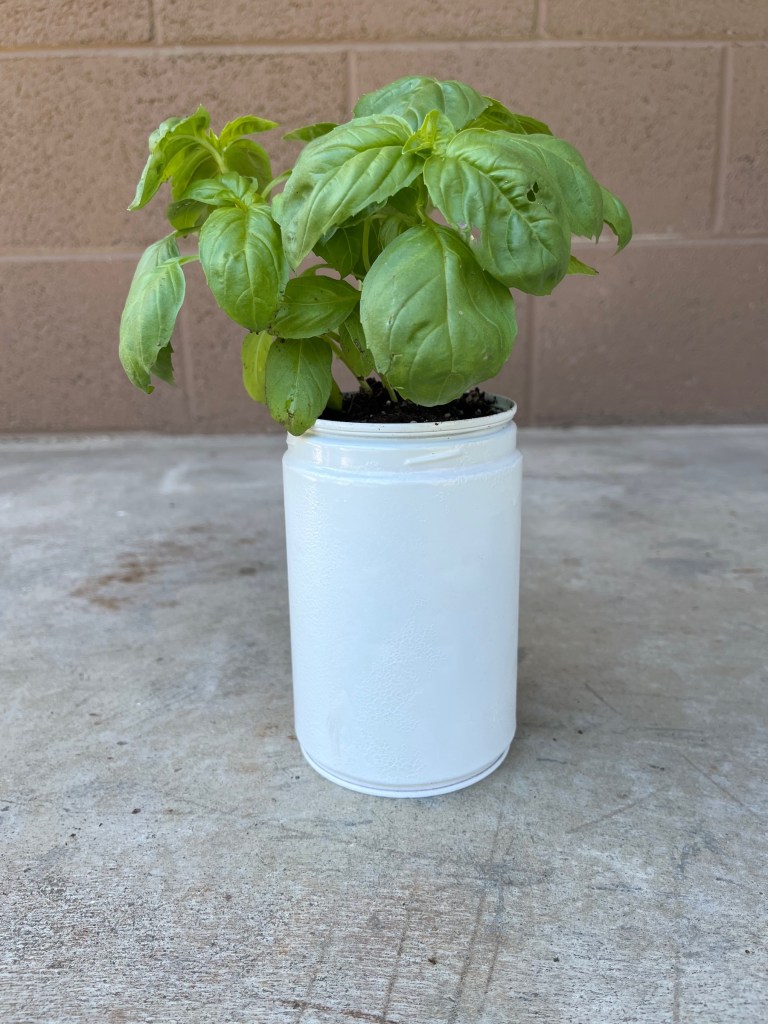
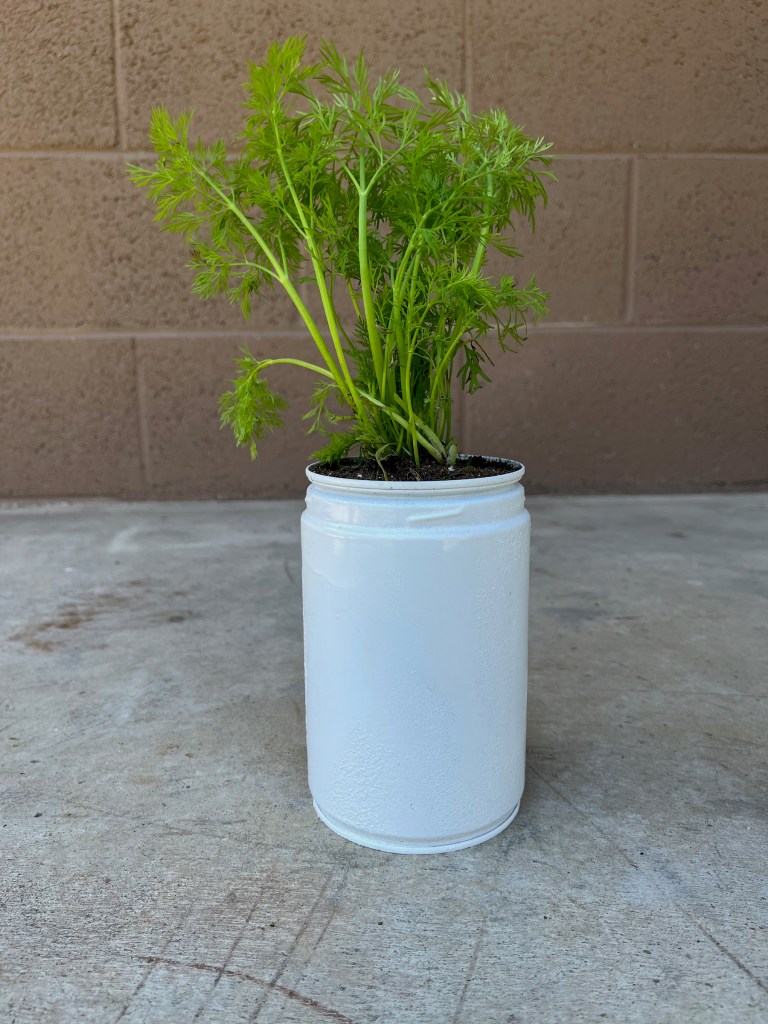
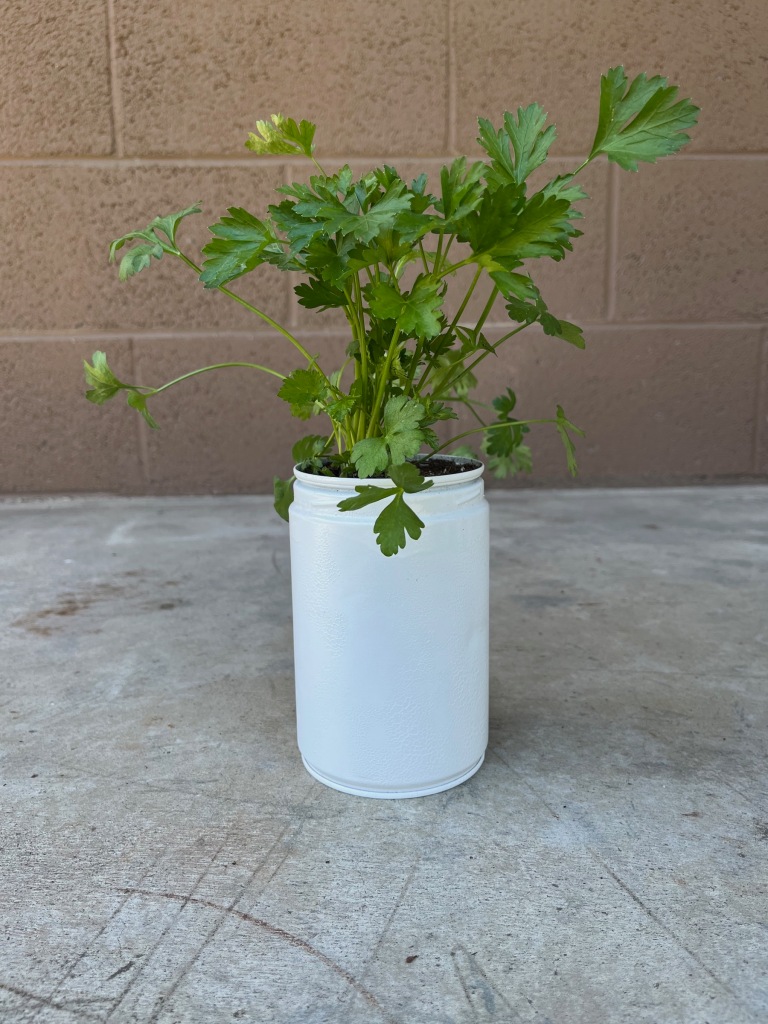
I created an up-cycled container herb garden using a hammer, nail, empty coffee cans and paint. This is a straightforward craft that’s perfect for DIYers of any level (beginners included)! To make it even more unique, you can choose what type/shape of can to use as well as whichever color of paint your heart desires! Have fun with it!
You can also choose what types of plants you want to place in these containers. Succulents are perfect and fresh herbs are fantastic! I’ve always wanted a small herb garden to pick and choose from when my husband or I are cooking and, now is the time!
SUPPLIES
Sturdy cans
Hammer
Nail
All-in-One spray paint (color of your choice)
Soil
Herbs of choice
INSTRUCTIONS
Wipe down the outside of each can so it’s clean from any dust or debris.
Flip the cans over and using a hammer and nail, gently tap drain holes into the bottom of each can. I poked 9 holes into the bottom of each can.
In a well ventilated, paint-protected space, spray each can in several layers with your chosen spray paint. Allow each layer to dry before painting another. If there is more moisture in the air, it will take longer for each layer to dry. Allow for each layer to dry thoroughly before painting another or you will experience a bubbling/crackled effect on the paint. I liked this look, so I allowed for it.
Once the final layer is on and the cans are dry, flip them back over and place a layer of soil in the bottom. Place your herbs in the can and surround with more soil to stabilize the planted herb.
Set in a space that gets warmth and sunlight. Water from the bottom and enjoy!
Welcome back friends! Do you crochet? I do! I feel calm and cozy when I’m crocheting, and fiercely proud whenever I complete a project.
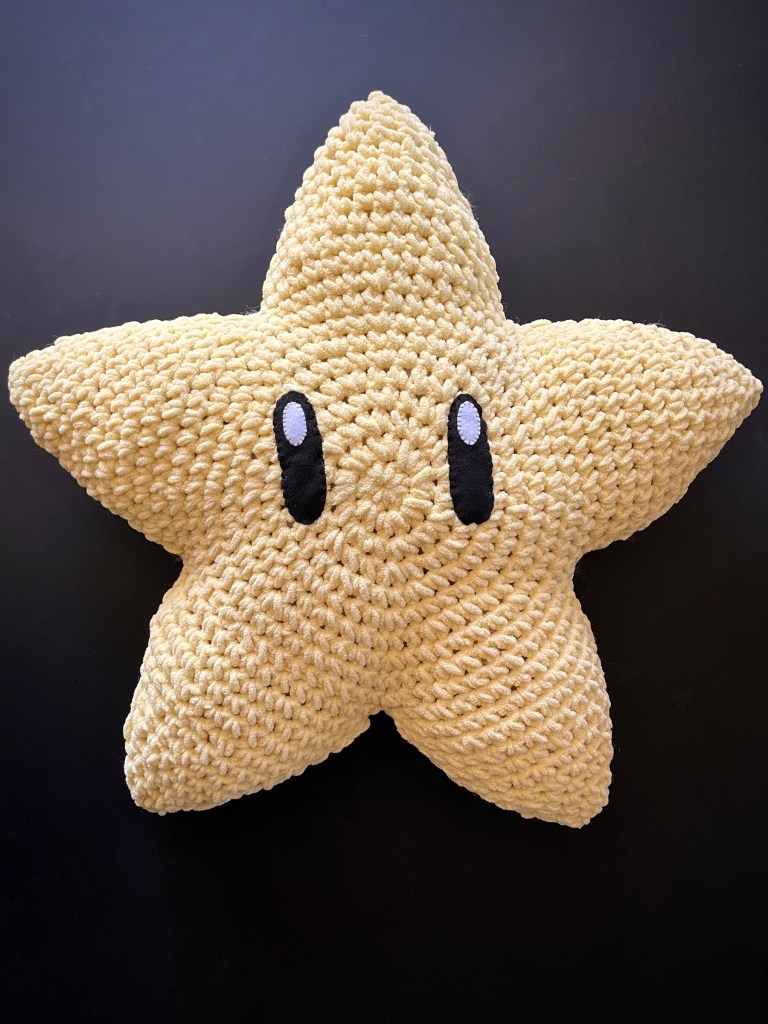
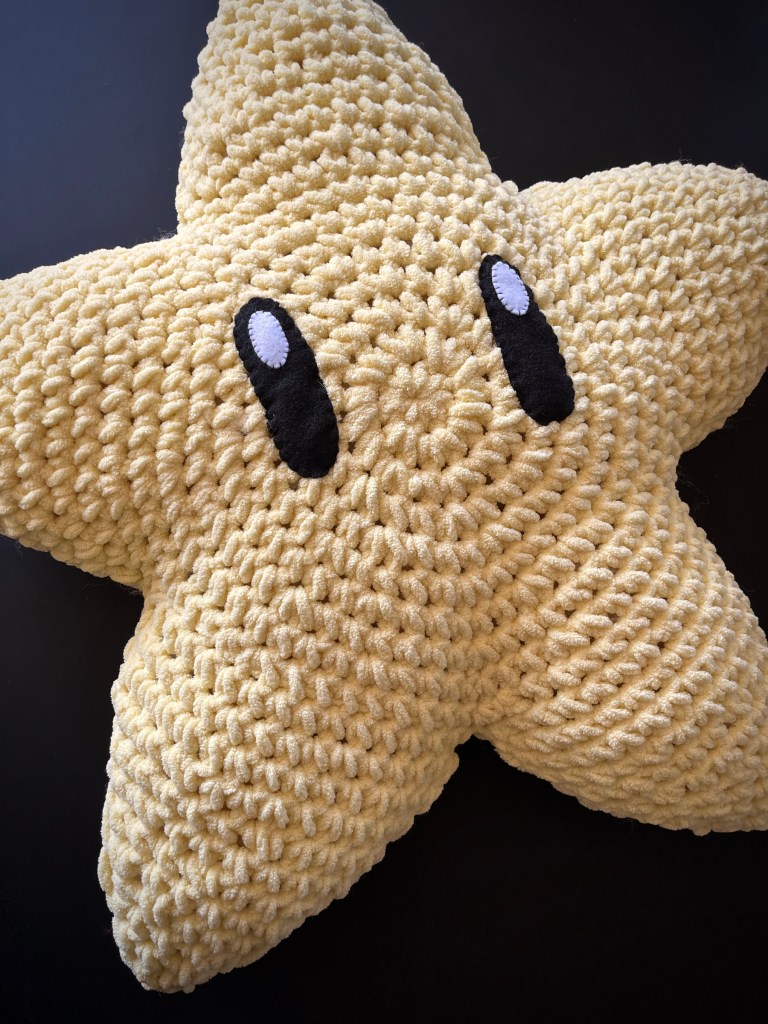
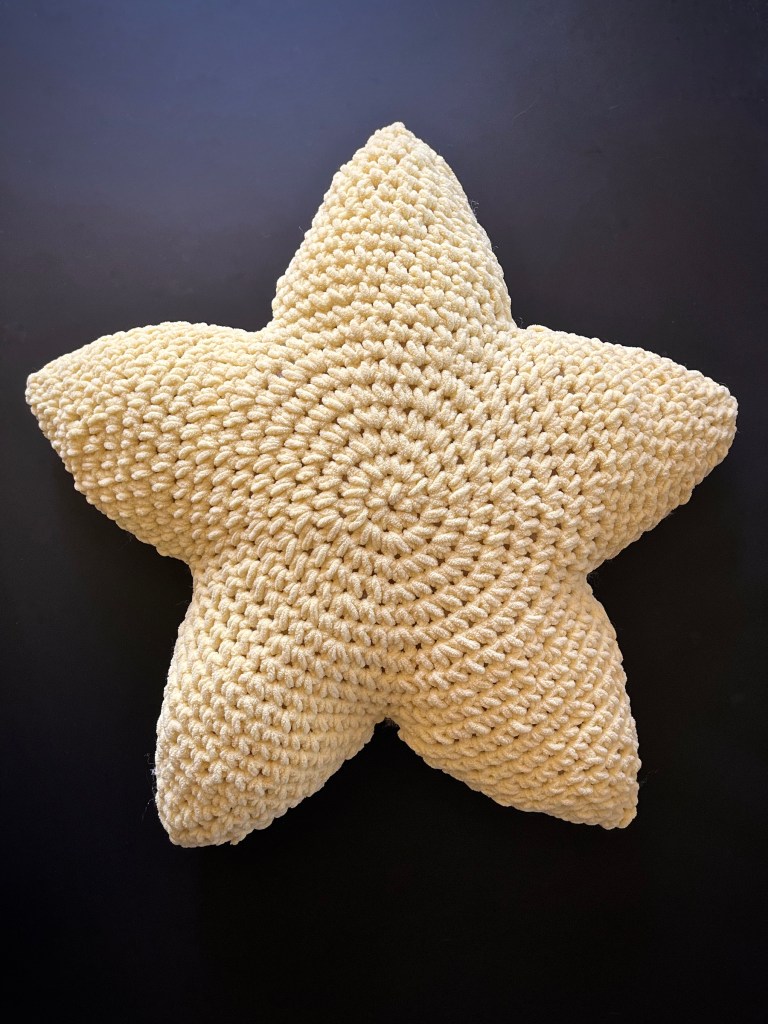
March 10th was Mario Day! In celebration I created this super soft and cuddly Super Star pillow! This pattern is intermediate and ideal for those who know their way around “magic rings”, “increases” and “decreases”. Any chenille-style yarn, size 6, can be used in this pattern, but for my example piece I used Bernat Baby Blanket Yarn in buttercup yellow.
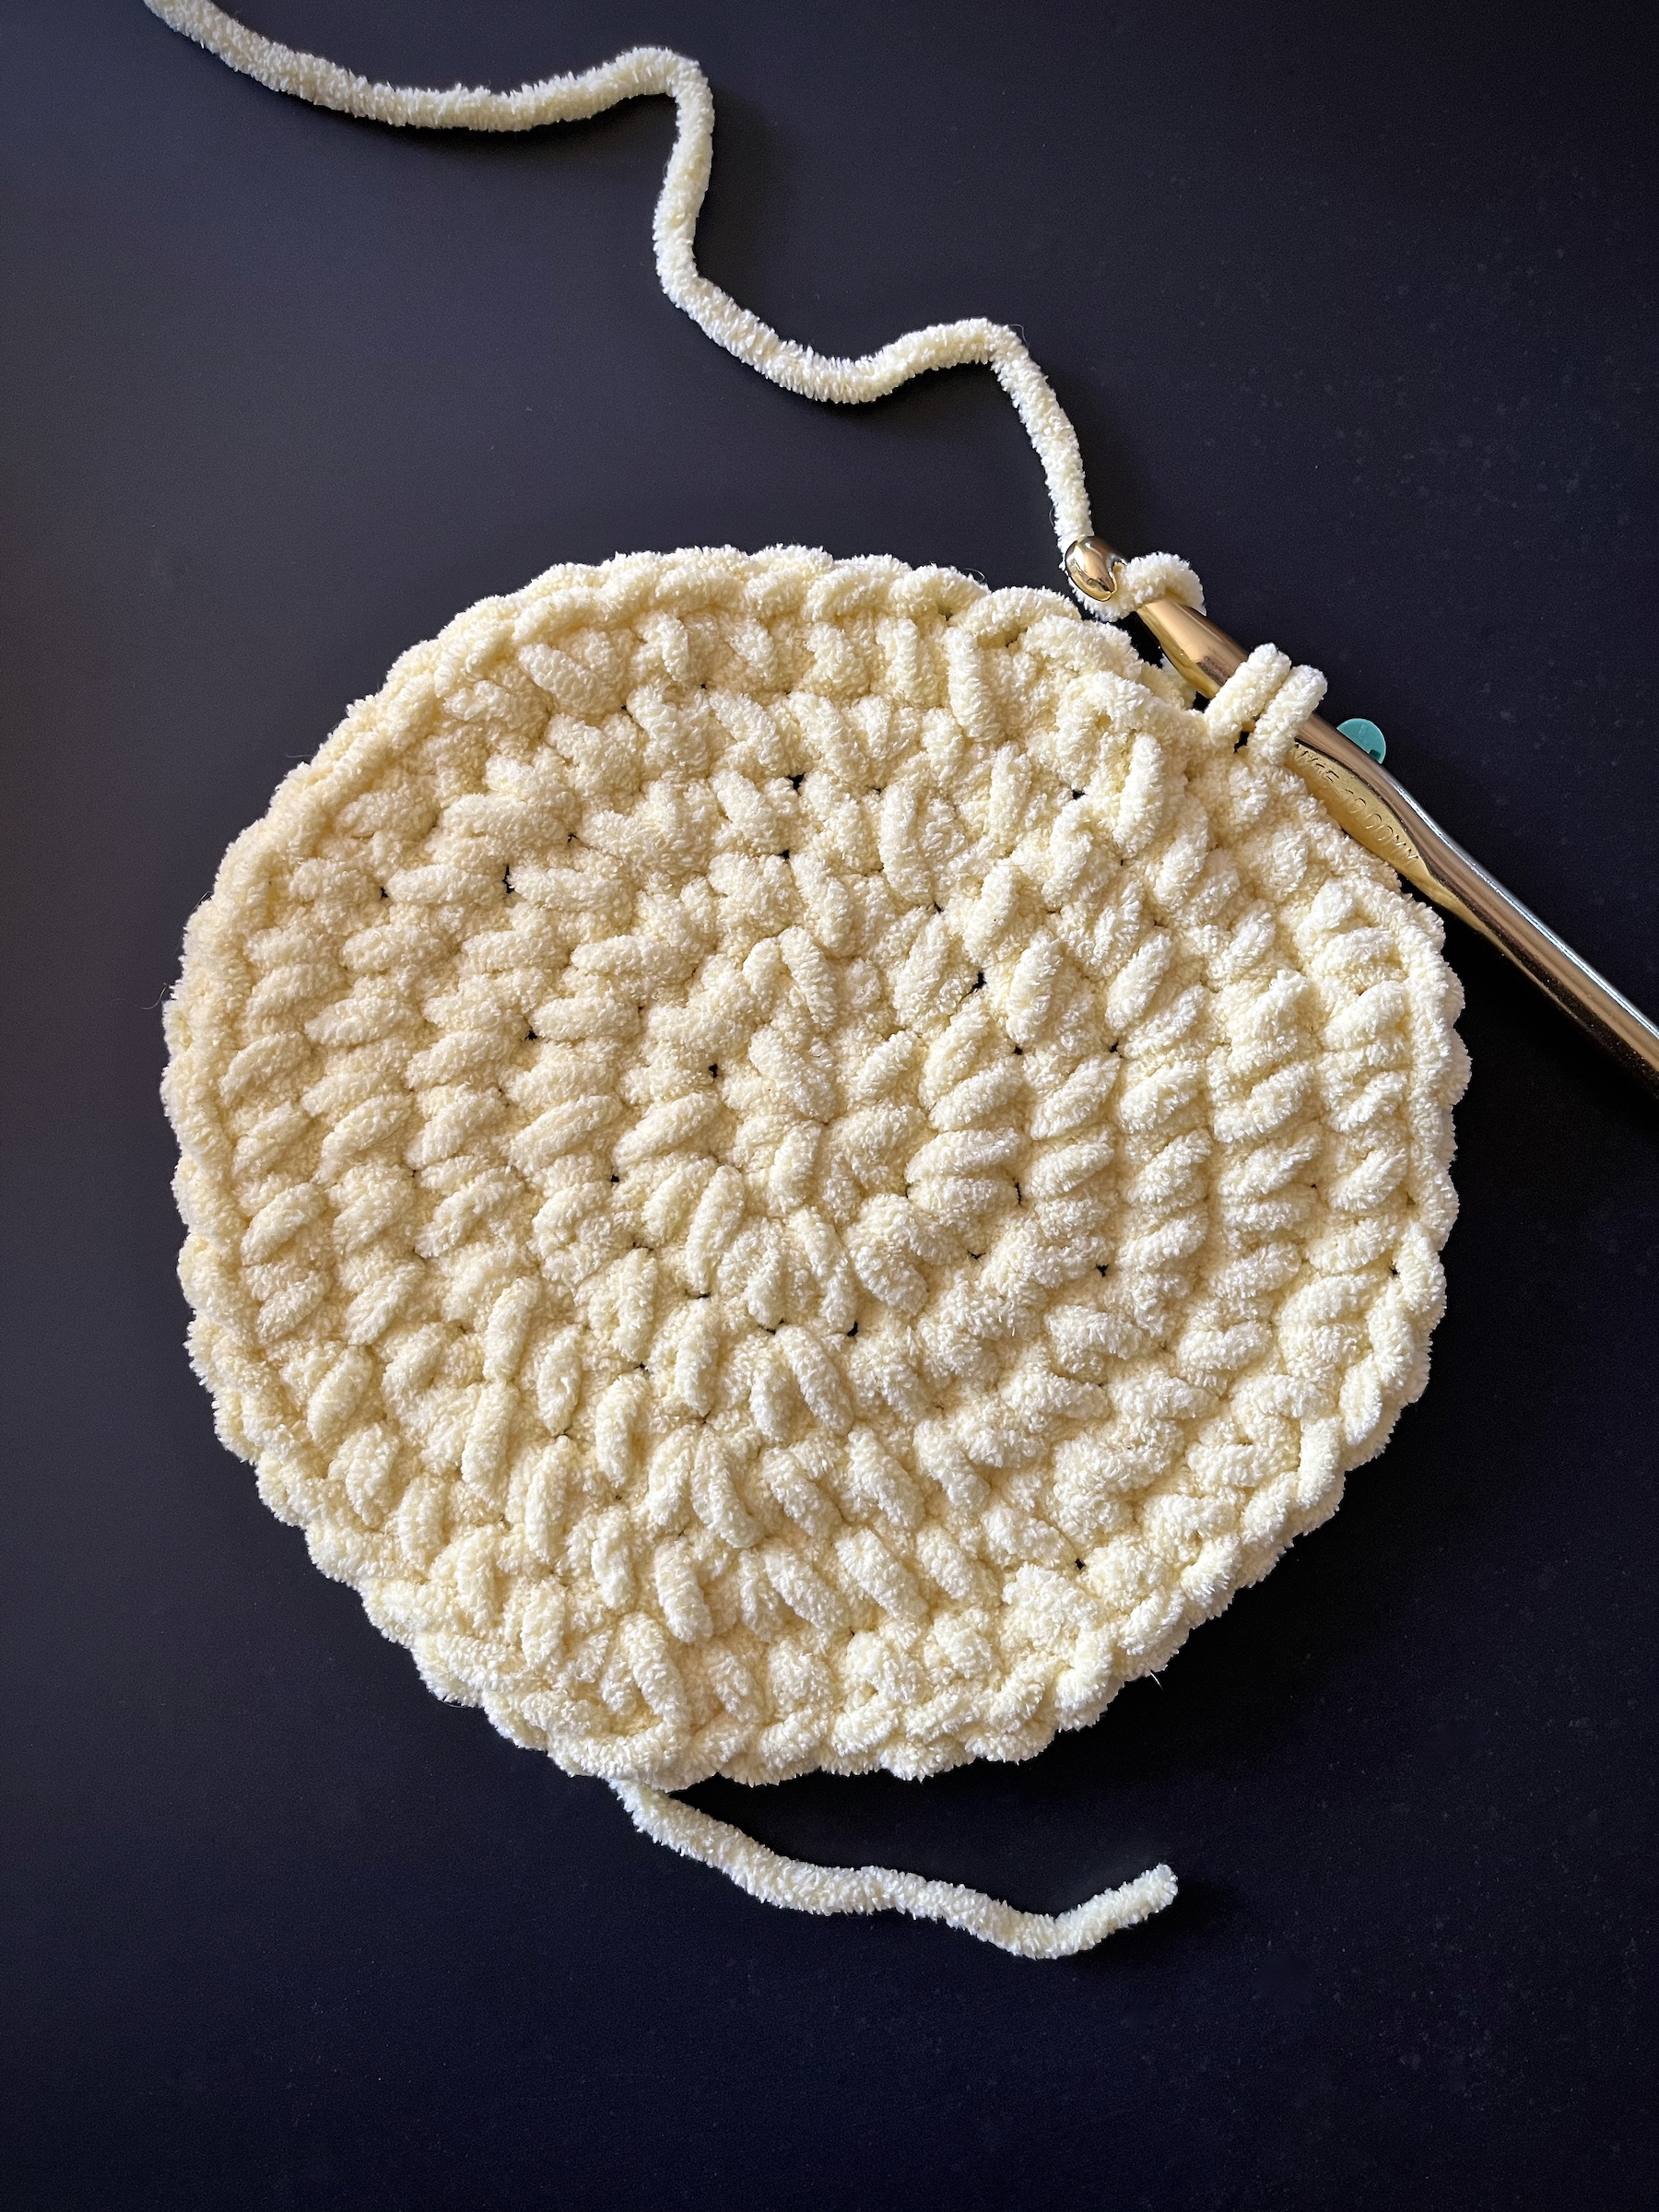
Round 1: Create a magic ring with 8 single crochets (total of 8 stitches). Place a stitch marker in the last stitch of this round.
Round 2: Increase in each stitch around (total of 16 stitches). Place a stitch marker in the last stitch of this round (henceforth remove it and move it up to the last stitch in each round after this one).
Round 3: 1 single crochet, 1 increase, alternating around the round (24).
Round 4: 1 single crochet, 1 increase, 1 single crochet, alternating around the round (32).
Round 5: 3 single crochet, 1 increase, alternating around the round (40).
Round 6: 2 single crochet, 1 increase, 2 single crochet, alternating around the round (48).
Round 7: 5 single crochet, 1 increase, alternating around the round (56).
Round 8: 3 single crochet, 1 increase, 3 single crochet, alternating around the round (64).
Round 9: 7 single crochet, 1 increase, alternating around the round (72).
Round 10: 4 single crochet, 1 increase, 4 single crochet, alternating around the round (80).
Finish off the first center piece of the star by slip stitching into the next stitch, then cutting the yarn pulling the end through. Using a yarn needle, stitch the loose end of the yarn into the body of the center piece and set it aside.
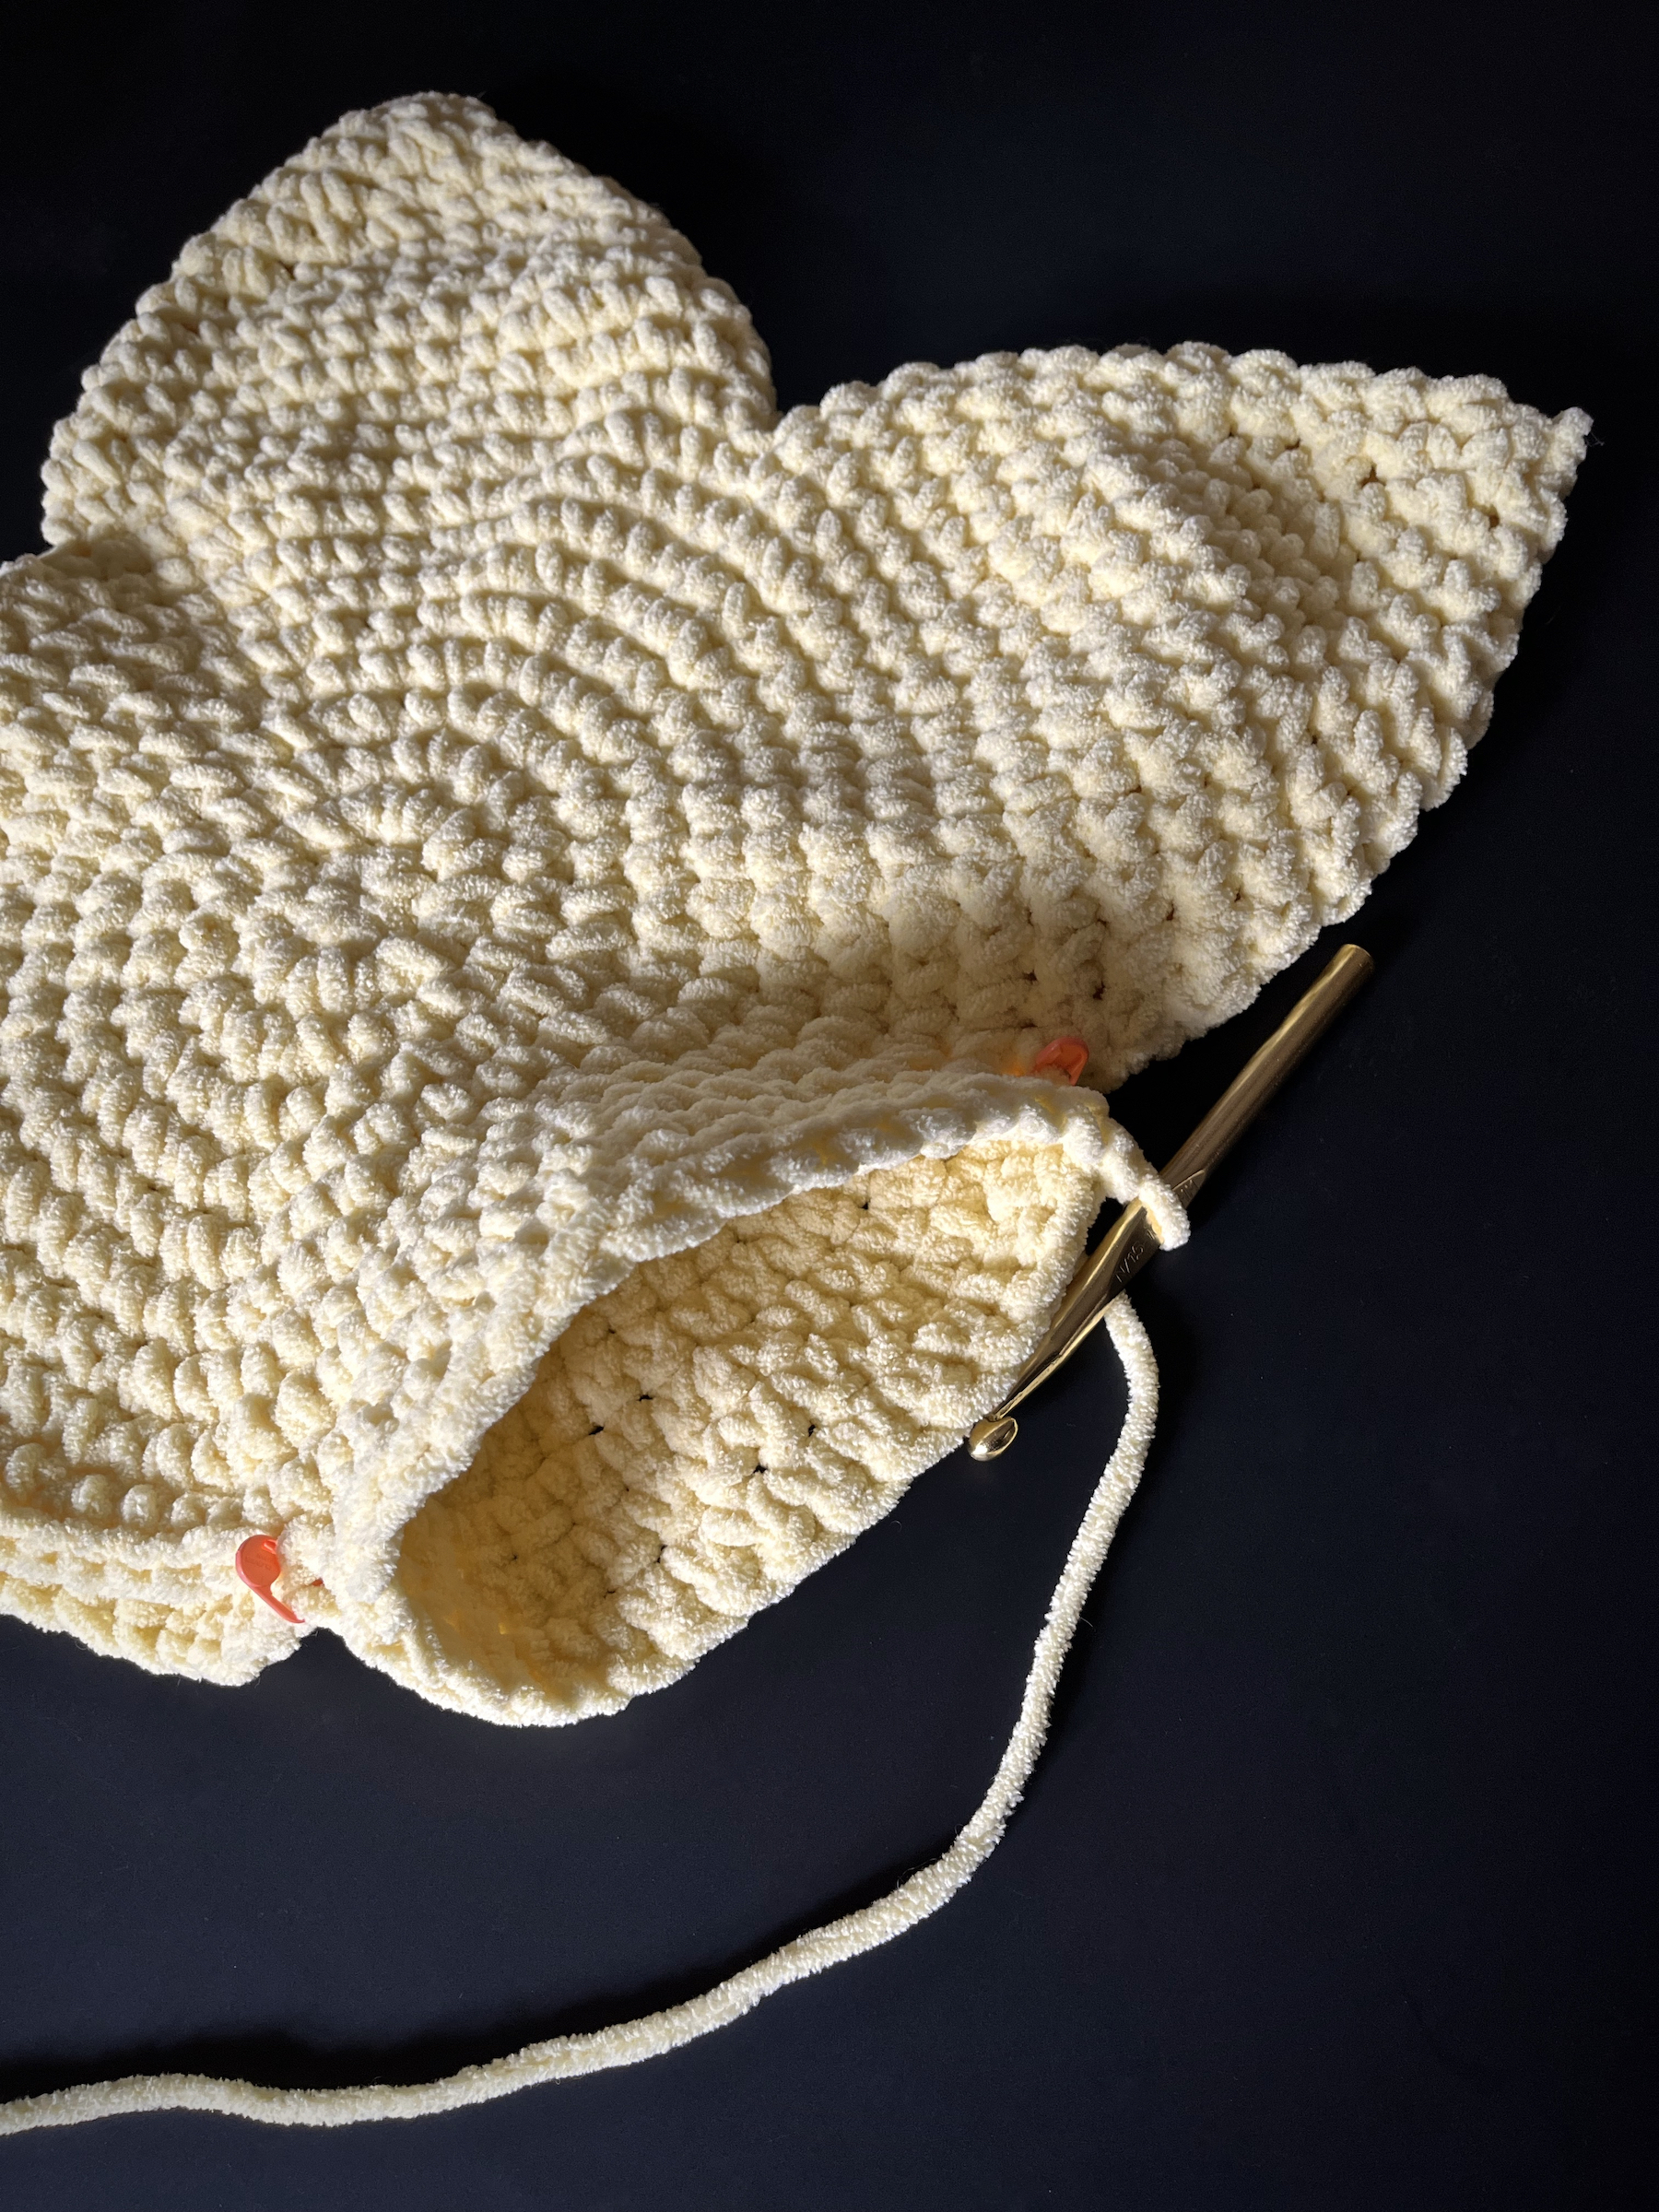
Repeat steps 1 through 10 to create a second center piece of the star. This time, do not slip stitch, leave the yarn attached and move the stitch marker to the last stitch.
On this second center piece that we have not tied off, count 16 stitches from the marker on your last stitch from the round before and put a stitch marker through the 16th stitch. Count 16 stitches from this marker and place another marker through that stitch. Continue this around your center piece until you have 5 markers total.
Place the marked centerpiece over the tied-off centerpiece with the more textured sides both facing out, then re-pin the five markers through the aligned stitches of both centerpieces.
Point Round 1: 16 single crochet down one side of the pinned centerpieces from marker to marker with the 16th stitch bringing both sides together just inside the next marker. Then turn your work and do 16 single crochet up the other centerpiece side to reach your starting point (32). Place a stitch maker in the last stitch of this round, which also joins both sides together.
Point Round 2: Single crochet in each stitch around (32). Place a stitch marker in the last stitch of this round (henceforth remove it and move it up to the last stitch in each round after this one).
Point Round 3: 14 single crochet, 1 decline, turn the project around and then 14 single crochet and 1 decline (30).
Point Round 4: 4 single crochet, 1 decline, 4 single crochet, alternating around the point round (27).
Point Round 5: 7 single crochet, 1 decline, alternating around the point round (24).
Point Round 6: 3 single crochet, 1 decline, 3 single crochet, alternating around the point round (21).
Point Round 7: 5 single crochet, 1 decline, alternating around the point round (18).
Point Round 8: 2 single crochet, 1 decline, 2 single crochet, alternating around the point round (15).
Point Round 9: 3 single crochet, 1 decline, alternating around the point round (12).
Point Round 10: 1 single crochet, 1 decline, 1 single crochet, alternating around the point round (9).
Point Round 11: 1 single crochet, 1 decline, alternating around the point round (6).
Point Round 12: Decline 3 times (3).
Cut off your yarn with a little bit of a tail. Attach a yarn needle and insert your needle through the top 3 stitches of the point and pull them tight to make a sharper point. Then stitch the rest of the tail into the body.
To begin a new point with loose yarn, insert your hook into the first stitch, yarn over with your loose yarn and pull through, then complete the stitch by yarning over and pulling through this loop. This will anchor your loose yarn to the next point and mark the first stitch.
Repeat steps 15 through 27 to create the next point. If you’re feeling lost, remember to always count your stitches. At the end of each round the amount of stitches should match the number I’ve put into parenthesis for that round.
Continue repeating steps 15 through 27 until you have completed 4 points of the star, then stuff what you’ve completed. Do not worry about the holes at the base of each point, we will sew them up once we’ve completed the final point.
Begin the last point and stuff it a little at a time as you stitch upwards. Finish the stuffing with chopstick and tie off.
Once the star has been stuffed and completed with 5 points, use the same yarn and a yarn needle to sew up any holes, found at the base in between each point. Concealing any excess yarn by stitching it into the body of the star.
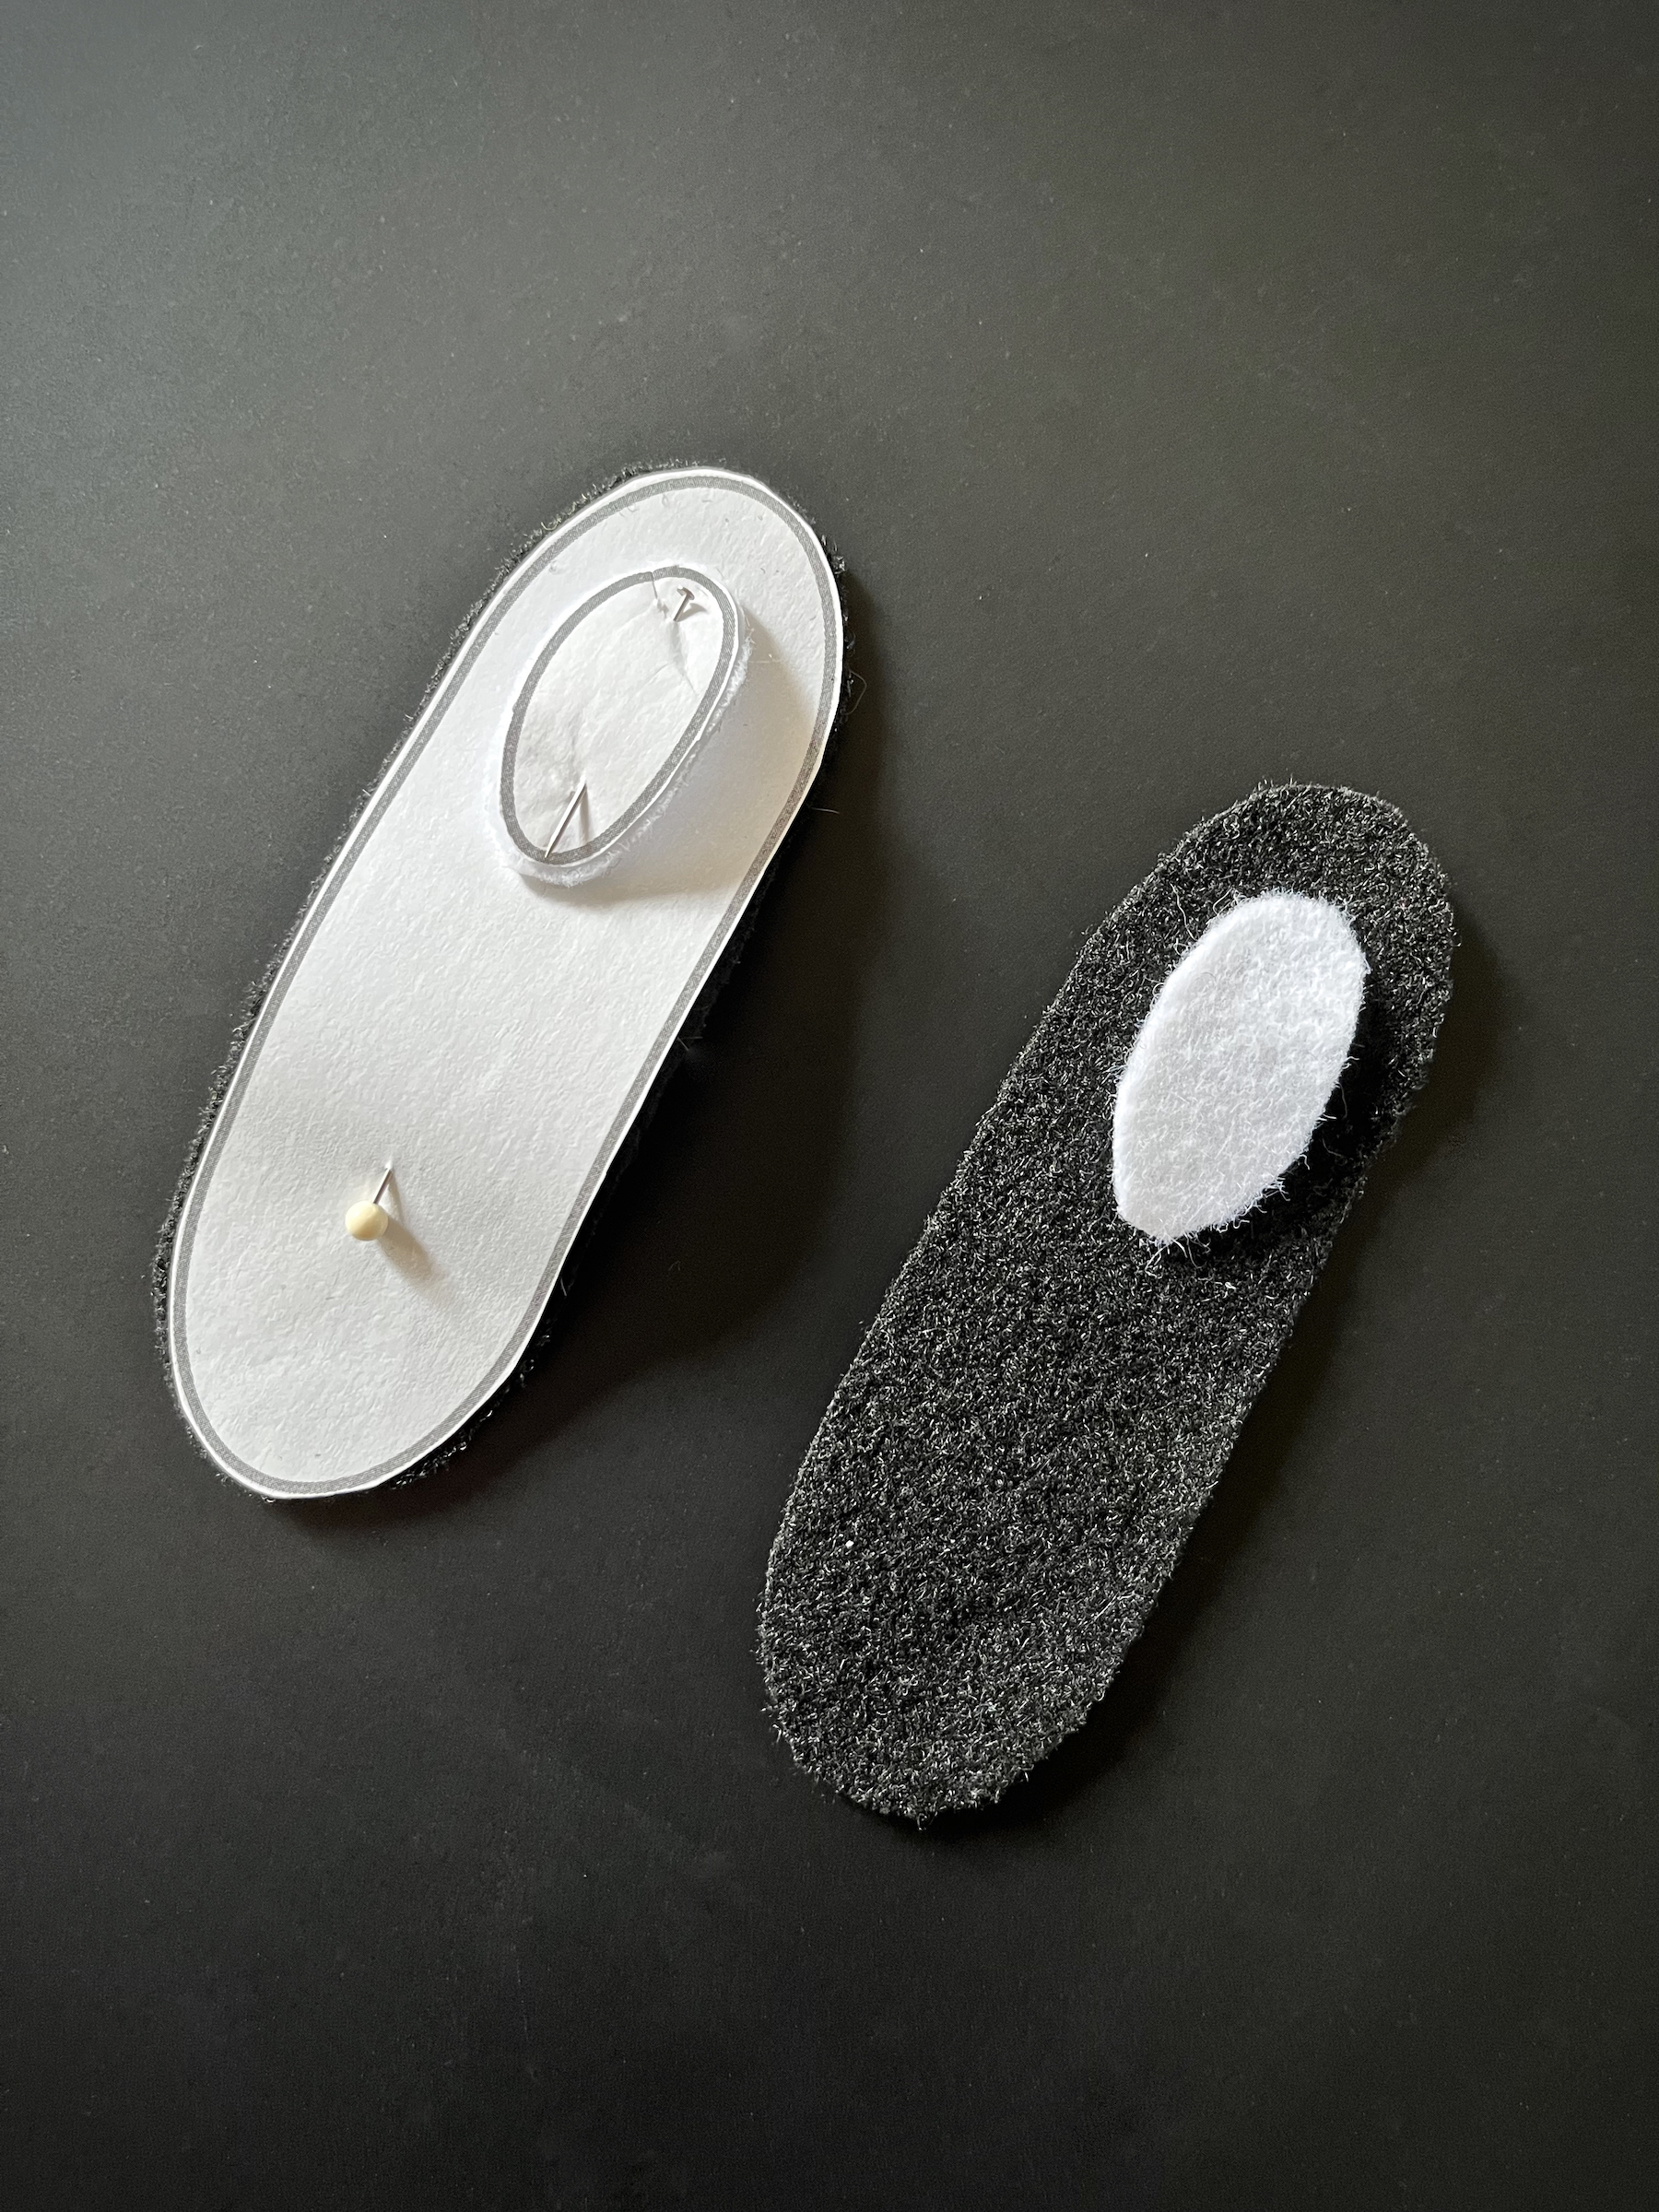
Once the star has been completed. Cut out the pieces for the felt eyes using the patterns I’ve provided, and the black and white felt.
Stitch the white highlights onto the black backgrounds, then stitch the eyes onto the pillow.