Growing up reading The Velveteen Rabbit and then watching the Toy Story films, I became convinced (as I’m sure many children do) that toys are alive and they have feelings. This made giving them up extra hard, and although I had to say goodbye to a lot of them over the years to keep my room and storage from overflowing, I did save a lot of toys that were meaningful to me in the hopes I could pass them on to my future child (like I believe Andy should have done in Toy Story 3). Now we have a daughter and I cannot wait to share some of my beloved toys with her in the hopes that they will be beloved to her too.
I dug through my parent’s garage and found my classic My Little Pony plushies (or Hasbro Softies) from the 1980s! In my memory they were in perfect condition, in reality their bodies are in good condition with no visible stains, but their manes and tails were a matted mess! I also noticed a great deal of their eye paint had scratched off!
I set to work cleaning, repairing and styling my My Little Ponies and now they are all ready for Zoey! I want to help you do the same so you can share them with your little ones, or collect them for yourself, the choice is yours!


First thing’s first let’s assess these ponies! The tags warn that these plushies are surface wash only; submerging them in water could ruin them, so let’s avoid that! I am fortunate that my pony plushies had very little discoloration or staining, so I used soap water to clean them. If I come across a dirtier plush, I will test other methods on them, so stay tuned!
SUPPLIES
- Castile soap
- Toothbrush
- Washcloth
- Conditioner
- Detangler spray
- Comb or wet brush
- Small towel
- Paper towels
- Clothespin
- Masking tape
- Oil-based paint markers ( I used fine tip and wider)
INSTRUCTIONS


*Do not submerge this pony in water*
- Create a sudsy mixture of castile soap and water in a small bowl. Dip your cleaning toothbrush into this mixture as needed and use it to gently clean the pony’s body.
- Once you’ve cleaned the whole pony, dampen a soft washcloth and wipe away the soap.
- While avoiding getting the pony’s body wet under a faucet, carefully wash and rinse the mane and tail using castile soap or shampoo.
- Apply conditioner to the mane and tail. Allow it to sit for 5 to 10 minutes, then use a wet brush or a comb to gently brush through any tangles. If any of the knots are really stubborn, spraying a little detangler spray on them will help!
- Avoiding the pony’s body again, carefully rinse the hair out and use a small towel to give the hair a couple of squeezes to remove any excess water.
- While the pony’s hair is still damp, comb through it again so it’s smooth and set it with paper towels and a clothespin. Whichever way you want the pony’s mane to fall (sometimes it’s already decided for you) place a paper towel under the mane, against the body, then wrap the pony’s mane around its neck in that direction with a second paper towel over it and secure it with a clothespin. The tail could air dry, but you are always welcome to wrap a paper towel around it and tuck it between the pony’s legs to smooth it down.
- Allow your pony to completely air dry (overnight or 24 hours), then remove the paper towels.
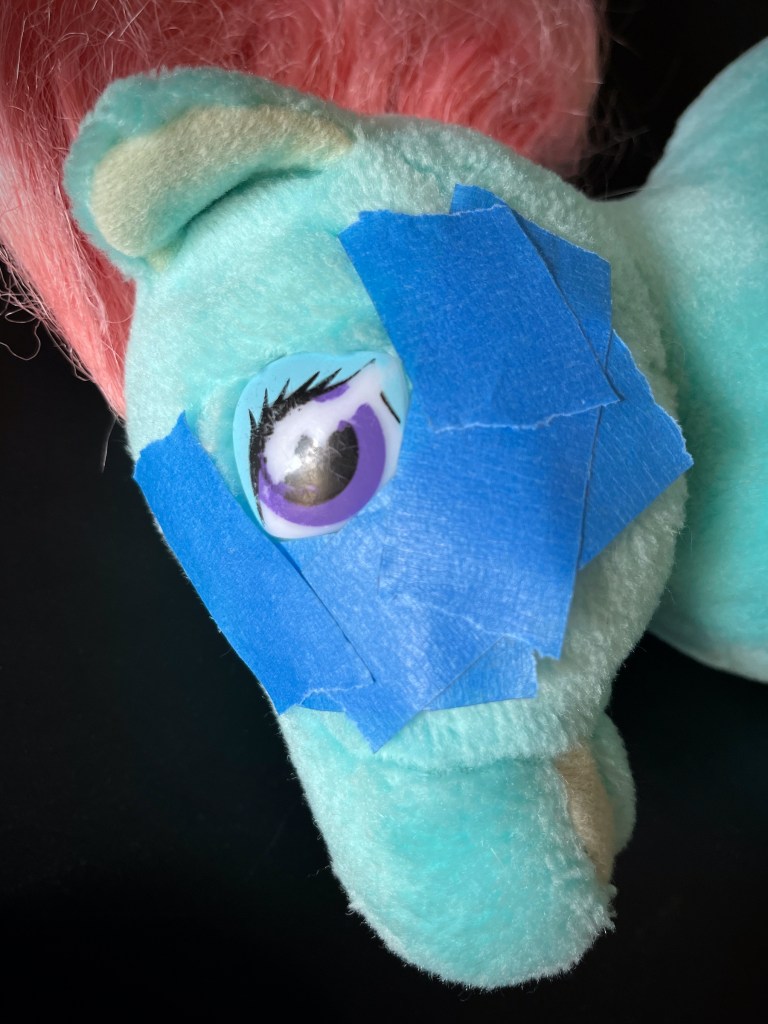
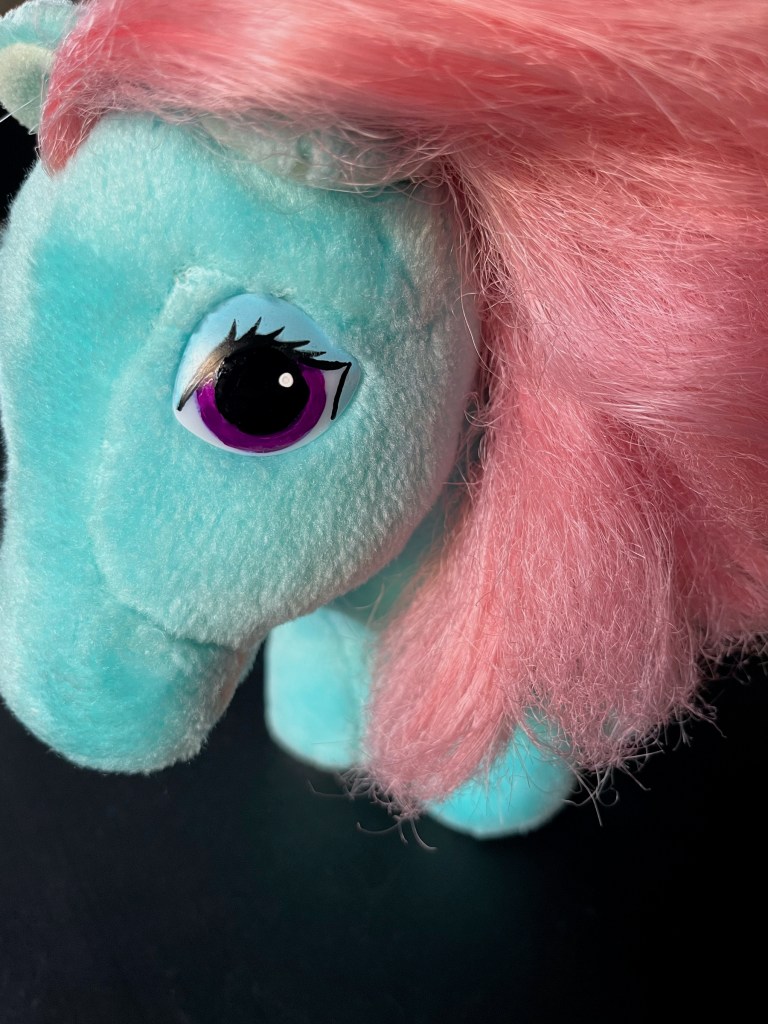
- Once the pony is completely dry, we can repair their eyes. Before painting, use masking tape to cover the fur around each eye. I used oil-based paint pens and began with the pupil, coloring in the pupil. I did not have a color that perfectly matched the iris, so I chose the closest color and re-colored the whole iris to match. Use a finer tip for the eyelashes and liner. Allow this paint to dry and then add white highlight marks to each eye.
- Once everything is fully dry, enjoy!


What My Little Ponies plushies do you have? How did they turn out? I hope you and your loved ones enjoy them!