How to Play – Sophie’s Seashell Scramble

Part of the fun in raising Zoey is finding things that delight and educate her; I want to find fun, creative board games to play with her during our family game nights! This week we played Sophie’s Seashell Scramble by Educational Insights for up to 4 players! 

Zoey has loved this game since before she even knew how to play! She would pull everything out and play with the Sophie and the seashells, honestly it’s surprising that there are no missing pieces! Then we learned how to play the game together, and she loves it even more! She loves picking up the shells with the Sophie pincers; we find it super fun and easy collecting and replacing the seashells to the mats and back.

Let’s play!

IN THE BOX
  • A game-board (part of the box)
  • A Sophie pincer
  • A spinner
  • 20 seashells in five patterns
  • 4 seashell snack mats
INSTRUCTIONS
  1. Remove everything from the game box, then scatter the seashells onto the seascape on the inside bottom of the box.
  2. Give each player a seashell snack mat.
  3. The youngest player takes the first turn. Play then passes to the left of that player and onward.
  4. On your turn, spin the spinner, pick up the Sophie pincers, and follow the directions below according to your spin. Then it’s the next player’s turn!
    • Pattern: Find a shell that matches the pattern (the color of the shell doesn’t matter) and use Sophie to pick it up and place it on your seashell snack mat.
    • One Shell: Pick any one shell from the seascape and use Sophie to pick it up and place it on your seashell snack mat.
    • Two Shells: Pick any two shells from the seascape and use Sophie to pick them up and place them on your seashell snack mat.
    • Big Wave: A big wave is crashing the shell-collecting party. All players lose a shell back to the seascape.
    • Hungry Otter: Use Sophie to take any shell from another player and place it on the matching space on your seashell snack mat.
    • Otto the Octopus: Take any shell from for seashell snack mat and place it on the table next to Otto. Spin the spinner, if you land on Otto or the pattern that matches the shell you chose you can take your shell back and take any other shell from the seascape. If you don’t land on Otto or the pattern that matches your shell, Otto tosses your shell back into the seascape.
  5. If you’re the first player to collect all of the shells to match the ones on your seashell snack mat, you win!

ENJOY!

How to Play – Hi Ho! Cherry-O!

Part of the fun in raising Zoey is finding things that delight and educate her; I want to find fun, creative board games to play with her during our family game nights! This week we played Hi Ho! Cherry-O by Milton Bradley! 

Zoey has loved this game since before she even knew how to play! She would pull everything out and sort the fruits by color or put the puzzle together, honestly it’s surprising that there are no missing pieces! Then we learned how to play the game together, and she loves it even more! She loves counting out the fruits; we find it super fun and easy collecting and replacing the fruit to the baskets and back. 

Let’s play!

IN THE BOX
  • A game-board
  • A spinner
  • A puzzle
  • 10 “apples”
  • 10 “blueberries”
  • 10 “cherries”
  • 10 “oranges”
  • 4 baskets
INSTRUCTIONS (CLASSIC)
  1. Place each basket in the game-board hole to the left of its matching color tree/bush.
  2. Each player chooses a tree/bush and places the matching colored fruit in each of the game-board holes.
  3. The puzzle is only for co-operative games so place it back in the box.
  4. The player whose birthday comes next takes the first turn. Play then passes to the left of that player and onward.
  5. On your turn, spin the spinner, then follow the directions below according to your spin. Then it’s the next player’s turn.
    • One Fruit: Pick one fruit from your tree/bush and put it in your basket.
      • Two Fruits: Pick two fruits from your tree/bush and put them in your basket.
      • Three Fruits: Pick three fruits from your tree/bush and put them in your basket.
      • Four Fruits: Pick four fruits from your tree/bush and put them in your basket.
      • Bird or Dog: Someone’s nibbling at your fruit! Take two fruits out of your basket and place them back on your tree/bush (if you only have one fruit, put that one back. If you have none, do nothing).
        • Spilled Basket: Uh-Oh! Take all of the fruits out of your basket, and place them back on your tree/bush.
  6. If you’re the first player to have all 10 fruits in your basket say “HI HO! CHERRY-O!” You win!
INSTRUCTIONS (CO-OPERATIVE)
  1. Place each basket in the game-board hole to the left of its matching color tree/bush.
  2. Each player chooses a tree/bush and places the matching colored fruit in each of the game-board holes.
  3. Break up the puzzle and place the pieces facedown near the game-board.
  4. The player whose birthday comes next takes the first turn. Play then passes to the left of that player and onward.
  5. On your turn, spin the spinner, then follow the directions below according to your spin. Then it’s the next player’s turn.
    • One Fruit: Pick one fruit from your tree/bush and put it in your basket.
    • Two Fruits: Pick two fruits from your tree/bush and put them in your basket.
    • Three Fruits: Pick three fruits from your tree/bush and put them in your basket.
    • Four Fruits: Pick four fruits from your tree/bush and put them in your basket.
    • Dog: Remove one fruit from your basket and place it back on the matching tree/bush (if you have none, do nothing).
    • Spilled Basket: Remove two fruits from your basket, and place them back on your tree/bush (if you only have one fruit, put that one back. If you have none, do nothing).
    • Bird: Turn one piece of the bird puzzle face up. Every time you turn over a puzzle piece, try to fit it into the bird puzzle. If you can’t do this leave it face up until it fits.
  6. The players win if they pick all the fruits and say “HI HO! CHERRY-O!”, before the puzzle is completed. The bird wins if the puzzle gets completed before all the fruit is picked.

ENJOY!

DIY – Felt Pie

What child (or inner child) doesn’t love preparing toy food in a play kitchen? 

I had a play kitchen when I was a little girl and loved preparing pie for myself, my sister and my parents. Now that I’m grown and have a daughter of my own, I want to make her some handcrafted play food so she can enjoy making meals for everyone during play, or while we cook in the kitchen next to her!

Please feel free to use these patterns to create some play food for you and yours! This pattern will make one slice of pie. I made 6 slices total to create a whole pie. You can duplicate it as much as you want to make multiple pieces of each food!

SUPPLIES
  • Pie patterns (see above) 
  • Paper scissors
  • Light tan felt material
  • Red felt material (or whichever color you want for the pie’s interior)
  • Fiberfill stuffing
  • Sewing pins
  • Sewing scissors
  • Sewing needle
  • Embroidery floss (light tan and red or whichever color you choose for the pie’s interior)
INSTRUCTIONS
  1. Print out the pie pattern I’ve provided, then cut the patterns from the paper.
  2. Pin the patterns on the appropriate colored felt, then use sewing scissors to cut the felt.
  3. Thread a sewing needle with red embroidery floss to sew the pie filling together.
  4. Using a whipstitch, begin sewing along one of the short edges of the pie filling, conceal the knots in between the two pieces of felt.
  5. Pin the red vent piece to the top crust piece and use red embroidery floss to whipstitch the vent “hole” in place.
  6. Thread a sewing needle with light tan embroidery floss and whipstitch the triangular shape of the pie filling to the triangular shape of the bottom crust. Conceal the knots inside.
  7. Continue using light tan embroidery floss to whipstitch the triangular shape of the top crust to the triangular other side of the pie filling. Conceal the knots inside.
  8. Align the back crust to the open back end of the pie we’ve already stitched together. This piece will be taller than the main pie structure and that’s perfect! We are going to fold the excess down to create the edge of the crust!
  9. Beginning at the top of one side of the filling, whipstitch down the filling, along the bottom crust then up the other side of the filling. Stop here to stuff the pie.
  10. Stuff the inside of the pie with fiberfill, then continue stitching the back crust to the top crust. Conceal the knots inside.
  11. Fold the extra felt down to create the edge of the crust and stitch along where the end meets the back of the pie. Conceal the knots inside.
  12. Stuff the edge of the crust with fiberfill and then sew the sides shut to keep the stuffing in. Conceal the knots inside.
  13. Repeat steps 2 through 12 five more times for a full pie!
  14. Enjoy!

Fun and Easy Non-alcoholic Butterbeer Recipe

Welcome back friends! With the release of Hogwarts Legacy, I am in a Harry Potter kind of mood, and craving some Harry Potter food!

Wowee, Butterbeer is sweet! It best enjoyed with something salty to counteract just how sweet it is! Another way to counteract the sweetness is to leave the whipped cream plain, no added sugar or sweetener, just the whipped cream. If you mix the whipped cream and the butterbeer it creates a perfectly balanced bite! Not too sweet!

Let’s make some!

INGREDIENTS
  • 1⁄2 cup of butterscotch syrup
  • 1⁄2 tablespoon of butter, melted
  • 1 cup of cream soda
  • Heavy whipping cream
INSTRUCTIONS
  1. Measure and pour the butterscotch syrup into a bowl.
  2. Add the melted butter to the butterscotch syrup and whisk gently until combined.
  3. Measure and pour the cream soda into the butter, butterscotch mixture and whisk gently again until combined, then set aside.
  4. In a separate mixing bowl, whip the heavy cream until it forms stiff peaks. 
  5. Pour the butterbeer into mugs of your choosing, leaving room for the whipped cream topping.
  6. Top the butterbeer with a few dollops of whipped cream and enjoy! 

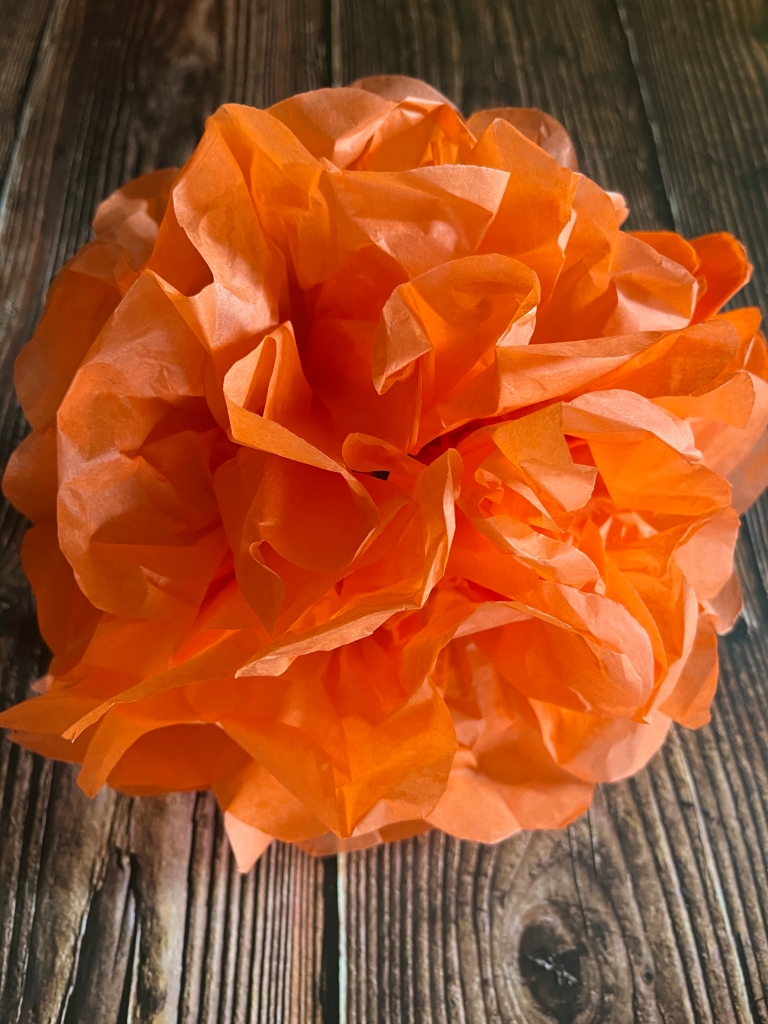
DIY – Tissue Paper Flowers

Part of the fun in raising Zoey is making things that delight her; I want to create fun, educational crafts for her that are made with love and will be loved! 

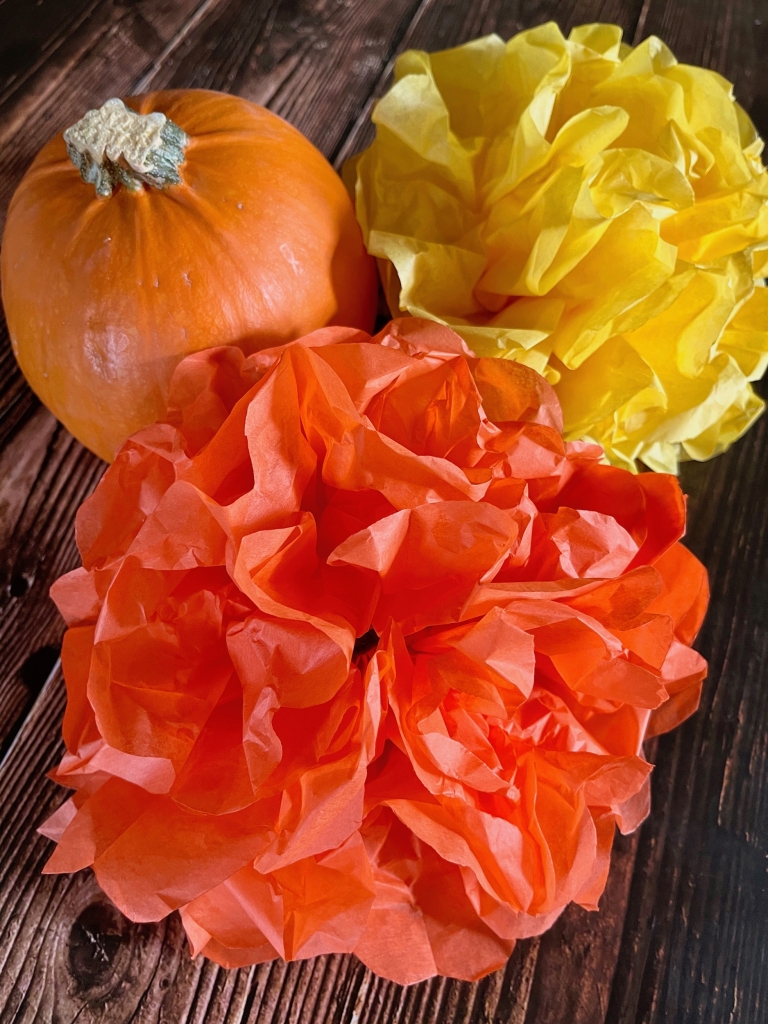
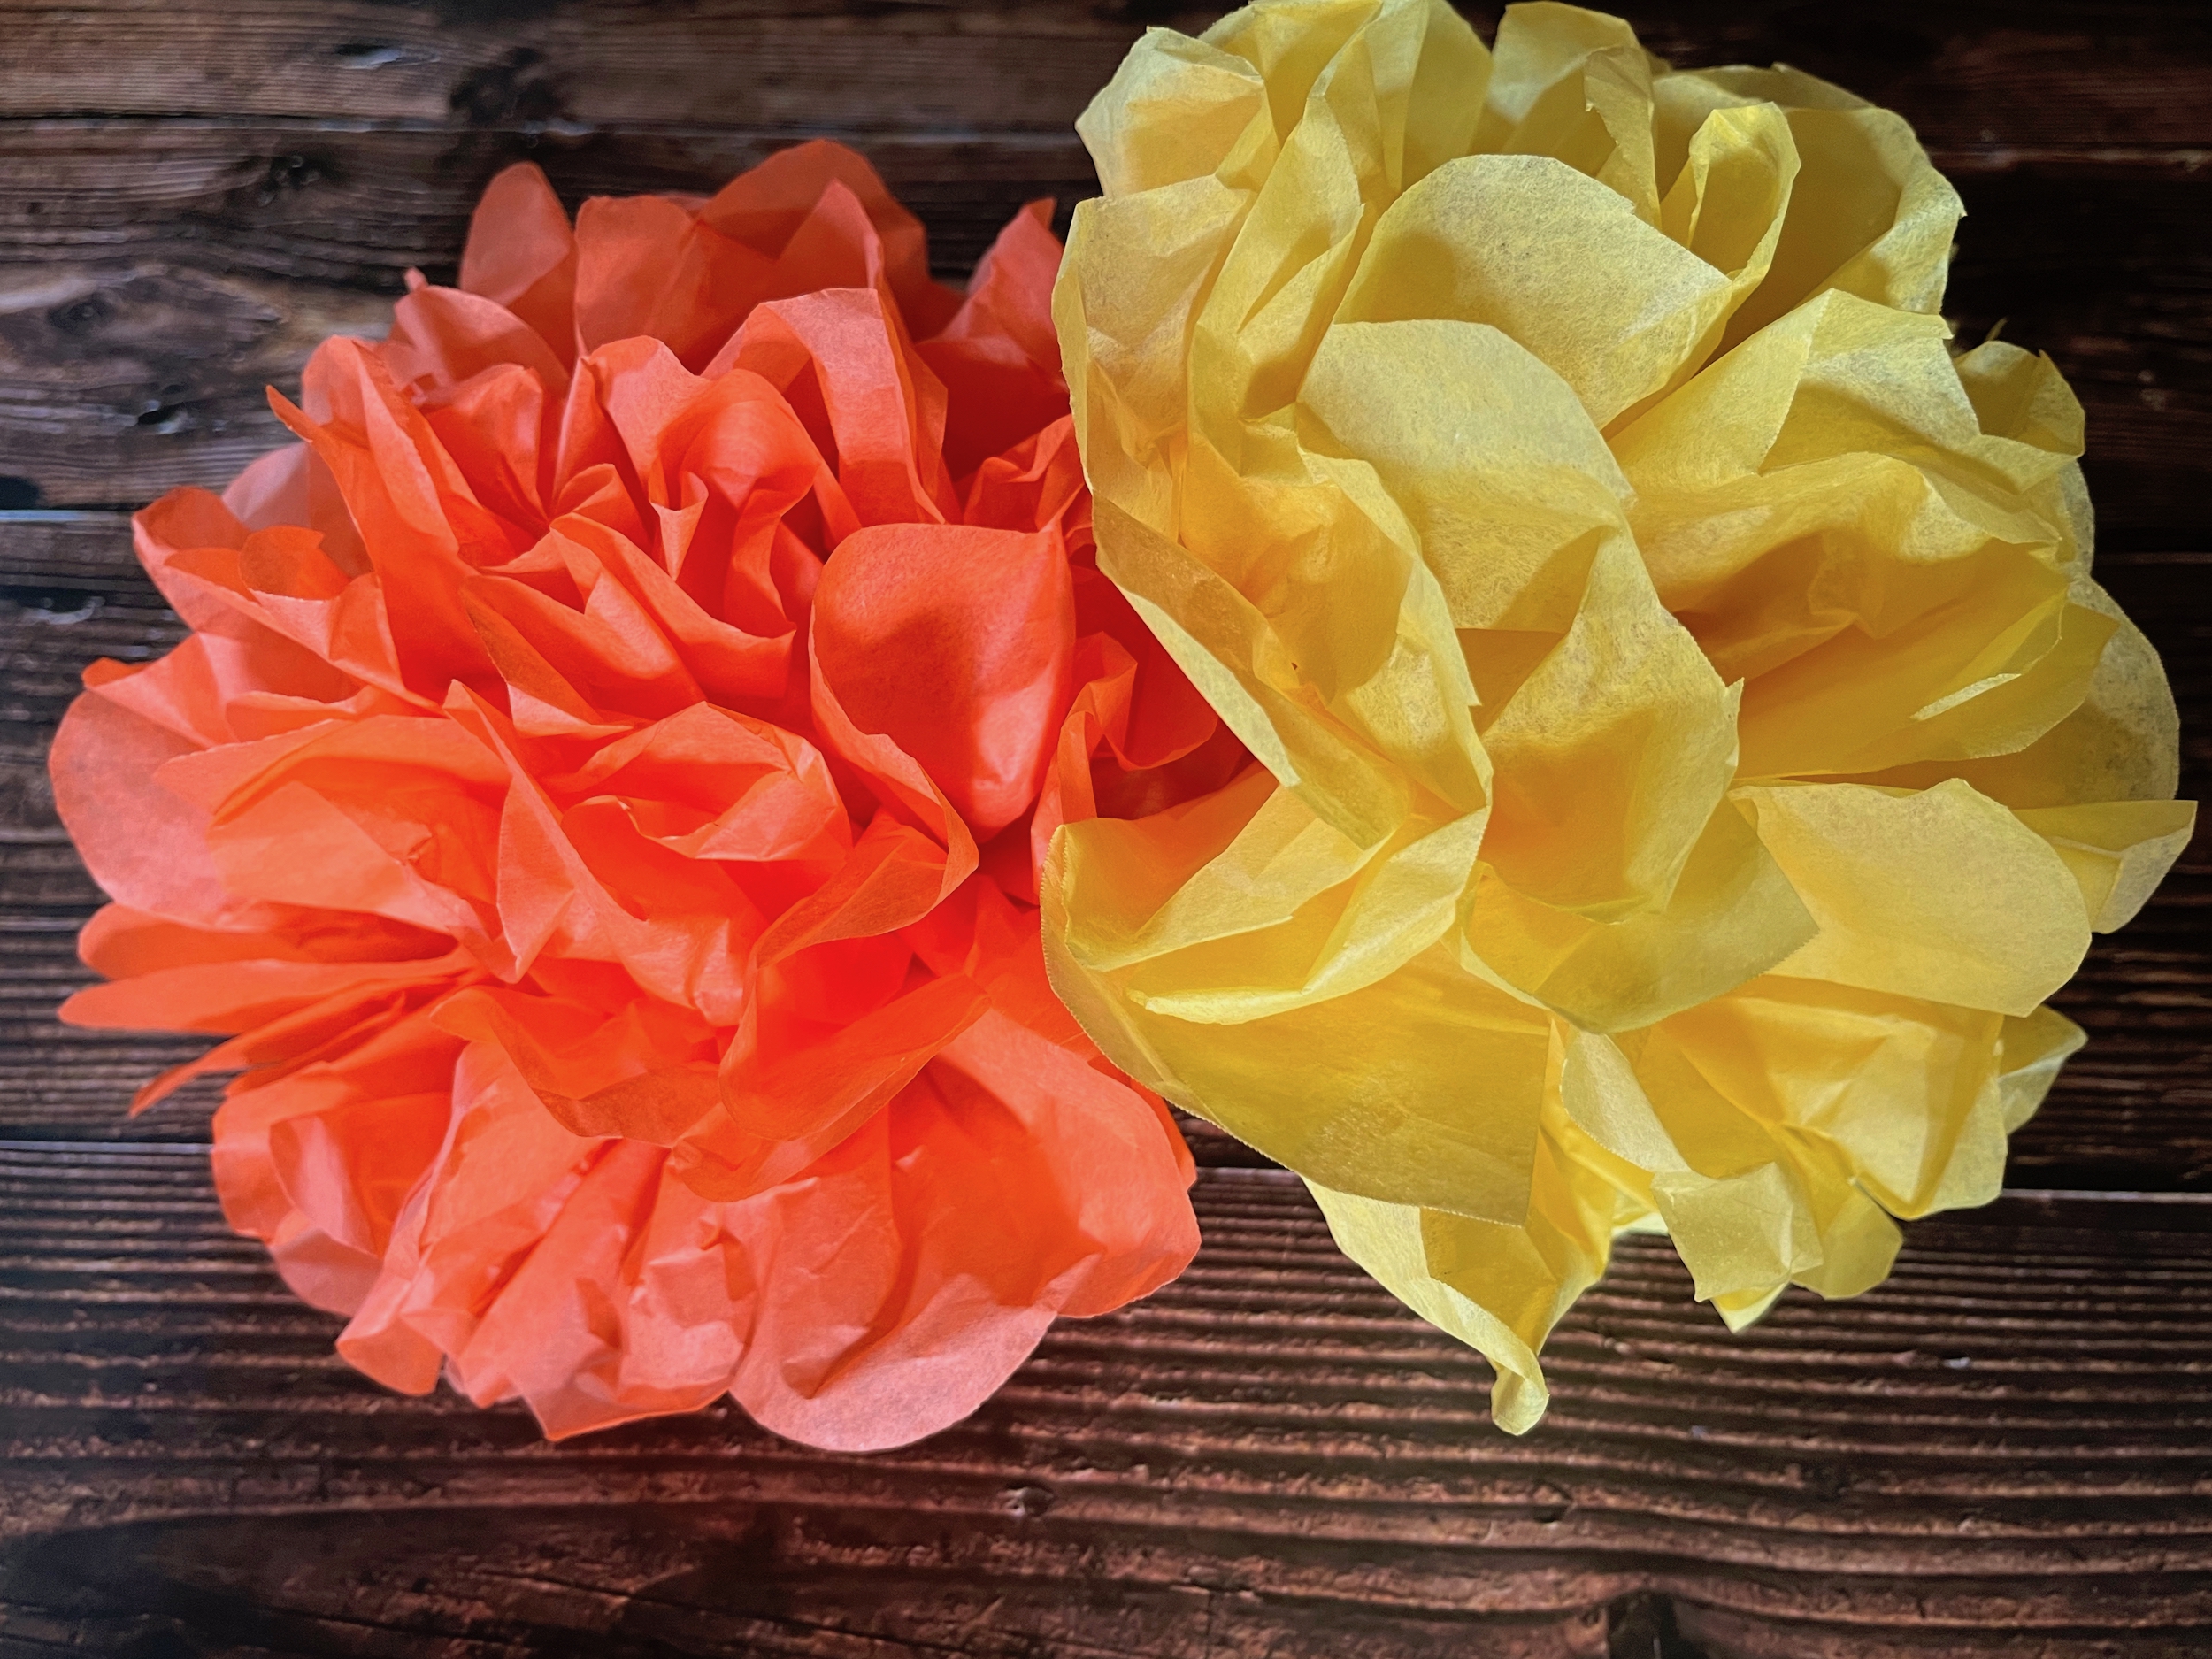
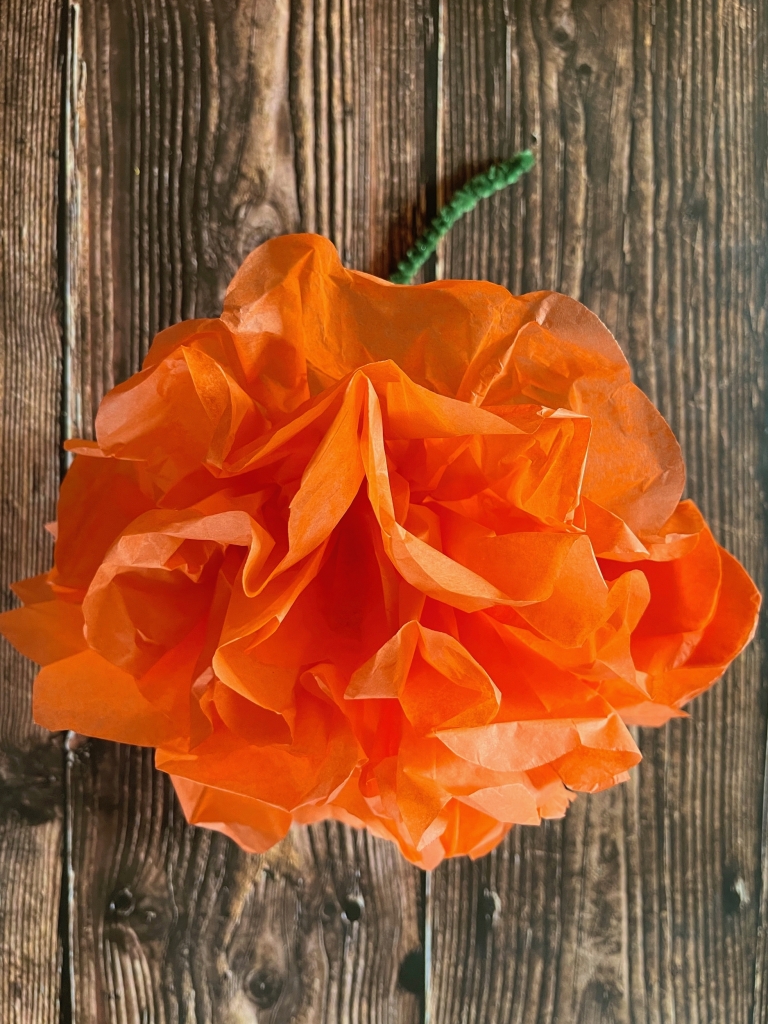
This week we’ll be creating paper marigolds in honor of their color and beauty, but also to begin educating Zoey on their significance this time of year. 

These supplies and instructions create two large paper flowers, but you can multiply and create as many as you like in as many color variations as you like!

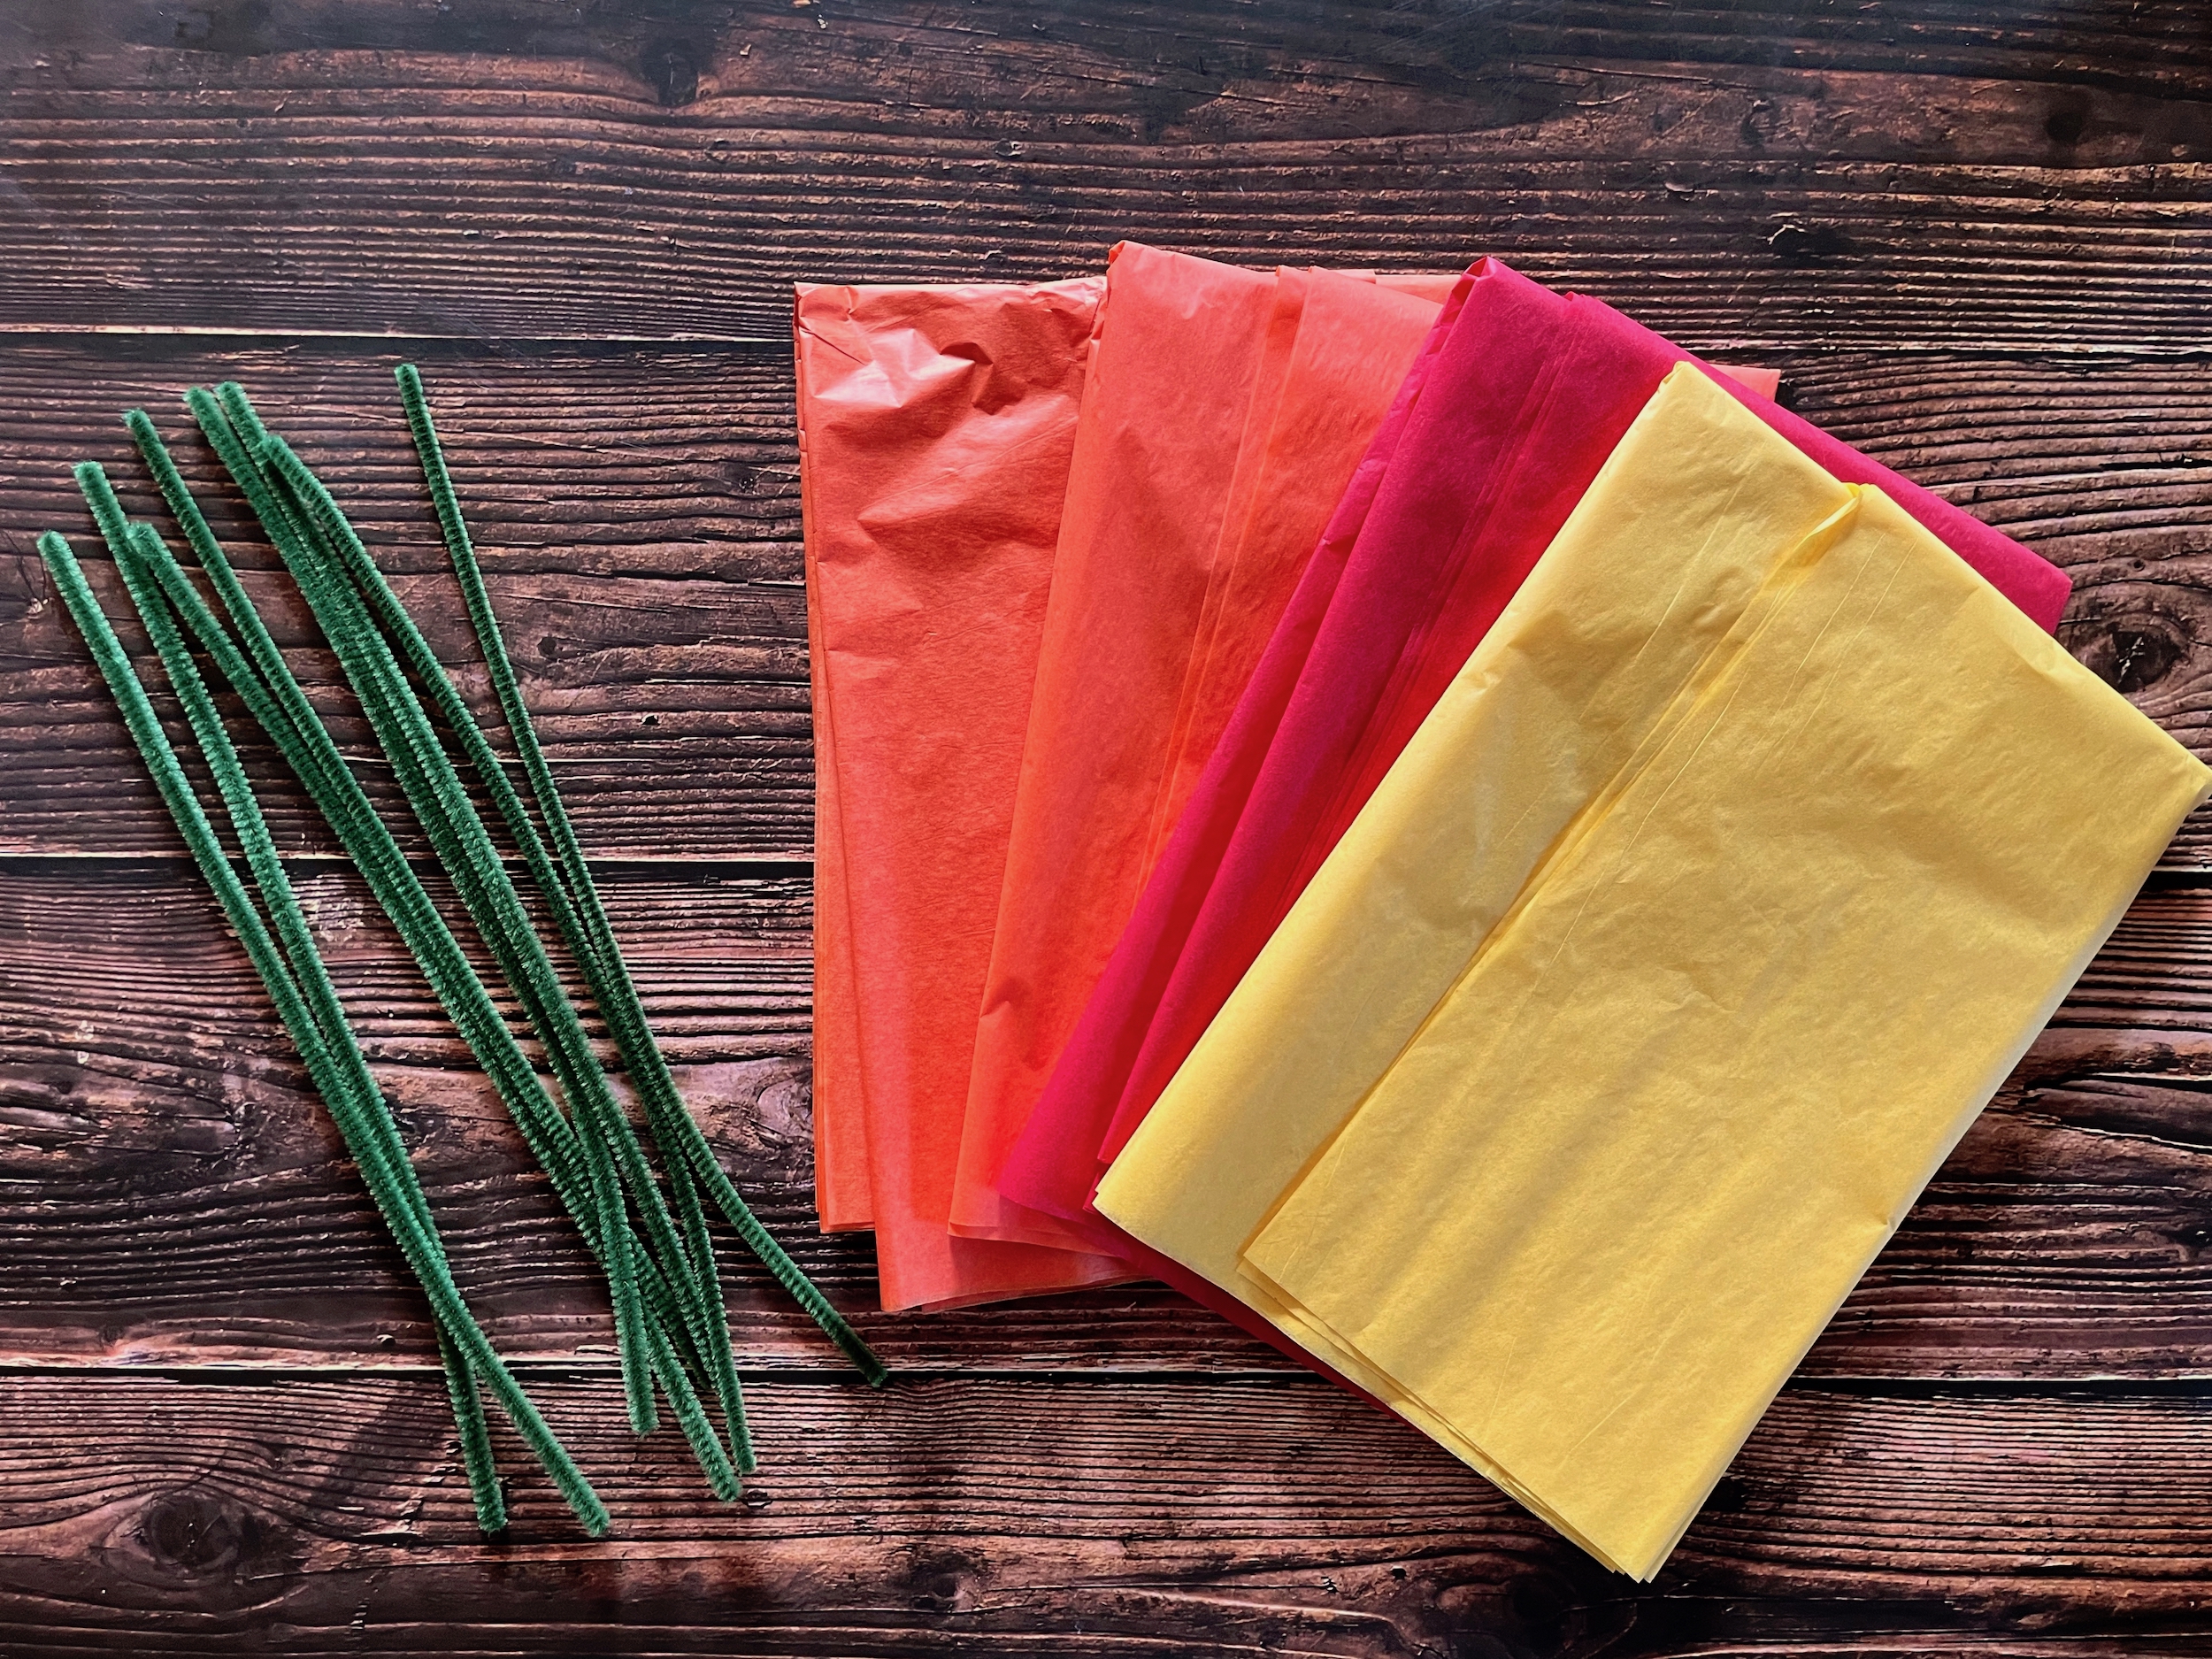
SUPPLIES
  • 4 green pipe cleaners
  • 5 sheets of 20” x 20” gift-wrapping tissue paper (or similar)
  • Scissors
INSTRUCTIONS
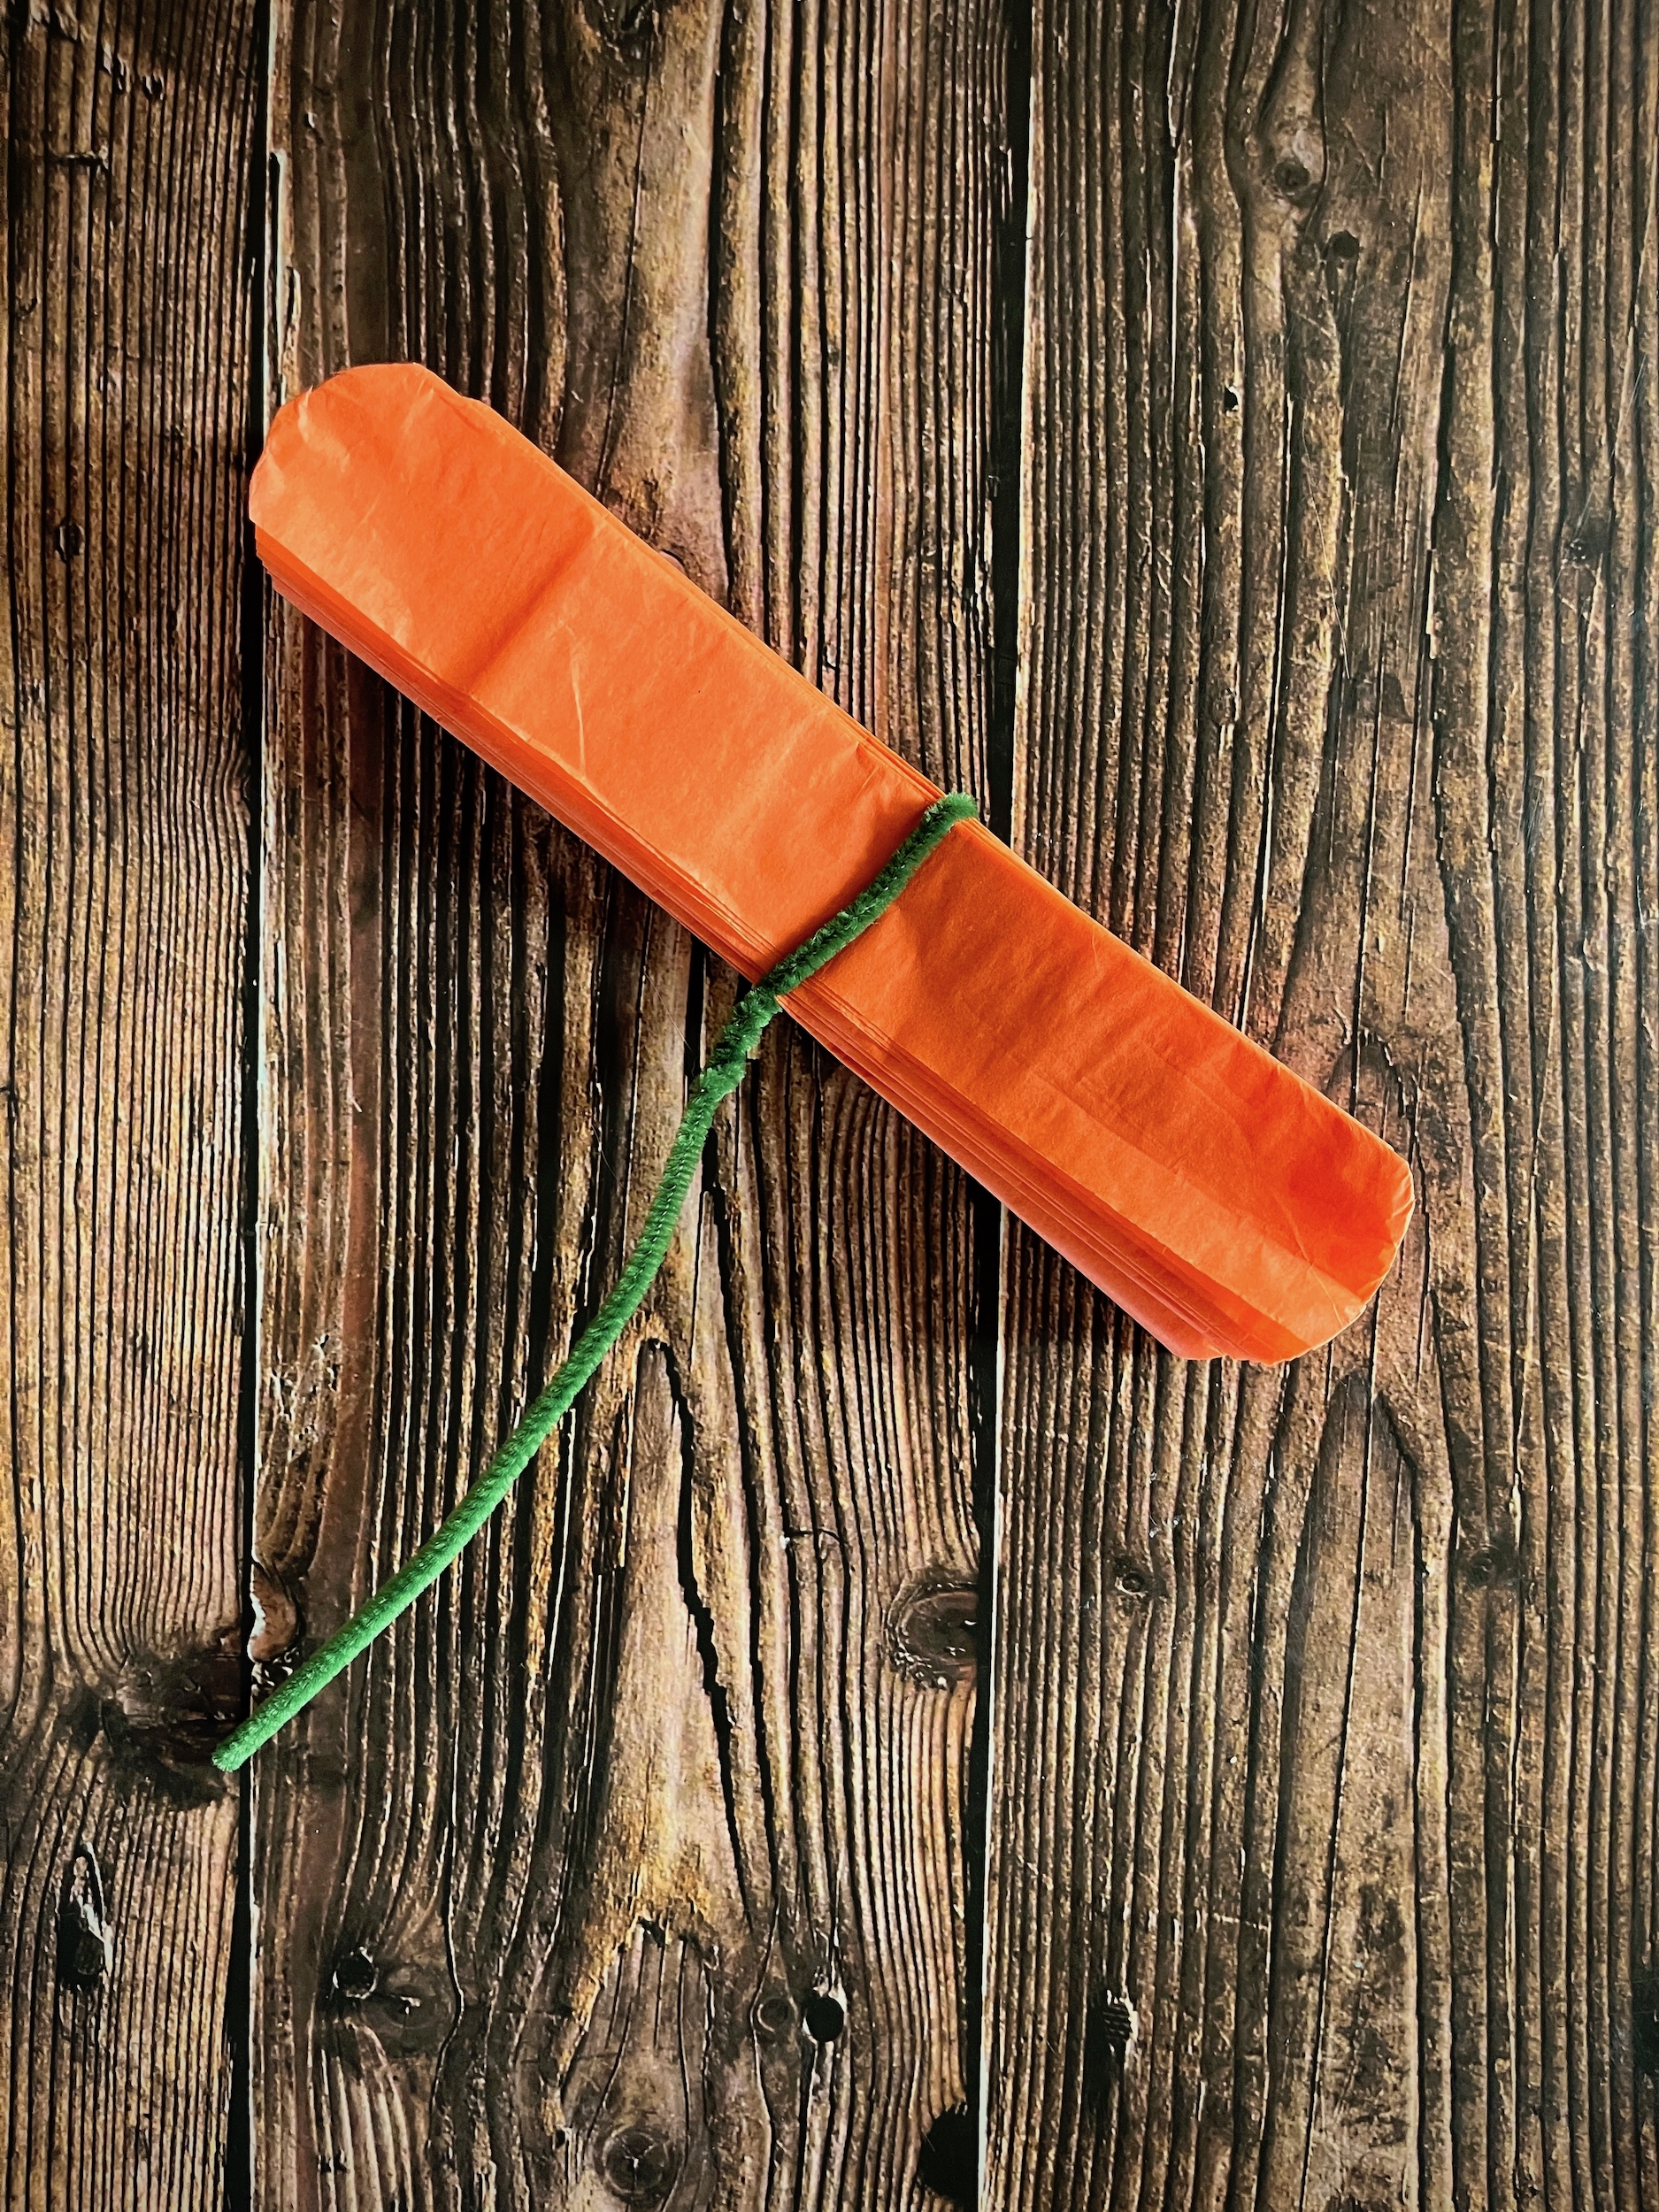
  1. Layer and align the 5 sheets of tissue paper, then fold them in half and crease.
  2. Cut along the crease line so you now have two groups of tissue sheets, 10” by 20” each.
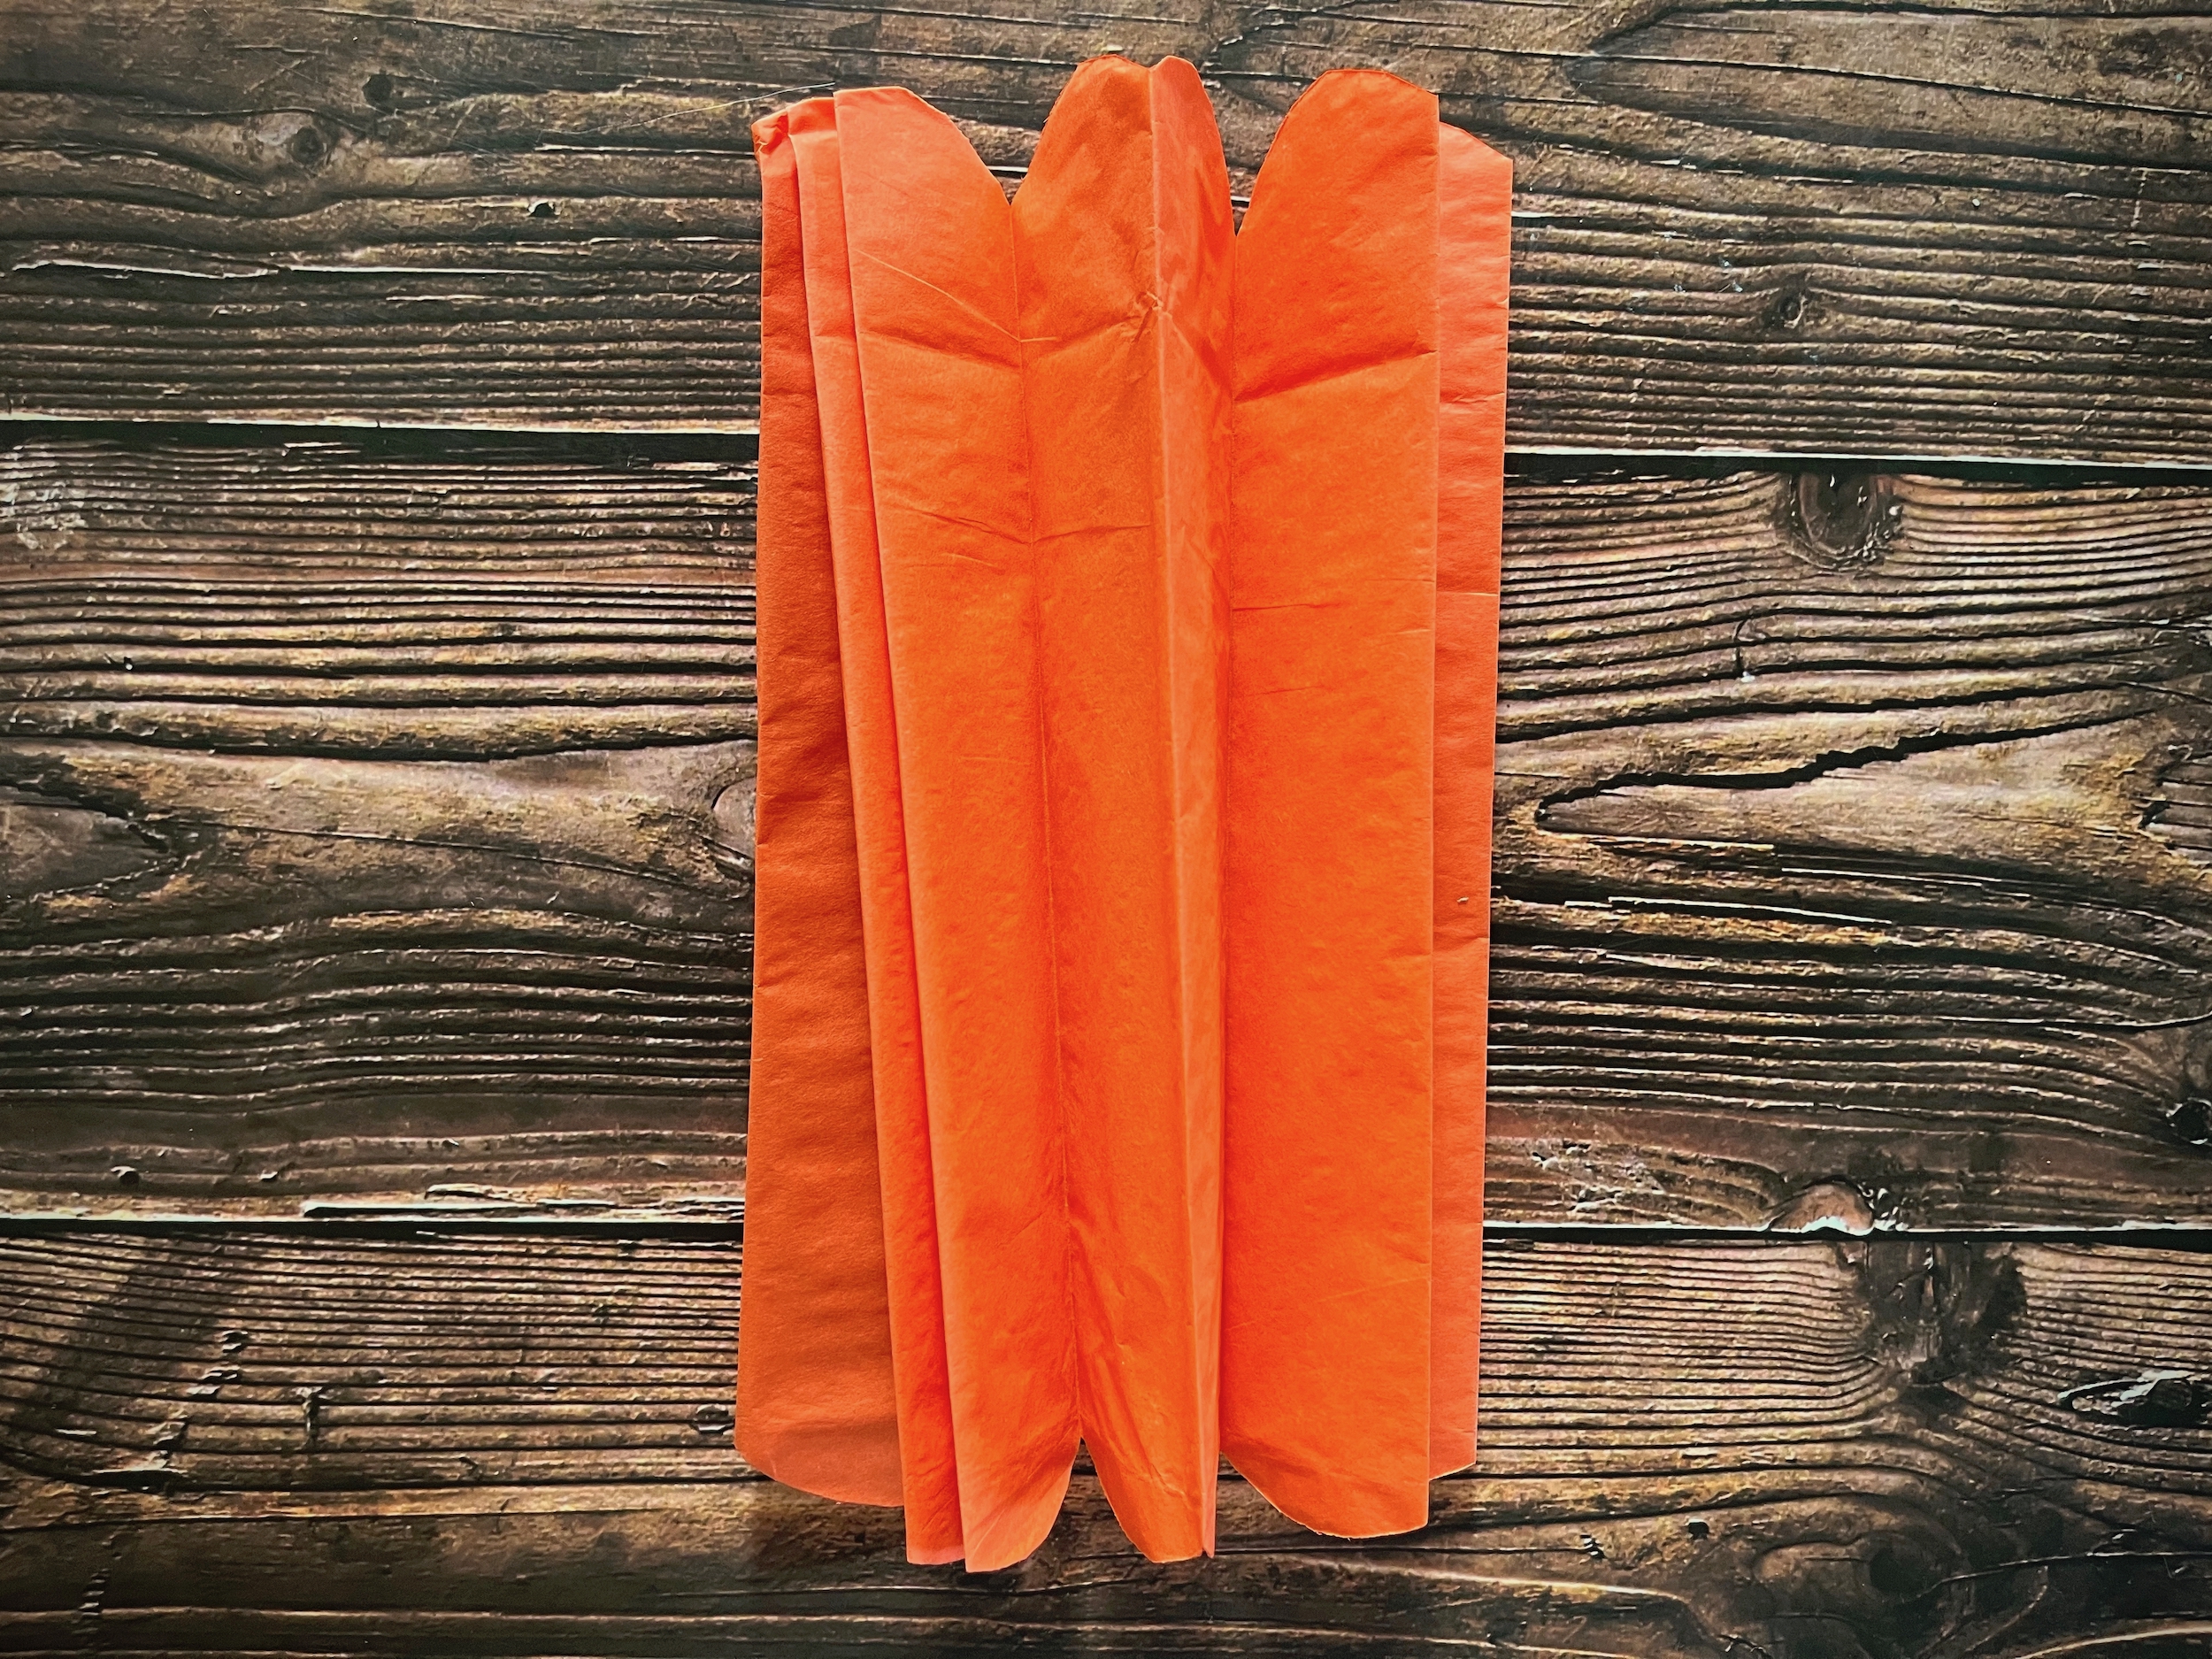
  3. Keeping each group of tissue sheets layered and aligned, pleat the paper in an accordion fold.
  4. Holding the accordion fold closed, cut a half-circle shape from each end. (You could also cut a point or zig-zag)
  5. Holding the accordion fold closed, wrap the top of a pipe cleaner around the middle of the paper and twist it around itself to hold it in place. This will also act as the stem.
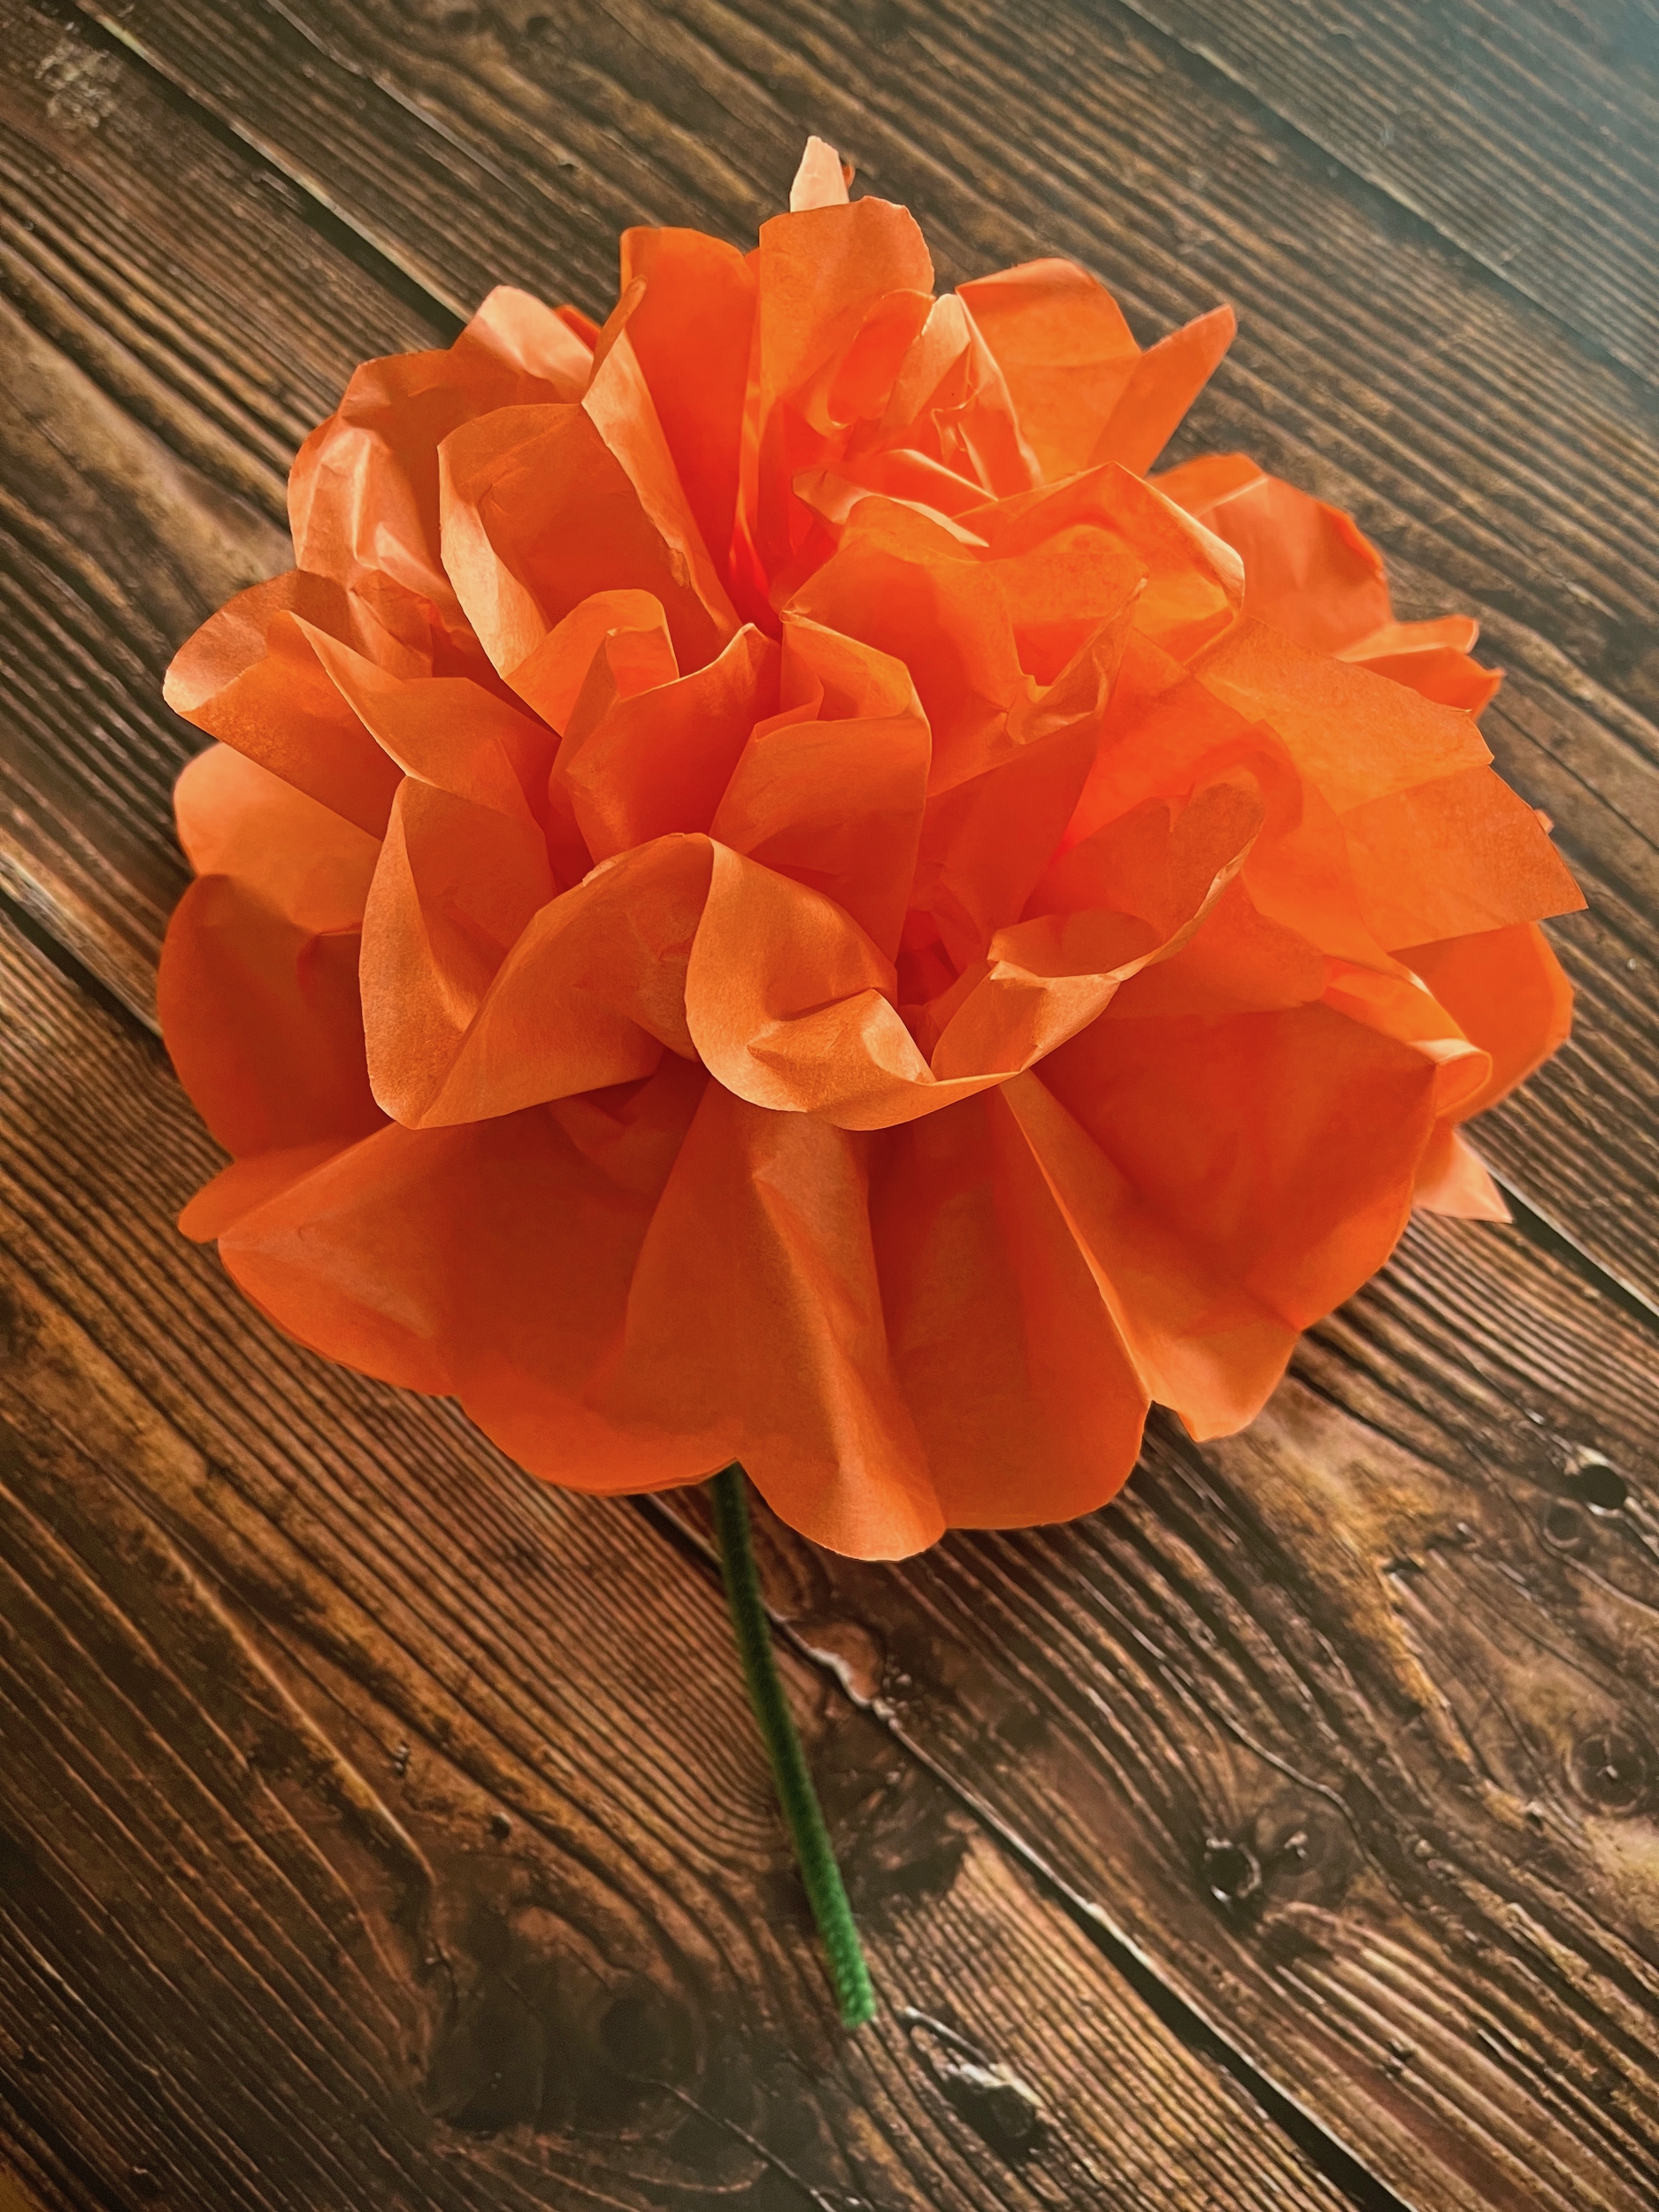
  6. Fan out the paper, then gently separate the first layer of paper from the rest, and move it up to form the top layer of petals.
  7. Gently separate the rest of the paper layers and fluff out your flower.
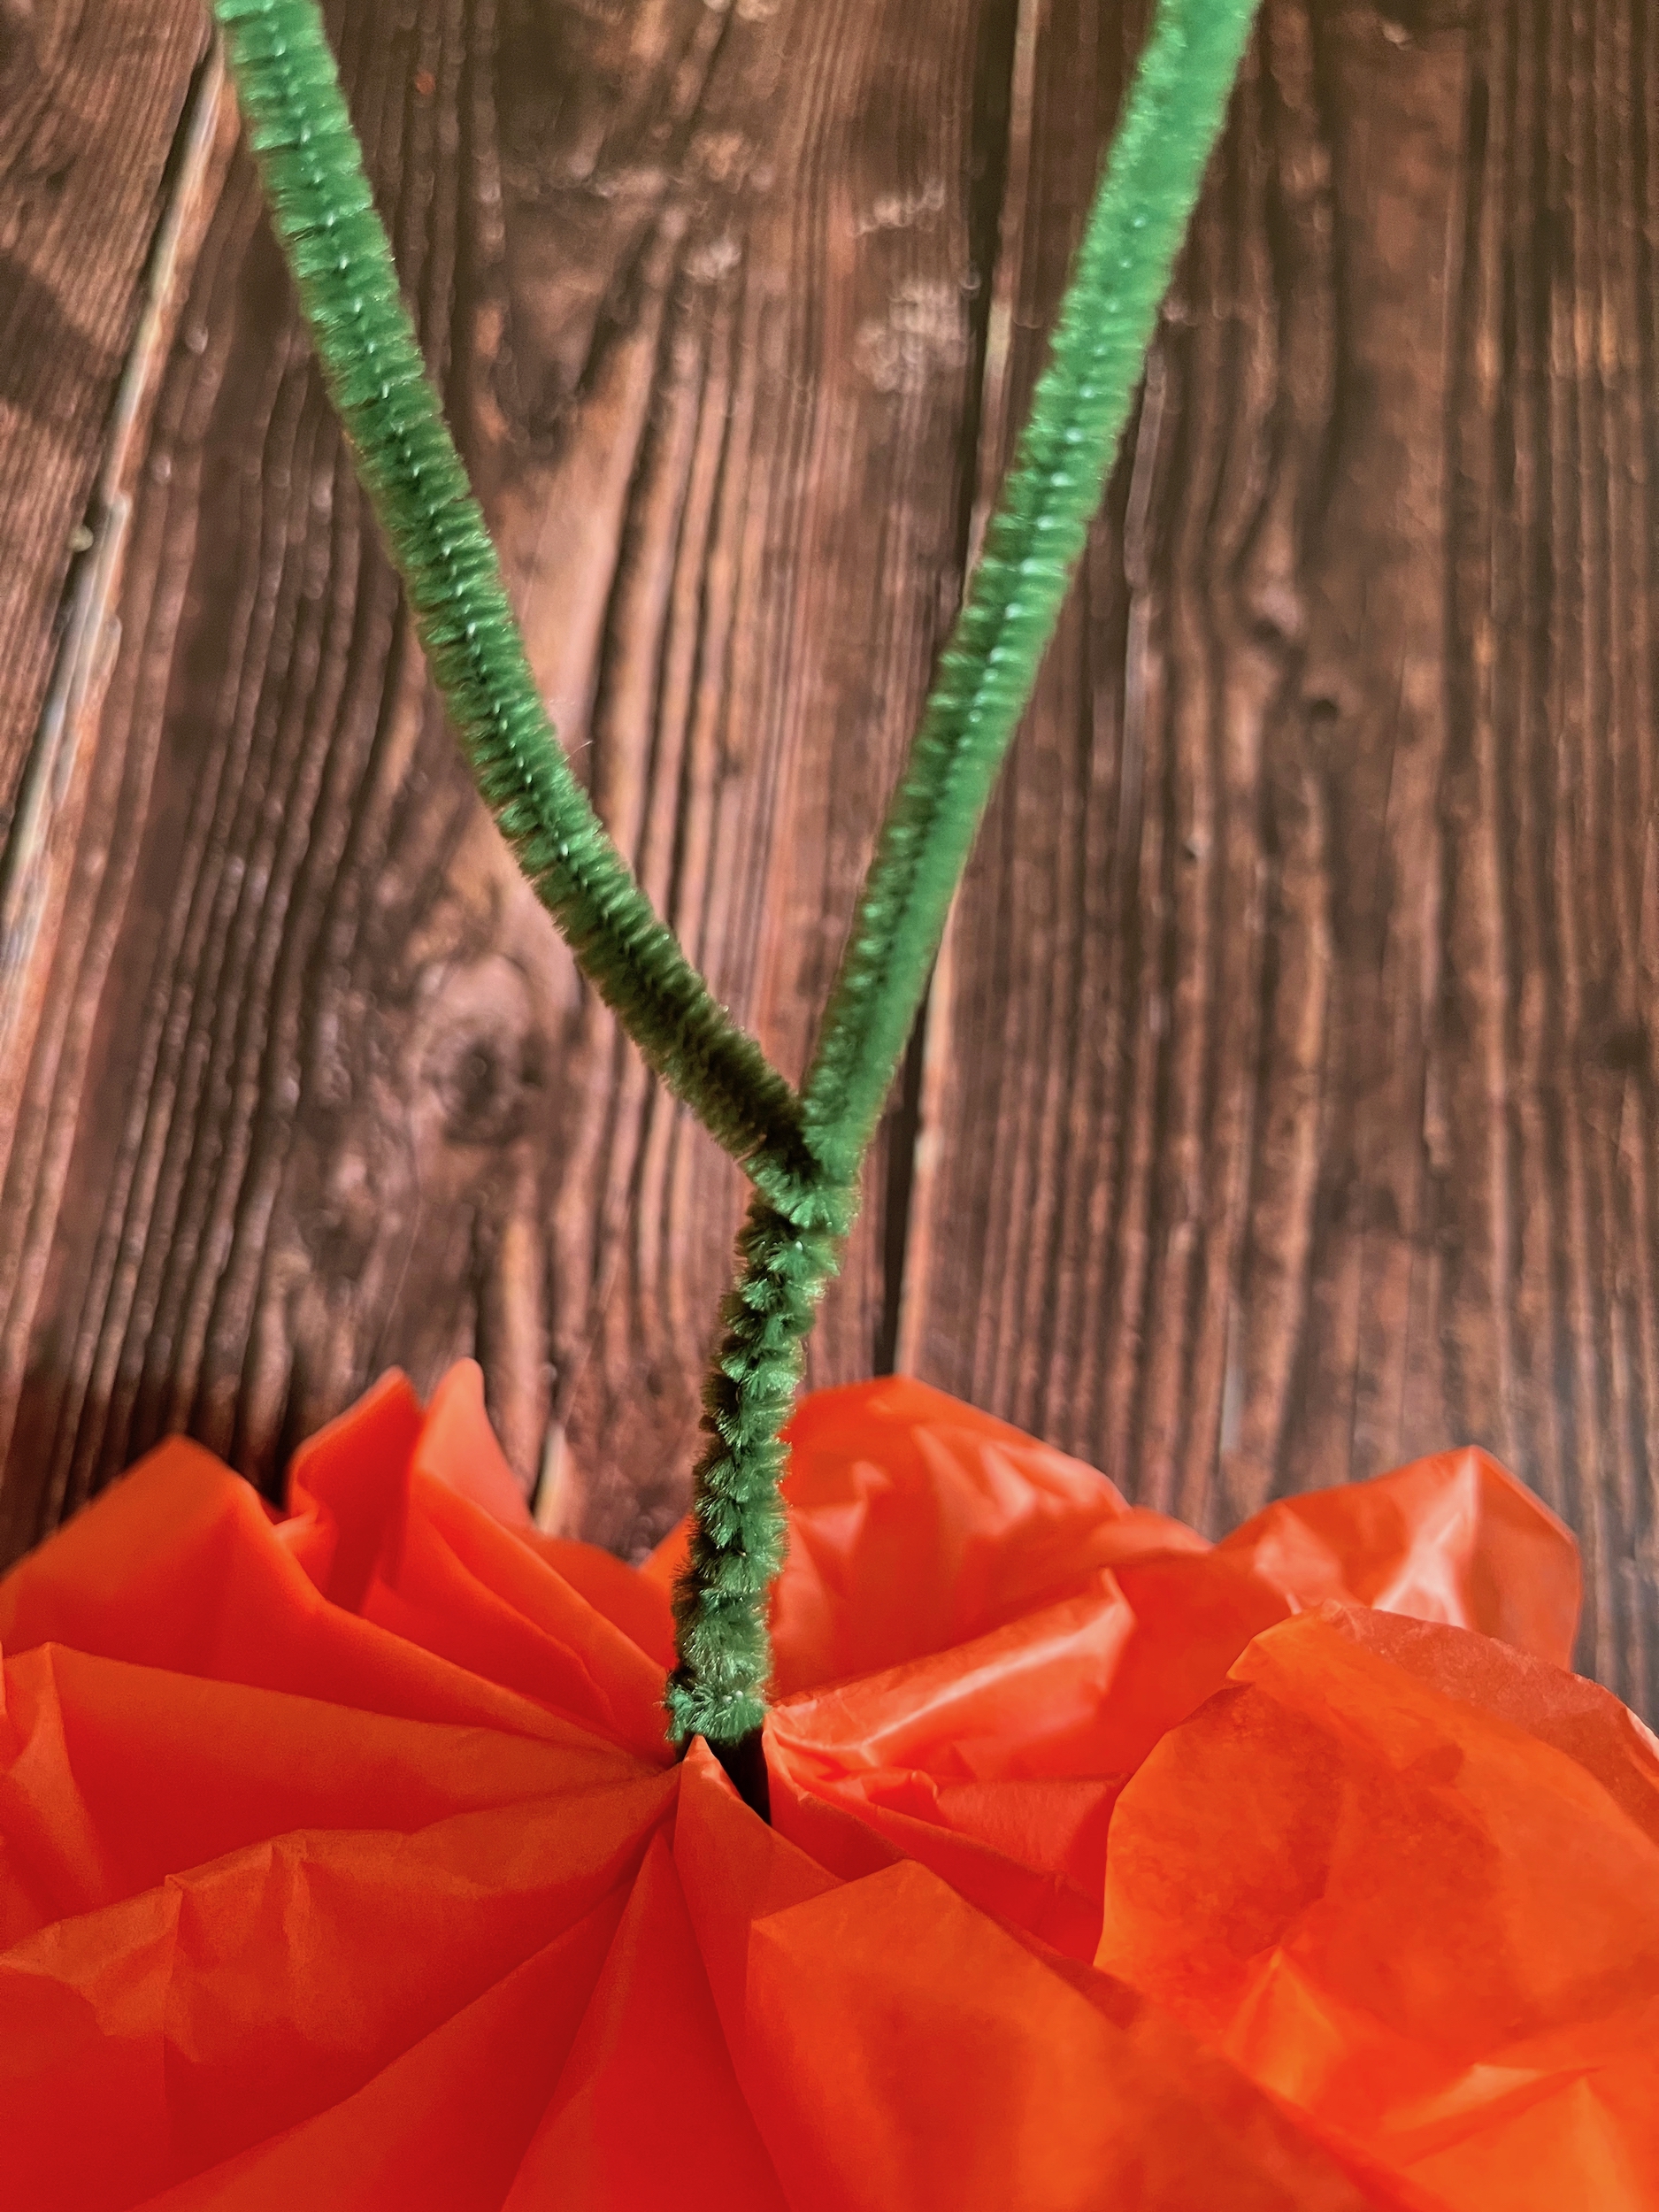
  8. To bolster the stem a bit more: Secure a second pipe cleaner around the existing pipe cleaner where it meets the flower, and wrap it around the existing pipe cleaner down to the base (start back up if you have extra).
  9. Repeat steps 3 through 8 with the second group of tissue sheets.
  10. Enjoy!

DIY – Bat Silhouette Pom Pom Painting

Part of the fun in raising Zoey is making things that delight her; I want to create fun, educational crafts for her that are made with love and will be loved! This week we’ll be creating pom pom paintings of bat silhouettes for halloween! 

I remember when I was a kid we made halloween crafts at school and my mom would bring them out every year as part of our halloween decor. It made me feel super happy and proud that she would take the time to save and display my art every year and that is the feeling I want to inspire in my own daughter.

Let’s get painting!

SUPPLIES
  • Bat silhouette pattern (see above)
  • Printer paper
  • Scissors
  • Scotch tape
  • Black cardstock paper (8.5 x 11”)
  • Clothespin(s)
  • Pom poms
  • Sunset colored paints (I used red, orange, purple and yellow)
INSTRUCTIONS
  1. Print this bat pattern I’ve created and cut the bats out.
  2. Break off several small pieces of tape, roll them into cylinders, and use them to attach the bats where you want them on the black cardstock paper.
  3. Pour non-toxic sunset colored acrylic paints into a pie plate (or something similar) and set out a pom pom for each color.
  4. Use a clothespin to grab one pom pom at a time, or one clothespin per color.
  5. Allow your little one to dab the paint around and over the bats to their heart’s content.
  6. Allow the paint to dry and then gently peel off the bats to reveal their silhouettes!
  7. Hang it up and enjoy! 

DIY – Ghost Pom Pom Painting

Part of the fun in raising Zoey is making things that delight her; I want to create fun, educational crafts for her that are made with love and will be loved! This week we’ll be creating pom pom paintings of a ghost for halloween! 

I remember when I was a kid we made halloween crafts at school and my mom would bring them out every year as part of our halloween decor. It made me feel super happy and proud that she would take the time to save and display my art every year and that is the feeling I want to inspire in my own daughter.

Let’s get painting!

SUPPLIES
  • Ghost pattern (see above)
  • Printer paper
  • Scissors
  • Scotch tape
  • Black cardstock paper (8.5 x 11”)
  • Clothespin
  • Pom pom
  • White paint
INSTRUCTIONS
  1. Print this ghost pattern I’ve created and cut it out of it’s frame, then set the frame aside.
  2. Cut the eyes and mouth out of the ghost shape.
  3. Break off three small pieces of tape, roll them into cylinders, and use them to attach the eyes and mouth where you want them on the black cardstock paper.
  4. Pour non-toxic white acrylic paint into a pie plate (or something similar) and use a clothespin to grab ahold of a pom pom.
  5. Place the ghost pattern’s frame around the edges of your cardstock page and dab the pom pom in the white paint, then dab it around in the edges of the ghost’s shape to create a dotted pattern for your little one.
  6. Remove the frame and allow your little one to dab the paint away to their heart’s content.
  7. Allow the paint to dry and then gently peel off the eyes and mouth to reveal!
  8. Hang it up and enjoy!

Homemade Stovetop Popcorn

Welcome back friends! Who wants some fresh stovetop popcorn to enjoy on one (or more) of these beautiful autumn nights? Maybe cuddled under a blanket, while watching a good movie? I know I do, so let’s pop some!

HOMEMADE STOVETOP POPCORN
  • 3 tablespoons of olive oil
  • 3/4 cup of popcorn kernels
  • 2 to 3 tablespoons of unsalted butter, melted
  • 2 teaspoon of popcorn salt
INSTRUCTIONS
  1. To create popcorn salt, grind it into a fine powder with a mortar and pestle or run 1/2 cup of salt in the food processor until fine.
  2. Place the olive oil and popcorn kernels in a large lightweight pot, then gently shake the pot to distribute the kernels over the bottom of the pan and evenly coat the kernels with oil.
  3. Place the pot on medium heat (or slightly lower depending on the power of your stovetop) and put the the lid on. The kernels will begin popping in about a minute or so and you may need to hold the lid on using the safety handle.
  4. Shake the pot briefly every 30 seconds or so. When the popping stops, immediately pour the popcorn in to a large bowl. You may want to have a bowl set aside to pour excess popcorn into as you go if your pot turns out to be too small.
  5. Melt the butter in a saucepan or microwave, then pour it over the popcorn and sprinkle the salt, shaking well to toss and disperse.
  6. Enjoy!

*This popcorn may look a little dark, but the kernels were toasted in the pan before popping, I did not taste any burnt flavor.

Homemade Play Dough Recipe

Part of the fun in raising Zoey is making things that delight her; I want to create fun, educational crafts for her that are made with love and will be loved! I see much play dough in our future, and while buying it is always a viable option, how fun and cost effective is it to make some on your own?

So let’s make some homemade play dough!

SUPPLIES
  • Large saucepan
  • Wooden spoon
  • Wax paper
  • Gloves
  • Sandwich bags
INGREDIENTS
  • 2 cups of all-purpose flour
  • 3/4 cup of salt
  • 4 teaspoons of cream of tartar
  • 2 cups of warm water
  • 2 tablespoons of vegetable oil
  • Food coloring
INSTRUCTIONS
  1. Place the cream of tartar, flour, and salt in a large saucepan and stir to combine.
  2. Slowly add the oil and water, stirring until well incorporated.
  3. Cook over medium heat, stirring consistently, until the mixture thickens into a dough.
  4. Remove the pan from the heat and allow the dough to cool slightly until it can be handled comfortably.
  5. Divide the dough into equal portions based on how many colors you would like, and roll into balls.
  6. Put on gloves and press an indentation into each ball of dough, then add 15 drops of food coloring to the indentation of each ball to start, you can always add more later. 
  7. Knead each ball of dough until the color is well incorporated. If the color is not as bright as you want, you can add more food coloring and knead again.
  8. Enjoy!

*This can be stored in sandwich bags, one for each color. Just be sure to remove all the excess air for longevity of the dough!

Family Friendly Autumnal Activity Ideas

Welcome back Autumn! Every year I look forward to the Autumn and the warmth it generates inside my home and soul. Where I live, September and October are still rather warm on some days, and turn wet and cold as the months progress toward Winter.  I cannot get enough of the rain this time of year. The cold, wet weather begins to take over outside, driving us all inside to be together and warm. There’s nothing like cuddling up with people you love, reading a good book, watching a movie or playing a video game while the weather misbehaves outside.

I intend to spend a lot of time with my family this year and came up with some family friendly ideas I’d like to experience with Zoey! Follow along and try some of these activities for yourself, this is a time we should all enjoy!

We intend to:

  • Bake bread.
  • Bake cookies for family and/or friends.
  • Collect acorns and make art.
  • Collect leaves and make art.
  • Collect rocks and make art.
  • Make nature pressings or rubbings.
  • Donate to a food bank.
  • Go on a hayride.
  • Go puddling in the rain.
  • Have an indoor picnic on a stormy day.
  • Make a bird feeder.
  • Make Halloween decorations.
  • Go trick or treating!
  • Make fresh tortillas.
  • Make homemade play dough.
  • Make stovetop popcorn.
  • Pick apples.
  • Bake apple pie.
  • Drink apple cider.
  • Make caramel apples.
  • Pick out pumpkins at a pumpkin patch.
  • Give pumpkins a bath.
  • Carve, decorate and/or paint pumpkins.
  • Bake pumpkin bread. 
  • Roast pumpkin seeds.
  • Roast s’mores.