
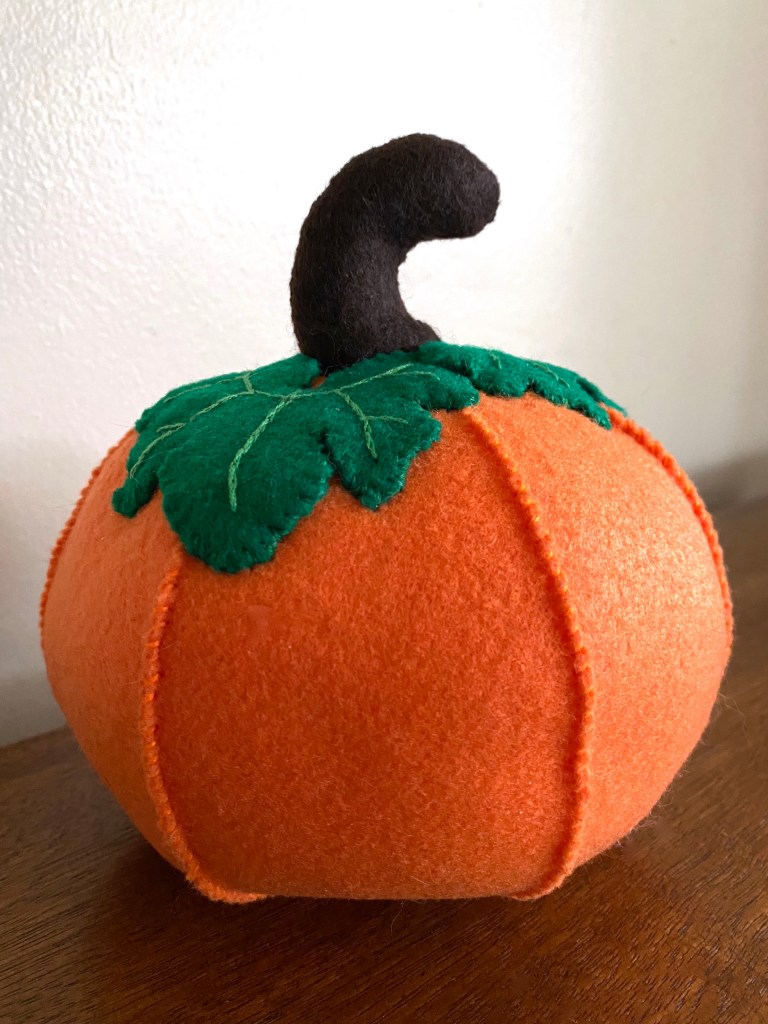
It is Autumn, my favorite season of the year!
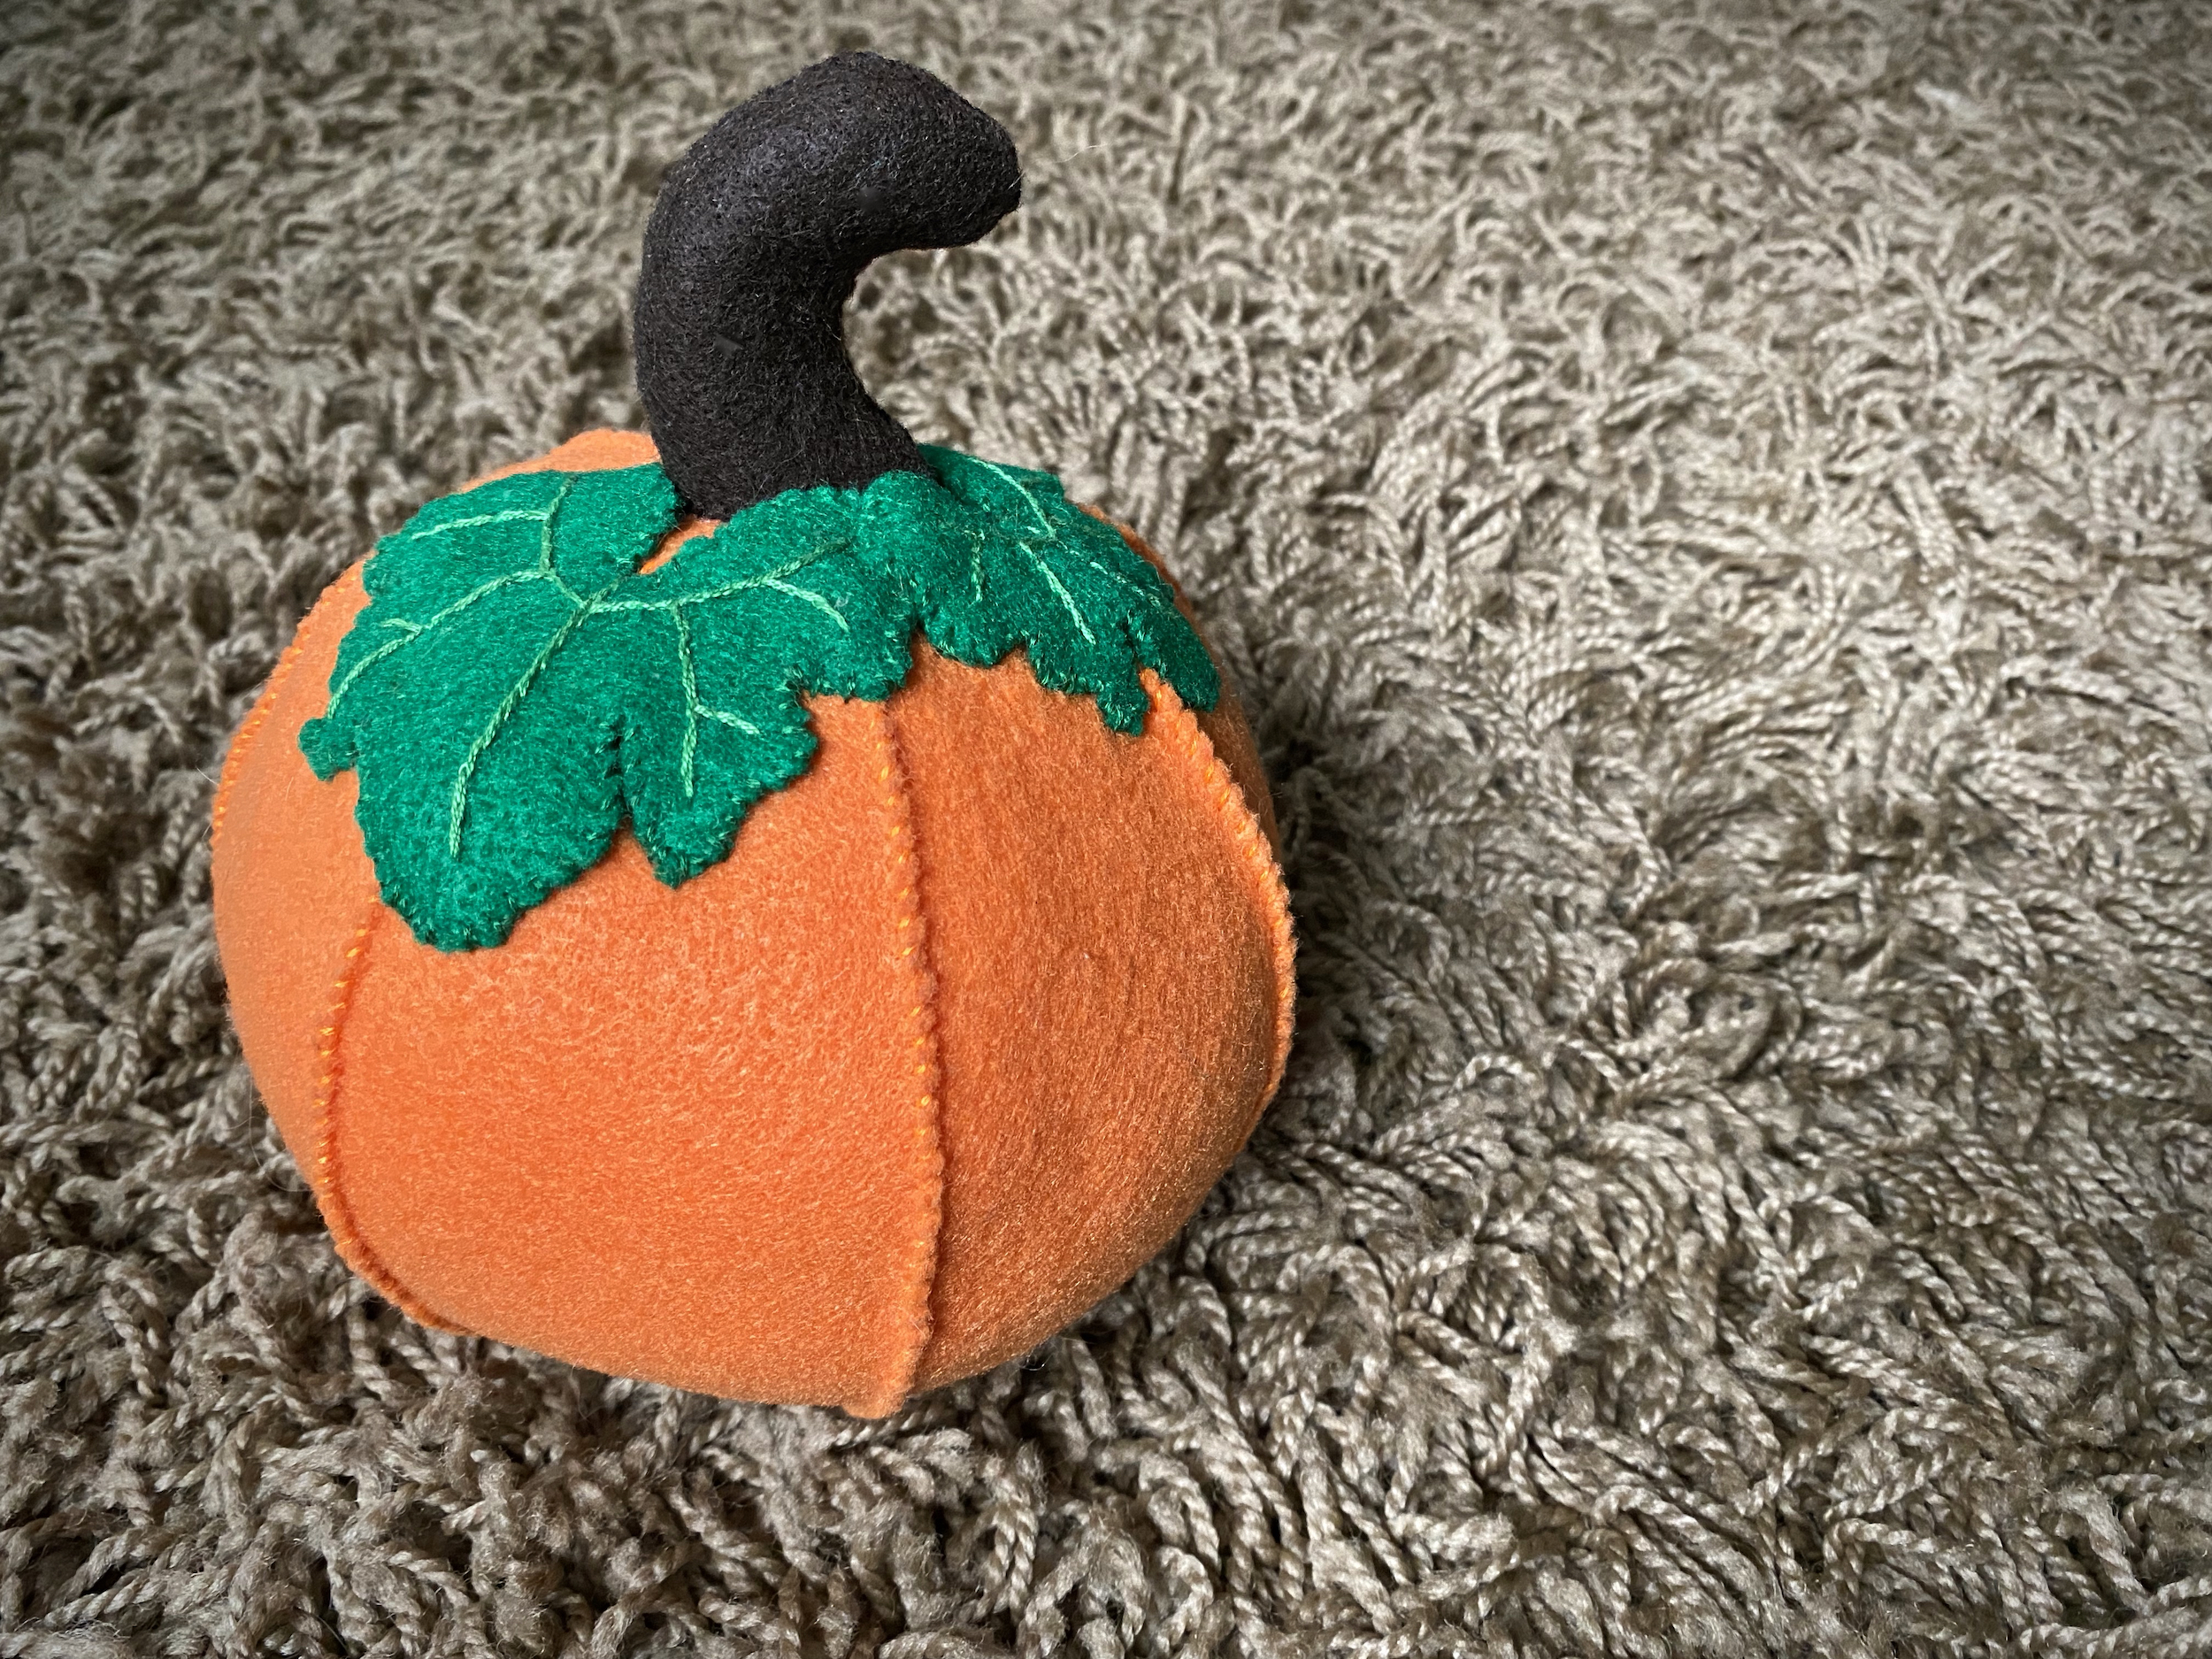
I want to begin creating well-made decorations that mean something to us and will last. What better way to start than by something that will go great with Halloween and Thanksgiving, pumpkins! I’ve created a pattern for fabric pumpkins and you’re welcome to use it to create your own! This will work to create either felt or regular fabric pumpkins, I’m excited to create a few different colors and sizes!
SUPPLIES
- Pumpkin patterns (see above)
- Paper scissors
- Felt fabric
- Sewing pins
- Sewing scissors
- Embroidery floss
- Sewing needle
- Stuffing
INSTRUCTIONS
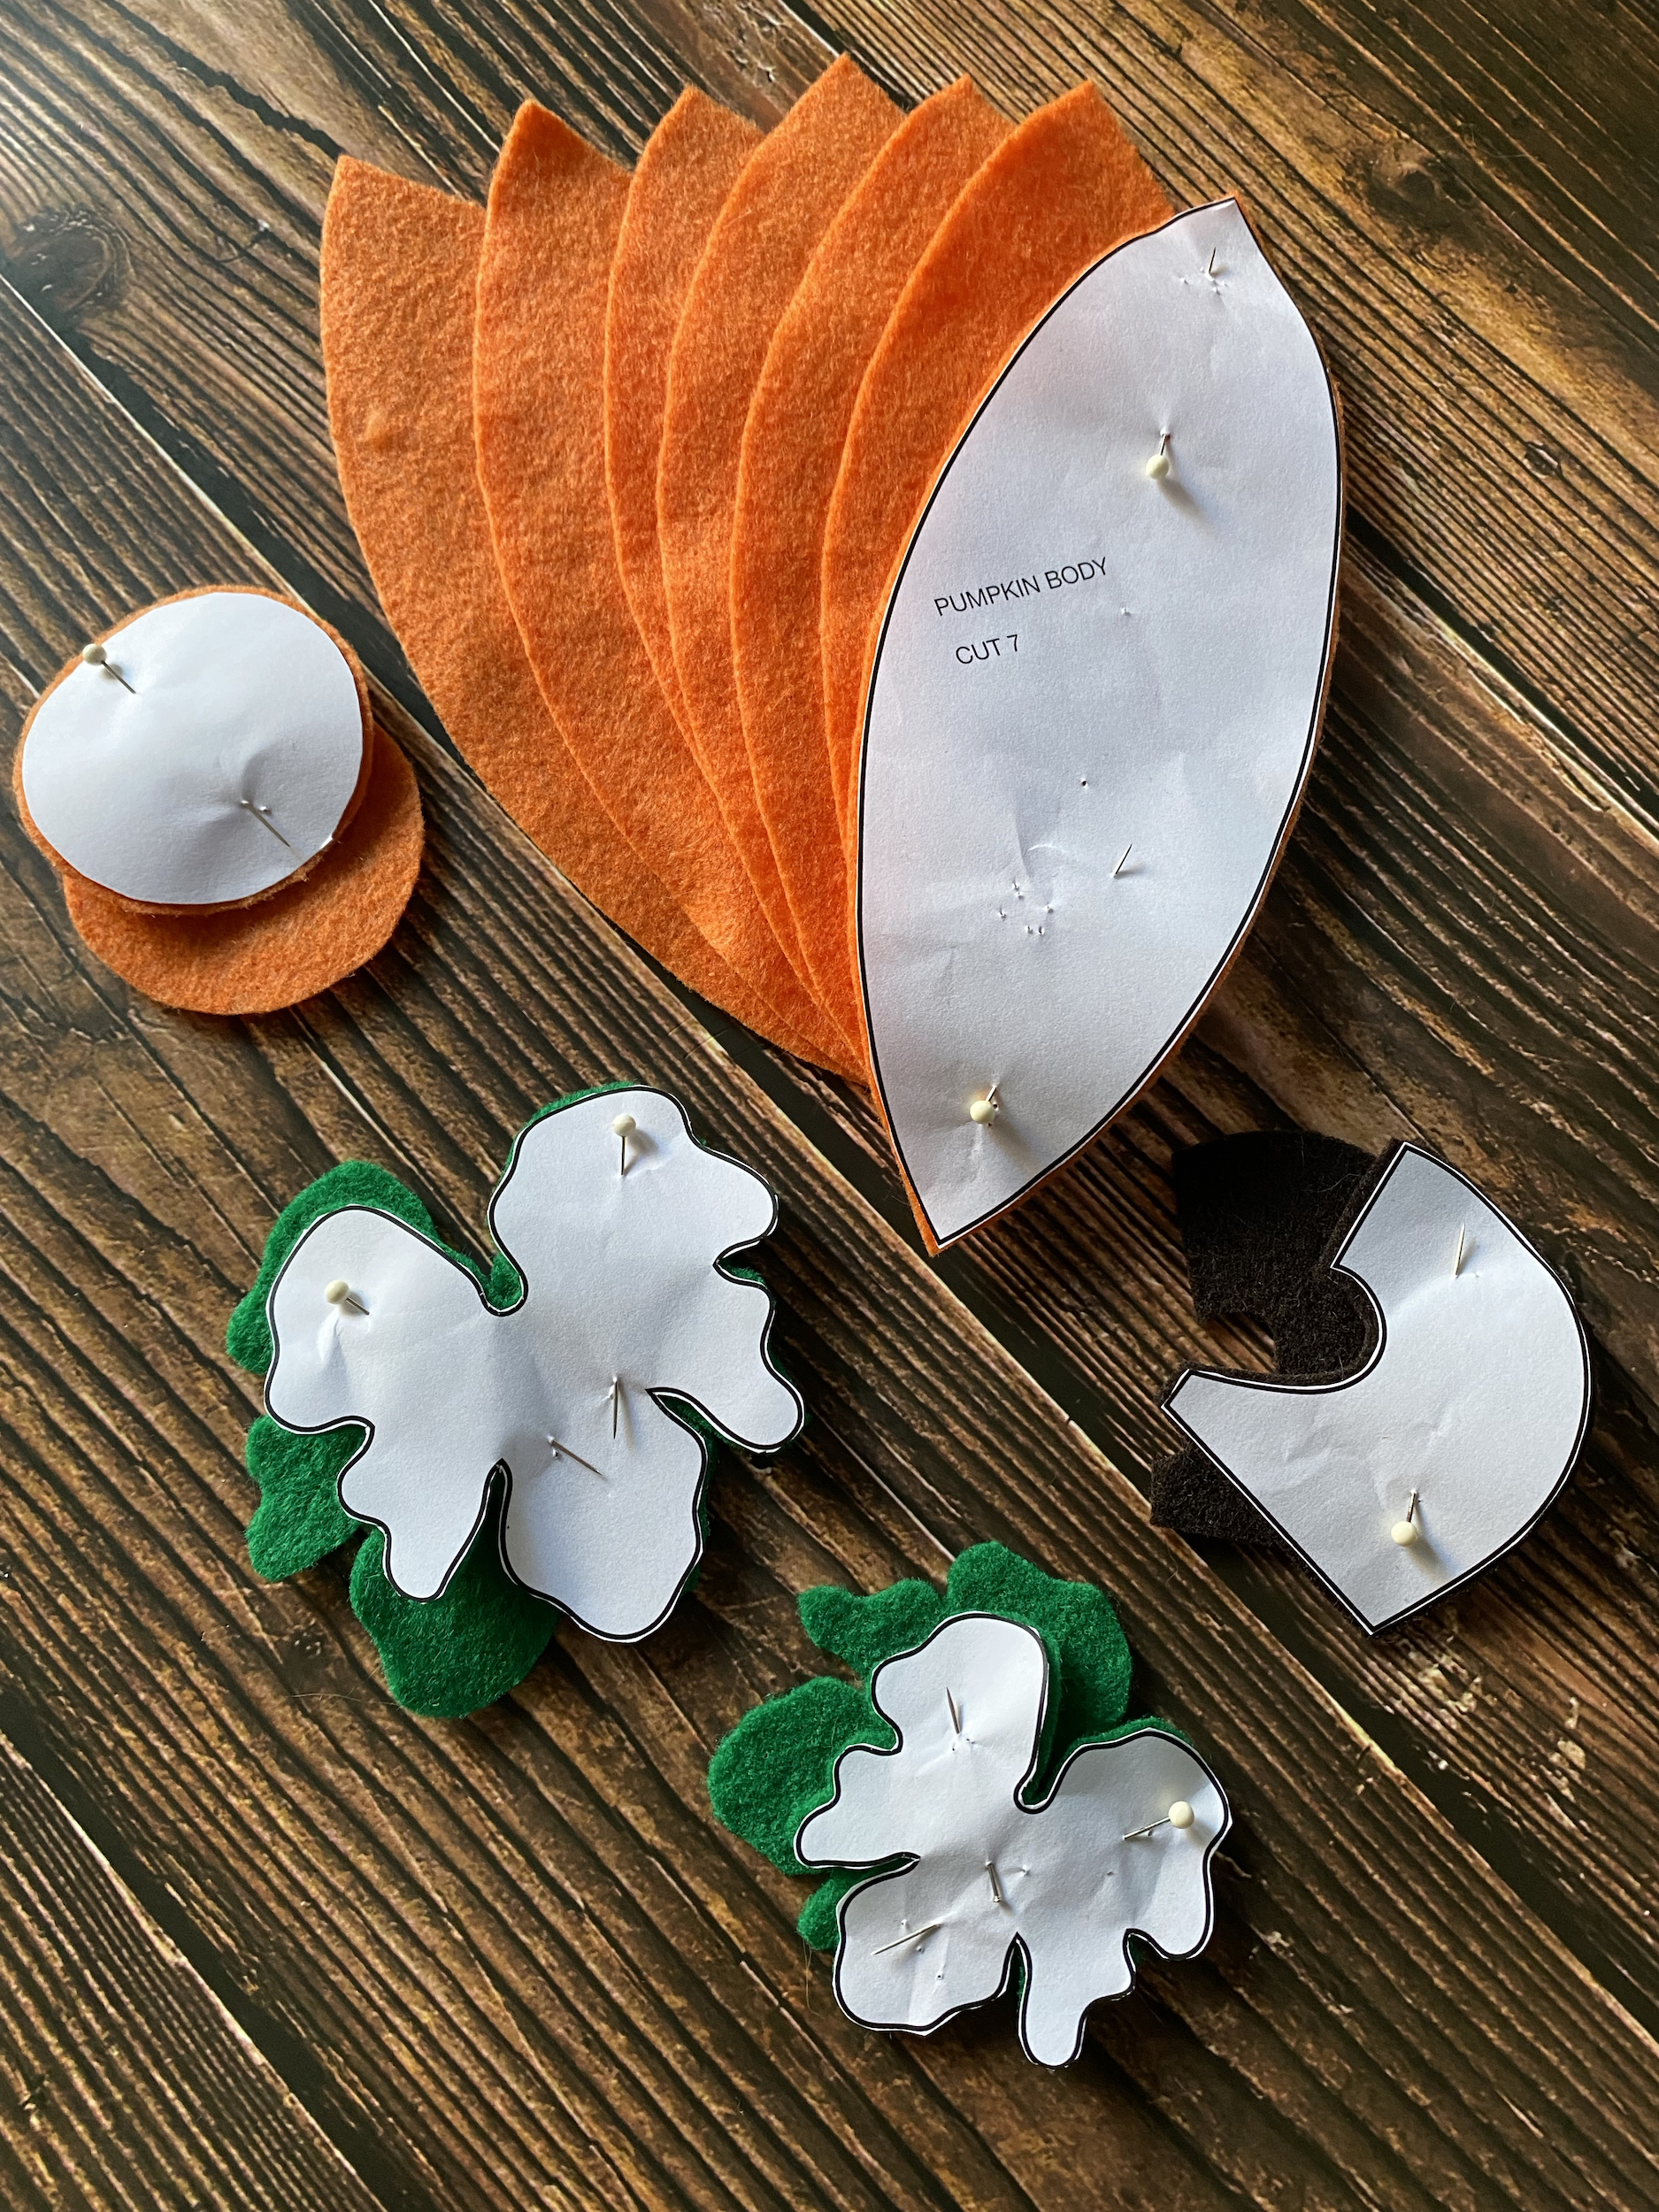

- Print out the pumpkin patterns I’ve provided, then cut the patterns from the paper.
- Pin the patterns on the appropriate colored felt, then use sewing scissors to cut the felt.
- Thread orange embroidery floss onto your sewing needle.
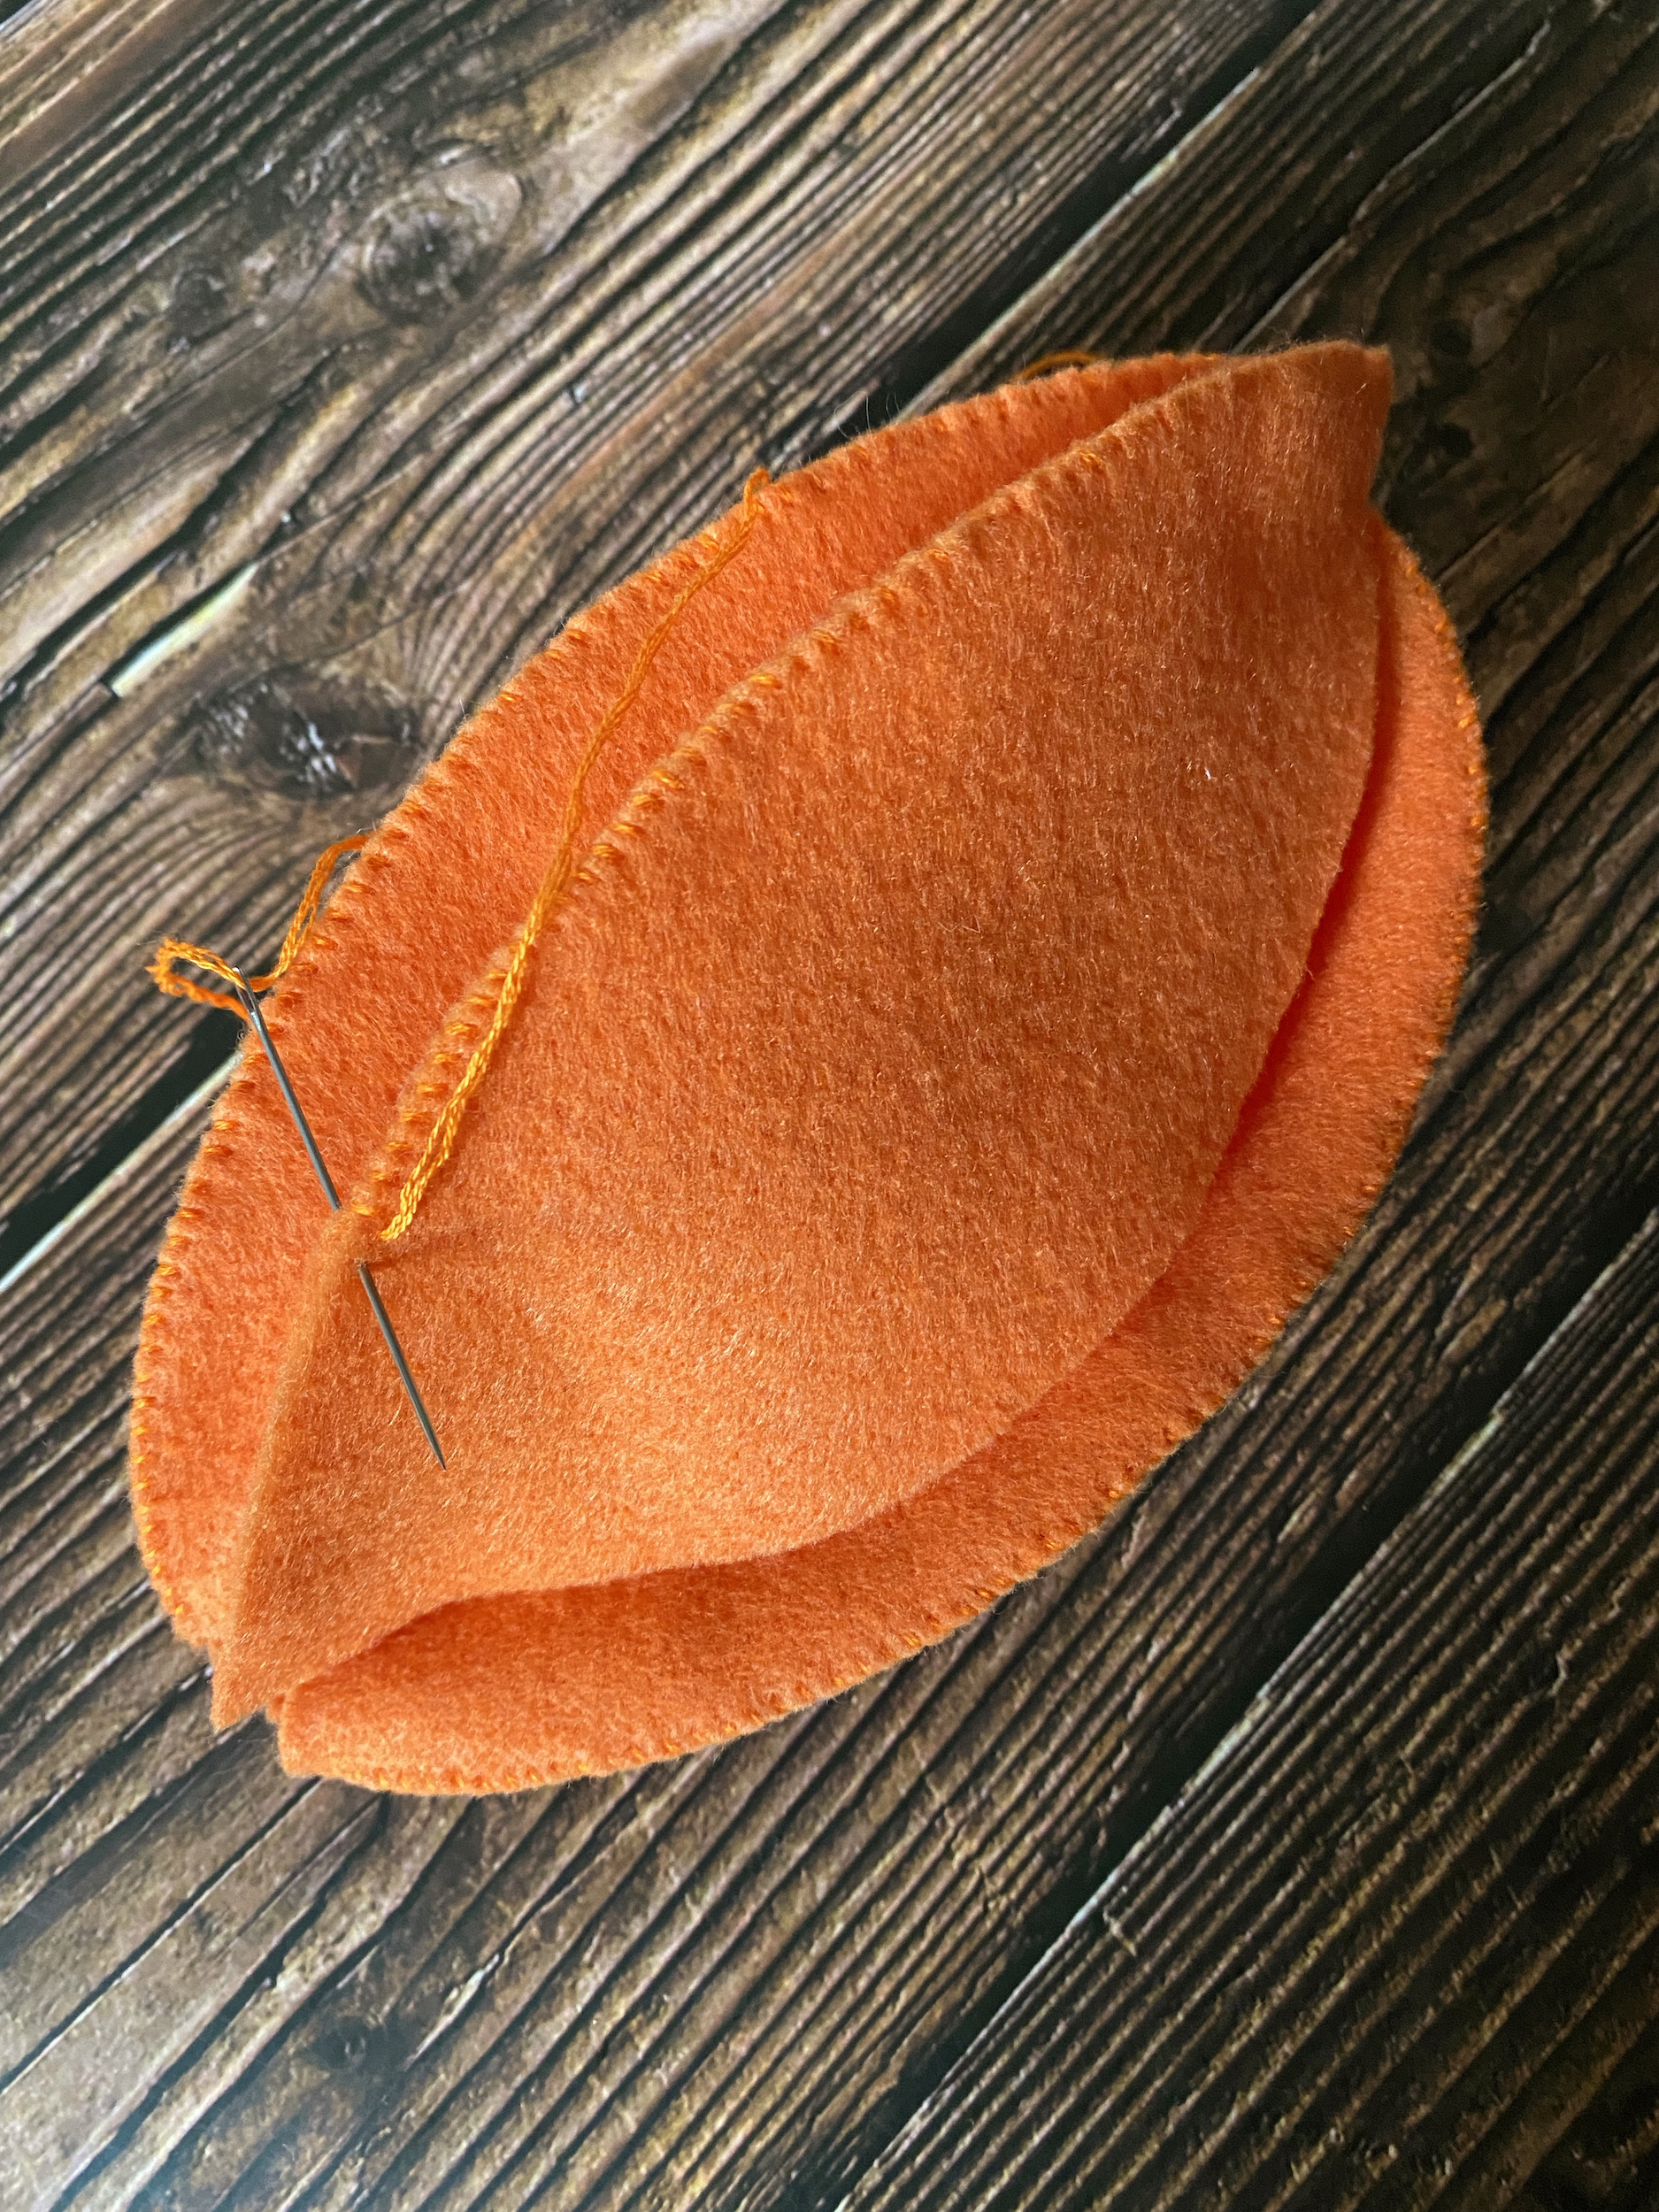
- Align two of the pumpkin pieces and whip stitch along one side, from one point to the next, concealing the first and ending knot underneath so that the stitching will be exposed.
- Repeat step 3 to continue adding pieces of the pumpkin.
- Once you’ve stitched the last piece on, join the two ends together with a whip stitch to complete the pumpkin body.
- Stuff the pumpkin, then place the circles on the top and bottom of the pumpkin and secure them with sewing pins.
- Using a whip stitch, attach the circles to the pumpkin, concealing the first and ending knots underneath. Then remove the sewing pins.
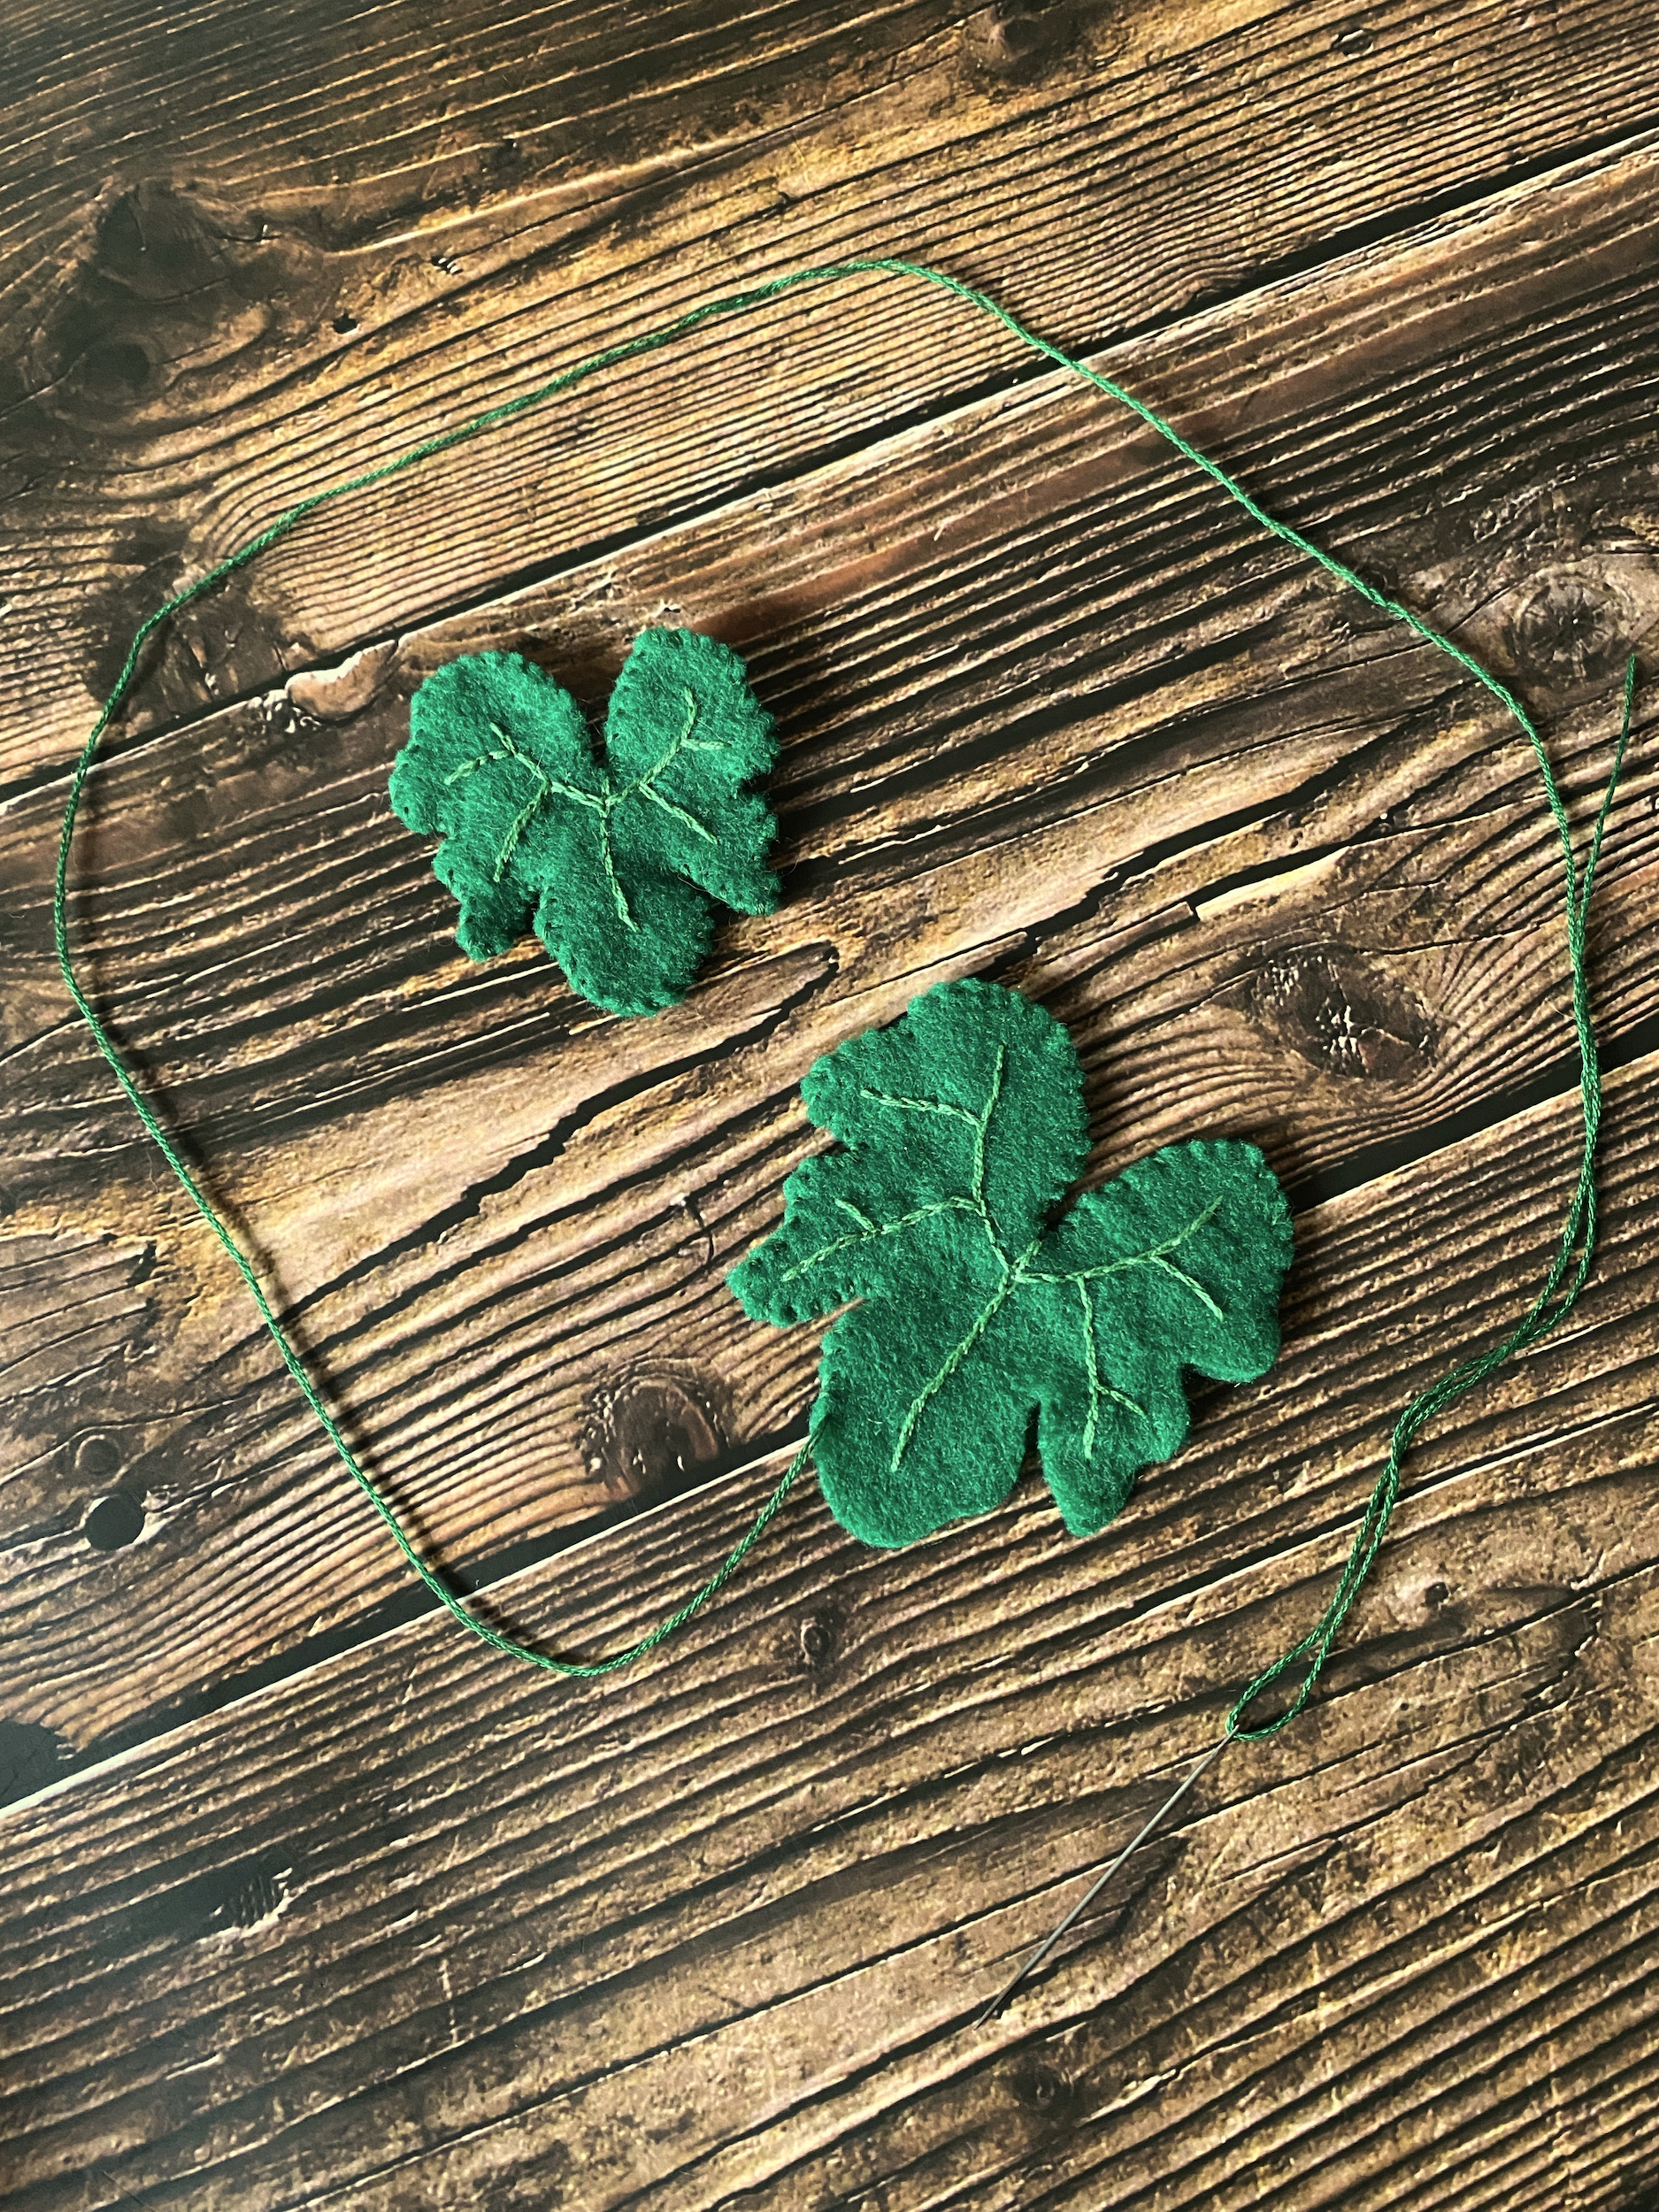
- Thread green embroidery floss on your sewing needle and stitch the veins onto one side of each leaf.
- Once done with the veins, align the two halves of each leaf (concealing the stitching in between) and whipstitch around the edges of the leaves to make them whole.
- Thread brown embroidery floss onto your sewing needle and whipstitch around the outside edges of the stem, leaving the bottom of the stem open. At this point you can leave the stem as it is or turn it around to conceal the stitching.
- Stuff the stem, then place it on top of the pumpkin and secure it with sewing pins.
- Using a whip stitch, attach the stem to the body of the pumpkin.
- Enjoy!


hermoso trabajo. Gracias por compartirnos tus ideas. Está genial! Te felicito!👍🏻🫂
LikeLike