
I wonder why white dish towels are so popular? They are nearly impossible to keep stainless and who wants stained and dirty looking dish towels hanging in the kitchen? Trying something new, I purchased a 5-pack of white flour sack towels and dyed them blue! Let me show you how!

SUPPLIES
- Cotton flour-sack towels
- Plastic table cover
- Paper towels
- Rubber gloves
- Plastic container or stainless steel sink
- Large metal spoon
- 1 teaspoon of dishwashing detergent
- 1 cup of salt
- Rit All-Purpose Dye (liquid)
INSTRUCTIONS


- To remove any finishes that may interfere with dye absorption, pre-wash the flour sack towels in warm, soapy water without any fabric softener.
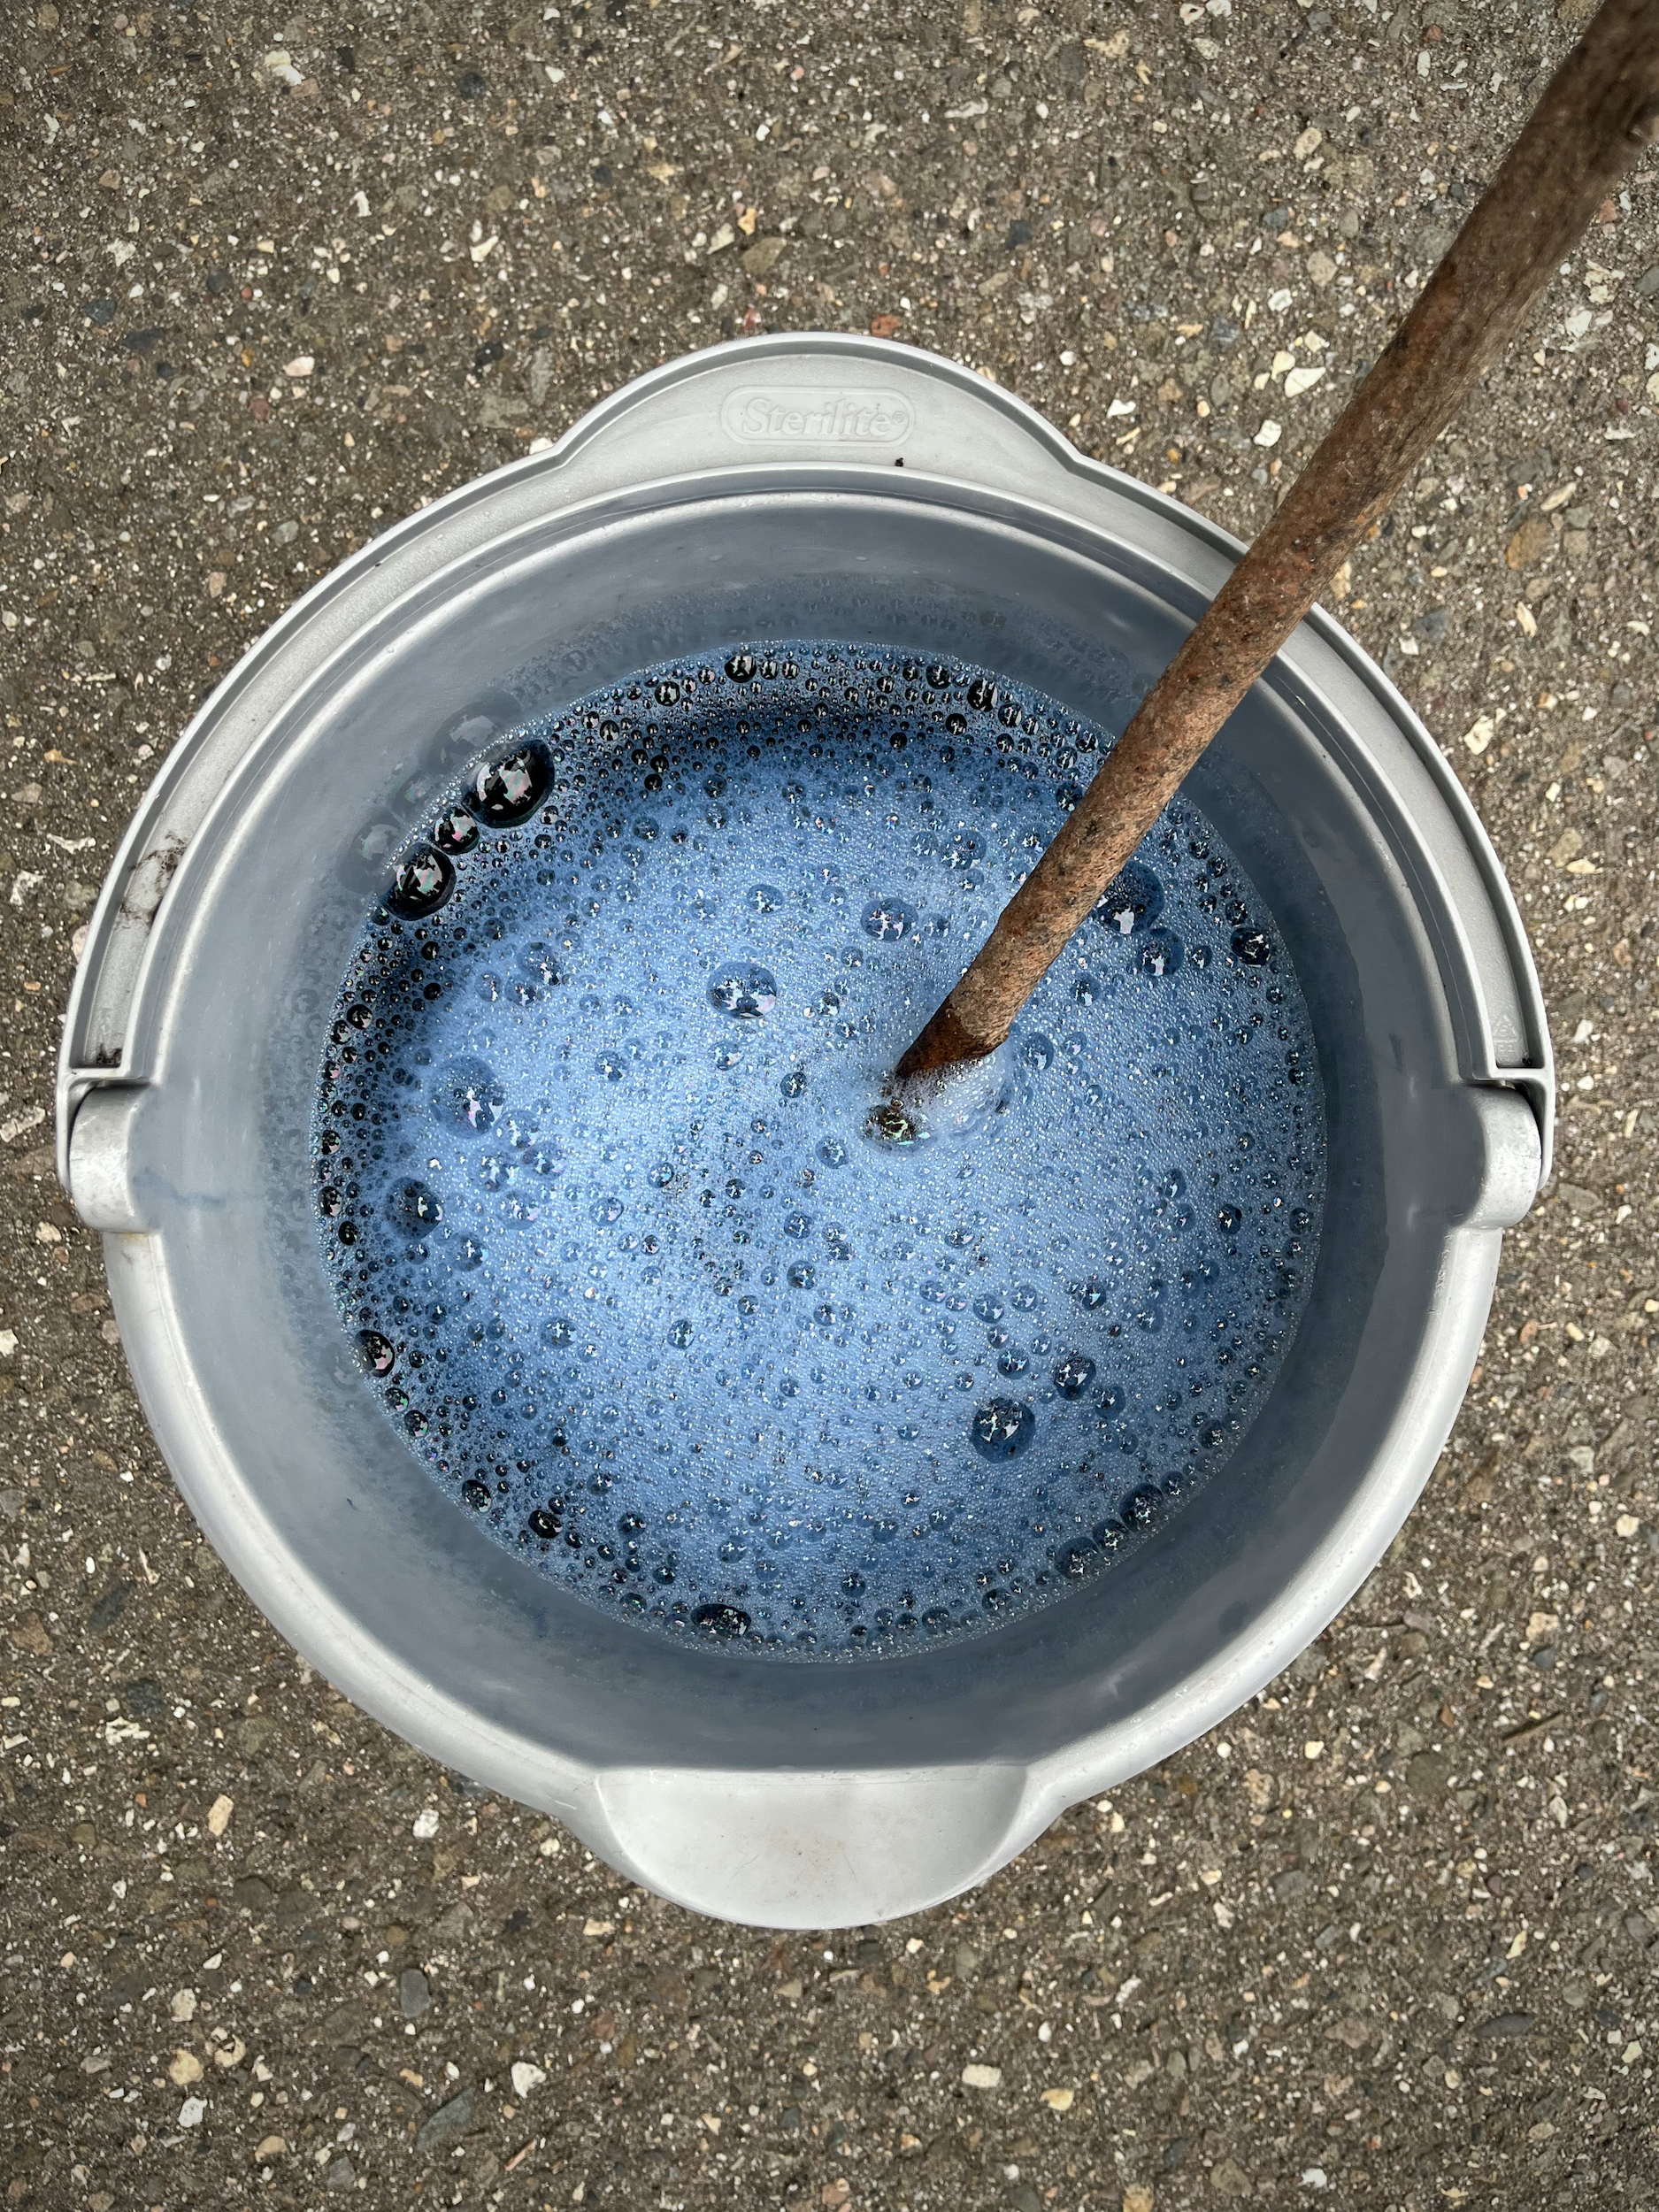
- Prepare your workspace. If you do not have an asphalt driveway to work on like myself, cover your workspace with plastic table cover and have paper towels handy to protect against any possible spills.
- To protect your hands from hot water and staining, please wear rubber gloves.
- Fill a plastic container or stainless steel sink with enough water for the fabric to move freely when stirred. This water should ideally be 140°F. My tap did not get hot enough, so I used an electric kettle to heat the water and it worked out well!
- To enhance the color in cotton: add 1 cup of salt and 1 teaspoon of dish detergent.
- Shake the liquid dye well and add it to the dye-bath.
- Test the color by dipping a paper towel into the dye-bath. If color is too light, add more dye. If color is too dark, add more water. I used the whole 8 oz. bottle of dye in a plastic bucket filled 2/3 of the way full with water.
- Wet the towels, squeeze out any excess water, and add them to the dye-bath.
- The first 10 minutes are the most critical, stir slowly and continuously to ensure an even color.
- The towels can remain in the dye-bath from 10 minutes up to one hour with stirring. I left mine in for about 45 minutes.
- When the desired color is achieved, remove the towels from the dye-bath. Keep in mind that the fabric will look darker when wet and will dry lighter.
- Rinse the towels in cool water until the water begins to run clear.
- Wash them in warm water with a mild detergent, rinse and dry.
- Enjoy!