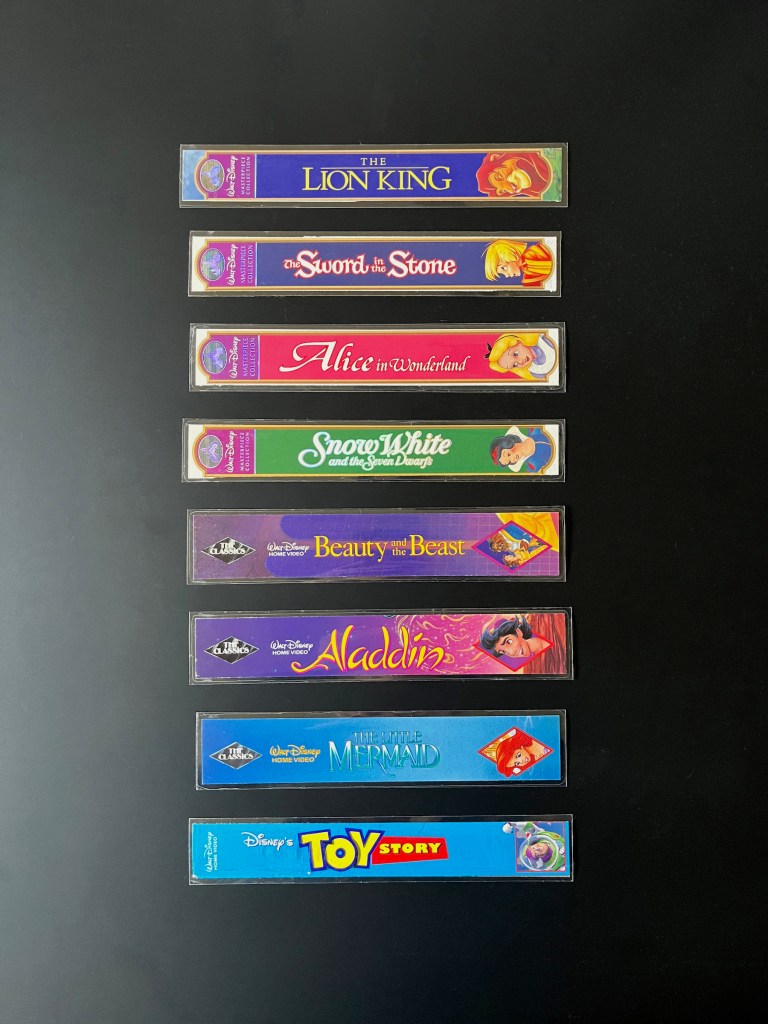
Welcome back friends! Do you still have a VCR? Not many people have VCRs anymore. We do, although we don’t really use it anymore.
If you don’t have a VCR anymore, what should you do with all your old VHS, including all those Disney films you grew up with? You could collect them, donate them, or recycle them. But wait! If you decide to recycle them, let’s remove the spines and use them to create bookmarks!
I’ve also used the beautiful Disney cover art to make drink coasters you can find here!
Let’s get started!

SUPPLIES
- Disney VHS cover art
- Guillotine paper trimmer
- Plastic ruler
- Self adhesive clear laminating sheets

INSTRUCTIONS
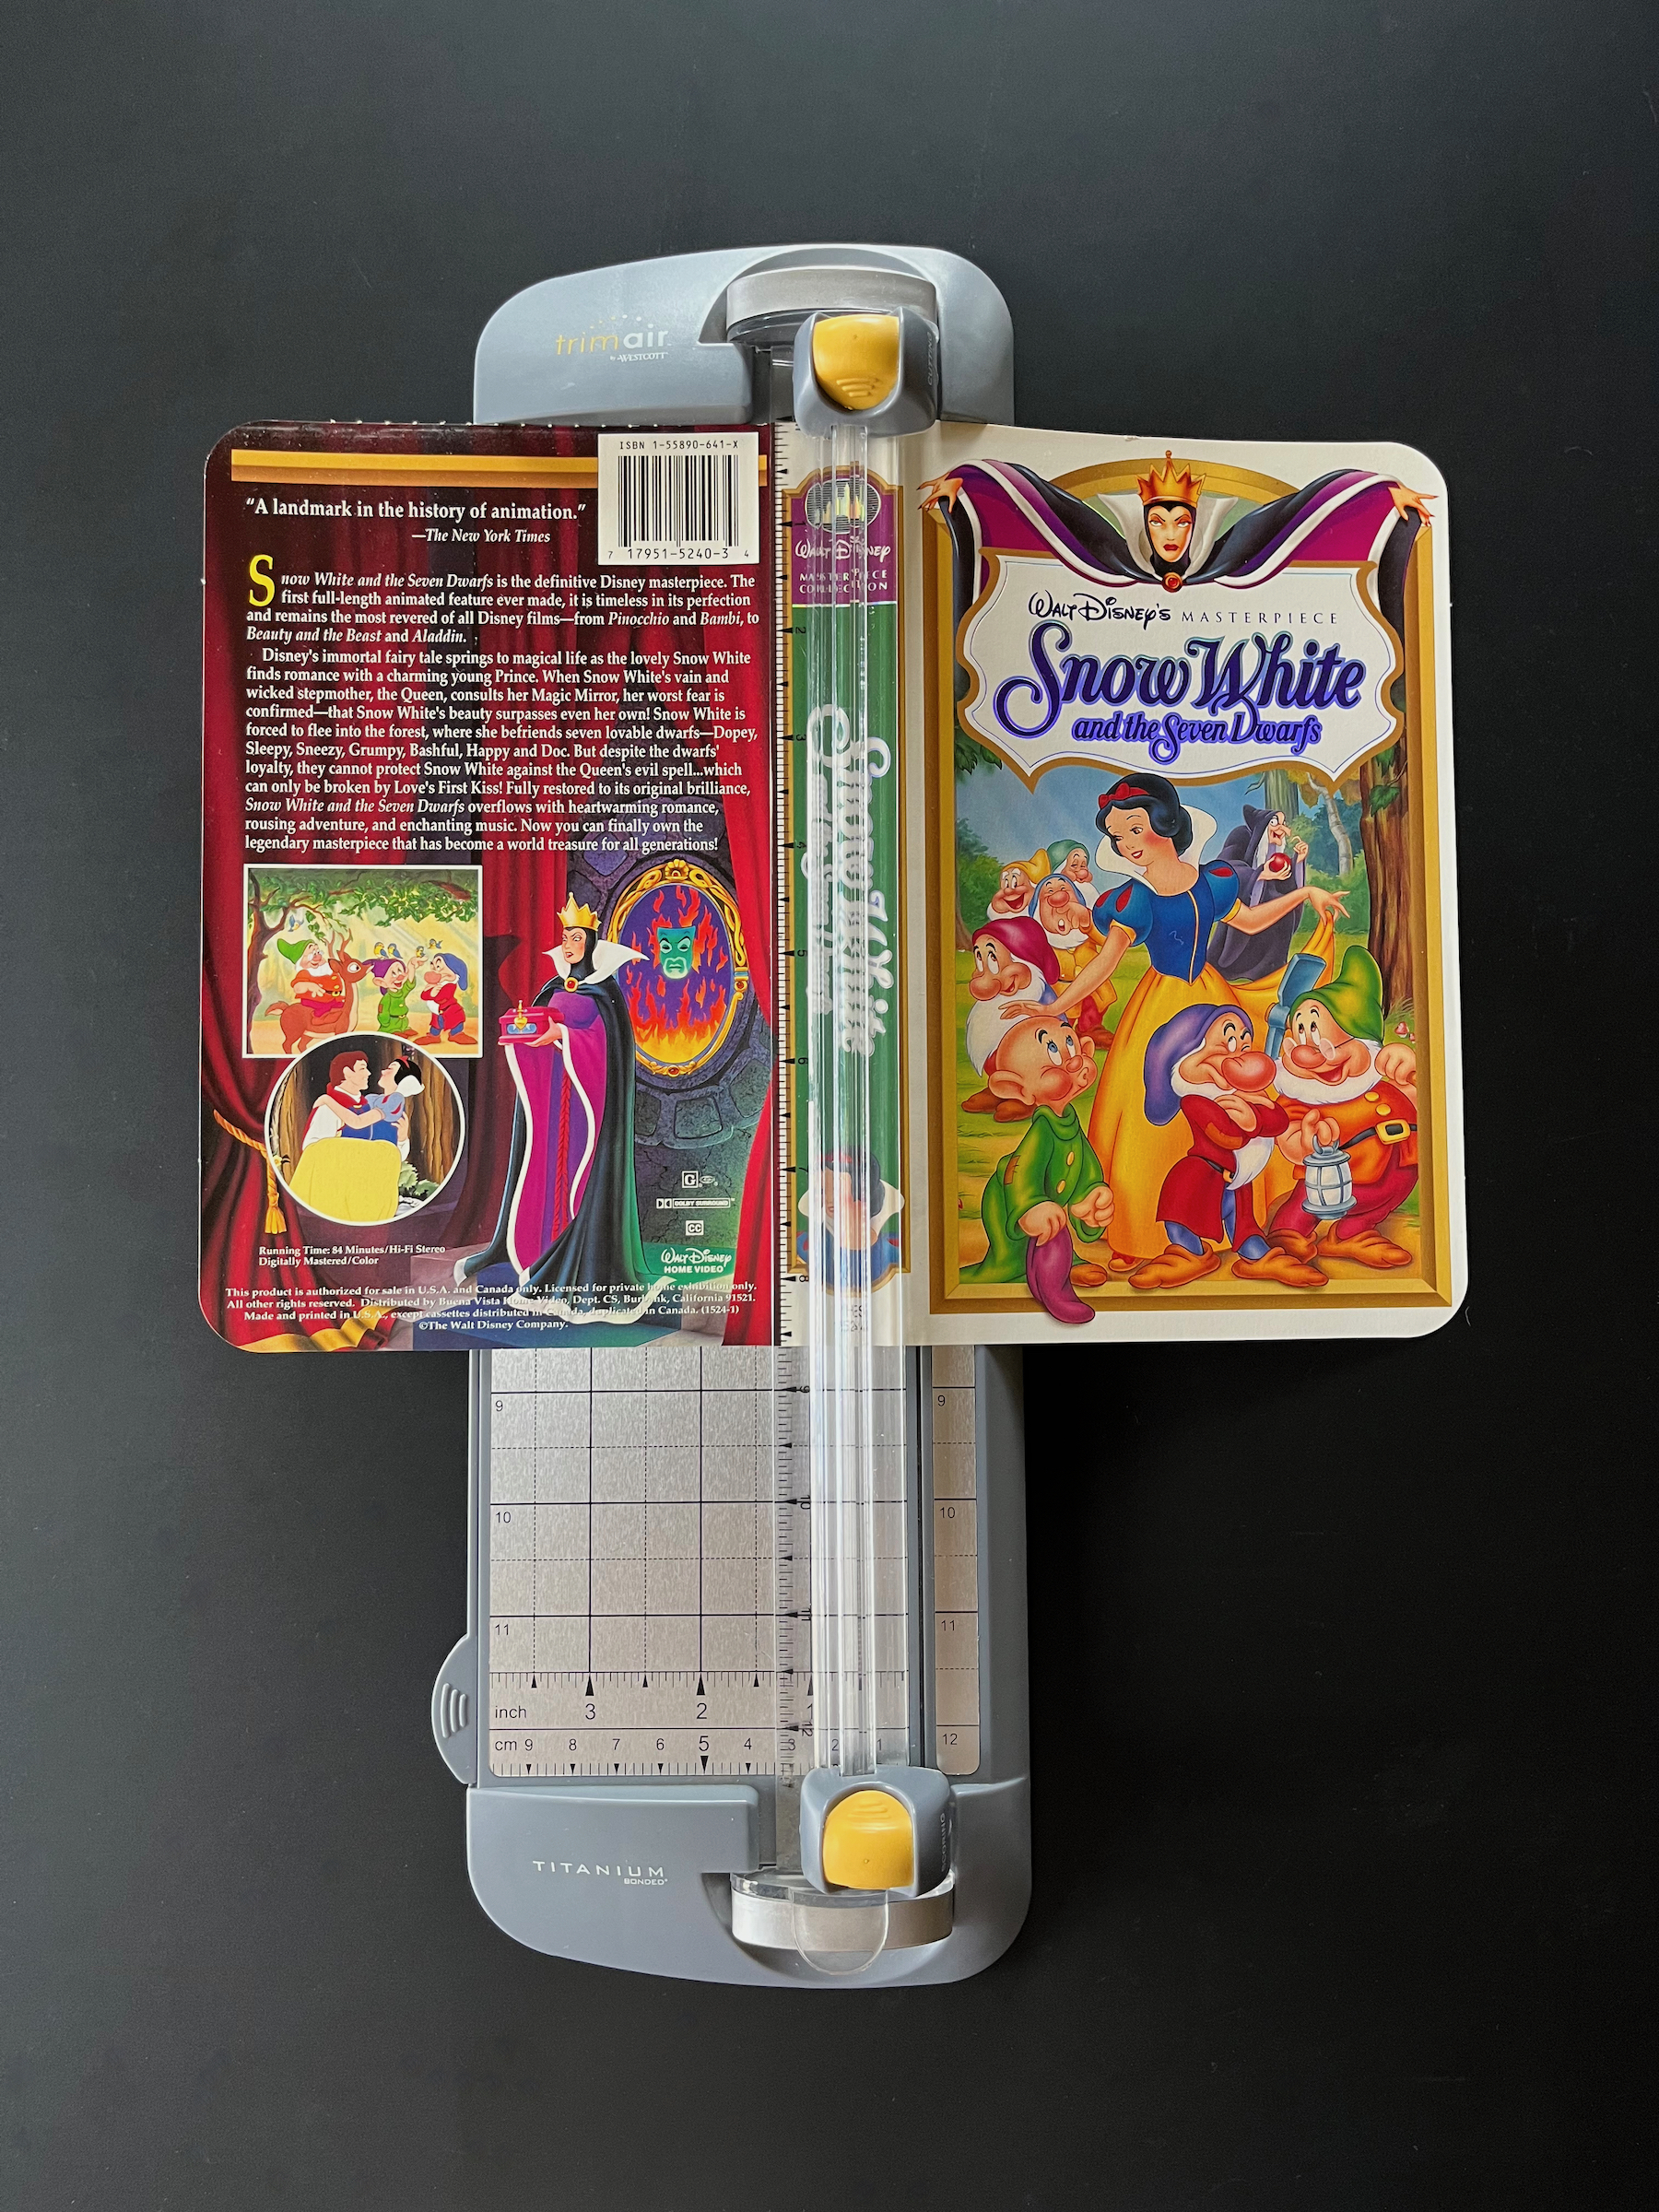
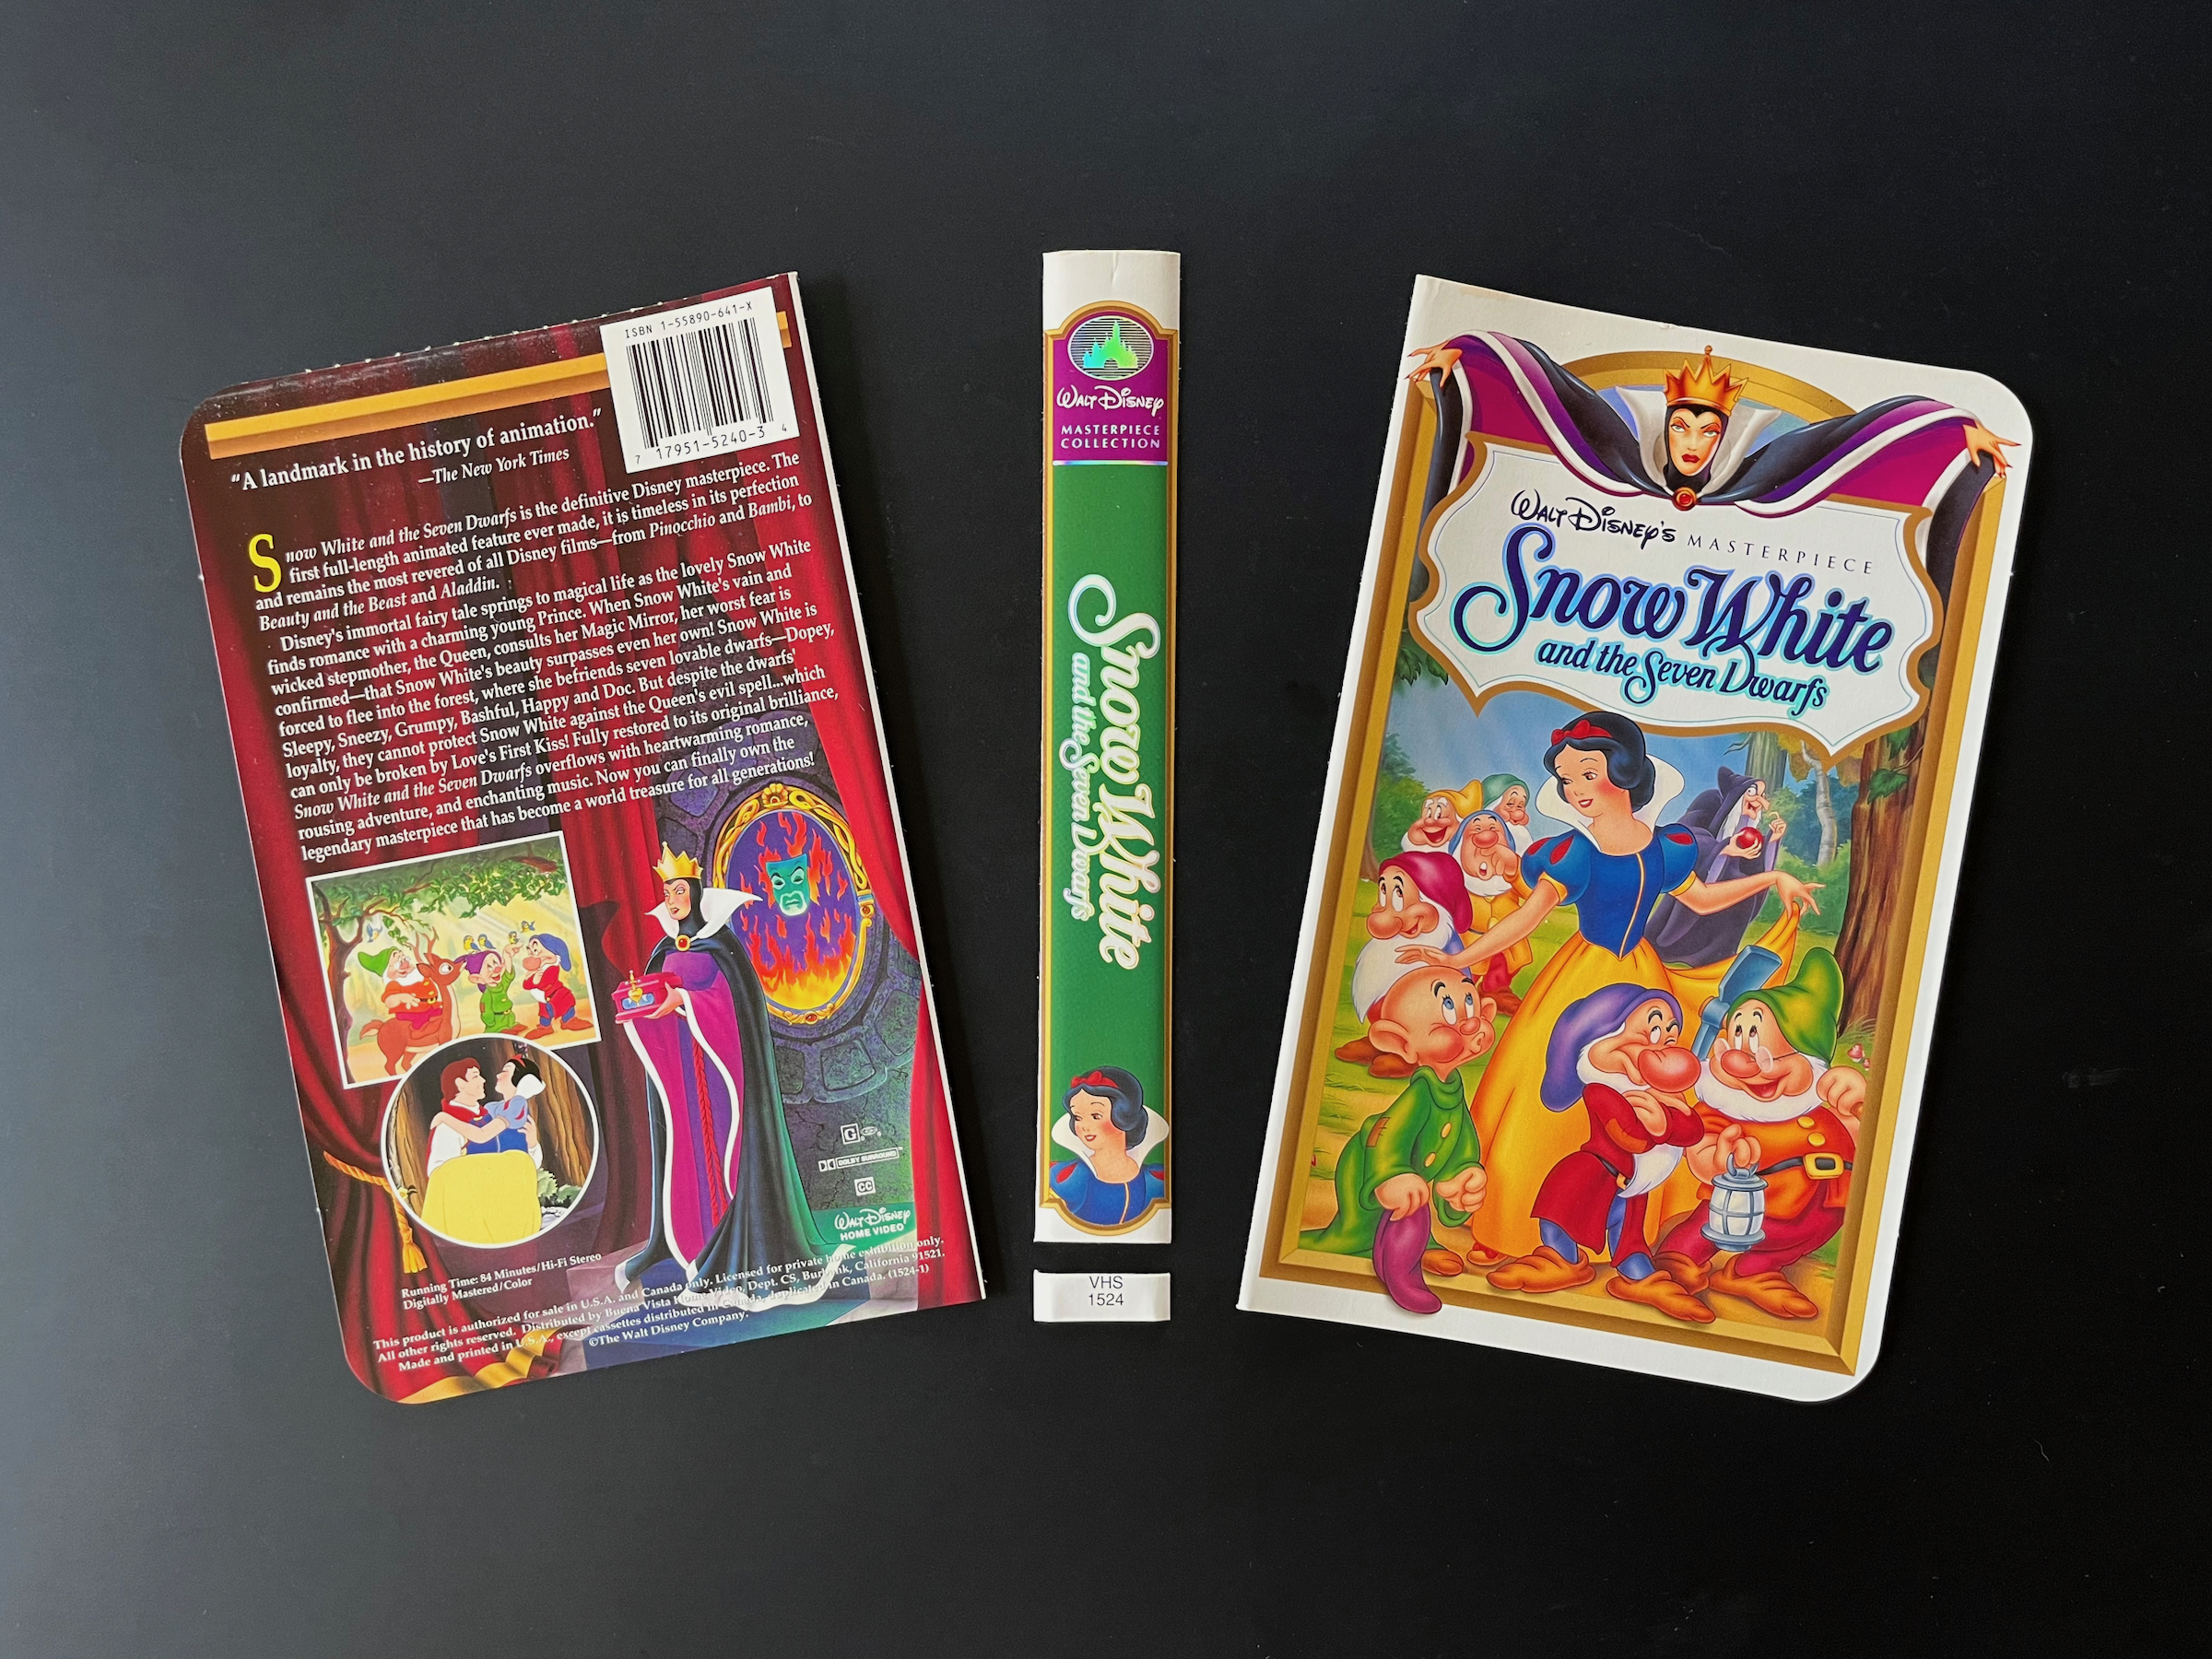
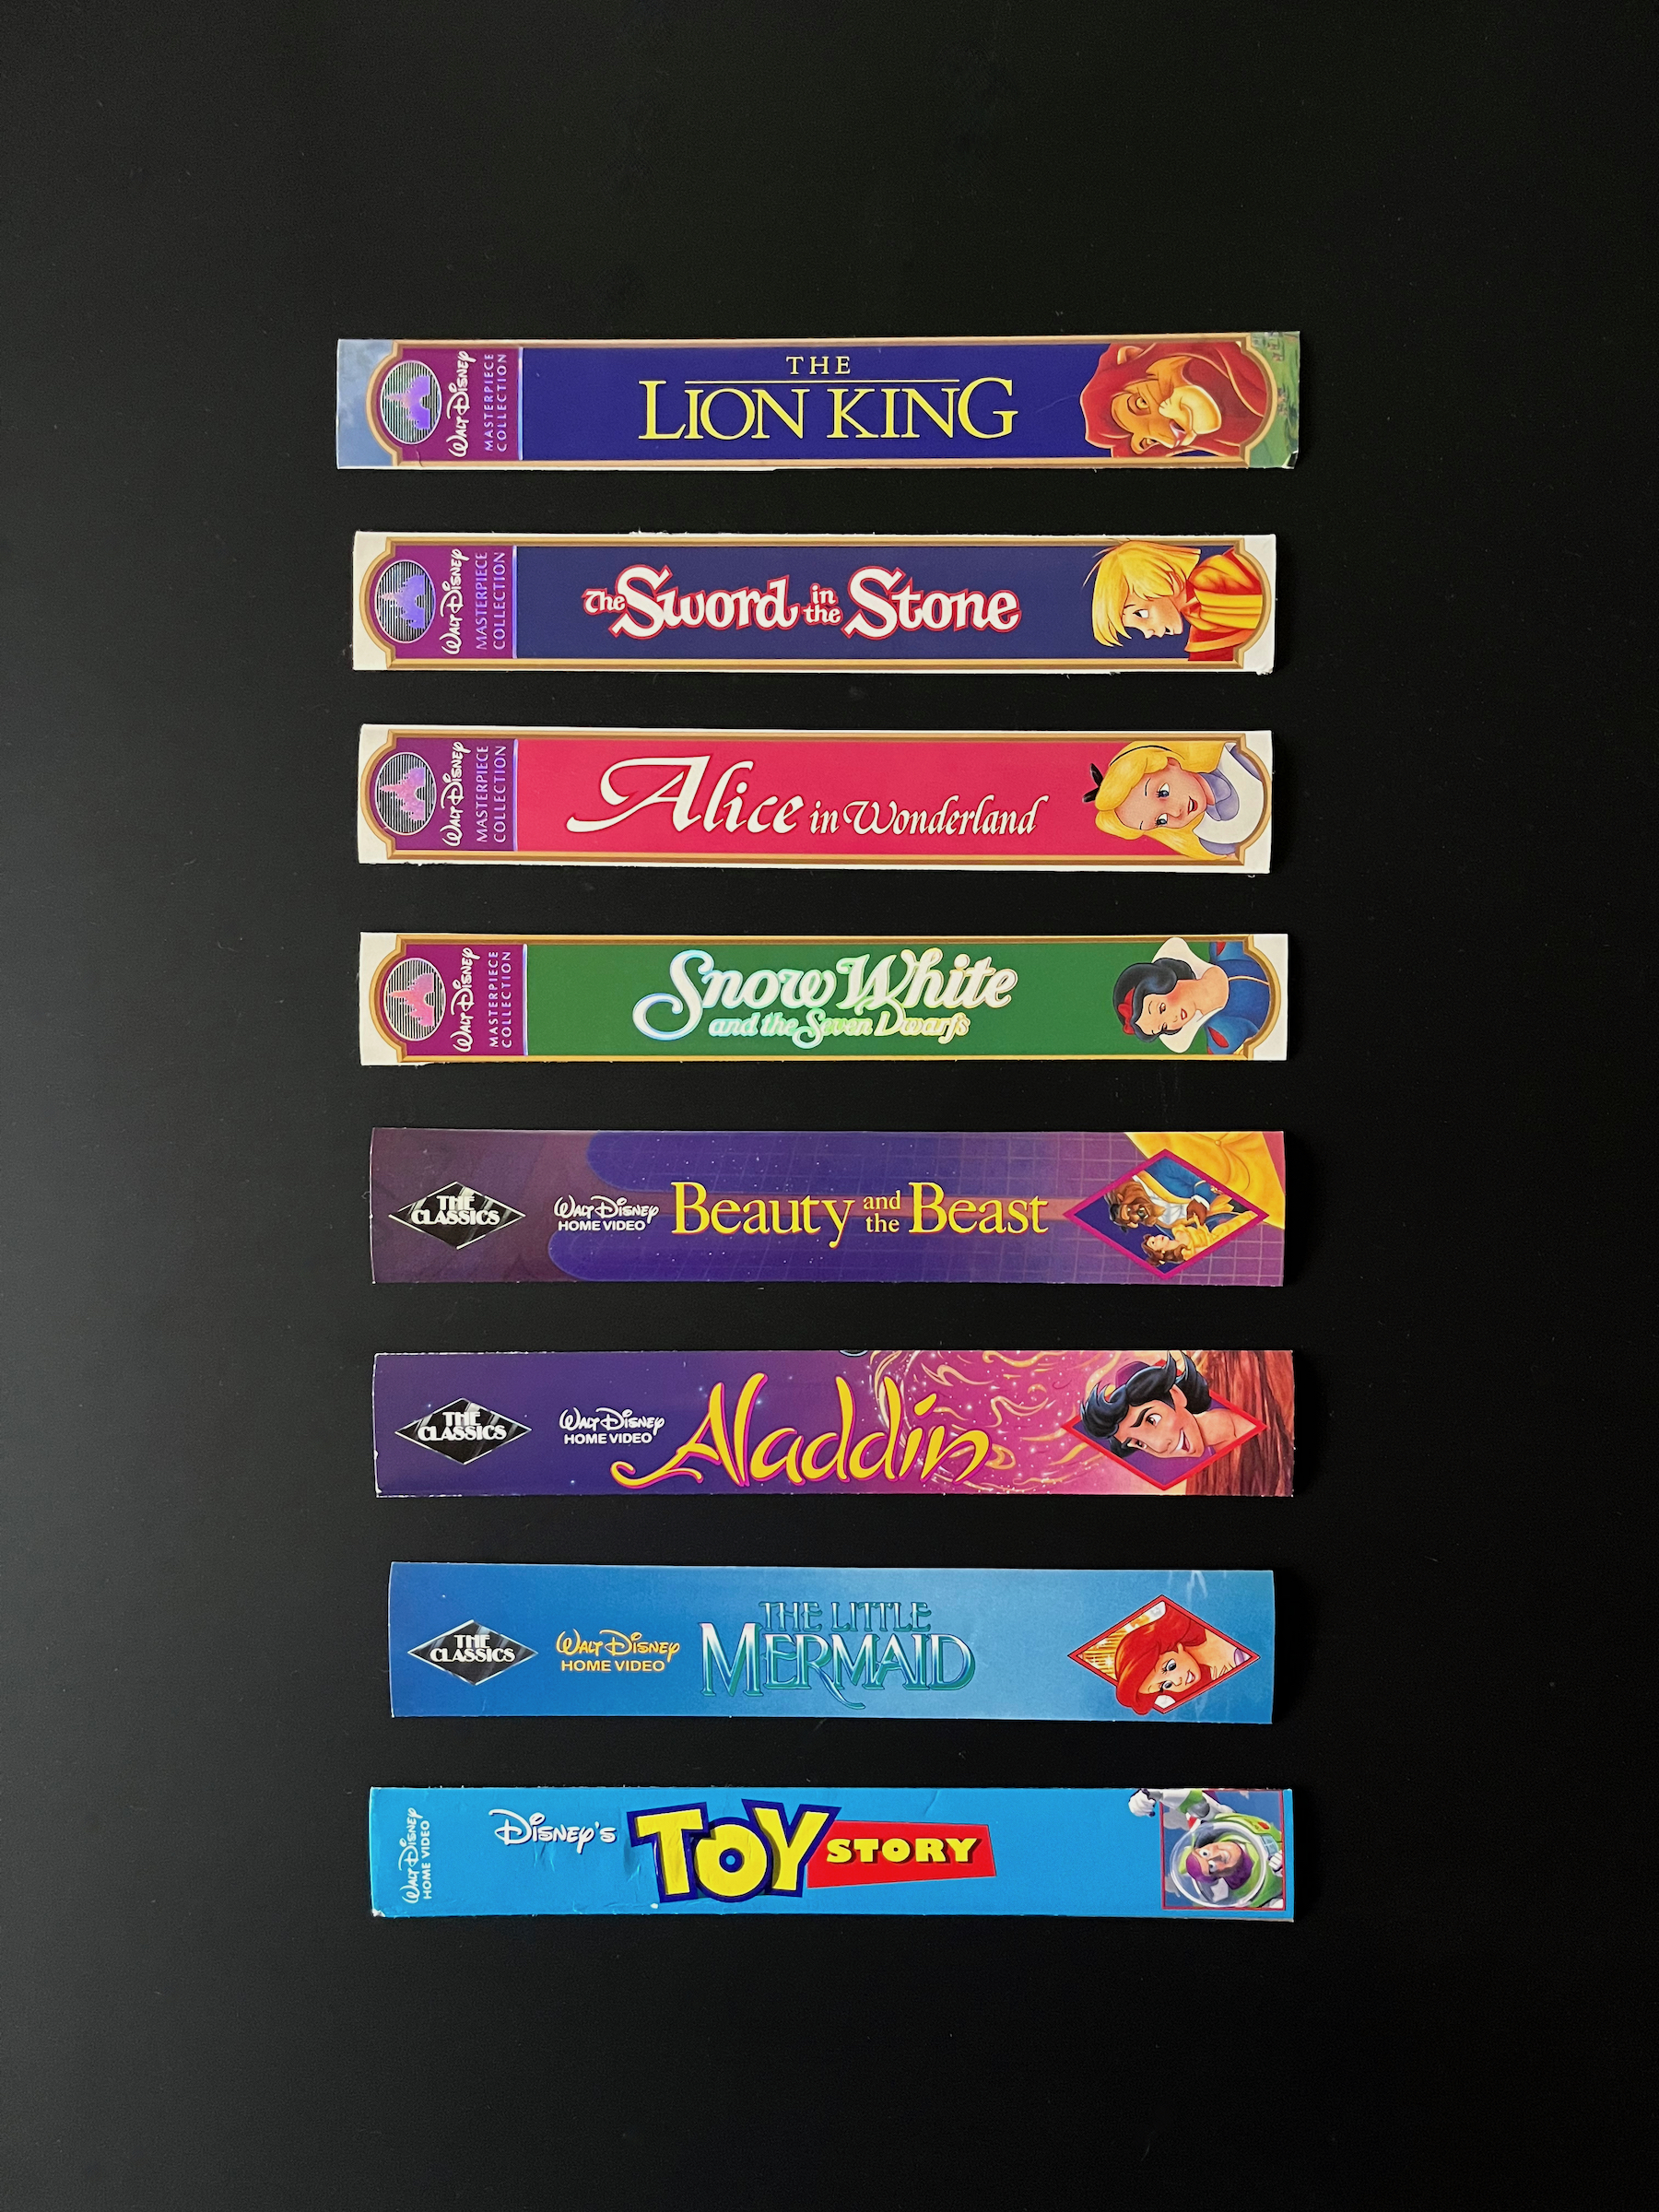
- Remove the cover art from the VHS cases.
- Use a guillotine paper trimmer to cut the spine from the cover art in straight, smooth edges
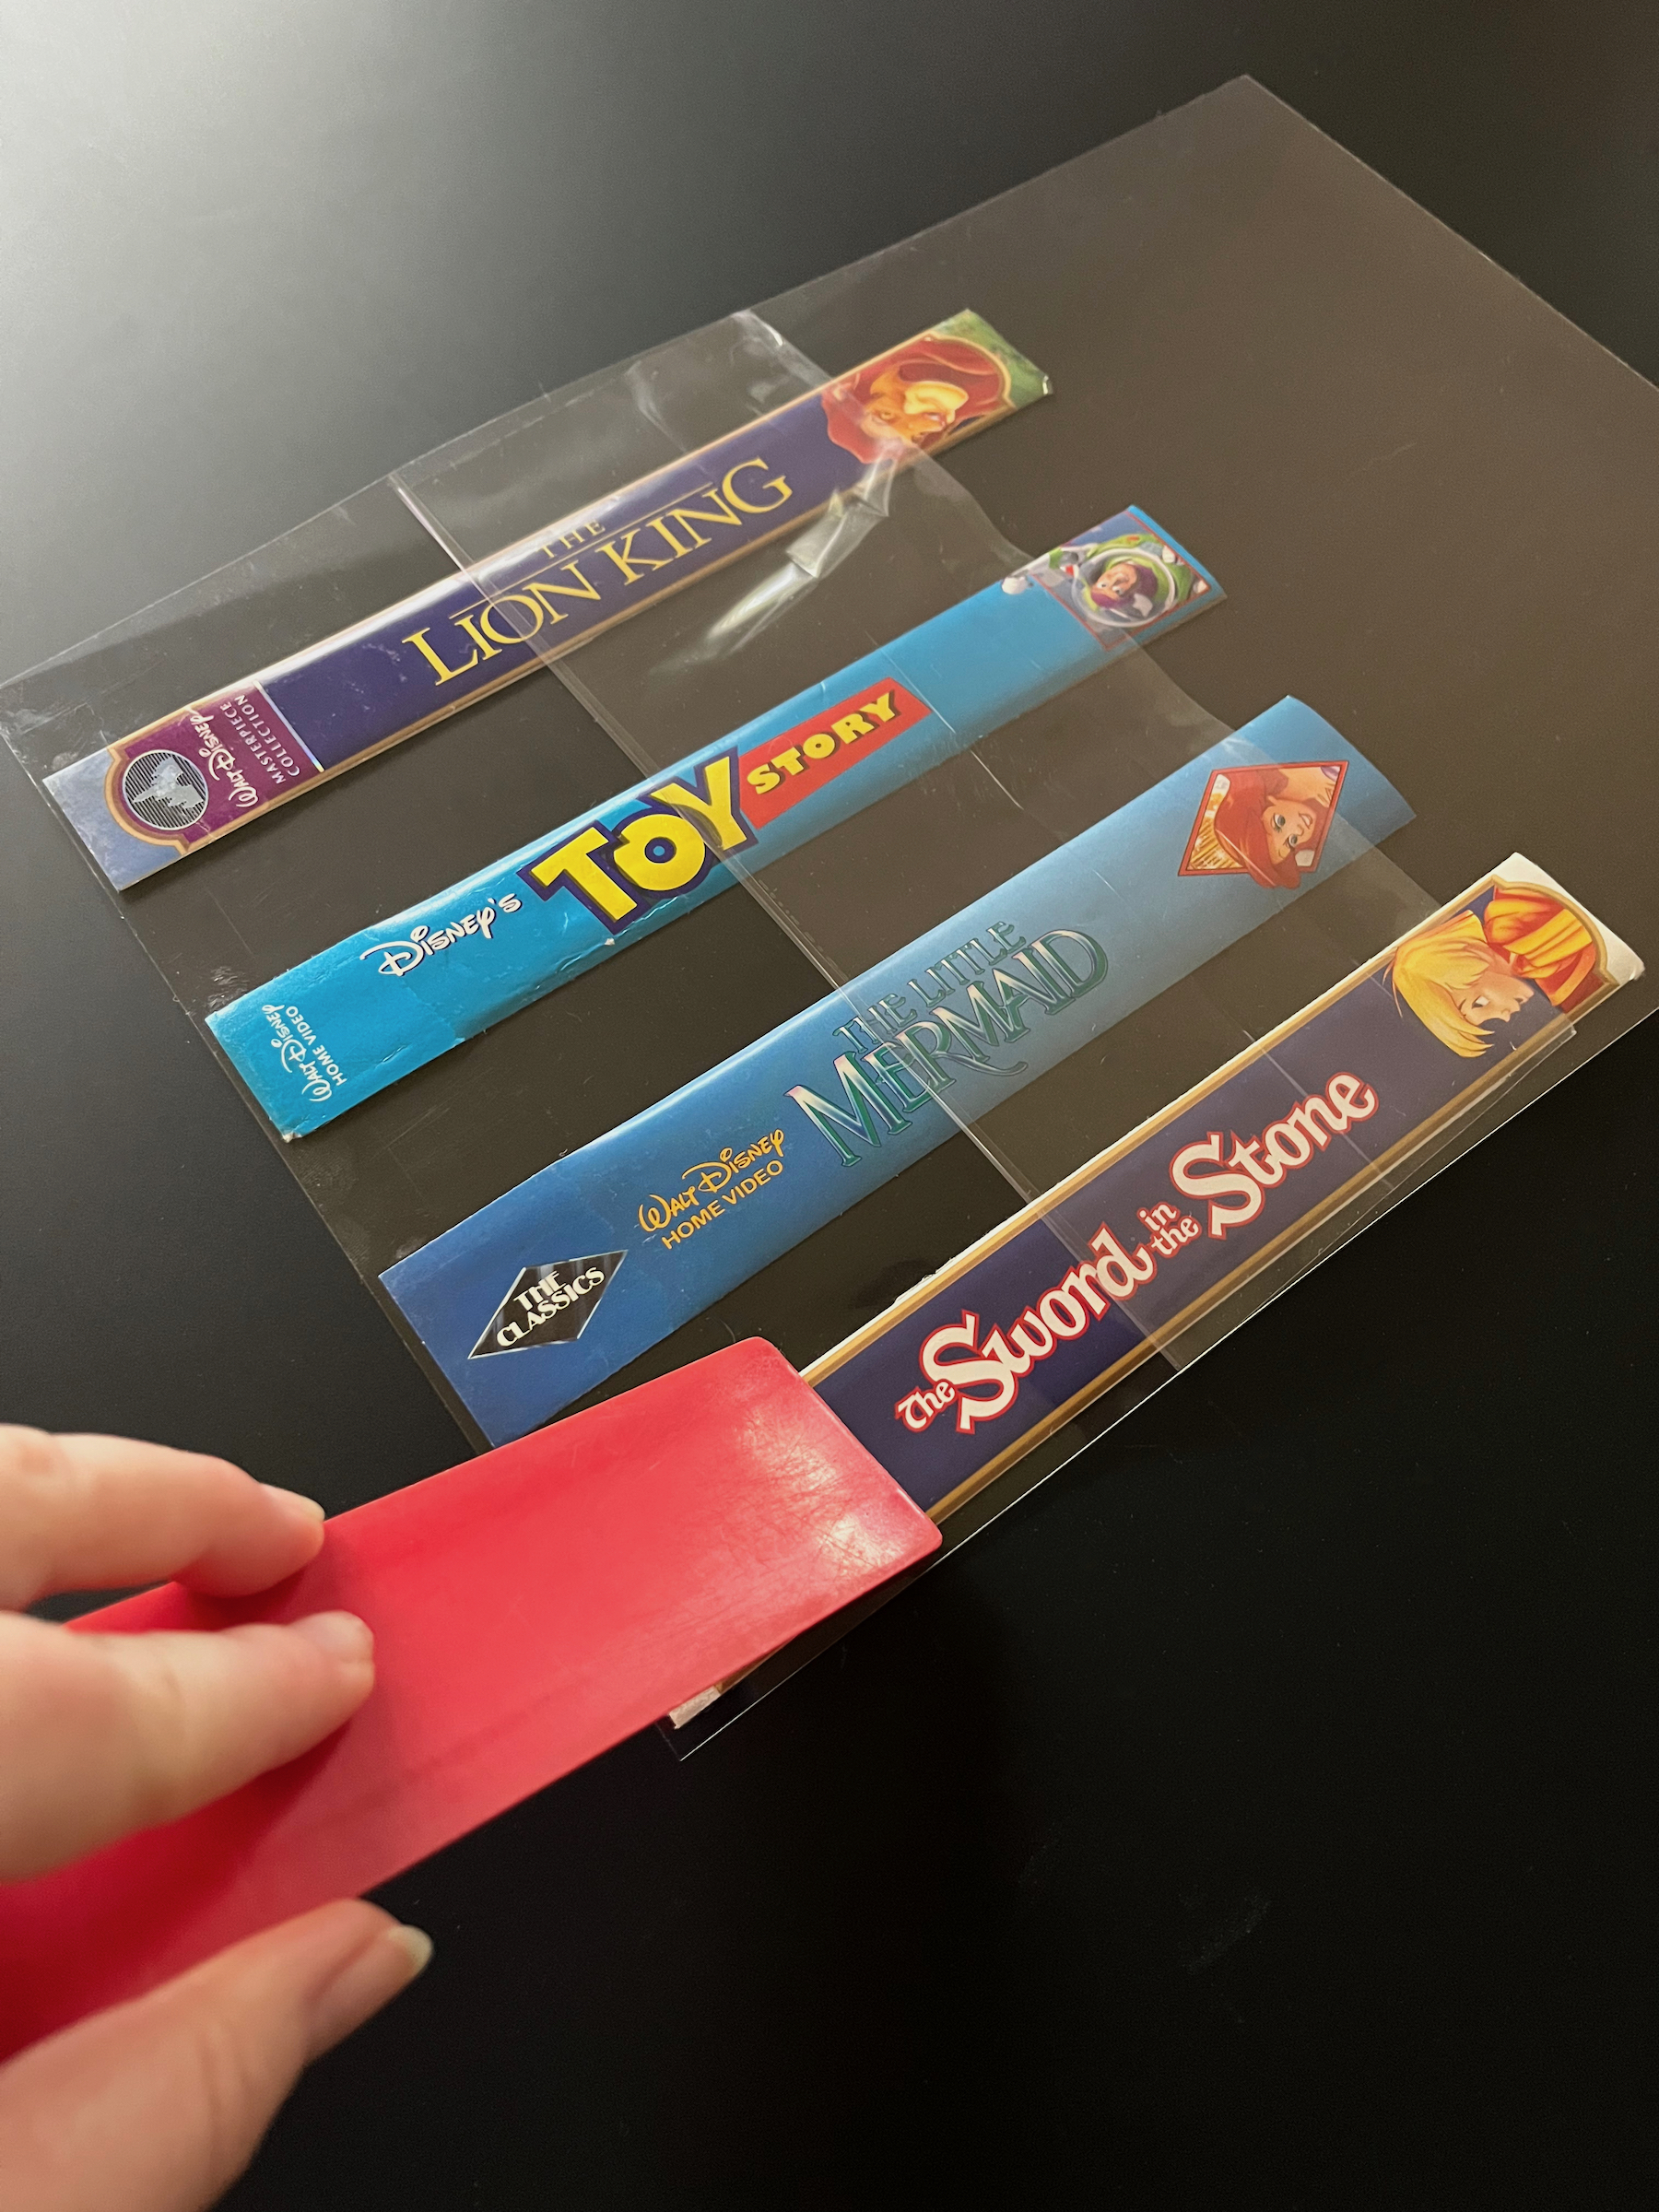
- Make sure the spines and surface you’ll be working on are clean and free of lint, then place a laminate page on your working surface with the adhesive side face-up.
- Peel back about an inch and a half of the release liner and place the spines (artwork side down) on the adhesive, leaving about a half inch above the spine for sealing and trimming.
- Turn the laminate page over and use a plastic ruler to smooth the laminate onto the artwork, removing any air bubbles.
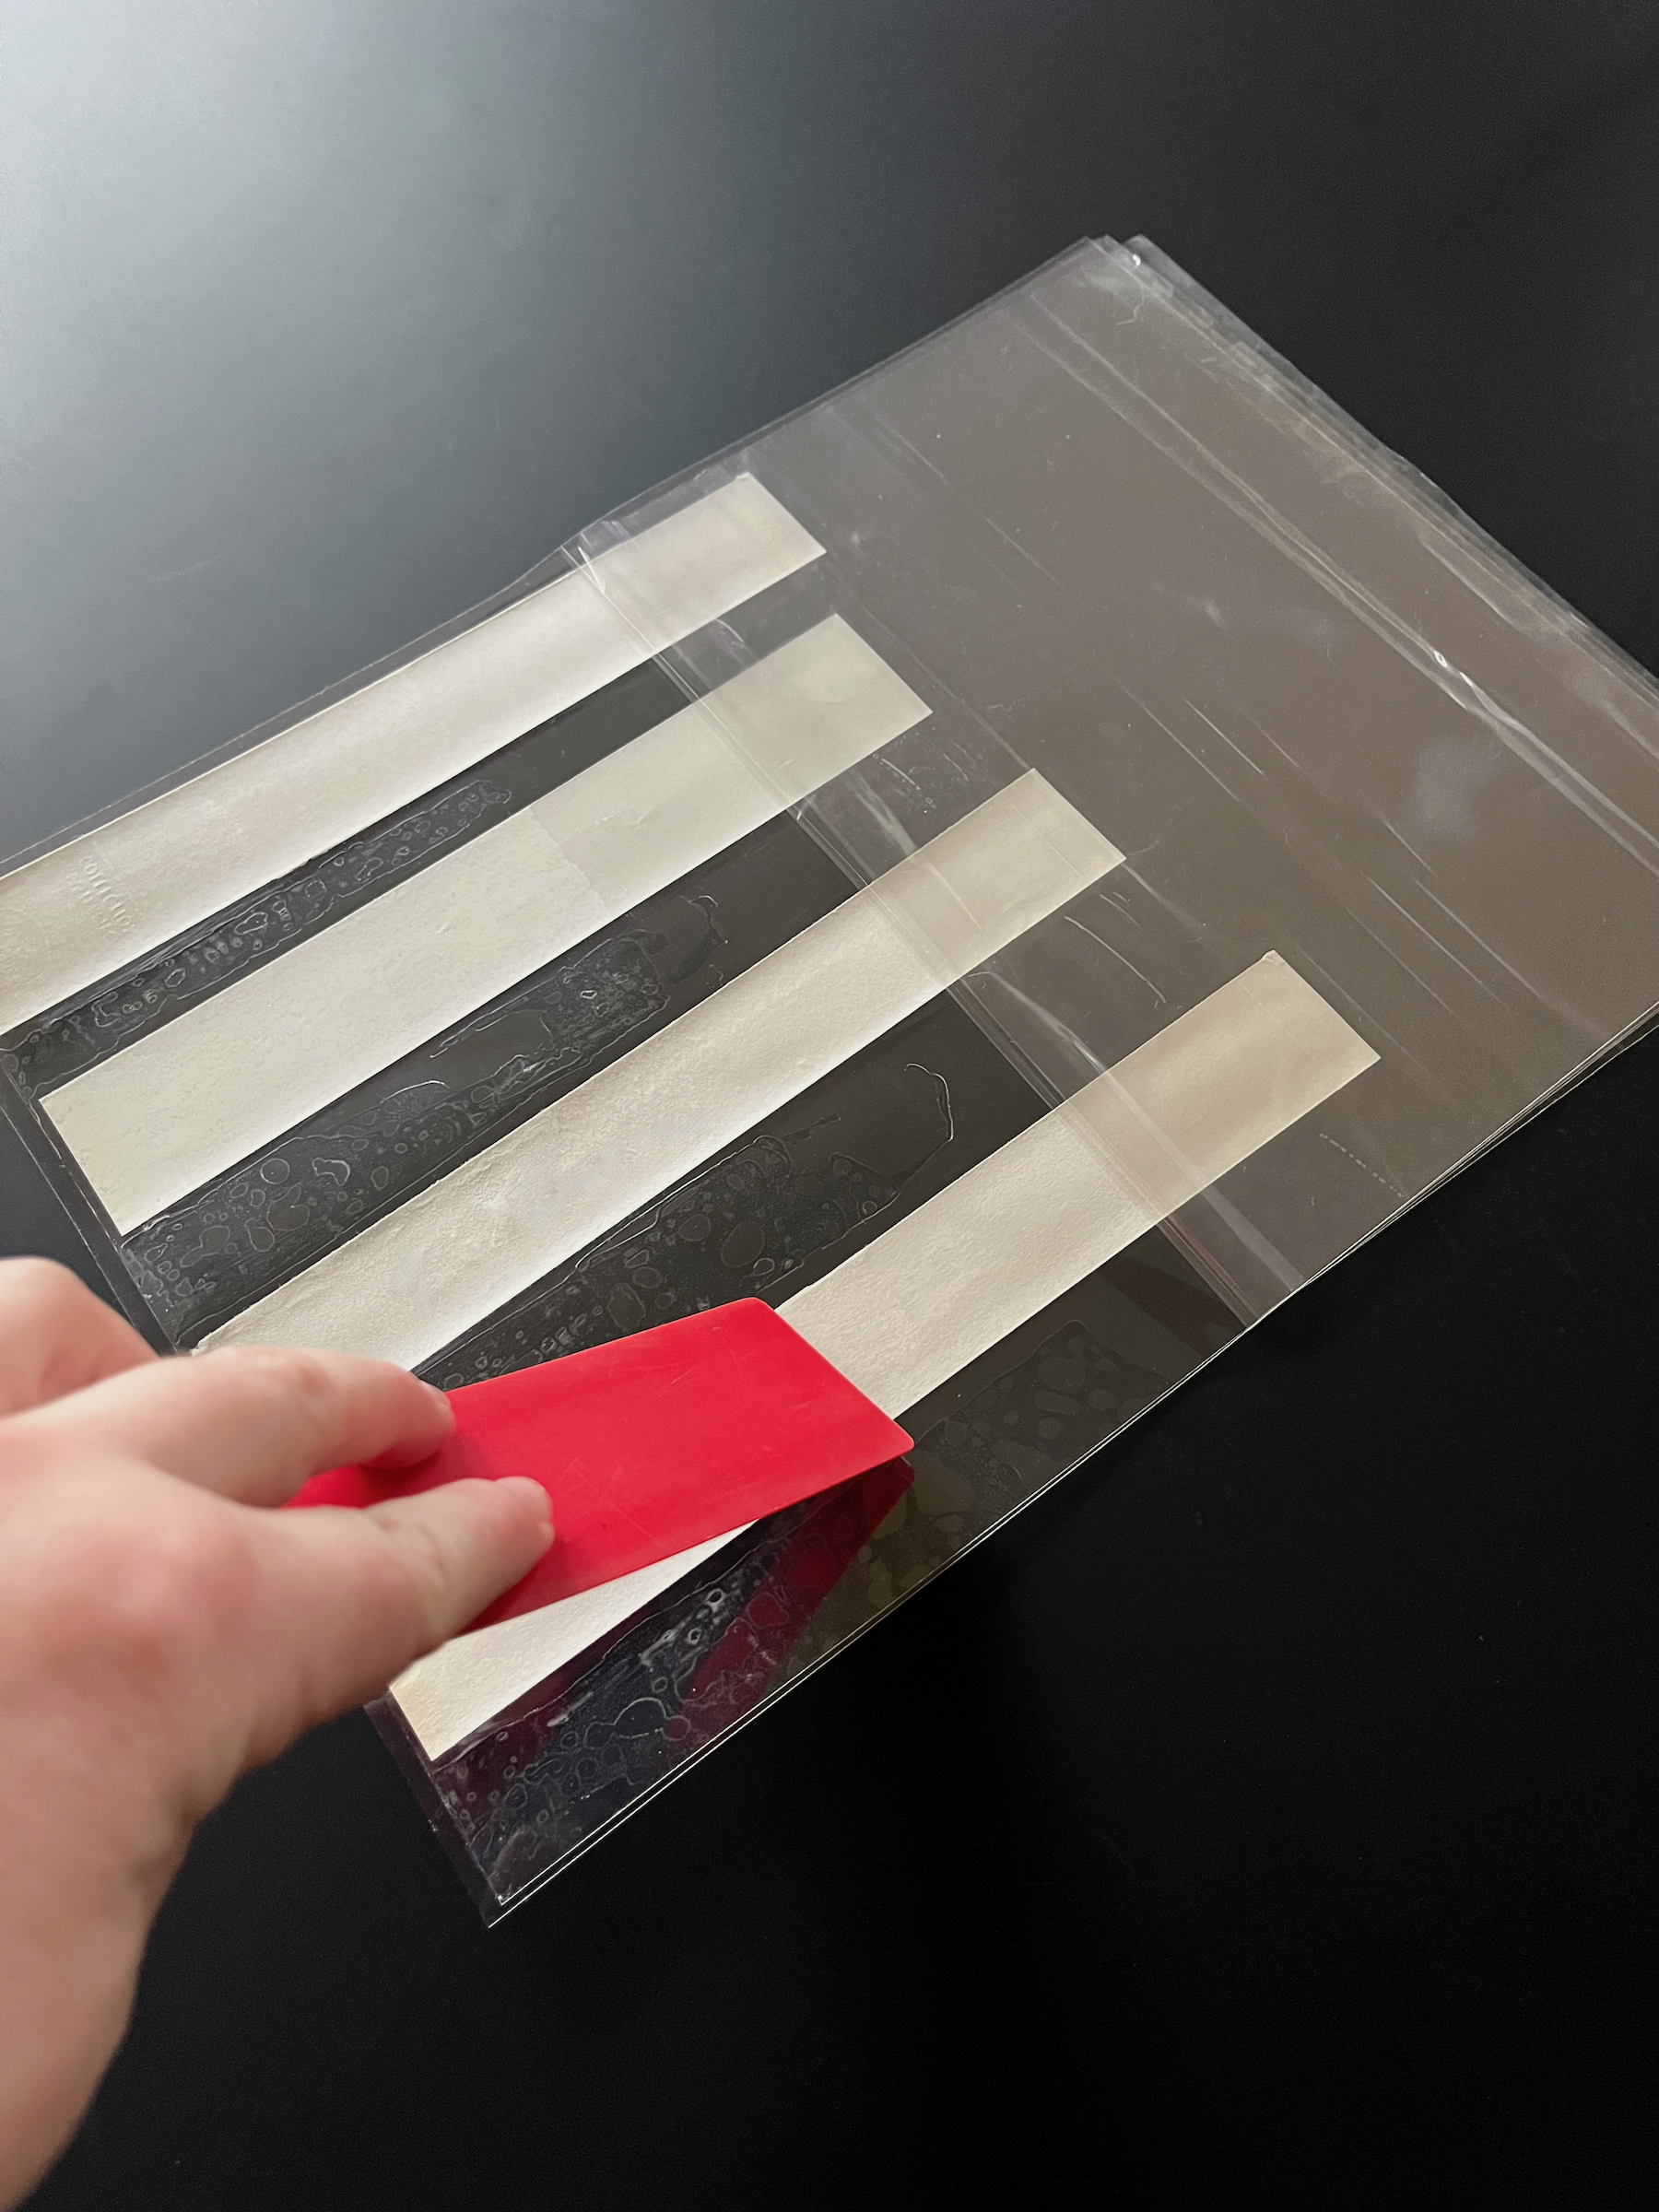
- Gently peel back the release liner about an inch at a time, using the ruler to smooth the laminate all the way down until the artwork is completely adhered. Leave the release paper attached at the bottom for now and flip the page back over (the artwork facing down again).
- Take another laminate page and peel back about an inch and half worth of the release liner, then align the top of this page (adhesive side down) with the top of the first page (adhesive side up).
- Pull the release liner from the first page up to meet the new release liner between the two laminate pages, this will keep the pages from sticking to to the wrong places while you work.
- Using the plastic ruler, smooth the laminate all the way down (peeling both release liners back together a little at a time) until the bookmarks are completely laminated between the two pages.
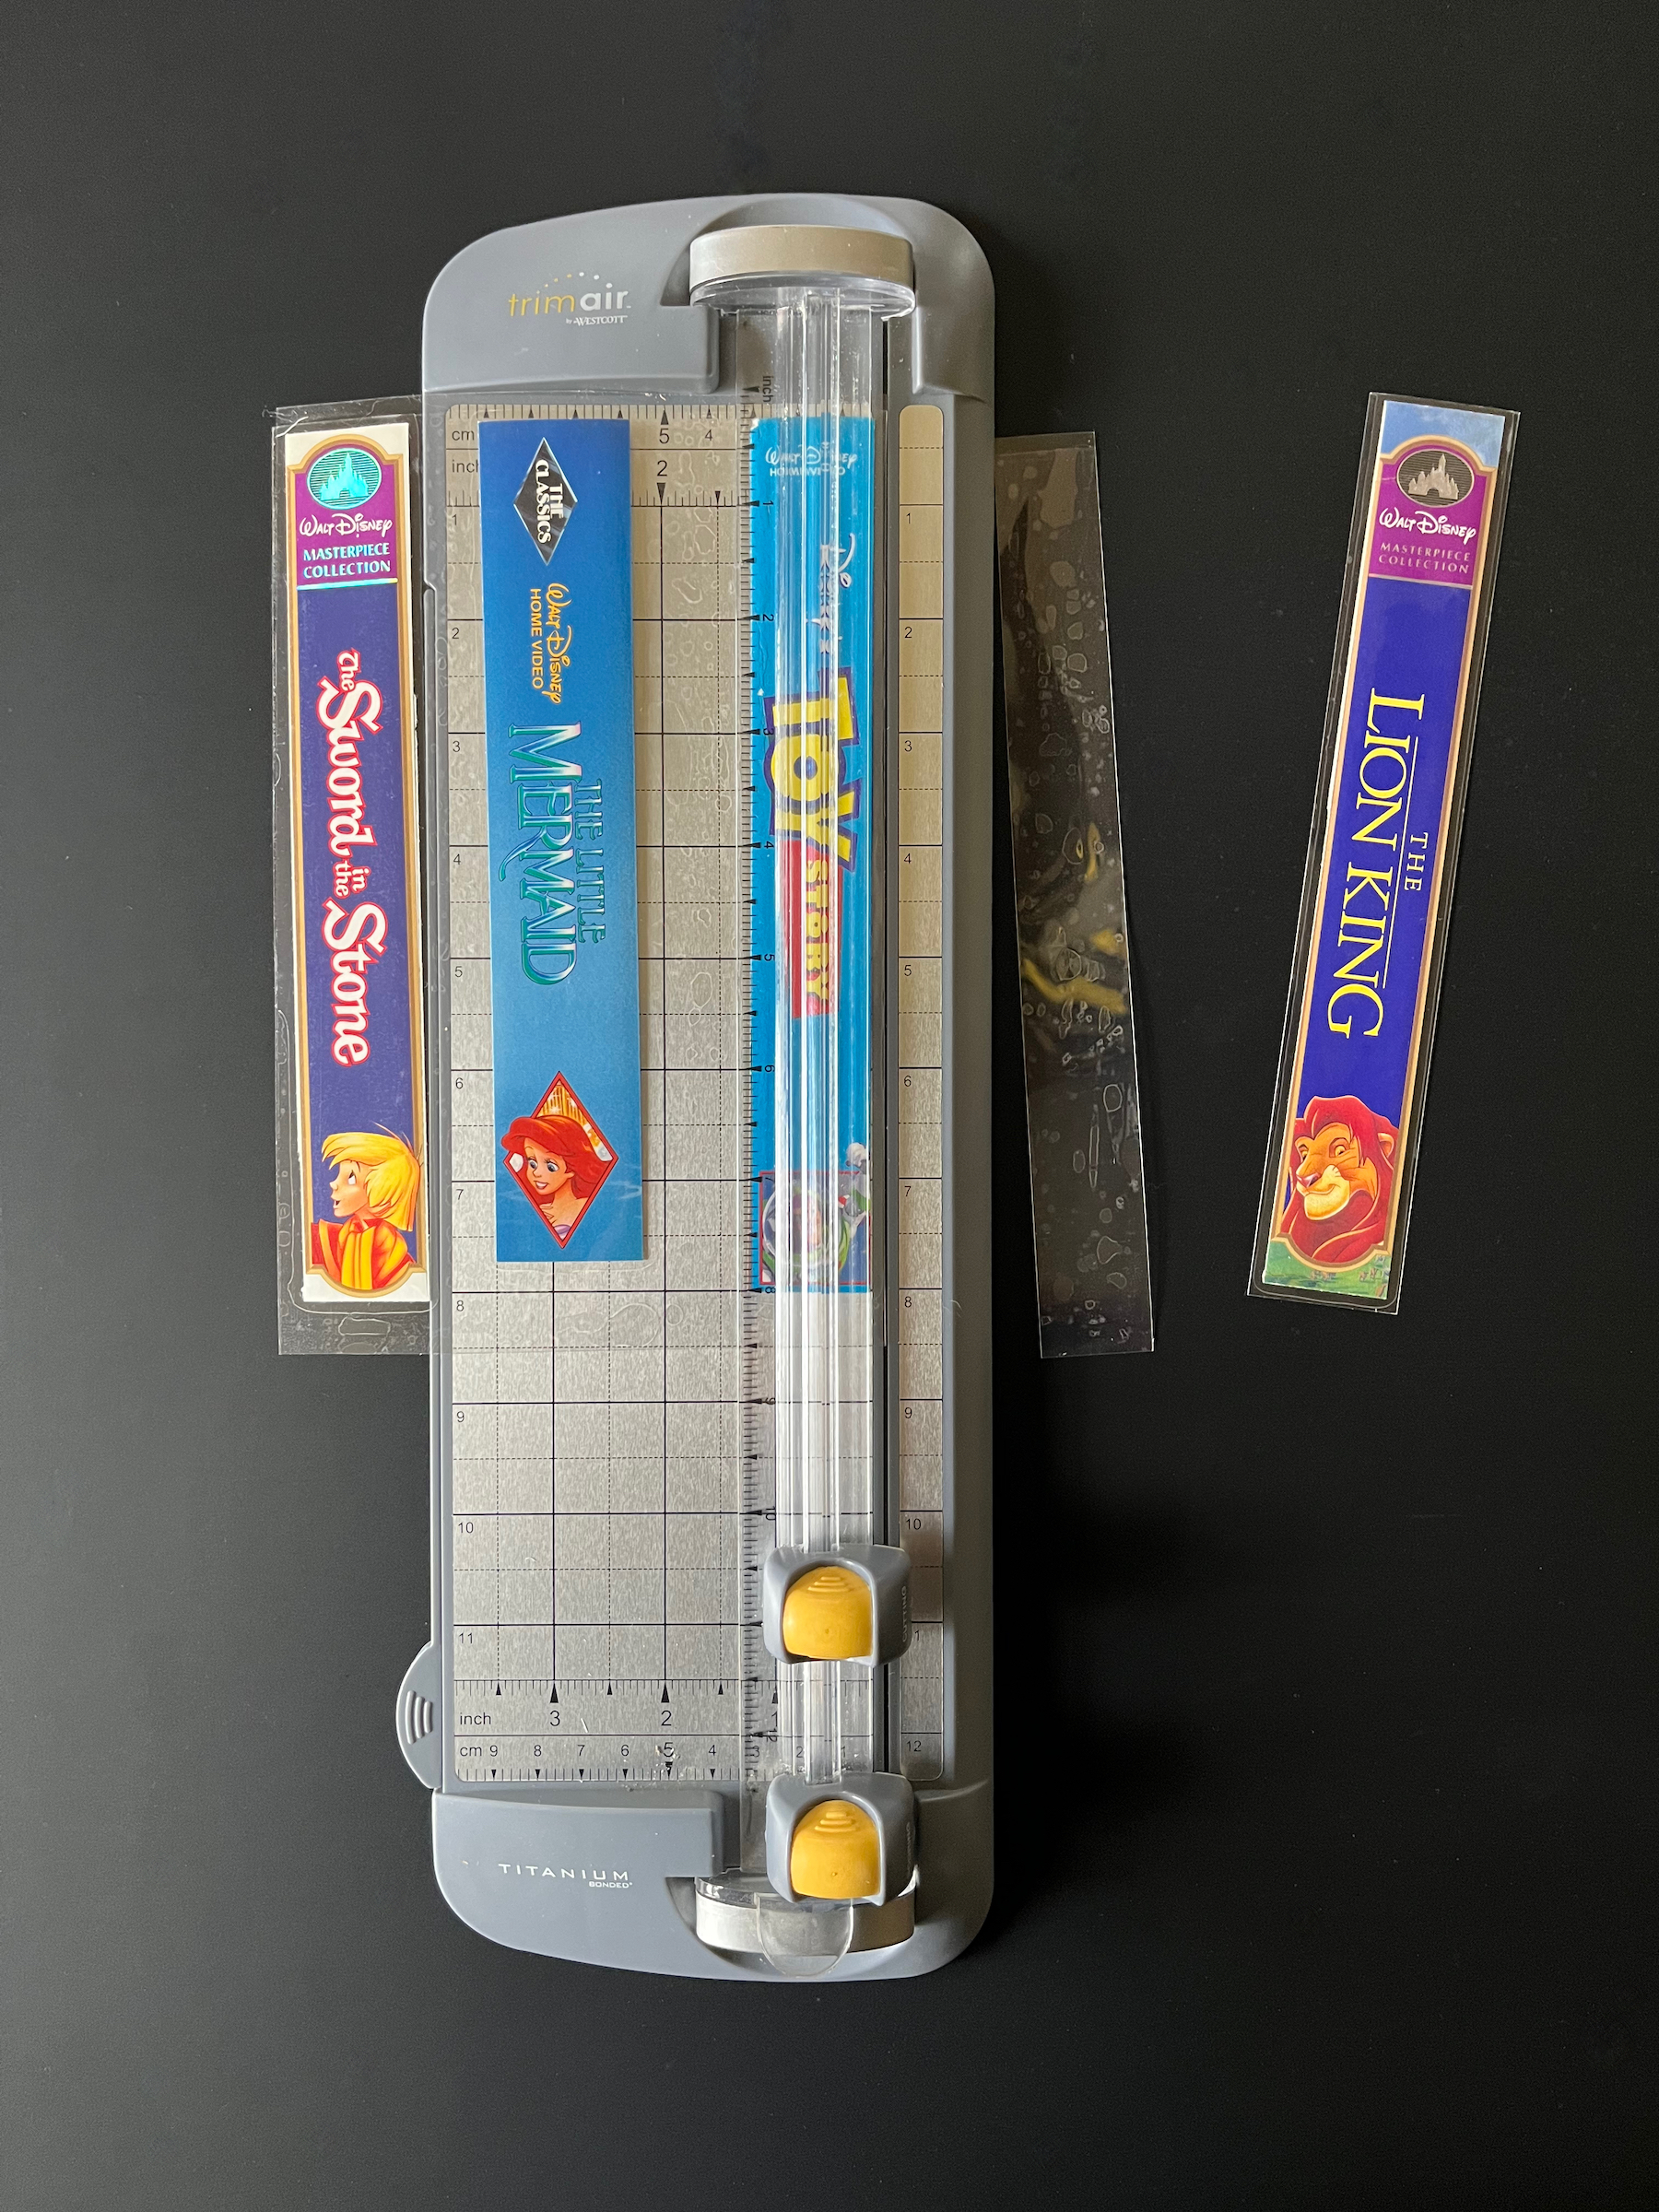
- Allow for a little space so the laminate remains sealed (but less conspicuous), use the guillotine trimmer to trim down the bookmark edges.
- Place in the books you’re reading, and enjoy!