Growing up reading The Velveteen Rabbit and then watching the Toy Story films, I became convinced (as I’m sure many children do) that toys are alive, and they have feelings. This made giving them up extra hard, and although I had to say goodbye to a lot of them over the years to keep my room and storage from overflowing, I did save many that were meaningful to me in the hopes I could pass them on to my future child (like I believe Andy should have done in Toy Story 3). Now our daughter is here and I cannot wait to share some of my beloved toys with her in the hopes that they will be beloved to her too!
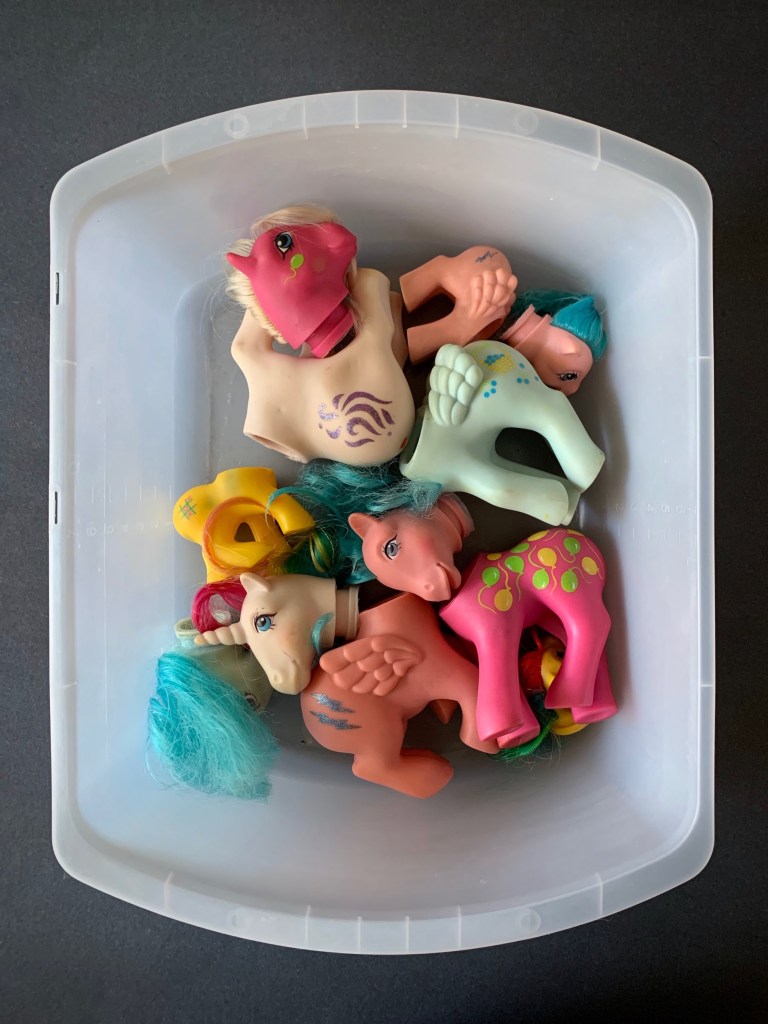
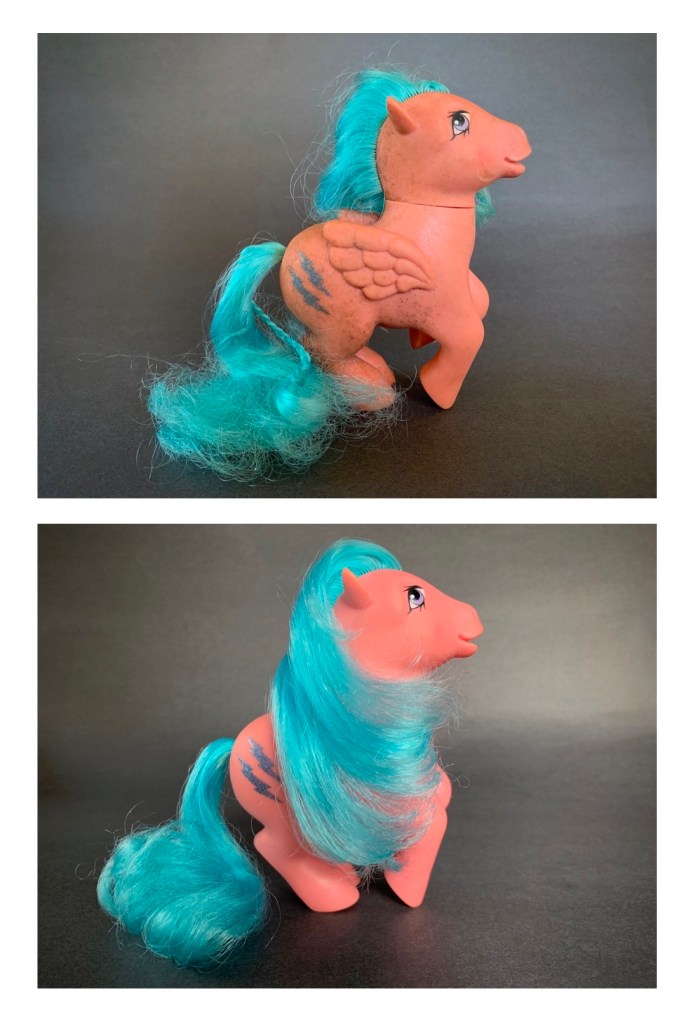
I dug through my parent’s garage and found my classic My Little Ponies from the 1980s and 90s! In my memory they were in perfect condition, in reality they had been kept in a cardboard box way up in the rafters of a hot garage for about 25 years; they were all covered in grime and in need of a good cleaning.


I set to work cleaning and styling my My Little Ponies for Zoey and, after a fair amount of effort, they are ready! Now I want to help you restore your Little Ponies so you can share them with your little ones, or collect them for yourself, the choice is yours!
First thing’s first let’s assess these ponies! Separate them into two groups based on these questions. Are they superficially dirty and just need a good wash? Or do they need to be taken apart for a deep clean? The best way to tell if they need a deep clean is discoloration at the base of their tail that indicates rust growing from the metal washer inside. There is also a chance you’ll wash a superficially dirty pony and realize it needs a deeper clean so it’s best to start cleaning these ponies first.
*These are not methods to use on a flocked pony. I do not own any flocked ponies so I was not able to test cleaning out on them.*
SUPERFICIAL CLEANING
SUPPLIES
- Magic Eraser sponge
- Castile soap or shampoo
- Toothbrush
- Conditioner
- Comb or wet brush
- Paper towels
- Hand towel
- Drinking straws (curly haired ponies)
- Bobby pins (curly haired ponies)
INSTRUCTIONS
*Do not submerge this pony in water, you are not taking the superficially dirty ponies apart so you do not want to get water trapped inside. Use a small stream of water from your faucet to first wet the pony and then to rinse the soap, shampoo and conditioner off.*
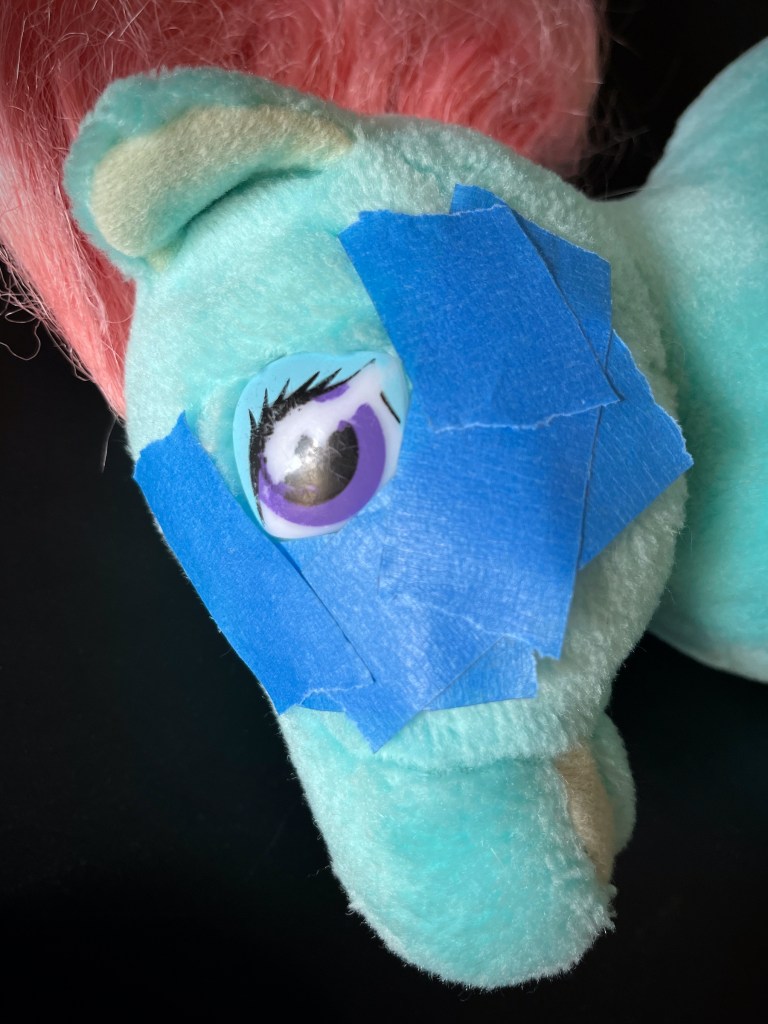
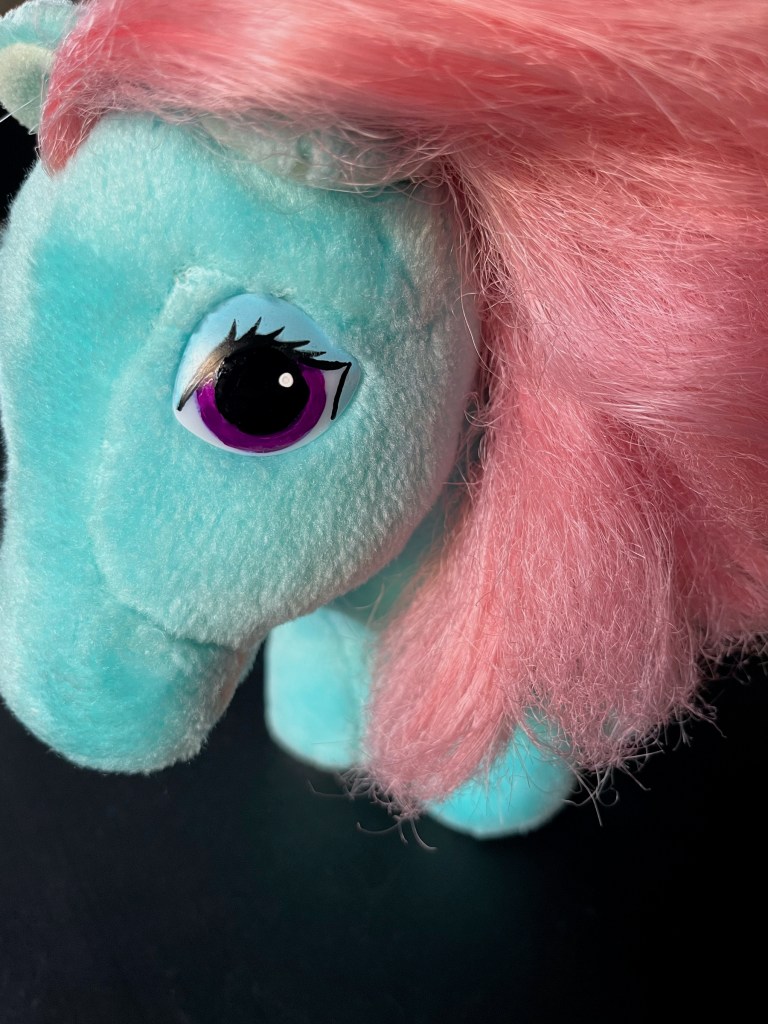
- Wet a Magic Eraser sponge and use it to gently clean the pony’s body. Use more scrubbing force on any stubborn marks, but avoid scrubbing too hard on the eyes and cutie marks (symbols).
- Use a small stream of water from your sink’s faucet to lightly rinse the pony.
- With a toothbrush and Castile soap or shampoo, gently clean the pony’s body, then lightly rinse.
- At this point if you feel the pony needs a deeper clean see DEEP CLEANING below.
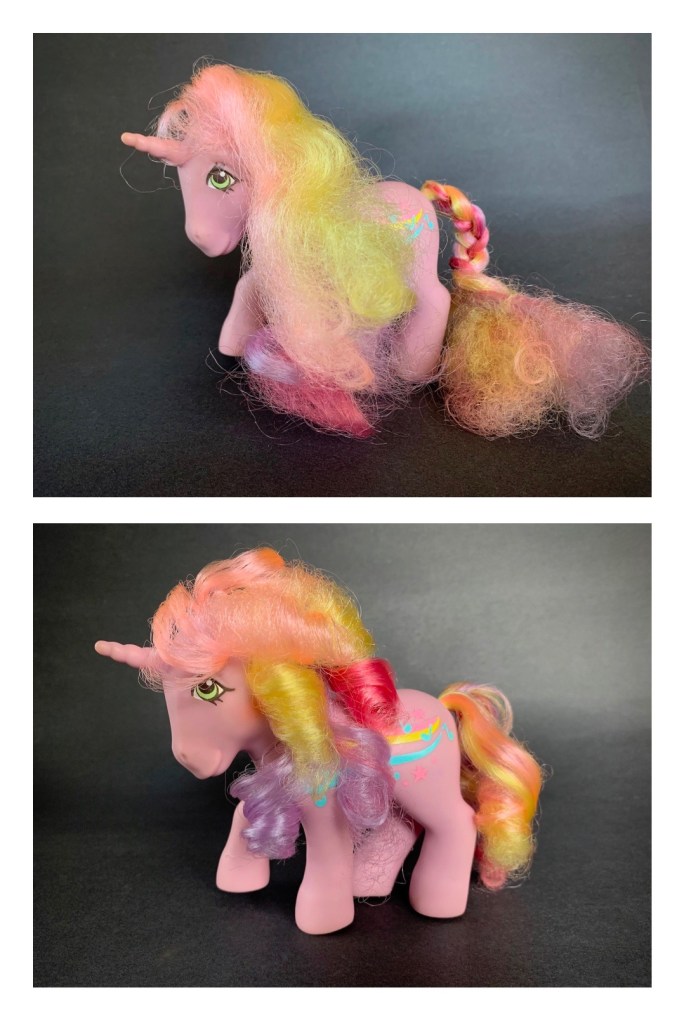
- After you’re satisfied with the condition of the pony’s body, wet the mane and tail with a small stream of water from your faucet. Avoid saturating the base of the mane or tail.
- Using Castile soap or shampoo, wash your pony’s mane and tail, and rinse.
- Apply conditioner to the mane and tail. Allow it to sit for a minute or two, then use a wet brush or a comb to gently brush through any tangles.
- Allow the combed and conditioned mane and tail to sit longer. How long depends on how smooth or coarse your pony’s hair is to begin with. I let one pony’s coarse hair sit in conditioner overnight, it did help, but at a certain point their synthetic hair may be damaged beyond full repair.
- Gently rinse the hair out when you feel it’s time. Use a hand towel to dry the body and give the hair a couple of squeezes to remove any excess water.
- While the pony’s hair is still damp, comb through it again so it’s smooth and set its hair.
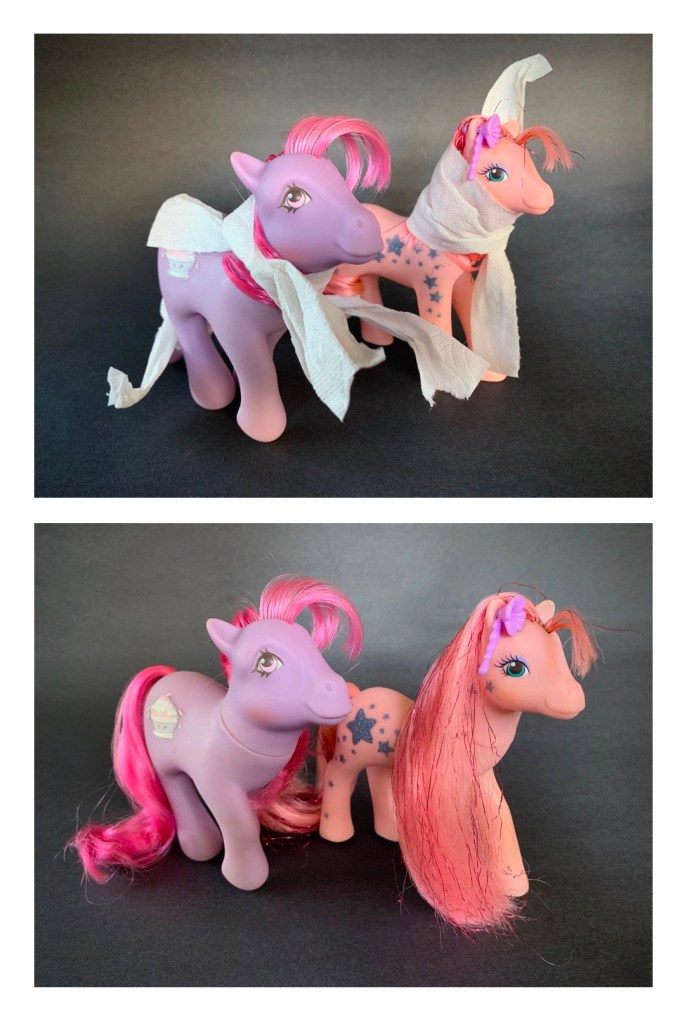
- For straight-haired pony manes – cut a strip of paper towel about an inch to an inch and a half thick. Wrap the pony’s mane around its neck and secure it by wrapping the paper towel over the damp mane, around the neck, and tying it in a knot.

- For straight-haired pony tails – cut a strip of paper towel about an inch to an inch and a half thick and place it between the pony’s legs in preparation. Wrap the tail around one of the pony’s hind legs and secure it with the paper towel.

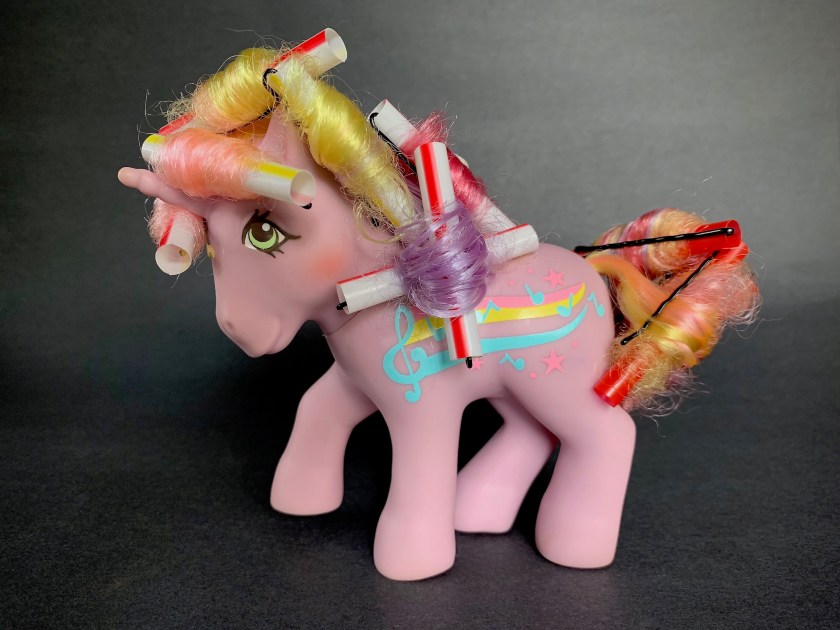
- For curly-haired pony manes and tails – cut up several drinking straws into fourths (roughly 2 inches a piece) for curlers. Separate out your pony’s mane and tail by how many curls you want and use each piece of straw to curl a strand of hair from the tip to the base and secure it with a bobby pin over the hair, and through the straw. You can curl it over or under, dependent on your preference.
- Allow your pony to completely air dry (overnight or 24 hours) then remove the paper towels or curlers. For the straight-haired ponies, I usually run a comb through the mane to give it just a little bounce, but I leave the tail alone. If you comb the hair too much it will lose its curl. For the curly-haired ponies you can leave the curls as they are, or using a loose toothed comb, gently comb through them to loosen them up, again if you comb the hair too much it will lose its curl.

DEEP CLEANING
 SUPPLIES
- Hobby knife
- Needle nose pliers
- White vinegar
- Bucket/container
- OxiClean
- Magic Eraser sponge
- Castile soap or shampoo
- Pipe cleaner
- Toothbrush
- Conditioner
- Comb or wet brush
- Paper towels
- Hand towel
- Drinking straws (curly haired ponies)
- Bobby pins (curly haired ponies)
INSTRUCTIONS
*It is OK to submerge this pony in water, you are taking the deeply dirty ponies apart so everything will be allowed to dry inside and out. To deep clean the really dirty ponies you’ll need to remove their heads and then tails.*
- Lean the head from side to side to see how attached it is and where. Carefully insert the tip of a hobby knife into the glue spots and cut them loose. BE CAREFUL not to slice into the inner rim of the neck that holds the head in place without the glue. If you do (and I accidentally did it) be extra careful when removing the head so you do not rip the inner rim open more or completely off.


- Once the head has been removed take a pair of needle nose pliers, reach into the pony, grasp and pull the tail out through the neck.

- Place the metal clamp holding the tail together and the washer into a bowl or cup of white vinegar and allow them to soak for at least 30 minutes or longer depending on how much rust there is.
- Remove them periodically to rub them with a toothbrush to see how much rust can be removed. When you’re satisfied the rust has been removed from the metal clamp of the tail and the washer, take them out, rinse the vinegar off and dry the metal thoroughly.
- With a toothbrush and Castile soap or shampoo, completely clean inside and outside of the pony’s body. If the toothbrush cannot reach into the legs, fold a pipe cleaner in half and twist it together, then clean down into the legs. Rinse thoroughly.


- In a container or bucket, mix OxiClean with warm water and place the pony (head, tail and body) into the mix to soak overnight.

- Once done soaking, rinse and drain the ponies.
- Wet a Magic Eraser sponge and use it to gently clean the pony’s body. Use more scrubbing force on any stubborn marks, but avoid scrubbing too hard on the eyes and cutie marks (symbols).
- Wash the pony again, see step 5.
- Allow all the components of the pony to completely dry before reassembling. This could take up to 24 hours.
- Reassemble the pony starting with the tail, poke one side of the tail’s metal clamp into the hole and use the pliers to pull it all the way in. I decided to leave the washer’s out of the tail, but if you want to replace them you will need to use the same method to pull the tail through the hole in the washer within the body.

- Washer or not, center the metal clamp and pull the tail taught.
- Replace the pony’s head. I am not replacing the glue at this time, but if you wanted to secure the head, you can use super glue. BE CAREFUL! Do not get too much glue on the neckline or it will seep out the sides, creating problems for your hands and the pony’s body and hair. I recommend applying the glue around the rim of the neck with a toothpick and then inserting the head, holding it’s hair and your hands out of the way.
- Once your pony has been reassembled and the super glue (if you used it) has dried you can style the hair.
- Using Castile soap or shampoo, wash your pony’s mane and tail, and rinse.
- Apply conditioner to the mane and tail. Allow it to sit for a minute or two, then use a wet brush or a comb to gently brush through any tangles.
- Allow the combed and conditioned mane and tail to sit for longer. How long depends on how smooth or coarse your pony’s hair is to begin with. I let one pony’s coarse hair sit in conditioner overnight, it did help, but at a certain point their synthetic hair may be damaged beyond full repair.
- Gently rinse the hair out when you feel it’s time and use a small towel to dry the body and give the hair a couple of squeezes with the hand towel to remove any excess water.
- While the pony’s hair is still damp, comb through it again so it’s smooth and set its hair.
- For straight-haired ponies manes – cut a strip of paper towel about an inch to an inch and a half thick. Whichever way you want the pony’s mane to fall (sometimes it’s already decided for you) wrap the pony’s mane around its neck in that direction and secure it with the paper towel, by wrapping the paper towel around the neck and over the damp mane and tying it with a small knot.
- For straight-haired ponies tails – cut a strip of paper towel about an inch to an inch and a half thick. Place the paper between the pony’s legs in preparation, then take the tail and wrap it around one of the pony’s hind legs. Secure the wrapped tail with the paper towel and tie a knot.
- For curly-haired ponies manes and tails – cut up several drinking straws into fourths (roughly 2 inches a piece) for curlers. Separate out your pony’s mane and tail by how many curls you want and use each piece of straw to curl a strand of hair from the tip to the base and secure it with a bobby pin over the hair, and through the straw. You can curl it over or under, dependent on your preference.
- Allow your pony to completely air dry (overnight or 24 hours) then remove the paper towels or curlers. For the straight-haired ponies, I usually run a comb through the mane to give it just a little bounce, but I leave the tail alone. If you comb the hair too much it will lose its curl. For the curly-haired ponies you can leave the curls as they are, or using a loose toothed comb, gently comb through them to loosen them up, again if you comb the hair too much it will lose its curl.
 What My Little Ponies do you have? How did they turn out? I hope you and your loved ones enjoy them! I plan on giving mine to Zoey within the next year, after she stops sticking absolutely everything in her mouth !*face palm*


 Years ago, I purchased an old empty frame from a Goodwill store. I didn’t know exactly what I wanted to use it for, I just knew that I loved the decals on each corner and wanted to fix it up and give it a home. After years of procrastinating while the frame sat around and gathered dust, I finally decided to paint it and create a chalkboard.
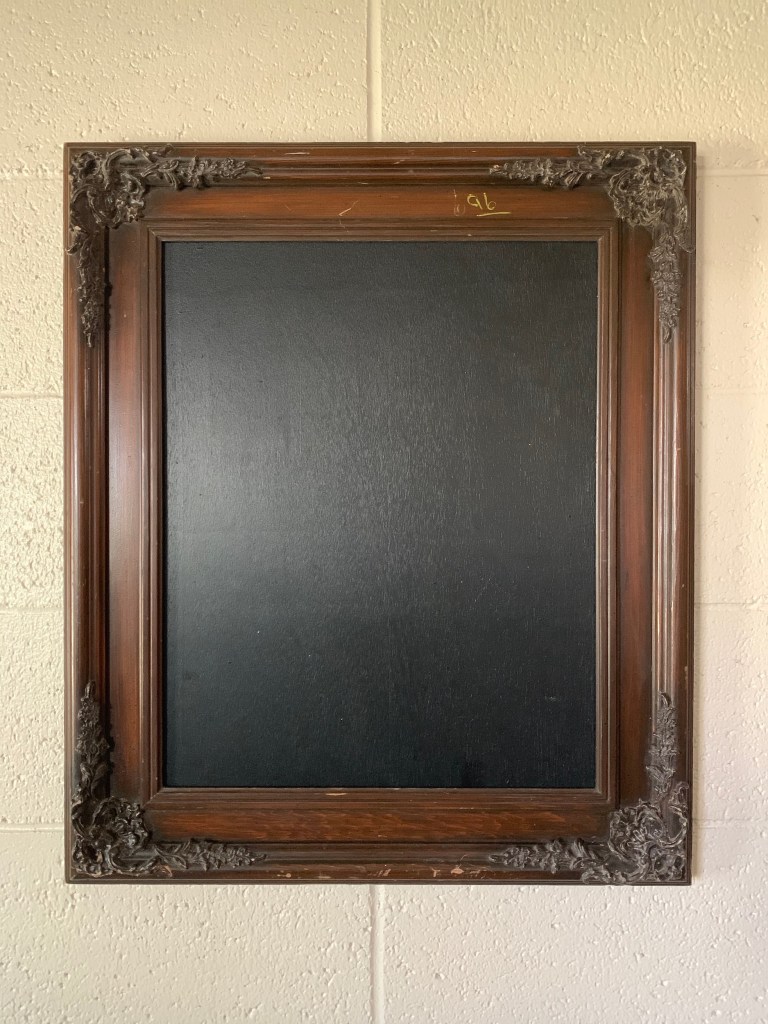 First, remove and sand one side of the mounting board to smooth it out. Once it’s as smooth as you prefer clean it off and prime it, then begin layering coats of chalkboard paint until you’ve reached your desired chalkboard depth and texture.
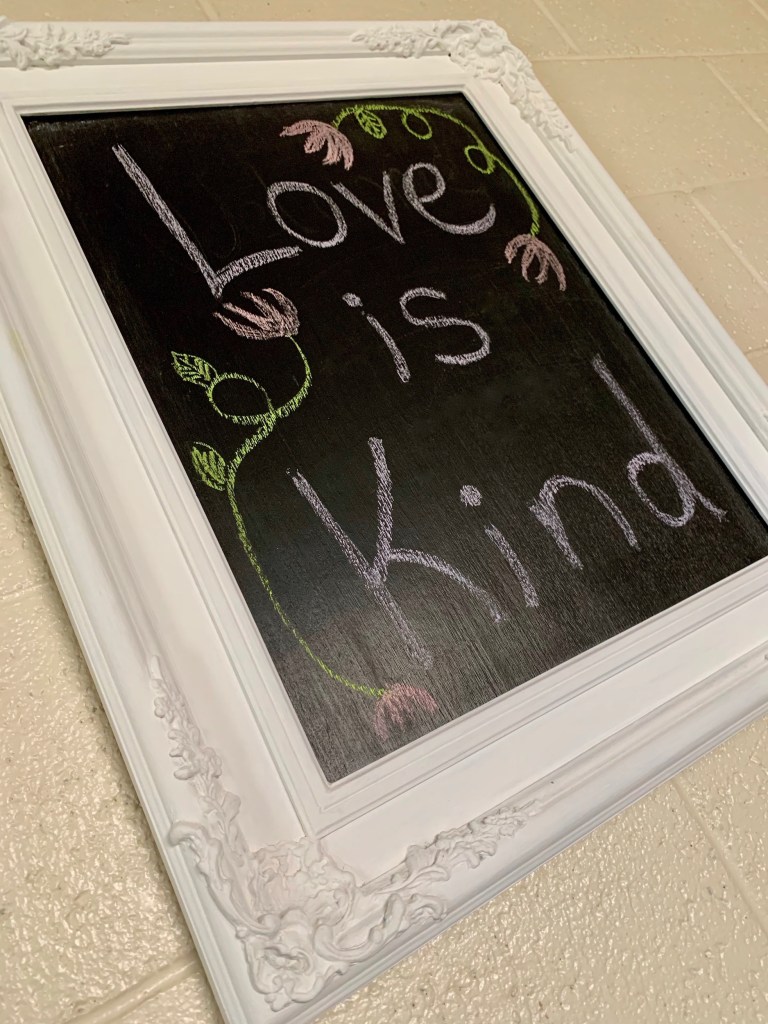
 Once both pieces are dry, you can reassemble the frame. Before writing or drawing on the chalkboard, you’ll need to prime it by coating it with chalk.
 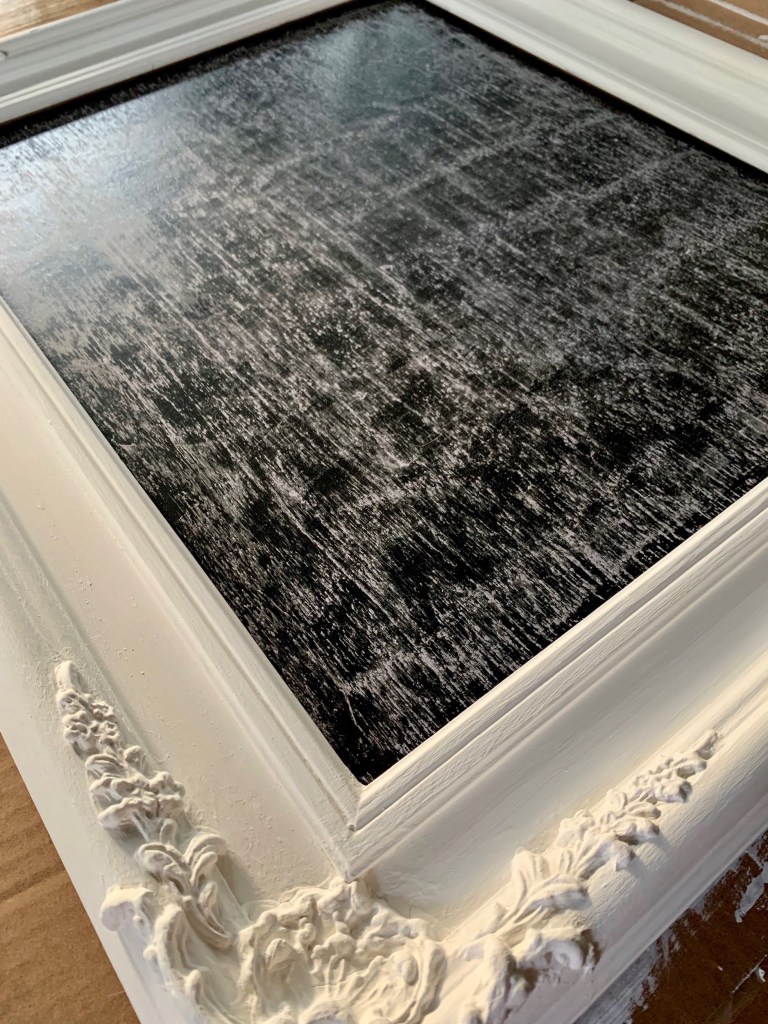 As you can see I just wrote the first thing that came to my mind here, but I intend on leaving this frame up as decor year round and changing it for different events, seasons or holidays!
