Creme de la Creme a la Edgar and Roquefort’s Cookie Recipes (The Aristocats)

Creme de la Creme a la Edgar and Roquefort's Cookie Recipes from Disney's The Aristocats.INTRODUCTION

Welcome back friends! This week we are cooking up Creme de la creme a la Edgar as a dipping sauce with Roquefort’s butter cookies from Disney’s The Aristocats!

Creme de la Creme a la Edgar and Roquefort's Cookie Recipes from Disney's The Aristocats.This recipe is featured when Edgar wants to get rid of Duchess and her kittens, thinking they will be the sole heirs to his employer’s fortune. He makes a cream for the cats to drink, laced with sleeping pills and drives them out to the countryside to abandon them. Roquefort the mouse brings his cookie to share the cream, and ends up falling asleep too!

Creme de la Creme a la Edgar and Roquefort's Cookie Recipes from Disney's The Aristocats. Creme de la Creme a la Edgar and Roquefort's Cookie Recipes from Disney's The Aristocats.First thing is first, I did not lace the creme with sleeping pills, I’m not trying to knock you all out. What I did do was infuse it with chamomile to add a calming effect, although this is optional. With or without the chamomile it really is quite tasty as a dip, on its own, or even as a creamer for tea or coffee.

I’d also like to mention that when Roquefort brings out his “cookie” he actually refers to it as a cracker, but it looks so similar to a Sable Breton or French Butter Cookie that I took the liberty of switching it over. Totally worth it when pairing the cookies with the cream!

Creme de la Creme a la Edgar and Roquefort's Cookie Recipes from Disney's The Aristocats. Creme de la Creme a la Edgar and Roquefort's Cookie Recipes from Disney's The Aristocats.CREME DE LA CREME A LA EDGAR
  • 2 cups heavy cream
  • 1/4 tsp. cinnamon
  • 1/8 tsp. nutmeg
  • 2 tbsp. sugar
  • 1/2 tsp. vanilla extract
  • 1 or 2 chamomile tea bags (optional)
INSTRUCTIONS (CREME DE LA CREME A LA EDGAR)
  1. In a medium saucepan, combine the heavy cream, cinnamon, nutmeg, sugar and the chamomile bag or bags (optional).
  2. Cook over a medium heat, stirring occasionally until the sugar dissolves and the cream mixture begins to steam. Do not let it reach a boil.
  3. Remove the creme from the heat and stir in the vanilla extract.
  4. Divide into a bowl, bowls or cups and enjoy with Roquefort’s cookies (see below)!
Creme de la Creme a la Edgar and Roquefort's Cookie Recipes from Disney's The Aristocats.ROQUEFORT’S COOKIES
  • 1/2 cup salted butter, softened
  • 3 egg yolks
  • 1/2 cup confectioner’s sugar
  • 1 1/4 cup flour
  • 1/2 tsp. baking powder
  • 1 tsp. vanilla extract
INSTRUCTIONS (ROQUEFORT’S COOKIES)
  1. Pre-cut the butter into small cubes and allow enough time for it to soften.
  2. Separate the egg yolks from the whites (you can keep the egg whites in the fridge for another recipe).
  3. Place the confectioner’s sugar and the egg yolks into a large bowl and whisk them together until they are fluffy and lighter in color.
  4. Add the softened butter, and whisk the mixture again until combined, this should look like a thick paste.
  5. Sift and stir in the baking powder and flour. Stop as soon as the dough comes together.
  6. Prepare a baking tray lined with a baking mat or parchment paper.
  7. Pre-heat the oven to 325F.
  8. Lightly flour your work area and transfer the cookie dough to it. Sprinkle the dough with a little bit of flour and flour your rolling pin.
  9. Using the floured rolling pin, gently press and stretch the dough to flatten it.
  10. Using a round cookie cutter (mine was about 2.5 inches in diameter), cut out the cookies and place them on your prepared baking tray, leaving a little bit of space between each cookie.
  11. Use the tip of a butter knife, create four + shaped patterns in the dough (see image above). If you butter knife is sticking to the cooke dip it in a little bit of flour.
  12. Repeat the process with any extra dough left. If the dough starts to become really soft, place in the fridge for a few minutes to harden.
  13. Bake for 25 to 30 minutes, until the cookies have a golden tint. Keep an eye on them, every oven is different!
  14. Remove the cookies from the oven and transfer them to a cooling rack until completely cool.
  15. Dip in the Creme de la creme a la Edgar (see above) and enjoy!

Mrs. Judson’s Cheese Crumpet Recipe (The Great Mouse Detective)

Mrs. Judson's Cheese Crumpet Recipe from Disney's The Great Mouse Detective.INTRODUCTION

Welcome back friends! This week we are baking Mrs. Judson’s cheese crumpets from Disney’s The Great Mouse Detective!

Mrs. Judson's Cheese Crumpet Recipe from Disney's The Great Mouse Detective.These crumpets are featured when Olivia Flaversham and Dr. Dawson arrive at Basil’s apartment. Mrs. Judson (Basil’s maid) offers and serves them before Basil sets off on a lead, Olivia managing to snag a few before they rush off.

Mrs. Judson's Cheese Crumpet Recipe from Disney's The Great Mouse Detective.I am going to be so bold as to say that these are not traditional crumpets. Disney usually does their homework pretty thoroughly so I may be wrong, but perhaps they meant scones? Traditional crumpets look like the ones I made for Ratty and Mole’s Recipe in November, cooked on a flat surface within round rings. It was very hard to achieve the puffed look from the film using a crumpet recipe in a muffin tin, but I tried twice. The first time I used the recipe from Ratty and Mole’s Crumpets and added cheese, but they were very deflated up top. The second time I got a bit more lift by using baking powder instead of baking soda. Neither option had as much lift and puff as the cartoon, but they both taste cheesy and delicious so use what you have available!

Mrs. Judson's Cheese Crumpet Recipe from Disney's The Great Mouse Detective.Mrs. Judson's Cheese Crumpet Recipe from Disney's The Great Mouse Detective.BAKED CHEESE CRUMPETS
  • 1 teaspoon of cane sugar
  • 1 tablespoon of dried active yeast
  • 1 cup of warm milk
  • 2 cups of all-purpose flour
  • 1 teaspoon of salt
  • ½ teaspoon of baking powder
  • 1 cup of warm water
  • 1 cup of shredded cheese (I used sharp cheddar)
INSTRUCTIONS (CRUMPETS)
  1. Stir the sugar and yeast into the warm milk and let it rest for 10 minutes until frothy.
  2. In a large bowl, combine the flour and salt.
  3. Add the liquid to the flour mixture and stir/knead until a thick dough forms.
  4. Cover the bowl loosely with plastic wrap and set it in a warm place for an hour to let the dough rise.
  5. Dissolve the baking powder in the warm water and add it to the dough. Using a mixer, beat the dough for about one or two minutes. Any remaining lumps will dissolve during the next resting stage.
  6. Lightly coat the shredded cheese with flour, add it to the batter and stir to incorporate.
  7. Lightly grease a muffin pan and scoop the batter into it, filling each space no more than 2/3 full.
  8. Cover the batter while it’s in the pan and let it rest again in a warm place for at least 30 minutes. The batter should be nice and bubbly.
  9. While the batter is resting for its final 30 minutes, preheat the oven to 400F.
  10. Bake the crumpets for about 20-30 minutes until they are lightly golden. Keep an eye on them, everyone’s oven is different!
  11. Remove the muffin pan from the oven and let it cool on a wire rack for about 10 minutes.
  12. Remove the cheese crumpets from the muffin pan and serve warm, or you can reheat them later!

Winnie the Pooh’s Hero Cake Recipe (The Many Adventures of Winnie the Pooh)

Winnie the Pooh's Hero Cake Recipe from Disney's The Many Adventures of Winnie the Pooh.INTRODUCTION

Welcome back friends! This week we will be baking Winnie the Pooh’s hero cake from Disney’s The Many Adventures of Winnie the Pooh.

Winnie the Pooh's Hero (Thumbprint) Cookie and Hero Cake Recipe from Disney's The Many Adventures of Winnie the Pooh.Winnie the Pooh’s hero cake (and the hero cookies we made last week) is featured in the “Blustery Day” featurette when Christopher Robin throws a Hero Party for Pooh Bear, believing him to be Piglet’s rescuer during the flood. Pooh and Piglet really just happened to be in the same predicament at the same time and came out together perfectly alright, but it was still sweet of Christopher Robin and their friends to celebrate them all the same!

Winnie the Pooh's Hero (Thumbprint) Cookie and Hero Cake Recipe from Disney's The Many Adventures of Winnie the Pooh.This is a surprisingly complex cake, and I had a lot of fun creating and tasting it! I chose to make pink velvet cake (my own interpretation of what flavor the pink color stood for) with chocolate frosting. White buttercream frosting surrounds the base of each of the orange candles and orange buttercream, in color and in flavor, whimsically dots the chocolate frosting in puffs. If you take the cake with the chocolate frosting and orange buttercream in the same bite it is absolute heaven and will definitely satisfy the rumbly of any tumbly!

Winnie the Pooh's Hero Cake Recipe from Disney's The Many Adventures of Winnie the Pooh.HERO CAKE
  • 4 cups of all-purpose flour
  • 4 teaspoons of baking powder
  • 2 pinches of salt
  • 12 tablespoons of unsalted butter, room temperature and cubed
  • 2 cups of granulated sugar
  • 1 teaspoon of almond extract
  • 1 1/3 cups of whole milk, room temperature
  • 4 teaspoons of vanilla extract
  • 8 drops of red food coloring
  • 8 egg whites
INSTRUCTIONS (CAKE)
  1. Preheat the oven to 350 F.
  2. Prepare two 8-inch round cake pans with spray or parchment.
  3. In a large bowl, whisk together the flour, baking powder, and salt.
  4. In another large bowl, beat the butter until softened.
  5. Slowly add the sugar and beat until fluffy, then add in the almond extract, food coloring, milk, and vanilla extract; mix on low until ingredients are incorporated.
  6. Beat in the egg whites one at a time, scraping down the sides of the bowl after each addition.
  7. Divide the batter between the prepared cake pans and bake for 20-30 minutes (depending on your oven) until a toothpick is inserted at their centers comes out clean, not wet with cake batter.
  8. Remove the pans from the oven and allow the cakes to cool for about 10 minutes within the pan, then transfer to a wire rack to cool completely before assembling.
  9. While the cakes are cooling, make the frostings (see below).
CHOCOLATE FROSTING
  • 1/2 cup of butter, melted
  • 6 tablespoons of cocoa powder
  • 1 tablespoon of oil
  • 3 1/2 cups of powdered sugar
  • Milk, room temperature
  • 1 teaspoon of vanilla
INSTRUCTIONS (CHOCOLATE FROSTING)
  1. In a large bowl, mix the melted butter, cocoa powder and oil until well incorporated.
  2. Sift in the powdered sugar half a cup at a time and mix well.
  3. Add milk a little at a time and keep mixing until the chocolate is smooth and creamy.
  4. Add the vanilla in last and stir until well incorporated.
  5. Once the cakes are cool, put a small dollop of this frosting on the center of cake stand, then place the first layer of cake down on top of the dollop; this will anchor the cake to the stand.
  6. Scoop the desired amount of chocolate frosting onto the top of the first layer of cake and spread it around evenly, then add the next layer of cake over it.
  7. Apply the rest of the chocolate frosting to the sides, and then the top of the cake, using an icing spatula or something similar. I added texture to the sides of my cake using a cake comb that came with the little cake decorating set I bought.

* You can double this recipe for a thicker layer of frosting on the cake.

ORANGE AND WHITE BUTTERCREAM FROSTING
  • 1/2 cup of butter, softened
  • 2 cups of powdered sugar
  • 3 tablespoons of heavy whipping cream
  • 1/2 teaspoon of orange extract
  • Orange food coloring
INSTRUCTIONS (ORANGE AND WHITE BUTTERCREAM FROSTING)
  1. In a medium bowl, cream butter and powdered sugar together by low speed (or hand otherwise you’ll have a cloud of powdered sugar).
  2. Add in the whipping cream and orange extract and mix until well incorporated.
  3. Pause and scoop about a fourth of the white frosting into a pastry bag and set aside.
  4. Add in the orange food coloring and beat until fully incorporated.
  5. Scoop the orange frosting into another pastry bag with a large tip.
  6. After the cakes cool and you’ve applied the chocolate frosting, pipe 4 dollops of the white buttercream frosting onto the top of the cake where you want the candles to be and stick the candles in at their center.
  7. Using the orange buttercream, pipe small orange puff dots all around and on top of the cake.

Enjoy it!

Winnie the Pooh’s Hero Cookie Recipe (The Many Adventures of Winnie the Pooh)

Winnie the Pooh's Hero (Thumbprint) Cookie Recipe from Disney's The Many Adventures of Winnie the Pooh.INTRODUCTION

Welcome back friends! This week we’ll be baking Winnie the Pooh’s Hero Cookies from Disney’s The Many Adventures of Winnie the Pooh.

Winnie the Pooh's Hero (Thumbprint) Cookie  and Hero Cake Recipe from Disney's The Many Adventures of Winnie the Pooh.Winnie the Pooh’s hero cookies are featured in the “Blustery Day” featurette when Christopher Robin throws a Hero Party for Pooh Bear, believing him to be Piglet’s rescuer.

Winnie the Pooh's Hero (Thumbprint) Cookie Recipe from Disney's The Many Adventures of Winnie the Pooh.These cookies are open to interpretation, visually they look like a cookie or a pastry with red filling or topping. I believe they are thumbprint cookies with raspberry jam filling and boy are they tasty! I didn’t have any issues beyond lightly burning my finger on the side of the pan while re-pressing the indentations before adding the jam, rookie mistake!

Winnie the Pooh's Hero (Thumbprint) Cookie Recipe from Disney's The Many Adventures of Winnie the Pooh.HERO COOKIES
  • 2 1/4 cups of all-purpose flour
  • 1/2 teaspoon of baking powder
  • 1/2 teaspoon of baking soda
  • 1/2 teaspoon of salt
  • 12 tablespoon of unsalted butter (softened)
  • 2/3 cup of granulated sugar
  • 6 tablespoons of a full-fat block cream cheese (softened)
  • 1 large egg
  • 1 1/2 teaspoons of vanilla
  • 3/4 cup of raspberry jam

INSTRUCTIONS (COOKIES)

  1. Preheat the oven to 350F and line 2 baking sheets with parchment paper.
  2. In a medium bowl, whisk together the flour, baking powder, baking soda, and salt.
  3. In a large bowl, cream the butter and sugar together at medium speed until light and fluffy; scraping down the bowl as needed.
  4. Add the cream cheese, egg, and vanilla, then beat until combined (about 30 seconds); scraping down the bowl as needed.
  5. Slowly add the flour mixture and whisk at a low speed until combined, about another 30 seconds; scraping down the bowl as needed.
  6. Scoop out 1 tbsp. portions of dough, lightly flour your hands and roll them into little balls, placing them on the prepared baking sheets 1 1/2 to 2 inches apart.
  7. Lightly flour the bottom of a teaspoon and press the bottom of the teaspoon into the center of each dough ball to make a small indentation. Re-flour the bottom of the teaspoon as needed.
  8. Fill a zip top or piping bag with the jam and set it aside.
  9. Bake the cookies for 10 minutes. Making sure to only bake one sheet at a time.
  10. Remove the cookies from the oven and use the bottom of the teaspoon measuring spoon to reshape the indents in the cookies again. Be very careful, the sides of the pan are hot!
  11. Take a pastry bag or a ziplock bag and snip off a small corner. Pipe enough jam into each cookie to fill the indentation in.
  12. Put the baking sheet back into the oven and bake for 12-14 minutes (depending on your oven) until golden around the edges.
  13. Follow the same steps for the next baking sheet until the dough is gone!
  14. Allow the cookies to cool on the baking sheet for 10 minutes before transferring to a cooling rack to complete the cooling process.

Rufus’s Gingersnap Cookie Recipe (The Rescuers)

Rufus's Gingersnap Cookie Recipe from Disney's The Rescuers.INTRODUCTION

Welcome back friends! This week we’ll be baking the Gingersnap cookies Penny gives Rufus the cat in Disney’s The Rescuers.

Rufus's Gingersnap Cookie Recipe from Disney's The Rescuers.These cookies are featured when Bernard and Miss Bianca visit the orphanage to find Penny. They find Rufus the cat instead, and he recollects the last time he saw her. In his memory, she snuck him two Gingersnap cookies, which he charmingly mistook for “Catnipsnaps”.

Rufus's Gingersnap Cookie Recipe from Disney's The Rescuers.I think baking cookies is my favorite! There is just something so satisfying about making cookie dough and then baking snack size treats for loved ones. I tend to enjoy eating the chewier and gooier cookies, but these were like eating crunchy gingerbread cookies and I really love them! Perhaps its the crunchy store-bought or factory-made cookies I’m not as fond of!

Rufus's Gingersnap Cookie Recipe from Disney's The Rescuers.GINGERSNAPS

  • 2 cups of all-purpose flour
  • 1 ½ teaspoons of baking soda
  • ½ teaspoon of ground black pepper
  • 2 teaspoon of ground cinnamon
  • 1 ½ teaspoons of ground ginger
  • ½ teaspoon of salt
  • 11 tablespoons of unsalted butter, at room temperature
  • 2/3 cup of sugar
  • 1 large egg, at room temperature
  • ¼ cup of mild-flavored molasses (sometimes called ‘light’ molasses)
  • ½ teaspoon of vanilla extract
  • Coarse sugar crystals or granulated sugar for coating the cookies

INSTRUCTIONS (GINGERSNAPS)

  1. In a medium bowl, stir together the flour, baking soda, black pepper, cinnamon, ginger and salt.
  2. In another medium to large bowl, beat the butter until soft, then add the sugar and continue to beat until light and fluffy; scrape down the sides of the bowl as needed.
  3. Add the egg, molasses and vanilla to the butter and sugar; scrape down the sides of the bowl as needed.
  4. Gradually mix in the dry ingredients until the dough is smooth; scrape down the sides of the bowl as needed.
  5. Lightly flour your hands and gather all the dough into a loose ball (if it starts sticking to your fingers add a little more flour until it doesn’t), then place it back in the bowl.
  6. Cover the top of the bowl with plastic wrap and place it in the refrigerator for 30 minutes to an hour.
  7. We are to firm up the dough enough so it isn’t floppy while rolling it into a cylinder shape in the next step.
  8. Divide the dough in two equal portions and roll each on a lightly-floured surface until each is in a cylindrical shape that’s about 2 inches in diameter. Don’t worry if they’re not perfect; you can neaten them up in a second.
  9. Wrap each portion of dough in plastic wrap then roll them lightly on the counter to smooth them out.
  10. Refrigerate until both are firm (I let mine refrigerate overnight).
  11. To bake, preheat the oven to 350 F and line a baking sheet or two with parchment paper or silicone baking mats.
  12. Remove the dough cylinders from the refrigerator, remove the plastic wrap, and slice the cookie dough into 1/4-inch thick rounds with a sharp knife. I would work with one portion at a time so the other doesn’t get too soft.
  13. Pour coarse or granulated sugar into a bowl and dip one side of each dough slice into the sugar to coat.
  14. Place each slice sugar side up on the baking sheet, evenly spaced apart. Leave a couple of inches between the cookies since they will spread while baking.
  15. Bake for 10-14 minutes, rotating the baking sheets midway during baking, until deep-golden brown. This will depend on your oven, but you can bake closer to 10 minutes for softer cookies, and closer to 14 minutes for snappier ones.
  16. Let the cookies cool on the baking sheet for about two minutes, then remove them with a spatula and transfer them to a cooling rack.

Ichabod’s Turkey Recipe (The Adventures of Ichabod and Mr. Toad)

Ichabod's Turkey Recipe from Disney's The Adventures of Ichabod and Mr. Toad, or Sleepy Hollow.INTRODUCTION

Welcome back friends! This week we’ll be baking what must be one of the many turkey’s Ichabod Crane is fed by the ladies of Sleepy Hollow in Disney’s The Adventures of Ichabod and Mr. Toad.

Ratty and Mole's Crumpet, Ichabod's Red Velvet Cake and Ichabod's Turkey Recipe from Disney's The Adventures of Ichabod and Mr. Toad or the Wind in the Willows.This turkey is featured when Ichabod visits one of his student’s households for supper and is fed a turkey by the lady of the house.

Ichabod's Turkey Recipe from Disney's The Adventures of Ichabod and Mr. Toad, or Sleepy Hollow.
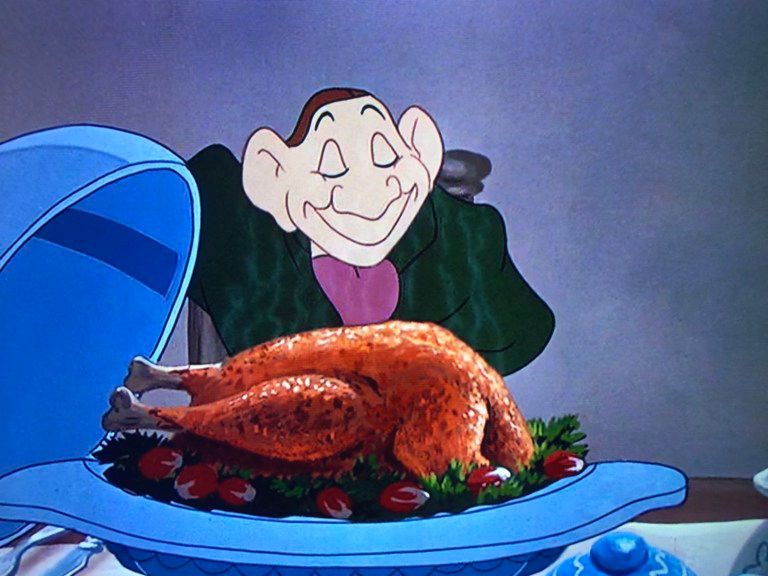
I highly doubt the residents of Sleepy Hollow had access to the Godzilla size turkeys we have available today, so I chose to work with a smaller size turkey. Smaller stature, paired with classic and simple seasoning and cooking methods resulted in the best tasting turkey I think I’ve ever created!

Ichabod's Turkey Recipe from Disney's The Adventures of Ichabod and Mr. Toad, or Sleepy Hollow.TURKEY
  • 12 to 14 pound turkey (thaw if frozen)
  • freshly ground pepper
  • kosher salt
  • 1 carrot, cut into chunks
  • 1 rib of celery, cut into chunks
  • 1 onion, quartered
  • 3 sprigs of sage, plus 1 tablespoon of chopped leaves
  • 3 sprigs of thyme, plus 1 tablespoon of chopped leaves
  • 12 tablespoons of unsalted butter
  • 2 teaspoons of paprika
INSTRUCTIONS (TURKEY)
  1. Let the turkey sit at room temperature for 30 minutes.
  2. Position an oven rack in the lowest position and remove the other racks, then preheat to 350 degrees F.
  3. Remove the neck and giblets from the turkey and reserve for gravy if desired.
  4. Pat the turkey very dry with paper towels and rub inside and out with pepper and salt.
  5. Stuff the cavity with the carrot, celery, onion, sage and thyme sprigs; then tie the legs together with kitchen twine.
  6. Put the turkey on a rack set it in a large roasting pan and tuck the wings under the body.
  7. Melt the butter in a small saucepan over low heat and whisk in the paprika, chopped sage and thyme leaves.
  8. Let the paprika butter cool slightly, then brush it all over the turkey.
  9. Transfer the turkey to the oven and roast for 1 hour.
  10. After the turkey has roasted for 1 hour, baste with the drippings.
  11. Continue roasting and basting every 30 minutes until the skin is golden brown and a thermometer inserted into the thigh registers 165 degrees F.
  12. Transfer the turkey to a cutting board and let it rest for 30 minutes before carving; reserve the drippings for gravy if desired.

Ichabod’s Red Velvet Cake Recipe (The Adventures of Ichabod and Mr. Toad)

Ichabod's Red Velvet Cake Recipe from Disney's The Adventures of Ichabod and Mr. Toad, or Sleepy Hollow.INTRODUCTION

Welcome back friends! This week we’ll be baking up the red velvet cake Ichabod Crane stuffs into his mouth in Disney’s The Adventures of Ichabod and Mr. Toad.

Ratty and Mole's Crumpet, Ichabod's Red Velvet Cake and Ichabod's Turkey Recipe from Disney's The Adventures of Ichabod and Mr. Toad or the Wind in the Willows.This cake is featured during the Halloween party thrown by Baltus Van Tassel, Katrina Van Tassel’s father. Ichabod’s stomach is never satisfied so he snatches a piece of this cake up while dancing with Katrina, and pops it in his mouth without even skipping a step.

Ichabod's Red Velvet Cake Recipe from Disney's The Adventures of Ichabod and Mr. Toad, or Sleepy Hollow.Similar to Mrs. Frankenstein’s Dutch Apple Cake, the first cake recipe I posted, this recipe was a lesson in trial and error. I knew I wanted to go more natural and traditional, using beets as the red component in the red velvet and ermine icing (or flour buttercream) instead of cream cheese frosting. The first attempt was delicious, but I only used the beet juice and it came out more cocoa brown than red. This time I used the physical beets and it resulted in a red I am very happy with.

Ichabod's Red Velvet Cake Recipe from Disney's The Adventures of Ichabod and Mr. Toad, or Sleepy Hollow.RED VELVET CAKE
  • 3 medium beets
  • ¾ cup buttermilk
  • Juice of 1 large lemon
  • 1 ½ teaspoons vanilla extract
  • 2 teaspoons white vinegar
  • 3 tablespoons non-dutched cocoa powder
  • 2 cups cake flour (sift before measuring)
  • 1 ⅛ teaspoon baking powder
  • ½ teaspoon baking soda
  • 1 teaspoon salt
  • ¾ cup butter, plus more for greasing pan
  • 1 ¾ cup granulated sugar
  • 3 eggs
INSTRUCTIONS (CAKE)
  1. Preheat the oven to 350 degrees.
  2. Wash the beets and wrap each one in aluminum foil.
  3. Bake the beets until the tip of a knife slides easily into the largest beet (about 1 hour 15 minutes), then remove them from the oven and allow to cool until they can be handled.
  4. Peel the beets and place them into a food processor, then chop them until they’re about the size of finely diced onions.
  5. Measure 1 cup of the finely chopped beets and set aside. Remove the remaining beets from the food processor and reserve them for another purpose.
  6. Return the cup of beets to the food processor and purée with the buttermilk, lemon juice, vanilla and vinegar until smooth.
  7. In a medium size bowl, sift together the cocoa, flour, baking powder, baking soda, and salt.
  8. In a large bowl, beat the butter until soft.
  9. Slowly add the sugar and beat until fluffy, then beat in the eggs one at a time, scraping down the sides of the bowl after each addition.
  10. Alternate adding dry ingredient mixture and the beet mixture to butter mixture, beginning and ending with the dry ingredients. Beat for 10 seconds after each addition and scrape down the bowl after each addition of the beet mixture.
  11. Grease two 9-inch cake pans, then line the bottoms of the pans with parchment and grease again.
  12. Divide the batter between the prepared cake pans and smooth the tops.
  13. Bake until a cake tester inserted in the center of the cake comes out clean (about 20 to 25 minutes), then remove the pans from the oven and allow them to cool completely on a wire rack.
  14. To assemble, peel away the parchment of one cake and place the flat side down on a serving platter. Place about 1 cup of icing (see below) onto cake and, using a flat spatula, spread evenly over top. Remove the parchment from the second cake and place the flat side down on top of first layer. Use the remaining frosting to cover the top and sides of cake.
ERMINE ICING
  • 10 tbsp. all-purpose flour
  • 2 cups whole milk
  • 2 pinches salt
  • 2 tsp. vanilla extract
  • 2 cups unsalted butter, room temperature (do not microwave)
  • 2 cups granulated sugar
INSTRUCTIONS (ICING)
  1. In a small saucepan, whisk together flour, milk, and salt.
  2. Bring to a boil over medium heat, whisking constantly, and continue to cook for 1-2 minutes until mixture is very thick.  If small lumps develop, whisk vigorously until smooth.
  3. Remove from the heat and whisk in the vanilla extract.
  4. Transfer to a small bow and press a piece of plastic wrap directly onto the mixture’s surface to prevent a skin from forming, then set aside to cool completely.
  5. In a medium to large bowl, cream butter and sugar for about 3 minutes then stop and scrape down the bottom and sides of the bowl. Cream butter and sugar for another 3 minutes until very smooth, light, and fluffy (insufficient creaming of the butter/sugar will result in a gritty frosting).
  6. Gradually beat the cooled flour mixture into the creamed mixture a few tablespoons at a time and the icing will begin to lighten. The mixture might look curdled when the flour paste is first added, but additional whipping will smooth it out.
  7. Gently scrape bowl and beat until mixture is fluffy and resembles whipped cream.
  8. Ermine Icing will break down above 70 degrees F.  It’s best when freshly-whipped, but cakes and cupcakes should be completely cooled before frosting.

Ratty and Mole’s Crumpet Recipe (The Adventures of Ichabod and Mr. Toad)

Ratty and Mole's Crumpet Recipe from Disney's The Adventures of Ichabod and Mr. Toad or the Wind in the Willows.INTRODUCTION

Welcome back friends! This week we’ll be cooking up the crumpets Ratty and Mole share during their tea time in Disney’s The Adventures of Ichabod and Mr. Toad (or The Wind in the Willows).

Ratty and Mole's Crumpet, Ichabod's Red Velvet Cake and Ichabod's Turkey Recipe from Disney's The Adventures of Ichabod and Mr. Toad or the Wind in the Willows.These crumpets are featured when Ratty and Mole are sitting down to afternoon tea, before they’re pulled into all of Mr. Toad’s manias. Looking at them, they really could be crumpets or cookies, but since we’ll be featuring cookies from other Disney features, I thought it would be a fun challenge to make something new!

Ratty and Mole's Crumpet Recipe from Disney's The Adventures of Ichabod and Mr. Toad or the Wind in the Willows.Crumpets are relatively easy to make, albeit time consuming due to the amount of time the dough/batter spends resting. These are tasty on their own, but you’ll definitely get the most out of them by slathering them with some butter, honey, jam or whatever topping you prefer. Like most foods, these are best when they’re fresh, but my husband has toasted them the last two mornings for breakfast and they’re still tasty!

Ratty and Mole's Crumpet Recipe from Disney's The Adventures of Ichabod and Mr. Toad or the Wind in the Willows.CRUMPETS
  • 1 teaspoon of cane sugar
  • 1 tablespoon of dried active yeast
  • 1 cup of warm milk
  • 2 cups of all-purpose flour
  • 1 teaspoon of salt
  • ½ teaspoon of baking soda
  • 1 cup of warm water
INSTRUCTIONS (CRUMPETS)
  1. Stir the sugar and yeast into the warm milk and let it rest for 10 minutes until frothy.
  2. In a large bowl, combine the flour and salt.
  3. Add the liquid to the flour mixture and stir/knead until a thick dough forms.
  4. Cover the bowl loosely with plastic wrap and set it in a warm place for an hour to let the dough rise.
  5. Dissolve the baking soda in the warm water and add it to the dough. Using a mixer, beat the dough for about one or two minutes. Any remaining lumps will dissolve during the next resting stage.
  6. Cover the batter again and let it rest in a warm place for at least 30 minutes. After 30 minutes the batter should be nice and bubbly.
  7. Prepare the crumpet rings by oiling the inside of each rim and lightly oil the frying pan. You can use a regular skillet or a cast iron pan (my preference for even heating).
  8. Place the rings in the frying pan over medium-high heat.
  9. Once the rings are hot, pour the batter into each ring until it’s slightly more than half full.
  10. Cook for about 5 minutes or until the classic pores/holes are present and the bottoms slightly browned.
  11. Remove the rings and flip the crumpets over to cook the other side for a minute or two until golden brown.
  12. Serve warm with butter, jam, golden syrup or honey. To reheat later, toast them in the toaster. These can also be frozen, thaw first before toasting.

Dante’s Concha Bread Recipe (Coco)

Dante's Concha Bread Recipe from Disney and Pixar's Coco.INTRODUCTION

Welcome back friends! This week we’re baking the concha bread, or pan dulce, Dante tries to steal in Disney and Pixar’s heartfelt and visually stunning Pixar film, Coco.

Abuelita's Pork Tamale Recipe, Churros and Dante's Concha Bread Recipe from Disney and Pixar's Coco.When Miguel’s family brings him back to the land of the dead to ask Mama Imelda for help, they enter the Department of Family Reunions and Dante tries to steal a plate of sweets off of one of the desks. The Concha bread is on this plate, and it can also be seen in various scenes throughout the film.

Dante's Concha Bread Recipe from Disney and Pixar's Coco.Like the tamales, I wanted to research and find a traditional recipe for this treat. I then took my recipe to my friends to see if they thought it was traditional enough and they approved! There are different variations of toppings out there, but I chose to go with something closer to the film, with no food coloring.

I’ve never really worked with yeast before; it’s really fascinating to see the dough doubling in size! The topping is cinnamon deliciousness and I highly recommend eating these freshly baked and warm, but they do hold up well the following few days.

Dante's Concha Bread Recipe from Disney and Pixar's Coco.CONCHA BREAD
  • 1 packet (1/4 ounce) of active dry yeast
  • 1⁄2 cup of warm water
  • 1 egg
  • 1⁄2 cup of warm evaporated milk
  • 1/3 cup of sugar
  • 1/3 cup of butter (melted)
  • 1 teaspoon of salt
  • 4 cups of all-purpose flour (plus enough to lightly flour a surface)
  • 1⁄2 teaspoon of ground cinnamon
INSTRUCTIONS (BREAD)
  1. In a large bowl stir together the yeast and the warm water., then let the mixture stand for 10 minutes.
  2. Stir in the egg, evaporated milk, sugar, melted butter and salt.
  3. Stir in 2 cups of the flour and then gradually stir in another 2 cups of flour and the cinnamon to make a dough.
  4. Place the dough on a lightly floured surface. Knead for 3 to 5 minutes or until smooth and elastic, then shape into a ball.
  5. Transfer the ball of dough to a large greased bowl and turn it to coat the surface of the dough.
  6. Cover and let it rise in a warm place until doubled in size (about 1 to 1 1⁄4 hours).
  7. Punch down the dough, then cover, and let it stand for another 10 minutes.
  8. Make the topping (see below).
  9. Divide the dough into 12 portions and shape each portion into a smooth ball.
  10. Place the dough balls about 3 inches apart on baking sheets lined with parchment paper and press down on each dough ball slightly.
  11. Divide the topping into 12 balled up portions; then pat each ball flat.
  12. Place one round of topping on each dough ball.
  13. Using a sharp paring knife, cut grooves in the topping to resemble a scallop shell.
  14. Cover the rolls and let them rise in a warm place until nearly doubled in size (about 45 minutes).
  15. Meanwhile, preheat the oven to 375 degrees F.
  16. Bake rolls for 18 to 20 minutes or until light golden brown.
  17. Remove from the baking sheets to cool on wire racks.
  18. Serve warm or cool.
TOPPING
  • 1⁄2 cup of butter, softened
  • 2/3 cup of sugar
  • 1 cup of all-purpose flour
  • 2 teaspoons of ground cinnamon
  • 1 teaspoon of vanilla extract
INSTRUCTIONS (TOPPING)
  1. In a medium bowl, beat the softened butter with an electric mixer on medium speed for 30 seconds.
  2. Add the sugar, beating until well mixed.
  3. Stir in the flour, cinnamon, and vanilla; mix until well incorporated.

A Returning Skeleton’s Churro Recipe (Coco)

A Returning Skeleton's Churro Recipe from Disney and Pixar's Coco.INTRODUCTION

Welcome back friends! This week we are creating the churros a Skeleton brings back with him to the Land of the Dead in the heartfelt and visually stunning Pixar film, Coco.

Abuelita's Pork Tamale Recipe, Churros and Dante's Concha Bread Recipe from Disney and Pixar's Coco.When Miguel’s family brings him back to the land of the dead to ask Mama Imelda for help, they join a customs line and our friend with the churros is at the front of this line. We never really get to know this Skeleton, but he likes churros and that’s a perfect excuse to make them!

A Returning Skeleton's Churro Recipe from Disney and Pixar's Coco.These are delicious and  they taste exactly like churros should taste, but they came out the size of fries due to my pastry tip being small! I plan on buying myself a bigger pastry tip, but the moral of the story is, churros are delicious in any size!

A Returning Skeleton's Churro Recipe from Disney and Pixar's Coco.CHURROS
  • vegetable oil (corn or canola)
  • 1 cup of water
  • 1/2 cup of butter
  • 1/4 teaspoon of salt
  • 1/2 cup of sugar
  • 1 cup of all-purpose flour, sifted
  • 3 eggs
  • 1/4 teaspoon of cinnamon
INSTRUCTIONS
  1. In a medium saucepan, heat the water and butter together until the butter melts.
  2. Add the salt and 1 tablespoon of the sugar, then stir until they’re dissolved.
  3. Bring mixture to a full boil, then mix in the flour, stirring vigorously to blend well. Continue stirring for about a minute or until mixture forms into a doughy ball, but remove from the heat after about 30 seconds or the churros will not puff properly.
  4. Add eggs one at a time, mixing well after each addition. Continue mixing until all the egg is completely incorporated and the dough is glossy. Set aside to cool and rest for about 5 minutes.
  5. Mix remaining sugar and cinnamon in a shallow dish and set aside.
  6. In a heavy/deep pan or deep fryer heat at least 2 inches of oil to 375 F.
  7. Test the temperature of your frying oil. Drop a small ball of the dough into the hot oil. It should bubble up to the surface immediately. If is doesn’t, the oil is not hot enough and you’ll end up with soggy, greasy churros.
  8. Spoon the dough mixture into a cake decorators’ piping tube with the largest star tip available. Rolling down from the top, squeeze 4-inch strips of dough into the hot oil. Don’t crowd the churros. 3 or 4 at a time is about right. Fry 3-4 minutes, turning once, until golden brown.
  9. Remove from the oil with a slotted spoon and set onto paper towels to drain. Roll churros in cinnamon/sugar mixture and serve warm.