Remy’s Ratatouille Recipe (Ratatouille)

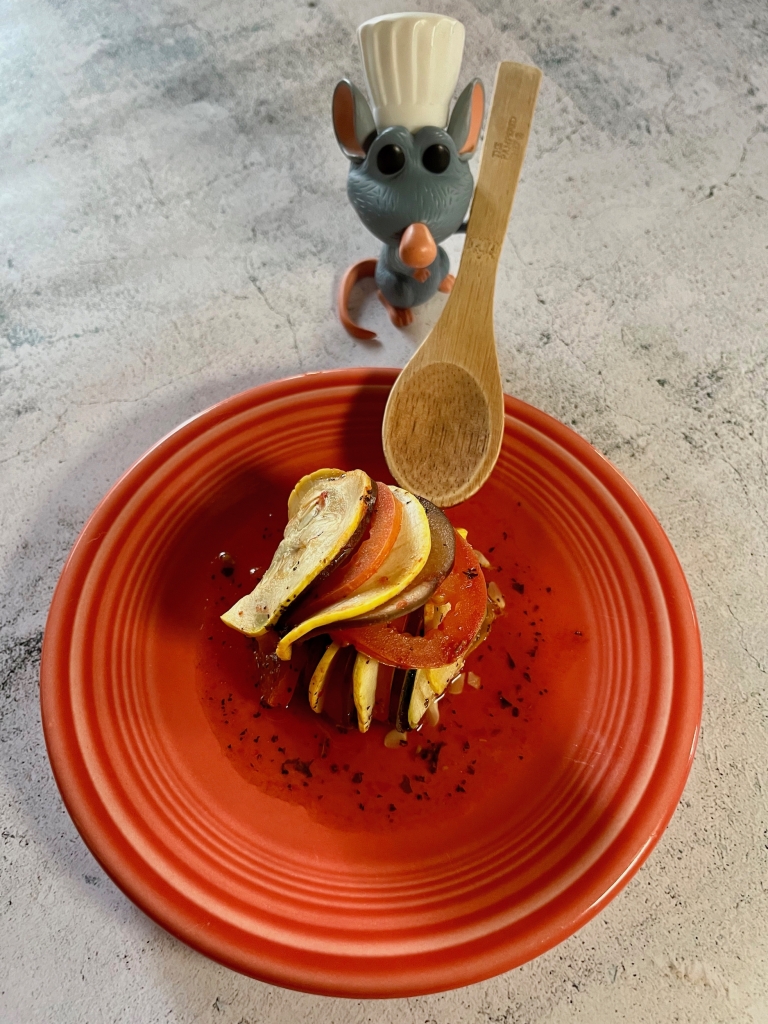
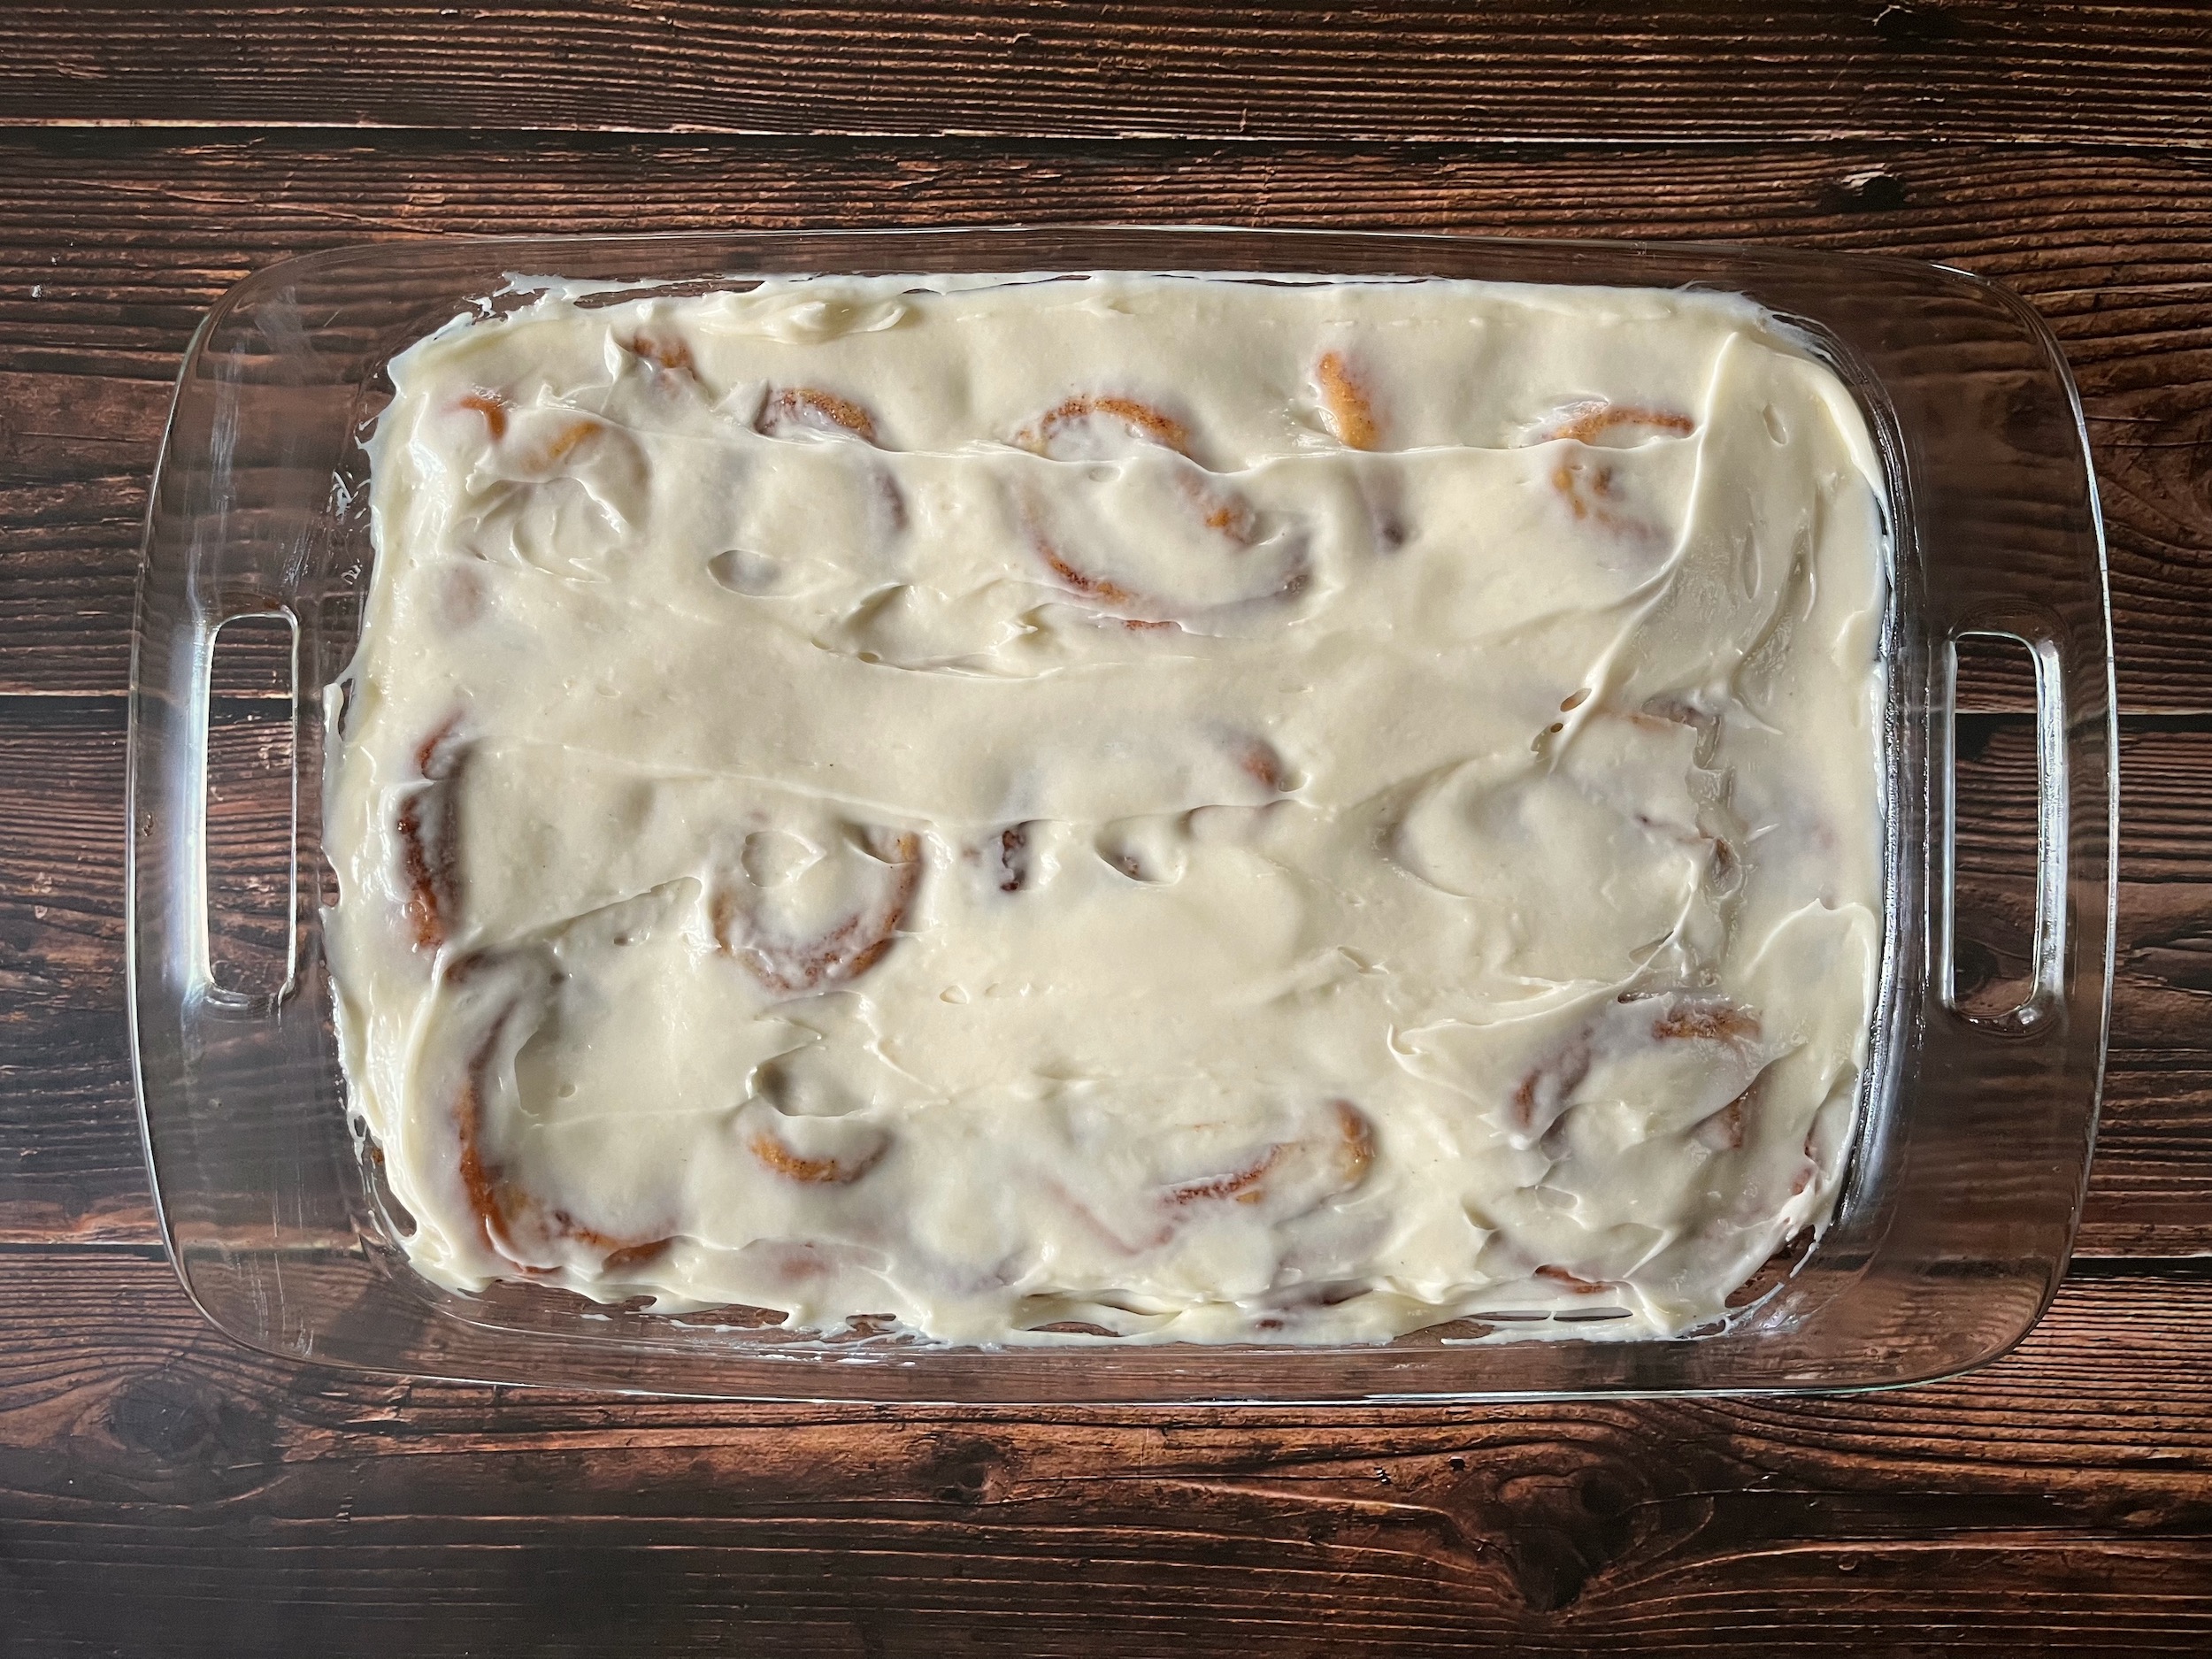
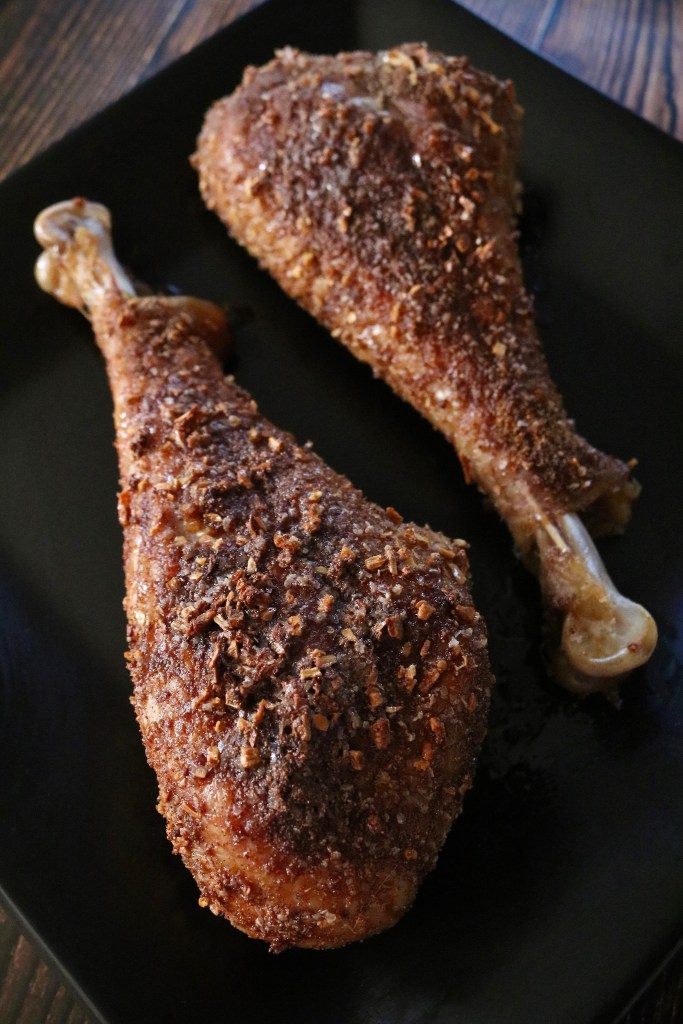
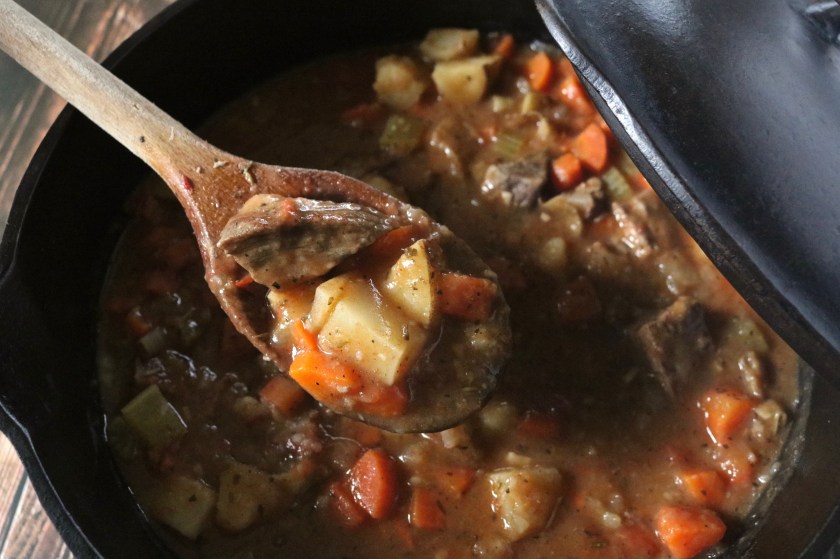
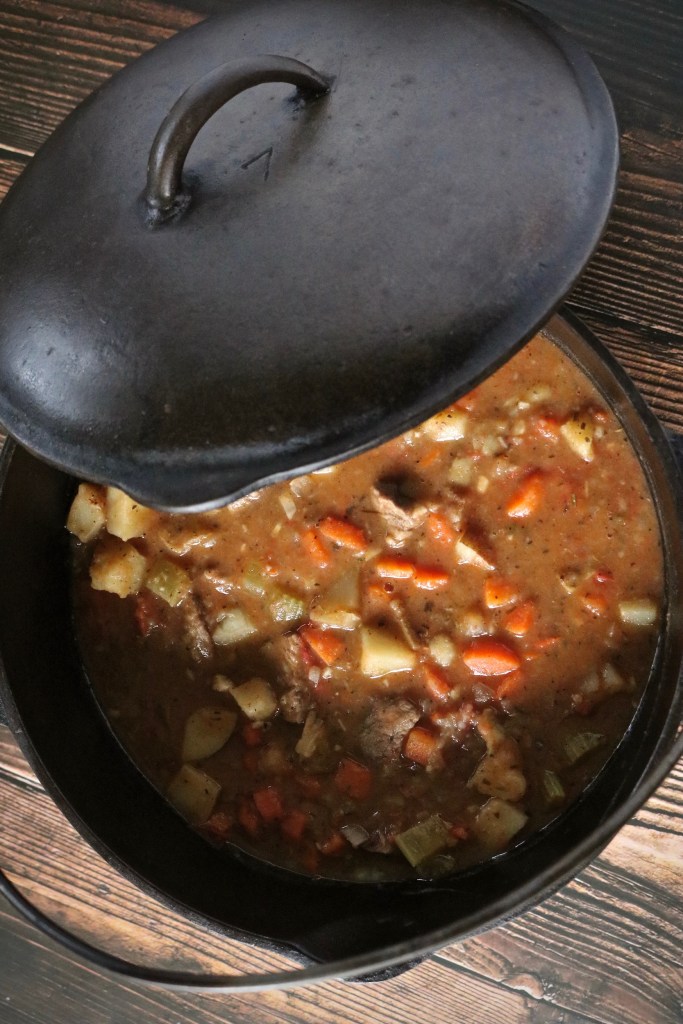
Welcome back friends! This week we’ll be cooking Remy’s Ratatouille from one of my favorite Disney and Pixar films, Ratatouille!

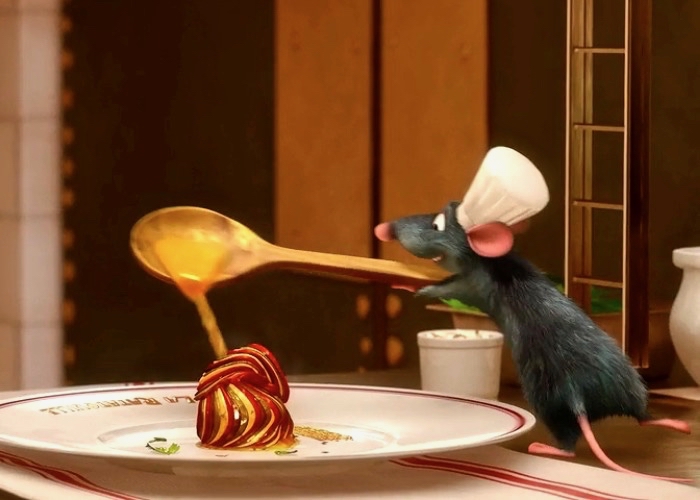
This recipe is featured near the end of the film when Remy is preparing a meal for the food critic, Anton Ego. It is referred to briefly as a “peasant’s dish”, but Remy’s version ignores all labels and boils down to good food that comforts the soul.

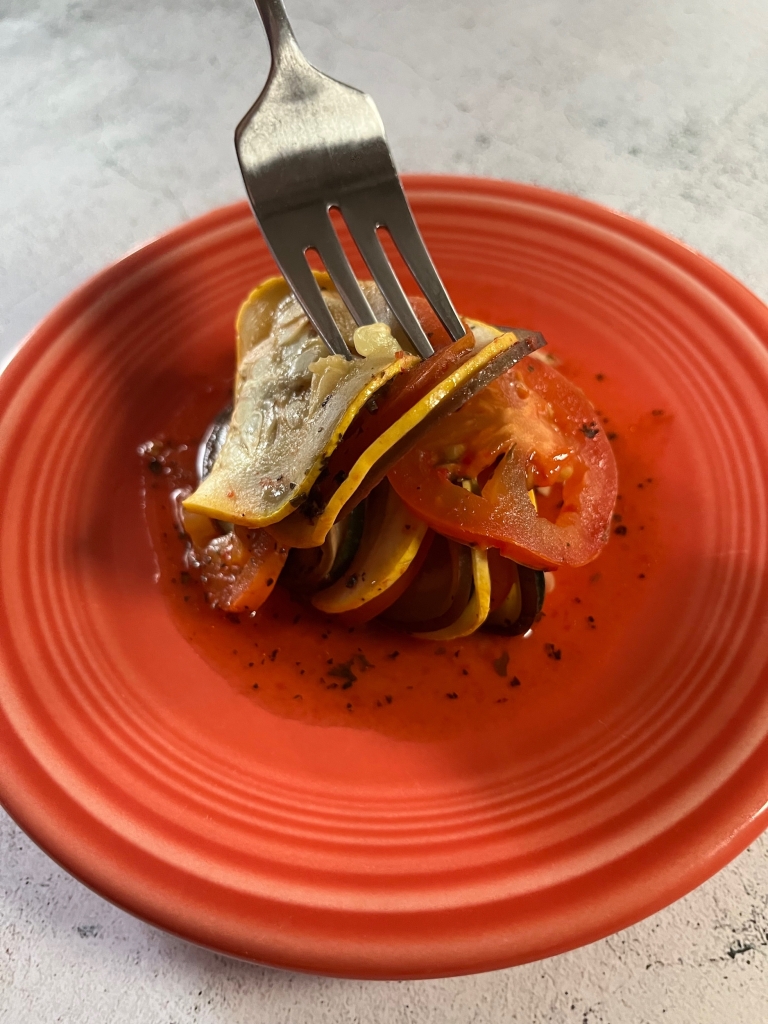
Ratatouille is warm and comforting; the perfect main or side dish for a cool or cold day. The arrangement of vegetables within the baking dish is creative and fun to do, although give yourself enough time to mise en place before beginning! Anyone can cook, bon appetit!

INGREDIENTS

VEGETABLES

  • 2 eggplant, trimmed and very thinly sliced
  • 6-8 Roma tomatoes, trimmed and very thinly sliced
  • 2 yellow squash, trimmed and very thinly sliced
  • 2 zucchini, trimmed and very thinly sliced

SAUCE

  • 2 tablespoons of olive oil
  • 4 cloves of garlic, minced
  • 1 onion, diced
  • 1 red bell pepper, diced
  • 1 yellow bell pepper, diced
  • Pepper, to taste
  • Salt, to taste
  • 28 ounce can of crushed tomatoes
  • 2 tablespoons of fresh basil, chopped

HERB SAUCE

  • 4 tablespoons of olive oil 
  • 2 tablespoons of fresh basil, chopped
  • 1 teaspoon of garlic, minced
  • 2 tablespoons of parsley, chopped
  • 2 teaspoons of fresh thyme
  • Salt, to taste
  • Pepper, to taste
INSTRUCTIONS
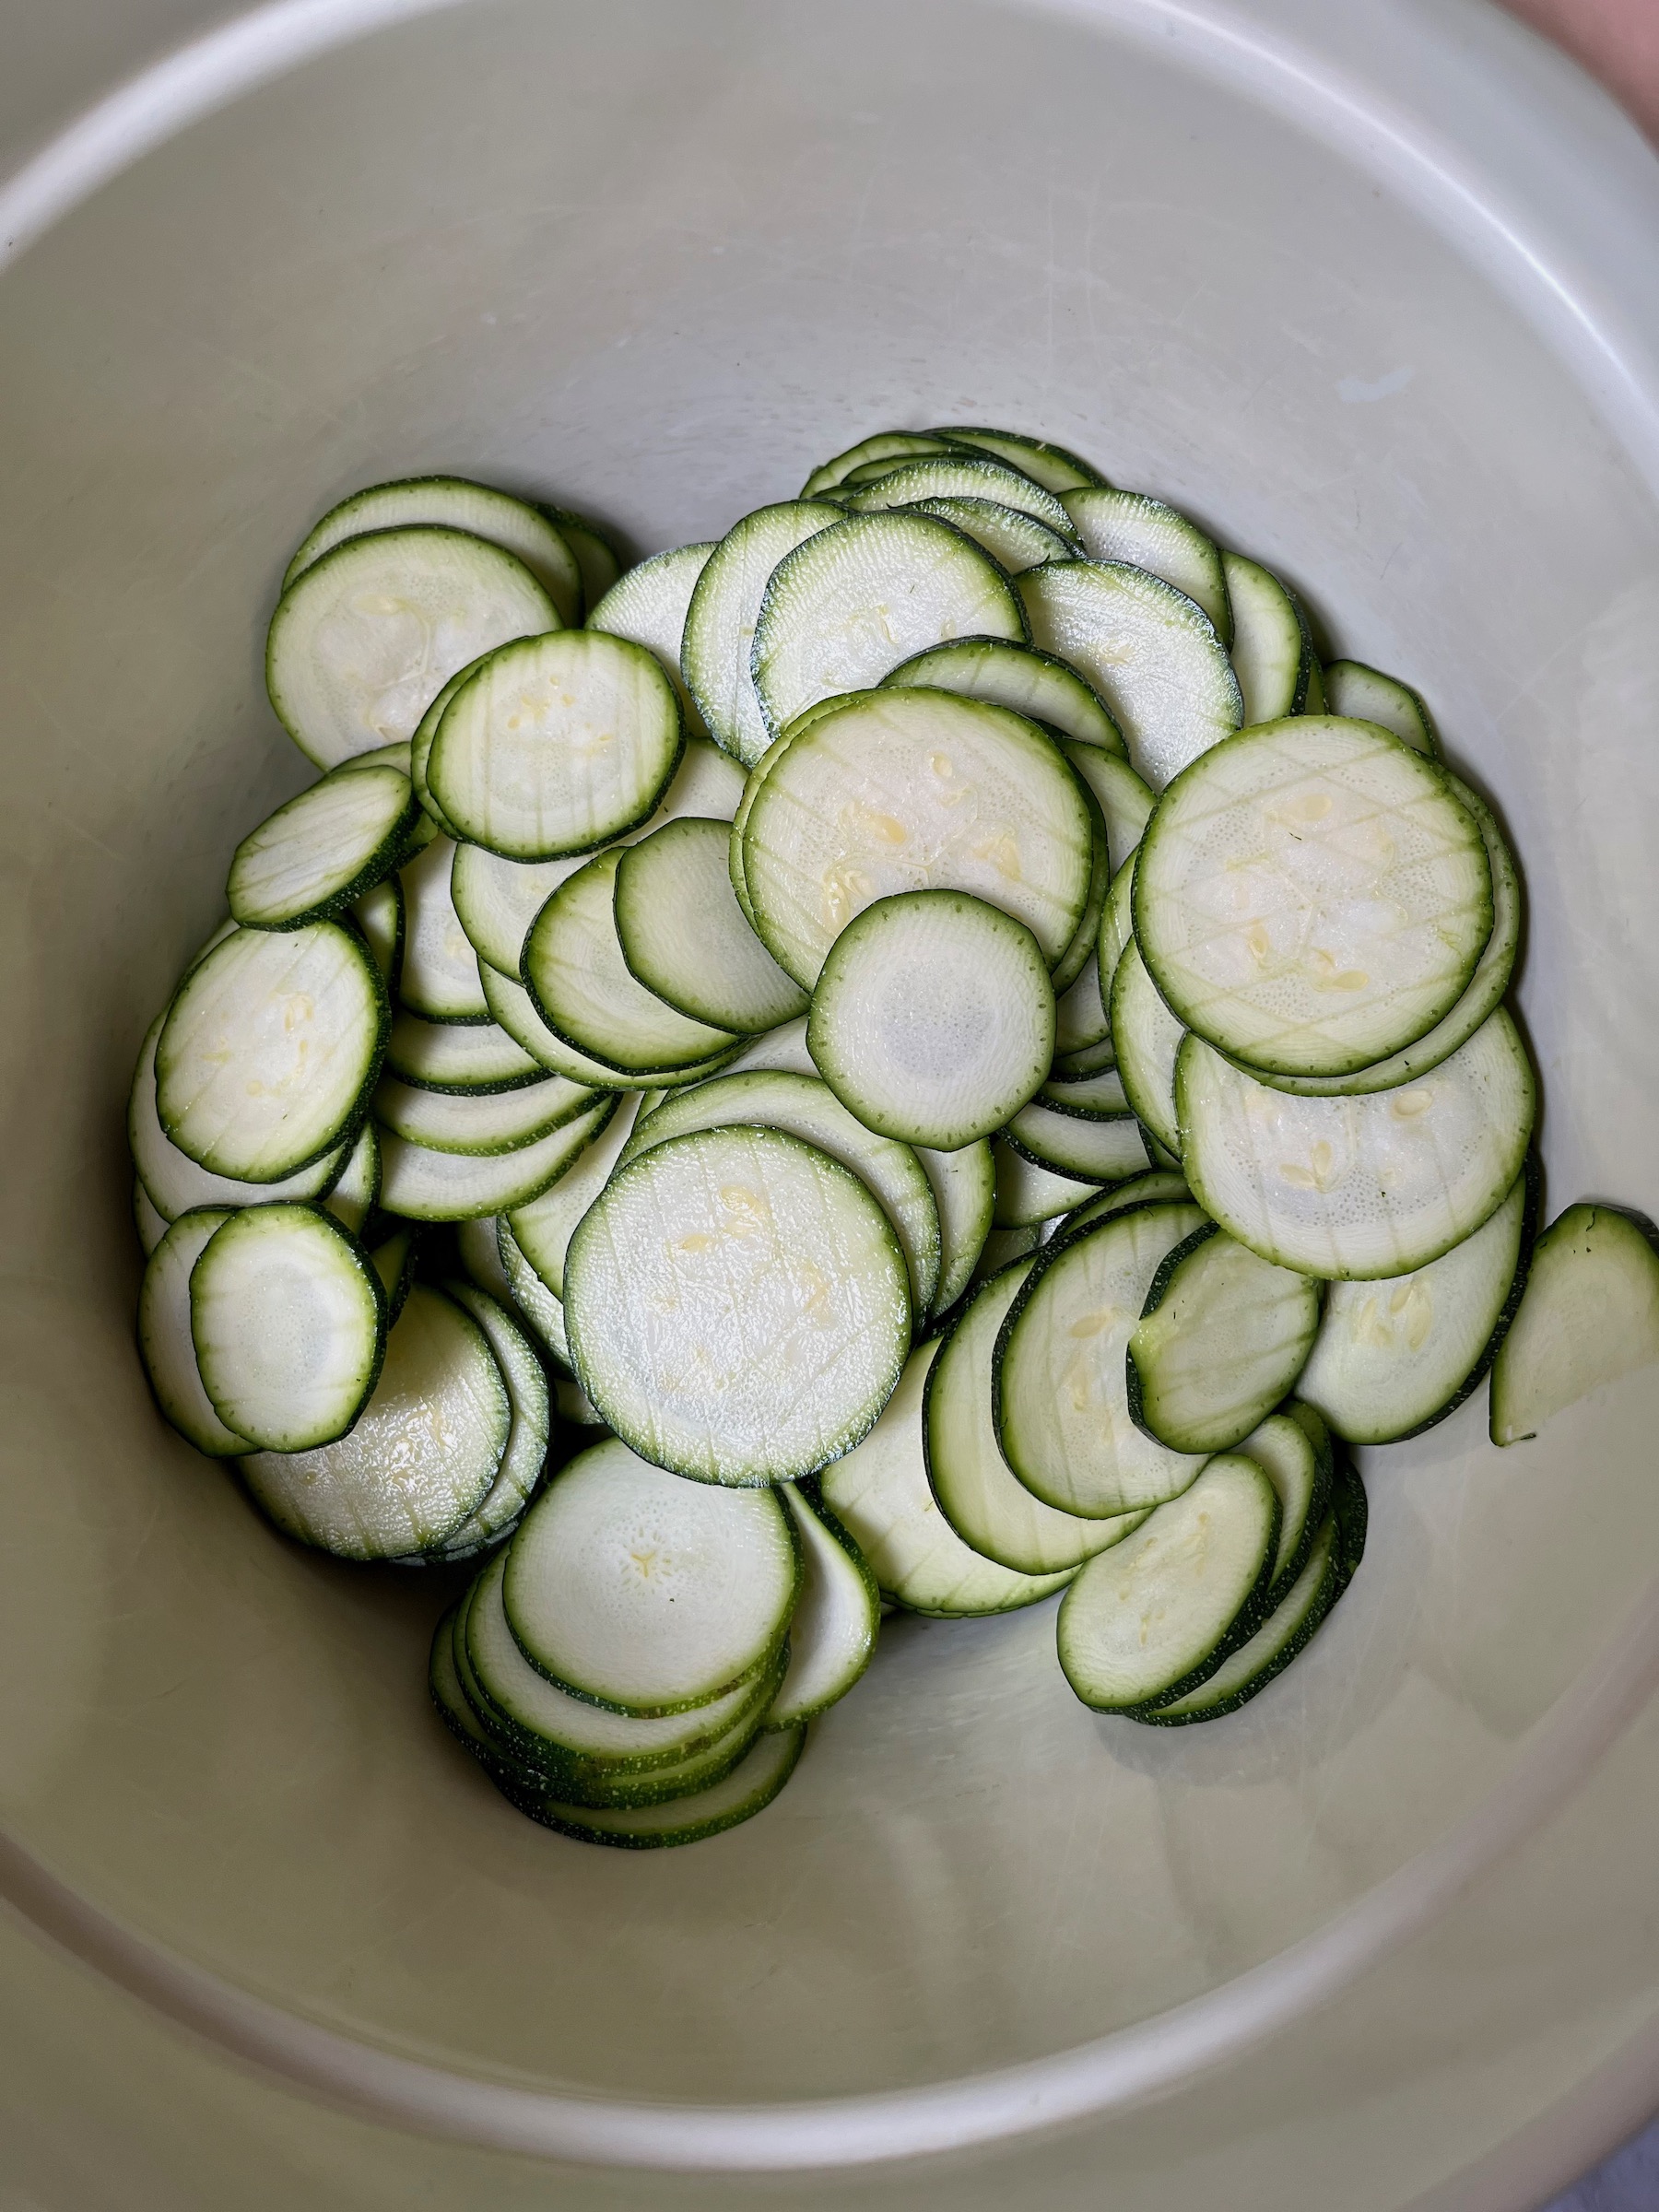
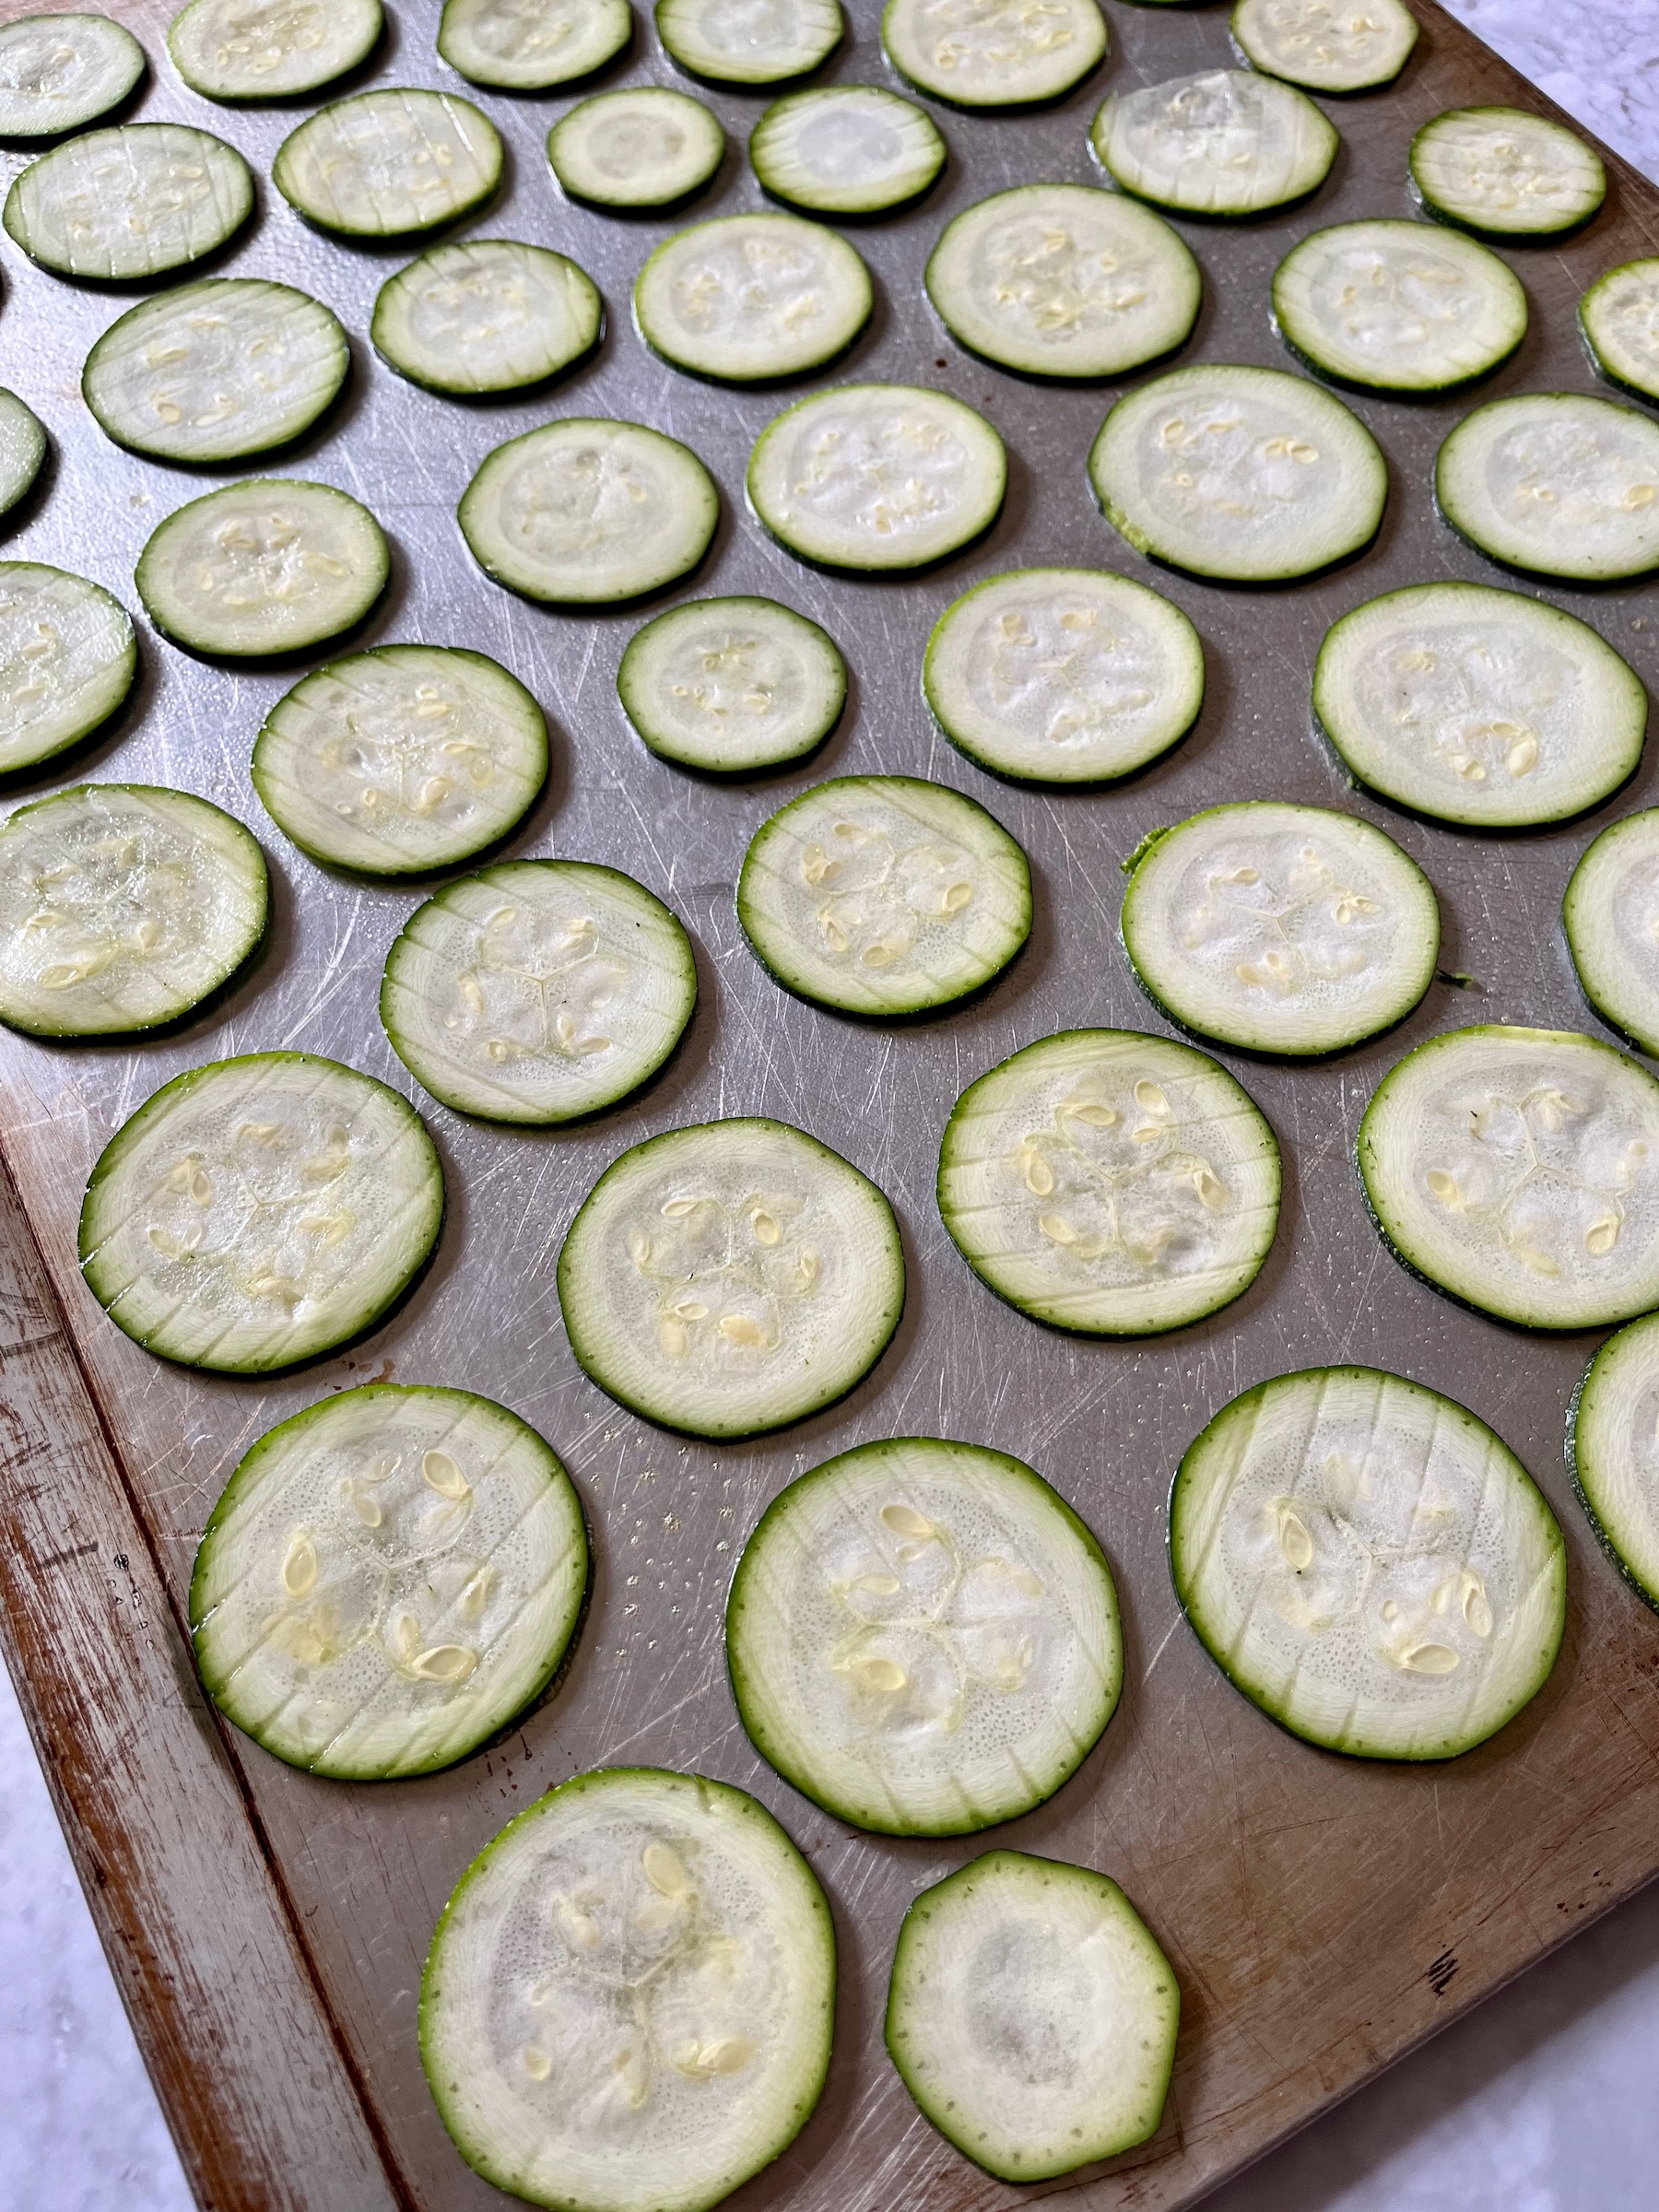
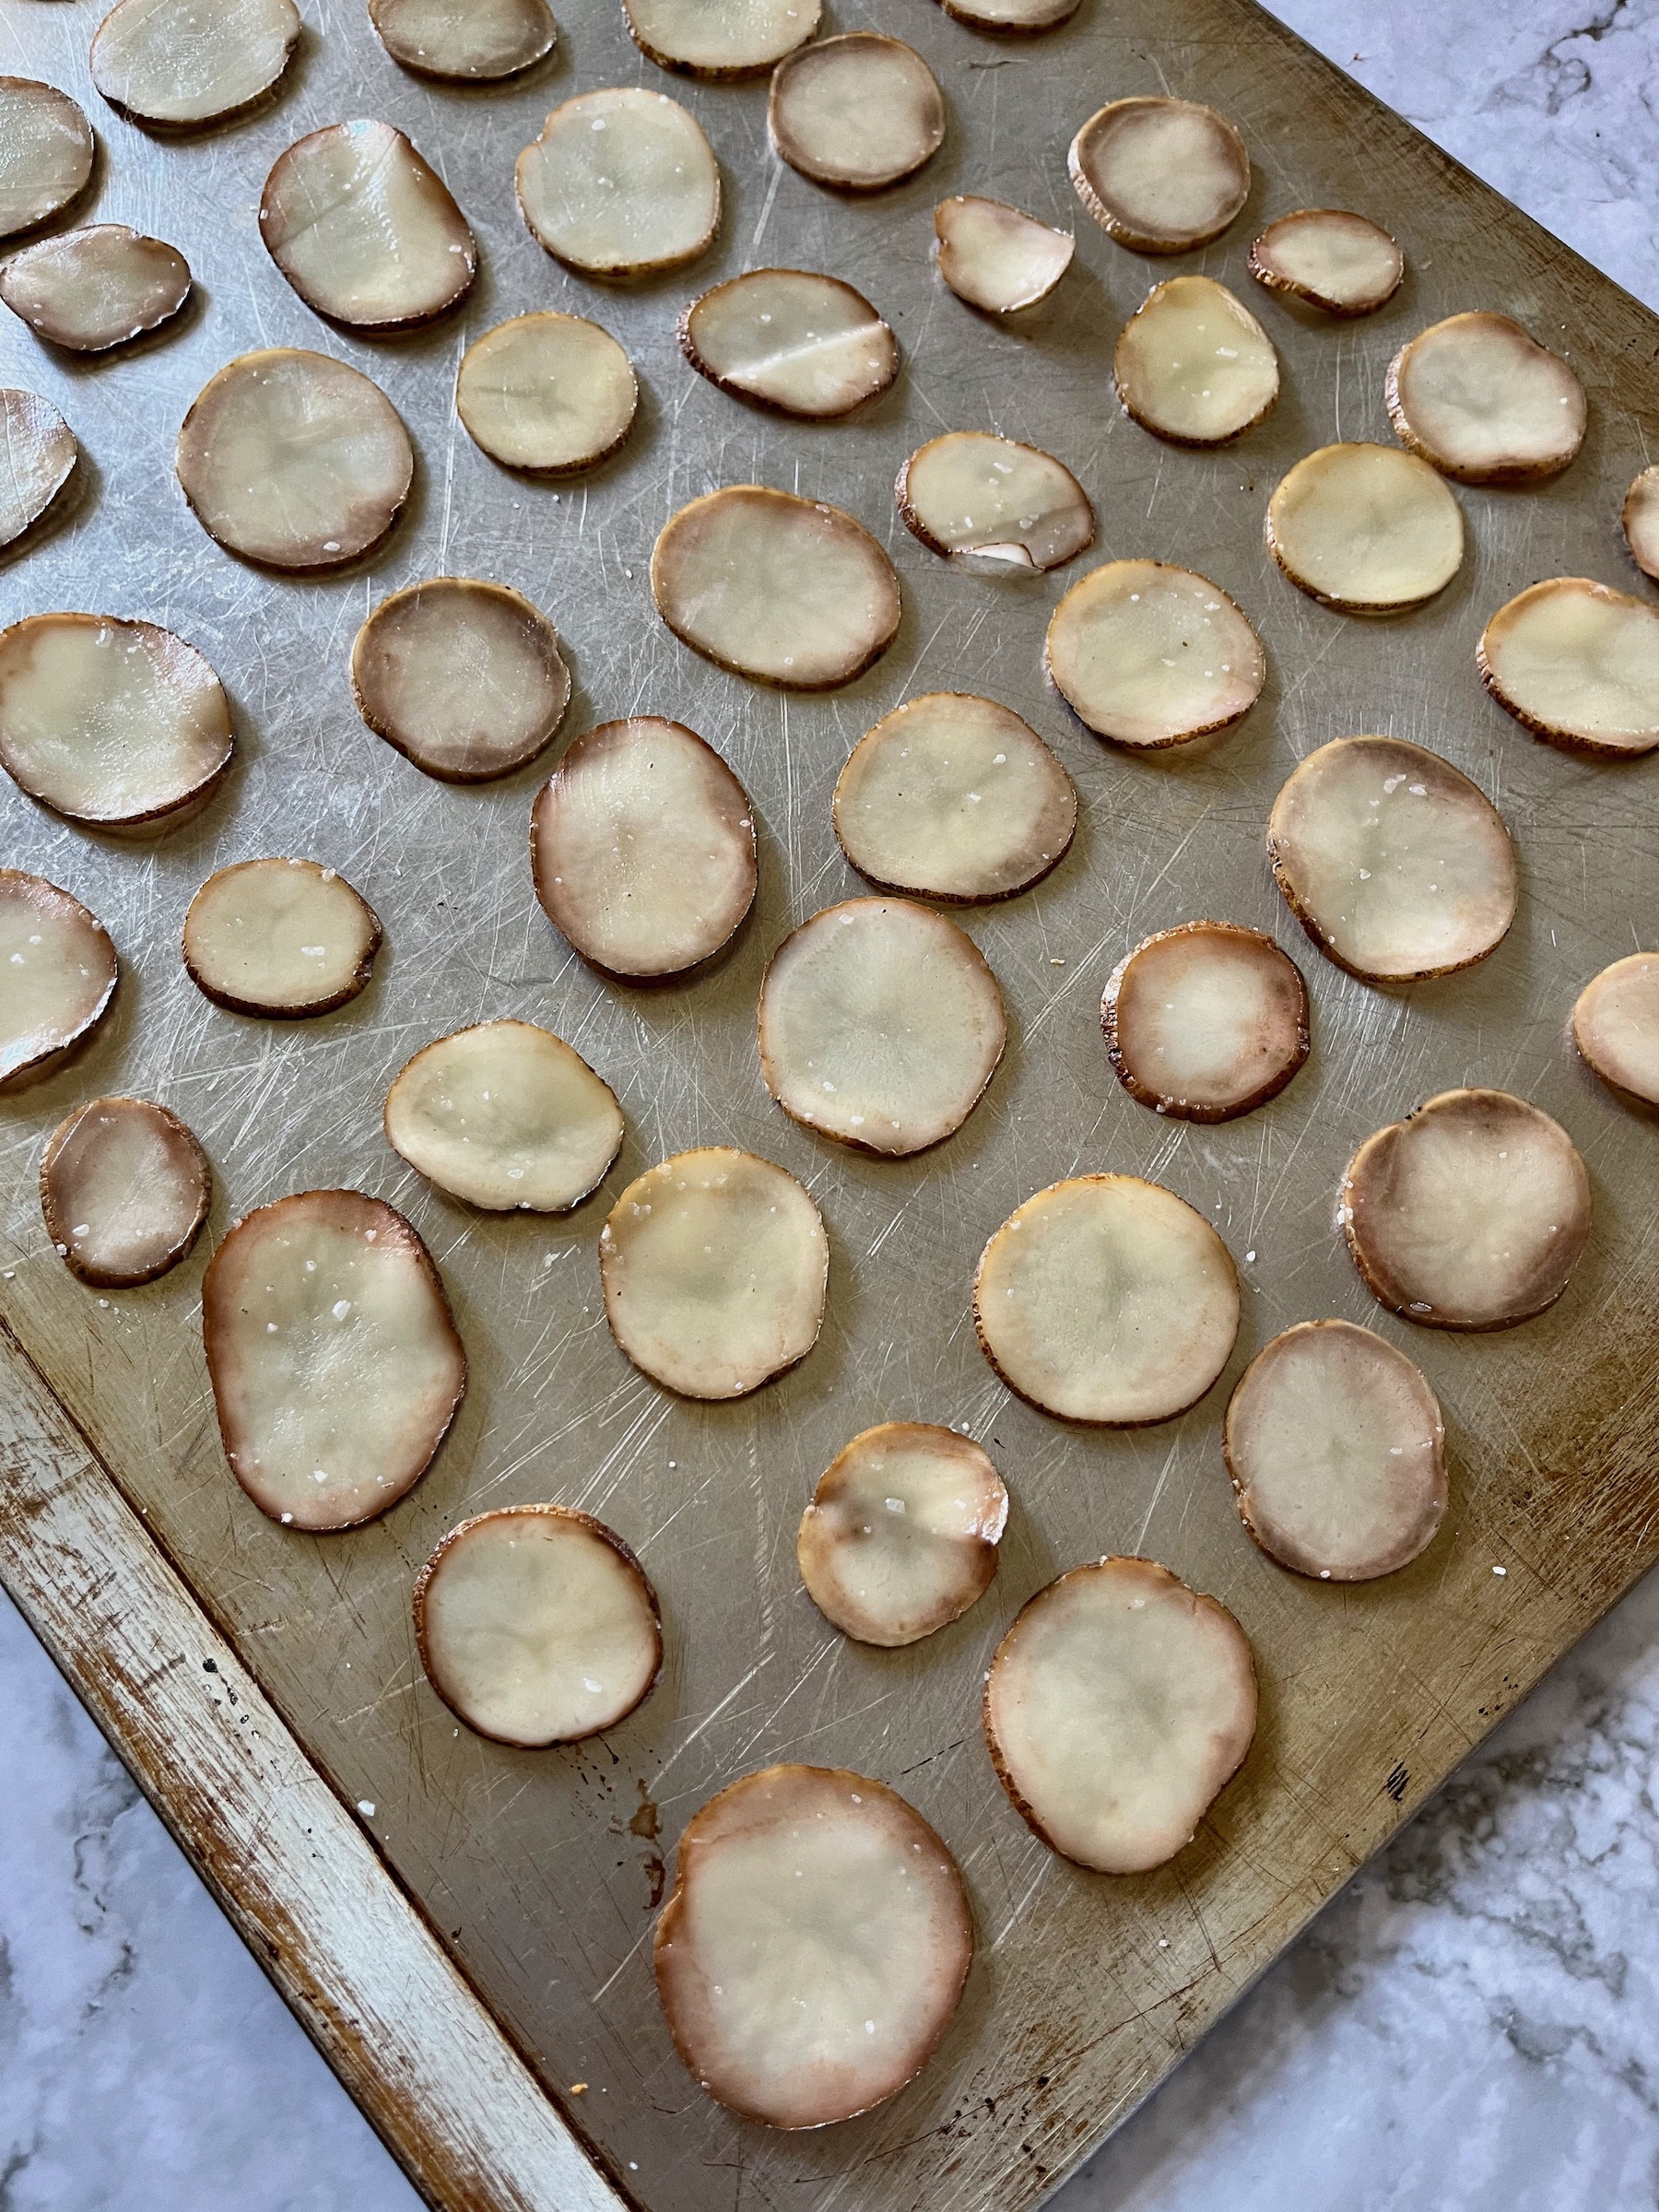
  1. Slice the eggplant, tomatoes, squash, and zucchini into approximately 1-mm rounds (I used a mandolin when possible), then set aside.
  2. To make the sauce, heat the olive oil in an oven-safe pan over medium-high heat. 
  3. Sauté the onion, garlic, and bell peppers until soft (about 10 minutes), then season with salt and pepper.
  4. Add the crushed tomatoes and stir until the ingredients are fully incorporated, then remove from heat, add the basil and stir again.
  5. Pre-heat the oven for 375 F.
  6. Arrange the sliced veggies in a repeating pattern (squash, zucchini, eggplant, tomato) on top of the sauce from the outer edge to the middle of the pan, then season with salt and pepper.
  7. To prepare the herb seasoning, mix together the basil, garlic, parsley, thyme, salt, pepper, and olive oil in a small bowl. 
  8. Brush the herb seasoning over the arranged vegetables.
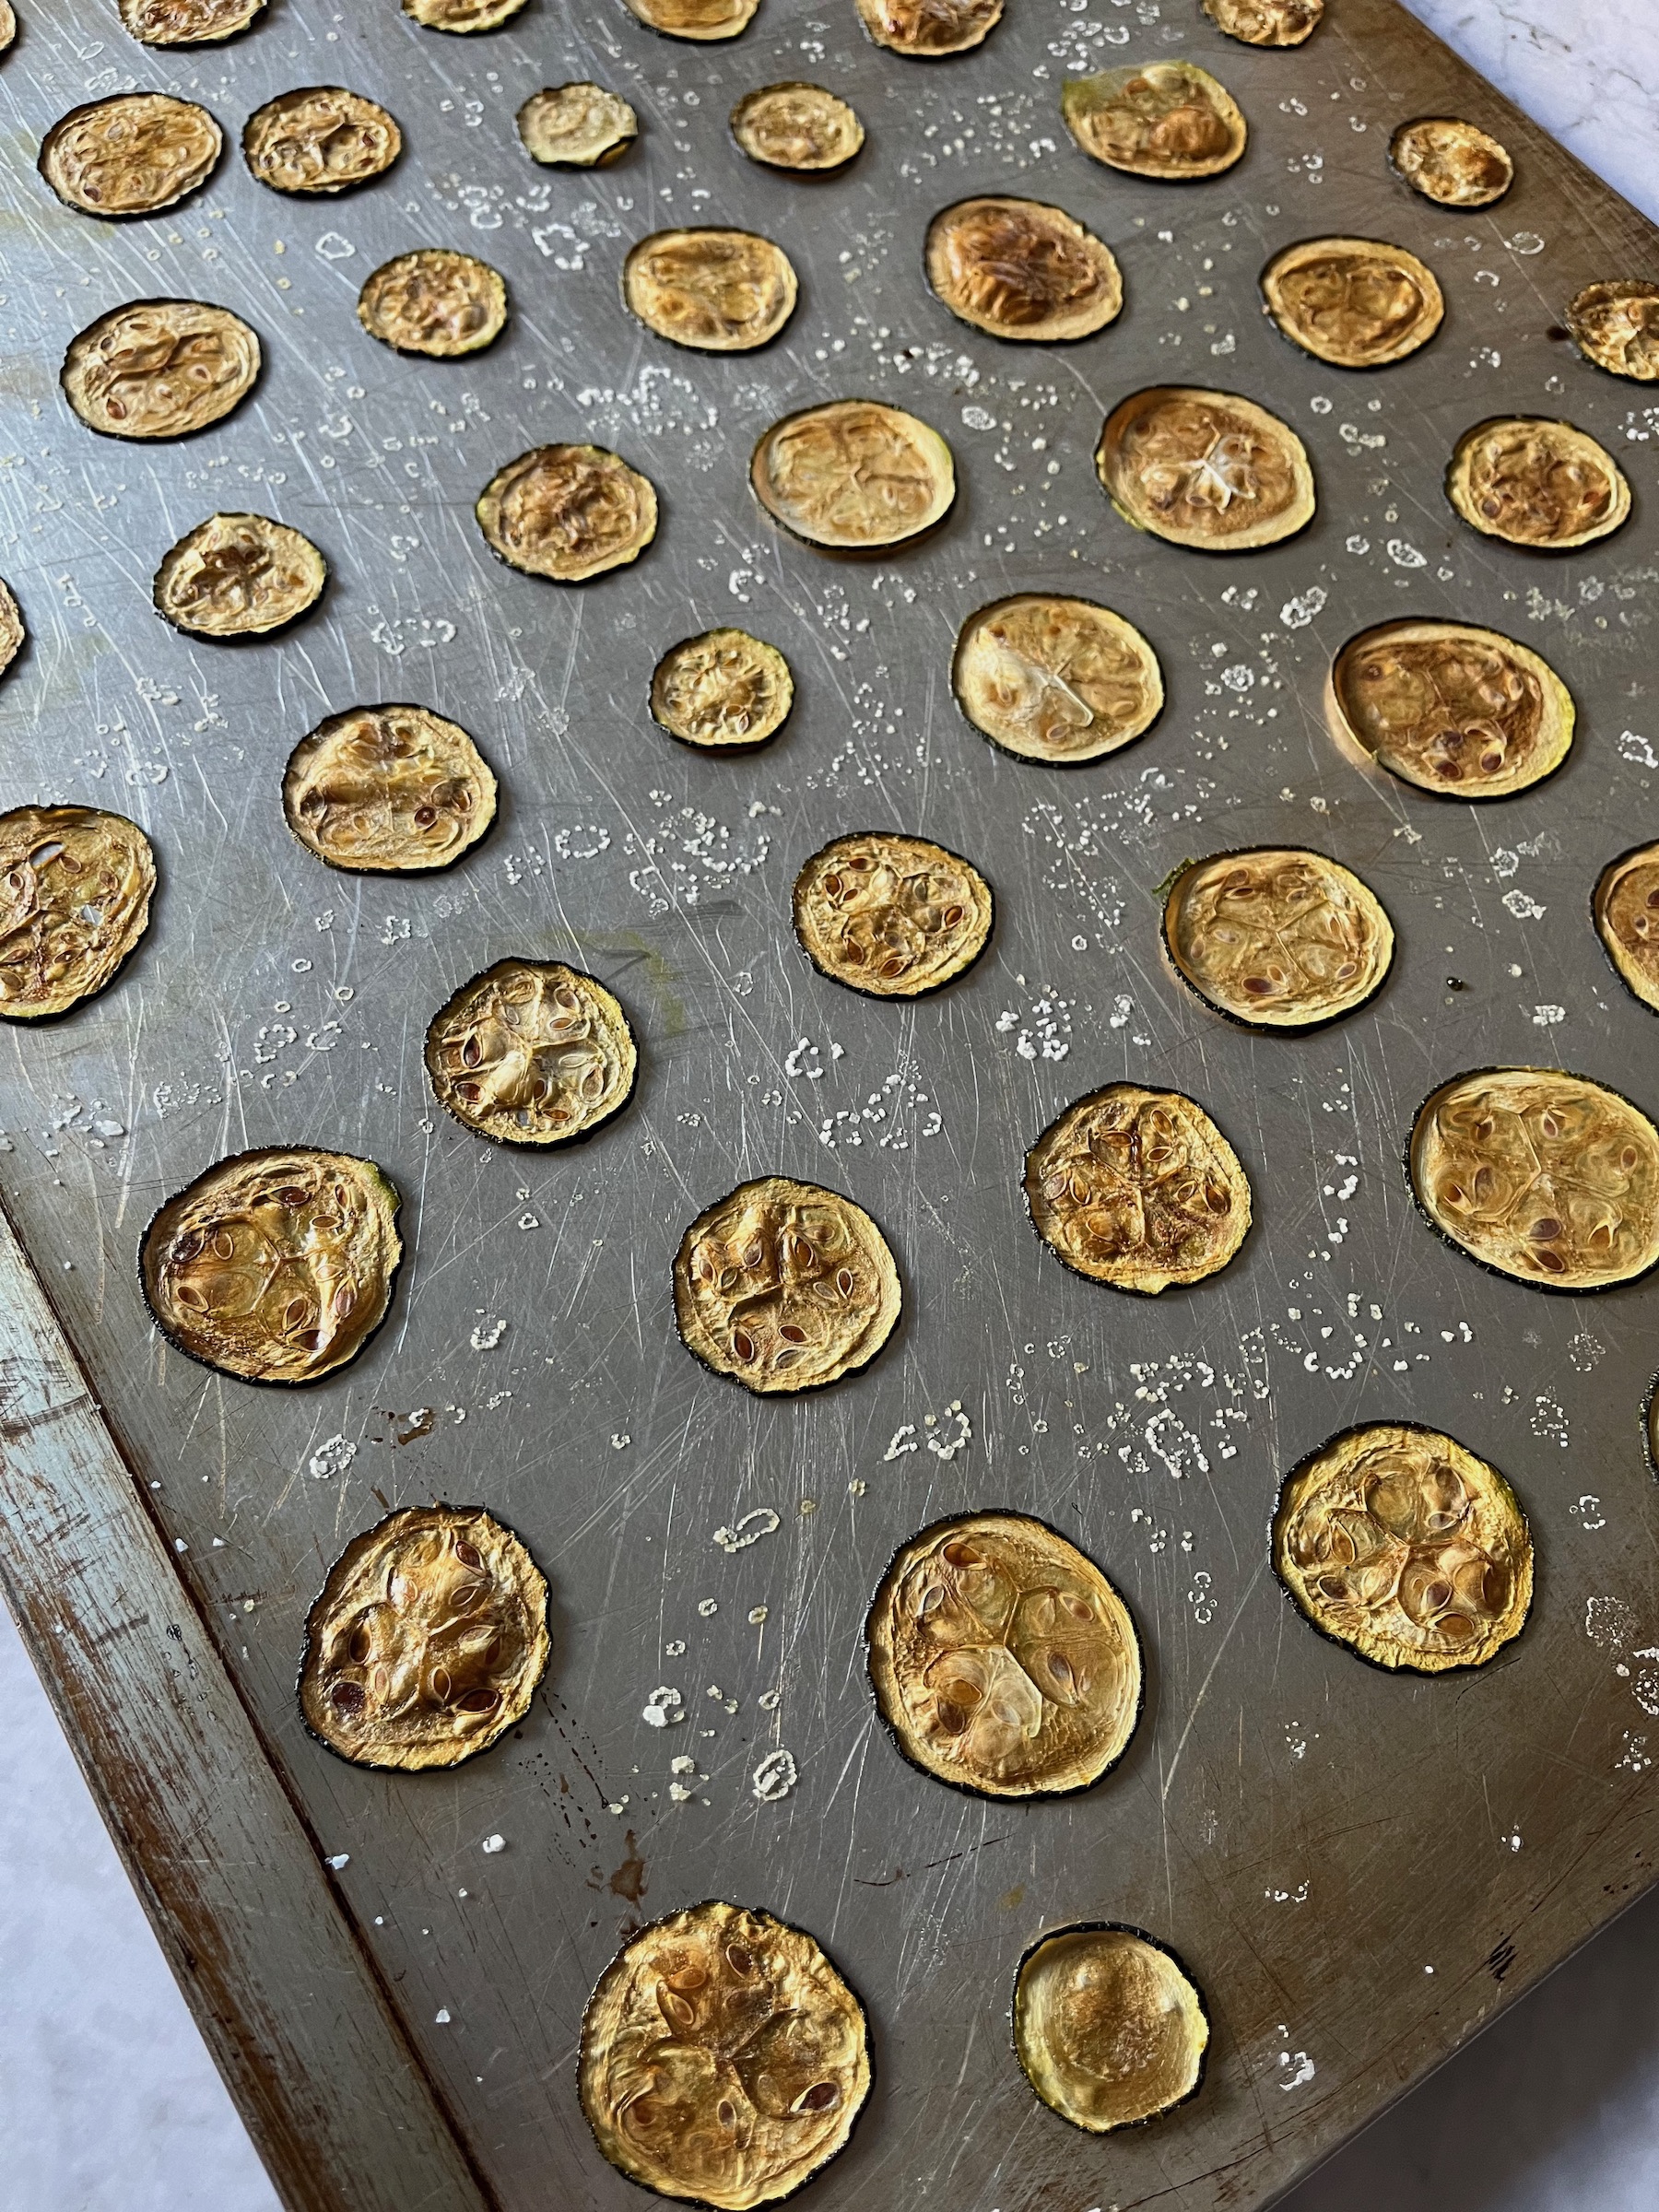
  9. Cut a circle of parchment paper and place it over the vegetables in the pan, then bake for 40 minutes. 
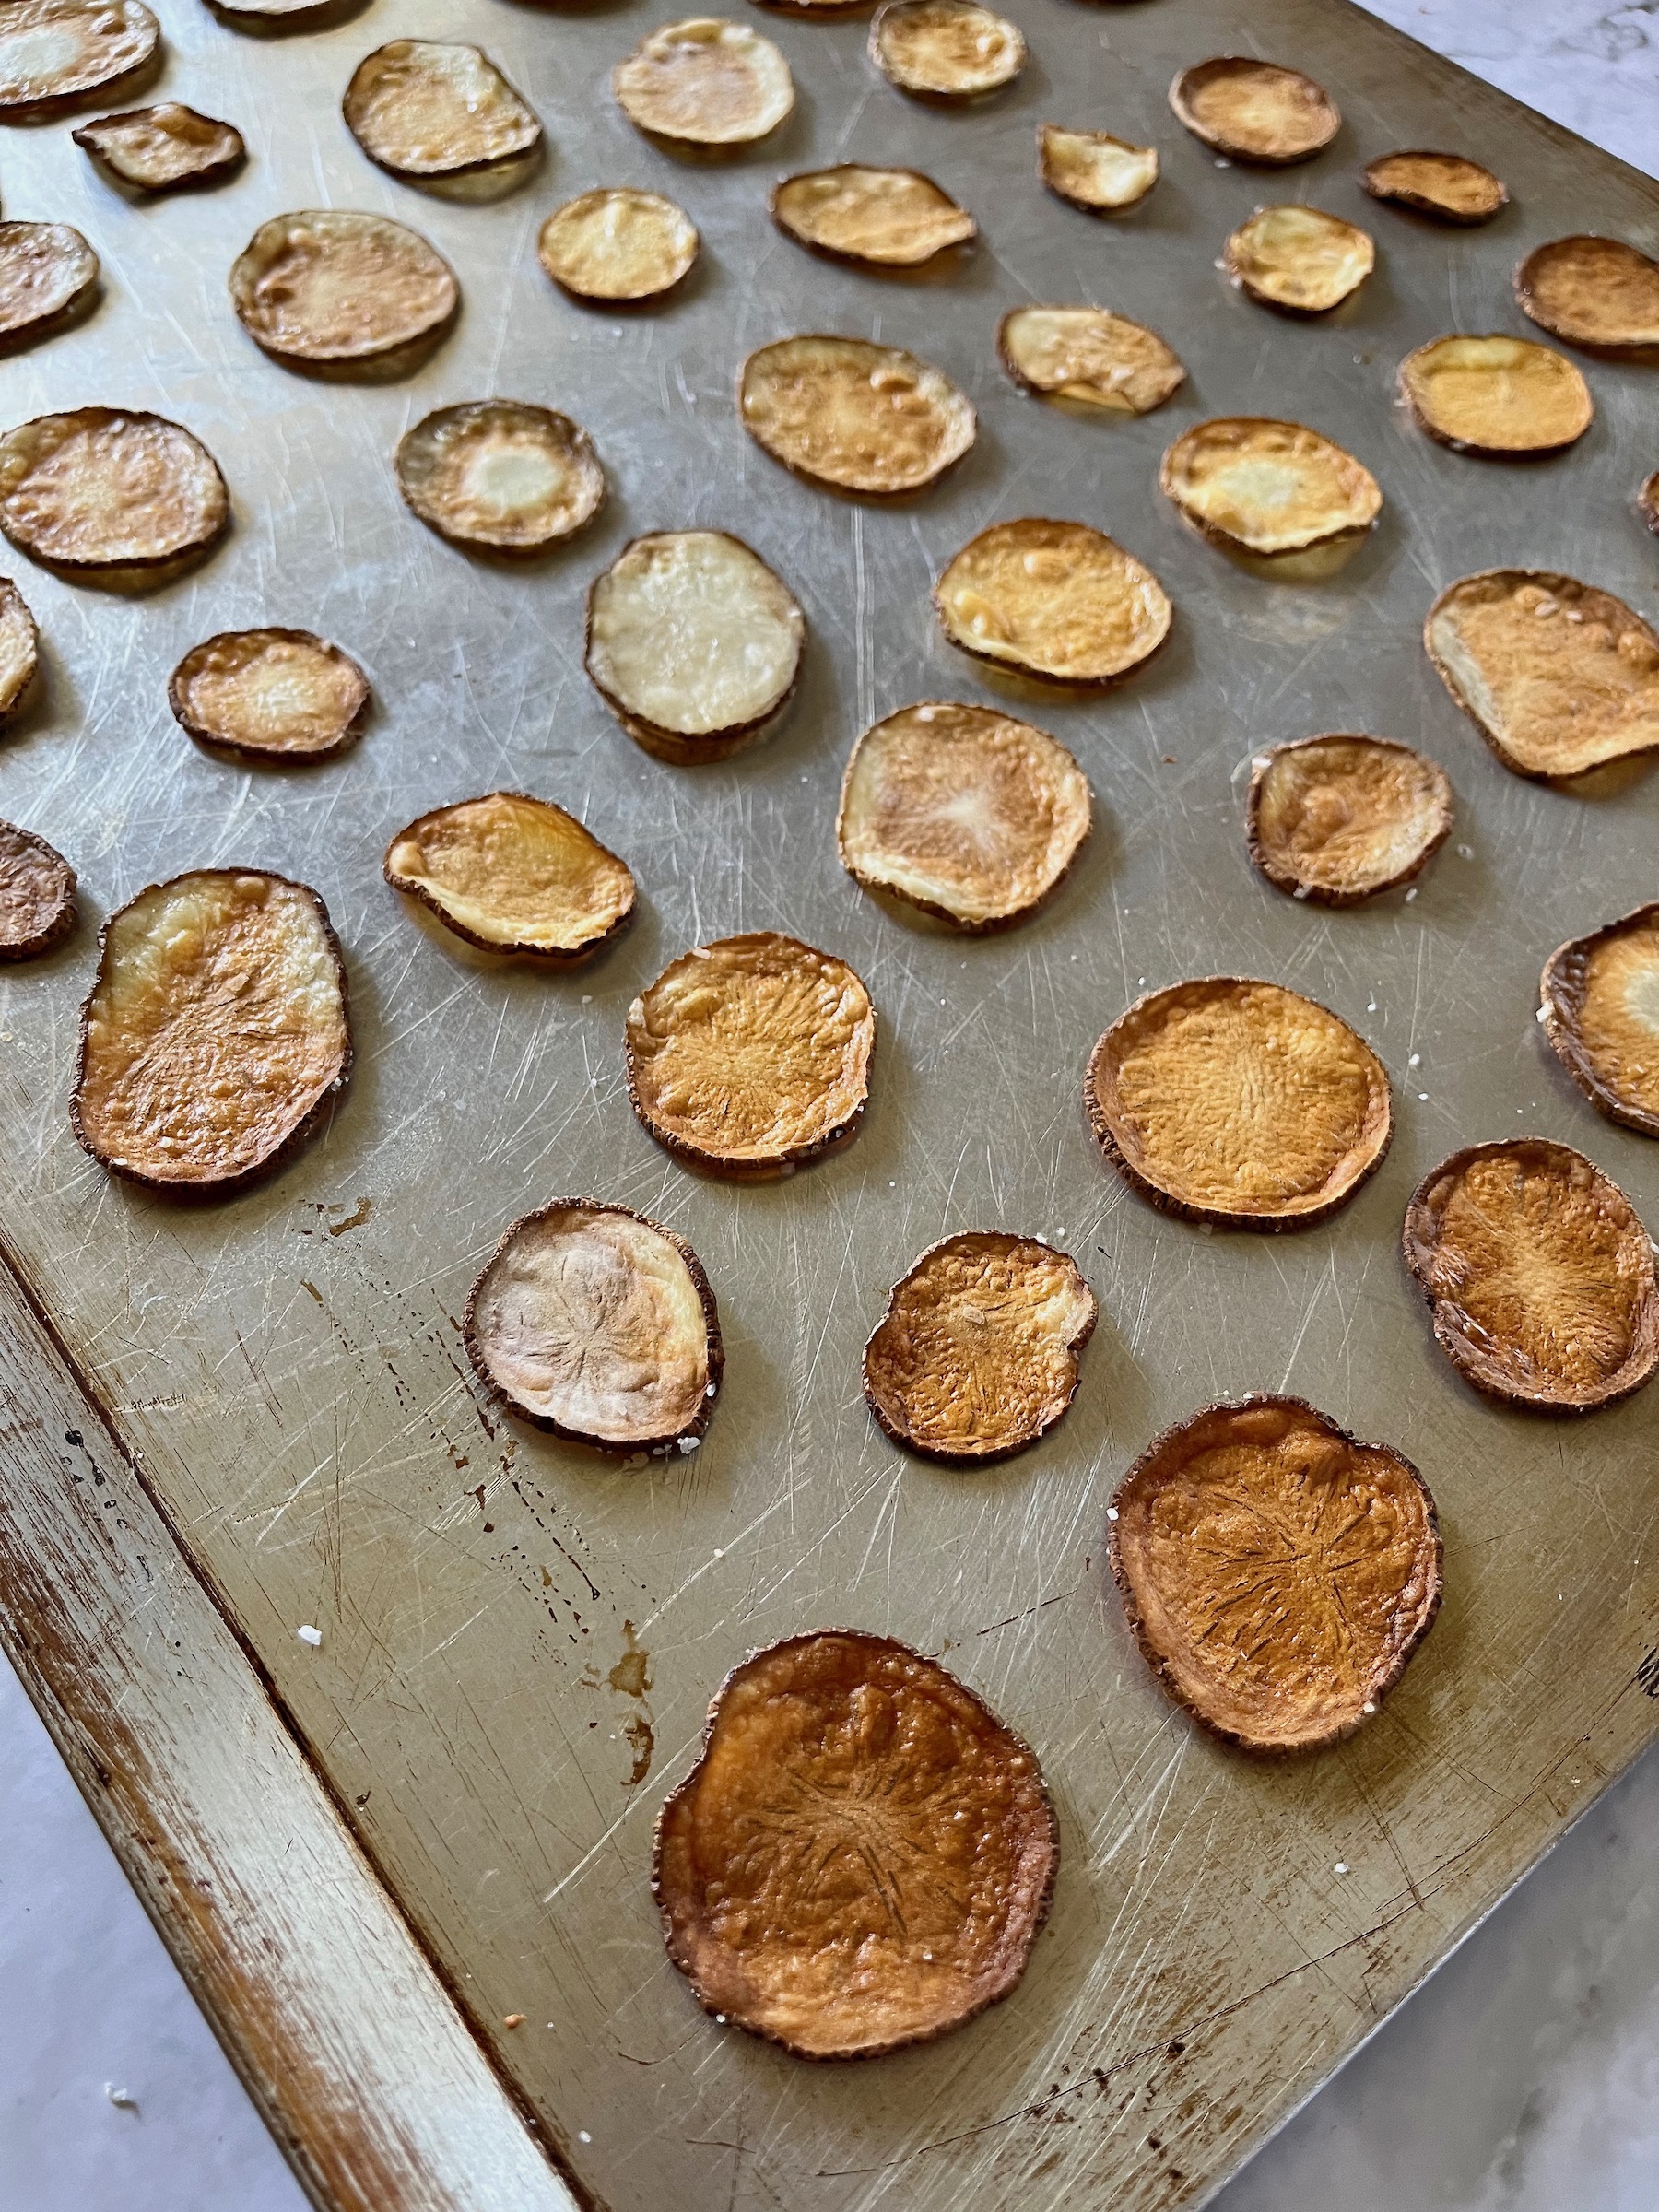
  10. Remove the parchment paper, then bake for another 20 minutes, until the vegetables are softened.
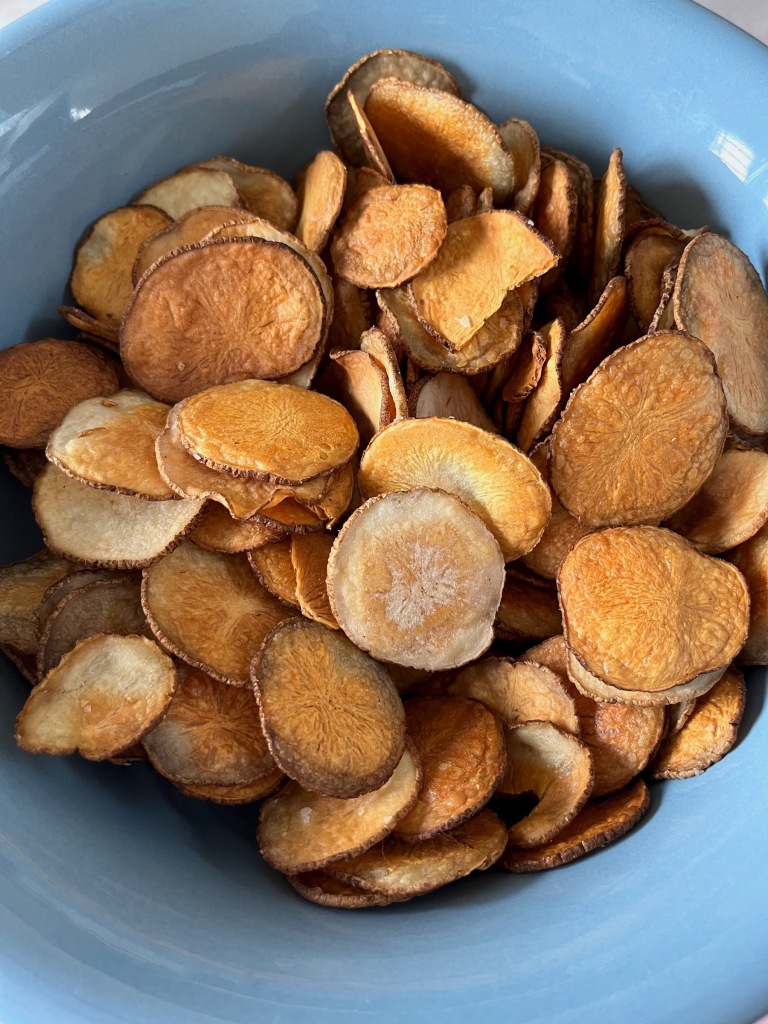
  11. Enjoy!
Advertisement

Homemade Comforting Cinnamon Roll Recipe

Welcome back friends! Who would like some warm and comforting, homemade cinnamon rolls on one (or more) of these cold winter mornings? Maybe at a table with some coffee or tea and a good book? Or maybe a good movie or show? I know I do, so let’s bake some!

INGREDIENTS

DOUGH

  • 1 cup of warm milk
  • 2 1/2 teaspoons of instant dry yeast
  • 1/2 cup of salted butter, softened
  • 2 large eggs, room temperature
  • 1/2 cup of granulated sugar
  • 4 1/2 cups of all-purpose flour, divided
  • 1 teaspoon of salt

FILLING

  • 1 cup of brown sugar, packed 
  • 1/2 cup of salted butter, softened
  • 2 tablespoons of cinnamon
  • 1 cup of heavy cream, divided

TOPPING

  • 1/3 cup of salted butter, softened 
  • 6 ounces of cream cheese, softened
  • 2 cups of powdered sugar
  • 1/2 tablespoon of vanilla extract
INSTRUCTIONS
  1. Pour the warm milk into a large bowl and sprinkle it with the yeast.
  2. Add the butter, eggs and sugar, then mix until well combined.
  3. Add 4 cups of the flour and the salt, then mix until well combined.
  4. Scrape the dough off the beater blade and knead for 5 to 7 minutes, or until the dough is elastic and smooth.
  5. Spray another large bowl with cooking spray and use a rubber spatula to remove the dough from the mixer bowl and place in the greased bowl.
  6. Cover the bowl and allow the dough to rise until doubled in size (about 30 minutes to an hour).
  7. While the dough is rising, prepare the filling. In a medium bowl, combine the soft butter, brown sugar, cinnamon and 1/2 cup of heavy cream; mixing it until well combined, then set it aside.
  8. Once the dough has risen, sprinkle a pastry mat generously with flour, and turn the dough onto the mat. Sprinkle the top of the dough with more flour.
  9. Flour a rolling pin and roll the dough to about 24” x 15” rectangle (though it does not have to be exact).
  10. Use a rubber spatula to smooth the filling over the whole dough rectangle.
  11. Starting at the long end, roll the dough up tightly.
  12. Cut the roll into 12 slices and place in a greased 9×13” baking pan.
  13. Cover the pan and allow the rolls to rise for 20 minutes or until nearly double.
  14. Pre-heat the oven to 375F.
  15. Warm the remaining 1/2 cup of heavy cream until the chill is off, then pour if over the risen rolls, allow it to soak in and around.
  16. Bake for 20 to 22 minutes, until gold brown and the center rolls are cooked through. Time will vary so keep an eye on them! If they are getting too brown, cover with aluminum foil.
  17. While the rolls are cooling, prepare the cream cheese frosting. In a large bowl combine the cream cheese and butter, blending well.
  18. Add the vanilla extract and powdered sugar, then beat until combined.
  19. Spread the frosting over the cooled rolls.

*To save time in the mornings, you can also prepare the dough the night before. Make the dough and proceed to the second rise when the rolls are in the pan. Once risen, cover them up again and put them in the refrigerator until morning. In the morning, remove them from the refrigerator and allow them to sit for about 30 minutes before baking.

Healthy Homemade Snack – Baked Zucchini Chips

I love a good snack, snacks are delicious! Are they good for you? Ehhh it’s always up for debate, but if you are going to eat something between meals, perhaps while you’re cozying up to watch a movie or play a game, why not make it a healthier choice?

I think most nutritionists agree that anything deep-fried should be consumed in moderation or not at all, but chips are sooooo good! The solution? Let’s create our own oven-baked chips! And not just potato chips, let’s create some delicious vegetable chips too! This way we are regulating exactly what is going into and/or on to our chips with no deep-frying to be found!

INGREDIENTS

  • 2 tablespoons of olive oil
  • 4 large zucchini
  • Salt

INSTRUCTIONS

  1. Preheat the oven to 240 F.
  2. Wash the zucchini, then use a mandolin to uniformly slice them into thin chips.
  3. Place the zucchini slices on a clean dish towel or paper towels. Cover them with another dish towel or paper towels and set a baking sheet on them, pressing own slightly to remove excess moisture.
  4. After drying, place the zucchini slices into a bowl and toss them with olive oil and a few pinches of salt (how much depends on your preference).
  5. Coat a large baking sheet (or more) with cooking spray or cover with parchment paper.
  6. Place the zucchini slices on the baking sheets in a single layer.
  7. Bake for 1 1/2 to 2 hours until crisp and golden.
  8. Allow the chips to cool completely. 
  9. Enjoy!

Healthy Homemade Snack – Baked Potato Chips

I love a good snack, snacks are delicious! Are they good for you? Ehhh it’s always up for debate, but if you are going to eat something between meals, perhaps while you’re cozying up to watch a movie or play a game, why not make it a healthier choice?

I think most nutritionists agree that anything deep-fried should be consumed in moderation or not at all, but chips are sooooo good! The solution? Let’s create our own oven-baked chips! This way we are regulating exactly what is going into and/or on to our chips with no deep-frying to be found!

INGREDIENTS

  • 1 pound of russet potatoes
  • 1 tablespoon of olive oil
  • 1/4 teaspoon of salt

INSTRUCTIONS

  1. Wash the potatoes, then use a mandolin to uniformly slice them into thin chips.
  2. Place the potato slices into a large bowl and cover them with cold water. 
  3. Cover the bowl and place it in the refrigerator to soak for at least 30 minutes to overnight.
  4. Drain the potato slices and pat them dry.
  5. Preheat the oven to 450 F.
  6. Coat a large baking sheet (or more) with cooking spray.
  7. In a large bowl, toss the potato slices together with the olive oil and salt to coat evenly. 
  8. Spread the potato slices in a single layer on the prepared baking sheet.
  9. Place in the oven and bake for 10 to 12 minutes, or until the chips are a very light golden color and appear crunchy. Keep a careful eye on the potatoes to make sure they don’t brown and overcook.
  10. Allow the chips to cool completely. 
  11. Enjoy!

Trigger’s Blackberry Pie Recipe (Robin Hood)

INTRODUCTION

Welcome back friends! This week we’ll be baking Trigger’s Blackberry Pie from Disney’s Robin Hood!

This recipe is featured when Robin Hood is discovered at Prince John’s archery competition and a fight ensues. One of the Sheriff of Nottingham’s henchmen, Trigger the vulture, is hiding out in a pie booth surrounded by these pies.

Note to self: Blackberries have seeds! This pie is sweet, tart and delicious, but there are seeds from the blackberries that startled me before I expected them! You could strain the seeds out by forcing the blackberries through a sieve. This recipe calls for whole berries, but you can adjust accordingly if the seeds throw off your groove!

TRIGGER’S BLACKBERRY PIE

CRUST

  • 2 1/2 cups of all-purpose flour
  • 1 teaspoon of kosher salt
  • 1 cup of unsalted butter, chilled
  • 6-8 tablespoons of water, chilled

FILLING

  • 1 cup of sugar
  • 1/2 cup of flour
  • 4-6 cups of fresh blackberries
INSTRUCTIONS (CRUST)
  • Add the flour and salt to a bowl and whisk to combine.
  • Cut the chilled butter into cubes and add the cubes to the bowl of flour and salt. Using a pastry cutter, cut the butter into the flour mixture until well combined.
  • Begin adding the tablespoons of chilled water one at a time and stirring well after each addition until the dough forms.
  • Turn the dough out onto a clean flat surface and work it into a ball. Cut this ball in half and plastic wrap each piece, then set inside the refrigerator to chill for at least 1 hour.
  • Bring out the first half of the dough and roll it out until it is about 1/4 inch thick and large enough to fit into your pie pan. 
  • Gently pick up the rolled out dough and place it gently into the bottom of your pie pan, then smooth it in and trim the edges.
INSTRUCTIONS (FILLING)
  1. Pre-heat the oven to 425 F.
  2. Wash the blackberries and add them to a bowl.
  3. Add the sugar and stir until well coated, then add the flour and stir until well coated.
  4. Pour the filling into the prepared pie crust.
  5. Bring out the second half of the dough and roll it out until it is about 1/4 inch thick and large enough to cover your pie.
  6. Gently pick up the rolled out dough and place it gently over the top of the pie, then trim the edges.
  7. Using a fork or your fingers, crimp or pinch the edges.
  8. Add 3 to 4 slits for venting while the pie bakes.
  9. Cover the edges of the pie with a 2 to 3 inch strip of foil to prevent excessive browning.
  10. Bake for 45-55 minutes or until the crust is golden brown and juice begins to bubble through the slits in crust, remove the foil for the last 15 minutes of baking. 
  11. Remove from the oven and allow it to cool on the rack at least 2 hours or more to allow the filling to thicken.
  12. Enjoy!

WDP Roasted Peanut Recipe (Dumbo)

WDP Peanut Recipe
INTRODUCTION

Welcome back friends! We took a little break from creating Disney recipes, but I’ve missed this, so we’re picking things back up again! This month we’ll be roasting the peanuts from the WDP Circus in Disney’s Dumbo.

This recipe is featured twice in the film. Timothy mouse is snacking on them when he first meets Dumbo, and when Dumbo stretches his ears to fly, he sucks them up and sprays over all the rude elephants.

I love salted peanuts! These are brined to get the salted flavor within the the shell, then tossed with peanut oil and salt before roasting. These are a healthy and delicious snack, I hope you enjoy them!

WDP Peanut Recipe
WDP Peanut Recipe
WDP CIRCUS’S ROASTED PEANUTS
  • 1 1/2 pounds in-shell raw dried peanuts
  • 2 quarts of water
  • 1/2 cup of kosher salt
  • 2 tablespoons of peanut oil
  • 2 tablespoons of kosher salt
INSTRUCTIONS
  1. Thoroughly rinse the peanuts under cool water to remove any excess dirt.
  2. In a large bowl or pot, dissolve the 1/2 cup of salt in the water, then add the peanuts. 
  3. Place a plate over the water’s surface to ensure the peanuts are submerged and brine for 24 hours.
  4. Drain the water, and spread the peanuts on baking sheets in a single layer to dry (this may take several days).
  5. Once the peanuts are dry, preheat the oven to 350 degrees F.
  6. Place the peanuts in a large bowl and toss them with the peanut oil and salt until well coated.
  7. Spread the peanuts back out onto baking sheets in a single layer. 
  8. Roast in the oven for 40 to 45 minutes, rotating the pan(s) after 20 minutes. Everyone’s oven is different, so keep an eye on them so they won’t burn!
  9. Remove the peanuts from the oven. They will continue to “cook” and become crunchy as they cool.
  10. Allow them to cool before eating and enjoy!
WDP Peanut Recipe

Sir Kay’s Turkey Leg Recipe

Sir Kay's Turkey Leg Recipe (Sword in the Stone)

INTRODUCTION

Welcome back friends! This week we are roasting the turkey legs Sir Kay eats in Disney’s The Sword in the Stone.

Sir Kay's Turkey Leg Recipe (Sword in the Stone)

This recipe is featured near the beginning of the film, in a scene that establishes Sir Kay’s contemptible nature. He munches on this turkey leg as he declares his indifference about Arthur’s whereabouts and safety. When I was little, I remember being fascinated at how easily he eats the meat off the bone.

Sir Kay's Turkey Leg Recipe (Sword in the Stone)

Sir Kay's Turkey Leg Recipe (Sword in the Stone)

This was an experimental recipe to be sure, but super fun to research! I looked up what kind of spices cooks had available and used on their meat during the Sword in the Stone’s time period, then created this rub! It is delicious, but I will warn you it is rich. I would definitely pair it with something fresh like a salad or another fruit or vegetable.

Sir Kay's Turkey Leg Recipe (Sword in the Stone)

Sir Kay's Turkey Leg Recipe (Sword in the Stone)

TURKEY LEGS
  • 2 Turkey legs
  • 1/16 teaspoon of black pepper
  • 1/2 teaspoon of cinnamon
  • 1 tablespoon of garlic powder
  • 1/8 teaspoon of ginger
  • 1 tablespoon of minced onion
  • 1/8 teaspoon of nutmeg
  • 3/4 tablespoon of salt
  • 1 cup of chicken broth
  • Honey
INSTRUCTIONS (TURKEY LEGS)
  1. Combine the black pepper, cinnamon, garlic powder, ginger, minced onion, nutmeg and salt in a small bowl and set aside.
  2. Preheat the oven to 350 F.
  3. Pat the turkey legs dry and place them in a large roasting pan. 
  4. Rub and pat the seasoning over and into the turkey legs.
  5. Pour the chicken broth into the bottom of the pan around the turkey legs.
  6. Roast the turkey legs for about 1 hour and 20 minutes.
  7. Bring the drumsticks out of the oven and glaze with honey then put them back into the oven for 10 to 20 minutes or until a meat thermometer registers 170 F.
  8. Remove the roasting pan from the oven, cover it with foil, and let it stand for 10 minutes.
  9. Once cool enough to eat, remove the foil and enjoy!

Little John’s Beef Stew Recipe

Little John's Beef Stew Recipe from Disney's Robin Hood

INTRODUCTION

Welcome back friends! This week we’ll be cooking up Little John’s beef stew featured in Disney’s animated feature, Robin Hood!

Little John's Beef Stew Recipe from Disney's Robin Hood
This recipe is featured when Robin Hood and Little John are taking a break in the woods. Unfortunately Little John leaves Robin to tend the stew, and Robin starts daydreaming, effectively burning the stew (don’t worry we won’t burn ours). Friar Tuck shows up while Little John is trying to salvage the food; he tries the stew, coughs a bit, and comments “well done, ain’t it?”

Little John's Beef Stew Recipe from Disney's Robin Hood

Little John's Beef Stew Recipe from Disney's Robin Hood

Little John's Beef Stew Recipe from Disney's Robin Hood
I love a good, hearty stew! I thought burning it would be in poor taste (#momjoke), so I kept an eye on it. I also feel like Little John takes pride in his cooking so I kept it simple based on ingredients they may have been able to obtain, but not so simple as to insult his enthusiasm.

Little John's Beef Stew Recipe from Disney's Robin Hood

Little John's Beef Stew Recipe from Disney's Robin Hood

BEEF STEW
  • 2 tablespoons of butter
  • 1 pound of beef stew meat, cubed
  • 1 large onion, diced
  • 1/2 teaspoon of basil
  • 1 teaspoon of black pepper (plus a few sprinkles more to season the meat)
  • 1/2 teaspoon of oregano
  • 1 teaspoon of rosemary
  • 1 1/2 teaspoons of salt (plus a few sprinkles more to season the meat)
  • 1 teaspoon of thyme
  • 3 cloves of garlic, minced
  • 3 ribs of celery, chopped
  • 1 cup of tomatoes, diced
  • 2 cups of water
  • 4 carrots, peeled and chopped
  • 4 potatoes, chopped
  • 2 tablespoons of flour
  • 1/4 cup of water (additional)
INSTRUCTIONS
  1. Melt the butter in a dutch oven or large pot on medium heat.
  2. Season the stew meat with a little salt and pepper, then add it to the pot and brown all sides.
  3. Once browned, remove the meat and allow it to rest on a plate with its juices.
  4. Add the onions, basil, black pepper, oregano, rosemary, salt, and thyme to the meat drippings within the dutch oven and sauté for about four or five minutes.
  5. Add the garlic and celery, then sauté for another two to three minutes.
  6. Deglaze the pan with a little water (enough to loosen up the food particles left behind from cooking the meat and aromatics) and stir, then allow everything to cook for another five minutes.
  7. Add the beef (and its accumulated juices) back into the pot, along with the diced tomatoes and two cups of water.
  8. Bring everything to a boil, then reduce to a simmer for about an hour to an hour and a half, or until the beef is fork tender.
  9. Add in the carrots and potatoes and bring the liquid back to a boil, then reduce to a simmer for another thirty to forty minutes or until the potatoes are fork tender.
  10. In a separate bowl, mix the flour into 1/4 cup of cold water and add it into the stew.
  11. Continue cooking and stirring the pot until the sauce has thickened (about 10 more minutes).
  12. Serve warm and enjoy!

Nick and Fennec’s Pawpsicle Recipe (Zootopia)

Nick and Fennec's Pawpsicle (Popsicle) Recipe from Disney's Zootopia.INTRODUCTION

Welcome back friends! This week we’ll be creating the pawpsicles (popsicles) the enterprising Nick Wilde and Fennec create and sell to the lemmings in Disney’s Zootopia.

Nick and Fennec's Pawpsicle (Popsicle) Recipe from Disney's Zootopia.Pawpsicles are featured after Nick and Fennec hustle a jumbo-pop from Judy and Jumbeaux Cafe’s owner, then turn it into their own smaller pawpsicles to sell for a profit. 

Nick and Fennec's Pawpsicle (Popsicle) Recipe from Disney's Zootopia. Nick and Fennec's Pawpsicle (Popsicle) Recipe from Disney's Zootopia.
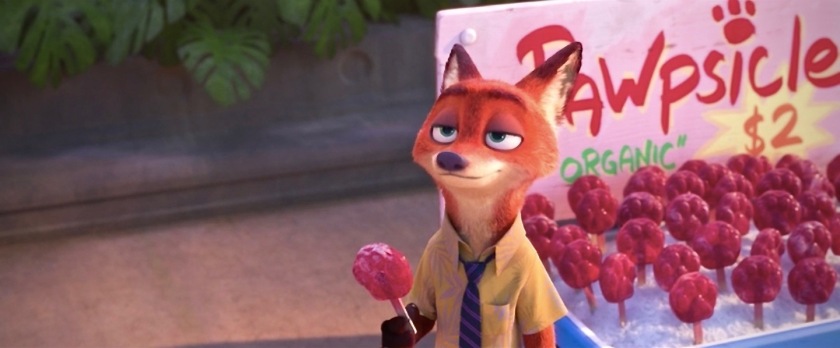
These are sweet, juicy and delicious, although they start to melt quickly so eat quickly! I wanted to use real fruit to make these with only minimal sugar added. Quite honestly, these probably would have been just as delicious without adding any sugar. I think I want to try that too!

Nick and Fennec's Pawpsicle (Popsicle) Recipe from Disney's Zootopia.PAWPSICLES
  • 1 cup of raspberries
  • 1 cup of strawberries, chopped
  • 1/2 cup of sugar, divided
  • 1 tablespoon of vanilla
  • 2 cups of cherry juice
  • Silicone paw print molds
  • Popsicle sticks
INSTRUCTIONS (PAWPSICLES)
  1. Preheat the oven to 350F and prepare a parchment lined sheet pan.
  2. Combine the raspberries, strawberries, vanilla and 1/4 cup of the sugar in a large bowl and stir to combine.
  3. Place the combined ingredients onto the parchment-lined sheet pan and place it in the oven. Roast for 20 minutes.
  4. In a saucepan, heat the cherry juice and 1/4 cup of sugar for about five minutes or until the sugar dissolves, then pour it into a bowl to cool.
  5. Once the fruit in the oven has roasted, add it into the bowl with the cherry juice, then place the bowl in the refrigerator to cool.
  6. Once cool, puree and pour the juice into the paw print molds and place in freezer for 5 or more hours.
  7. Serve and enjoy!

The Hua Family Pork Dumpling Recipe (Mulan)

The Faa Family and Mushu's Pork Dumpling or Potsticker Recipe from Disney's Mulan.INTRODUCTION

Welcome back friends! This week we’ll be cooking up the dumplings or potstickers featured in Disney’s Mulan.

Mushu's Happy Porridge and Faa Family Dumpling Recipe from Disney's Mulan.
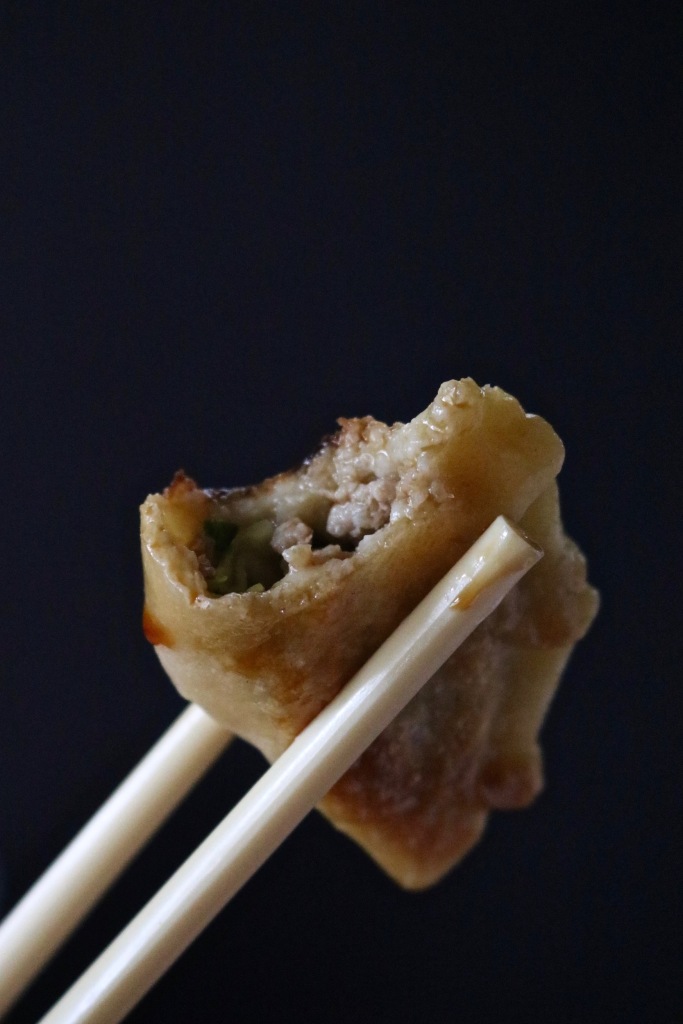
This recipe is featured twice, once when the Hua family is eating dinner before Mulan departs for training, and again when Mushu pulls one out to roast towards the end of the film.

The Faa Family and Mushu's Pork Dumpling or Potsticker Recipe from Disney's Mulan. The Faa Family and Mushu's Pork Dumpling or Potsticker Recipe from Disney's Mulan.Dumplings, in this case potstickers, are delicious! This recipe would have been (and could be) easier if I had used store-bought wonton wrappers, but I was looking in the wrong place and couldn’t find them. It’s a happy accident though, now the whole recipe has been made from scratch!

The Faa Family and Mushu's Pork Dumpling or Potsticker Recipe from Disney's Mulan. The Faa Family and Mushu's Pork Dumpling or Potsticker Recipe from Disney's Mulan. The Faa Family and Mushu's Pork Dumpling or Potsticker Recipe from Disney's Mulan.DUMPLING DOUGH
  • 2 cups of all-purpose flour (plus a little extra for kneading)
  • 1 egg
  • 3⁄4 teaspoon of salt
  • 1⁄2 cup of water
  • Cornstarch (for rolling out the dough)
INSTRUCTIONS (DUMPLING DOUGH)
  1. Place the flour into a large bowl.
  2. In a separate bowl, whisk together the egg, salt, and water.
  3. Create a well in the center of the flour and pour in the wet ingredients.
  4. Mix everything together with a spoon (or your hands), until the mixture begins to come together.
  5. Turn the dough onto a hard surface, dusted with flour and knead for about 3 to 5 minutes. The dough should be firm, but smooth when you are done. If your dough is too tacky, add a little extra flour to your counter.
  6. Place the dough back in a floured bowl, cover it with a damp towel, and let it rest for 1 hour.
  7. Divide the dough in half. Cover one half of the dough with your towel.
  8. Lightly dust your counter-top with cornstarch (NOT flour), and roll half of the dough as thin as you can. Mine came out a little thick. but it worked out just fine!
  9. Cut the sheet into 3 inch circles (you can use a cookie cutter, I used a cup).
  10. Repeat with the remaining dough until you’ve cut the maximum number of circles.
PORK DUMPLINGS (POTSTICKERS)
  • 1/2 pound ground pork
  • 1/2 cup chopped head cabbage
  • 1/4 cup finely chopped green onion
  • 3/4 teaspoon of sesame oil (or more to taste)
  • 1 lightly beaten egg white
  • 6 Tablespoon vegetable oil (for light frying)
INSTRUCTIONS (PORK DUMPLINGS)
  1. Season the ground pork to your preference and cook it In a skillet on medium high heat until it’s golden brown.
  2. Add the chopped cabbage and green onion to the skillet midway through so they can cook and get soft as the ground pork finishes.
  3. Place the individual dumpling wrappers on a clean, dry surface and scoop about a tablespoon of filling in the center of each one.
  4. Moisten the edge of each wrapper with the beaten egg white before folding.
  5. Pull the edge of each wrapper over the filling and use your fingers to crimp the edge into a folded fan pattern (see images above).
  6. Add 3 to 6 tablespoons of vegetable oil to a wok or deep skillet on medium heat.
  7. Place the dumplings in single layer on the bottom of pan and fry them on each surface until browned (about 2 to 3 minutes each side).
  8. Remove from the heat and enjoy!