
DIY Ocean Wave Sensory Bottle

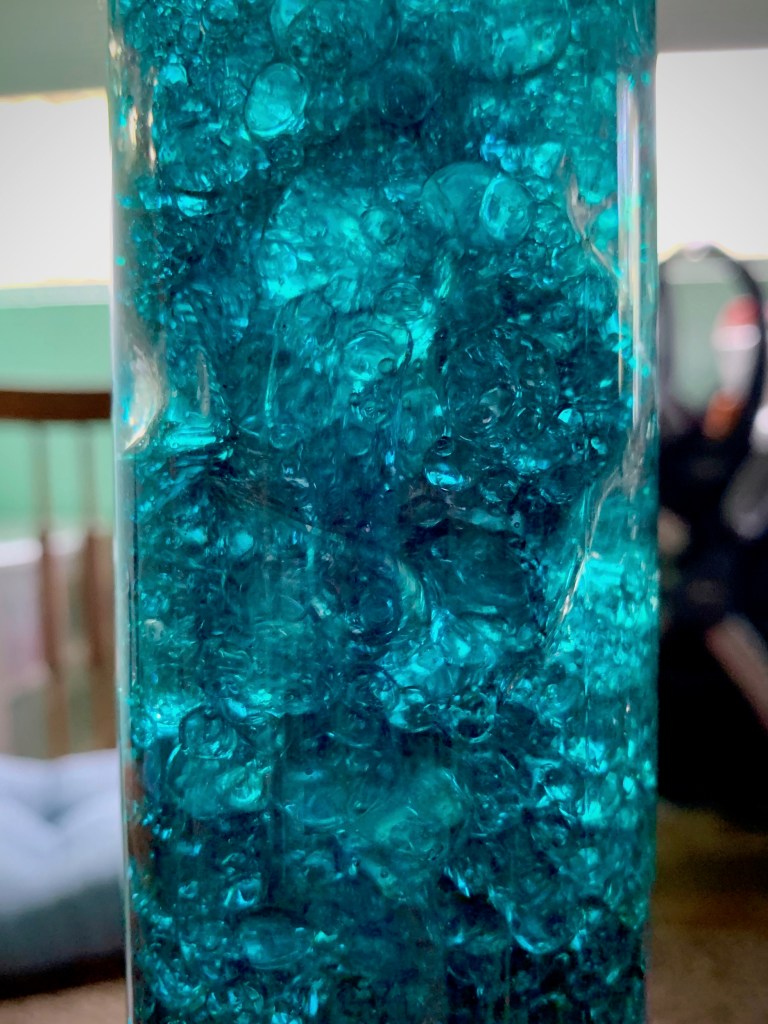
DIY Ocean Wave Sensory BottleWith Summer solstice right around the corner, I was thinking about the beach and got inspired to make an ocean wave sensory bottle (not to mention I had all the ingredients already on hand)! Part of the fun in raising Zoey is making things that teach and fascinate her. And, if I’m being completely honest, I find sensory bottles fascinating too, so let’s make one!

DIY Ocean Wave Sensory Bottle

SUPPLIES
  • 16 ounce clear, plastic bottle
  • Funnel
  • 8 ounces of water
  • Blue and green food coloring.
  • 8 ounces of baby oil
  • Glue

DIY Ocean Wave Sensory Bottle
DIY Ocean Wave Sensory Bottle DIY Ocean Wave Sensory Bottle

INSTRUCTIONS
  1. Place the funnel in the mouth of your bottle and use it to fill the bottle with 8 ounces of water.
  2. Remove the funnel and add several drops of blue and green food coloring until you reach your desired shade of ocean aqua. I used 8 drops of blue and 2 drops of green, as you can see that led to a very deep shade of blue green.
  3. Screw the lid back onto the bottle and shake the water until the food coloring is well incorporated, then remove the lid and replace the funnel.
  4. Add up to 8 ounces of baby oil.
  5. If your child is older and you worry about him/her undoing the lid, you can coat the inside of the lid with glue, then screw it back onto the bottle. This will secure the lid and make it harder for little ones to unscrew the lid and create a leak or spill the bottle’s contents. If you’re still concerned they may be able to get the lid off, please use cooking oil instead of baby oil.

Tabletop Game – Let’s Play Kanoodle!

Tabletop Game Let's Play KanoodleI’m always on the look-out for a fun, entertaining way to pass the time, like a good tabletop game! I purchased Kanoodle by educational insights, as a stocking stuffer for my husband and we ignored it for too long! This game is a great way to pass the time and a good way to stimulate your brain!

Tabletop Game Let's Play KanoodleKanoodle is a solitaire game for ages 7 and up, of two and three dimensional puzzles to solve using up to 12 puzzles pieces called “noodles”. You pick a puzzle from the included booklet, and put the intended number of noodles on the board as shown on the diagram. Do not move noodles that are already in position and solve each puzzle by filling up the empty space with the remaining noodles.

The first two levels, called “Pro” and “Super Pro”, are great for beginners with only one or two noodles needed to solve each puzzle. As the levels increase the puzzle’s difficulty does as well with larger empty spaces to fill with more noodles. The three dimensional puzzles are significantly more difficult so it’s best to start with the two dimensional puzzles and work your way up.

Tabletop Game Let's Play Kanoodle Tabletop Game Let's Play KanoodleI have completed all of the two dimensional puzzles, I am now working on the three dimensional puzzles and I intend to complete them all! Check it out!

  • Kanoodle – This looks like an updated version of the one I’m playing, with more puzzles!
  • Kanoodle Jr. – Beginner’s Kanoodle for little ones ages 4 through 7.
  • Kanoodle Extreme – Over 100 more puzzles than the original included from the start!
  • Kanoodle Genius – For those who have mastered the original Kanoodle or Kanoodle Extreme and are looking for more challenge.
  • Kanoodle Head to Head – A 2 player versus game.

DIY Chalkboard – Made from a Vintage Wall Frame

DIY upcycled chalkboard made from vintage wall frame.Years ago, I purchased an old empty frame from a Goodwill store. I didn’t know exactly what I wanted to use it for, I just knew that I loved the decals on each corner and wanted to fix it up and give it a home. After years of procrastinating while the frame sat around and gathered dust, I finally decided to paint it and create a chalkboard.

DIY upcycled chalkboard made from vintage wall frame.First, remove and sand one side of the mounting board to smooth it out. Once it’s as smooth as you prefer clean it off and prime it, then begin layering coats of chalkboard paint until you’ve reached your desired chalkboard depth and texture.
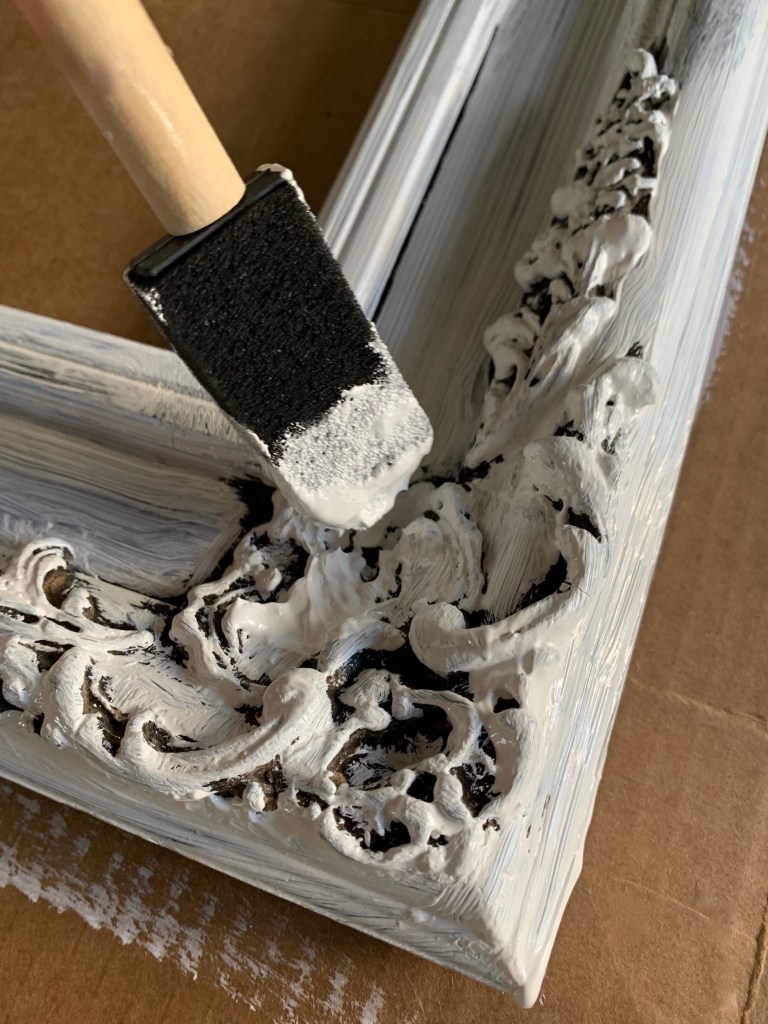
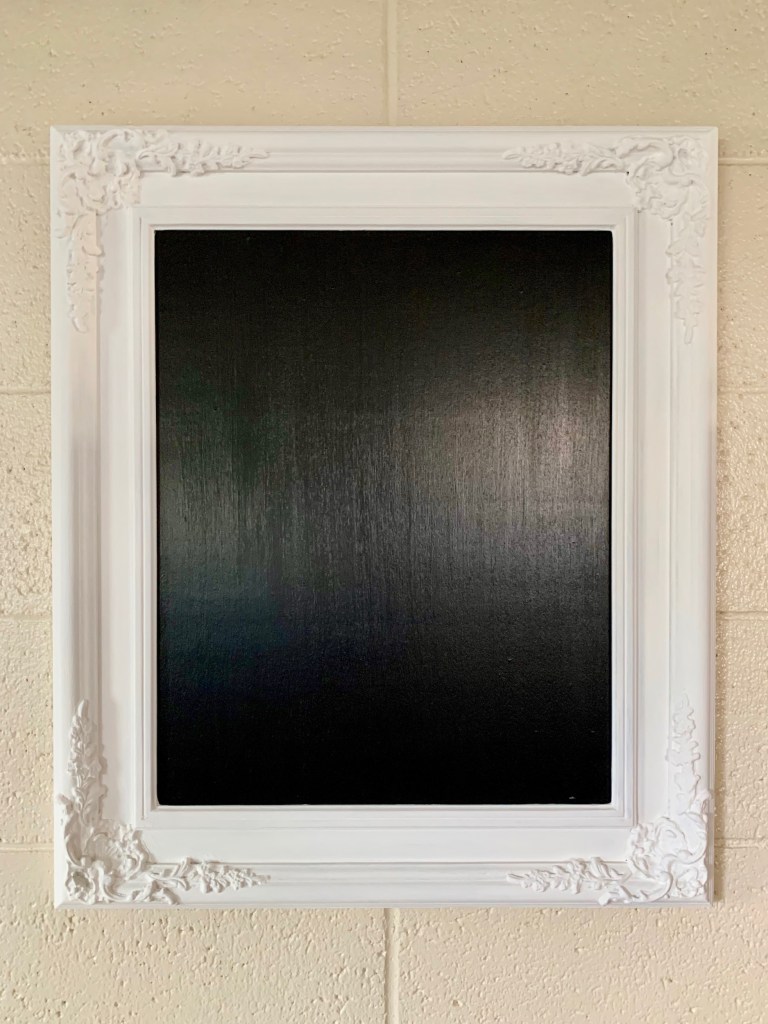
Scuff the frame with sanding paper all over to allow for the paint to adhere better. Clean the frame and prime it, then begin layering coats of white paint until you’ve reached your desired depth of color (or lack of color in my case since I used white); I used acrylic paint.

DIY upcycled chalkboard made from vintage wall frame.DIY upcycled chalkboard made from vintage wall frame.Once both pieces are dry, you can reassemble the frame. Before writing or drawing on the chalkboard, you’ll need to prime it by coating it with chalk.

DIY upcycled chalkboard made from vintage wall frame.As you can see I just wrote the first thing that came to my mind here, but I intend on leaving this frame up as decor year round and changing it for different events, seasons or holidays!

DIY upcycled chalkboard made from vintage wall frame.

Happy 8 Year Wedding Anniversary!

Every year, Cameron and I always find it hard to believe we have been married for five years, six years, seven years! This year we’ve been married 8 years and it’s still hard to believe! It’s not that we’re in total shock or disbelief that we lasted this long, it’s more that we can’t believe how fast the time has flown by.

Cameron and I are just right for one another and I am grateful every day that we found each other instead of settling for less. We love one another, we have fun together, we give each other space for our friends and hobbies, and we never fight. Oh sure we get a little irritable from time to time, more-so when we’re hungry or tired, but we’ve never had a fight and for that I am thankful.

Last August, we welcomed our first baby, Zoey. I have heard horror stories of how babies can be a real strain on a couple’s relationship, but we’ve squashed that stigma too. We support one another in raising her; we trade off feeding her, changing her diapers, we comfort her together, we’re united.

The moral of my story is that being with someone doesn’t have to be hard; if it’s right, it’s right. It should come naturally being in your person’s presence and you shouldn’t settle for anything less.

Check out the Summer Game Fest!

Summer Game Fest LogoPlaying video games is one of my favorite ways to decompress and relax. If I can’t be playing, then listening to video game news and chatter via podcasts or videos comes in a close second, especially when it gives me something to look forward to!
So, if you haven’t heard of the Summer Game Fest, and you enjoy video game news and culture, you’re missing out!

Summer Game Fest is a digital herald for the video game industry from May to August 2020. From the comfort of our homes we can watch showcase events from publishers, play select content, and experience in-game events.

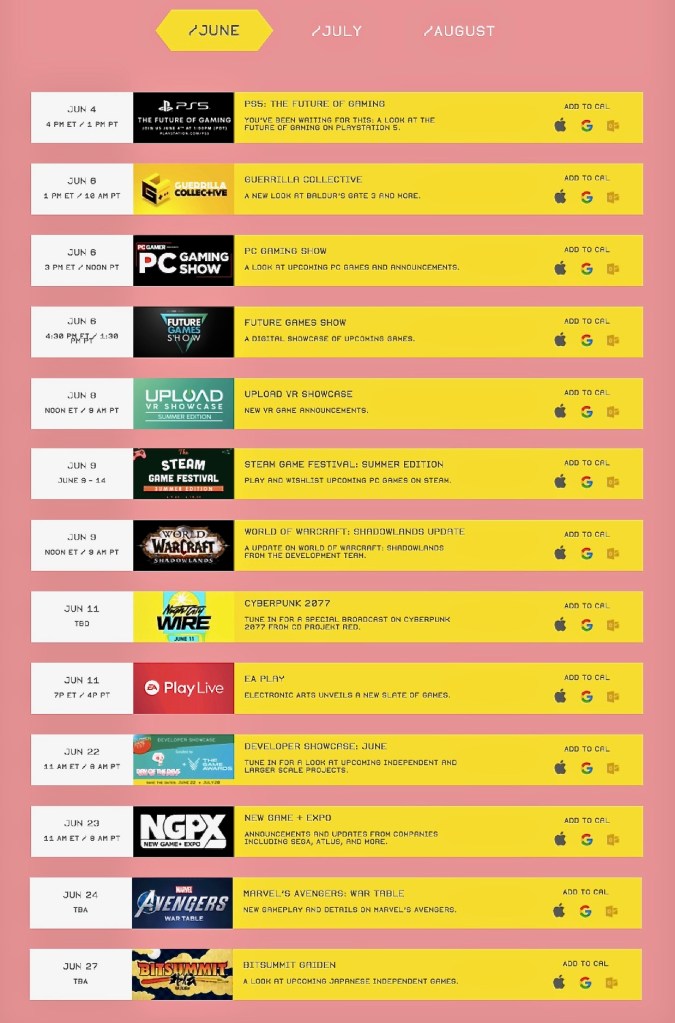
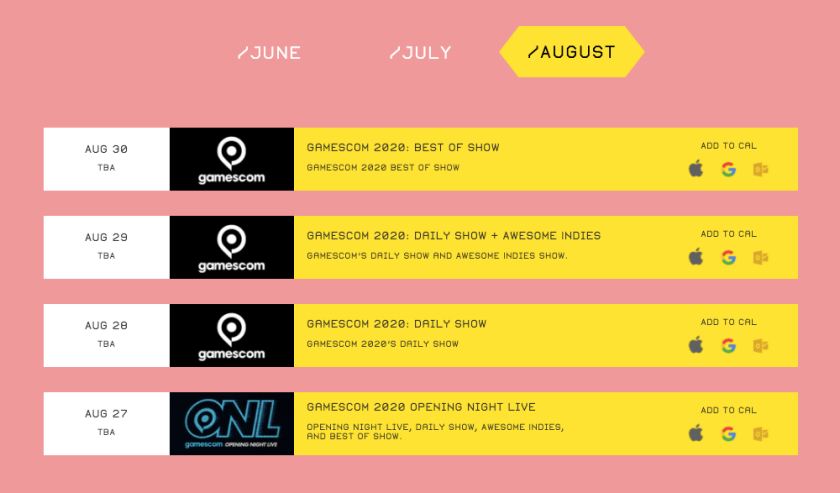
Here are the scheduled events as of today, June 1st, 2020, but I’m sure they will change and evolve as the Summer goes on.

June Summer Game Fest scheduled events as of June 1st, 2020.July Summer Game Fest scheduled events as of June 1st, 2020.August Summer Game Fest scheduled events as of June 1st, 2020.Visit www.summergamefest.com to sign up for notifications and learn more. I recommend following their twitter account for the most up to date information.

A word of warning for families, there is some content that has been aired for mature audiences. There are warnings at the beginning of each video, but if you come in at the middle you may miss that. If this is something that may affect and concern you, I would watch them away from little eyes.

What has stood out to me thus far:

  • Assassin’s Creed Valhalla – GRAPHIC CONTENT WARNING
  • Call of the Sea
  • Unreal Engine 5
  • Ghost of Tsushima – GRAPHIC CONTENT WARNING
  • Last of Us Part II – GRAPHIC CONTENT WARNING

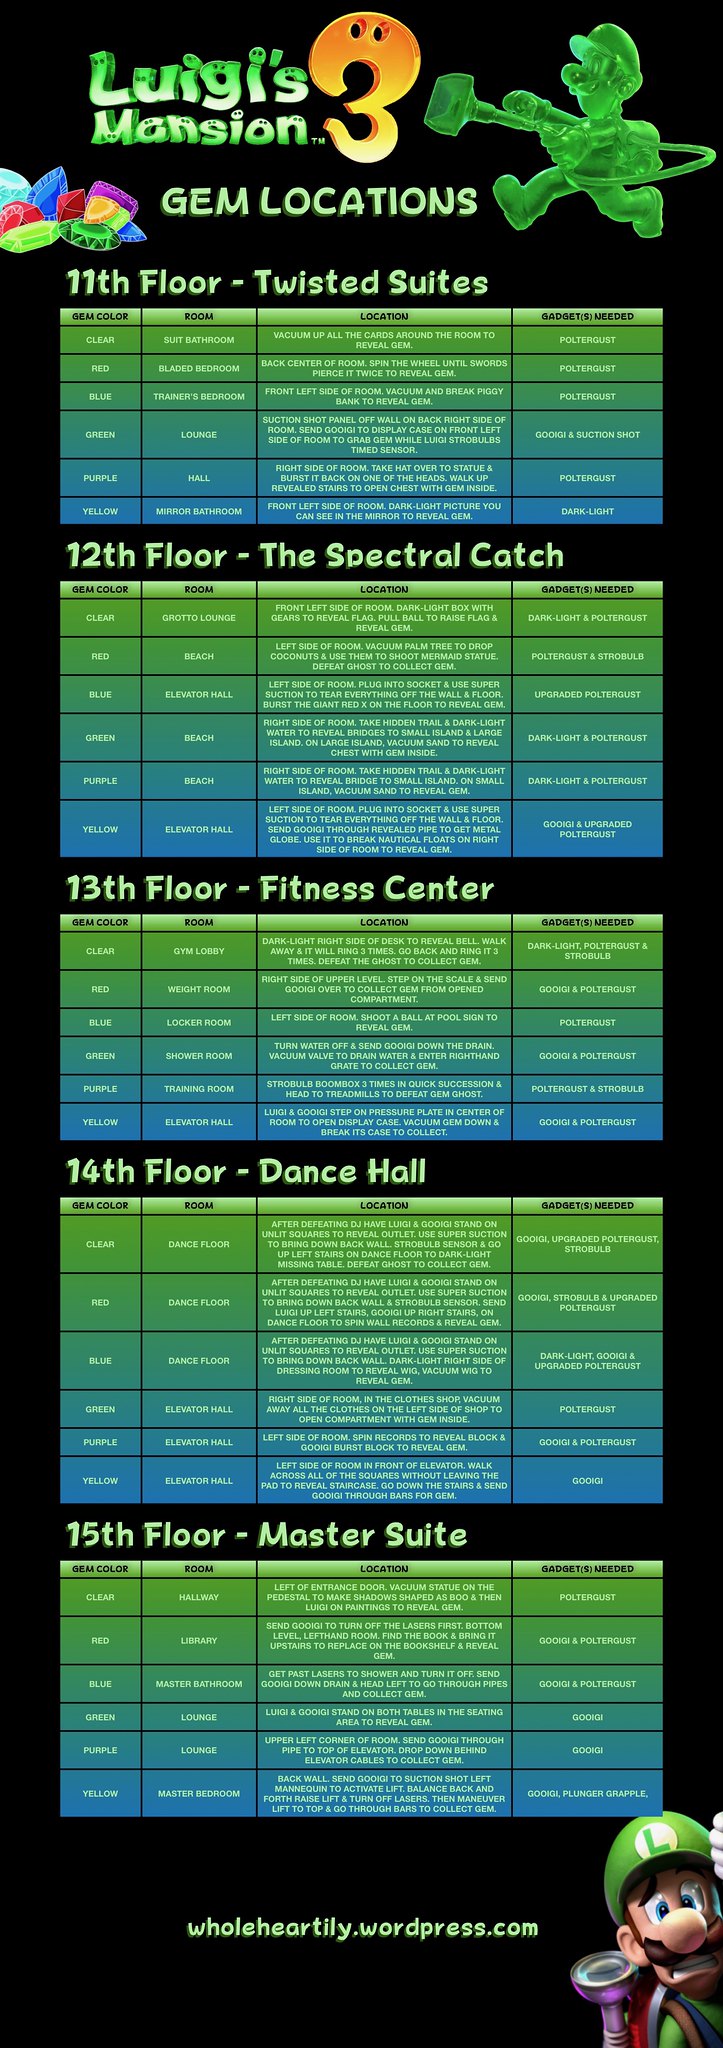
Luigi’s Mansion 3 – Complete Gem Guide by Floor

LuigisGems_Part1

If there’s one thing I do when I play a game (besides trying to relax and enjoy myself), it’s look up information. I get curious or stuck, and I find myself turning to the internet for answers. There are a lot of good guides out there that are super helpful, but what I don’t see are an abundance of simple and clean visual guides that lay out all the information in one place.

I just finished playing Nintendo’s Luigi’s Mansion 3 and loved every minute of it! As soon as I started playing I knew I wanted to create a complete, yet condensed, guide to collecting the game’s many (so many) gems. I took handwritten notes while I played and boy did that remind me fondly of the good ol’ days when you sometimes had to write down a game’s pertinent information in order to progress.

These infographics are organized by floor; I’ve provided each gem’s room, location and gadget(s) needed to find it. It is a lot of information and even condensed I had to create three separate pages to convey all the information. The first guide has the two basement levels through floor four, the second guide has floors five through ten, and the third guide has floors eleven through fifteen.

Please let me know if there are any games you would like to see visual information or guides for in the future! I love helping people, discussing games and organizing information!

LuigisGems_Part2
LuigisGems_Part3

Let’s try Intermittent Fasting!

I am now a fledgling intermittent faster. Do you want to try it with me?

If you’re not familiar with intermittent fasting, it is an eating pattern that cycles between periods of fasting and eating. It doesn’t specify which foods you should eat (although healthier foods yield better results), but rather when you should eat them.

I’ve chosen the 16/8 schedule, which means that I am restricting my eating to an 8 hour timeframe and fasting the remaining 16 hours of the day. This is what is working for me, but there are several other schedules out there if you’re looking for something different.

  • 20/4: Restrict eating to 4 hours of the day and fast the remaining 20.
  • 5/2: Eat regularly for 5 days of the week, on days 6 and 7 only consume about 500 calories per day.
  • 24 hour: Fast for 24 hours straight, once or twice a week.
  • 36 hour: Fast for 36 hours straight once a week.

Why am I doing such a thing you ask? Odd as it may sound, I wanted to conserve food during the pandemic. After breaking my fast, I usually don’t feel hungry again until right before the 8 hours are up. Everything is simpler, there are fewer meals to prepare, cook or clean up after!

In addition to conserving food, I would love to reach my pre-pregnancy weight or lower. As I mentioned above this eating pattern has me eating fewer meals and consuming less calories a day. I’ve also read that intermittent fasting can boost metabolism and that’s encouraging!

There are several other potential benefits, but the best thing I can do is tell you about my personal experience. I will practice intermittent fasting for the next three months at least and report back with my findings. How about you?

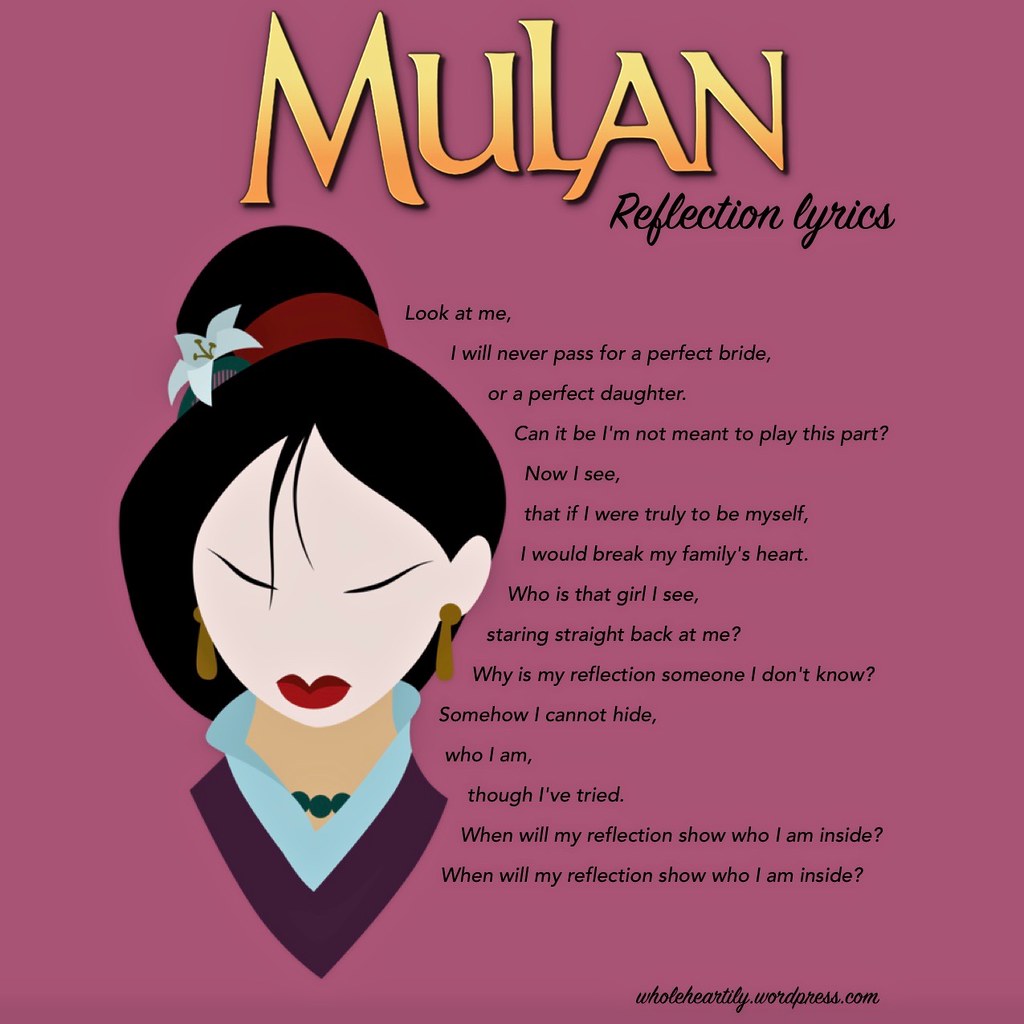
“Reflection” Lyric Page from Disney’s Mulan

Reflection Lyrics

I love singing to Baby Zoey and she loves being sung to!

I mean who can blame her? Her mom is communicating to her in singsong; making eye contact, smiling, and dancing or making funny movements. I haven’t sung so much in years (harsh comments in high school broke my confidence) and it feels good! I am opening back up and throwing myself into showing her my love through music and I think it’s having a positive affect on her and me.

I used to know all the songs from Disney movies by heart, but I’m a little rusty. I’ve started making lyric pages to refresh my memory or teach me new songs I’ve never known! Feel free to save them to your phone for a quick reference, and please let me know if there are any songs you would like to see lyric pages for!

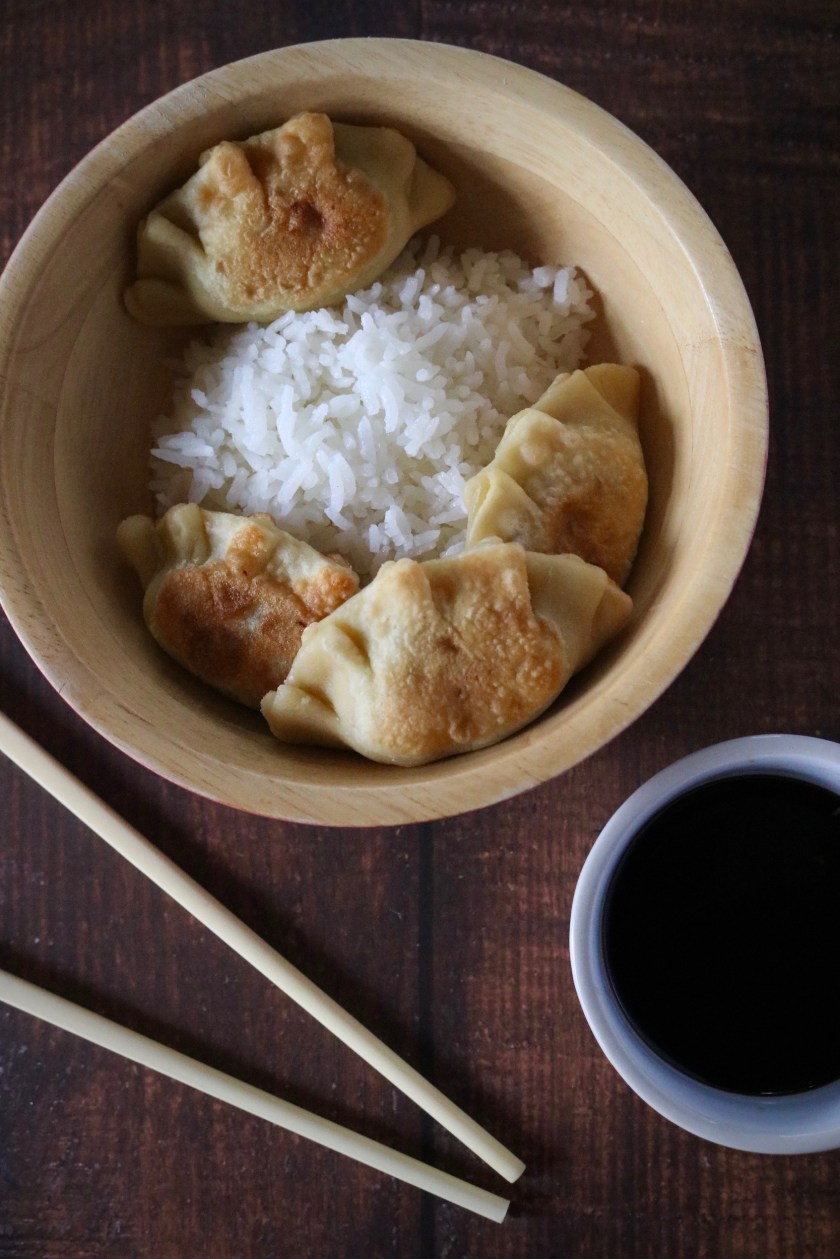
The Hua Family Pork Dumpling Recipe (Mulan)

The Faa Family and Mushu's Pork Dumpling or Potsticker Recipe from Disney's Mulan.INTRODUCTION

Welcome back friends! This week we’ll be cooking up the dumplings or potstickers featured in Disney’s Mulan.

Mushu's Happy Porridge and Faa Family Dumpling Recipe from Disney's Mulan.This recipe is featured twice, once when the Hua family is eating dinner before Mulan departs for training, and again when Mushu pulls one out to roast towards the end of the film.

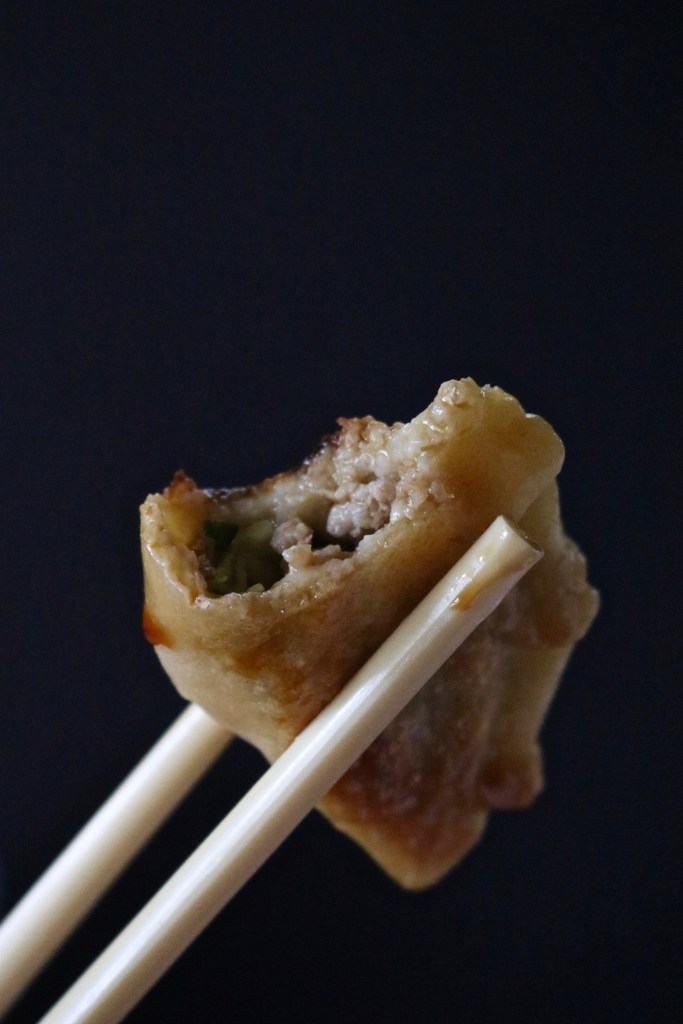
The Faa Family and Mushu's Pork Dumpling or Potsticker Recipe from Disney's Mulan. The Faa Family and Mushu's Pork Dumpling or Potsticker Recipe from Disney's Mulan.Dumplings, in this case potstickers, are delicious! This recipe would have been (and could be) easier if I had used store-bought wonton wrappers, but I was looking in the wrong place and couldn’t find them. It’s a happy accident though, now the whole recipe has been made from scratch!

The Faa Family and Mushu's Pork Dumpling or Potsticker Recipe from Disney's Mulan. The Faa Family and Mushu's Pork Dumpling or Potsticker Recipe from Disney's Mulan. The Faa Family and Mushu's Pork Dumpling or Potsticker Recipe from Disney's Mulan.DUMPLING DOUGH
  • 2 cups of all-purpose flour (plus a little extra for kneading)
  • 1 egg
  • 3⁄4 teaspoon of salt
  • 1⁄2 cup of water
  • Cornstarch (for rolling out the dough)
INSTRUCTIONS (DUMPLING DOUGH)
  1. Place the flour into a large bowl.
  2. In a separate bowl, whisk together the egg, salt, and water.
  3. Create a well in the center of the flour and pour in the wet ingredients.
  4. Mix everything together with a spoon (or your hands), until the mixture begins to come together.
  5. Turn the dough onto a hard surface, dusted with flour and knead for about 3 to 5 minutes. The dough should be firm, but smooth when you are done. If your dough is too tacky, add a little extra flour to your counter.
  6. Place the dough back in a floured bowl, cover it with a damp towel, and let it rest for 1 hour.
  7. Divide the dough in half. Cover one half of the dough with your towel.
  8. Lightly dust your counter-top with cornstarch (NOT flour), and roll half of the dough as thin as you can. Mine came out a little thick. but it worked out just fine!
  9. Cut the sheet into 3 inch circles (you can use a cookie cutter, I used a cup).
  10. Repeat with the remaining dough until you’ve cut the maximum number of circles.
PORK DUMPLINGS (POTSTICKERS)
  • 1/2 pound ground pork
  • 1/2 cup chopped head cabbage
  • 1/4 cup finely chopped green onion
  • 3/4 teaspoon of sesame oil (or more to taste)
  • 1 lightly beaten egg white
  • 6 Tablespoon vegetable oil (for light frying)
INSTRUCTIONS (PORK DUMPLINGS)
  1. Season the ground pork to your preference and cook it In a skillet on medium high heat until it’s golden brown.
  2. Add the chopped cabbage and green onion to the skillet midway through so they can cook and get soft as the ground pork finishes.
  3. Place the individual dumpling wrappers on a clean, dry surface and scoop about a tablespoon of filling in the center of each one.
  4. Moisten the edge of each wrapper with the beaten egg white before folding.
  5. Pull the edge of each wrapper over the filling and use your fingers to crimp the edge into a folded fan pattern (see images above).
  6. Add 3 to 6 tablespoons of vegetable oil to a wok or deep skillet on medium heat.
  7. Place the dumplings in single layer on the bottom of pan and fry them on each surface until browned (about 2 to 3 minutes each side).
  8. Remove from the heat and enjoy!

Ring Fit Adventure Challenge – Reboot

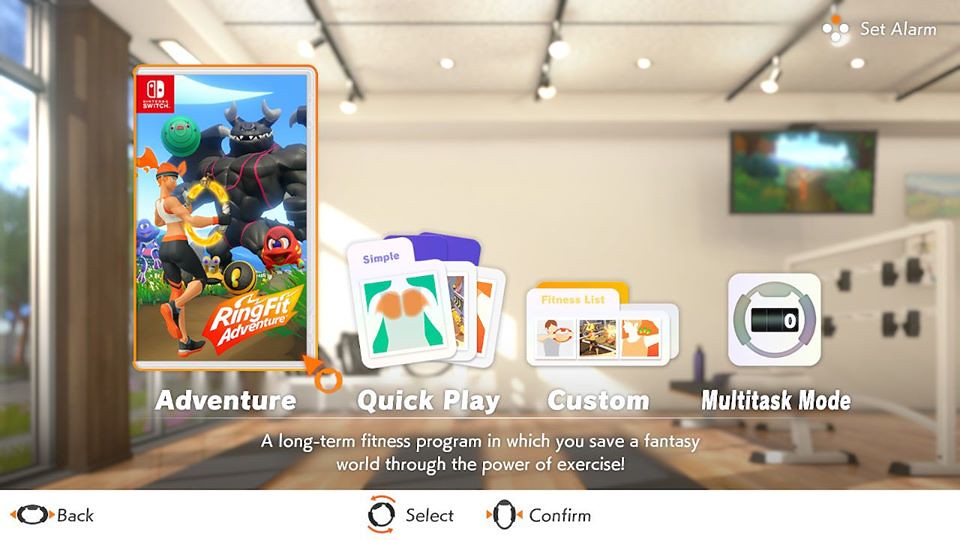
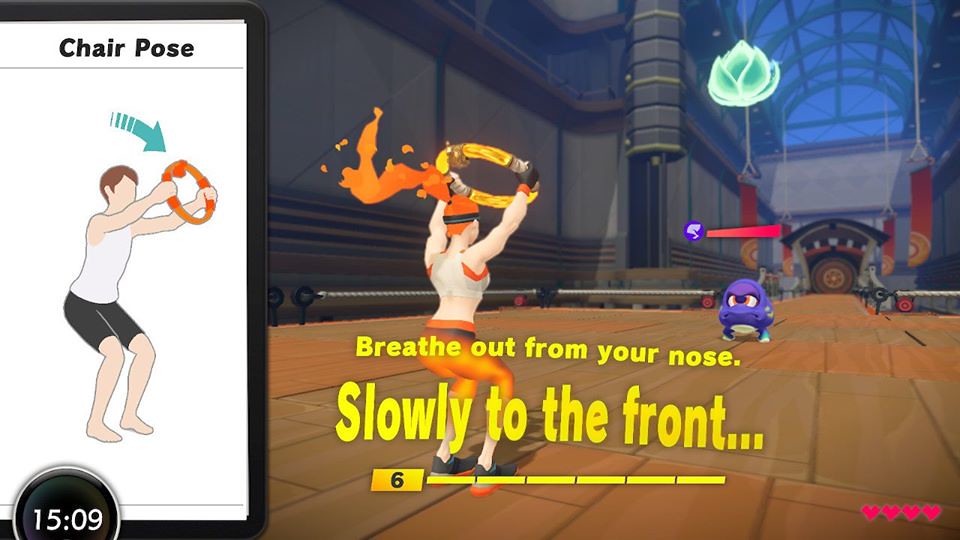
Fit Ring Adventure 1Can playing a video game really help you and I get fit? I believe Ring Fit Adventure can and I’m going to test it out!

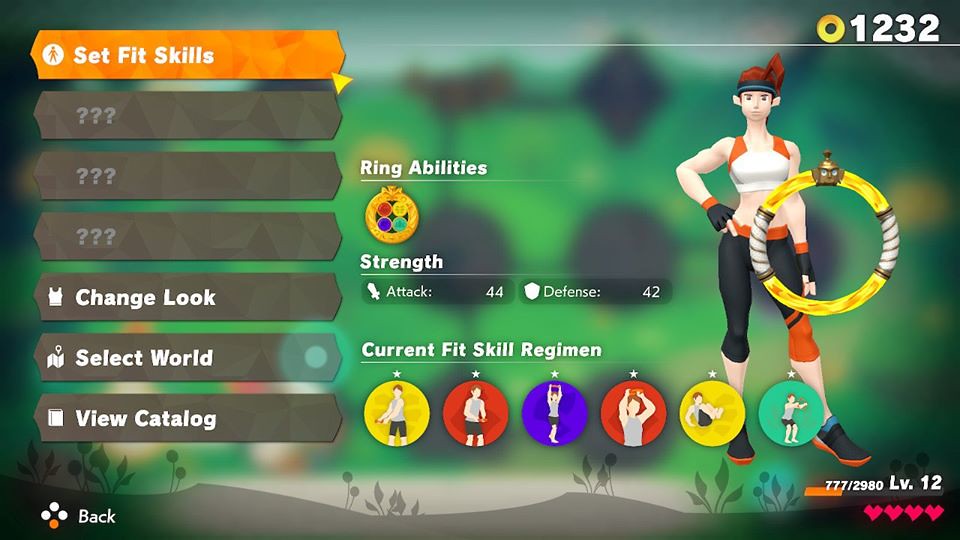
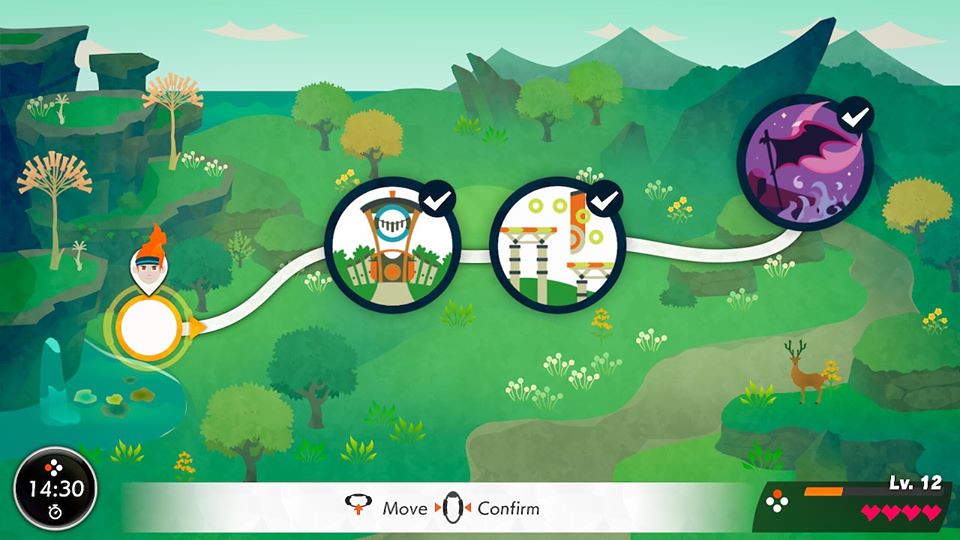
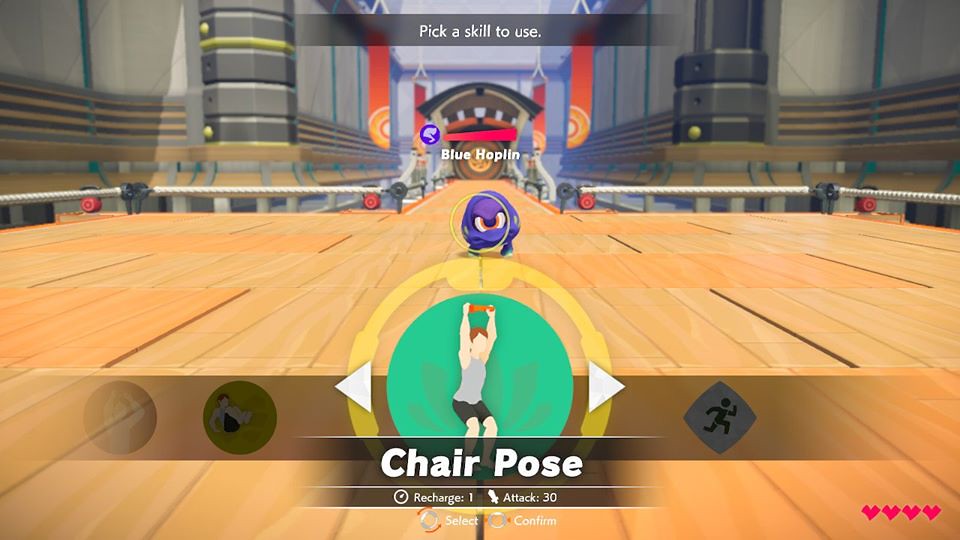
Fit Ring Adventure 2Ring Fit Adventure was released Saturday October 18th, 2019 for the Nintendo Switch. It comes with a squeezable pilates ring to hold and an elastic leg strap for leg movement. It piqued my interest because the main part of the game is a story where you need to travel across maps and defeat monsters to get to the boss who you also have to fight using different work out moves. The more you experience you get the more you level up and acquire new workout moves to complete your journey. It is delightfully distracting and entertaining!

Fit Ring Adventure 3
Fit Ring Adventure 5

Fit Ring Adventure 4Fit Ring Adventure 6
Fit Ring Adventure 7

As you might have gathered, I am not the epitome of health I would love to be, and to speak plainly, I haven’t been for a long time. This is uncomfortable for me to tell you, but I currently weigh 170 pounds. I feel heavier and far less graceful on my feet than I ever used to, and I want movement to feel easy and comfortable instead of a chore. When I was a teenager, I was more active and fortunate enough to have a good metabolism; I weighed 110 pounds and, at 5’2” tall, I felt comfortable in my own body. Since then I have put on more and more weight as my metabolism has slacked off and my bad habits have grown. Now I am a freshly minted, new mama and I’m looking to get back into shape and lose my baby weight plus a little extra! I’ve indulged myself for a little too long and it’s time to get back on track!

In addition to the game, let’s talk about my variables:

  • I’ve been practicing up to 20 minutes of yoga daily.
  • I’ve been taking my daughter out in her stroller for 30 minute walks daily.
  • During this shelter-at-home order, I’ve started intermittent fasting and only feel like eating 2 large meals a day.
  • I am making an effort to drink at least 78 oz. of water a day.

Confession time: I started this challenge back in October when the game released, and I dropped the ball. Months went by and I started doing my daily yoga and walks. This has made me feel better than I have in a long time (being pregnant and having a baby is no joke on your body) and with a stronger foundation, I wanted to give this challenge another try!

Let’s do this! Follow along with me on here and Instagram!