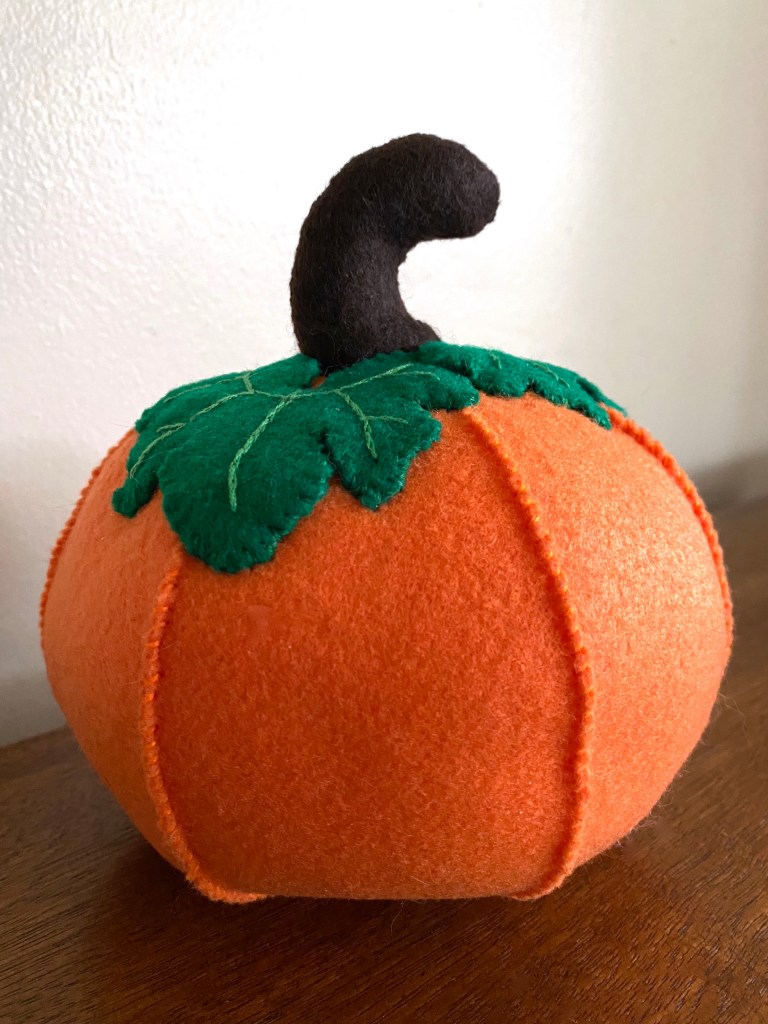
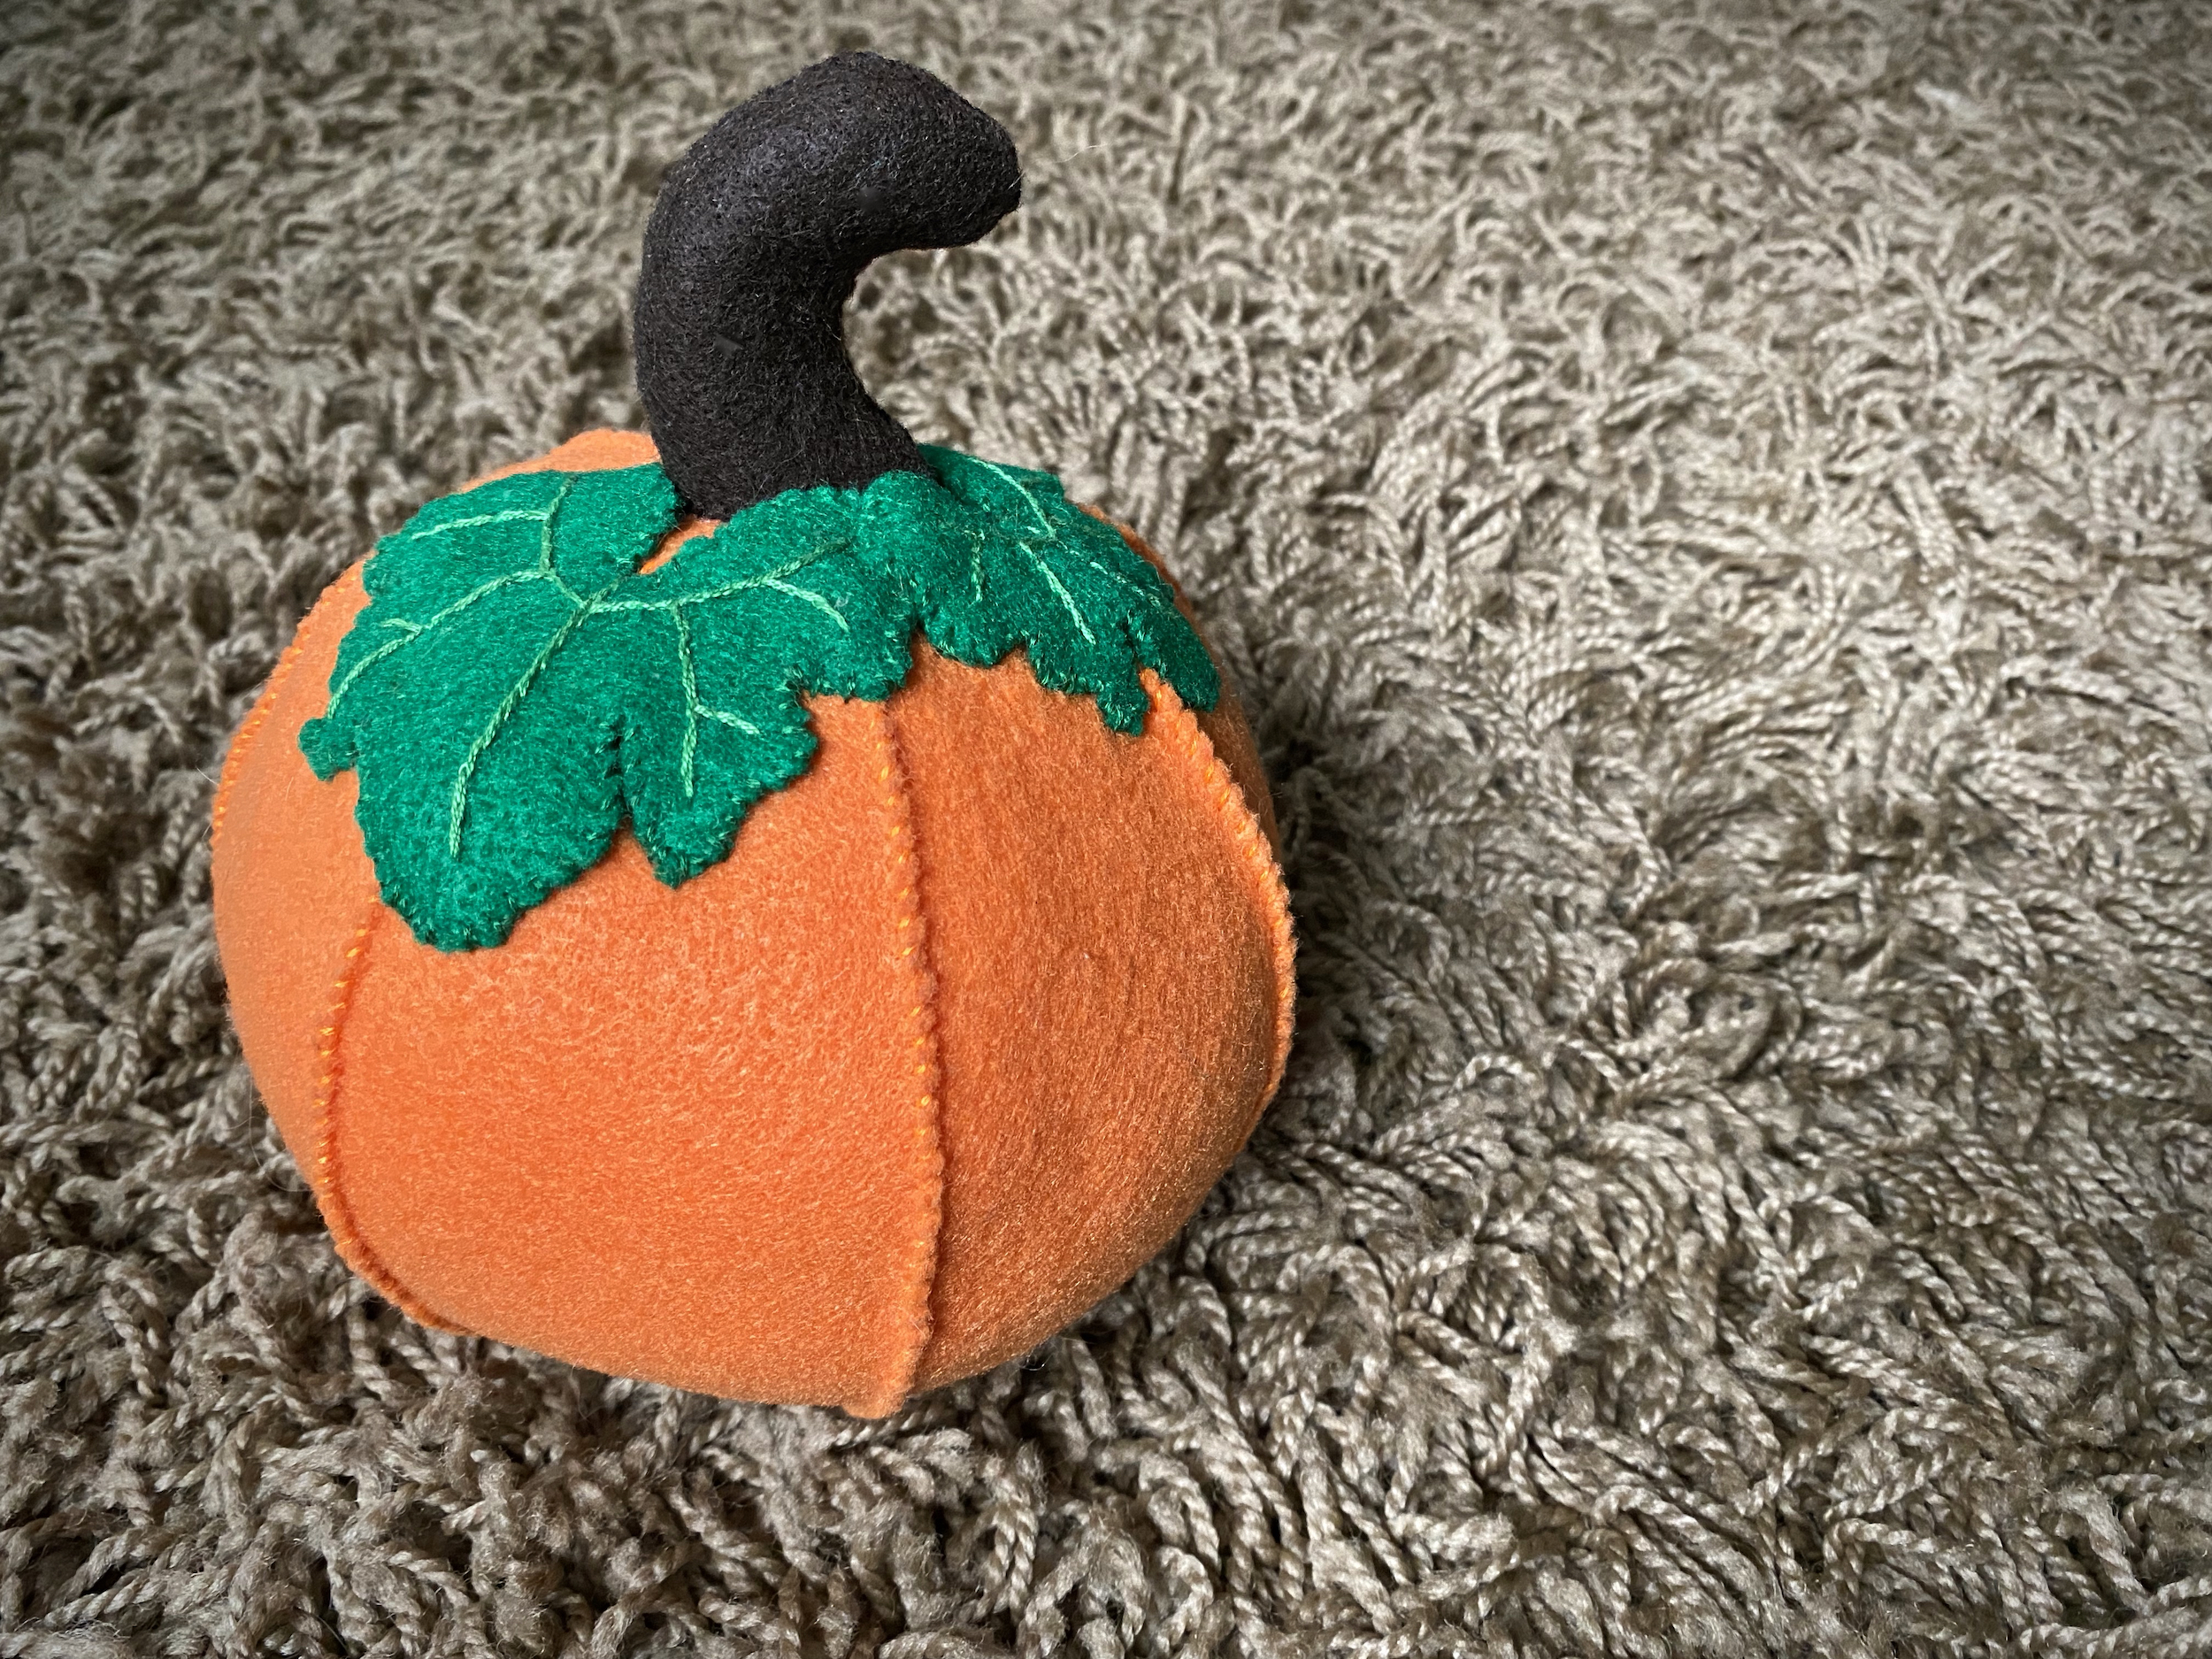
I want to begin creating well-made decorations that mean something to us and will last. What better way to start than by something that will go great with Halloween and Thanksgiving, pumpkins! I’ve created a pattern for fabric pumpkins and you’re welcome to use it to create your own! This will work to create either felt or regular fabric pumpkins, I’m excited to create a few different colors and sizes!
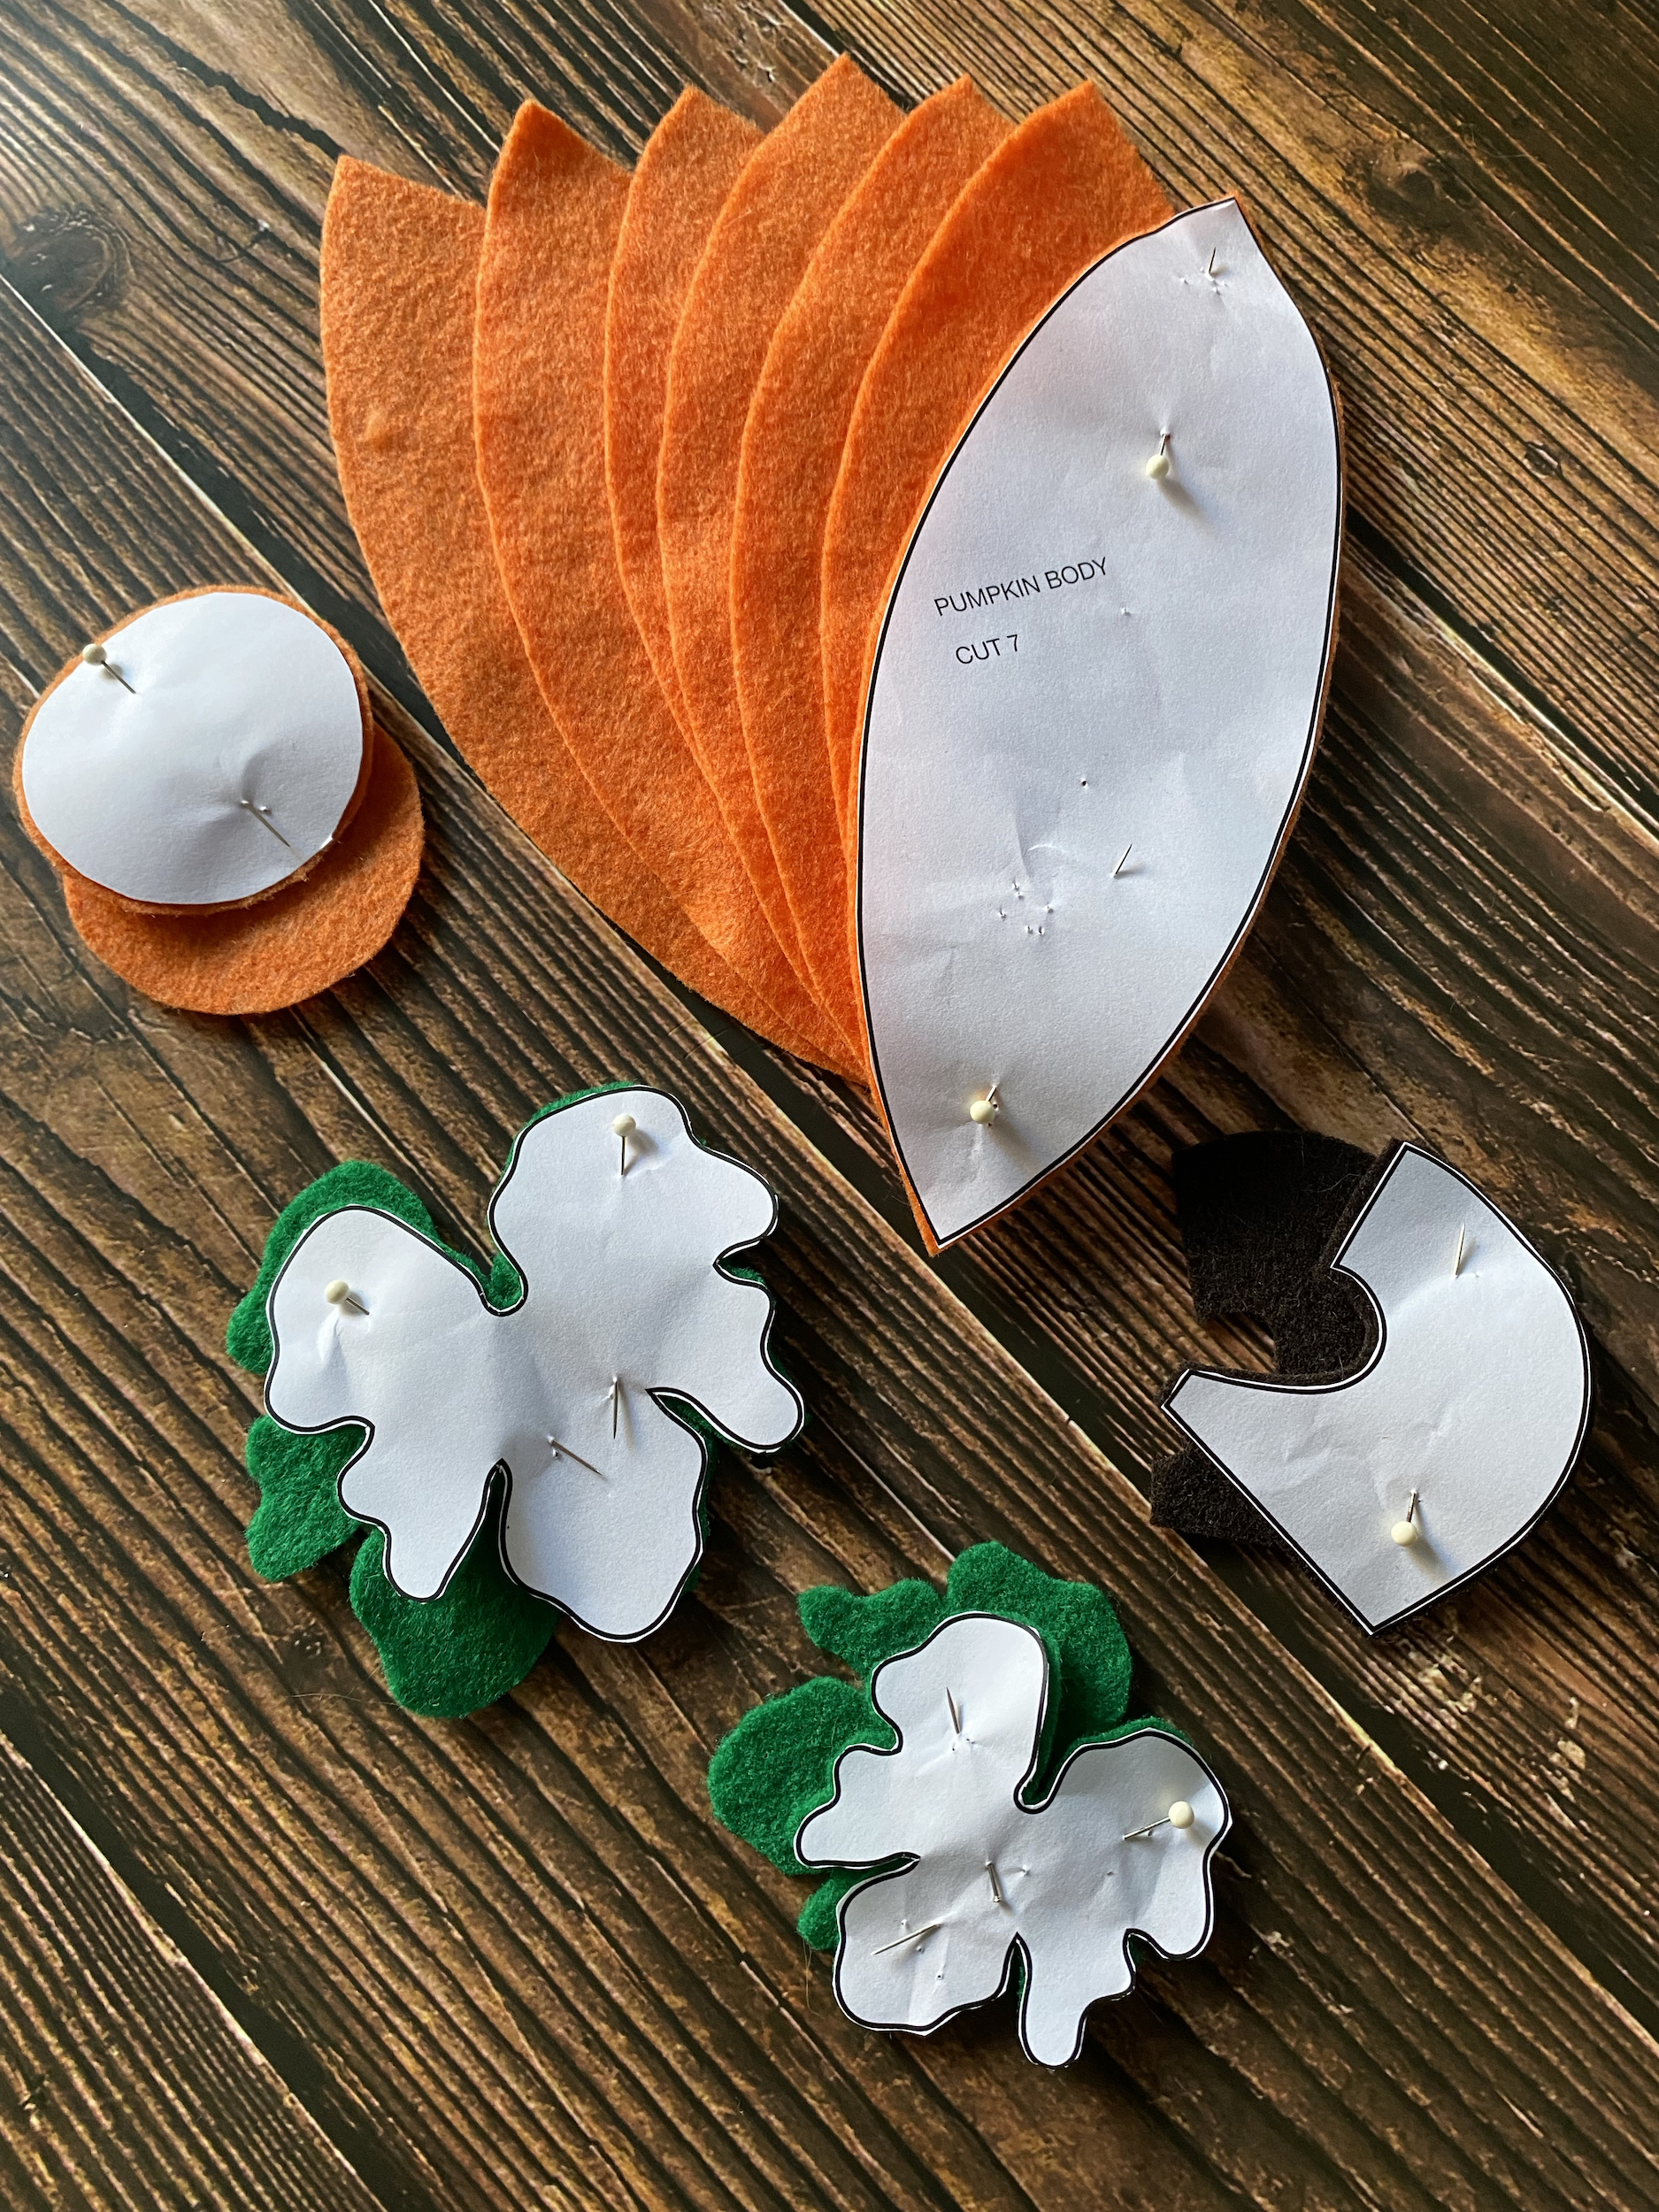
Print out the pumpkin patterns I’ve provided, then cut the patterns from the paper.
Pin the patterns on the appropriate colored felt, then use sewing scissors to cut the felt.
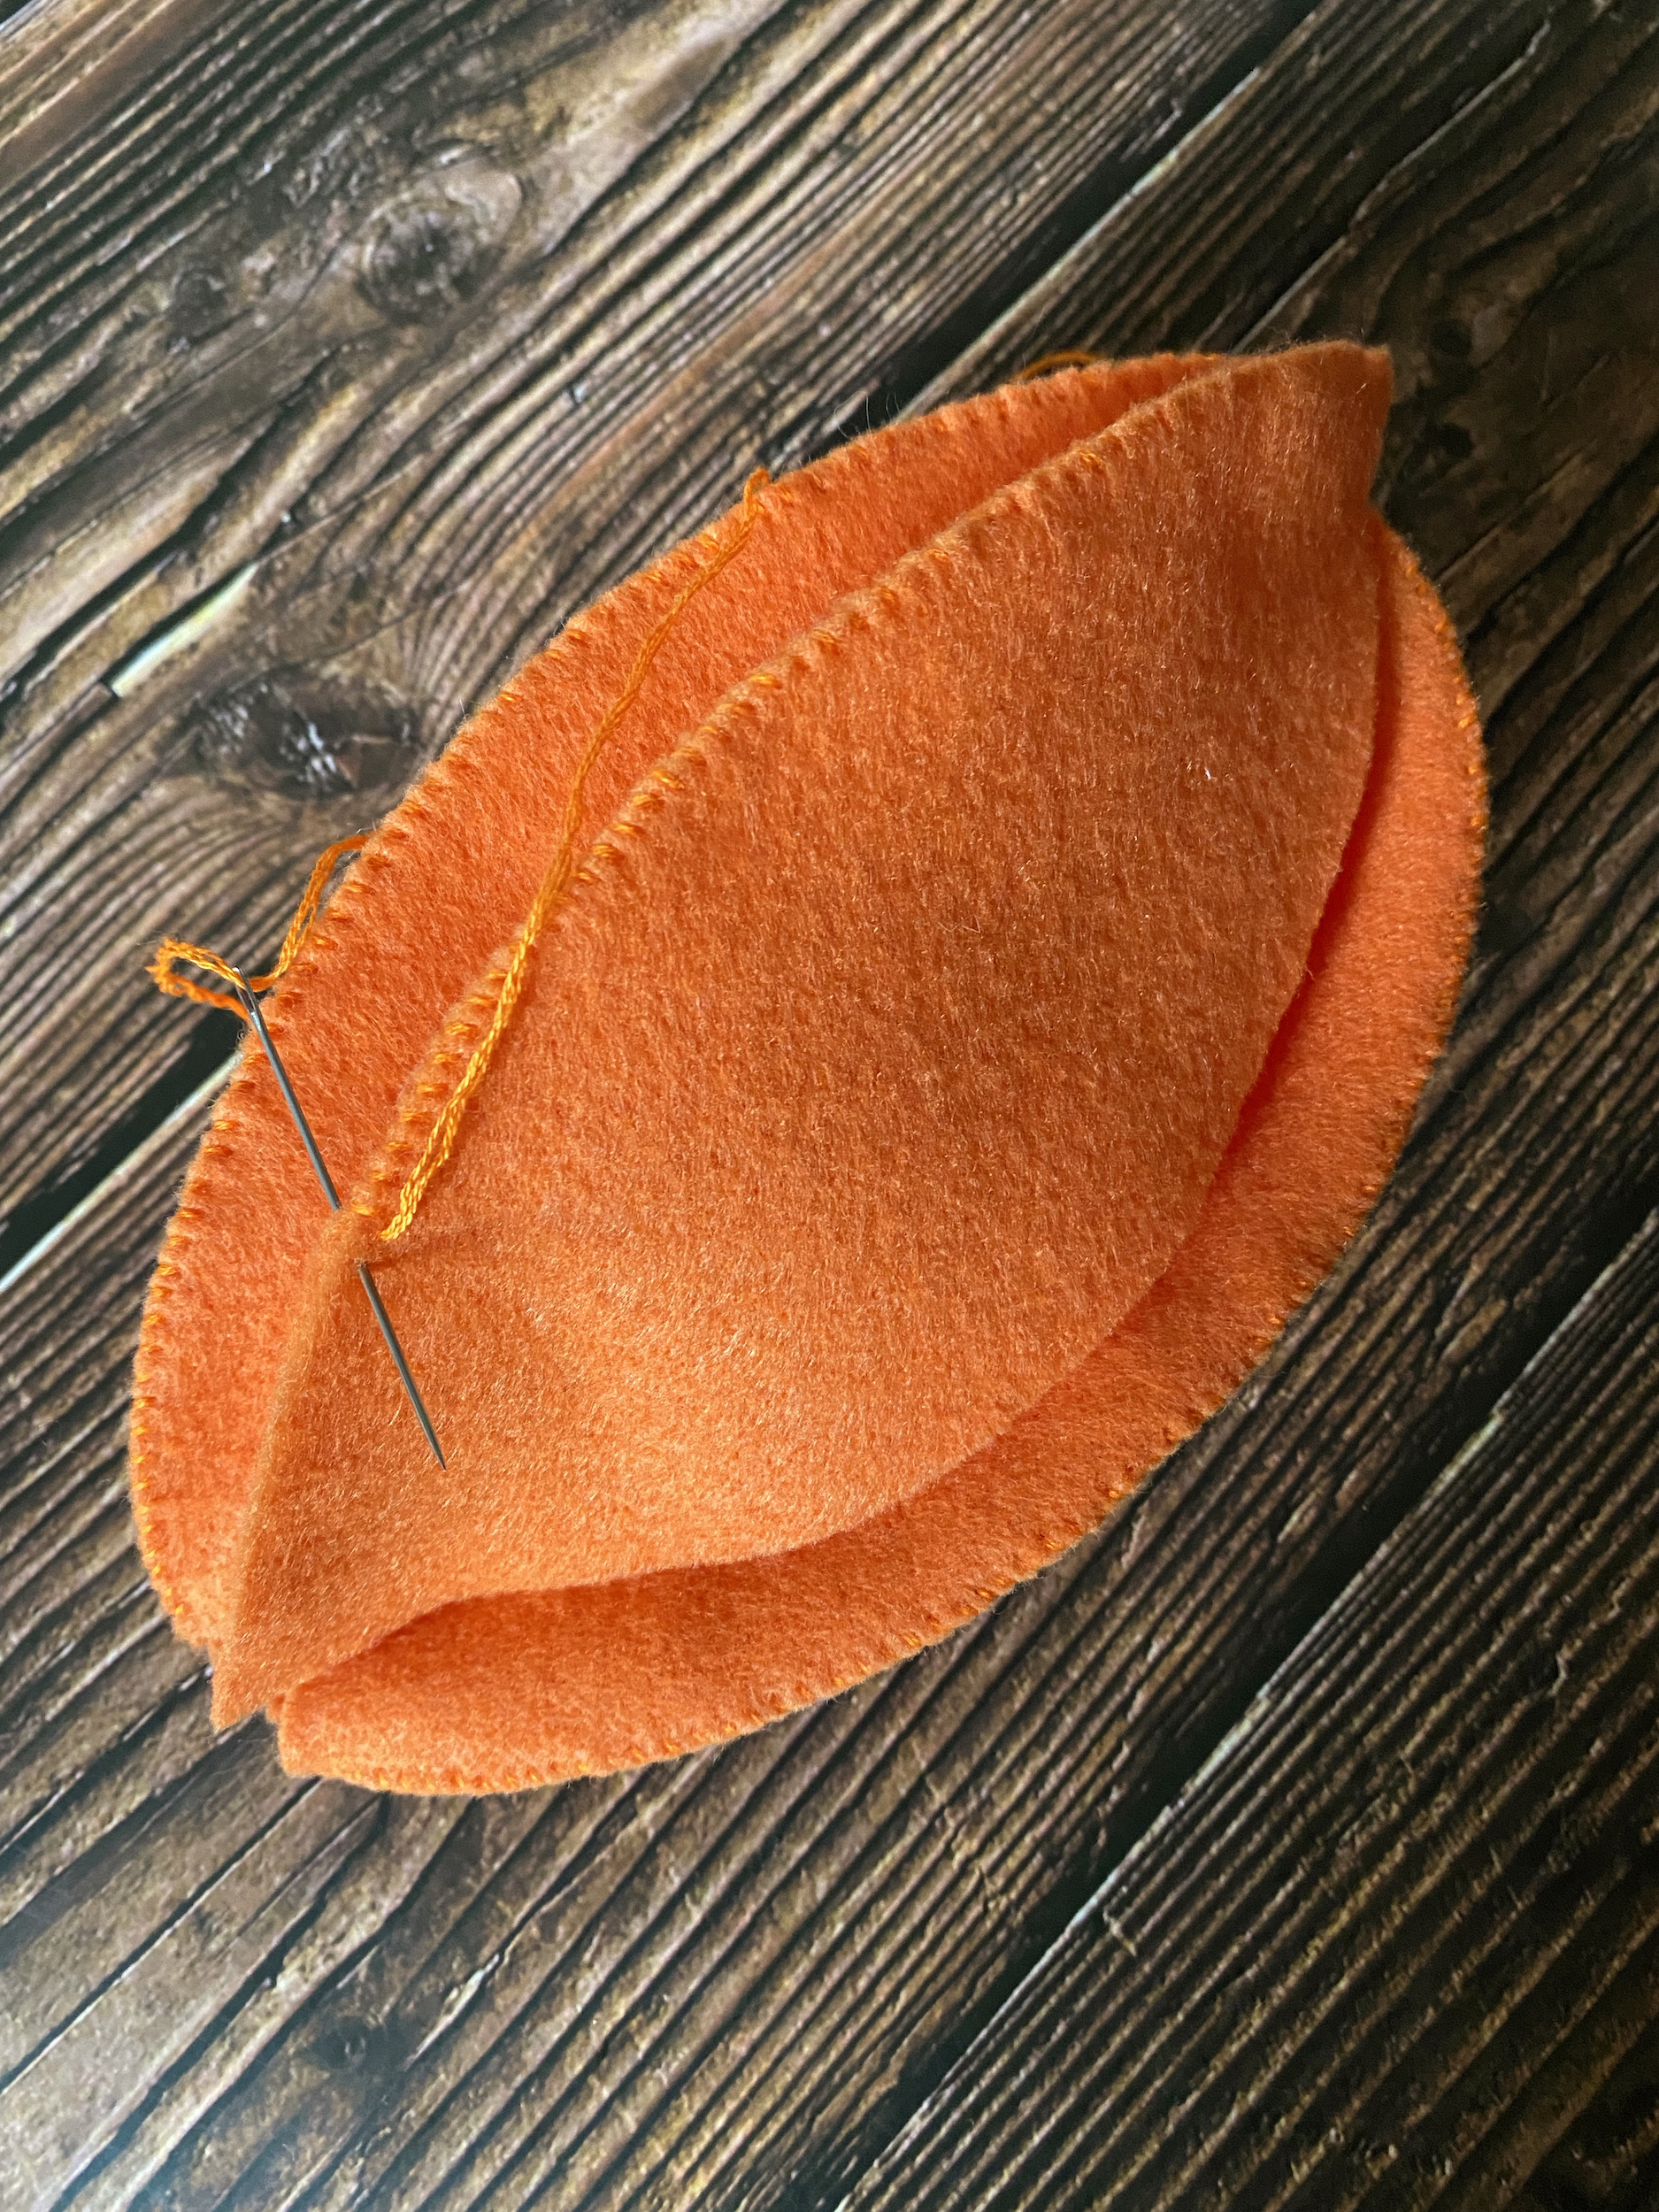
Thread orange embroidery floss onto your sewing needle.
Align two of the pumpkin pieces and whip stitch along one side, from one point to the next, concealing the first and ending knot underneath so that the stitching will be exposed.
Repeat step 3 to continue adding pieces of the pumpkin.
Once you’ve stitched the last piece on, join the two ends together with a whip stitch to complete the pumpkin body.
Stuff the pumpkin, then place the circles on the top and bottom of the pumpkin and secure them with sewing pins.
Using a whip stitch, attach the circles to the pumpkin, concealing the first and ending knots underneath. Then remove the sewing pins.
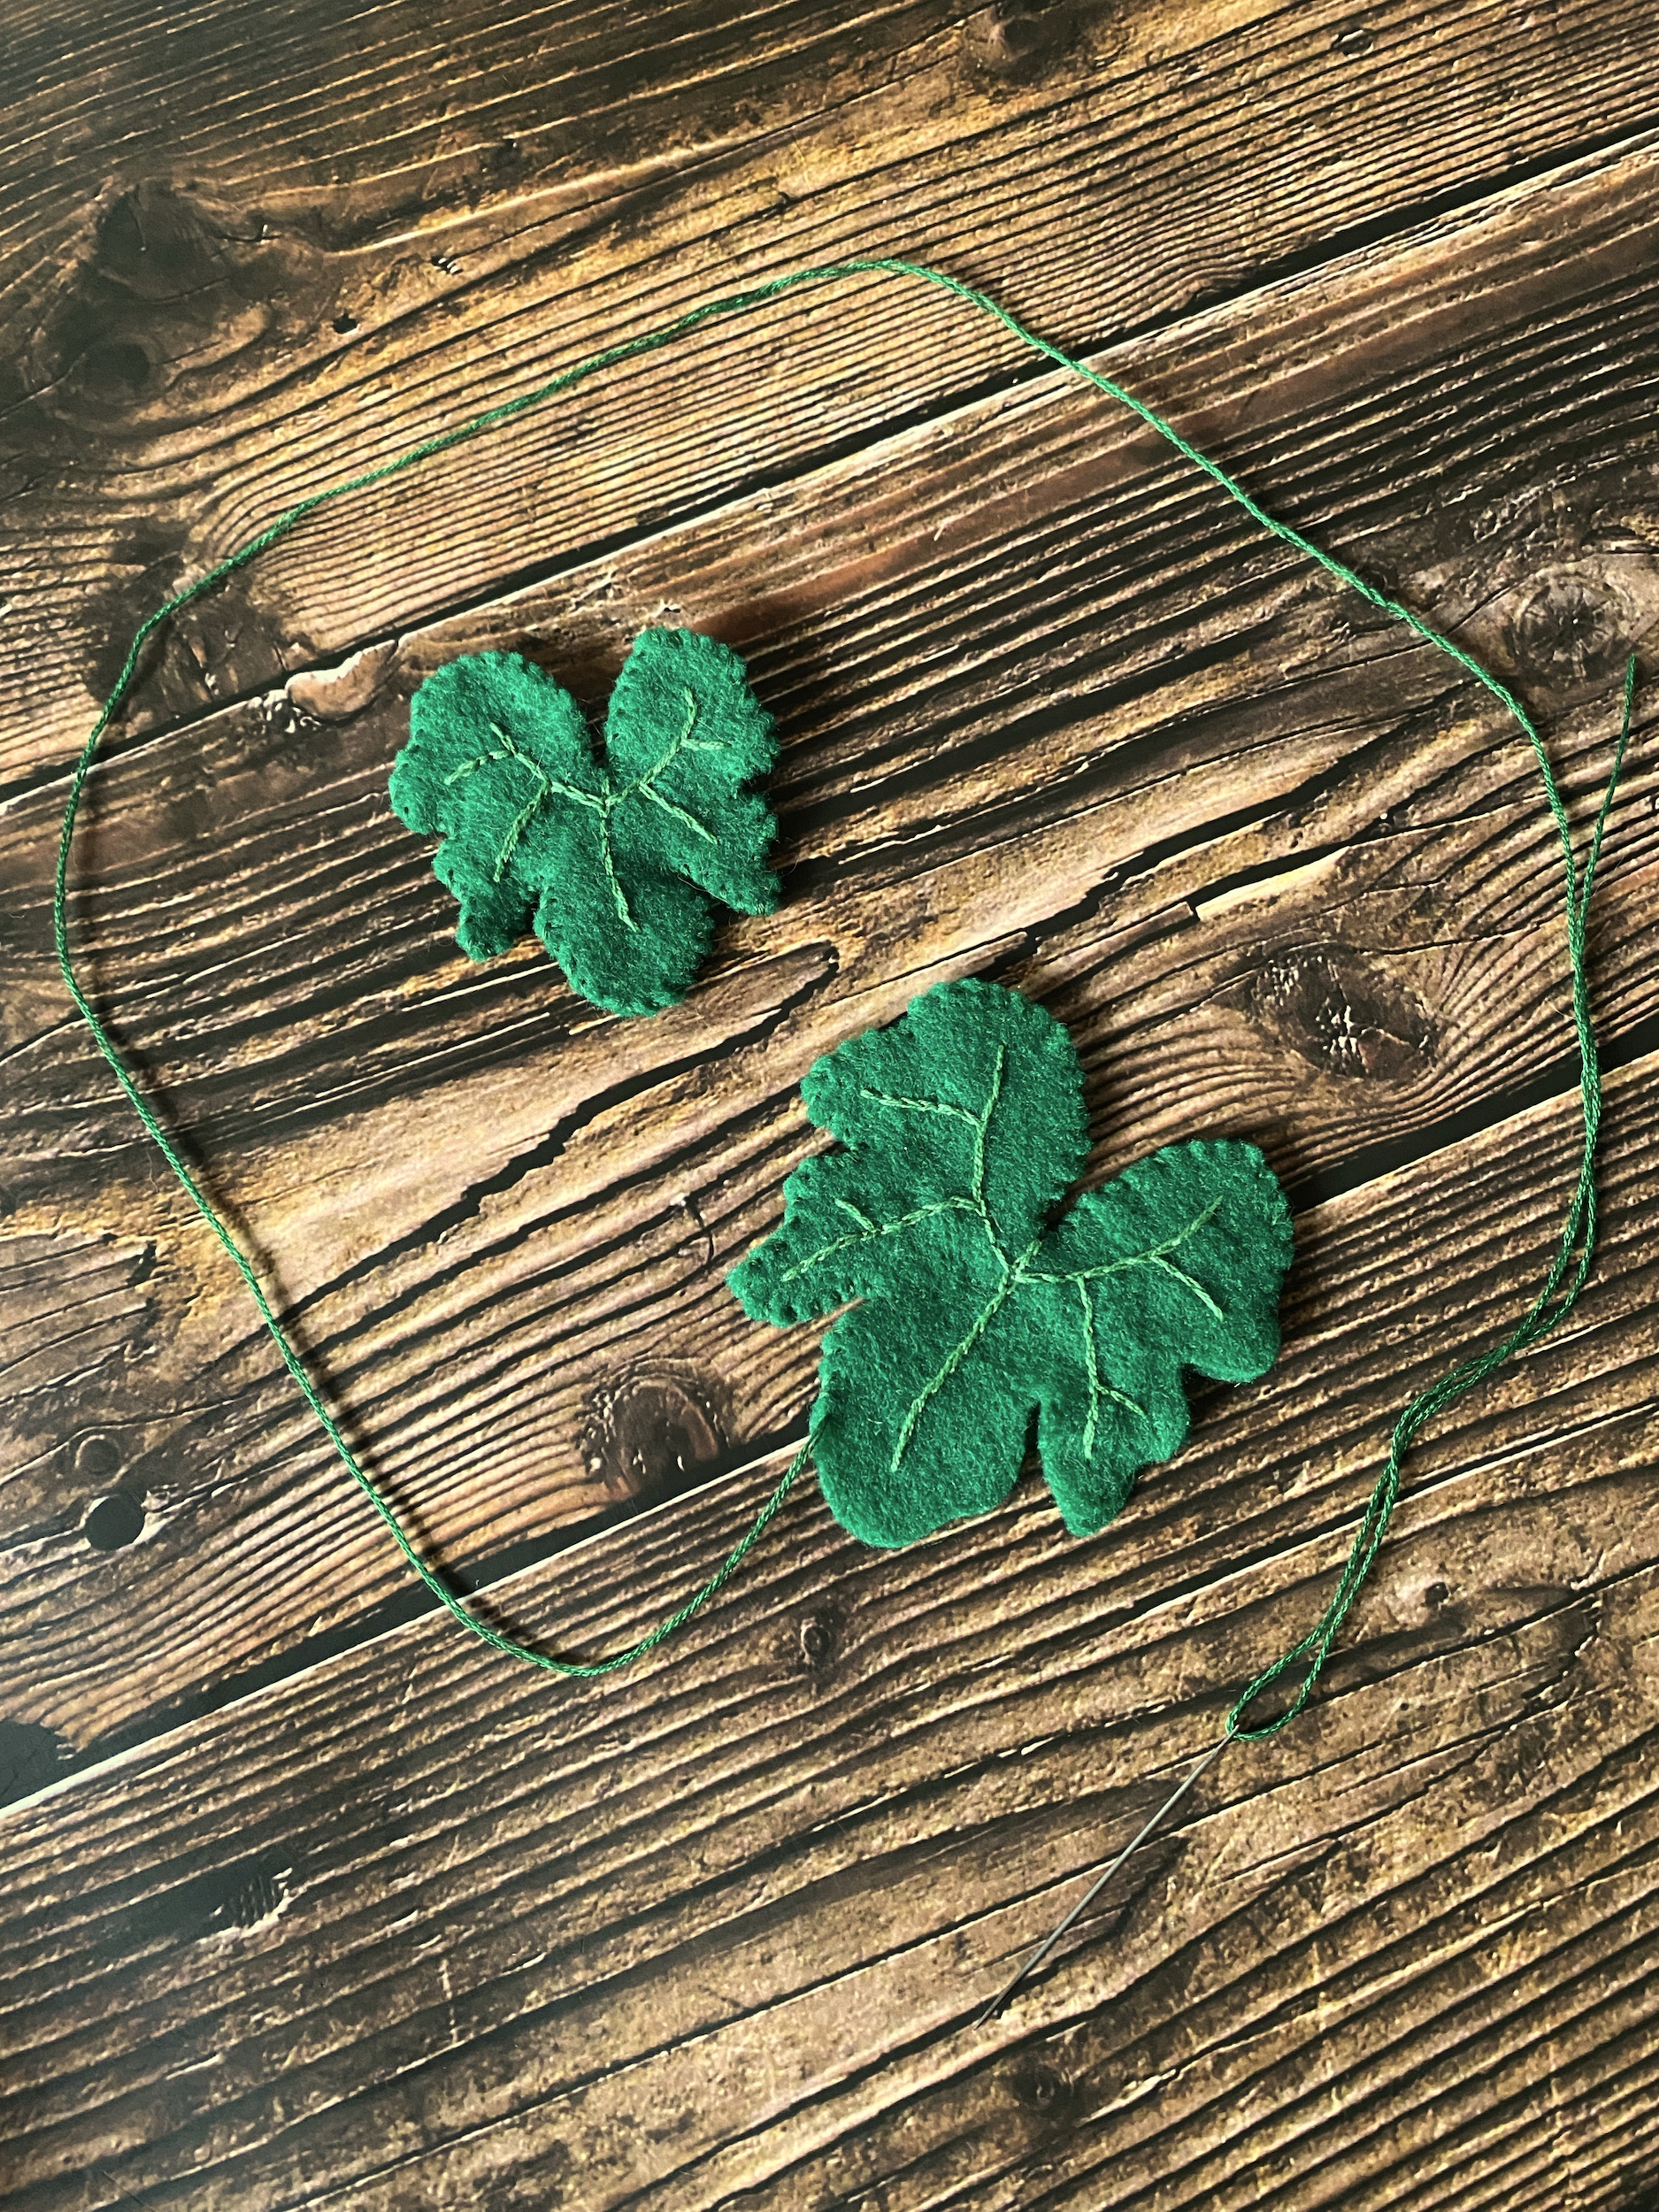
Thread green embroidery floss on your sewing needle and stitch the veins onto one side of each leaf.
Once done with the veins, align the two halves of each leaf (concealing the stitching in between) and whipstitch around the edges of the leaves to make them whole.
Thread brown embroidery floss onto your sewing needle and whipstitch around the outside edges of the stem, leaving the bottom of the stem open. At this point you can leave the stem as it is or turn it around to conceal the stitching.
Stuff the stem, then place it on top of the pumpkin and secure it with sewing pins.
Using a whip stitch, attach the stem to the body of the pumpkin.
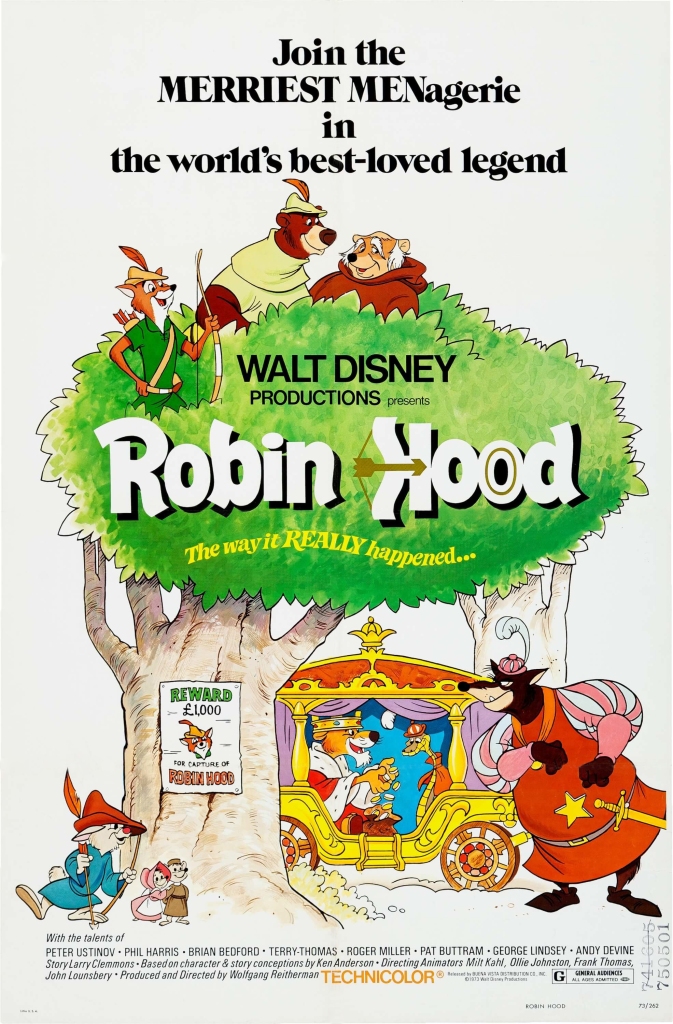
Welcome back friends! This week we’ll be baking Trigger’s Blackberry Pie from Disney’s Robin Hood!
This recipe is featured when Robin Hood is discovered at Prince John’s archery competition and a fight ensues. One of the Sheriff of Nottingham’s henchmen, Trigger the vulture, is hiding out in a pie booth surrounded by these pies.
Note to self: Blackberries have seeds! This pie is sweet, tart and delicious, but there are seeds from the blackberries that startled me before I expected them! You could strain the seeds out by forcing the blackberries through a sieve. This recipe calls for whole berries, but you can adjust accordingly if the seeds throw off your groove!
TRIGGER’S BLACKBERRY PIE
CRUST
2 1/2 cups of all-purpose flour
1 teaspoon of kosher salt
1 cup of unsalted butter, chilled
6-8 tablespoons of water, chilled
FILLING
1 cup of sugar
1/2 cup of flour
4-6 cups of fresh blackberries
INSTRUCTIONS (CRUST)
Add the flour and salt to a bowl and whisk to combine.
Cut the chilled butter into cubes and add the cubes to the bowl of flour and salt. Using a pastry cutter, cut the butter into the flour mixture until well combined.
Begin adding the tablespoons of chilled water one at a time and stirring well after each addition until the dough forms.
Turn the dough out onto a clean flat surface and work it into a ball. Cut this ball in half and plastic wrap each piece, then set inside the refrigerator to chill for at least 1 hour.
Bring out the first half of the dough and roll it out until it is about 1/4 inch thick and large enough to fit into your pie pan.
Gently pick up the rolled out dough and place it gently into the bottom of your pie pan, then smooth it in and trim the edges.
INSTRUCTIONS (FILLING)
Pre-heat the oven to 425 F.
Wash the blackberries and add them to a bowl.
Add the sugar and stir until well coated, then add the flour and stir until well coated.
Pour the filling into the prepared pie crust.
Bring out the second half of the dough and roll it out until it is about 1/4 inch thick and large enough to cover your pie.
Gently pick up the rolled out dough and place it gently over the top of the pie, then trim the edges.
Using a fork or your fingers, crimp or pinch the edges.
Add 3 to 4 slits for venting while the pie bakes.
Cover the edges of the pie with a 2 to 3 inch strip of foil to prevent excessive browning.
Bake for 45-55 minutes or until the crust is golden brown and juice begins to bubble through the slits in crust, remove the foil for the last 15 minutes of baking.
Remove from the oven and allow it to cool on the rack at least 2 hours or more to allow the filling to thicken.
What child (or inner child) doesn’t love preparing toy food in a play kitchen?
I had a play kitchen when I was a little girl and loved baking cookies for myself, my sister and my parents. Now that I’m grown and have a daughter of my own, I want to make her some handcrafted play food so she can enjoy making meals for everyone during play, or while we cook in the kitchen next to her!
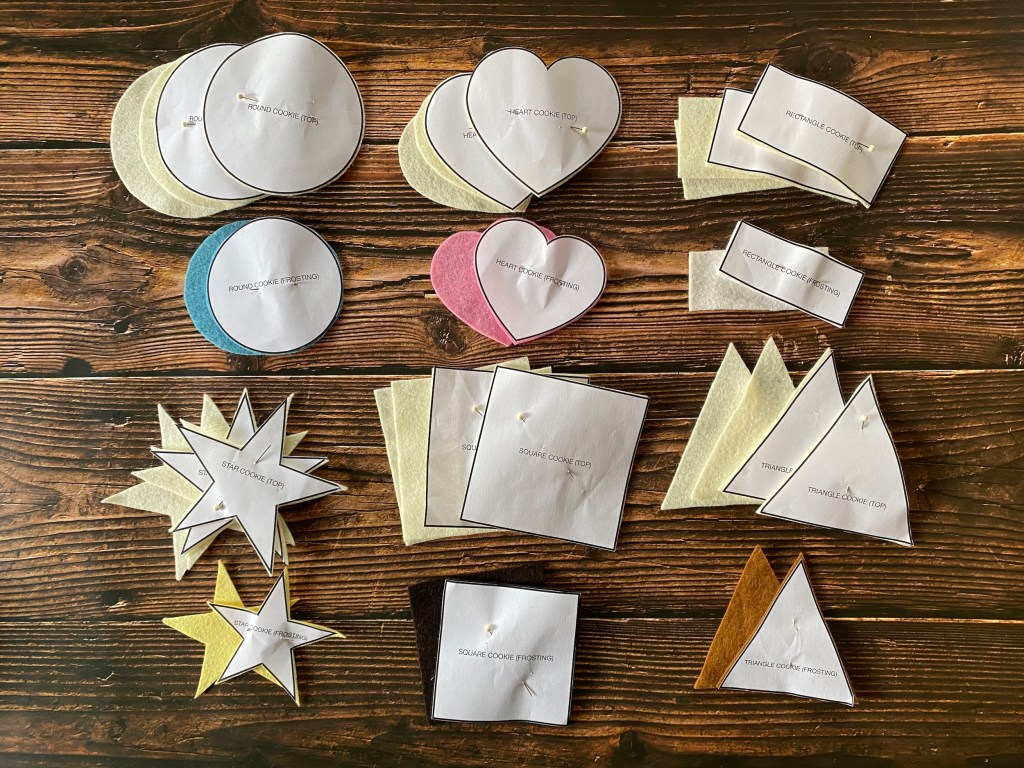
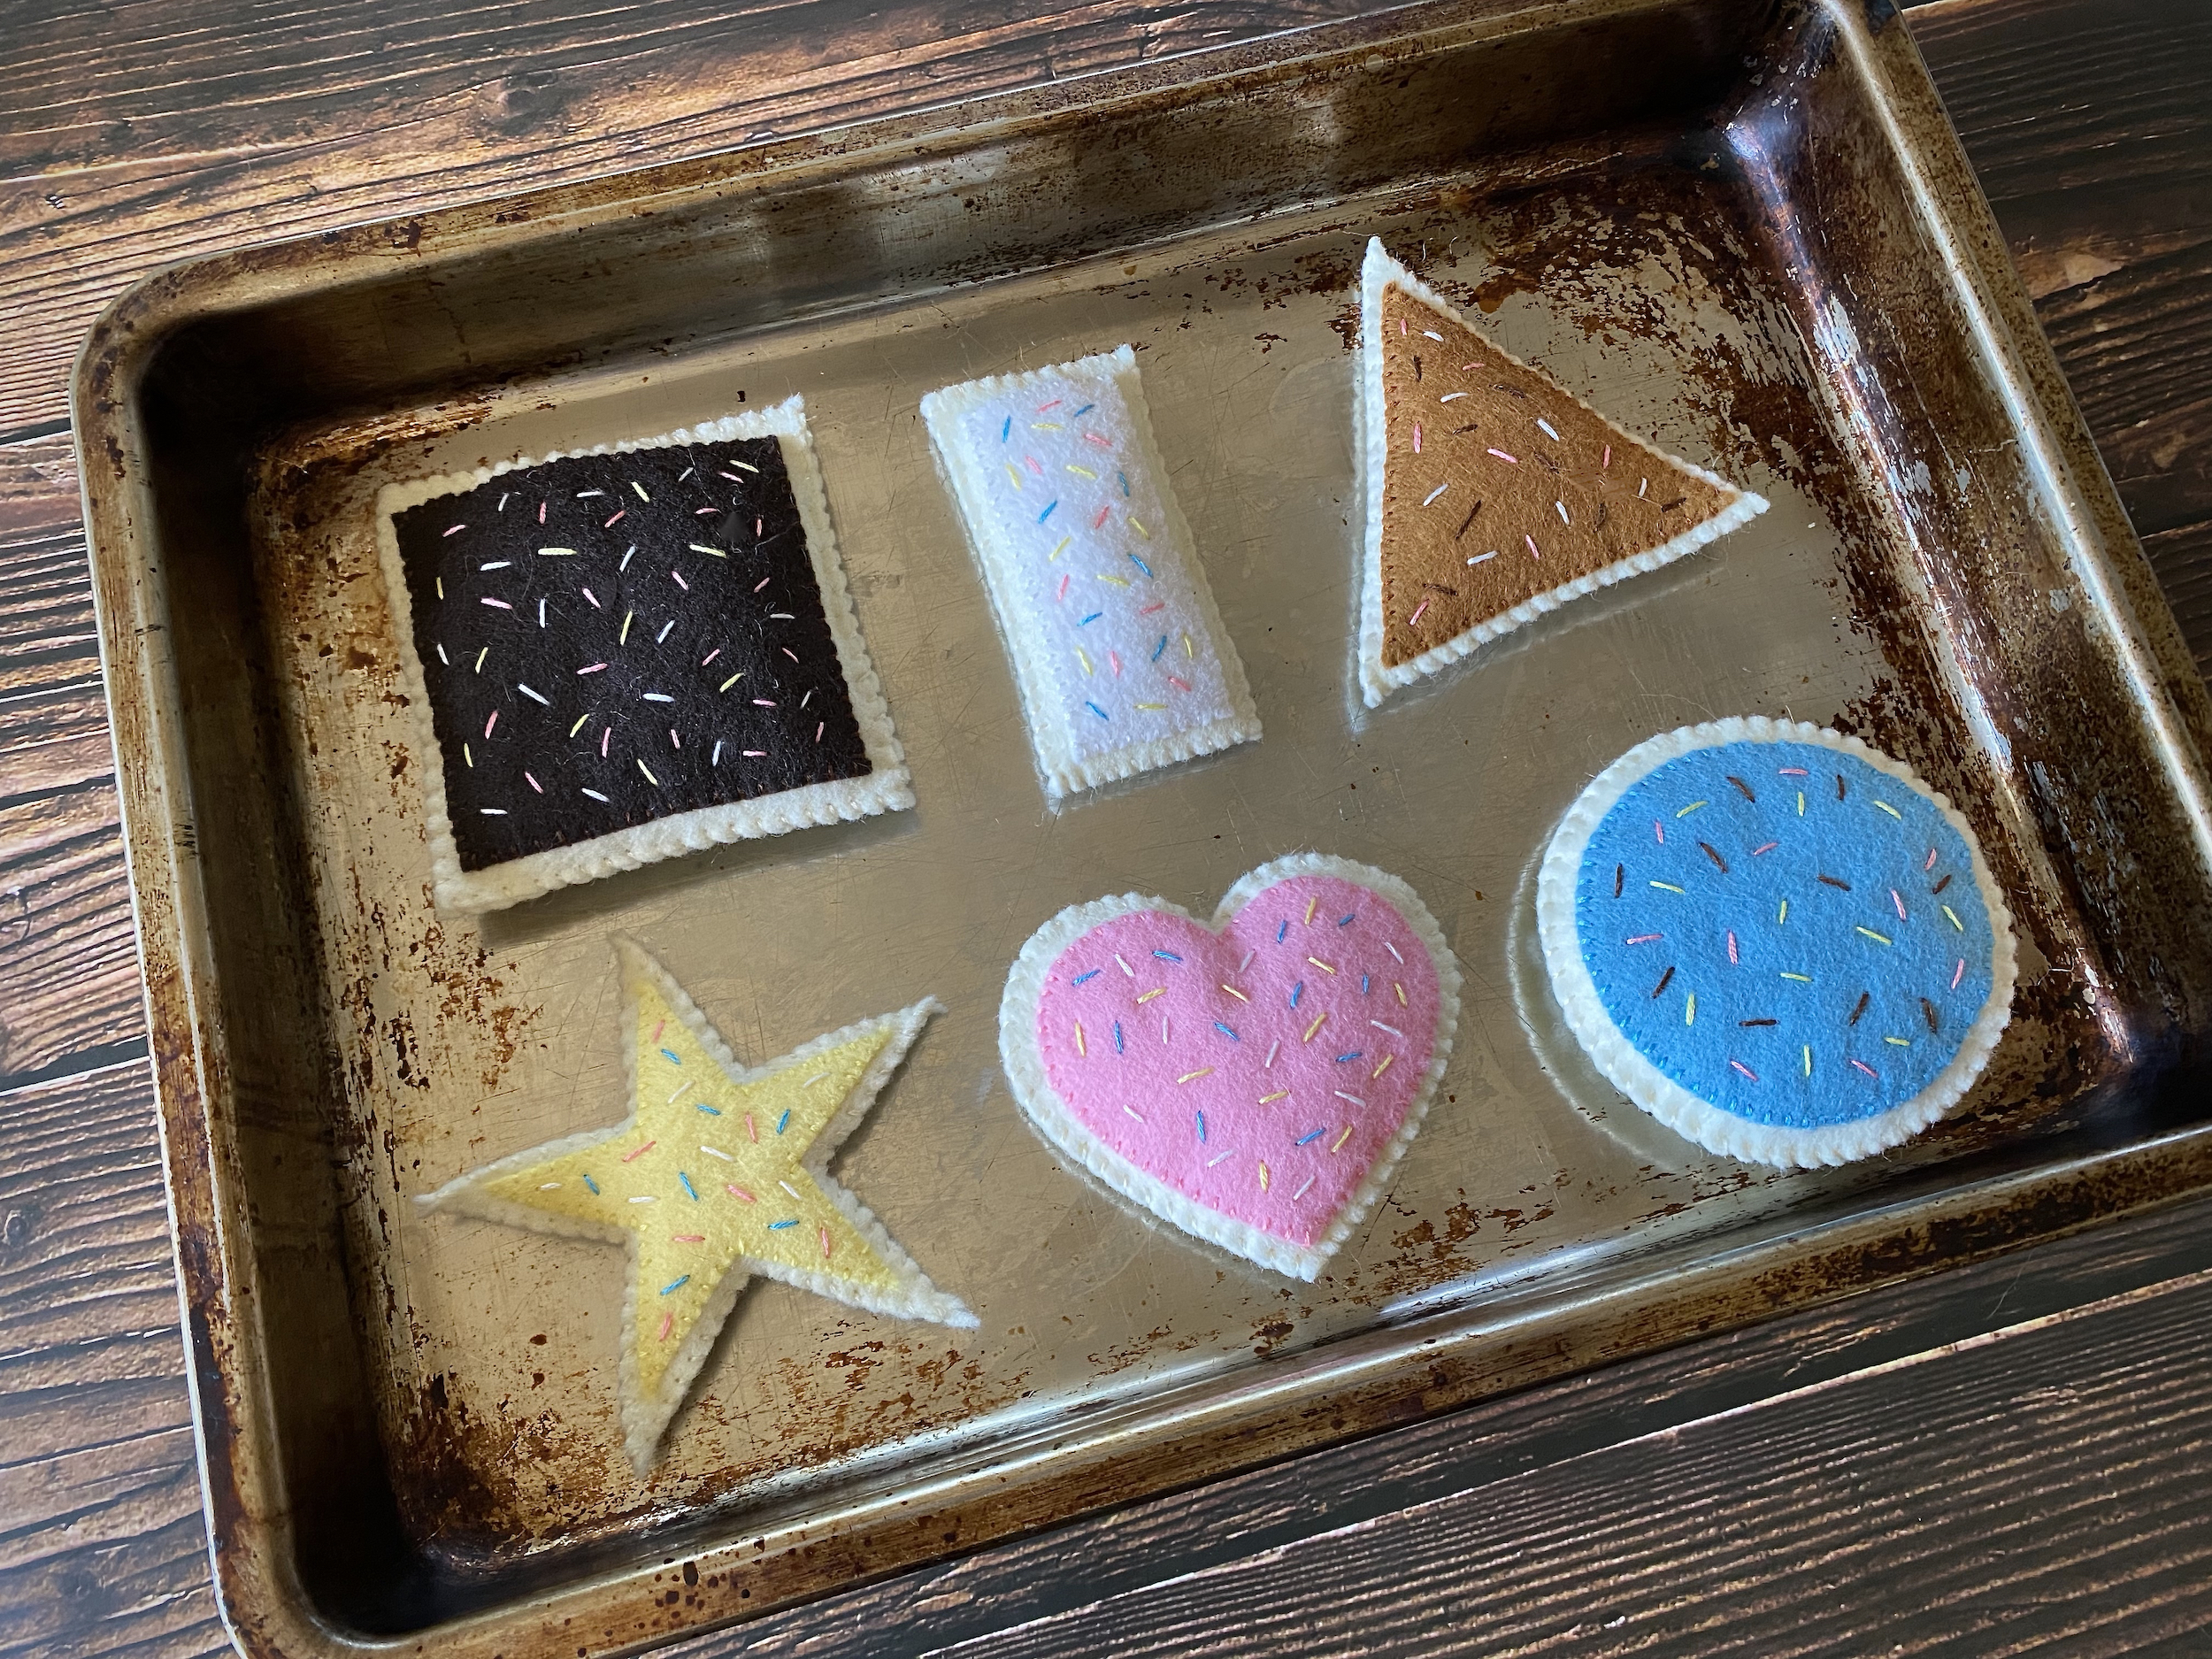
Please feel free to use these patterns to create some play food for you and yours! This pattern will make one circle cookie, one heart cookie, one star cookie, one triangle cookie, one square cookie and one rectangle cookie, each with frosting. I made one extra of each cookie shape so Zoey will have two of each. You can duplicate it as much as you want to make multiple pieces of each food!
Embroidery floss (pale tan, pale blue, light brown, dark brown, pale pink, white)
Sewing needle
INSTRUCTIONS
Print out the cookie pattern I’ve provided, then cut the patterns from the paper.
Pin the patterns on the appropriate colored felt, then use sewing scissors to cut the felt.
Align and pin the pale blue circle of frosting to one half of the circle of pale tan felt, then thread pale blue embroidery floss onto your sewing needle.
Begin sewing around the outer edges of the frosting using a whipstitch, concealing the first and ending knots underneath the layer of cookie.
One at a time, thread three of the other colors of embroidery floss onto your needle and create randomized stitches within the frosting to make sprinkles. Conceal the first and ending knots of each color underneath the layer of cookie.
Thread a sewing needle with pale tan embroidery floss and pin the bottom cookie layer over the stitching on the back of the frosted top half.
Using a whipstitch, begin sewing around the edges of the circle cookie, concealing the first knot and end knot in between the layers.
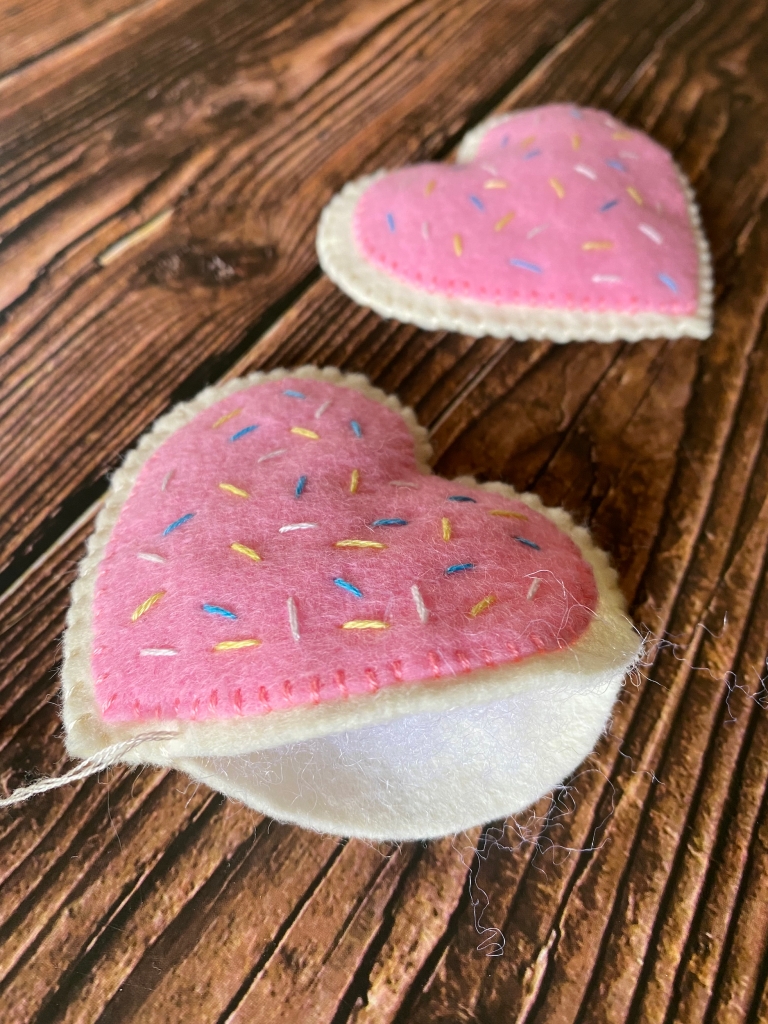
Align and pin the pale pink heart of frosting to one half of the heart of pale tan felt, then thread pale pink embroidery floss onto your sewing needle.
Begin sewing around the outer edges of the frosting using a whipstitch, concealing the first and ending knots underneath the layer of cookie.
One at a time, thread three of the other colors of embroidery floss onto your needle and create randomized stitches within the frosting to make sprinkles. Conceal the first and ending knots of each color underneath the layer of cookie.
Thread a sewing needle with pale tan embroidery floss and pin the bottom cookie layer over the stitching on the back of the frosted top half.
Using a whipstitch, begin sewing around the edges of the heart cookie, concealing the first knot and end knot in between the layers.
Align and pin the pale yellow star of frosting to one half of the star of pale tan felt, then thread pale yellow embroidery floss onto your sewing needle.
Begin sewing around the outer edges of the frosting using a whipstitch, concealing the first and ending knots underneath the layer of cookie.
One at a time, thread three of the other colors of embroidery floss onto your needle and create randomized stitches within the frosting to make sprinkles. Conceal the first and ending knots of each color underneath the layer of cookie.
Thread a sewing needle with pale tan embroidery floss and pin the bottom cookie layer over the stitching on the back of the frosted top half.
Using a whipstitch, begin sewing around the edges of the star cookie, concealing the first knot and end knot in between the layers.
Align and pin the white triangle of frosting to one half of the triangle of pale tan felt, then thread white embroidery floss onto your sewing needle.
Begin sewing around the outer edges of the frosting using a whipstitch, concealing the first and ending knots underneath the layer of cookie.
One at a time, thread three of the other colors of embroidery floss onto your needle and create randomized stitches within the frosting to make sprinkles. Conceal the first and ending knots of each color underneath the layer of cookie.
Thread a sewing needle with pale tan embroidery floss and pin the bottom cookie layer over the stitching on the back of the frosted top half.
Using a whipstitch, begin sewing around the edges of the triangle cookie, concealing the first knot and end knot in between the layers.
Align and pin the dark brown square of frosting to one half of the square of pale tan felt, then thread dark brown embroidery floss onto your sewing needle.
Begin sewing around the outer edges of the frosting using a whipstitch, concealing the first and ending knots underneath the layer of cookie.
One at a time, thread three of the other colors of embroidery floss onto your needle and create randomized stitches within the frosting to make sprinkles. Conceal the first and ending knots of each color underneath the layer of cookie.
Thread a sewing needle with pale tan embroidery floss and pin the bottom cookie layer over the stitching on the back of the frosted top half.
Using a whipstitch, begin sewing around the edges of the square cookie, concealing the first knot and end knot in between the layers.
Align and pin the pale brown rectangle of frosting to one half of the rectangle of pale tan felt, then thread pale brown embroidery floss onto your sewing needle.
Begin sewing around the outer edges of the frosting using a whipstitch, concealing the first and ending knots underneath the layer of cookie.
One at a time, thread three of the other colors of embroidery floss onto your needle and create randomized stitches within the frosting to make sprinkles. Conceal the first and ending knots of each color underneath the layer of cookie.
Thread a sewing needle with pale tan embroidery floss and pin the bottom cookie layer over the stitching on the back of the frosted top half.
Using a whipstitch, begin sewing around the edges of the rectangle cookie, concealing the first knot and end knot in between the layers.
What child (or inner child) doesn’t love preparing toy food in a play kitchen?
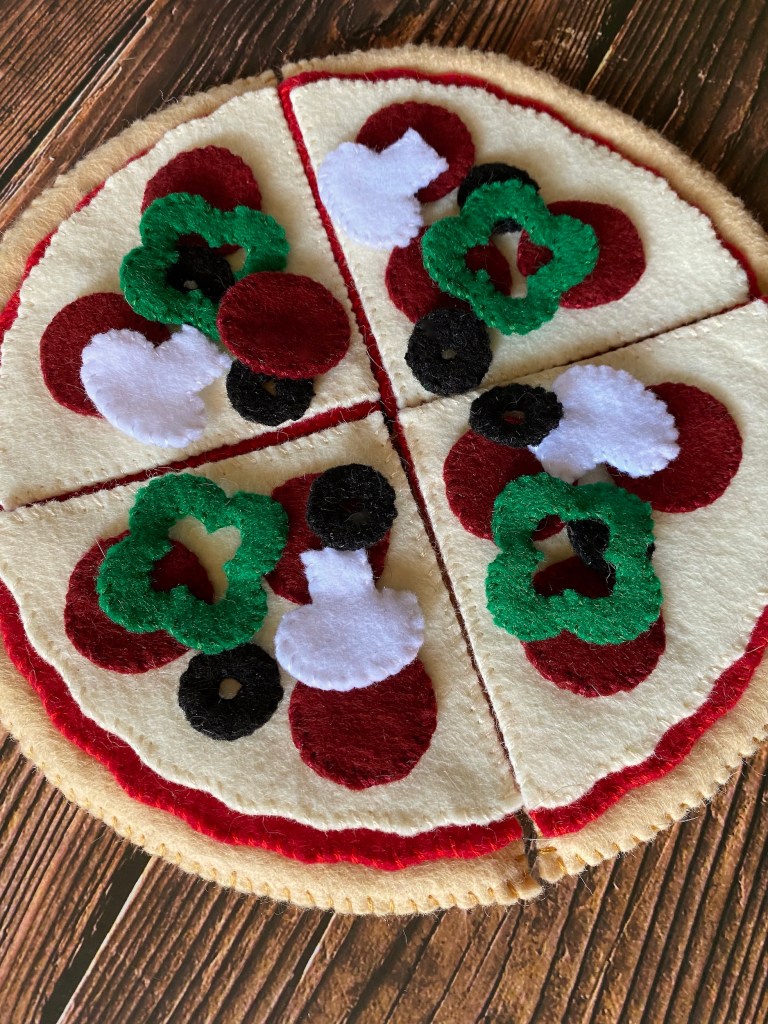
I had a play kitchen when I was a little girl and loved preparing pizza for myself, my sister and my parents. Now that I’m grown and have a daughter of my own, I want to make her some handcrafted play food so she can enjoy making meals for everyone during play, or while we cook in the kitchen next to her!
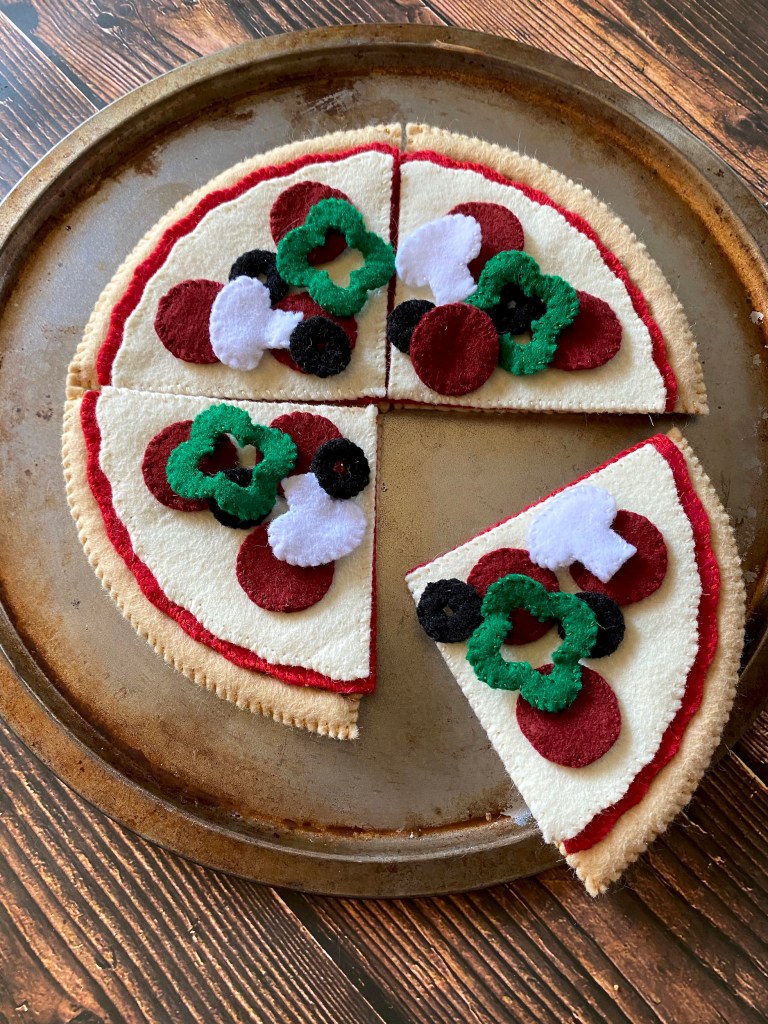
Please feel free to use these patterns to create some play food for you and yours! This pattern will make four slices of pizza with sauce and cheese. Toppings include 4 slices of bell pepper, 4 slices of mushroom, 12 slices of pepperoni, and 6 slices of olives. You can duplicate it as much as you want to make multiple pieces of each food!
Embroidery floss (light tan, red, dark red, white, off-white, green, and black)
INSTRUCTIONS
Print out the pizza patterns I’ve provided and cut them from the paper.
Place the patterns on the appropriate colored felt and pin them in place, then use sewing scissors to cut out the felt pieces.
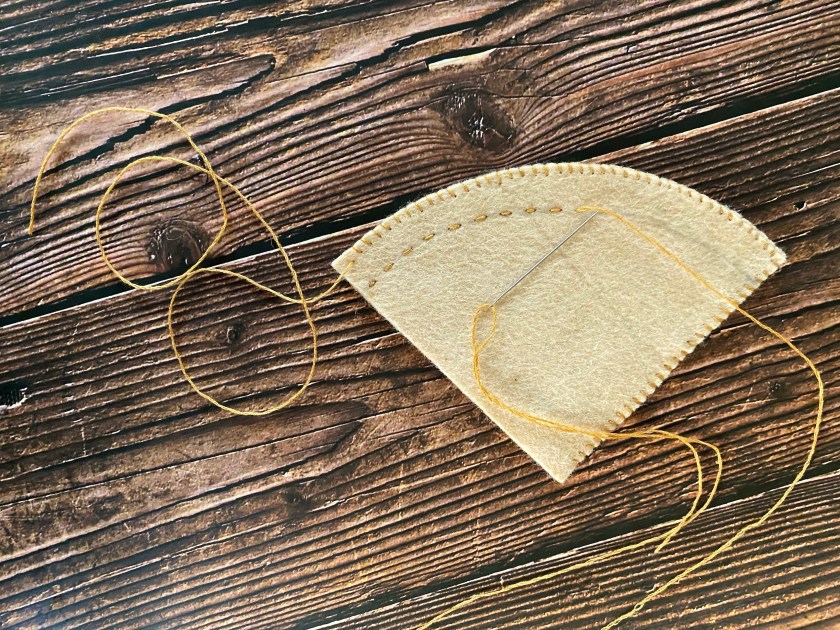
Align and pin the two halves of pizza crust together and thread light tan embroidery floss onto your sewing needle. Then, with a pencil, lightly sketch a curved line along and about 1/2 inch in from the arc of the crust.
Starting to one side of the pizza slice’s point, whipstitch along that edge and the top arc of the crust, stopping at the far end of the arc and setting that thread aside for a moment.
From the open edge of the pizza slice, use a running stitch along the pencil line to seal off the crust, concealing the first and ending knot between the layers, then use a little stuffing to inflate.
Pick up the previous thread and continue stitching down the remaining side of the pizza slice, concealing the end knot in between the layers.
Repeat steps 3 through 6 to create the three other pizza slices.
Align and pin the two halves of pizza sauce together and thread red embroidery floss onto your sewing needle.
Begin sewing around the edges of your pizza sauce using a whipstitch, concealing the first knot and ending knot in between the layers.
Repeat steps 8 and 9 to create the three other pizza sauces.
Align and pin the two halves of cheese together and thread off-white embroidery floss onto your sewing needle.
Begin sewing around the edges of your cheese using a whipstitch, concealing the first knot and ending knot in between the layers.
Repeat steps 11 and 12 to create the three other cheeses.
Align and pin the two halves of bell pepper together and thread green embroidery floss onto your sewing needle.
Begin sewing around the outer and then inner edges of your bell pepper using a whipstitch, concealing the first knot and ending knot in between the layers.
Repeat steps 14 and 15 to create the rest of the bell pepper pieces.
Align and pin the two halves of mushroom together and thread white embroidery floss onto your sewing needle.
Begin sewing around the edges of your mushroom using a whipstitch, concealing the first knot and ending knot in between the layers.
Repeat steps 17 and 18 to create the rest of the mushroom pieces.
Align and pin the two halves of pepperoni together and thread dark red embroidery floss onto your sewing needle.
Begin sewing around the edges of your pepperoni using a whipstitch, concealing the first knot and ending knot in between the layers.
Repeat steps 20 and 21 to create the rest of the pepperoni pieces.
Align and pin the two halves of olive together and thread black embroidery floss onto your sewing needle.
Begin sewing around the outer and then inner edges of your olive using a whipstitch, concealing the first knot and ending knot in between the layers.
Repeat steps 23 and 24 to create the rest of the olive pieces.
What child (or inner child) doesn’t love preparing toy food in a play kitchen?
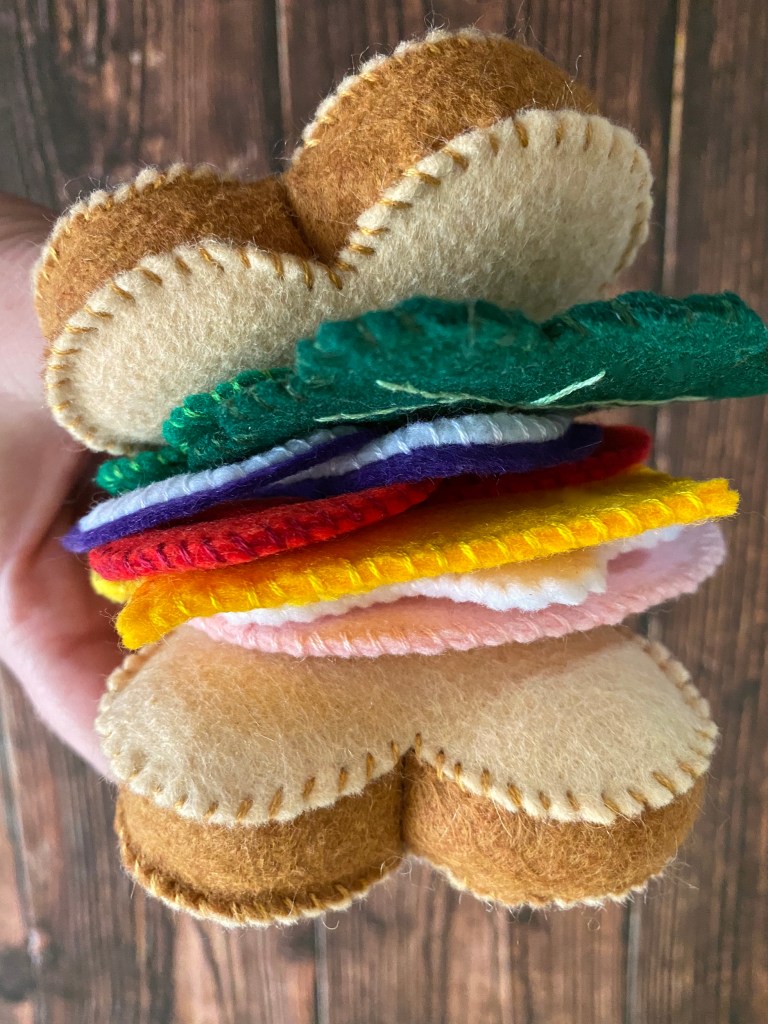
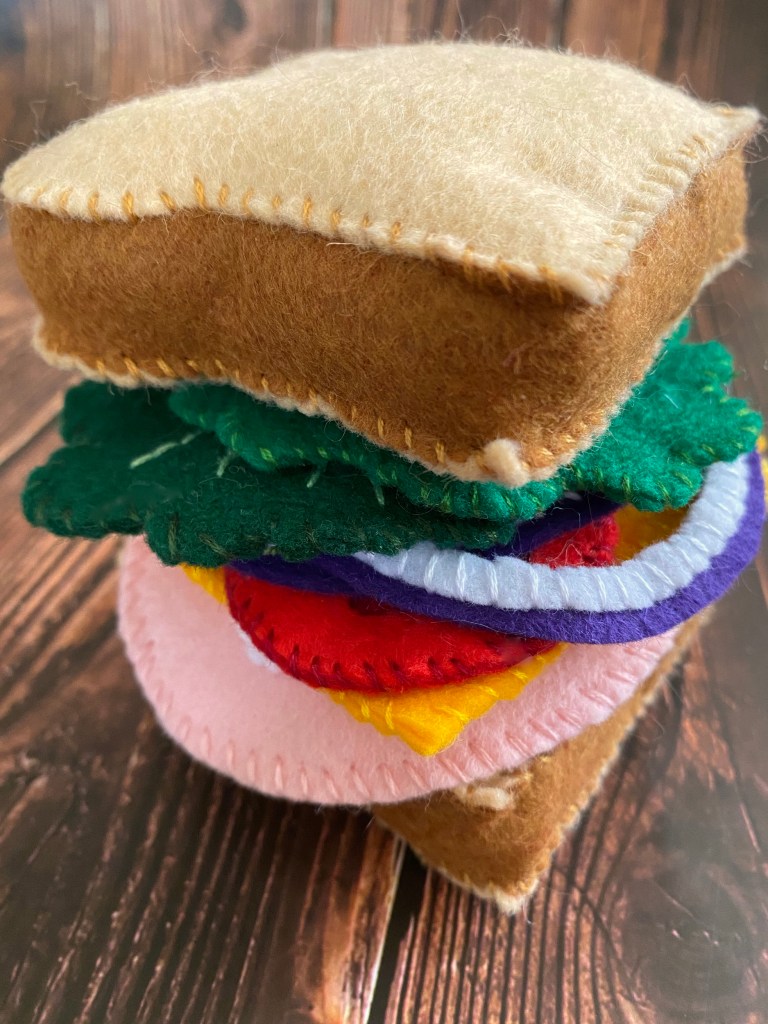
I had a play kitchen when I was a little girl and loved preparing sandwiches for myself, my sister and my parents. Now that I’m grown and have a daughter of my own, I want to make her some handcrafted play food so she can enjoy making meals for everyone during play, or while we cook in the kitchen next to her!
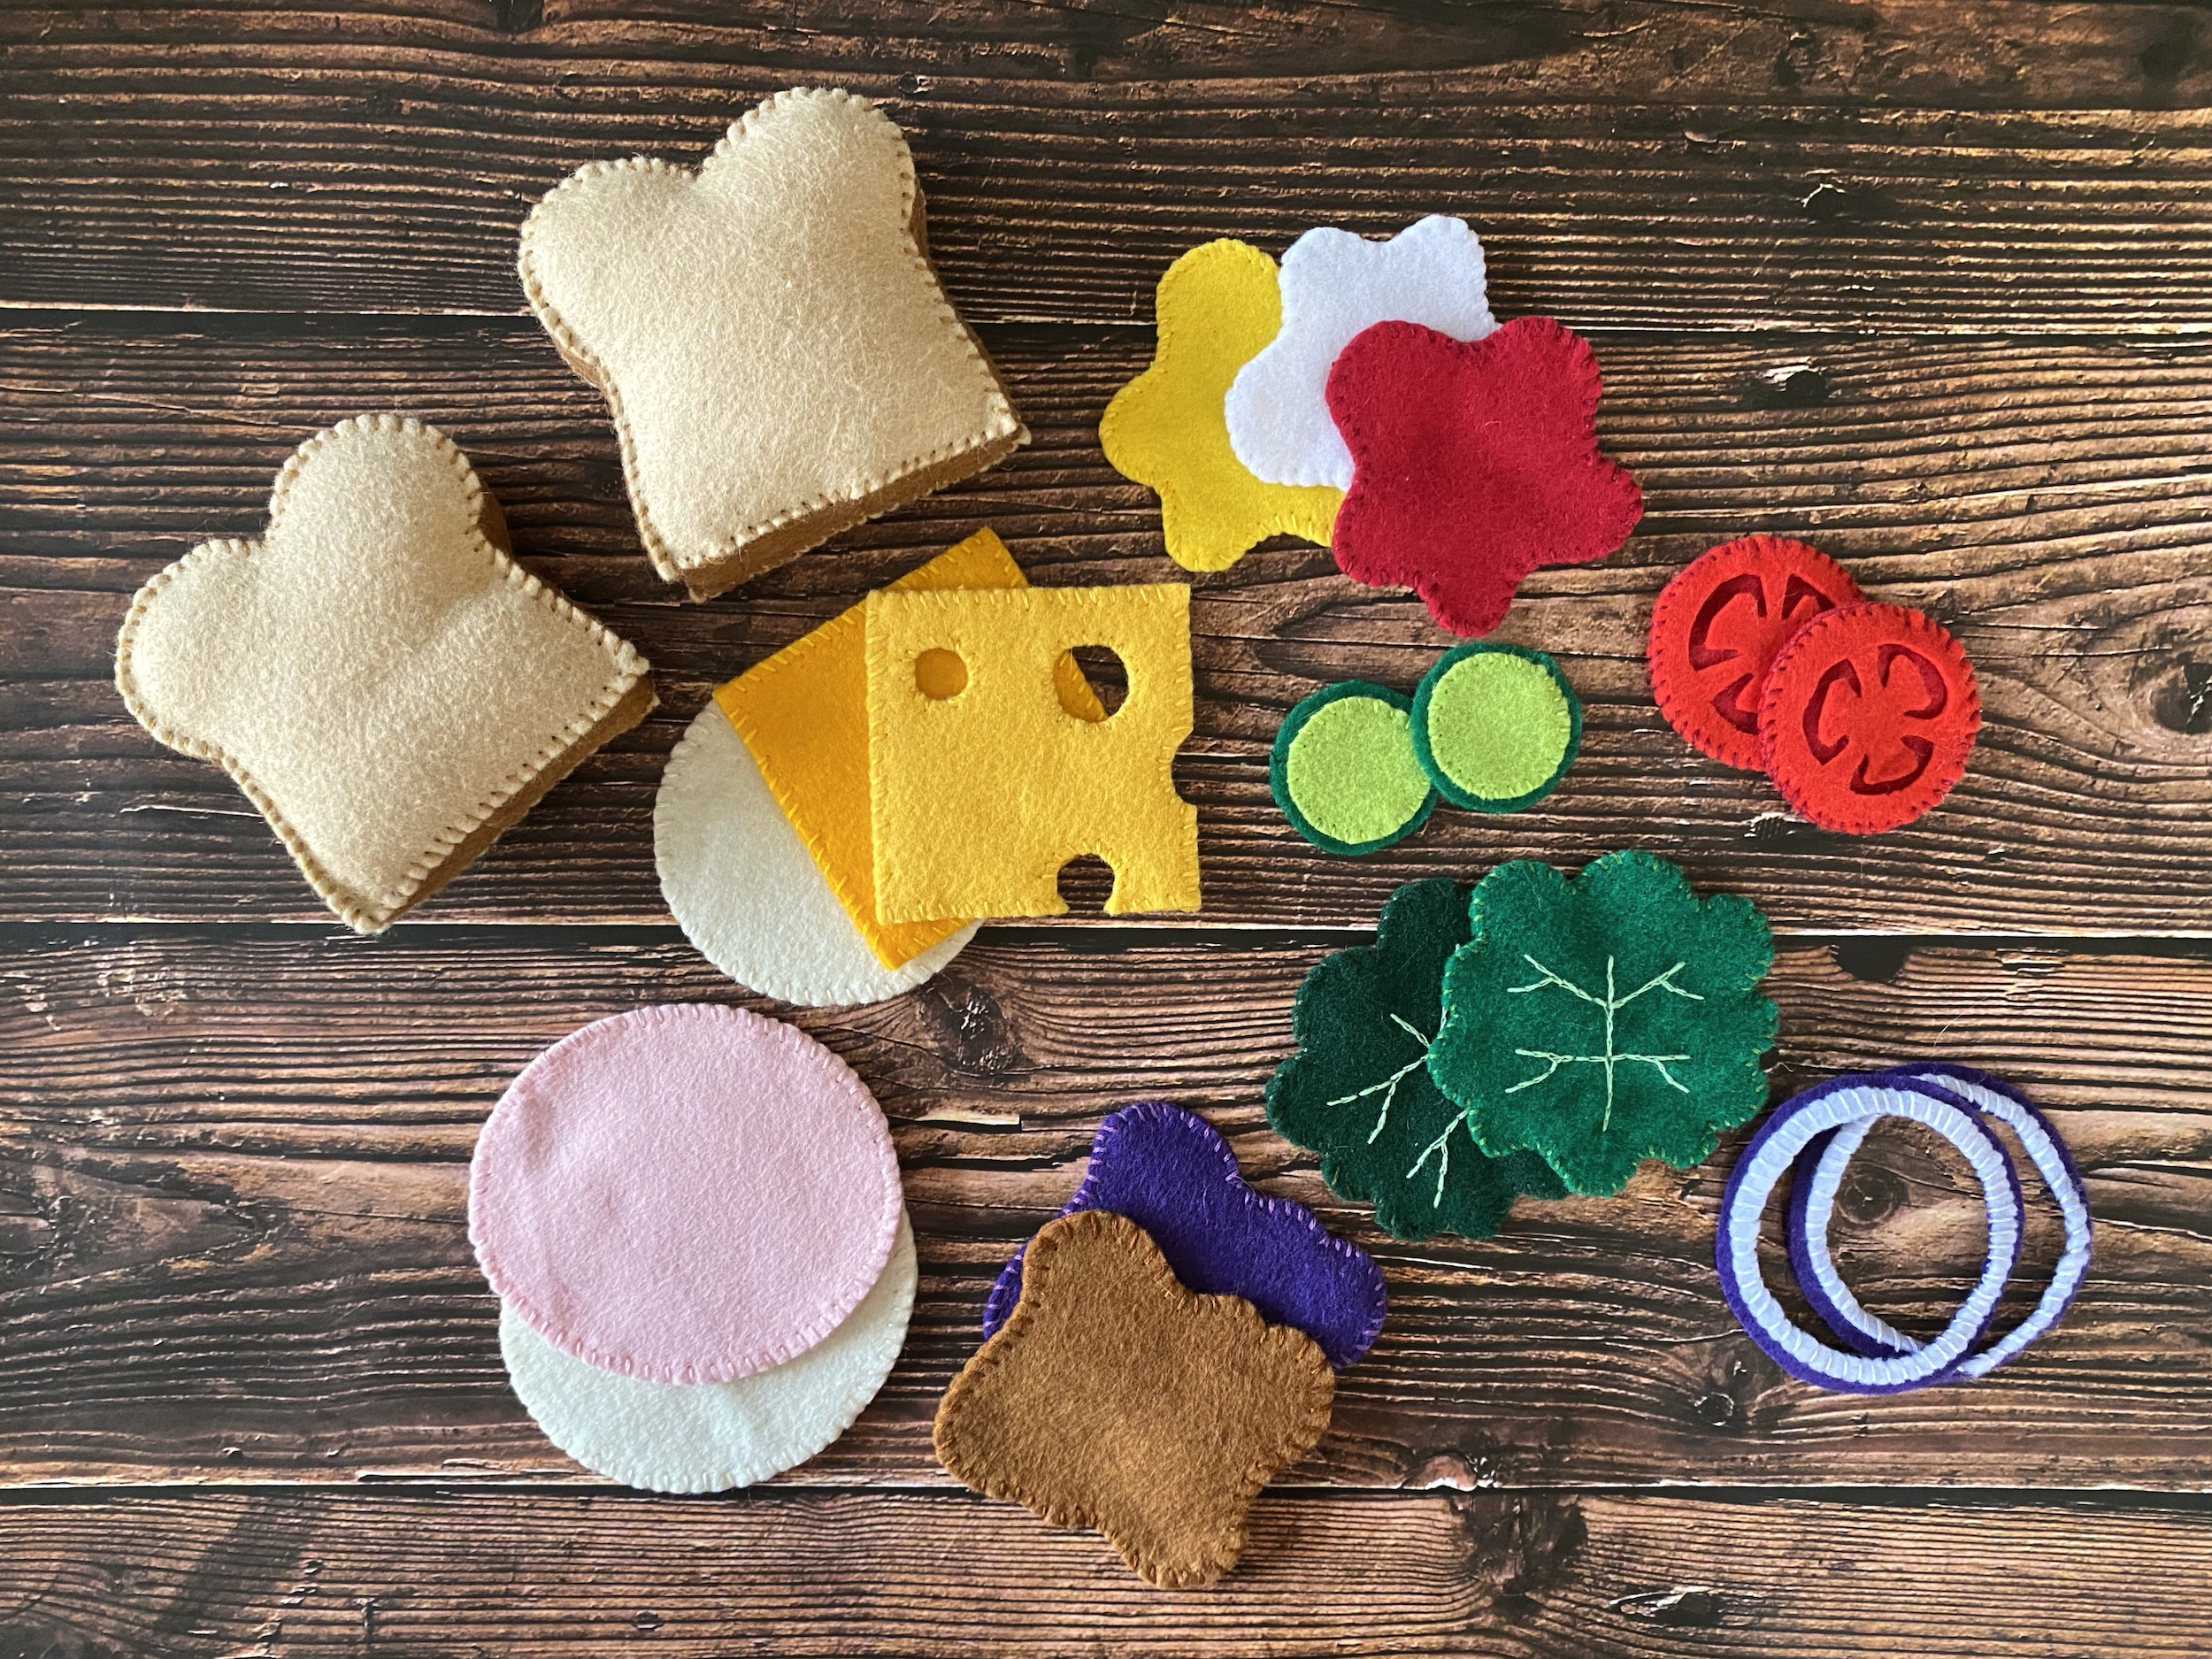
Please feel free to use these patterns to create some play food for you and yours! This pattern will make two slices of bread, a slice of American cheese, a slice of Swiss cheese, a slice of provolone cheese, a slice of deli meat, a lettuce leaf, two slices of tomato, two onion rings, two slices of pickle, ketchup, mayonnaise, mustard, peanut butter and jelly. I made an extra slice of deli meat and an extra (darker) leaf of lettuce. You can duplicate it as much as you want to make multiple pieces of each food!
Embroidery floss (light brown, green, light green, vibrant green, pale pink, purple, red, dark red, white, off-white, yellow, dark yellow and vibrant yellow)
Hot glue gun
INSTRUCTIONS
Print out the sandwich patterns I’ve provided and cut them from the paper.
Place the patterns on the appropriate colored felt and pin them in place, then use sewing scissors to cut out the felt pieces.
Align the two pieces of bread crust onto one another and thread your sewing needle with light brown embroidery floss. Whipstitch one of the shorter sides together, then pull open the strips to reveal what will be the dip in the top center of the bread.
Align the joined point of the bread crusts to the dip in the top of one half of the bread slice and begin to whipstitch around and down one side to attach. When you reach the bottom center, stop and tie it off. Begin at the top dip again and whipstitch down the other side of the bread until the two halves of crust meet, then tie it off. Within the piece of bread, join the two ends of the bread crust together and stitch them for reinforcement.
Lay the other half of the bread slice over the bread crust and whipstitch all the way around the bread, stopping 2/3 of the way around to insert stuffing, then complete the bread slice and conceal the knot between layers.
Repeat steps 3 through 5 to create the second slice of bread.
Align and pin the two halves of American cheese together and thread dark yellow embroidery floss onto your sewing needle.
Begin sewing around the edges of your American cheese using a whipstitch, concealing the first knot and ending knot in between the layers.
Align and pin the two halves of Swiss cheese together and thread yellow embroidery floss onto your sewing needle.
Begin sewing around the edges and inside the holes of your Swiss cheese using a whipstitch, concealing the first knot and ending knot in between the layers.
Align and pin the two halves of provolone cheese together and thread off-white embroidery floss onto your sewing needle.
Begin sewing around the edges of your provolone cheese using a whipstitch, concealing the first knot and ending knot in between the layers.
Align and pin the two halves of deli meat together and thread pale pink embroidery floss onto your sewing needle.
Begin sewing around the edges of your deli meat using a whipstitch, concealing the first knot and ending knot in between the layers.
Thread your sewing needle with light green embroidery floss and create the veins on each half of the the lettuce using a backstitch. Check before you begin to make ensure your stitches and knots will be concealed between the two halves.
Align and pin the two halves of lettuce together and thread green embroidery floss onto your sewing needle.
Begin sewing around the edges of your lettuce using a whipstitch, concealing the first knot and ending knot in between the layers.
Align and pin the two red halves of tomato (with the dark red base in between them) together and thread red embroidery floss onto your sewing needle.
Begin sewing around the edges of your tomato using a whipstitch, concealing the first knot and ending knot in between the layers.
Use small dabs from the hot glue gun to secure down the inner ridges of the tomato.
Repeat steps 18 through 20 to create the second tomato slice.
Align and pin the two different onion rings together and thread white embroidery floss onto your sewing needle.
Begin sewing around and over the white ring of the onion using a whipstitch and concealing the first and ending knots between the layers.
Repeat steps 22 and 24 to create the second onion ring.
Align and pin the two halves of the pickle (with the dark green base in between them) together and thread vibrant green embroidery floss onto your sewing needle.
Begin sewing around the vibrant green of your pickle using a whipstitch, concealing the first knot and ending knot in between the layers.
Align and pin the two halves of ketchup together and thread dark red embroidery floss onto your sewing needle.
Begin sewing around the edges of your ketchup using a whipstitch, concealing the first knot and ending knot in between the layers.
Align and pin the two halves of mayonnaise together and thread white embroidery floss onto your sewing needle.
Begin sewing around the edges of your mayonnaise using a whipstitch, concealing the first knot and ending knot in between the layers.
Align and pin the two halves of mustard together and thread vibrant yellow embroidery floss onto your sewing needle.
Begin sewing around the edges of your mustard using a whipstitch, concealing the first knot and ending knot in between the layers.
Align and pin the two halves of peanut butter together and thread light brown embroidery floss onto your sewing needle.
Begin sewing around the edges of your peanut butter using a whipstitch, concealing the first knot and ending knot in between the layers.
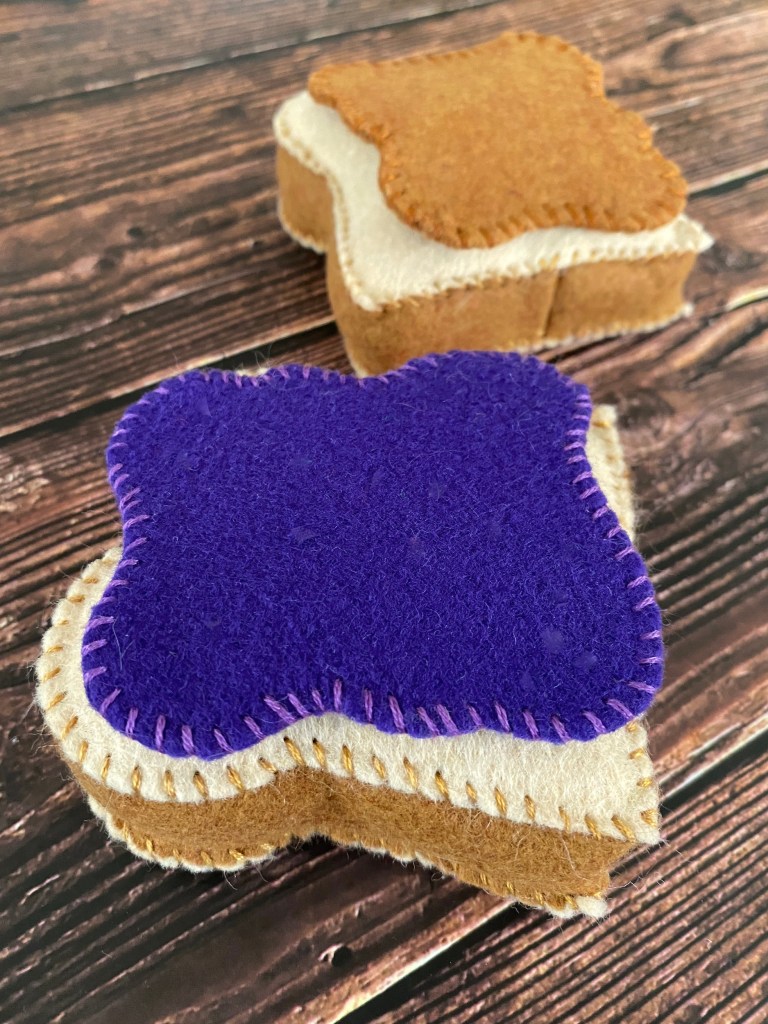
Align and pin the two halves of grape jelly together and thread purple embroidery floss onto your sewing needle.
Begin sewing around the edges of your grape jelly using a whipstitch, concealing the first knot and ending knot in between the layers.
What child (or inner child) doesn’t love preparing toy food in a play kitchen?
I had a play kitchen when I was a little girl and loved preparing pancakes for myself, my sister and my parents. Now that I’m grown and have a daughter of my own, I want to make her some handcrafted play food so she can enjoy making meals for everyone during play, or while we cook in the kitchen next to her!
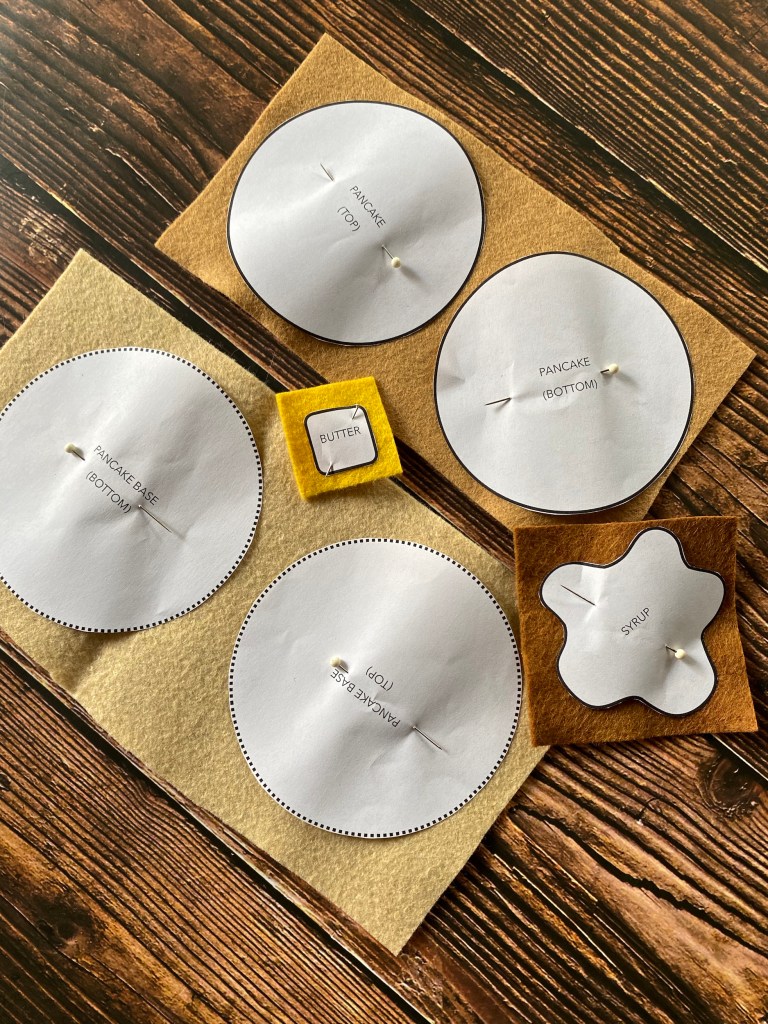
Please feel free to use these patterns to create some play food for you and yours! This pattern will make one pancake, one dollop of syrup and one pat of butter. I made two extra pancakes for a stack of three underneath the syrup and butter. You can duplicate it as much as you want to make multiple pieces of each food!
Embroidery floss (light tan, dark tan, light brown and yellow)
INSTRUCTIONS
Print out the pancakes pattern I’ve provided, then cut the patterns from the paper.
Pin the patterns on the appropriate colored felt, then use sewing scissors to cut the felt.
Thread a sewing needle with yellow embroidery floss and pin the two layers of yellow butter to one layer of the syrup.
Using a whipstitch, begin sewing around the edges of the butter, attaching it to the syrup, then tie it off underneath the syrup layer.
Thread a sewing needle with light brown embroidery floss and pin the second brown syrup layer over the stitching on the back of the first.
Using a whipstitch, begin sewing around the edges of the syrup, concealing the first knot and end knot in between the layers.
Thread a sewing needle with dark tan embroidery floss and pin each dark tan toasted circle of pancake to a lighter tan larger circle.
For each half of the pancake, completely sew the darker tan circle onto the lighter tan circle using a whipstitch, then tie it off underneath the lighter tan circle.
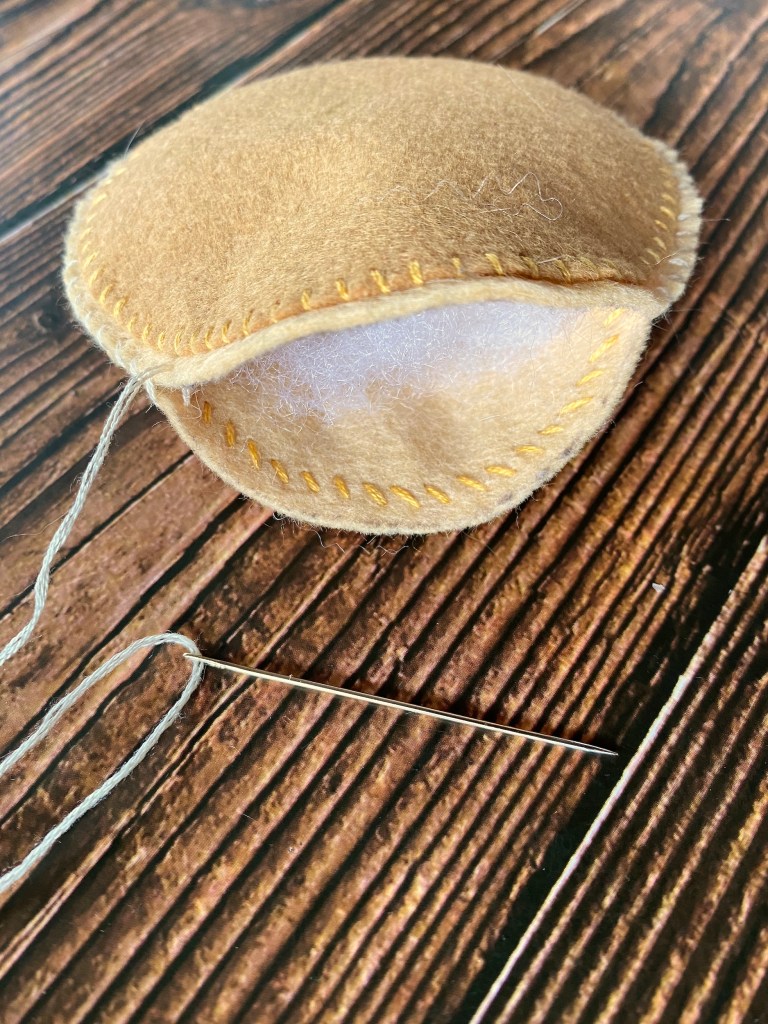
Thread a sewing needle with light tan embroidery floss and pin the two halves of the pancake together with the stitches concealed between the two halves.
Begin sewing the two halves together with a whipstitch. About 3/4 of the way around the pancake, stop sewing and gently stuff the pancake. Once you’re satisfied with the fullness of the pancake, complete stitching around the pancake and concealing the first knot and end knot in between the layers.
What child (or inner child) doesn’t love preparing toy food in a play kitchen?
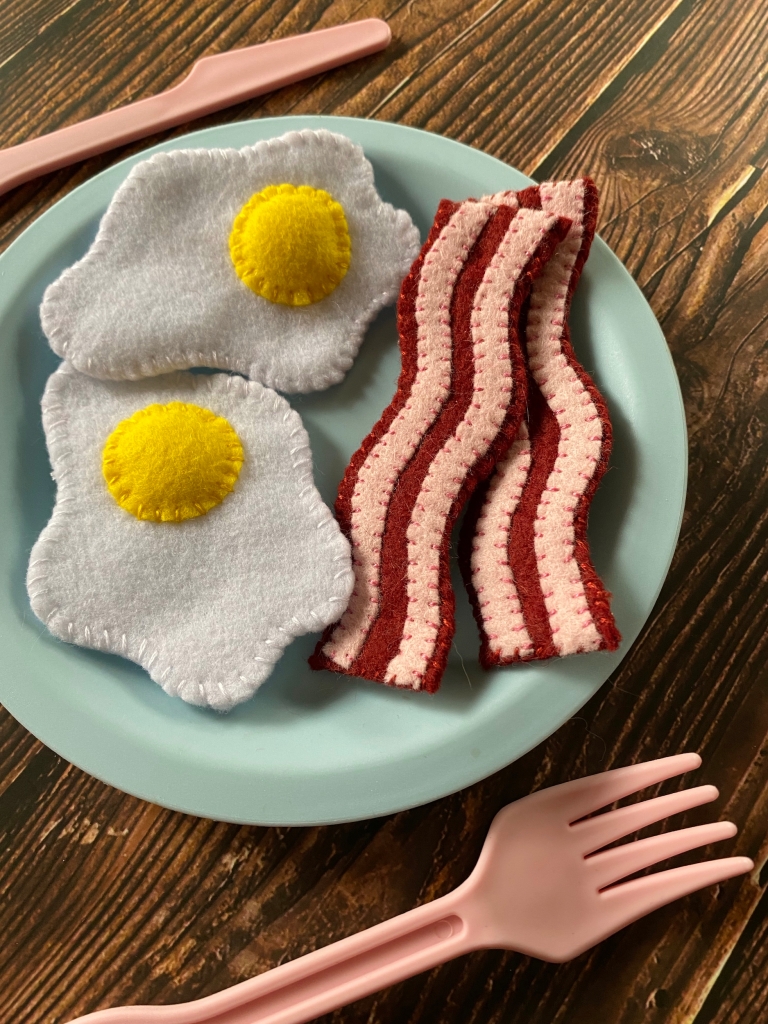
I had a play kitchen when I was a little girl and loved preparing eggs and bacon for myself, my sister and my parents. Now that I’m grown and have a daughter of my own, I want to make her some handcrafted play food so she can enjoy making meals for everyone during play, or while we cook in the kitchen next to her!
Please feel free to use these patterns to create some play food for you and yours! This pattern will make two eggs and two pieces of bacon. You can duplicate it as much as you want to make multiple pieces of each food!
Embroidery floss (white, yellow, dark red, and pale pink)
INSTRUCTIONS
Print out the eggs and bacon pattern I’ve provided, then cut the patterns from the paper.
Pin the patterns on the appropriate colored felt, then use sewing scissors to cut the felt.
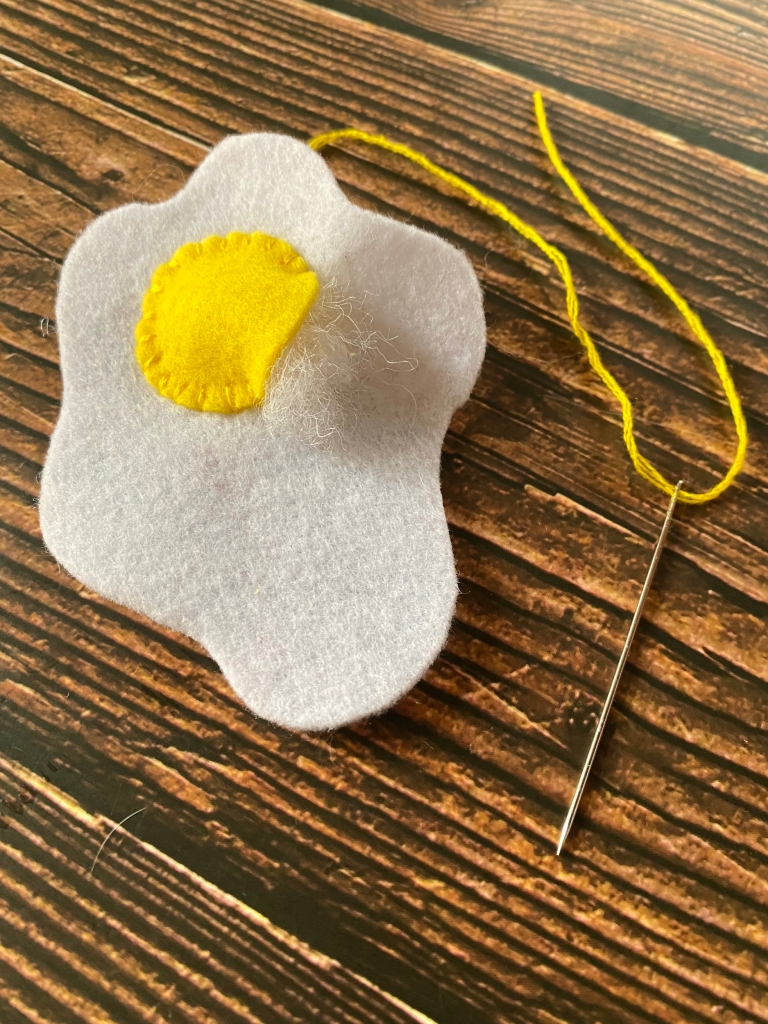
Thread a sewing needle with yellow embroidery floss and pin the egg yolk to a piece of the egg white.
Begin sewing the yellow yolk onto the egg white felt using a whipstitch. When you reach 2/3 of the way around the yolk, stop and place a small pinch of stuffing underneath it, then complete the circle and tie it off underneath the egg white layer.
Thread a sewing needle with white embroidery floss and pin the second egg white layer over the stitching on the back of the first.
Using a whipstitch, begin sewing around the edges of the two layers of egg white, concealing the first knot and end knot in between the layers.
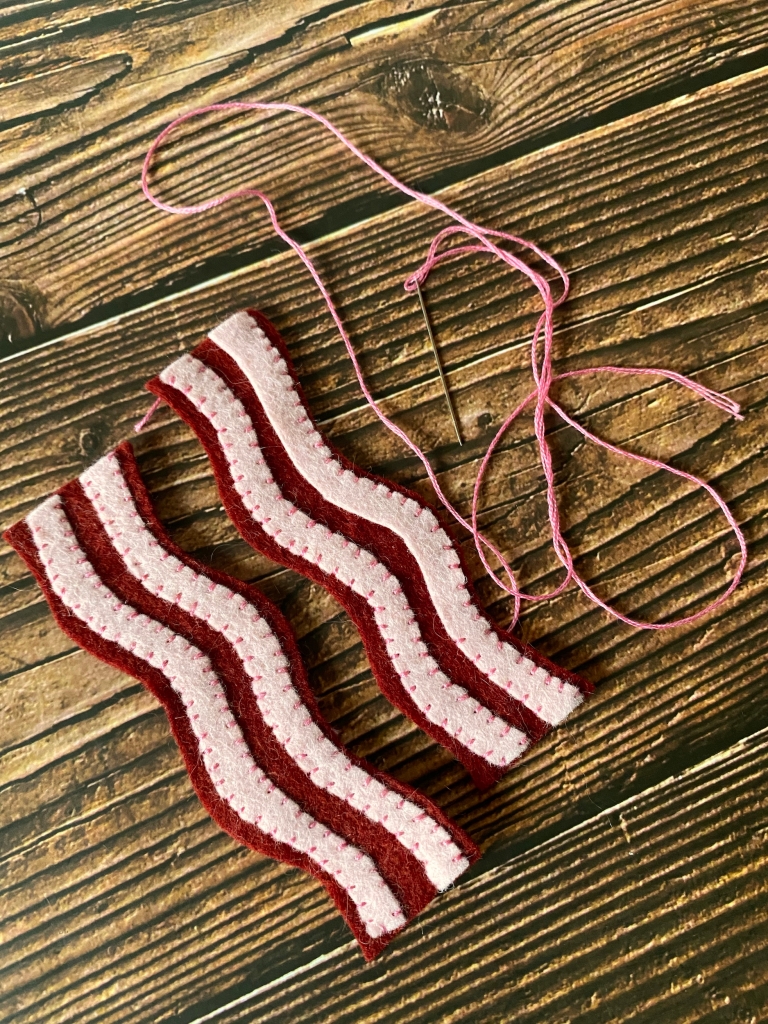
Thread a sewing needle with pale pink embroidery floss and pin two pieces of marbling onto one side of two different bacon strips.
Begin sewing the pale pink marbling onto the dark red felt bacon using a whipstitch. When completed with each streak, tie it off underneath the bacon layer.
Thread a sewing needle with dark red embroidery floss and pin the second bacon layer over the stitching on the back of the first.
Using a whipstitch, begin sewing around the edges of the two layers of bacon, concealing the first knot and end knot in between the layers.