Bob’s Burgers BUJO – March Spreads

Bob's Burgers BUJO for March with Linda

I’ve been keeping my eyes open for a Bob’s Burgers planner, but I have yet to find one, I’ve decided to make my own!

I have been admiring bullet journals for the past year, and attempted my own, but hit a wall with how complex I was trying to make them. This is technically my first bullet journal so please bear with me as I learn what works and what doesn’t.

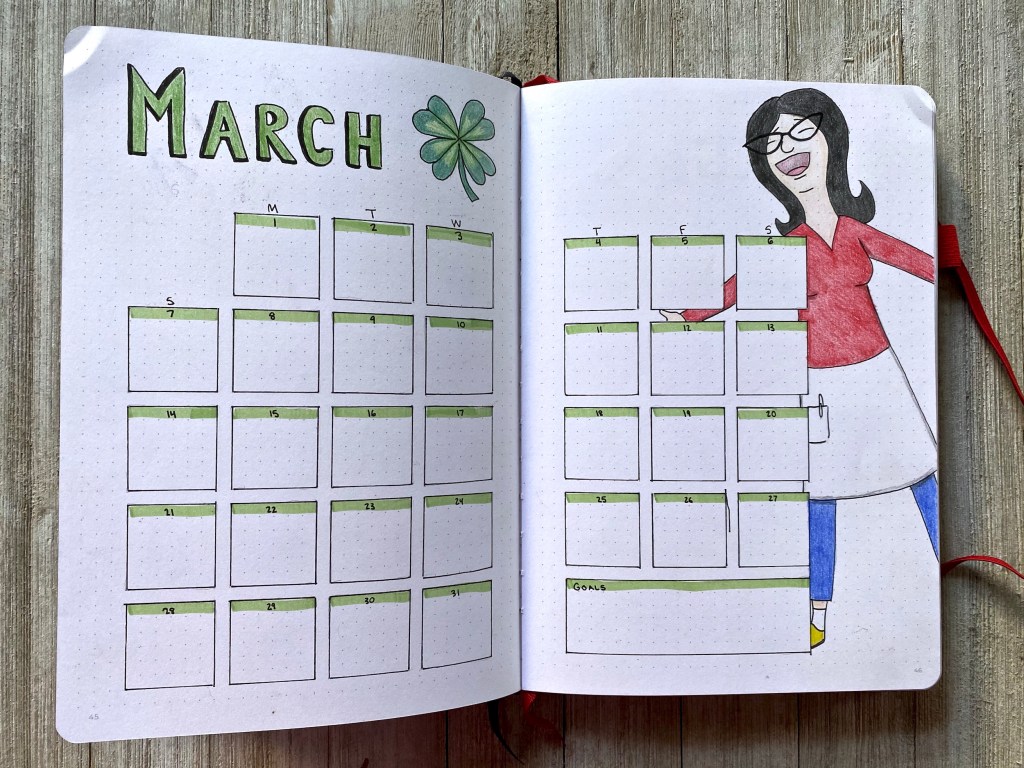
Each month will be themed for a different character or idea! I started with Bob for January, Valentine’s episodes for February and March is for Linda. I tried to hand draw some more pieces this month instead of using mostly stickers.

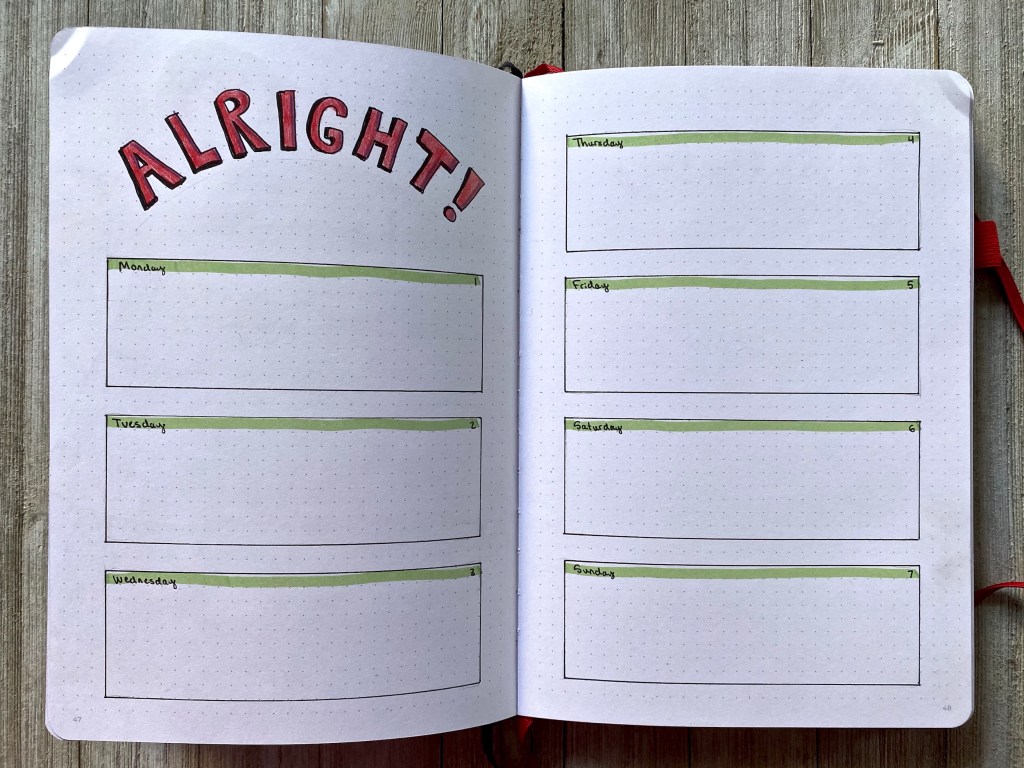
For the March weekly spreads, I decided to draw small snapshots that remind me of Linda. The first snapshot is what I would consider Linda’s catchphrase. I see her as such a positive force in the family that’s always willing to try new things and get out there! Alllllright!

Bob's Burgers BUJO for March with Linda

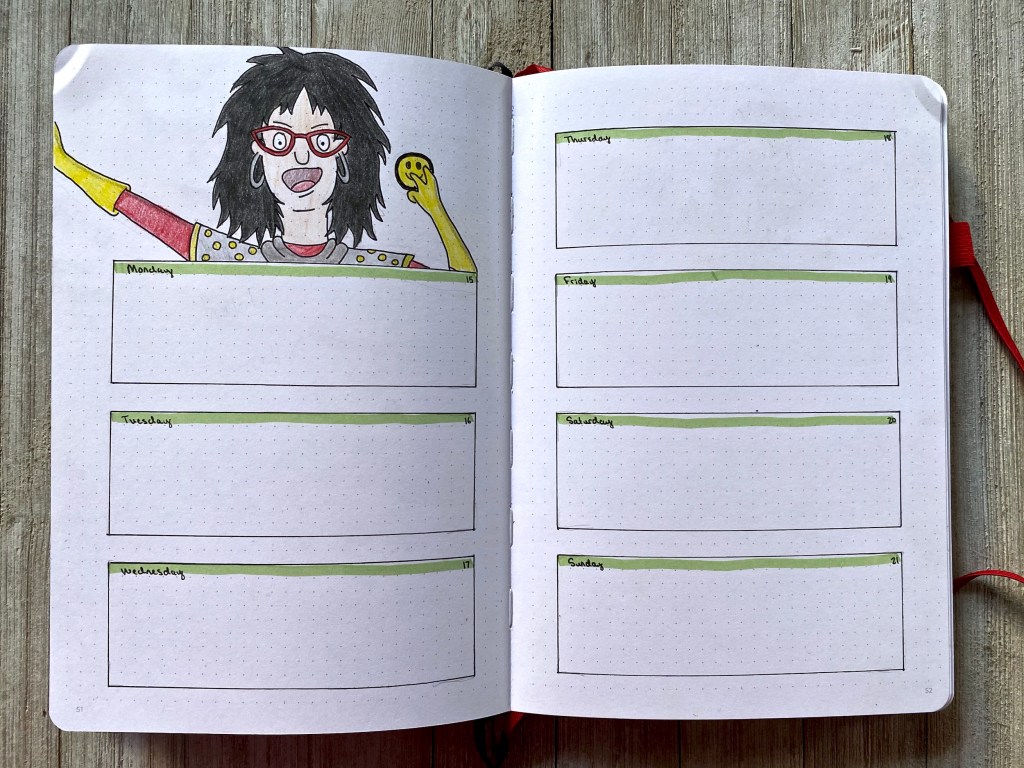
The second snapshot is from the episode “Friends with Burger-fits”. Linda and the kids run a Thunderdome-inspired wrestling league and I love how Linda dresses up and gets so into playing with her kids.

Bob's Burgers BUJO for March with Linda

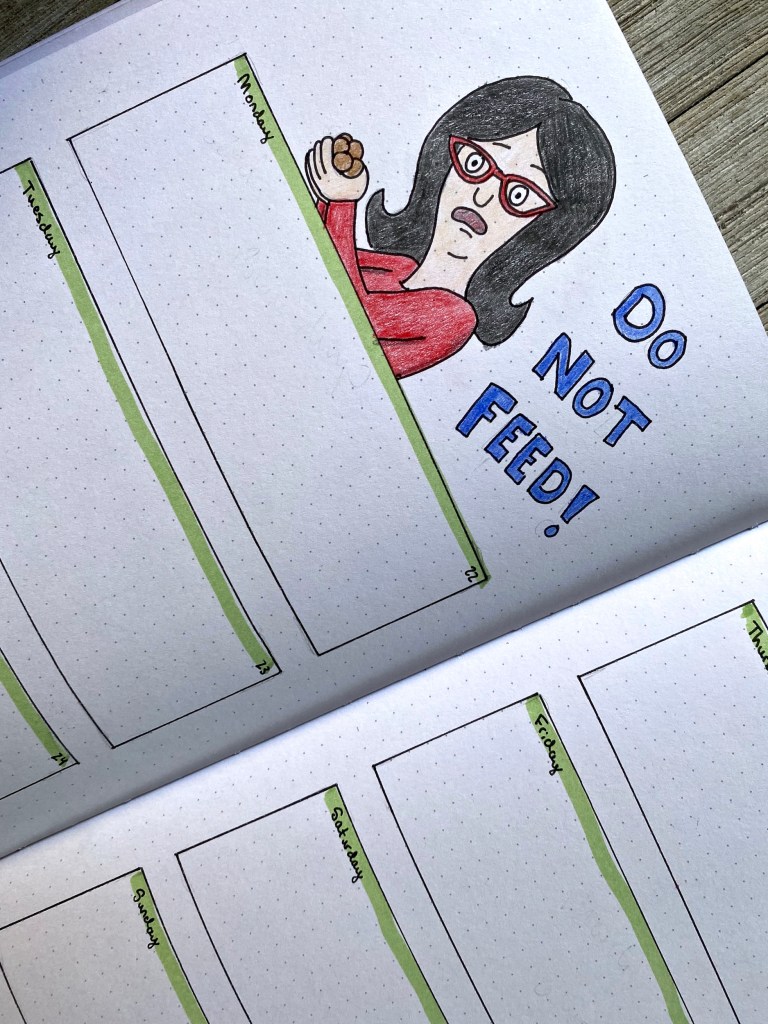
The third snapshot is from the episode “Eat, Spray, Linda”. Linda gets stranded on her birthday and struggles to make it home. While the family is looking for her, Bob and the kids visit a bakery and the owner has a photo of Linda that says “Do Not Feed” on it. I think someone overdid it on the free samples!

Bob's Burgers BUJO for March with Linda

Check back next month for a Gayle themed spread! I’ll have to get started on it right now so I’m not late again!

DIY Spring Sensory Bottle

Happy Spring everyone! Spring has now sprung and it’s a time for fresh growth, vibrant colors and new life! Part of the fun in raising Zoey is making things that teach and fascinate her. And, if I’m being completely honest, I find sensory bottles fascinating too, so let’s make one!

SUPPLIES

  • A 16 ounce clear, plastic bottle
  • A funnel
  • 1 1/2 cups of white rice
  • 3/4 teaspoon of white vinegar
  • Green food coloring
  • Miniature insect (or other spring inspired) erasers 
  • Glue (optional)

INSTRUCTIONS

  1. Place the rice in a resealable plastic sandwich bag.
  2. Add the vinegar and food coloring to the rice. You can add however many drops of food coloring you’d like, I added 20 drops.
  3. Seal the bag and shake well until the color is well dispersed throughout.
  4. Spread the rice onto a baking sheet and allow it to dry overnight.
  5. Place the funnel in the mouth of your bottle and use it to fill the bottle with half of the rice.
  6. Remove the funnel and add half of the insect erasers.
  7. Screw the lid back onto the bottle and shake until well incorporated, then remove the lid and replace the funnel.
  8. Add the rest of the rice and the rest of the insect erasers.
  9. Replace the lid onto the bottle and shake well again until well incorporated.
  10. If your child is older and you worry about him/her undoing the lid, you can coat the inside of the lid with glue, then screw it back onto the bottle. This will secure the lid and make it harder for little ones to unscrew the lid and create a leak or spill the bottle’s contents.

Enjoy!

Link’s Item Guide – The Legend of Zelda: A Link to the Past

Link's Items Guide

If there’s one thing I do when I play a game (besides trying to relax and enjoy myself), it’s look up information. I get curious or stuck, and I find myself turning to the internet for answers. There are a lot of good guides out there that are super helpful, but what I don’t see are an abundance of simple and clean visual guides that lay out all the information in one place.

I finished playing The Legend of Zelda: A Link to the Past earlier this year and it felt good to finally find everything and complete the game! I thought it would be helpful and fun to make a couple guides on where to find all of Link’s equipment and items for anyone else who may be curious and wondering where they are.

This visual or infographic guide is for Link’s “Items” as categorized on the inventory screen. After much consideration, I decided to organize the items alphabetically by their name.

I have also created another guide for Link’s “Equipment” and action or “Do” items as categorized on the inventory screen.

Please let me know if you would like me to work on a guide for the other collectibles within The Legend of Zelda: A Link to the Past or if there are any games you would like to see visual information or guides for in the future! I love helping people, discussing games and organizing information!

Link’s Equipment Guide – The Legend of Zelda: A Link to the Past

Link's Equipment Guide

If there’s one thing I do when I play a game (besides trying to relax and enjoy myself), it’s look up information. I get curious or stuck, and I find myself turning to the internet for answers. There are a lot of good guides out there that are super helpful, but what I don’t see are an abundance of simple and clean visual guides that lay out all the information in one place.

I finished playing The Legend of Zelda: A Link to the Past earlier this year and it felt good to finally find everything and complete the game! I thought it would be helpful and fun to make a couple guides on where to find all of Link’s equipment and items for anyone else who may be curious and wondering where they are.

This visual or infographic guide is for Link’s “Equipment” and action or “Do” items as organized on the inventory screen. I will have another guide for the “Items” as organized on the inventory screen.

Please let me know if you would like me to work on a guide for the other collectibles within The Legend of Zelda: A Link to the Past or if there are any games you would like to see visual information or guides for in the future! I love helping people, discussing games and organizing information!

The Benefits of Reading to Children

Stack of Children's BooksZoey’s Bedtime Story is a nighttime ritual I started last year, and this year, the adventure continues! I made a New Year’s resolution to read to Zoey every night this year and we have yet to miss a day!

Reading has always been very special to me. I remember my mom reading to me as a child and I believe it had a profound impact on my love for reading and books, not to mention my performance in school. I want to continue that tradition with Zoey. I want her to hear my voice, hear the diction and the pronunciation, see the beautiful images and eventually enjoy the stories. I imagine her sitting in my lap or lying cozy in her bed while I sit next to her and read, her eyes on the book with rapt attention. In reality, she sits on my lap for about five to ten seconds then tootles all over the room while I keep reading and trying to pull her attention back. I keep going because I know tat the more we read, the more she’ll settle in and pay attention.

There are many benefits of reading to children, no matter their age!

  • Increased attention span
  • Bonding between parent/guardian and child
  • Cognitive and language development
  • Creativity
  • Expanded vocabulary
  • Life lessons
  • Listening skills
  • Social and emotional development

So if you haven’t started reading to your little one(s) it’s not too late to start today! And if you’ve started reading to your little one(s) and their attention is anywhere but on you and the book don’t give up! Consistency is the key!

Please come follow along on my Instagram where I post which book we’re reading each night in my story, and every book I’ve read to her has been saved to the highlights on my profile.

I’ve started a Pinterest Board of all the books I would like to read to Zoey or share with her someday. Check it out to get inspired and please let me know if there are any children books you would recommend; we love sharing stories!

A Dr. Seuss Children’s Book Bibliography

Dr. Seuss Children's Book Bibliography

Another of my favorite children’s authors is Dr. Seuss!

See my Bill Peet bibliography here!

So many of this man’s books were read to me throughout my childhood and I’m sure you’ve had a similar experience! The artwork is uniquely appealing, his wordplay is masterful (have you read Fox in Socks?) and above all each story has a good moral that can teach all who read it!

I am starting to collect Dr. Seuss books to read to my daughter, so I’ve created this one-page handy dandy bibliography to keep track as I go! Please feel free to use it too if you need it!

POSTHUMOUSLY

Chocolaty M&M Valentine’s Day Cookie Recipe

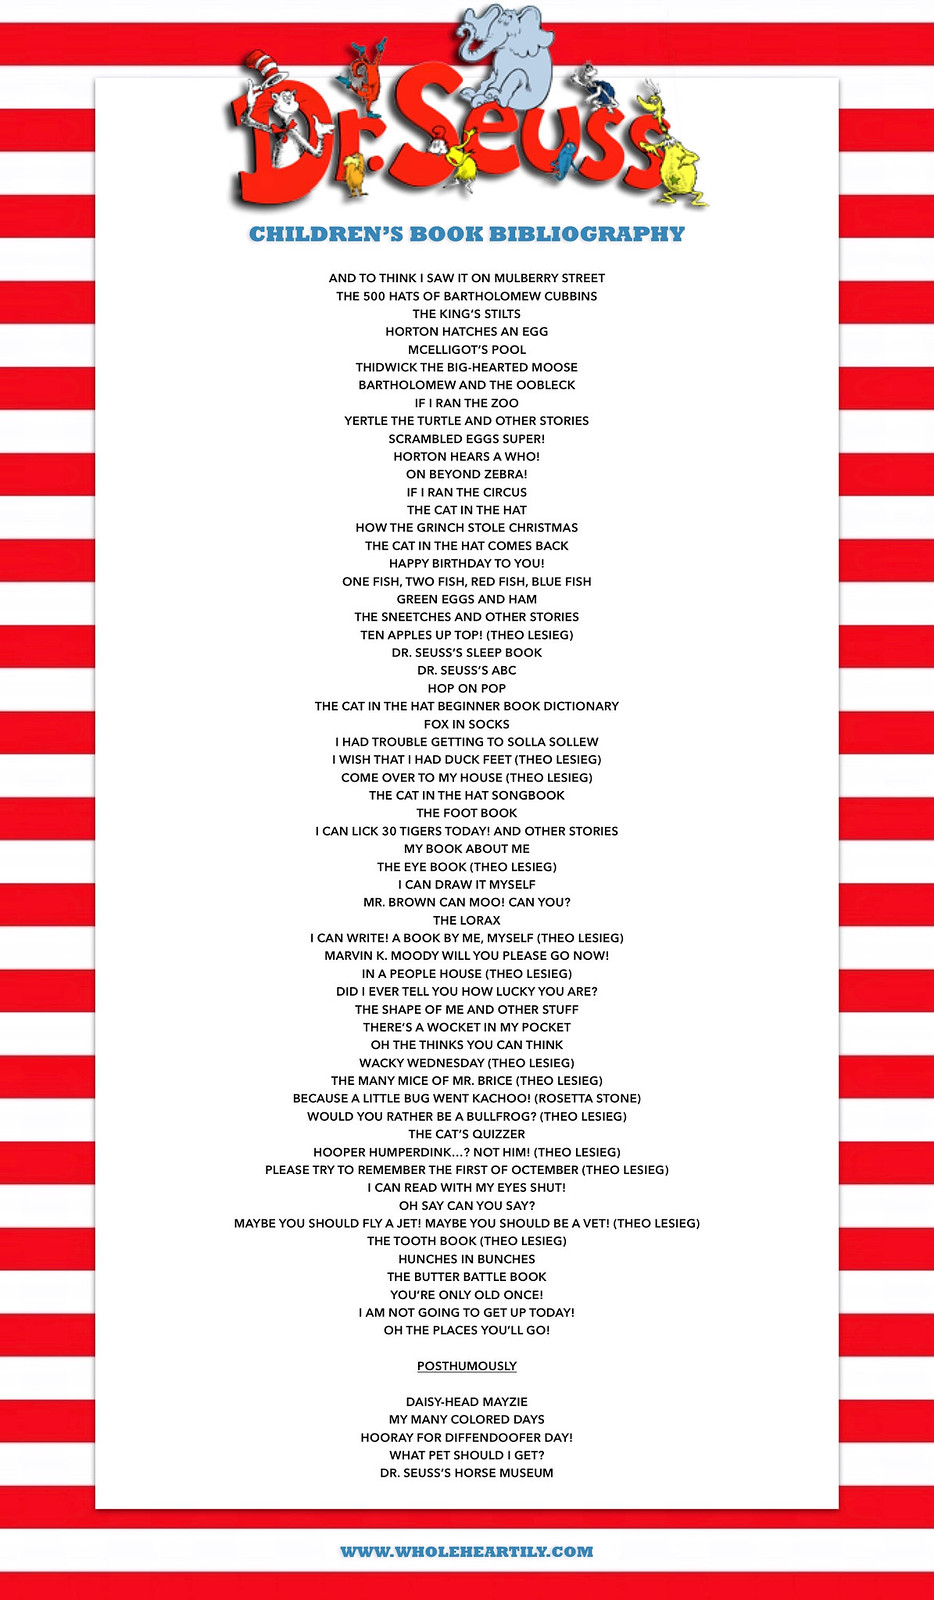
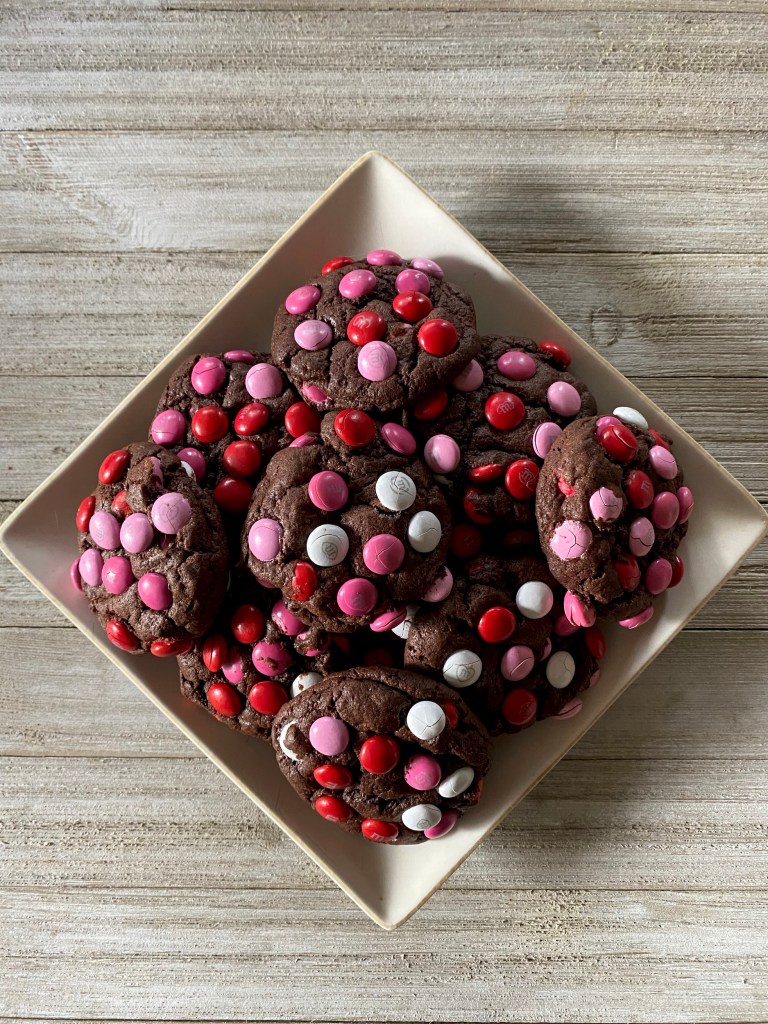
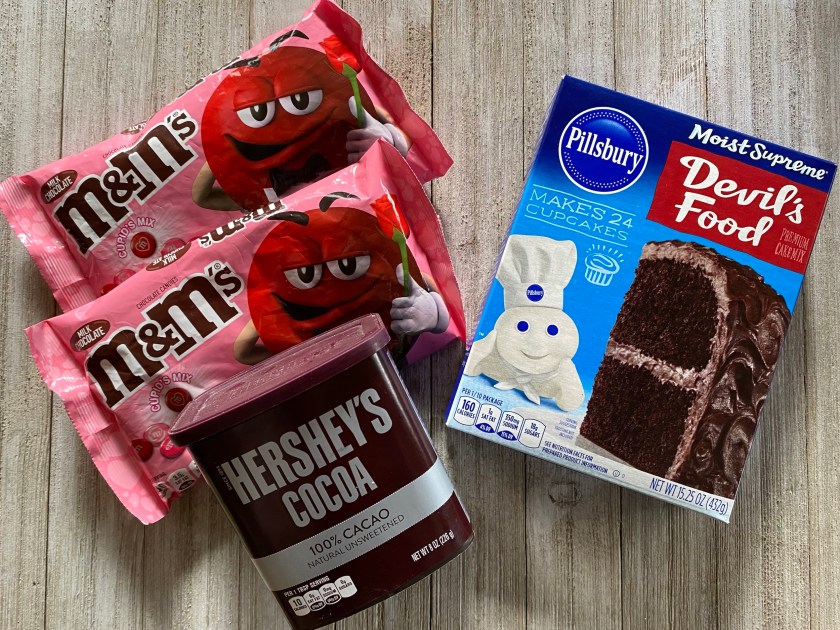
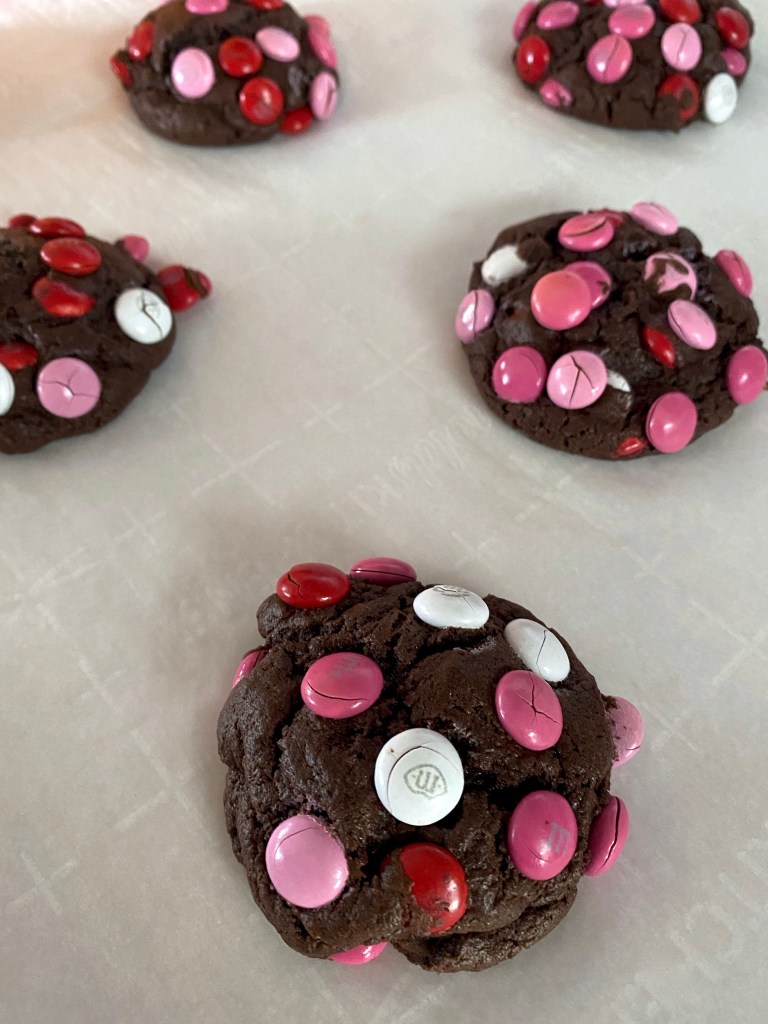
Happy February friends! I have some chocolaty Valentine cookies for you, and whether you celebrate Valentine’s Day or not, cookies are rarely unwelcome!

You may have heard that you can make cookies with boxed cake mix and this recipe does just that, but with a boost of unsweetened cocoa powder and M&Ms! They are delicious; rich and not too sweet. If you’re looking for something tasty to bake for yourself or someone(s) you love, please try these and enjoy!

COOKIES

  • 1 box of devil’s food chocolate cake mix
  • 1/4 cup of unsweetened cocoa powder
  • 3/4 cup of butter, softened
  • 2 eggs
  • 2 cups of “cupid’s mix” Valentine M&Ms
INSTRUCTIONS
  1. Pre-heat the oven to 350F and line a baking sheet with parchment paper.
  2. Pour the cake mix and unsweetened cocoa into a large bowl and stir gently to incorporate.
  3. Add the eggs and softened butter into the dry ingredients and mix until a thick dough forms.
  4. Divide the M&Ms: Mix one cup into the cookie dough and place the other cup into a separate small bowl.
  5. Roll the dough into 1 to 1 1/2 inch balls, then dip the top of each dough ball into the small bowl of M&Ms and place each one onto the baking sheet.
  6. Place the baking sheet into the oven and bake for 10 to 12 minutes depending on the power of your oven.
  7. Bring the cookies out of the oven and allow them to cool on the sheet for about 5 minutes, then transfer the cookies to a cooling rack for another 5 to 10 minutes.
  8. Repeat this process until all the cookie dough has been baked, this should yield about 16 cookies.
  9. Enjoy!