DIY Crochet – Bee Plush

Welcome back friends! Do you crochet? I do! I feel calm and cozy when I’m crocheting, and fiercely proud whenever I complete a project.

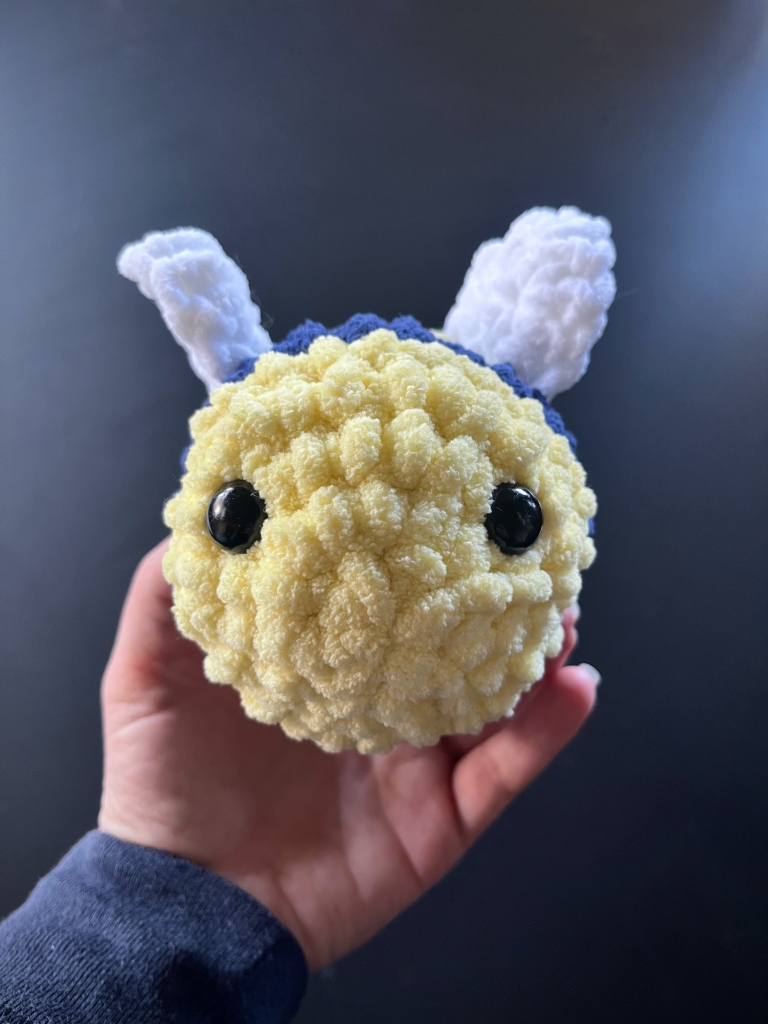
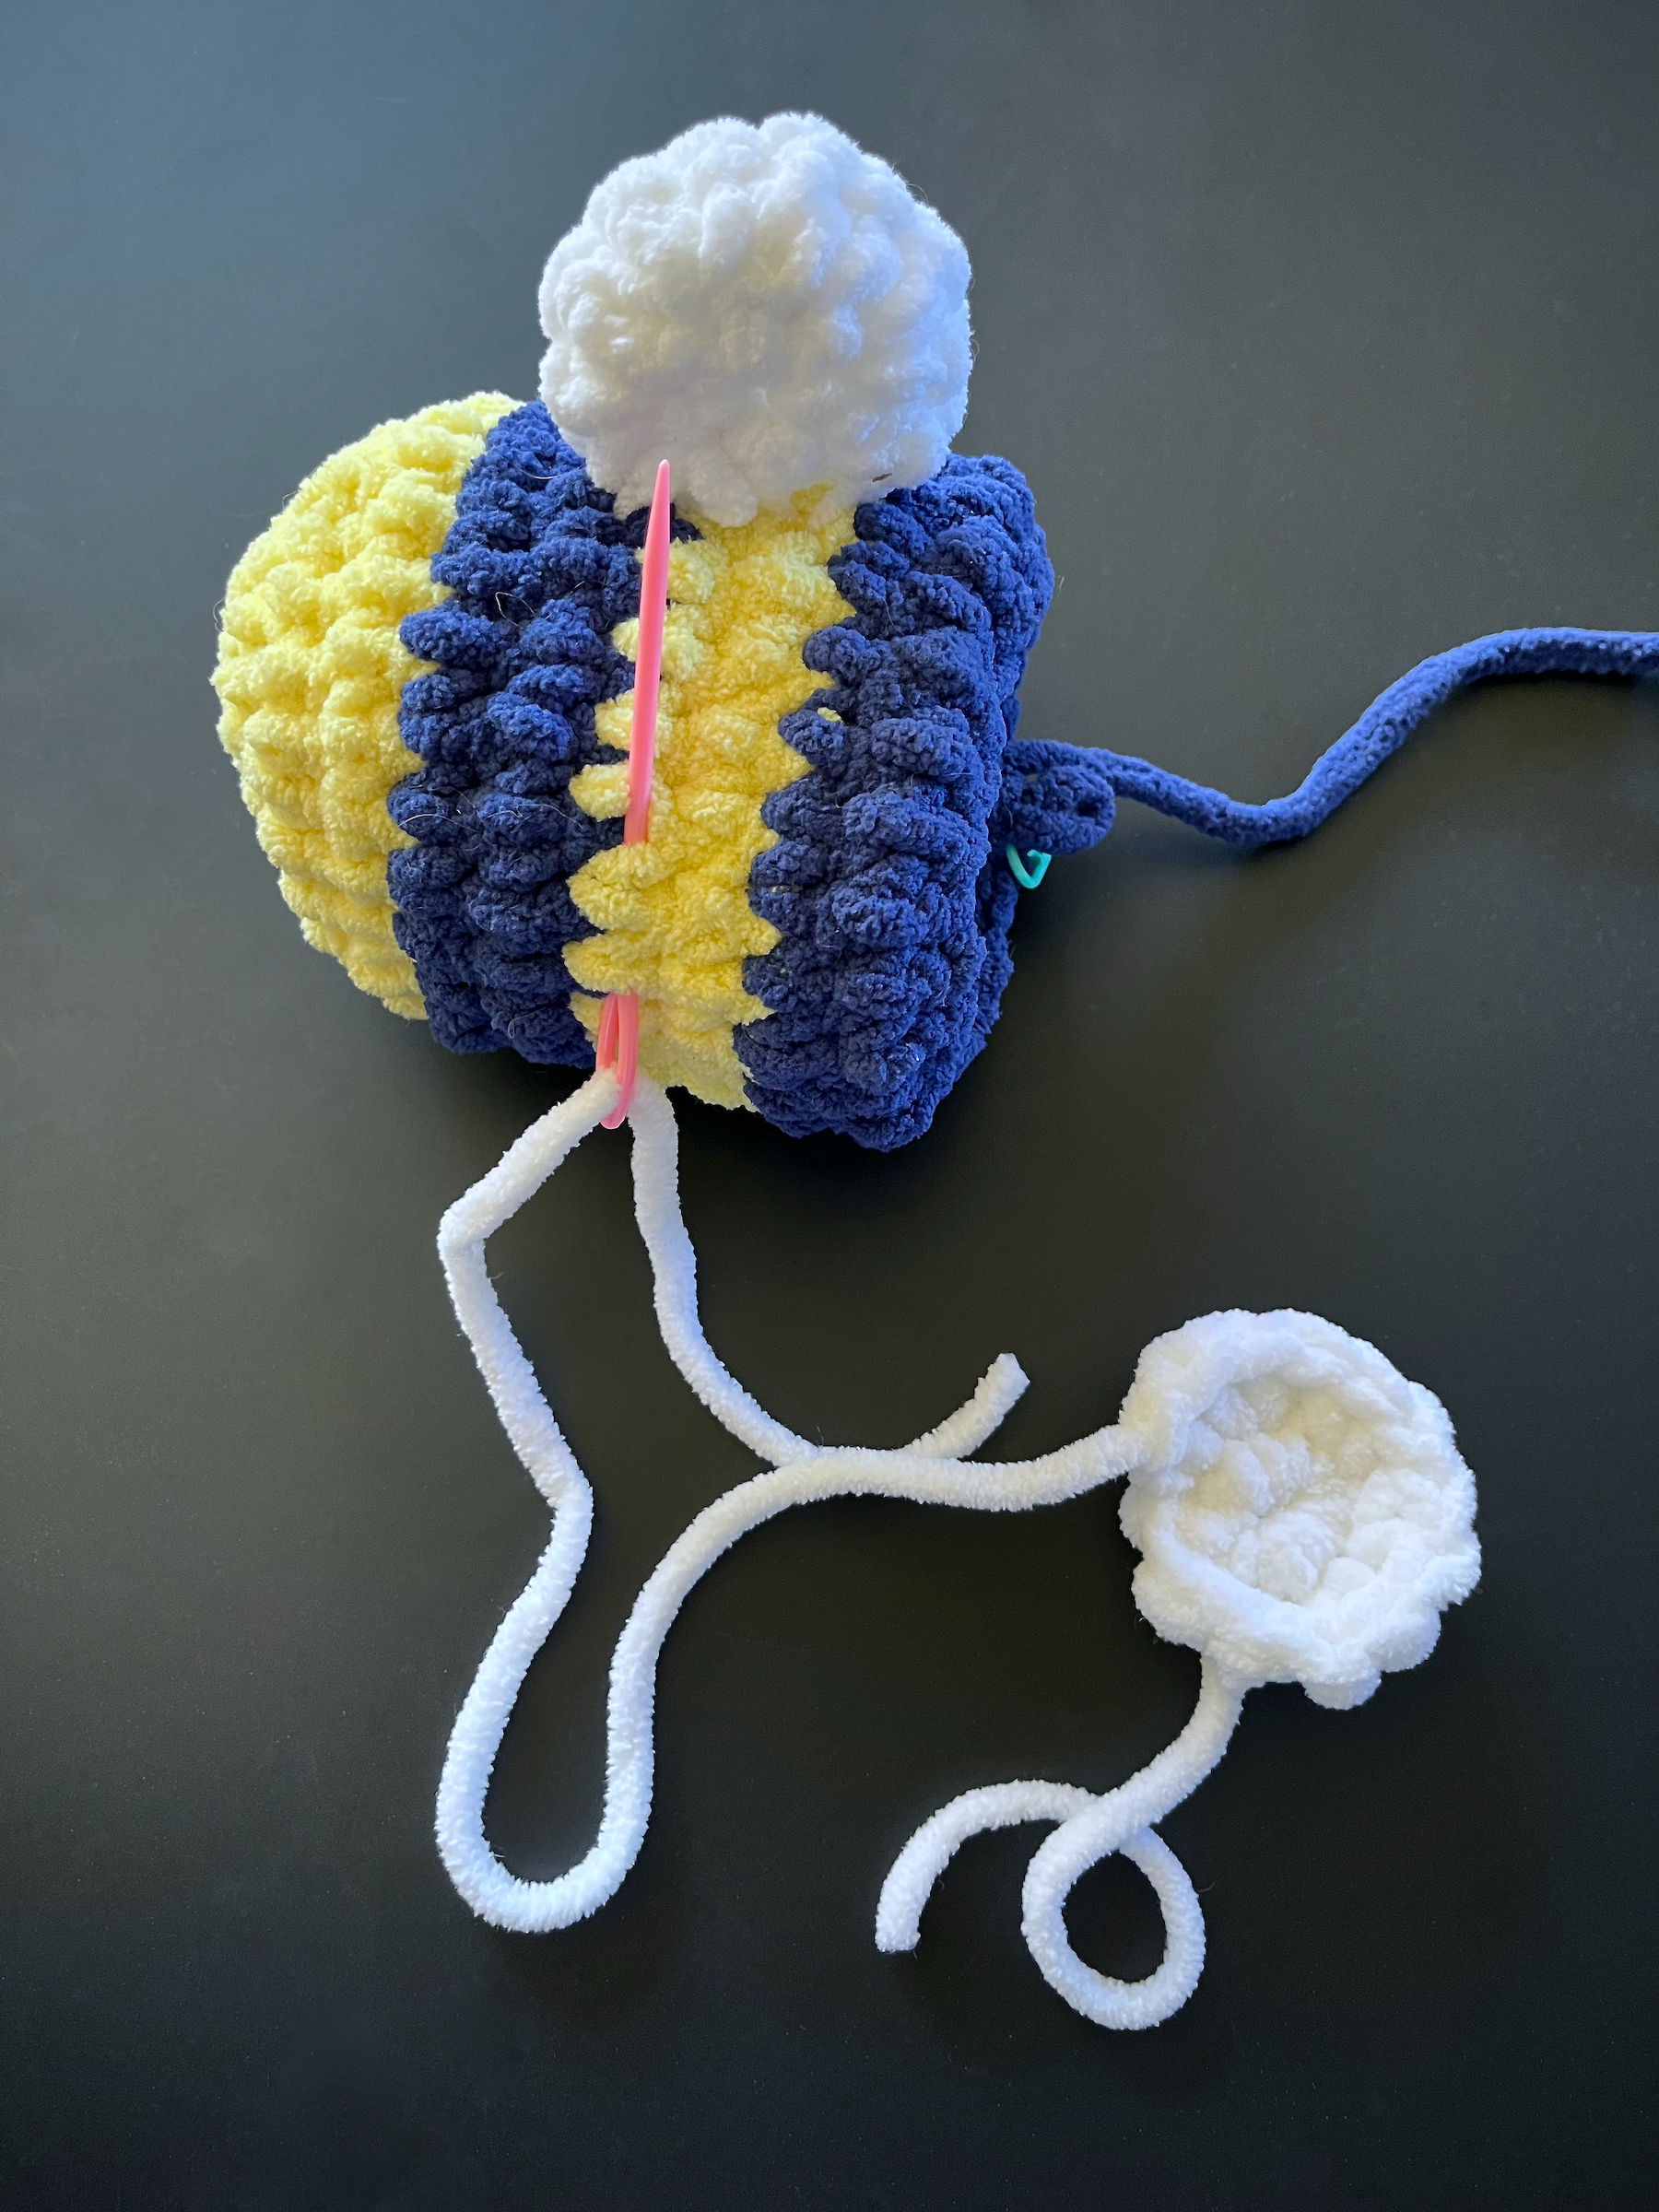
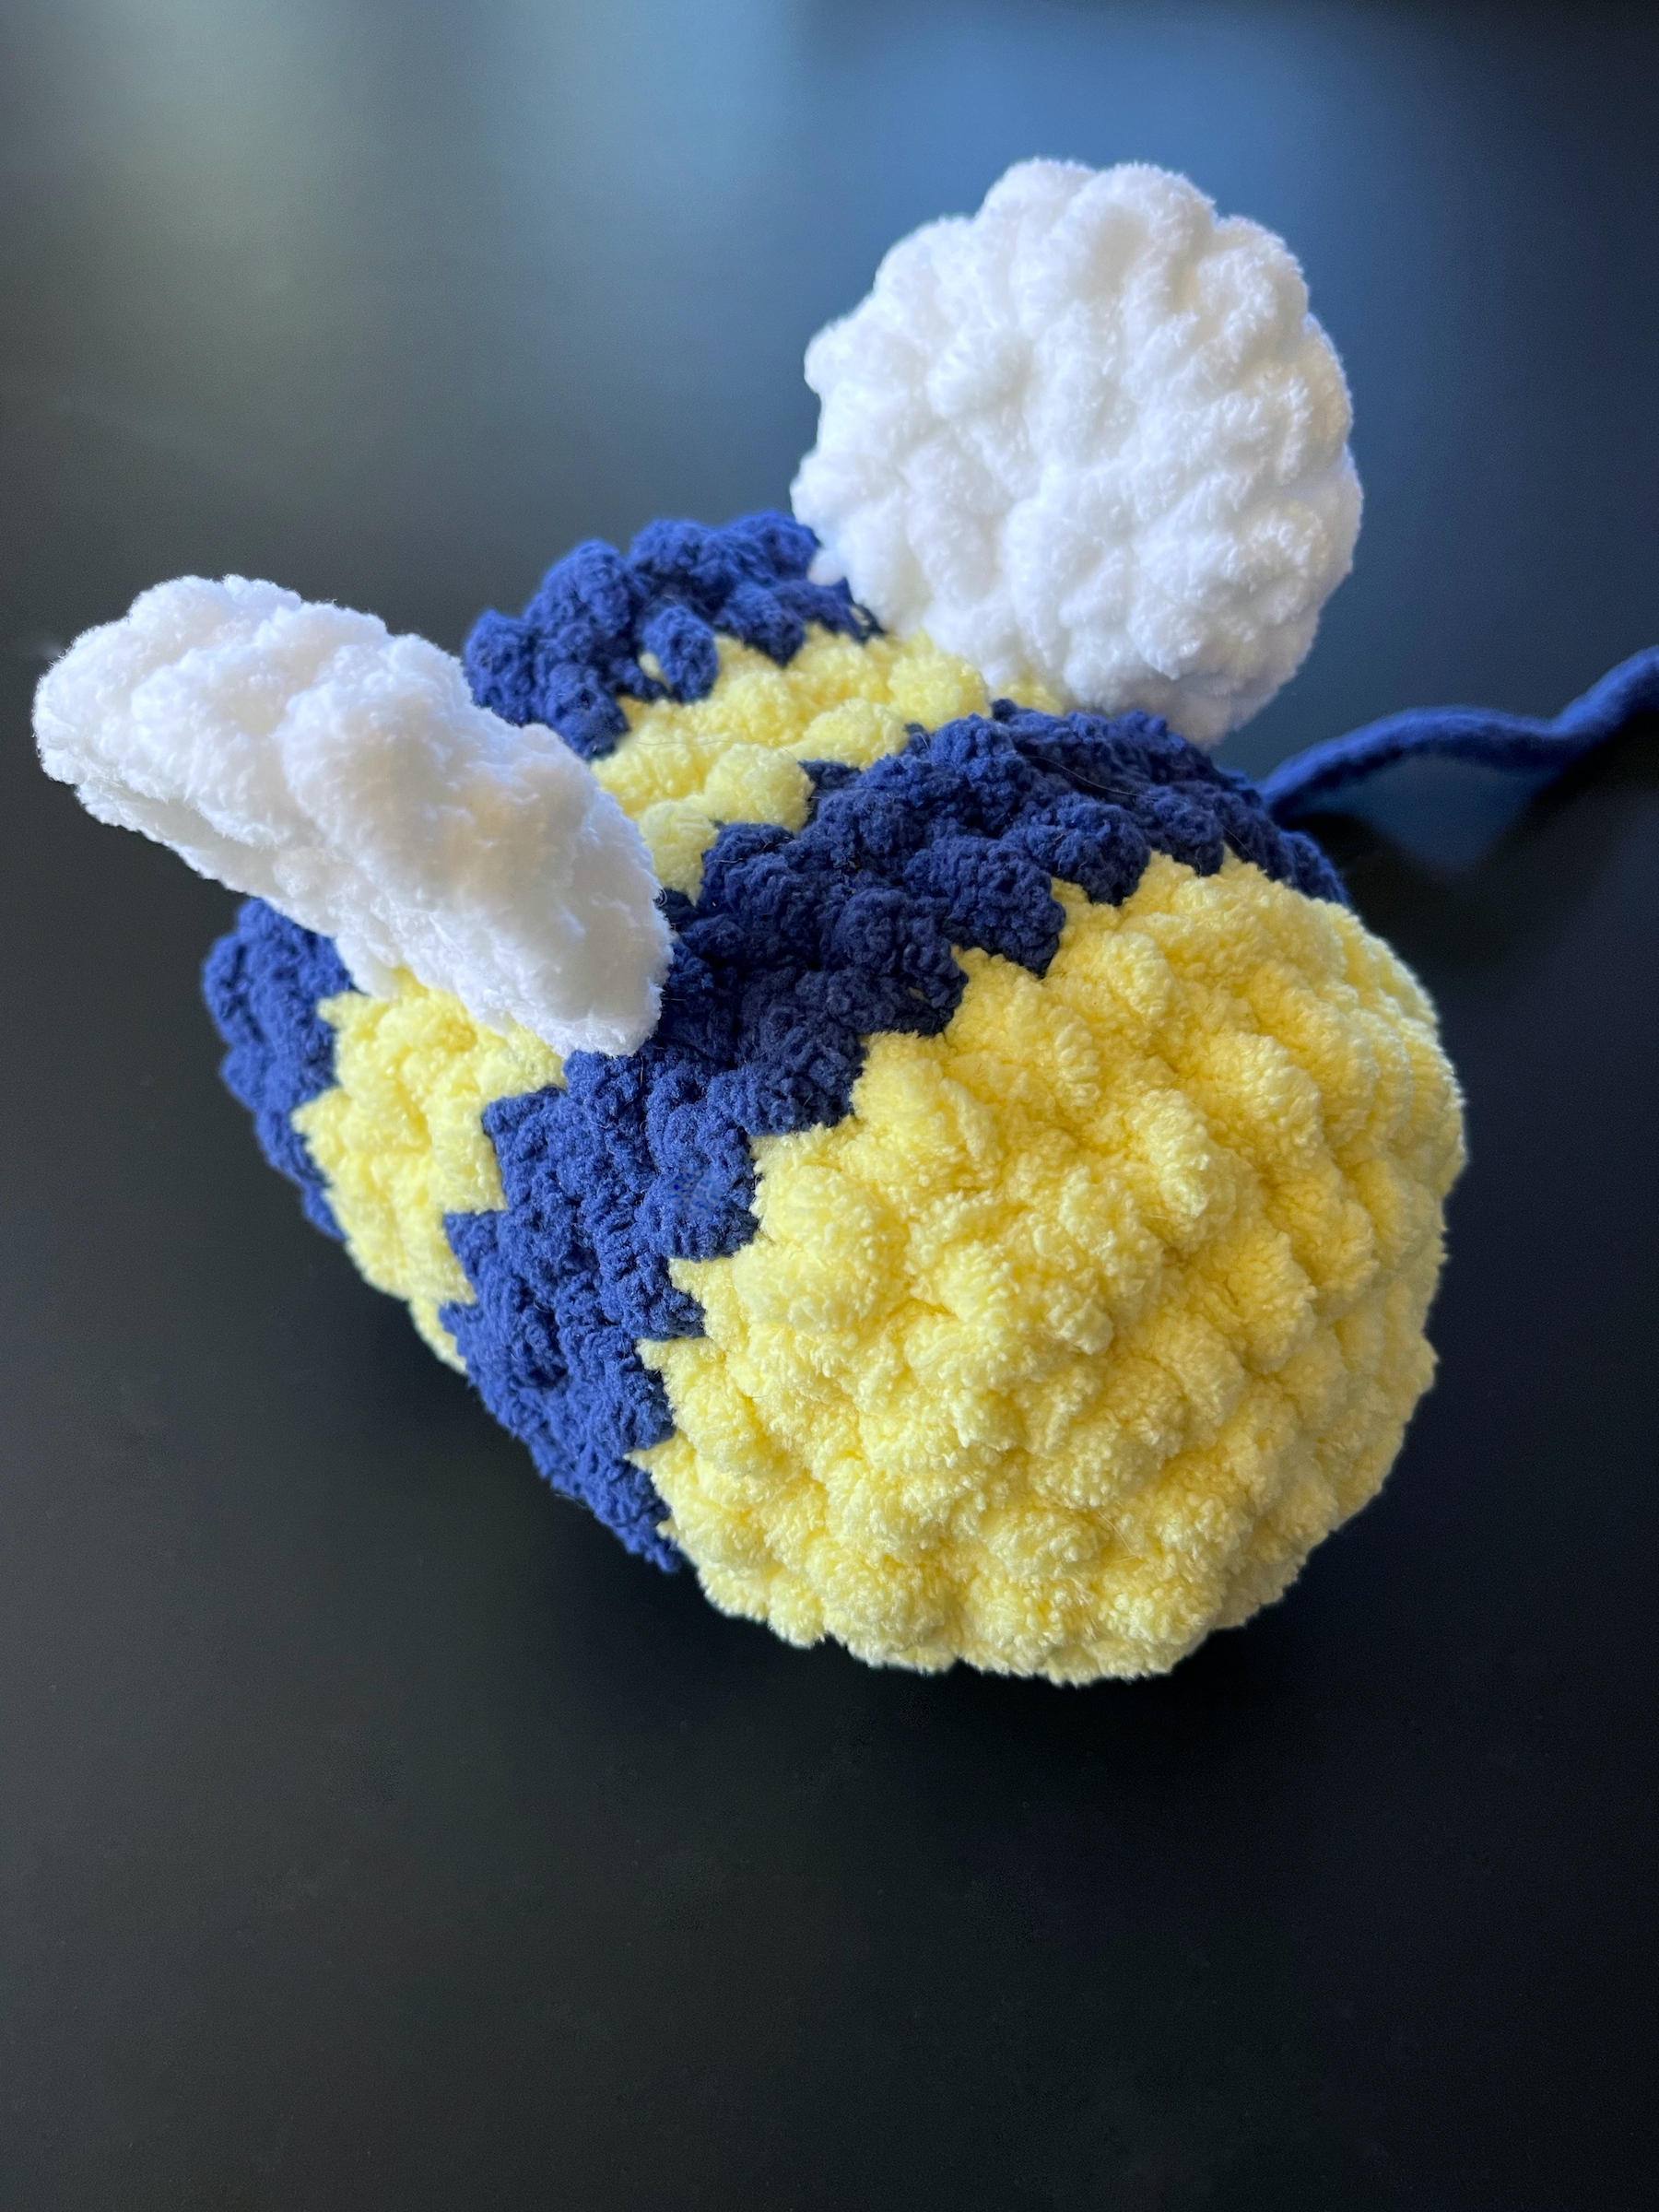
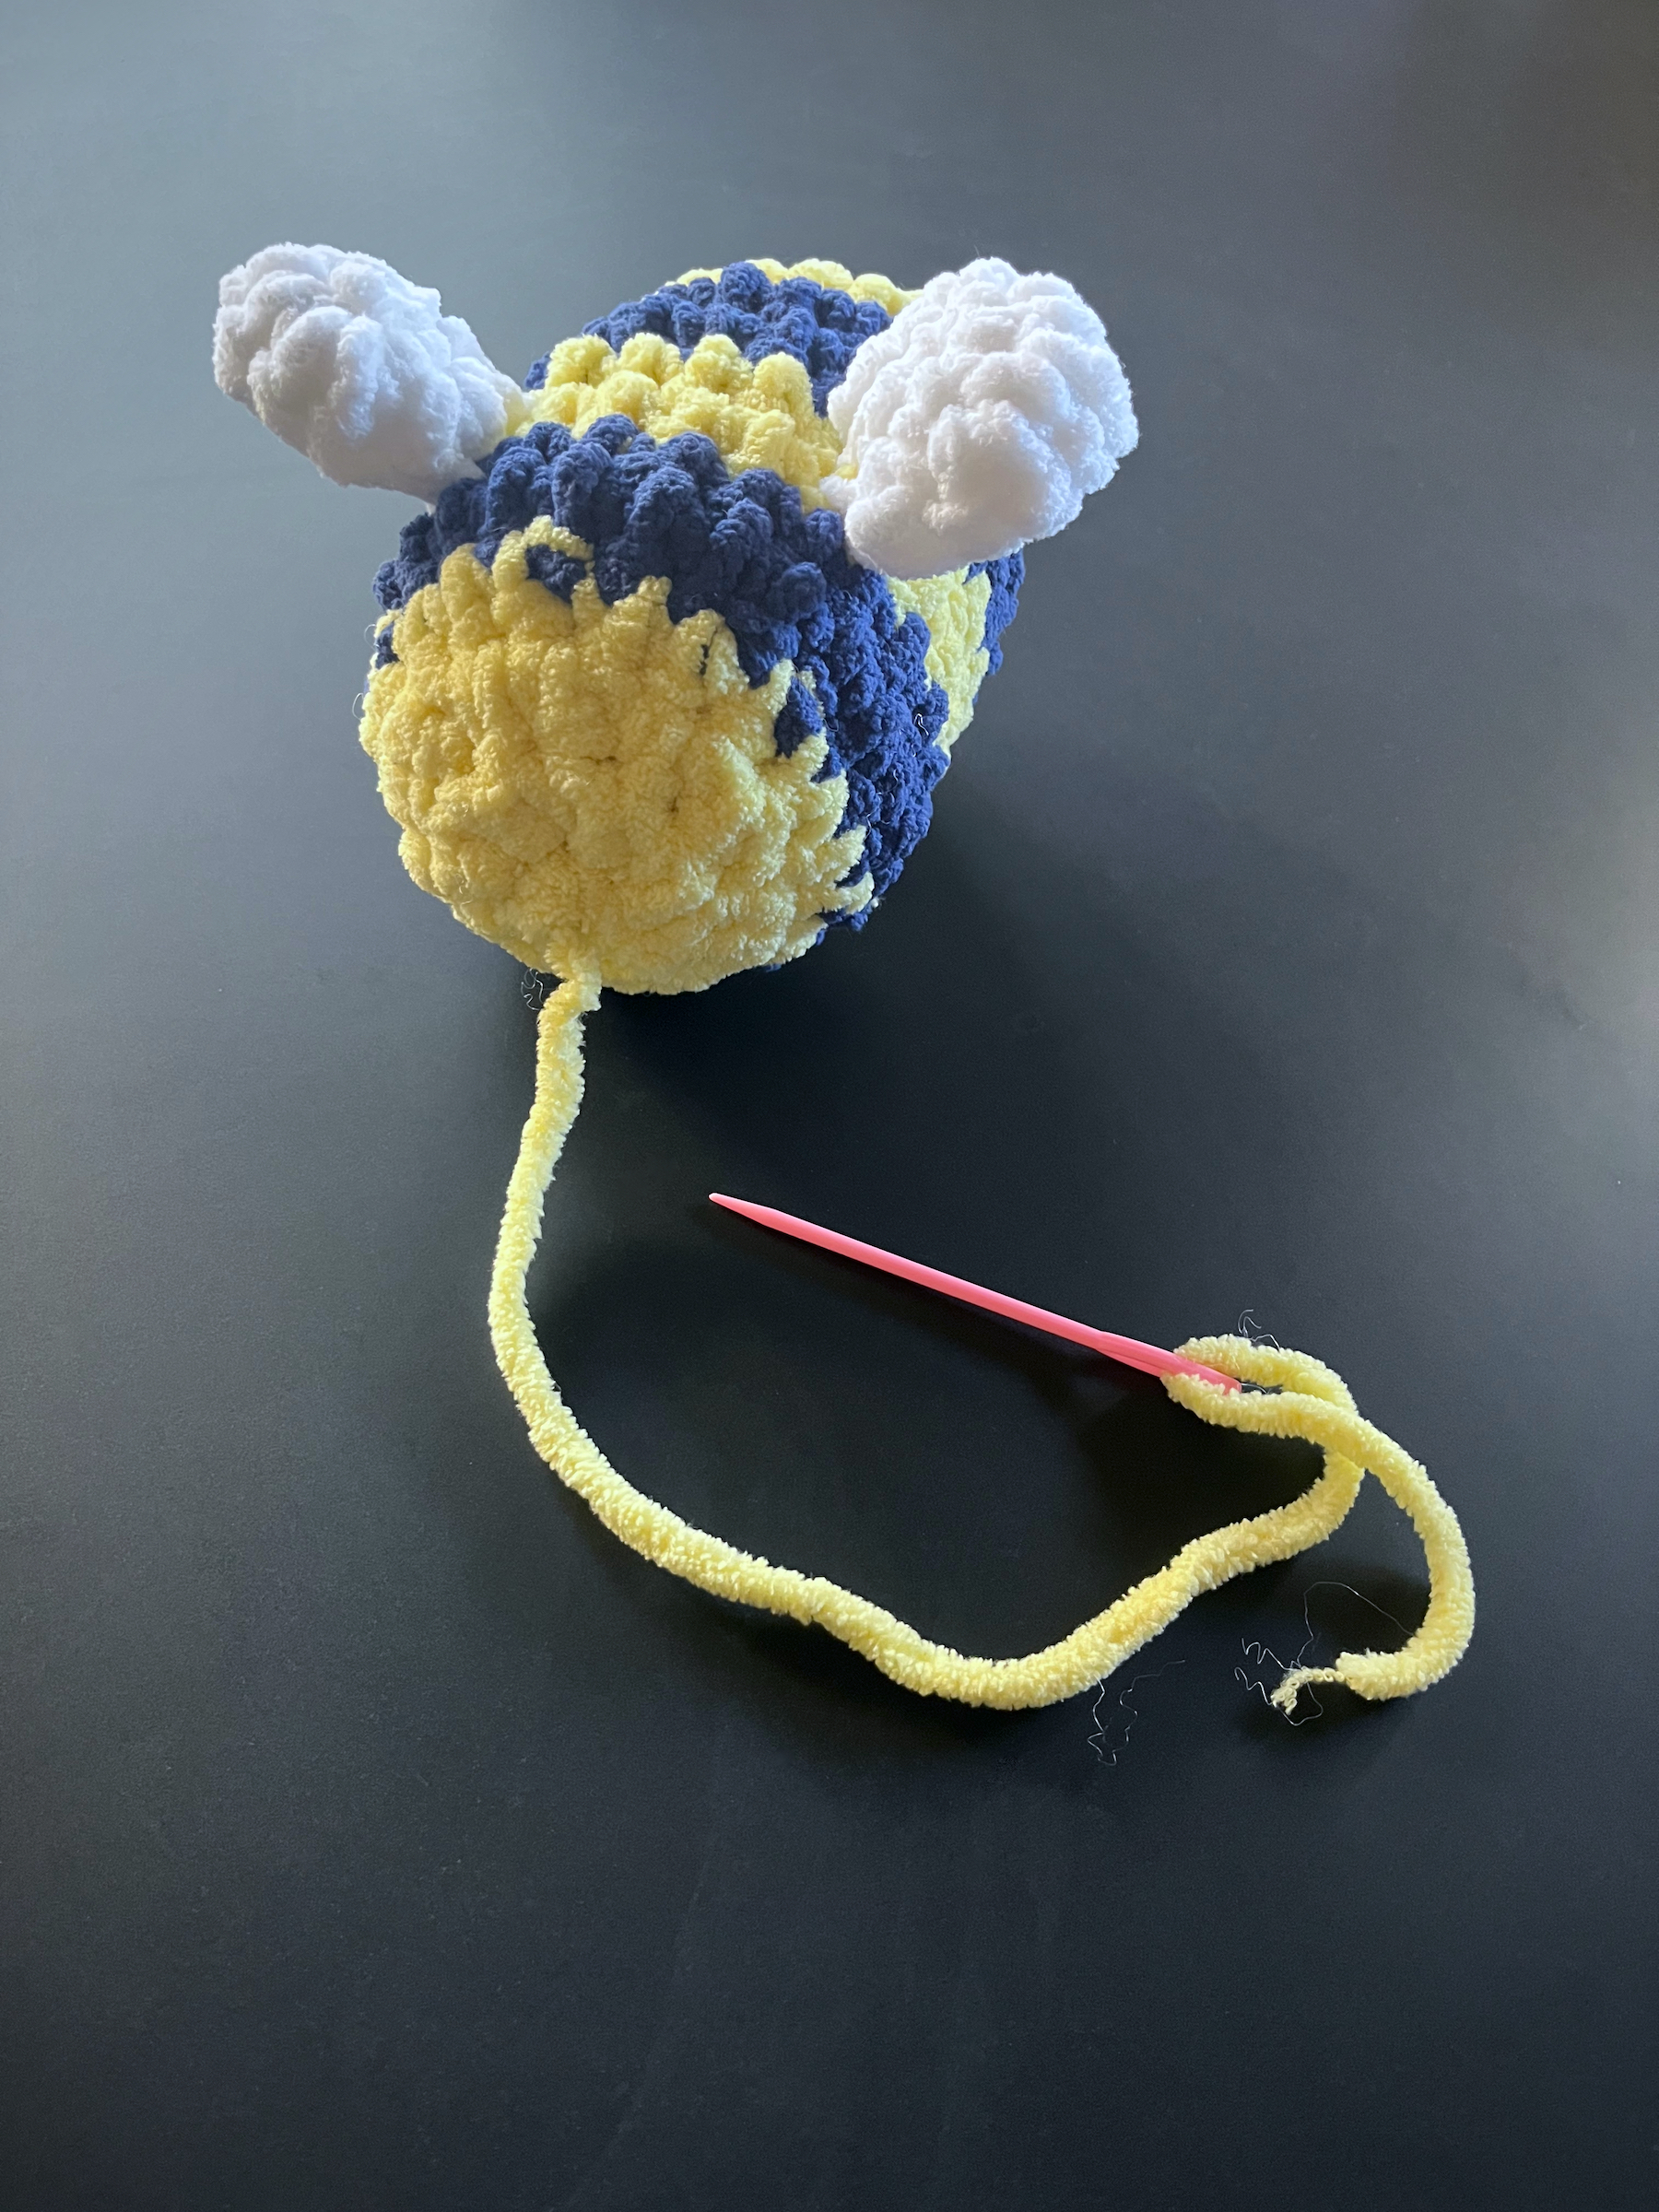
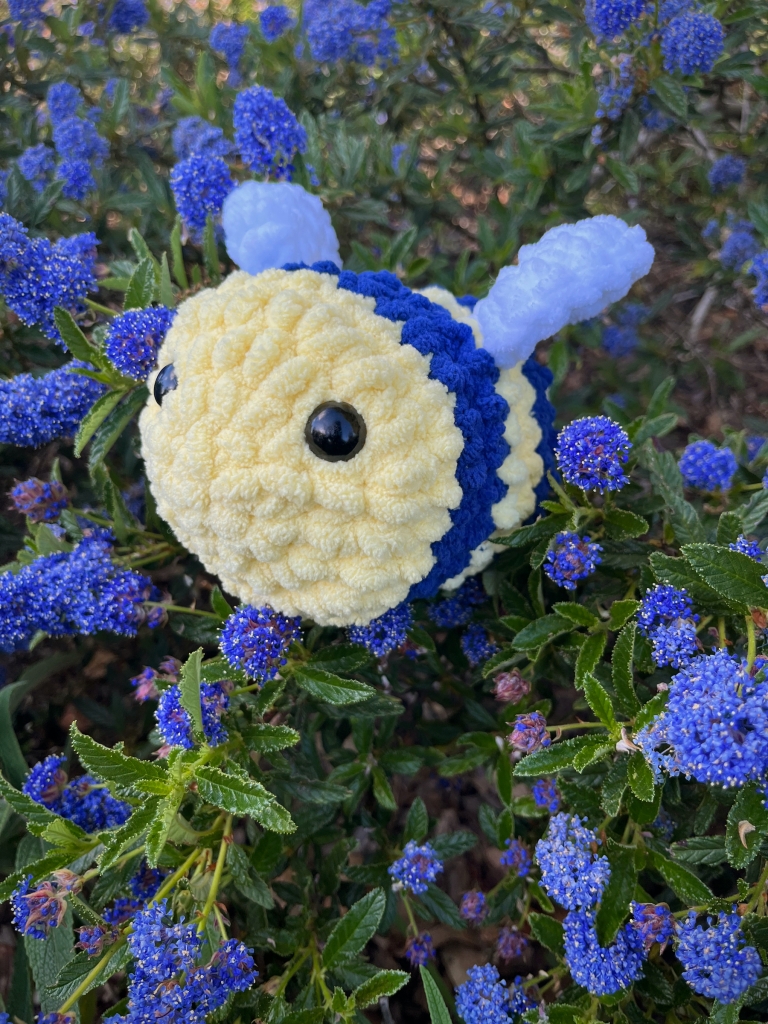
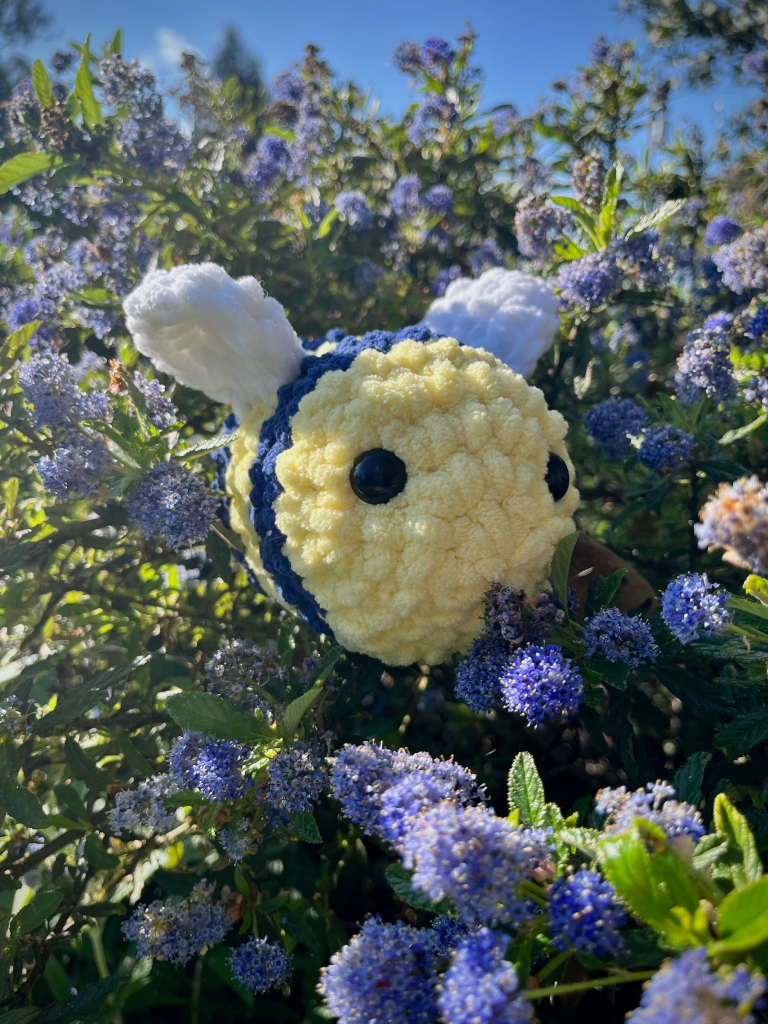
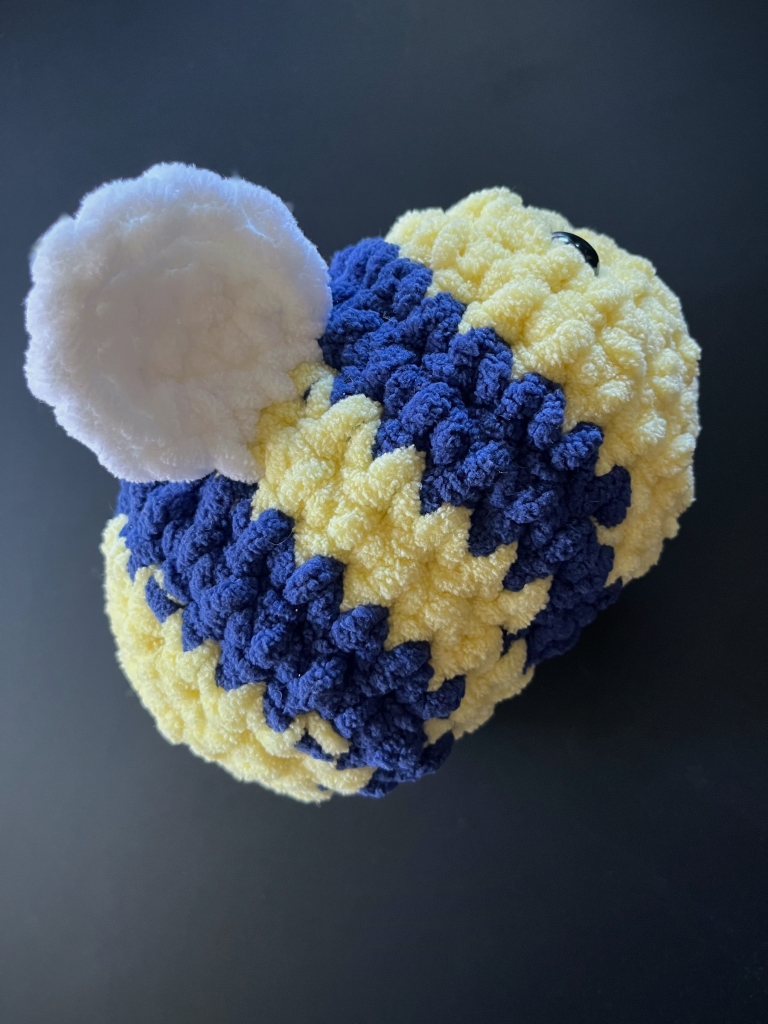
I’ve seen some adorable bee plushies in the animated shows my daughter watches, and I wanted to create one for her!

This bee is soft and cuddly! The pattern is easy, and ideal for any level of crocheter (beginners included)! Any size 6 chenille-style yarn can be used in this pattern, but I used Bernat Baby in buttercup yellow and lapis blue, and for the white of the wings. You can use whatever color combination you prefer!

Let’s get started!
SUPPLIES
  • Crochet hook (size 6.50 mm)
  • Chenille-style yarn (size 6)
  • Scissors
  • Yarn needle or small crochet hook
  • Fiber fill
INSTRUCTIONS
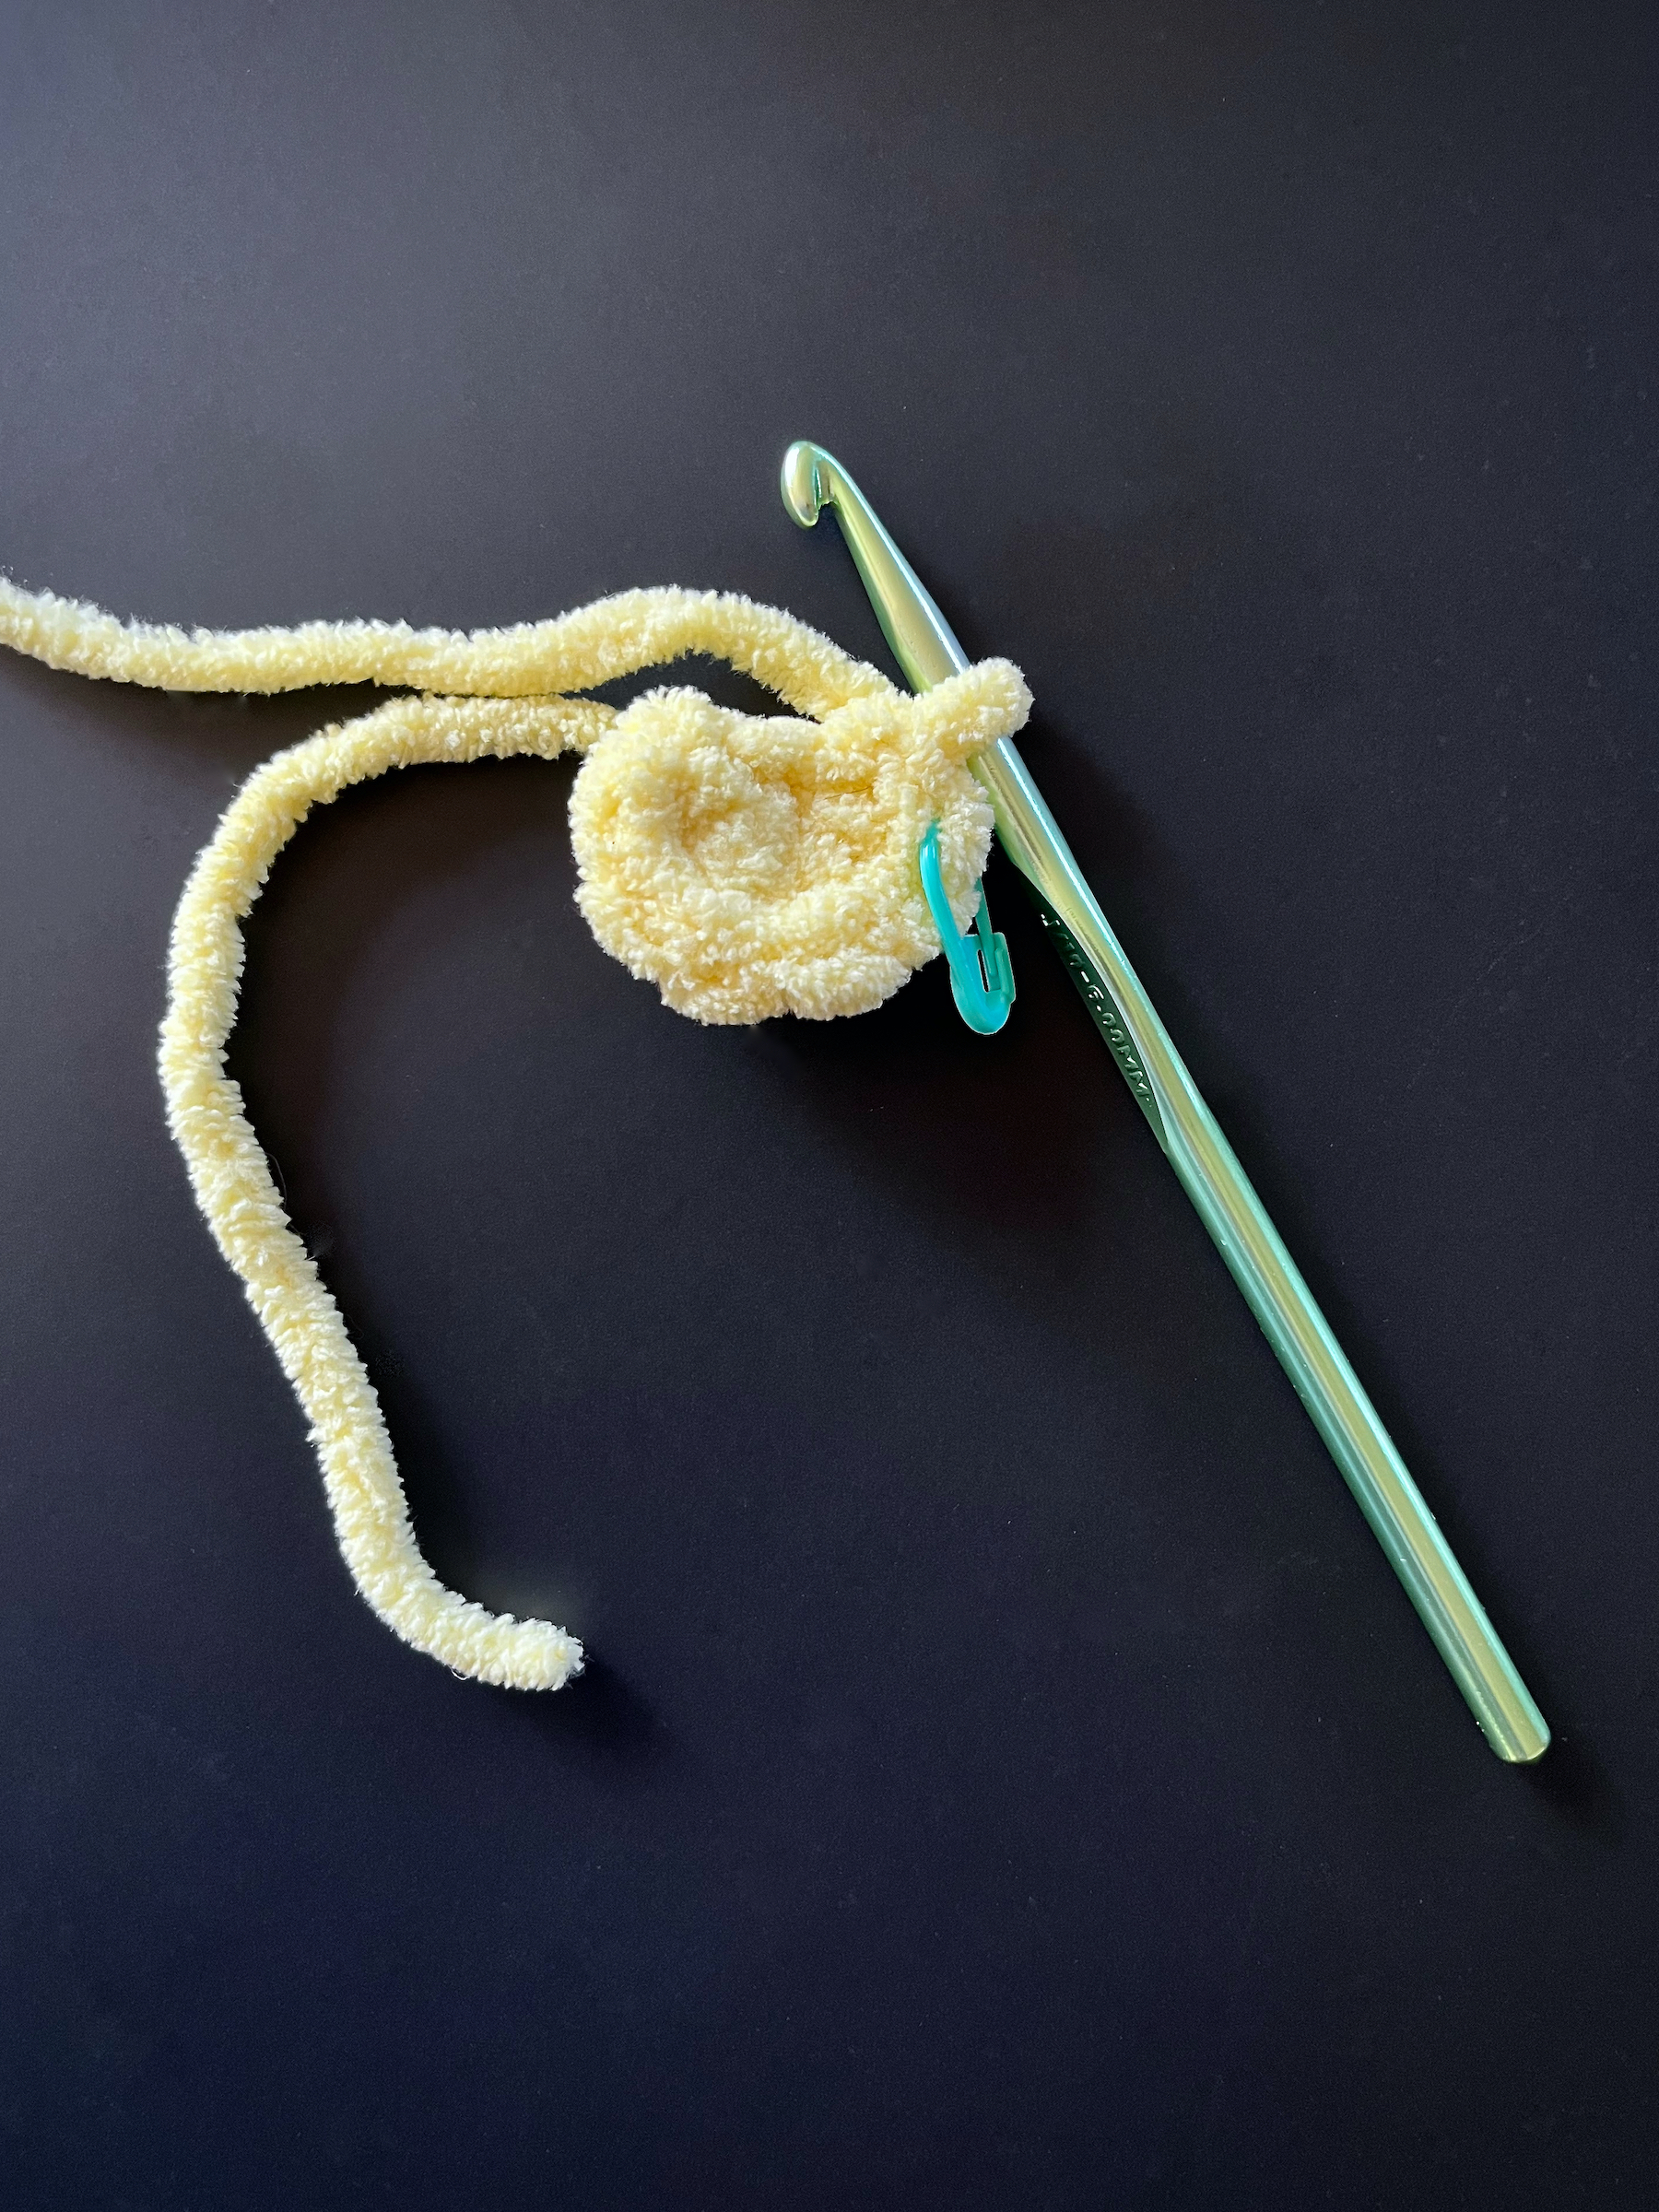
  1. Round 1: With the yellow yarn, create a magic ring with 6 single crochets (total of 6 stitches). Place a stitch marker in the last stitch of this round.
  2. Round 2: Increase in each stitch around (total of 12 stitches). Place a stitch marker in the last stitch of this round (henceforth remove it and move it up to the last stitch in each round after this one).
  3. Round 3: 1 single crochet, 1 increase, alternating around the round (18).
  4. Round 4: 2 single crochet, 1 increase, alternating around the round (24).
  5. Round 5: Single crochet in each stitch around (24).
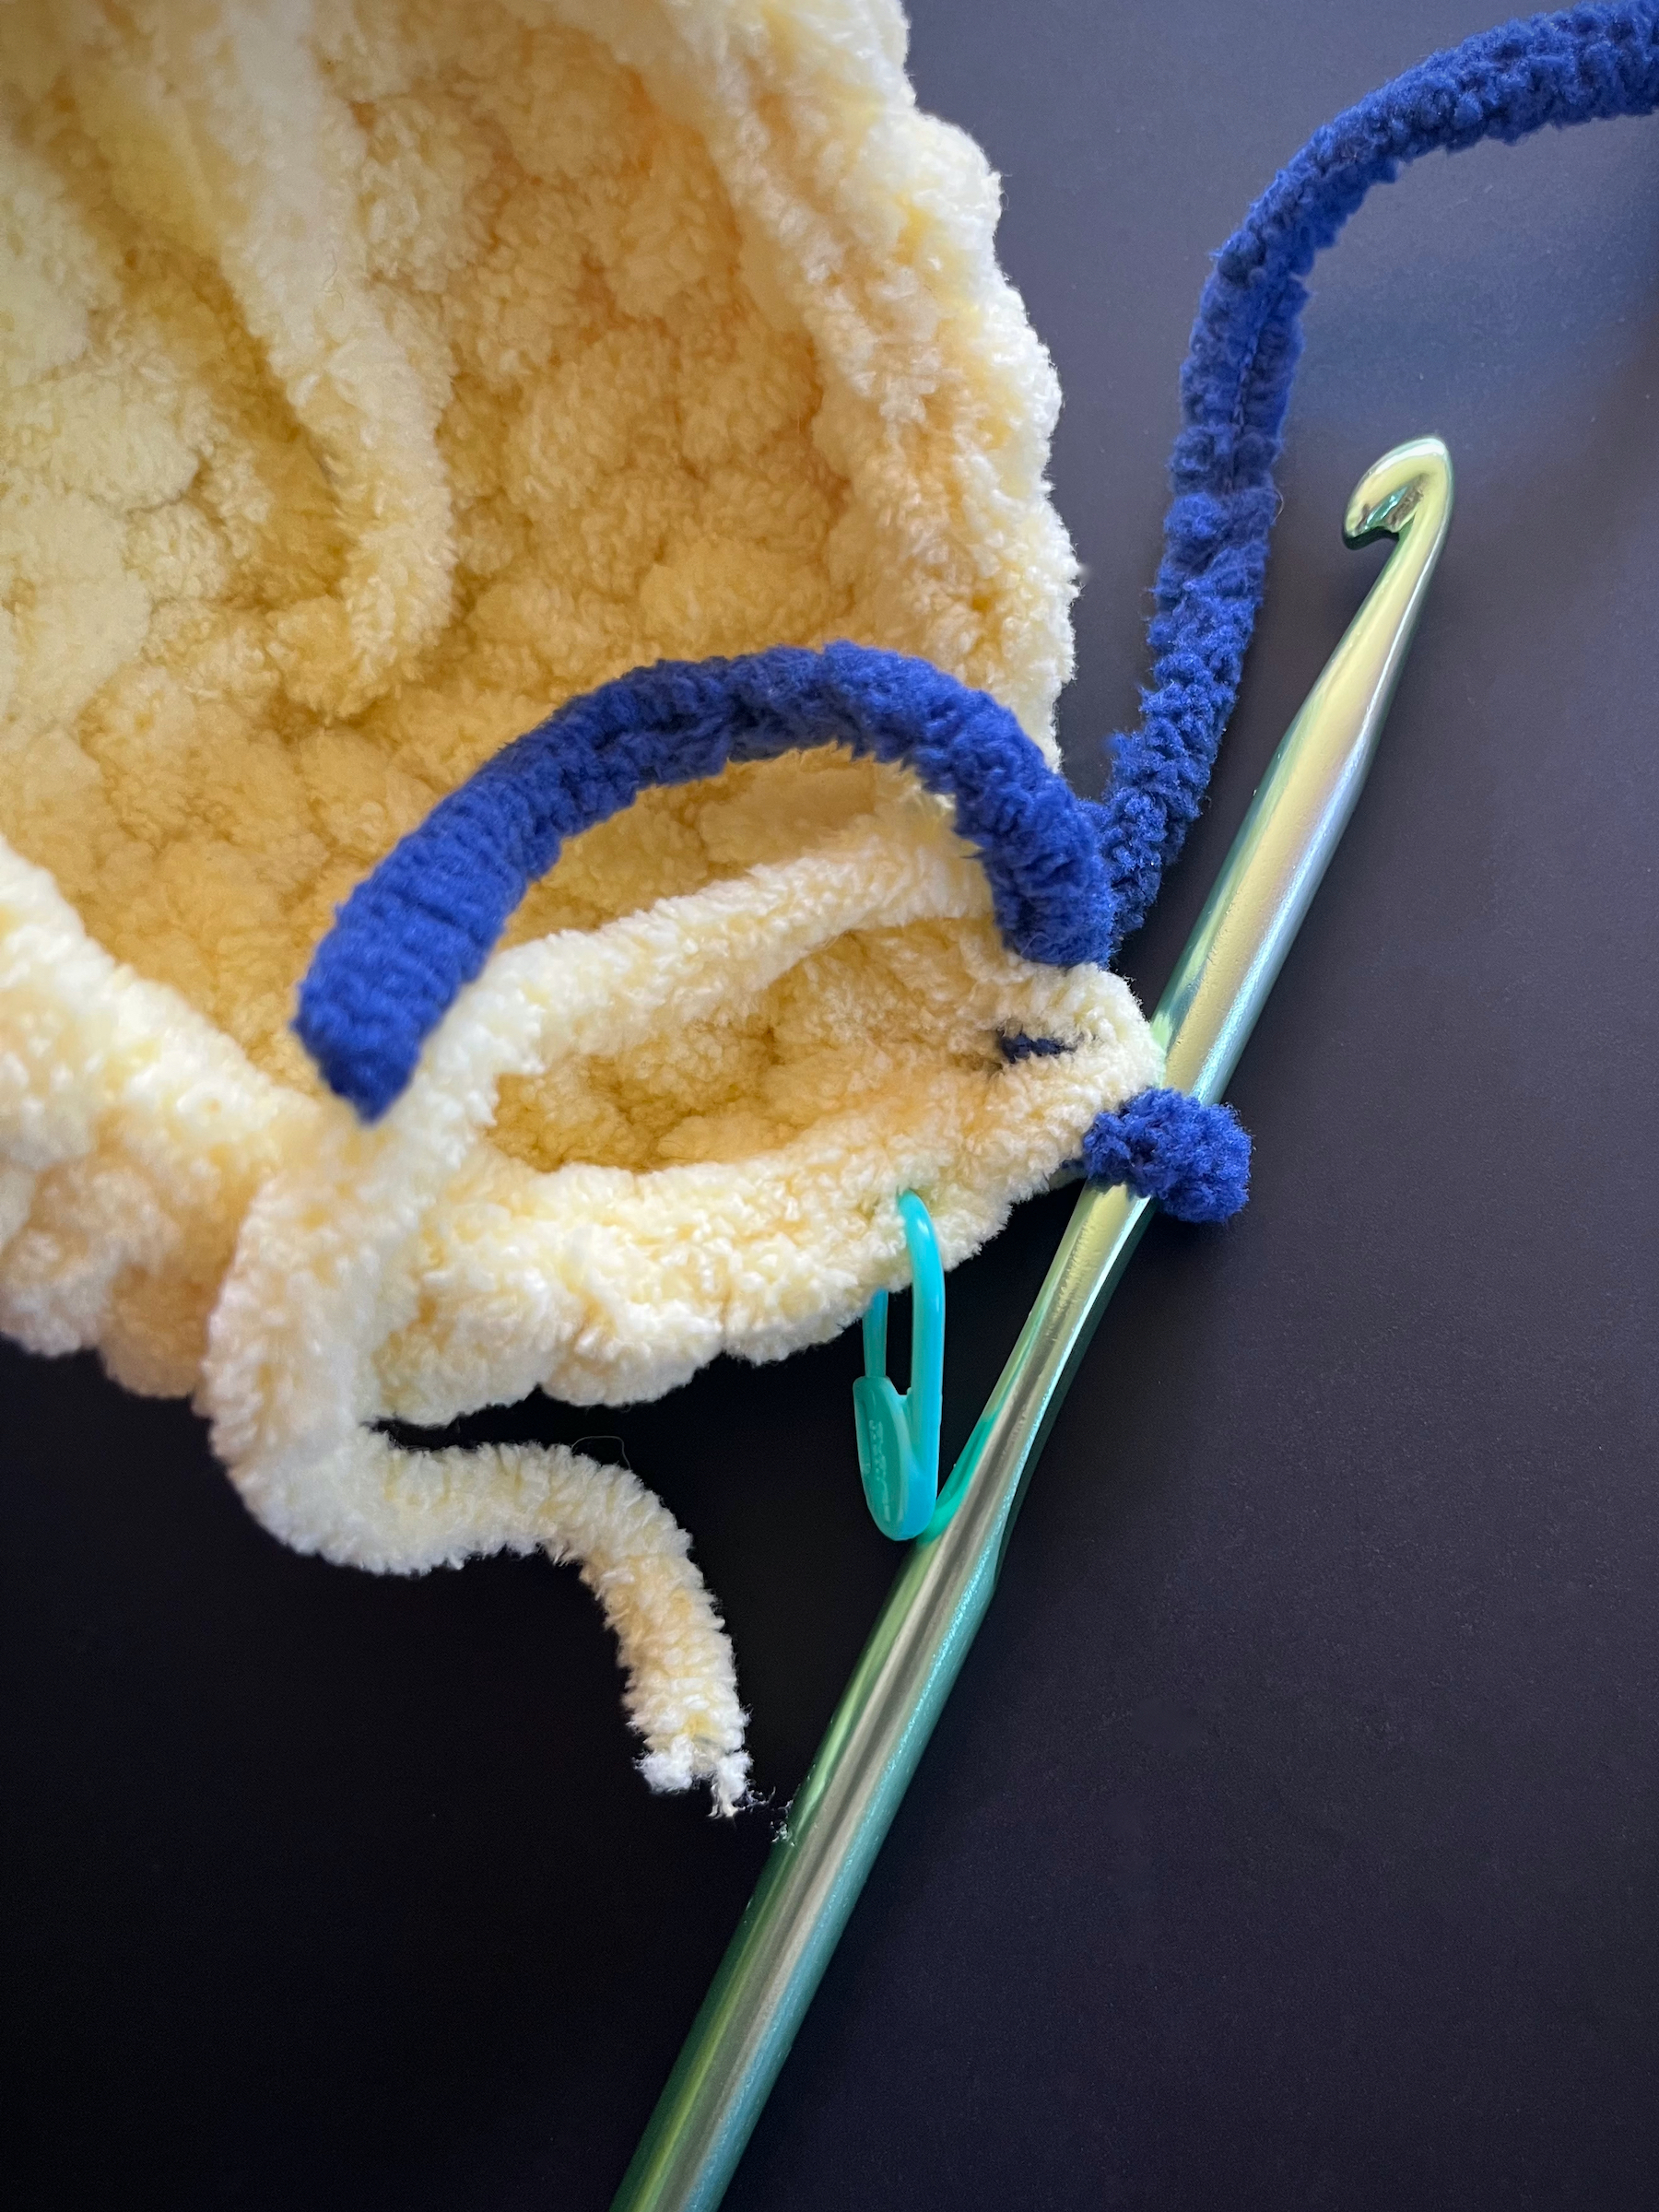
  6. Round 6: Switch colors to blue (or whatever color you choose for the bee’s stripes), then single crochet in each stitch around (24). 
    • To switch colors insert your hook into the first stitch, yarn over and pull through so there are two loops of yellow on your hook. Hook onto the blue and pull in through the two loops of yellow to create the first stitch of Round 6 (for extra security, bring the two loose ends together inside the project and double knot).
  7. Round 7: Single crochet in each stitch around (24).
  8. Round 8: Switch colors back to yellow then single crochet in each stitch around (24).
  9. Round 9: Single crochet in each stitch around (24).
  10. Round 10: Switch colors back to blue then single crochet in each stitch around (24).
  11. Round 11: Single crochet in each stitch around (24).
  12. Set the main body aside for now and begin the wings.
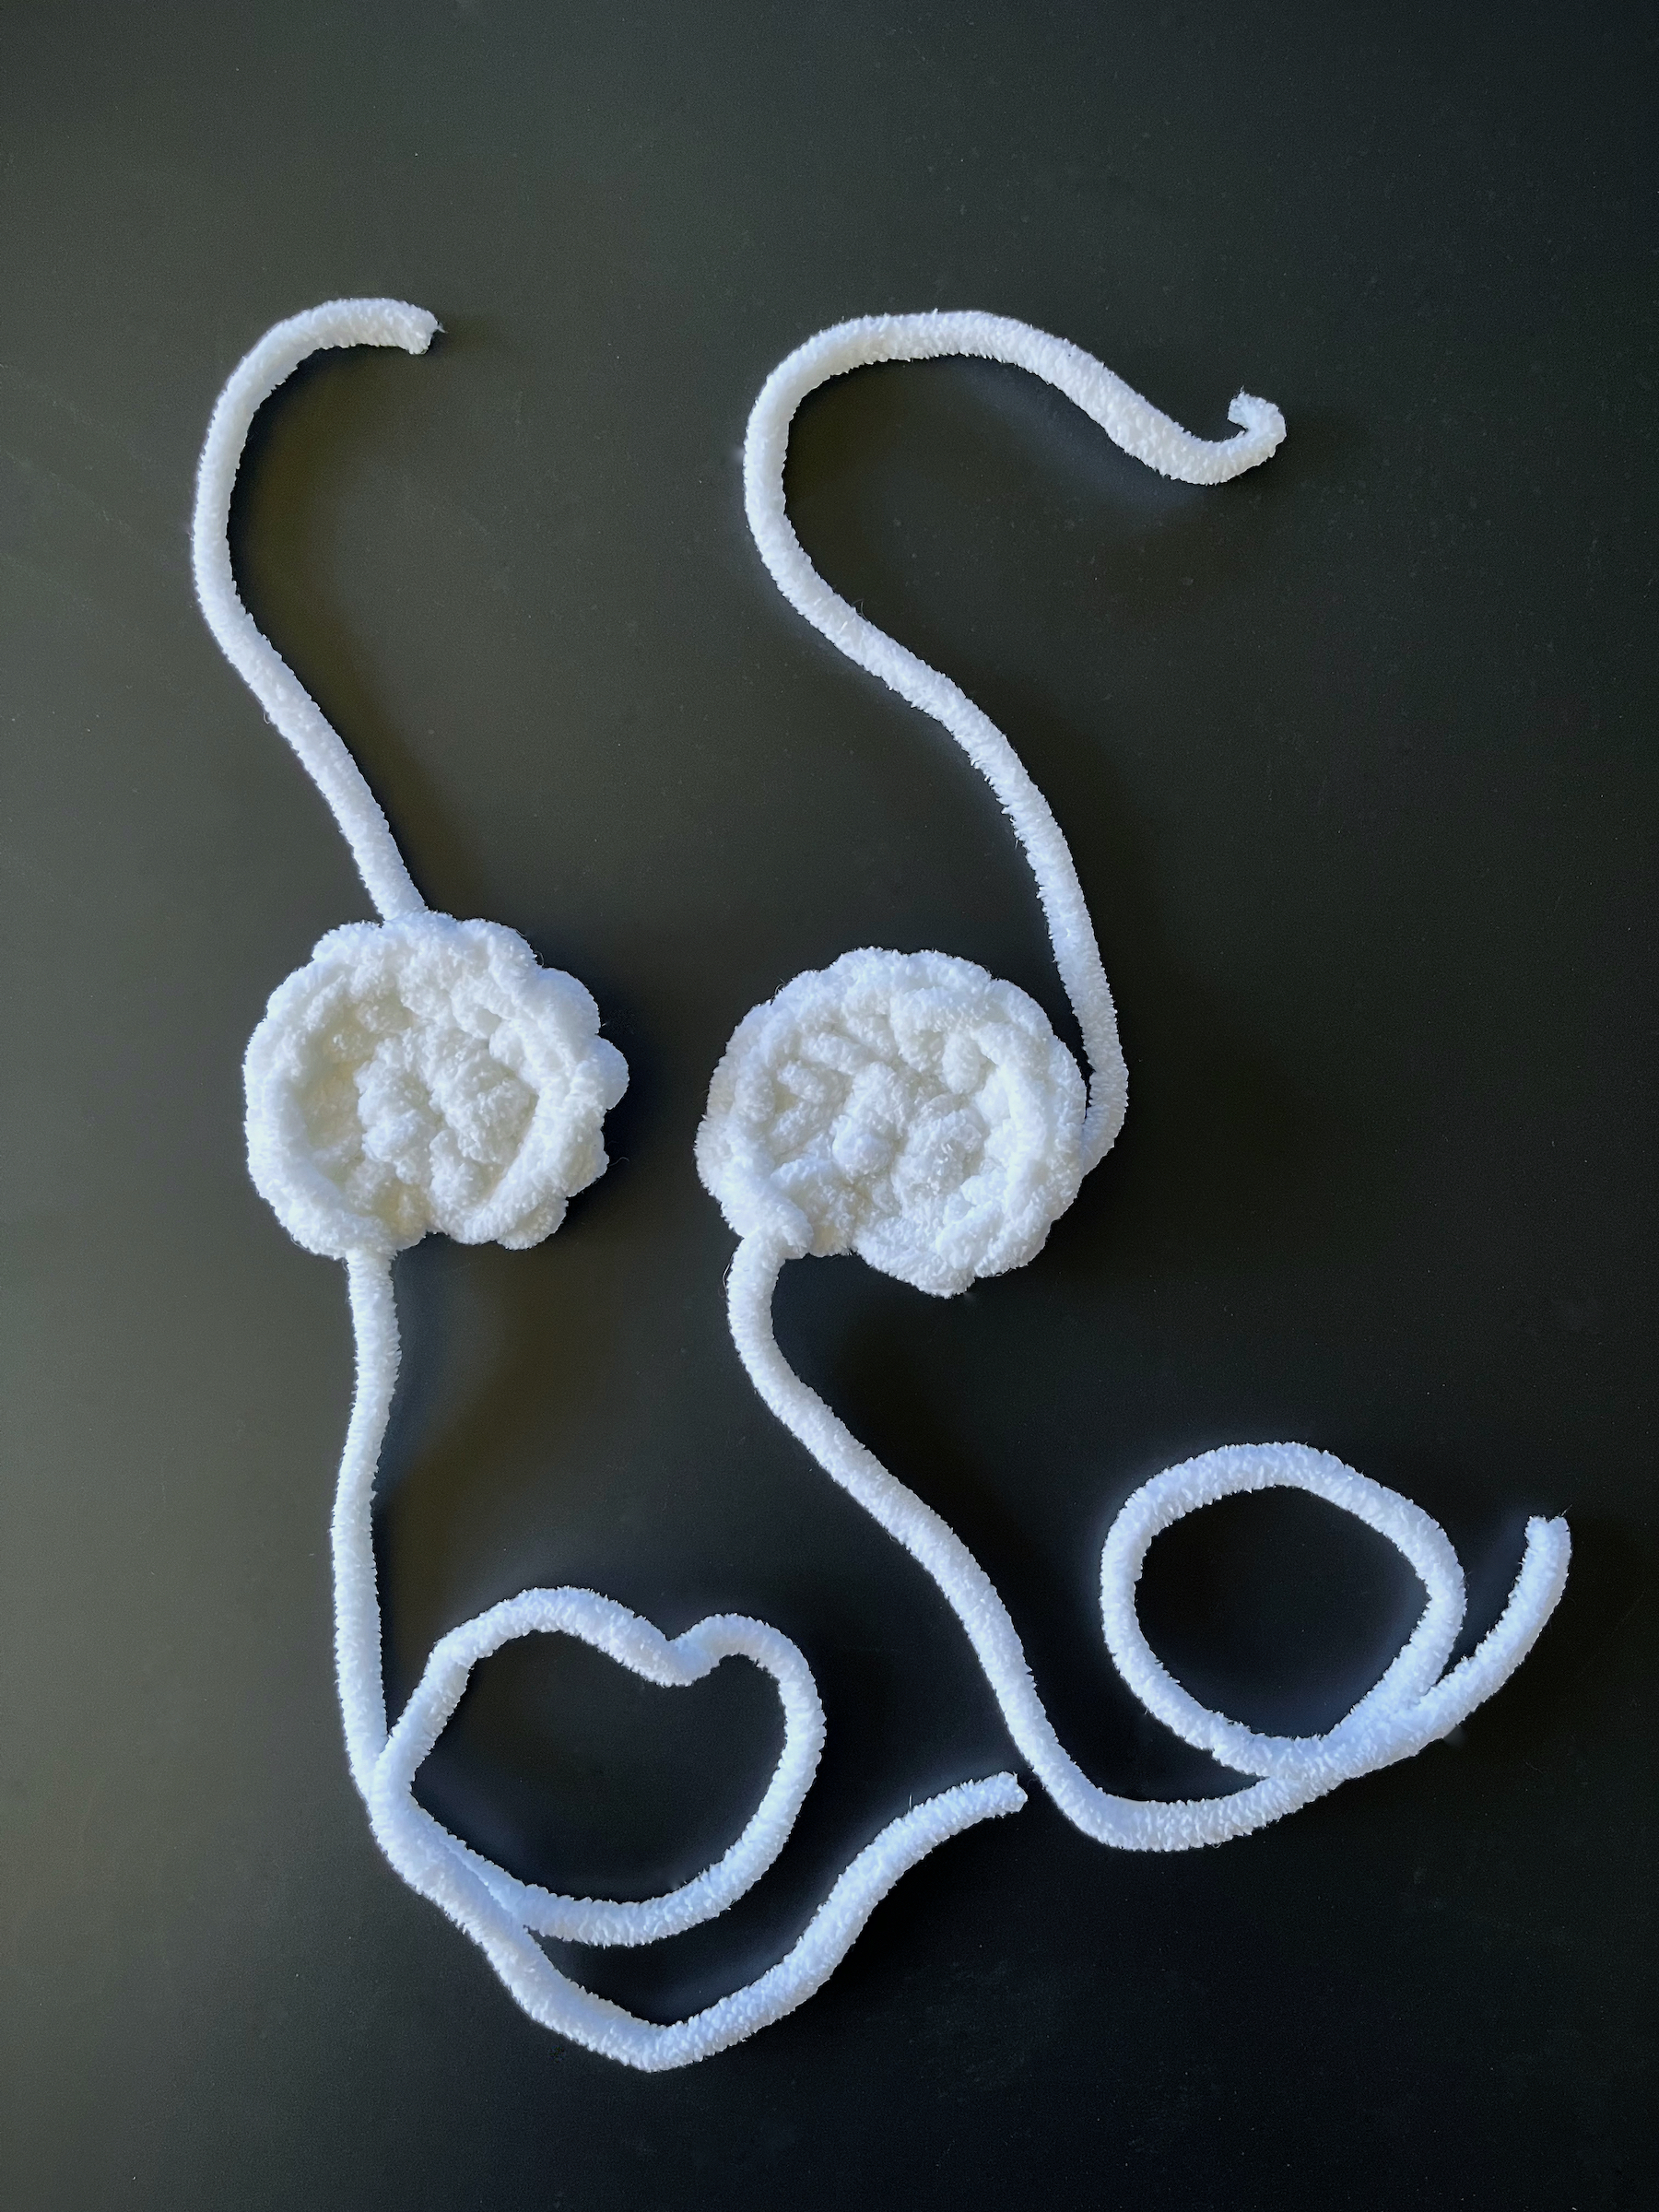
  13. Wings Round 1: With the white yarn, create a magic ring with 6 single crochets (total of 6 stitches). Place a stitch marker in the last stitch of this round.
  14. Wings Round 2: Increase in each stitch around (total of 12 stitches). Place a stitch marker in the last stitch of this round.
  15. Cut the yarn about 8 to 10 inches from your hook and pull the loose end through the last stitch, then set it aside.
  16. Repeat steps 13 through 15 to create a second wing.
  17. Thread your yarn needle with the loose end of one wing, position it where you would like (somewhere on the band of yellow between the two black stripes), and insert your needle through one of the stitches. Pull through until the wing stops at the body of the bee. Position wing and stitch through the bottom of the wing where it comes into contact with the body of the bee. Repeat this stitching process along the bottom of the wing.
    • If there is a tail from creating the magic ring, conceal it by stitching it into the wing and/or into the body of the bee.
  18. Repeat for the second wing.
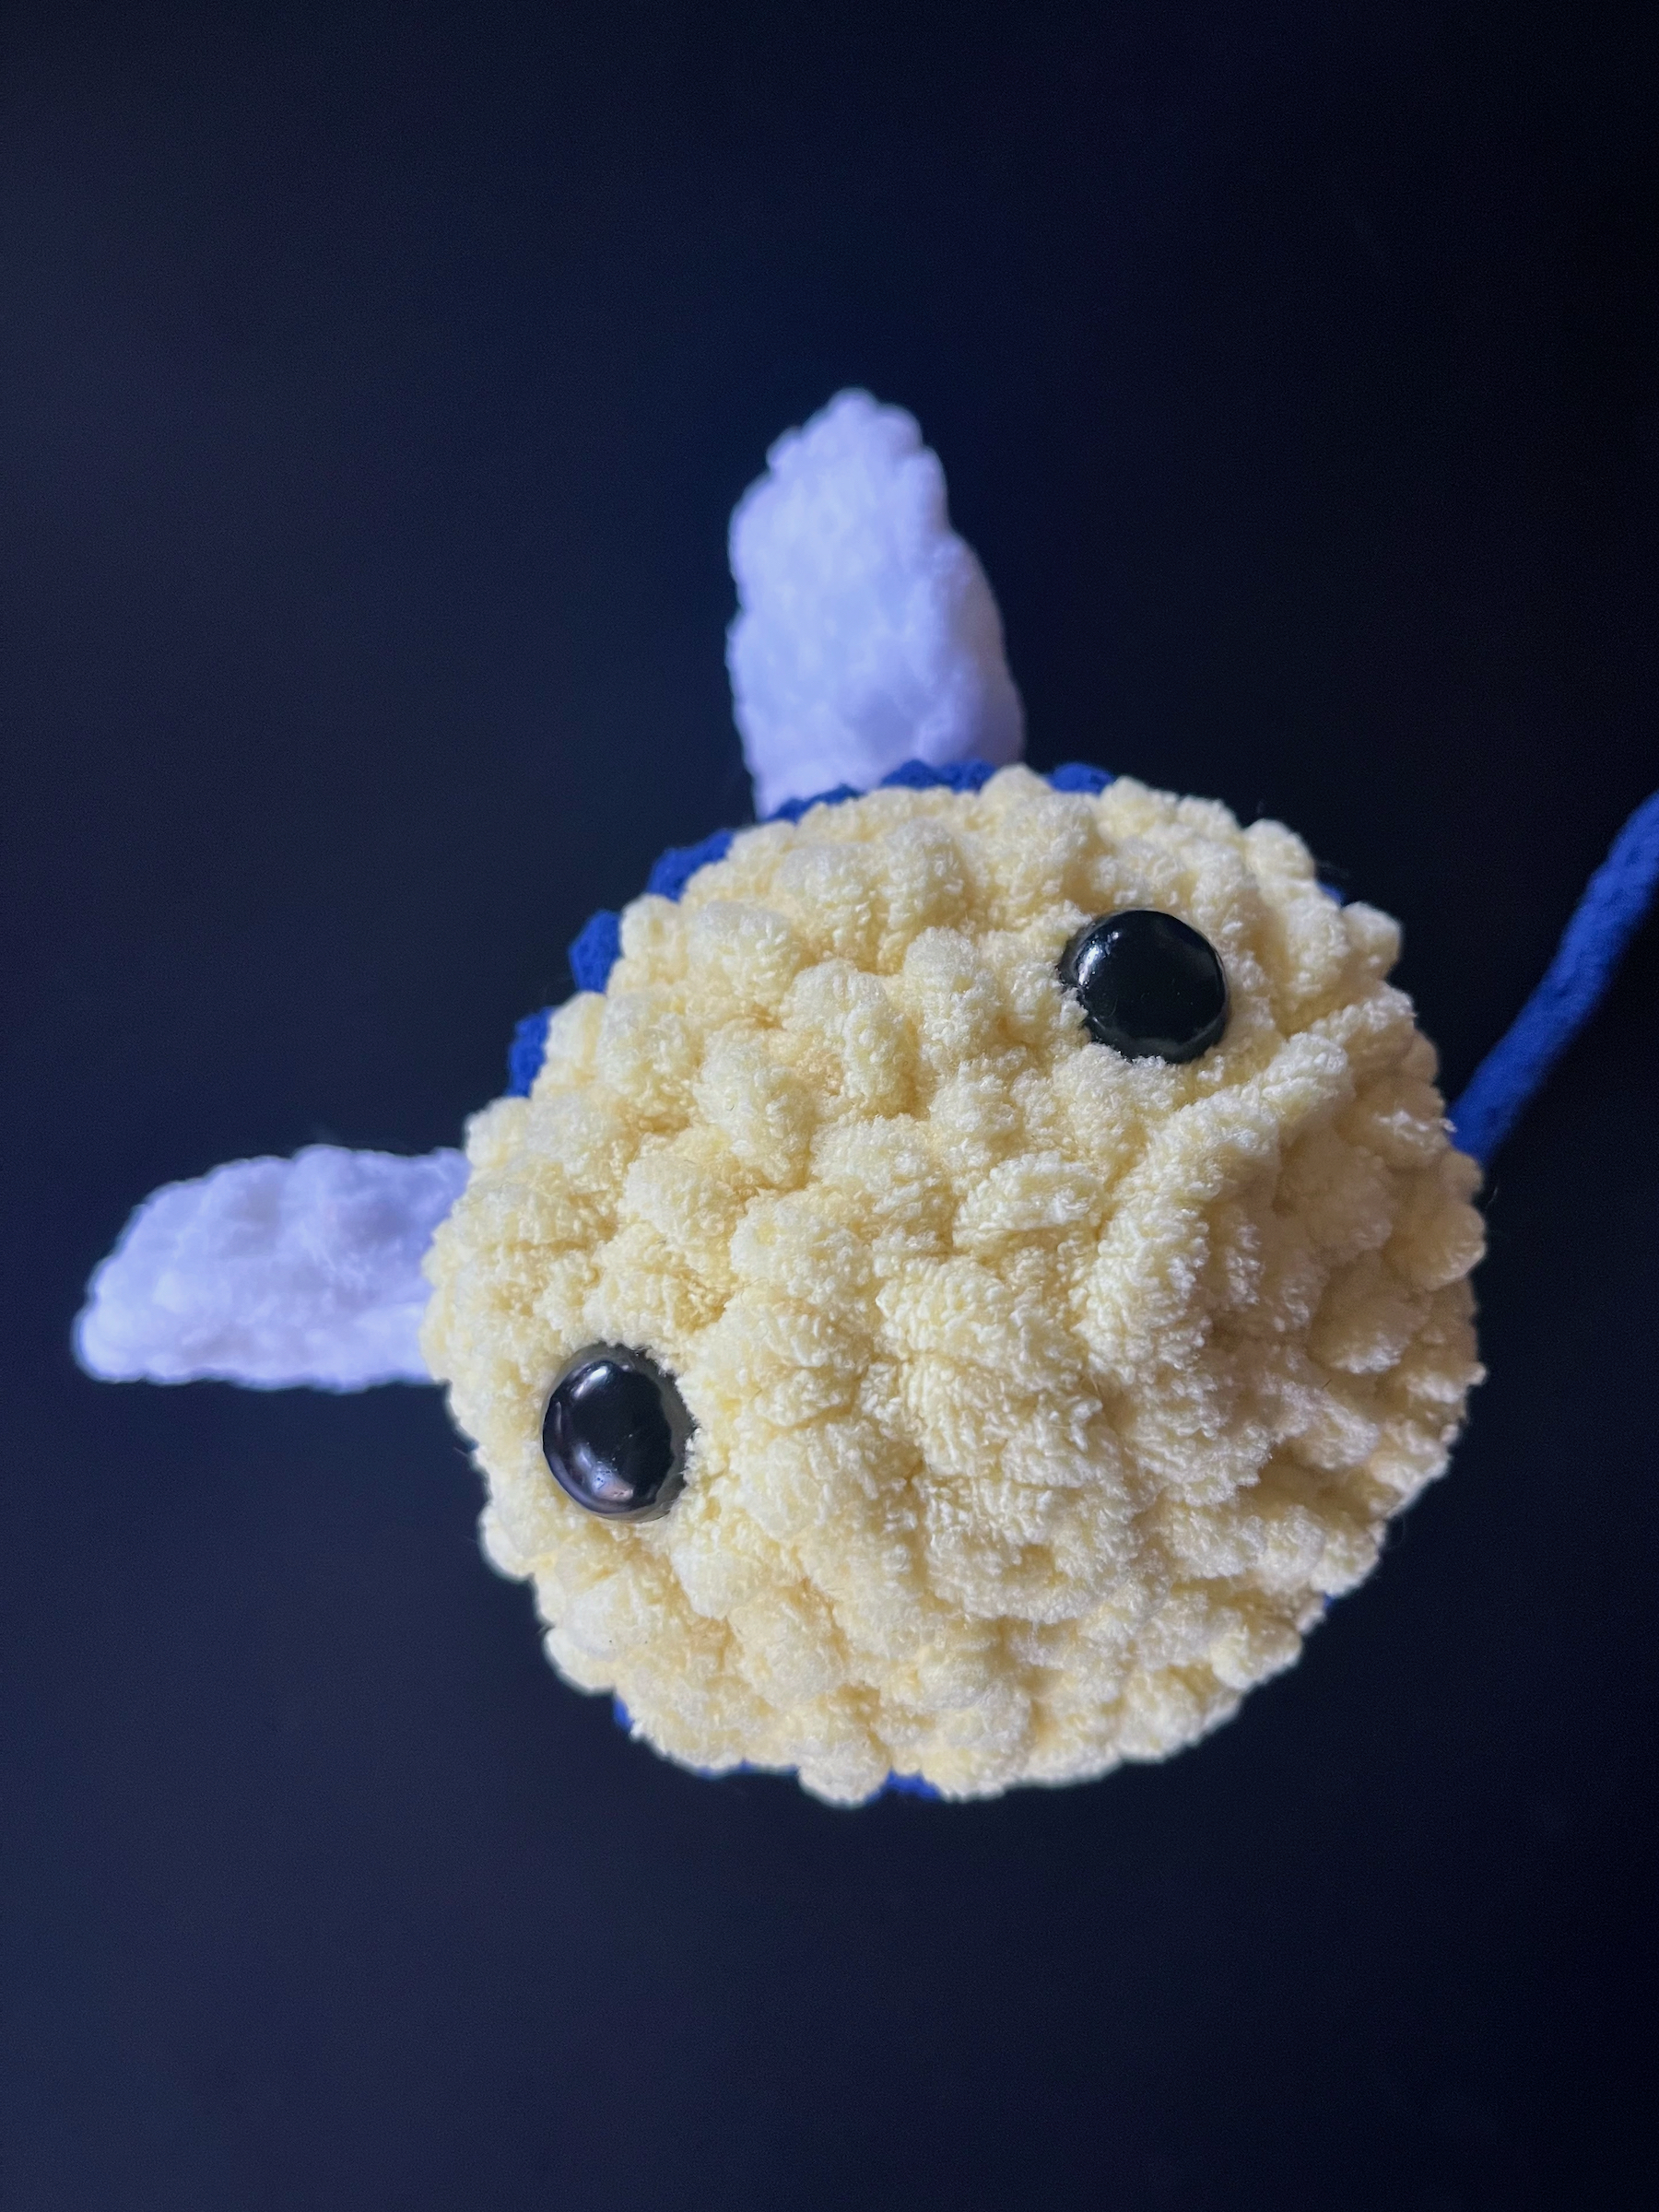
  19. Attach the safety eyes.
  20. Body Round 12: Switch colors back to yellow, then 2 single crochet, 1 decrease, alternating around the round (18).
  21. Body Round 13: 1 single crochet, 1 decrease, alternating around the round (12).
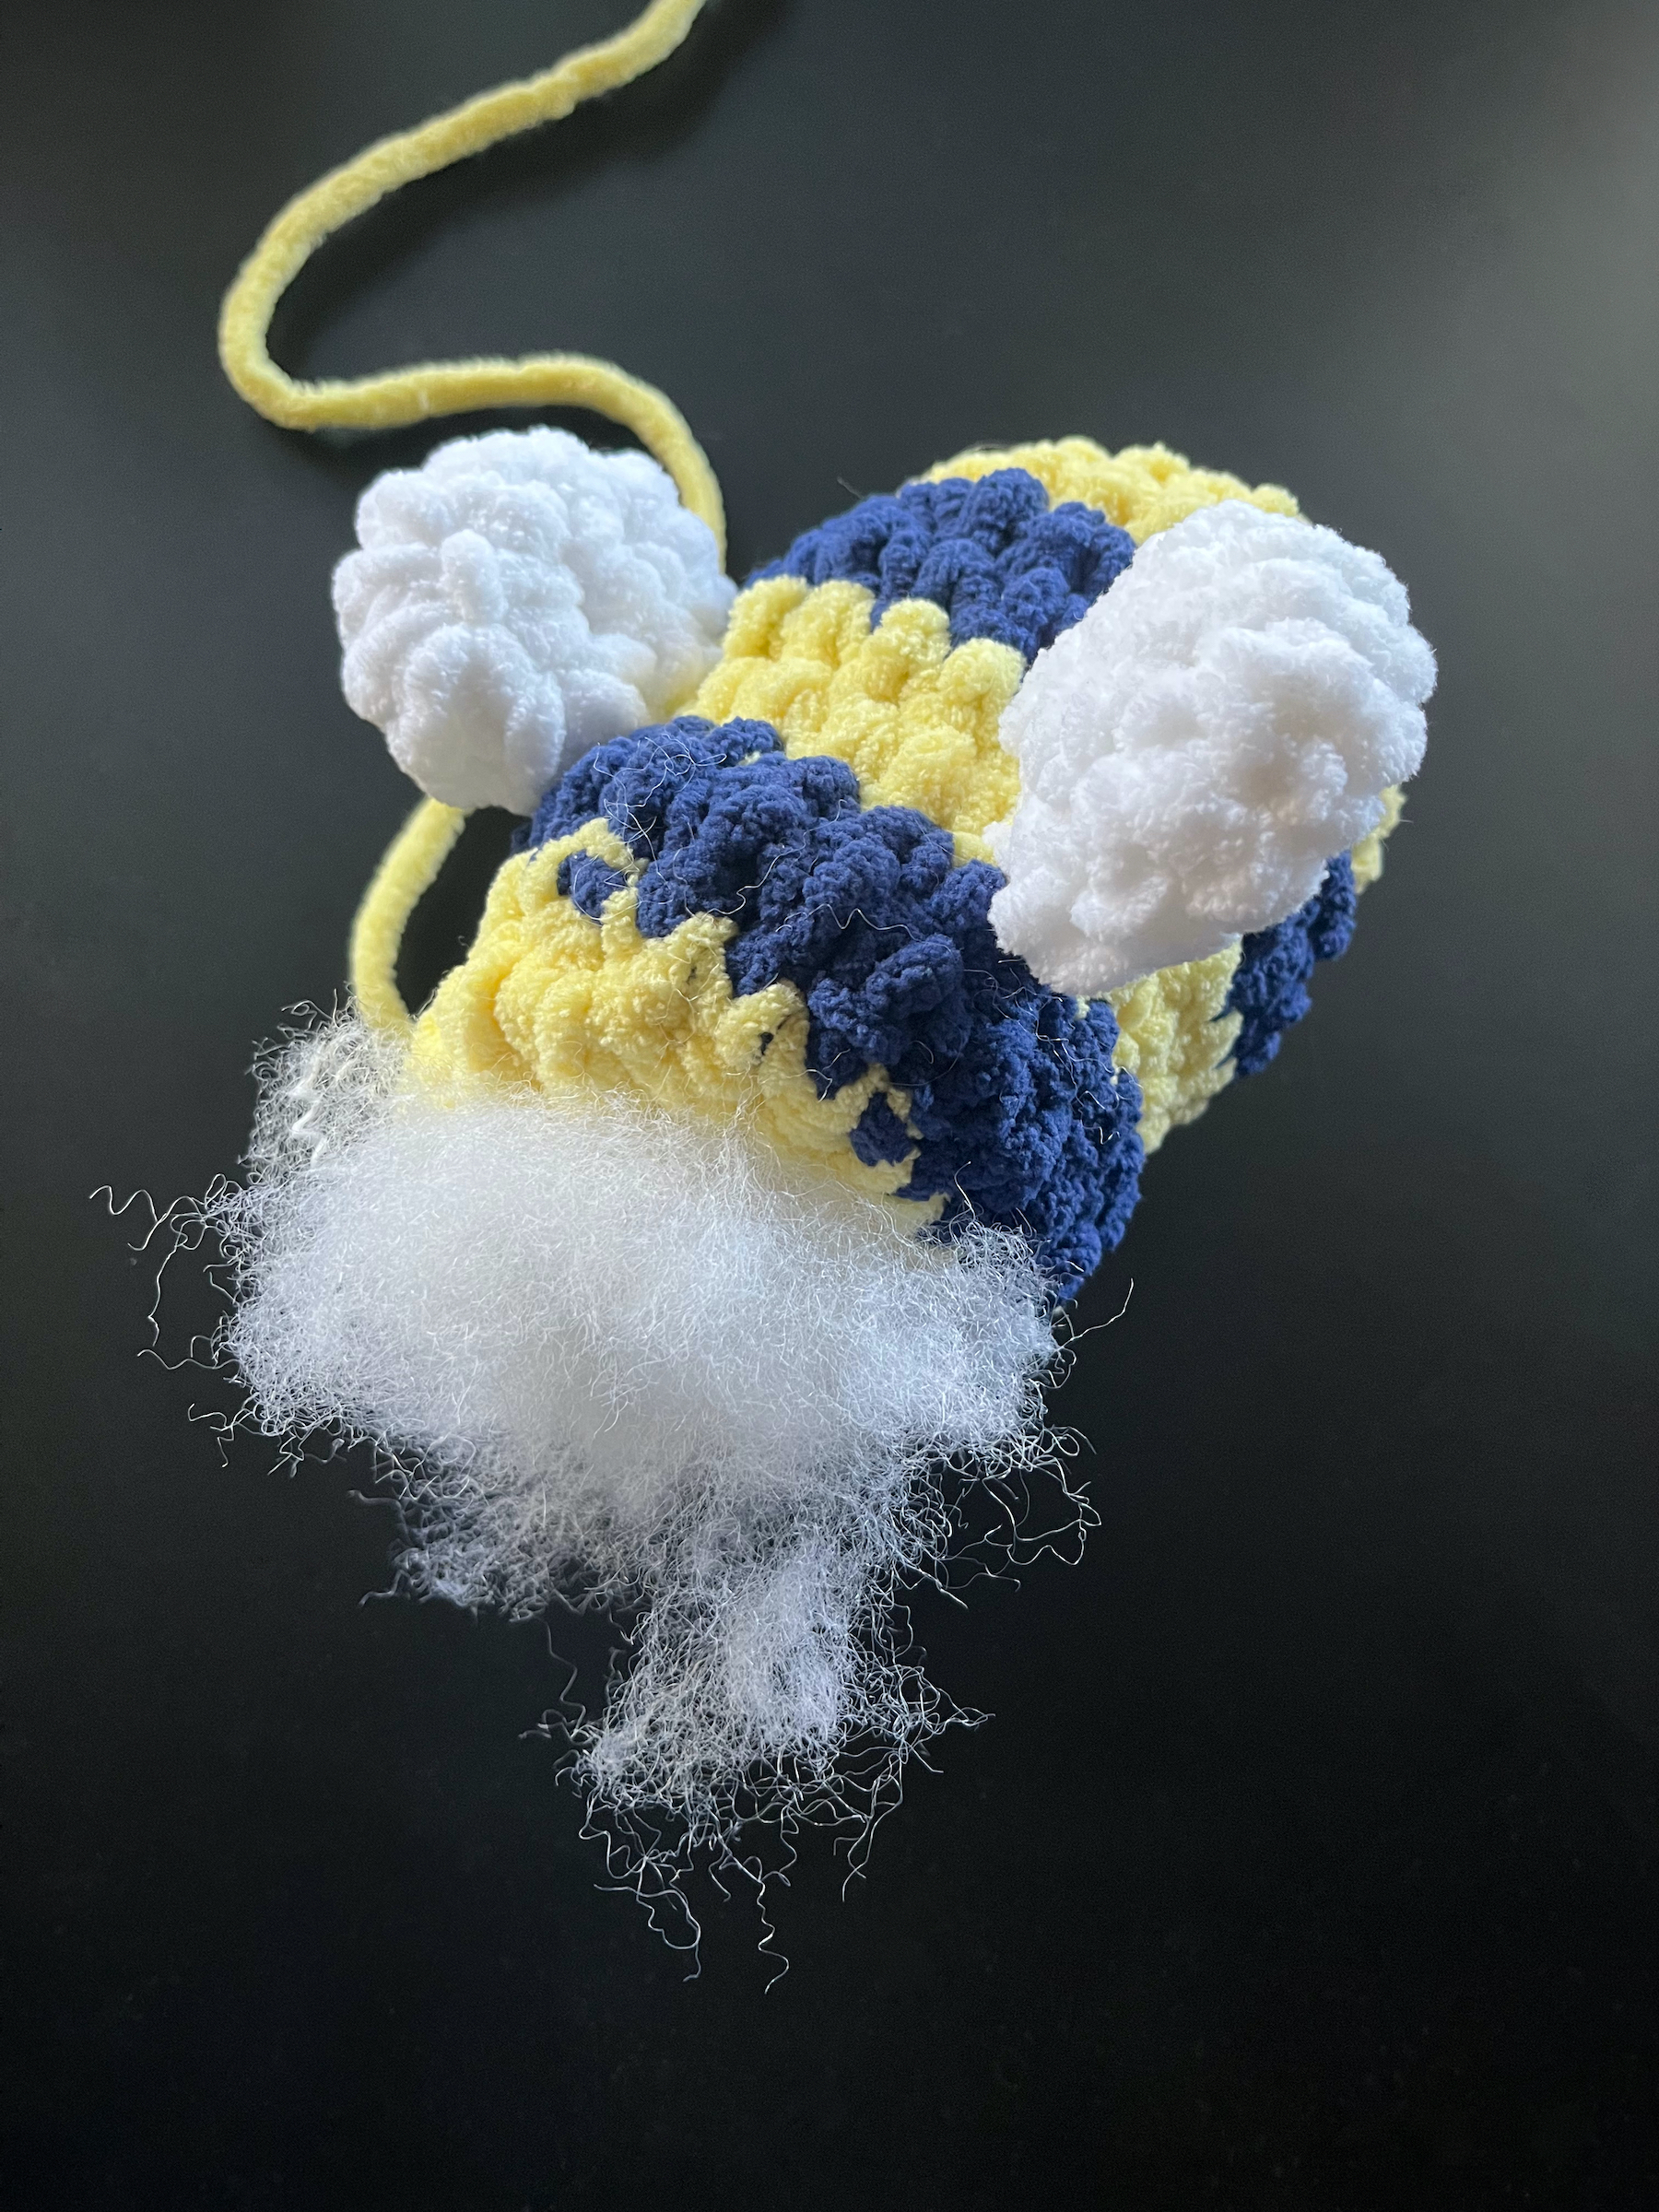
  22. Begin stuffing the bee to your preference.
  23. Body Round 14: 6 decreases around (6).
  24. Cut the yarn off 8 to 10 inches from the project and pull it through the last stitch.
  25. Stuff the bee a little more if necessary.
  26. Thread the needle and insert the needle through each stitch, then pull tight.
  27. Knot and sew the remaining tail of yarn into the yellow stitches around.
  28. Enjoy!

DIY Crochet – Super Mario Super Star

Welcome back friends! Do you crochet? I do! I feel calm and cozy when I’m crocheting, and fiercely proud whenever I complete a project.

March 10th was Mario Day! In celebration I created this super soft and cuddly Super Star pillow! This pattern is intermediate and ideal for those who know their way around “magic rings”, “increases” and “decreases”. Any chenille-style yarn, size 6, can be used in this pattern, but for my example piece I used Bernat Baby Blanket Yarn in buttercup yellow.

Let’s get started!

SUPPLIES
  • Crochet hook (size 10 mm)
  • Chenille-style yarn (size 6)
  • Scissors
  • Yarn needle or small crochet hook
  • Fiber fill
  • Black felt
  • White felt
  • Black thread
  • Sewing needle
INSTRUCTIONS
  1. Round 1: Create a magic ring with 8 single crochets (total of 8 stitches). Place a stitch marker in the last stitch of this round.
  2. Round 2: Increase in each stitch around (total of 16 stitches). Place a stitch marker in the last stitch of this round (henceforth remove it and move it up to the last stitch in each round after this one).
  3. Round 3: 1 single crochet, 1 increase, alternating around the round (24).
  4. Round 4: 1 single crochet, 1 increase, 1 single crochet, alternating around the round (32).
  5. Round 5: 3 single crochet, 1 increase, alternating around the round (40).
  6. Round 6: 2 single crochet, 1 increase, 2 single crochet, alternating around the round (48).
  7. Round 7: 5 single crochet, 1 increase, alternating around the round (56).
  8. Round 8: 3 single crochet, 1 increase, 3 single crochet, alternating around the round (64).
  9. Round 9: 7 single crochet, 1 increase, alternating around the round (72).
  10. Round 10: 4 single crochet, 1 increase, 4 single crochet, alternating around the round (80).
  11. Finish off the first center piece of the star by slip stitching into the next stitch, then cutting the yarn pulling the end through. Using a yarn needle, stitch the loose end of the yarn into the body of the center piece and set it aside.
  12. Repeat steps 1 through 10 to create a second center piece of the star. This time, do not slip stitch, leave the yarn attached and move the stitch marker to the last stitch.
  13. On this second center piece that we have not tied off, count 16 stitches from the marker on your last stitch from the round before and put a stitch marker through the 16th stitch. Count 16 stitches from this marker and place another marker through that stitch. Continue this around your center piece until you have 5 markers total.
  14. Place the marked centerpiece over the tied-off centerpiece with the more textured sides both facing out, then re-pin the five markers through the aligned stitches of both centerpieces.
  15. Point Round 1: 16 single crochet down one side of the pinned centerpieces from marker to marker with the 16th stitch bringing both sides together just inside the next marker. Then turn your work and do 16 single crochet up the other centerpiece side to reach your starting point (32). Place a stitch maker in the last stitch of this round, which also joins both sides together.
  16. Point Round 2: Single crochet in each stitch around (32). Place a stitch marker in the last stitch of this round (henceforth remove it and move it up to the last stitch in each round after this one).
  17. Point Round 3: 14 single crochet, 1 decline, turn the project around and then 14 single crochet and 1 decline (30).
  18. Point Round 4: 4 single crochet, 1 decline, 4 single crochet, alternating around the point round (27).
  19. Point Round 5: 7 single crochet, 1 decline, alternating around the point round (24).
  20. Point Round 6: 3 single crochet, 1 decline, 3 single crochet, alternating around the point round (21).
  21. Point Round 7: 5 single crochet, 1 decline, alternating around the point round (18).
  22. Point Round 8: 2 single crochet, 1 decline, 2 single crochet, alternating around the point round (15).
  23. Point Round 9: 3 single crochet, 1 decline, alternating around the point round (12).
  24. Point Round 10: 1 single crochet, 1 decline, 1 single crochet, alternating around the point round (9).
  25. Point Round 11: 1 single crochet, 1 decline, alternating around the point round (6).
  26. Point Round 12: Decline 3 times (3).
  27. Cut off your yarn with a little bit of a tail. Attach a yarn needle and insert your needle through the top 3 stitches of the point and pull them tight to make a sharper point. Then stitch the rest of the tail into the body.
  28. To begin a new point with loose yarn, insert your hook into the first stitch, yarn over with your loose yarn and pull through, then complete the stitch by yarning over and pulling through this loop. This will anchor your loose yarn to the next point and mark the first stitch.
  29. Repeat steps 15 through 27 to create the next point. If you’re feeling lost, remember to always count your stitches. At the end of each round the amount of stitches should match the number I’ve put into parenthesis for that round.
  30. Continue repeating steps 15 through 27 until you have completed 4 points of the star, then stuff what you’ve completed. Do not worry about the holes at the base of each point, we will sew them up once we’ve completed the final point.
  31. Begin the last point and stuff it a little at a time as you stitch upwards. Finish the stuffing with chopstick and tie off.
  32. Once the star has been stuffed and completed with 5 points, use the same yarn and a yarn needle to sew up any holes, found at the base in between each point. Concealing any excess yarn by stitching it into the body of the star.
  33. Once the star has been completed. Cut out the pieces for the felt eyes using the patterns I’ve provided, and the black and white felt.
  34. Stitch the white highlights onto the black backgrounds, then stitch the eyes onto the pillow.
  35. Enjoy!

DIY Fuse Bead – Super Mario World Magnets

Welcome back friends! We bought a new refrigerator some time ago and I’ve been thinking it would be nice to decorate it with some Super Mario Bros. magnets! Also, March 10th is Mario Day!

Working with a limited amount of black and white perler beads, I chose a handful of characters / objects from Super Mario World to begin with, and more to come! I created (and the pictures of the patterns are included below) for small Mario, small Luigi, a coin, Yoshi’s egg and Yoshi.

The magnets turned out great! I left them a little less melted on outward facing side because I like the look, but you are always welcome to melt them more! Be careful with the iron, but don’t be afraid to make some mistakes! Mistakes happen for everyone, you may see two pieces of my Mario’s mustache that were over-melted from an unevenly heated iron, but if it’s not worth scrapping the whole piece, embrace it!

Let’s get started!

SUPPLIES
  • Fuse beads
  • Fuse bead pegboard
  • Parchment paper
  • Point tweezers (optional)
  • Painter’s tape
  • Seam ripper
  • Iron
  • Iron-safe surface
  • Peel and stick magnet discs
INSTRUCTIONS
  1. If your beads did not come pre-sorted by color, sort them into the colors you need per character and/or object.
    • Coin: 50 black, 25 white, 17 light brown, 27 bright yellow, 41 gold yellow.
    • Luigi: 63 black, 29 white, 19 bright green, 39 light brown, 18 dark brown, 5 lighter blue, 17 blue, 12 darker blue, 20 lighter tan, 17 golden tan, 2 bright yellow.
    • Mario: 63 black, 29 white, 19 bright red, 39 light brown, 18 dark brown, 5 lighter blue, 17 blue, 12 darker blue, 20 lighter tan, 17 golden tan, 2 bright yellow.
    • Yoshi’s egg: 40 black, 70 white, 19 darker green, 29 lighter green, 8 bright green.
    • Yoshi: 146 black, 63 white, 23 gold yellow, 20 bright red, 34 darker green, 54 bright green.
  2. On your pegboard, begin laying out the appropriate colored beads for the character(s) and/or object(s) you’ve chosen. I recommend working on one character/object at a time, then moving on to the next.
  3. If you are having a hard time placing beads into specific places, use pointed tweezers to pick up each bead and then insert it.
  4. Once each character has been completed, take strips of painter’s tape and cover that character, slightly layering each piece of tape so it’s one connected piece.
  5. Take a seam ripper (or other sharp pointed tool) and poke a small hole into the center of each fuse bead in the pattern. This allows built up heat to escape the tape when ironing.
  6. Carefully remove the taped pattern from the peg board and place it tape-side down on an iron-safe surface. Then place parchment, wax, or ironing paper over it.
  7. Heat a dry iron to a medium heat and as smoothly and evenly as you can, begin to iron the project in a circular motion. Do not press down. Beads take about 10 to 20 seconds per side to fuse evenly and some colors may fuse more quickly than others.
  8. When the beads begin to fuse together you’ll see their colors more clearly through the paper and the center holes will shrink to a pinhole size. Lift the paper occasionally to see how the beads are fusing.
  9. Let the design cool, placing a flat and heavy object over it to keep it from curling.
  10. Remove the weight and paper and flip the project over. Peel off the tape and place the paper back on this side of the project.
  11. Repeat step 7 through 9 on this side of the project. I chose to only lightly fuse the beads on this side because I prefer the look, but you are welcome to melt them more!
  12. Remove the weight and paper and flip the project over. 
  13. Peel the back-liner off a magnet and attach it to the back of your project. For the smaller objects like the coin and egg, I used one magnet. For Mario and Luigi I used two, spread evenly. And for Yoshi, I used three magnets, spread evenly!
  14. Stick to you refrigerator or other magnetic surface and enjoy!

DIY Crochet – Cat Ear Beanie Hat

Welcome back friends! Do you crochet? I dabbled in crochet off and on for a few years, always fascinated, but never fully catching on. I kept at it, and suddenly, it clicked! I feel calm and cozy when I’m crocheting, and fiercely proud whenever I complete a project.

It’s that time of year for keeping warm! And, in the spirit of playing the Pete the Cat and the Missing Cupcakes game, I thought I’d make a blue crochet cat ear hat!

This hat is whimsical and cozy! The pattern is easy, and ideal for any level of crocheter (beginners included)! Any size 4 yarn can be used in this pattern, but for the Pete the Cat blue of my example piece, I used Red Heart yarn in the “soft navy” color. The size of the hat can also be adjusted for smaller heads by reducing the amount of rows to match half the circumference of the intended person’s head.

Let’s get started!

SUPPLIES
  • Crochet hook (size 5.50 mm)
  • Red Heart yarn (color: soft navy)
  • Scissors
  • Yarn needle or small crochet hook
INSTRUCTIONS
  1. Create a slip knot and then at least 60 chain stitches (you can chain a few more if you want to make the brim wider). I wanted a wider brim/slouchier hat so I chained 70.
  2. Turn your chain around and half double crochet (hdc) into the third stitch from the hook, then continue to hdc all the way across your chain.
  3. Chain 2 and turn your work. Hdc into the back loop of the third stitch from the hook, then continue to hdc in the back loops of each stitch all the way across your project.
  4. Repeat step 3 until there is a total of 28 to 30 hdc rows (the amount of rows can be adjusted so that the width of the project matches half of the circumference of your head).
  5. After the last hdc of your last row, fold the length of the project in half (the fold will be the top of your hat where the “ears” form).
  6. Using the yarn that is still attached, stitch up this side of the hat towards the fold. Insert your hook through the aligned stitches on either side and perform a single crochet to bring them together. 
  7. Once you’ve reached the top corner of the fold, tie a knot and cut the yarn. Use a yarn needle or a small crochet hook to weave the remaining yarn into the project.
  8. Knot the tail from the beginning of the project to your yarn skein and repeat steps 6 and 7 up the other side of the hat.
  9. Fold up the brim, place the hat on your head and adjust the ears to your preference!
  10. Enjoy!

DIY Crochet – Warm, Fuzzy Scarf Pattern

Welcome back friends! Do you crochet? I dabbled in crochet off and on for a few years, always fascinated, but never fully catching on. I kept at it, and suddenly, it clicked! I feel calm and cozy when I’m crocheting, and fiercely proud whenever I complete a project.

It’s that time of year for keeping warm! Whether you’d like to create a scarf for yourself or to gift to a friend, I’m here to help! 

This scarf is cozy classic and ideal for any level of crocheter (beginners included)! Any bulky size 5 yarn can be used in this pattern, but for the soft and fuzzy results of my example piece, I used Carron Latte Cakes Yarn.

SUPPLIES
  • Crochet hook (size 6mm)
  • Carron Latte Cakes Yarn (Color: Rose Scented)
  • Scissors
  • Yarn needle or small crochet hook
INSTRUCTIONS
  1. Create a slip knot, then chain 250 stitches.
  2. Turn your chain around and half double crochet (hdc) into the third stitch from the hook. Continue to hdc in each stitch all the way across your chain.
  3. Chain 2 and turn your work. Hdc into the back loop of the third stitch from the hook, then continue to hdc in the back loops of each stitch all the way across your project.
  4. Repeat step 3 for the next thirteen rows for a total of 15 hdc rows. You are welcome increase the amount of rows if you’d prefer a wider scarf!
  5. After the last hdc stitch of your last row, use the scissors to disconnect the yarn from the skein and pull the loose end through your crochet loop.
  6. Using a yarn needle or a small crochet hook, weave the loose ends of the yarn into the surrounding scarf.
  7. Wrap around your neck and get cozy!

DIY – Snow White and the Seven Dwarfs Peg Dolls

Part of the fun in raising Zoey is making things that delight her; I want to create lasting, meaningful toys for her that are made with love and will be loved! Wooden toys are classic and beautiful, when created and treated right, they can last a lifetime; so let’s make some!

It’s no secret that Cameron and I love Disney. We’ve begun showing Zoey the classics, starting with the first full length animated feature that started them all! Snow White!

This week I’ll be sharing the steps I took to create a Snow White peg doll, along with her friends, the seven dwarfs.

SUPPLIES
  • Blank peg doll(s)
  • Small, flat & fine tip paint brushes
  • Paint palette (or a tray for your paint)
  • Non-toxic acrylic paints
  • Non-toxic varnish (I used Duraclear Ultra Matte Varnish)
INSTRUCTIONS
  1. With a pencil, lightly sketch Snow White onto a blank peg doll.
  2. Begin painting your peg doll with the base layers first. I started with the yellow of her dress and the white of her collar. Allow this paint to dry before moving on to avoid smudging, then apply a few more layers of each until you’re happy with the colors and textures.
  3. Paint the very bottom and its edges of the peg doll black to signify her slippers. Also take this opportunity to paint the black of her hair. Allow this paint to dry and apply a few more layers until you’re happy with the colors and textures.
  4. Move to painting the dark blue of her bodice, the light blue of her sleeves and the red of her cape. Allow this paint to dry and apply a few more layers until you’re happy with the colors and textures.
  5. Paint the red of the accents on her sleeves and the red of the bow in her hair. Allow this paint to dry and apply a few more layers until you’re happy with the colors and textures.
  6. Finish up with outlining and/or adding small details, including a small thin yellow line down the middle of her bodice. Allow this paint to dry and apply a few more layers until you’re happy with the colors and textures.
  7. Taking something small and round (I used the opposite end of one of my smaller paint brushes) dip it in black paint and dot the two eyes. Using the finest tipped paintbrush you can find, give her an eyelash or two on each eye.
  8. Using the same method as the eyes, dip the opposite end of a slightly larger paintbrush into light pink paint and dot the blush under each eye.
  9. Allow for all paint to completely dry, then apply a varnish and allow it to dry. You can apply as many coats as you want for the finish you want, just allow them to dry in between applications and before handing her over to your child.
  10. If you want to paint the dwarfs too, lightly sketch them on blank peg dolls. I used different characteristics to define each one. For example, Grumpy has scowling eyebrows, Bashful has large blush spots on his cheeks, Sneezy has wrinkles above his nose, etc.
  11. The dwarfs are a colorfully dressed bunch! With different colored hats, shirts and pants it may take awhile to paint them all, but take your time and reference the picture for color. Allow each layer paint to dry and keep applying layers until you’re happy with the colors and textures.
  12. Using a fine tipped paintbrush, paint each dwarf’s white beard (except Dopey of course)! Allow this paint to dry and apply a few more layers until you’re happy with the color and texture.
  13. Taking something small and round (I used the opposite end of one of my smaller paint brushes) dip it in black paint and dot the two eyes.
  14. Using a fine tipped paintbrush, paint each dwarf’s nose and cheeks light pink.
  15. Finish up with outlining/and or adding small details like buttons and buckles!
  16. Allow for all paint to completely dry, then apply a varnish and allow it to dry. You can apply as many coats as you want for the finish you want, just allow them to dry in between applications and before handing them over to your child.
  17. Viola! Snow White and the seven dwarfs are done and ready to be played with! Enjoy!
Traditional and Modern Anniversary Gift Ideas by Year

My husband and I just celebrated 10 years of marriage, 10 years! It’s hard to wrap our minds around it because it really feels like hardly any time has passed; we are happy!

The concept of anniversary gift themes by year is super fun and engaging! We’ve gotten a bit distracted the past few years and forgot to follow the list, but what a perfect anniversary to pick it back up again!

If you aren’t familiar with the anniversary gift themes, I’ve created a handy dandy list of traditional and modern anniversary gifts by year, along with a bonus of flowers by year too! Happy anniversary and happy gifting!

DIY Red and White Striped Christmas Box

Christmas is nearly here and we love celebrating every moment!

What better way to celebrate than having a Christmas box! Now when I first heard of these, they were and are referred to as Christmas Eve boxes and presented on Christmas Eve for the family to enjoy, but then some of the items can only be enjoyed for one to two nights before Christmas is technically over, so I’ve decided to just call it a Christmas box and we can present it a week before Christmas to really enjoy its contents!

SUPPLIES
  • Wood crate
  • White acrylic paint
  • Red acrylic paint
  • Foam paint brushes
  • Painter’s tape
  • Matte varnish
  • Embellishments (optional)
  • Hot glue (optional)
INSTRUCTIONS
  1. Paint every other beam of the crate (outside and inside) with white paint and then allow it to dry.
  2. Repeat step 1 until the desired brightness of the paint is reached.
  3. Once the paint is dry, use painters tape to tape up and protect the edges of the white beams or anywhere else where the red paint may drip or bleed.
  4. Paint the remaining beams and the sides of the crate (outside and inside) with red paint and then allow it to dry.
  5. Repeat step 4 until the desired brightness of the paint is reached.
  6. Carefully peel off the painter’s tape and coat the whole crate with varnish, this may take two coats to reach the desired coverage.
  7. If you have any embellishments like an ornament or two, carefully glue them on with a hot glue gun and allow it to dry.
  8. Fill it up and enjoy!

If you’re looking for ideas to fill your new Christmas box with here are a few to spark your imagination!

  • Candy
  • Cookie mix
  • Festive hat(s)
  • Festive pajamas
  • Festive plushies
  • Festive socks or slippers
  • Gingerbread kit
  • Holiday-themed books
  • Holiday-themed movies
  • Hot Apple Cider mix
  • Hot Cocoa mix
  • Mug(s)
  • Ornament(s)
  • Savory snacks
  • Sweet snacks

DIY Peasant Belle Peg Doll

DIY Peasant Belle Peg Doll DIY Peasant Belle Peg Doll DIY Peasant Belle Peg DollPart of the fun in raising Zoey is making things that delight her; I want to create lasting, meaningful toys for her that are made with love and will be loved! Wooden toys are classic and beautiful, when created and treated right, they can last a lifetime; so let’s make some!

It’s no secret that Cameron and I love Disney. Zoey’s middle name was inspired by one of my favorite Disney princesses, Belle, and that Belle in her name has also led to another Disney nickname, Tinker Bell. I cannot wait to create a whole set of peg dolls for her, but these two characters hold the most significance until she begins watching the classics on her own.

We’ve created a Tinker Bell Peg Doll, check her out!

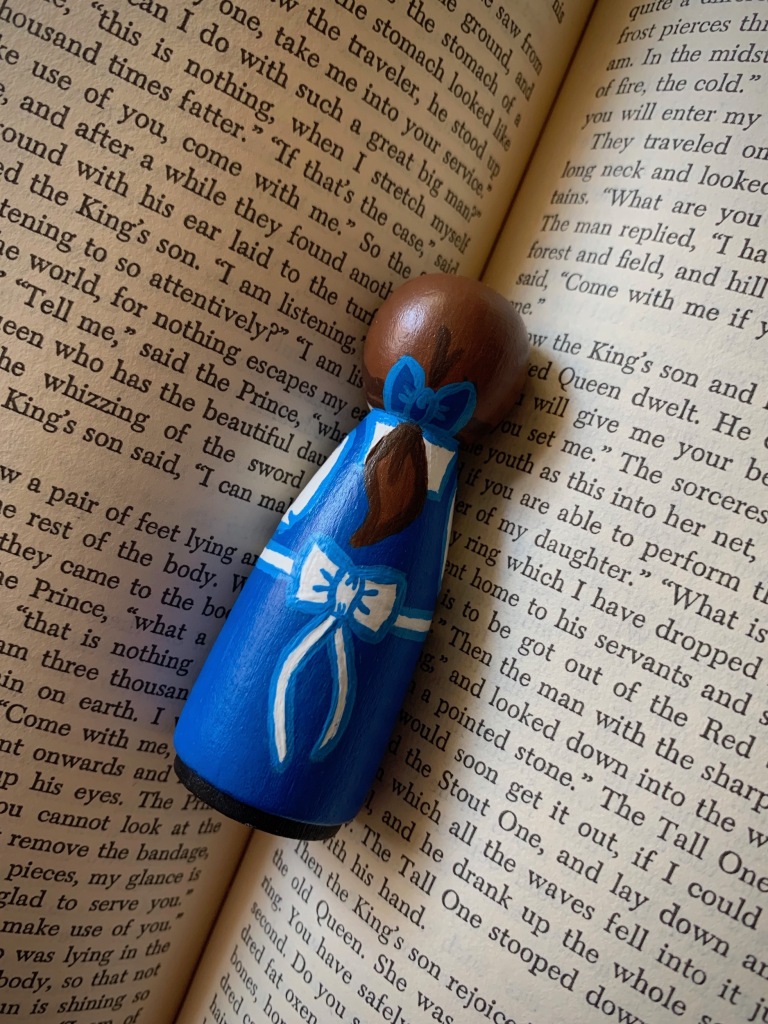
This week I’ll be sharing the steps I took to create a Belle peg doll in her blue peasant dress for Zoey.

DIY Peasant Belle Peg Doll

SUPPLIES
  • Blank peg doll (I used a “small angel” or “girl” shape/size)
  • Small, flat & fine tip paint brushes
  • Paint palette (or a tray for your paint)
  • Blue non-toxic acrylic paint
  • White non-toxic acrylic paint
  • Light blue non-toxic acrylic paint
  • Brown non-toxic acrylic paint
  • Dark brown non-toxic acrylic paint
  • Black non-toxic acrylic paint
  • Non-toxic varnish (I used Duraclear Ultra Matte Varnish)
INSTRUCTIONS

DIY Peasant Belle Peg Doll

DIY Peasant Belle Peg Doll

  1. With a pencil, lightly sketch Belle onto your blank peg doll. Belle wears a dress over a white blouse, I gave her sleeves so more of the blouse can be seen.
  2. Begin painting your peg doll with the base layers first. I started with the blue of her dress and hair bow, the white of her blouse and apron, and the brown of her hair. Allow this paint to dry before moving on to avoid smudging, then apply a few more layers of each until you’re happy with the colors and textures.
  3. Paint the very bottom and edges of the peg doll black to signify her shoes.
  4. After the base layers have dried, paint a border of light blue on the edges of her apron, shirt and hair bow. If you don’t have a lighter shade of blue, you can create some by adding a small amount of white paint to the original blue and blending.
  5. Paint dark brown accents on and around the hair, don’t forget her ponytail in the back!
  6. Taking something small and round (I used the opposite end of one of my smaller paint brushes) dip it in black paint and dot the two eyes. Using the finest tipped paintbrush you can find, give her an eyelash or two on each eye.
  7. Once the eye paint has dried, add a highlight dot to each eye with a fine tipped paintbrush and white paint.
  8. Using the same method as the eyes, dip the opposite end of a slightly larger paintbrush into light pink paint and dot the blush under each eye.
  9. With a little white paint, give her a few sparkles of pixie dust on the hem of her dress or wherever else you feel it will look right!
  10. Allow for all paint to completely dry, then apply a varnish and allow it to dry. You can apply as many coats as you want for the finish you want, just allow them to dry in between applications and before handing her over to your child.
  11. Voilà! Belle is done and ready to be played with! Enjoy!

DIY Peasant Belle Peg Doll DIY Peasant Belle Peg Doll

Father’s Day Inspiration

FathersDay_small

It’s almost that special time of the year when we recognize the fathers in our lives for being there to love and support us through it all. Like our mothers, our fathers would be happy just to know that his child/children love him and grateful for everything he’s done, but whether you want to show your appreciation through action or give him a gift, sometimes its hard to choose.

Now I know you know your dad best, but just in case you’re stumped I’ve made a list of ideas to spark your imagination.

Go for a drive. There’s nothing like hitting the open road with your dad and sibling or siblings if you have them. It doesn’t have to be to somewhere you’ve never been, just a scenic stretch of road and maybe a bite to eat along the way.

Get crafty and make him a masterpiece: Play to your strengths and make him something that you’re good at making. It doesn’t matter what that may be, as long as you have your Dad in mind when you’re creating it.

Give him something he’s interested in. Think of his hobbies and get him something that compliments those hobbies. Get him a tool for that project he’s been really into, buy him that vintage fishing reel to round out his collection; everyone has something they love doing.

Work on a project together. Ask him if he’d like your help with something he’s been working on and pitch in when and where you can, or just keep him company while he works if he doesn’t need the help.

Make him a meal or meals with his favorite foods. Fire up a grill and make some side dishes, or you make the side dishes and let him grill if that’s what he likes. If cooking isn’t your thing you could always buy him a meal or meals instead, no judgement!