Water Table Accessory and Activity Ideas

Water Table Activities

Part of the fun in raising Zoey is making things that delight her; I want to create fun, educational activities for her that are made with love and will be loved!

With how much young ones love water, water tables are perfection during the hot summer months! Set them up in a comfortable location with some shade, and watch them play to their hearts content! They can play with the table as is, or you can add accessories to make the play even more engaging and fun! 

Here to inspire you, I’ve created a list of water table accessory/activity ideas to keep the kiddos entertained for hours!

**If you live in California or any other location where wasting water may be an issue, no worries! Bypass adding any food coloring to the play water and once you’re done, you can use it to water your plants!

Advertisement

DIY Edible “Sand” for Sensory Playtime

DIY Edible Sand for Sensory Play
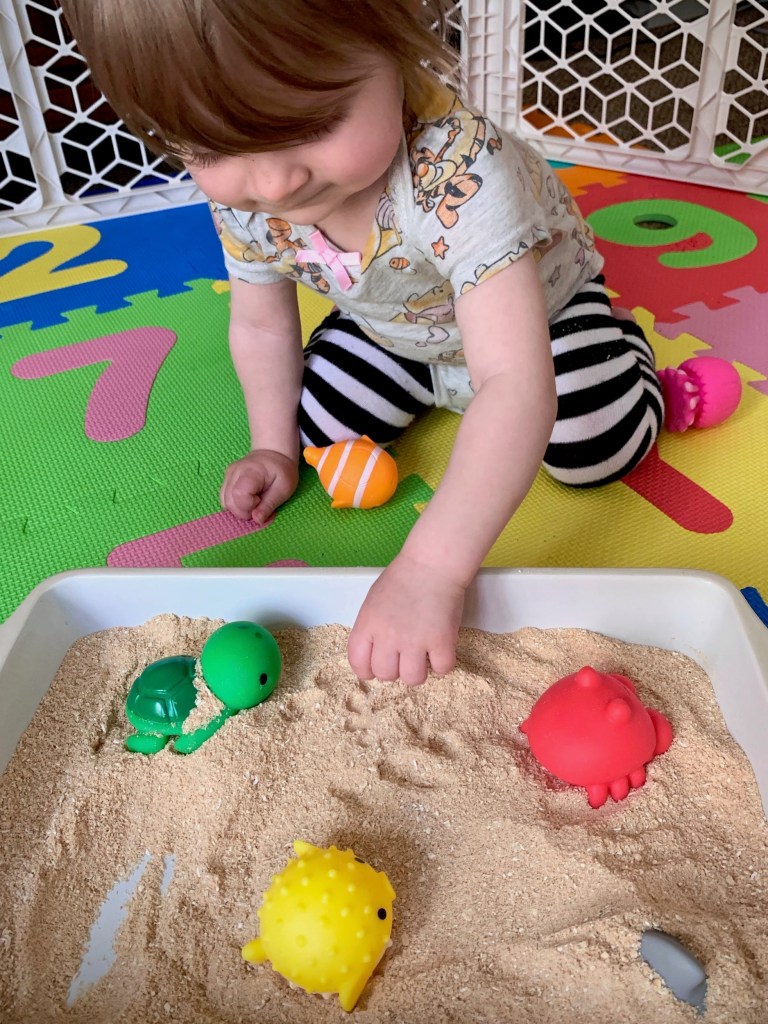
It’s the middle of Summer and I would love to take Zoey to the beach for the first time, but just about everything she picks up is quickly introduced to her mouth! I understand she’s figuring things out (and more power to her), but I’m not super enthusiastic about her ingesting beach sand. So, until she gets a little less eager to put everything in her mouth, why not bring a little beach experience to her?

Part of the fun in raising Zoey is making things that teach and fascinate her. We can make edible “sand” that’s fun to play in and safe to eat out of graham crackers and oatmeal; let’s make it!

Check back next week for the homemade teething cookies I made with the remaining edible “sand”.

DIY Edible Sand for Sensory Play

SUPPLIES
  • 1 box of graham crackers.
  • 2 cups of oatmeal (I used whole grain old-fashioned oats)
  • A food processor
  • A mixing bowl
  • A mixing spoon
  • A container for playing in the “sand” (I used a heavy casserole dish)
  • Beach or ocean themed toys (optional)
INSTRUCTIONS
  1. Open the graham crackers and blend them in the food processor until they are a fine sand-like texture.
  2. Remove the graham crackers from the food processor and pour them into a mixing bowl.
  3. Measure the oatmeal into the food processor and blend it until it is also a fine sand-like texture.
  4. Remove the oatmeal from the food processor and add it to the mixing bowl with the graham crackers.
  5. Using a mixing spoon, stir the graham crackers and oatmeal together until well combined.
  6. Pour the edible “sand” into the container you’ve chosen for your baby to play in. I used a heavy casserole dish since Zoey’s not strong enough to flip it yet. You can always double or triple the graham cracker and oatmeal ratio if you want to fill a larger container.

    DIY Edible Sand for Sensory Play
  7. Arrange beach and/or ocean themed toys in the sand for your little one to play with (optional).

    DIY Edible Sand for Sensory Play
  8. Introduce the edible “sand” to your baby and enjoy!

    DIY Edible Sand for Sensory PlayDIY Edible Sand for Sensory Play DIY Edible Sand for Sensory Play

DIY Frozen Mickey and Minnie Baby Treats using Candy Molds

DIY Frozen Mickey and Minnie Baby Treats using Candy Molds
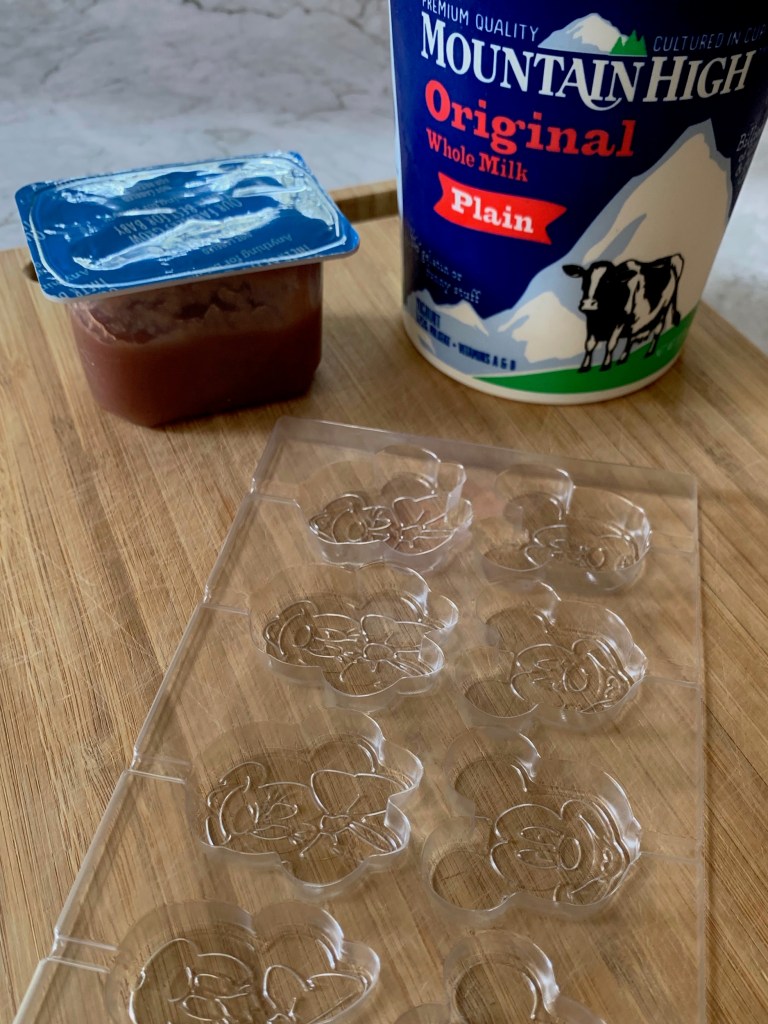
During these Summer months, and even into Fall, we get some pretty warm and sometimes uncomfortably hot days. To cool Zoey off and soothe her teething gums, I thought it would be fun and refreshing to make some frozen treats using the food she already eats and candy molds!

DIY Frozen Mickey and Minnie Baby Treats using Candy Molds

SUPPLIES
  • Candy mold of your choice (I used Mickey and Minnie)
  • Baby food
  • Yogurt (optional)
INSTRUCTIONS
  1. Wash and dry the candy mold.

    DIY Frozen Mickey and Minnie Baby Treats using Candy Molds
  2. Choose the flavor of baby food and/or yogurt you would like to freeze and spoon it into the candy molds until it’s even with the top of the mold. I wiped the top of my mold down to make it look better, but you do not need to do this.

    DIY Frozen Mickey and Minnie Baby Treats using Candy MoldsDIY Frozen Mickey and Minnie Baby Treats using Candy Molds
  3. Place the mold in the freezer for an hour or more until the contents are frozen.

    DIY Frozen Mickey and Minnie Baby Treats using Candy Molds
  4. Remove the mold from the freezer and pop out one or two frozen treats at a time for baby to enjoy!

    DIY Frozen Mickey and Minnie Baby Treats using Candy MoldsDIY Frozen Mickey and Minnie Baby Treats using Candy Molds

Nick and Fennec’s Pawpsicle Recipe (Zootopia)

Nick and Fennec's Pawpsicle (Popsicle) Recipe from Disney's Zootopia.INTRODUCTION

Welcome back friends! This week we’ll be creating the pawpsicles (popsicles) the enterprising Nick Wilde and Fennec create and sell to the lemmings in Disney’s Zootopia.

Nick and Fennec's Pawpsicle (Popsicle) Recipe from Disney's Zootopia.Pawpsicles are featured after Nick and Fennec hustle a jumbo-pop from Judy and Jumbeaux Cafe’s owner, then turn it into their own smaller pawpsicles to sell for a profit. 

Nick and Fennec's Pawpsicle (Popsicle) Recipe from Disney's Zootopia. Nick and Fennec's Pawpsicle (Popsicle) Recipe from Disney's Zootopia.
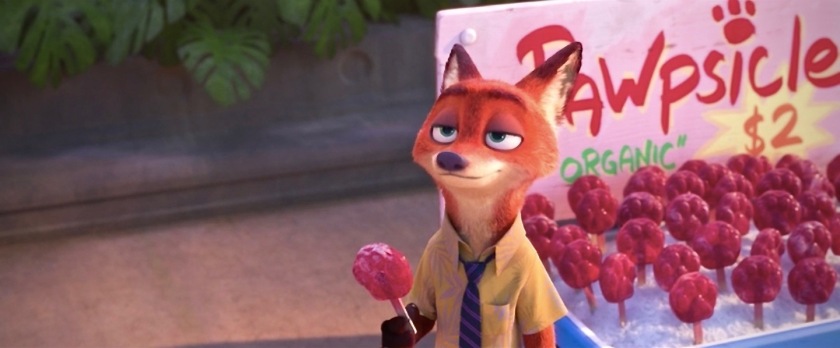
These are sweet, juicy and delicious, although they start to melt quickly so eat quickly! I wanted to use real fruit to make these with only minimal sugar added. Quite honestly, these probably would have been just as delicious without adding any sugar. I think I want to try that too!

Nick and Fennec's Pawpsicle (Popsicle) Recipe from Disney's Zootopia.PAWPSICLES
  • 1 cup of raspberries
  • 1 cup of strawberries, chopped
  • 1/2 cup of sugar, divided
  • 1 tablespoon of vanilla
  • 2 cups of cherry juice
  • Silicone paw print molds
  • Popsicle sticks
INSTRUCTIONS (PAWPSICLES)
  1. Preheat the oven to 350F and prepare a parchment lined sheet pan.
  2. Combine the raspberries, strawberries, vanilla and 1/4 cup of the sugar in a large bowl and stir to combine.
  3. Place the combined ingredients onto the parchment-lined sheet pan and place it in the oven. Roast for 20 minutes.
  4. In a saucepan, heat the cherry juice and 1/4 cup of sugar for about five minutes or until the sugar dissolves, then pour it into a bowl to cool.
  5. Once the fruit in the oven has roasted, add it into the bowl with the cherry juice, then place the bowl in the refrigerator to cool.
  6. Once cool, puree and pour the juice into the paw print molds and place in freezer for 5 or more hours.
  7. Serve and enjoy!