Fun and Easy Non-alcoholic Butterbeer Recipe

Welcome back friends! With the release of Hogwarts Legacy, I am in a Harry Potter kind of mood, and craving some Harry Potter food!

Wowee, Butterbeer is sweet! It best enjoyed with something salty to counteract just how sweet it is! Another way to counteract the sweetness is to leave the whipped cream plain, no added sugar or sweetener, just the whipped cream. If you mix the whipped cream and the butterbeer it creates a perfectly balanced bite! Not too sweet!

Let’s make some!

INGREDIENTS
  • 1⁄2 cup of butterscotch syrup
  • 1⁄2 tablespoon of butter, melted
  • 1 cup of cream soda
  • Heavy whipping cream
INSTRUCTIONS
  1. Measure and pour the butterscotch syrup into a bowl.
  2. Add the melted butter to the butterscotch syrup and whisk gently until combined.
  3. Measure and pour the cream soda into the butter, butterscotch mixture and whisk gently again until combined, then set aside.
  4. In a separate mixing bowl, whip the heavy cream until it forms stiff peaks. 
  5. Pour the butterbeer into mugs of your choosing, leaving room for the whipped cream topping.
  6. Top the butterbeer with a few dollops of whipped cream and enjoy! 
Advertisement

DIY Knit Loom Hat for Beginners

Welcome back friends! Do you have or have you heard of knit looms? They are fantastic! Whether you’re a beginner or not, it is cozy and comforting, sitting and creating items for yourself and/or loved ones!

I have a set of knit looms with four different sizes. I’ve recently been experimenting with different hat knits and patterns! Let’s create one of my favorites!

This pattern is pretty straight forward and easy to handle for any beginner! If you have any questions, please let me know!

SUPPLIES

  • Extra Large Knit loom XL gauge (41 pegs)
  • Bulky yarn (weight #5)
  • Loom hook
  • Scissors
  • Yarn needle

INSTRUCTIONS

  1. Create a slip-knot and cast it over the first vertical peg to the left of the horizontal anchor peg, with the tail of yarn draped within the loom.
  2. Working counter-clockwise, wrap the next peg twice, then use the loom hook to pull the bottom loop over the top loop and off the peg. Do this for each peg until you’ve completed the “cast-on” round.
  3. Now we’ll work on the brim! Continuing to work counter-clockwise, e-wrap each peg once and pull the bottom loops from the previous row over the new top loops and off the pegs. Repeat this step for at least 18 rounds.
  4. Once you’ve completed 18 rounds, find your original slip-knot and place its loop back on the first peg. Continue replacing the loops of the “cast-on” round back on to the loom, then tuck the tail of yarn from the knot into the folded brim.
  5. To anchor the brim, pull the loops from the previous round over the top “cast-on” round loops and off the pegs.
  6. Now we will work on the main part of the hat! Begin with a round of e-wrapping each peg once and pulling the bottom loops from the previous round over the new top loops and off the pegs.
  7. The next round will consist of alternating e-wrap pegs and purl pegs all the way around. To purl, stick your pick underneath the center of yarn on a peg, use it to grab ahold of the new yarn and pull it up under the existing yarn to make a loop. Carefully take the whole stitch off of the peg and loop this new loop of yarn on to the peg and pull it tight.
  8. Repeat steps 6 and 7 for as many times as you’d like the hat to be long. I did 14 e-wrap rounds and 14 e-wrap and purl rounds for a total of 28.
  9. When finished, take your yarn and wrap it around the outside edge of the loom until it touches back on itself and cut it here for extra yarn.
  10. Thread the extra yarn on to the yarn needle and stitch it upward through each loop, then you can remove that loop off of its peg. Once all of the loops have been stitched through with the needle, you can pull the string to begin forming the top of the hat.
  11. Turn the hat inside out and pull the needle and extra yarn through the still existing hole at the top of the hat, then pull the drawstring as tight as possible to close the hole completely.
  12. Stitch around the edges of where the hole was and tie it in knots to secure it. Then stitch the rest of the end into the inner stitches of the hat to hide it.
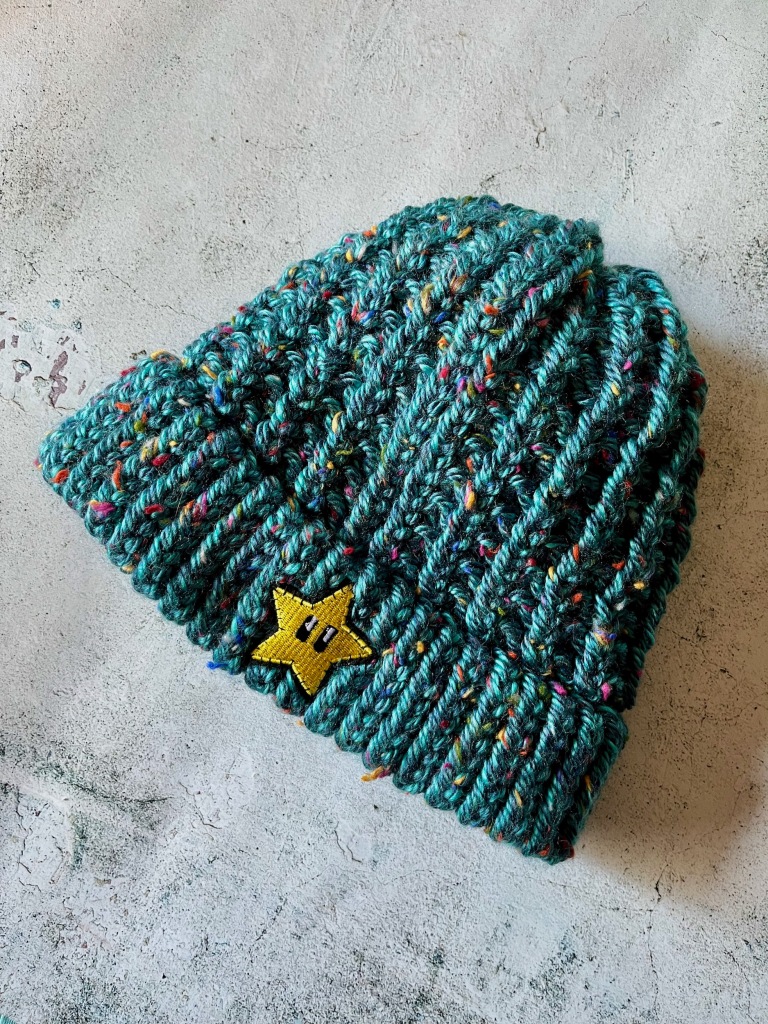
  13. Turn the hat right side out and if you have a patch (like my nifty Super Mario star) stitch that patch onto the brim.
  14. Enjoy!

30 Day Arm Challenge for Beginners

I don’t know about you, but I would like to feel better inside and out. I have been far too inactive for far too long, and it’s time to take my life back! 

Now I know (because I’m feeling it) that this can be intimidating for several reasons, but what if we just started small? What if we created a step-by-step stairway, instead of running into a wall and trying to scale it with zero momentum?

We began with a 30 day walking challenge to get our legs moving and to open up our heart and lungs! We followed that with a 30 day squat challenge and a 30 day plank challenge to strengthen our muscles! Now let’s continue strengthening our muscles by starting a 30 day arm challenge that begins with 4 each of the three exercises on the first day, and by end of the 30 days we will able to perform 40 of each exercise!

I recommend breaking the exercises up into sets as the numbers climb higher, please do not try to do them all at once!

Here we go!

30 Day Plank Challenge for Beginners

I don’t know about you, but I would like to feel better inside and out. I have been far too inactive for far too long, and it’s time to take my life back! 

Now I know (because I’m feeling it) that this can be intimidating for several reasons, but what if we just started small? What if we created a step-by-step stairway, instead of running into a wall and trying to scale it with zero momentum?

We began with a 30 day walking challenge to get our legs moving and to open up our heart and lungs! We followed that with a 30 day squat challenge to strengthen our muscles! Now let’s continue strengthening our muscles by starting a 30 day plank challenge that begins with holding the plank position for just 10 seconds on the first day, and by end of the 30 days we will able to hold it for 2 minutes!

Here we go!

30 Day Squat Challenge for Beginners

I don’t know about you, but I would like to feel better inside and out. I have been far too inactive for far too long, and it’s time to take my life back! 

Now I know (because I’m feeling it) that this can be intimidating for several reasons, but what if we just started small? What if we created a step-by-step stairway, instead of running into a wall and trying to scale it with zero momentum?

We began with a 30 day walking challenge to get our legs moving and to open up our heart and lungs! Now let’s take the next step and strengthen our muscles! Let’s start a 30 day squat challenge that begins with just 5 squats on the first day, but by the end of the 30 days we will able to do 100 squats in a day!

I recommend breaking the squats up into sets as the numbers climb higher, please do not try to do them all at once!

Here we go!

30 Day Walking Challenge for Beginners

I don’t know about you, but I would like to feel better inside and out. I have been far too inactive for far too long, and it’s time to take my life back! 

Now I know (because I’m feeling it) that this can be intimidating for several reasons, but what if we just started small? What if we created a step-by-step stairway, instead of running into a wall and trying to scale it with zero momentum?

So first step, let’s get our legs moving and open up our heart and lungs! Let’s start a 30 day walking challenge that begins with 15 minute sessions and by the end of the 30 days we will be walking for 60 minutes without stopping!

Here we go!

Let’s try Oak – Meditation and Breathing Application

Let's Try Meditation with The Free Oak - Meditation and Breathing ApplicationLet’s be real, this year has been rough; we’re all just trying to adjust and survive the best we can. Current events have really revealed that there are some pretty rude, self-entitled people out there and I for one am way too sensitive to people’s actions and emotions. I’ve found myself absorbing and/or responding to their vibes, which results in living day to day with too many negative thoughts and feelings.

In an effort to bring the tranquility and positivity back to my life, I have begun meditating and it feels good! If you’re feeling anything but tranquil, I highly recommend taking some time to meditate each day or, if every day isn’t for you, less frequently yet consistently; you will feel better!

Interested, but not sure where to start?

I am using the Oak – Meditation and Breathing application. It is simple and straightforward, with enough content to get you started without becoming overwhelming.  It is also the only meditation app. I’ve found that is truly free. Other applications, like Calm and Headspace (both fantastic), are free to download and offer some free content and/or free trials, but if you want more you’ll have to pay for a monthly or yearly premium membership. After Oak, Insight Timer is probably the next application that has the most free classes, but does have a premium membership if you want to access certain practices. We’ll focus on Insight Timer at a later date.

So let’s take a look at Oak!

When opening the app., you are presented with three categories: Meditation, Breathing and Sleeping. Each category has two or three practice options.

Let's Try Meditation with The Free Oak - Meditation and Breathing Application

Once you’ve selected a category and practice, you can customize a few more details depending on the practice. For example, if you want to practice Mindful Meditation, you can select the duration, instructor’s voice, background noise and a warmup duration.

Let's Try Meditation with The Free Oak - Meditation and Breathing Application Let's Try Meditation with The Free Oak - Meditation and Breathing Application

The breathing practices do not give you customization options, but they will give you details about how long you will be inhaling, holding and exhaling.

Let's Try Meditation with The Free Oak - Meditation and Breathing Application

If you’re looking for something deeper, there is a Courses tab which (so far) offers one course on Mantra Meditation. You will be prompted to “Buy” the course for $0.00. I’ve “purchased” it (yes it is free) and I am very pleased with the quality and length. I hope there will be more free courses in the future.

Let's Try Meditation with The Free Oak - Meditation and Breathing Application Let's Try Meditation with The Free Oak - Meditation and Breathing Application

I will be testing out other options for meditation and let you know what I discover!

How do you meditate? Do you use an application, or something else? If you do use an application, what is your favorite and why? I’d love to know!