DIY – Double Crochet Dish Cloth

Welcome back friends! Do you crochet? I do! I feel calm and cozy when I’m crocheting, and fiercely proud whenever I complete a project.

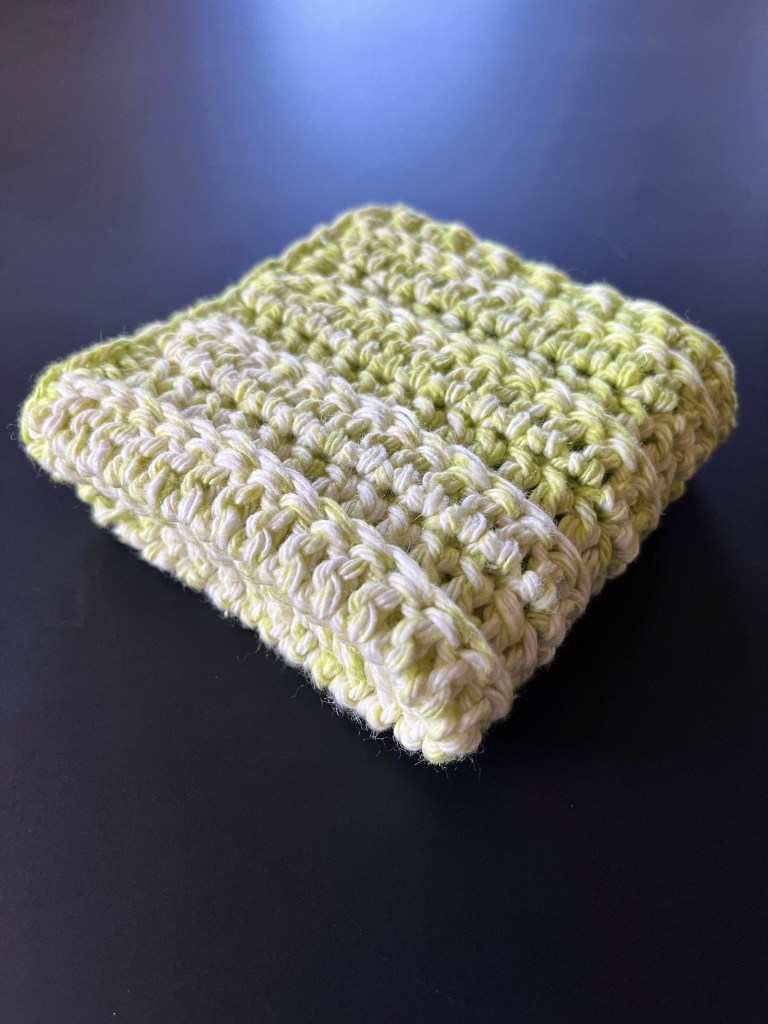
I’ve always wanted to crochet some of my own dish cloths and now is the perfect time! This pattern is simple, textured and ideal for any level of crocheter (beginners included)! Any cotton yarn can be used for this dish cloth.

Let’s get started!

SUPPLIES
  • Crochet hook (size 5 mm)
  • Cotton yarn
  • Scissors
  • Yarn needle or small crochet hook
INSTRUCTIONS
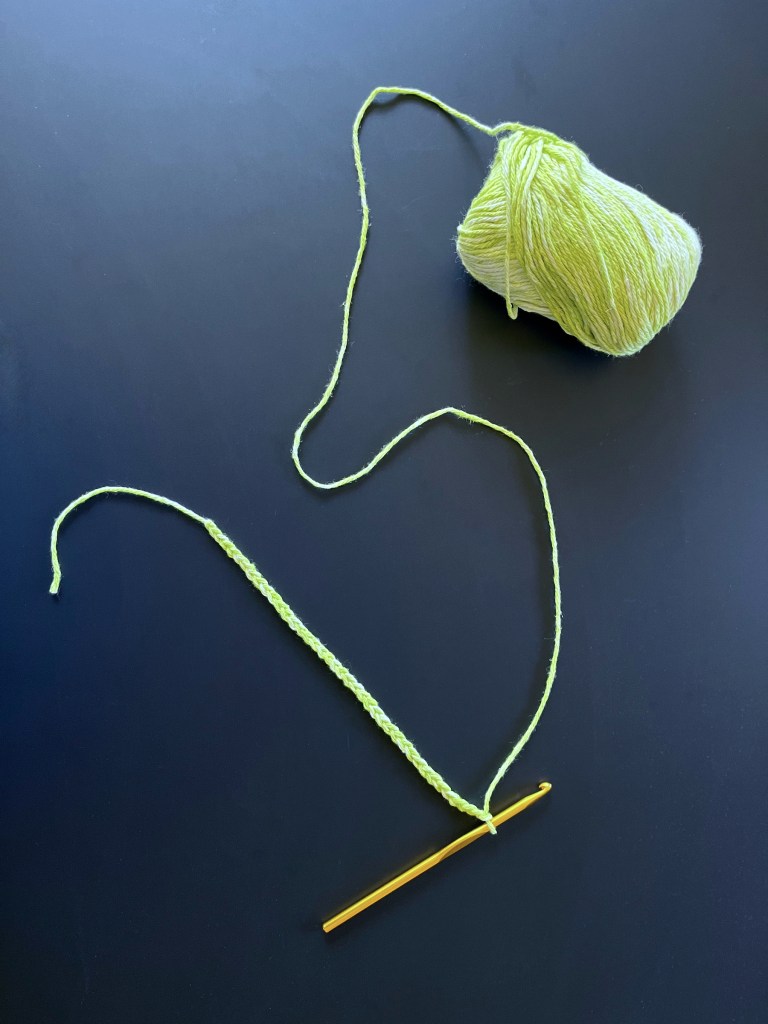
  1. Create a slip knot and then 30 chain stitches.
  2. Turn your chain around and double crochet (dc) into the third stitch from the hook, then continue to dc all the way across your chain.
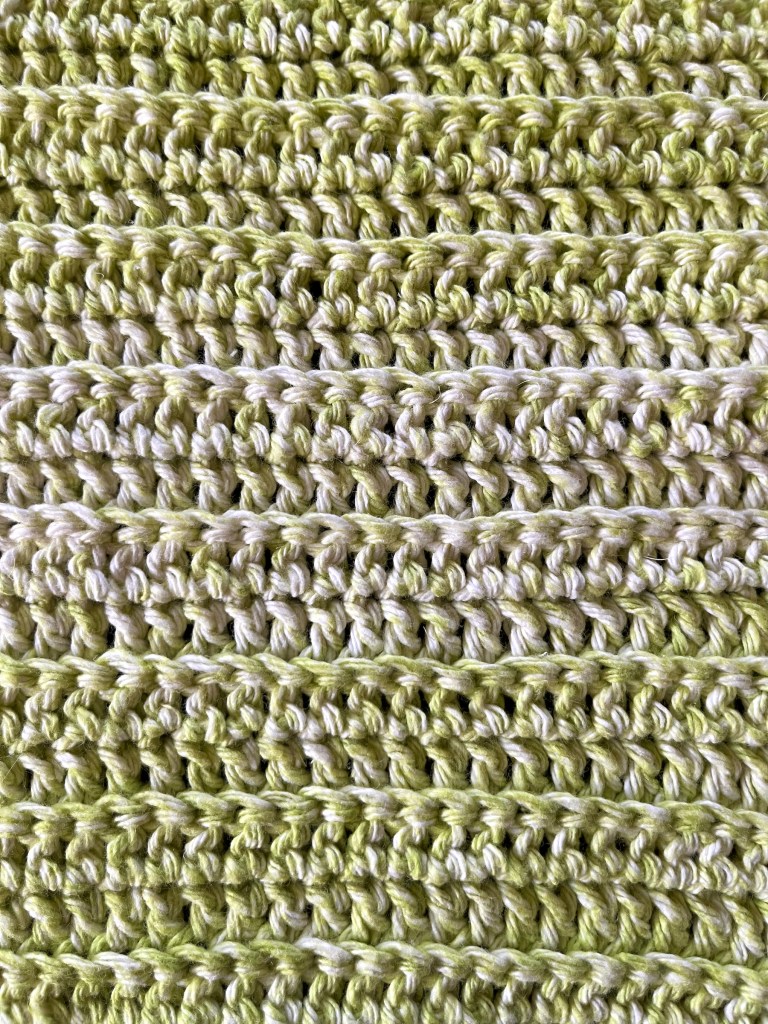
  3. Chain 2 and turn your work. Dc into the back loop of the third stitch from the hook, then continue to dc in the back loops of each stitch all the way across your project.
  4. Repeat step 3 for the next fourteen rows for a total of 16 dc rows.
  5. After the last dc of your last row, chain 1 and rotate the dish cloth 90 degrees to the right.
  6. Single crochet across this side of the dish cloth to give it a more finished look. There will be no distinct loops to follow, but try to stitch in regular intervals, your hook will know where to go!
  7. Chain 1 and rotate the dish cloth 90 degrees to the right again, lay the original tail along the original chain, then single crochet around it (to weave it in) as we single crochet all the way down the original chain.
  8. Chain 1 and rotate the dish cloth 90 degrees to the right again, then single crochet across this side of the dish cloth to give it a more finished look. There will be no distinct loops to follow, but try to stitch in regular intervals, your hook will know where to go!
  9. After the last single crochet, use the scissors to disconnect the yarn from the skein and pull the loose end in through your crochet loop.
  10. Using the yarn needle, weave the loose end into the dish cloth and cut off any extra.
  11. Enjoy!

The First 30 Minutes of Adventure Time Pirates of Enchiridion

Have you ever been undecided on what to play next? 

Should you buy that game? Should you install that game?

I’ve been there, and sometimes you just need to take a look at the graphics, hear the music, and learn a little about the plot to see if it resonates with you before taking the next step. I’m here to help! I am creating the first 30 to the first 60 minute videos of games; indie and mainstream, new and old!

This week let’s take a look at the first 30 minutes of Adventure Time: Pirates of Enchiridion…

Do you want to play the rest? 

How to Play – Mancala

Part of the fun in raising Zoey is finding things that delight and educate her; I want to find fun, creative board games to play with her during our family game nights! This week we played one of my all-time favorites, Mancala!

Zoey needed a little guidance, but she was able to grasp this game even though she’s under the age recommendation of 6 and up! And she won! Go Zoey!

When I’m researching the rules for these games I’ve played since childhood, I am discovering that I’ve been playing them differently for years! For example, I had not put the “captured” stones in our stores, just continued playing with them! Either way is still fun though!

So let’s play!

IN THE BOX
  • 48 stones
  • A game board
INSTRUCTIONS
  1. Place four stones in each of the 12 pockets on the game board.
  2. Each player has a store (or Mancala) to the right, on their side of the Mancala board.
  3. The game begins with one player picking up all of the stones in any one of the pockets on their side.
  4. Moving counter-clockwise, the player deposits one of the stones in each pocket until the stones run out.
  5. f you run into your own Mancala (store), deposit one stone in it. If you run into your opponent’s Mancala, skip it and continue moving to the next pocket.
  6. If the last stone you drop is into your own Mancala, you take another turn.
  7. If the last stone you drop is in an empty pocket on your side, you “capture” any stones in the pocket directly opposite. Place these captured stones into your Mancala.
  8. The game ends when all six pockets on one side of the Mancala board are empty.
  9. The player who still has stones on his/her side of the board when the game ends captures all of those stones into their Mancala.
  10. Count all the stones in each Mancala, the player with the most stones wins!

ENJOY!

The First 30 Minutes of SpongeBob SquarePants: Battle for Bikini Bottom – Rehydrated

Have you ever been undecided on what to play next? 

Should you buy that game? Should you install that game?

I’ve been there, and sometimes you just need to take a look at the graphics, hear the music, and learn a little about the plot to see if it resonates with you before taking the next step. I’m here to help! I am creating the first 30 to the first 60 minute videos of games; indie and mainstream, new and old!

This week let’s take a look at the first 30 minutes of SpongeBob Squarepants: Battle for Bikini Bottom – Rehydrated…

Do you want to play the rest? 

Coral Island – Food Recipe Guides

If there’s one thing I do when I play a game (besides trying to relax and enjoy myself), it’s look up information. I get curious or stuck, and I find myself turning to the internet for answers. There are a lot of good guides out there that are super helpful, but what I don’t see are an abundance of simple and clean visual guides that lay out all the information in one place.

I recently posted the first 60 minutes of Coral Island and in conjunction with that I wanted to create a cooking guide for all the food you can create in the game!

These visuals (or infographic guides) are categorized by the size of the meal created, and then organized alphabetically into helpful sections, and downloadable so you don’t need to keep hopping back online to check on the information.

Please let me know if you would like me to work on a guides for anything else within Coral Island or if there are any games you would like to see visual information or guides for in the future! I love helping people, discussing games and organizing information!

The First 60 Minutes of Coral Island

Have you ever been undecided on what to play next? 

Should you buy that game? Should you install that game?

I’ve been there, and sometimes you just need to take a look at the graphics, hear the music, and learn a little about the plot to see if it resonates with you before taking the next step. I’m here to help! I am creating the first 30 to the first 60 minute videos of games; indie and mainstream, new and old!

This week let’s take a look at the first 60 minutes of Coral Island…

Do you want to play the rest? 

The First 60 Minutes of Paper Mario: The Thousand-Year Door

Have you ever been undecided on what to play next? 

Should you buy that game? Should you install that game?

I’ve been there, and sometimes you just need to take a look at the graphics, hear the music, and learn a little about the plot to see if it resonates with you before taking the next step. I’m here to help! I am creating the first 30 to the first 60 minute videos of games; indie and mainstream, new and old!

This week let’s take a look at the first 60 minutes of Paper Mario: The Thousand-Year Door…

Do you want to play the rest? 

The First 30 Minutes of Princess Peach: Showtime!

Have you ever been undecided on what to play next? 

Should you buy that game? Should you install that game?

I’ve been there, and sometimes you just need to take a look at the graphics, hear the music, and learn a little about the plot to see if it resonates with you before taking the next step. I’m here to help! I am creating the first 30 to the first 60 minute videos of games; indie and mainstream, new and old!

This week let’s take a look at the first 30 minutes of Princess Peach: Showtime!…

Do you want to play the rest? 

DIY – Disney VHS Bookmark

Welcome back friends! Do you still have a VCR? Not many people have VCRs anymore. We do, although we don’t really use it anymore.

If you don’t have a VCR anymore, what should you do with all your old VHS, including all those Disney films you grew up with? You could collect them, donate them, or recycle them. But wait! If you decide to recycle them, let’s remove the spines and use them to create bookmarks! 

I’ve also used the beautiful Disney cover art to make drink coasters you can find here!

Let’s get started!

SUPPLIES
  • Disney VHS cover art
  • Guillotine paper trimmer
  • Plastic ruler
  • Self adhesive clear laminating sheets
INSTRUCTIONS
  1. Remove the cover art from the VHS cases.
  2. Use a guillotine paper trimmer to cut the spine from the cover art in straight, smooth edges
  3. Make sure the spines and surface you’ll be working on are clean and free of lint, then place a laminate page on your working surface with the adhesive side face-up.
  4. Peel back about an inch and a half of the release liner and place the spines (artwork side down) on the adhesive, leaving about a half inch above the spine for sealing and trimming.
  5. Turn the laminate page over and use a plastic ruler to smooth the laminate onto the artwork, removing any air bubbles. 
  6. Gently peel back the release liner about an inch at a time, using the ruler to smooth the laminate all the way down until the artwork is completely adhered. Leave the release paper attached at the bottom for now and flip the page back over (the artwork facing down again).
  7. Take another laminate page and peel back about an inch and half worth of the release liner, then align the top of this page (adhesive side down) with the top of the first page (adhesive side up).
    • Pull the release liner from the first page up to meet the new release liner between the two laminate pages, this will keep the pages from sticking to to the wrong places while you work.
  8. Using the plastic ruler, smooth the laminate all the way down (peeling both release liners back together a little at a time) until the bookmarks are completely laminated between the two pages.
  9. Allow for a little space so the laminate remains sealed (but less conspicuous), use the guillotine trimmer to trim down the bookmark edges.
  10. Place in the books you’re reading, and enjoy!

The First 60 Minutes of Disney’s Illusion Island

Have you ever been undecided on what to play next? 

Should you buy that game? Should you install that game?

I’ve been there, and sometimes you just need to take a look at the graphics, hear the music, and learn a little about the plot to see if it resonates with you before taking the next step. I’m here to help! I am creating the first 30 to the first 60 minute videos of games; indie and mainstream, new and old!

This week let’s take a look at the first 60 minutes of Disney’s Illusion Island…

Do you want to play the rest?