Have you ever been undecided on what to play next?
Should you buy that game? Should you install that game?
I’ve been there, and sometimes you just need to take a look at the graphics, hear the music, and learn a little about the plot to see if it resonates with you before taking the next step. I’m here to help! I am creating the first 30 to the first 60 minute videos of games; indie and mainstream, new and old!
This week let’s take a look at the first 60 minutes of Epic Mickey: Rebrushed…
Have you ever been undecided on what to play next?
Should you buy that game? Should you install that game?
I’ve been there, and sometimes you just need to take a look at the graphics, hear the music, and learn a little about the plot to see if it resonates with you before taking the next step. I’m here to help! I am creating the first 30 to the first 60 minute videos of games; indie and mainstream, new and old!
This week let’s take a look at the first 60 minutes of Child of Light…
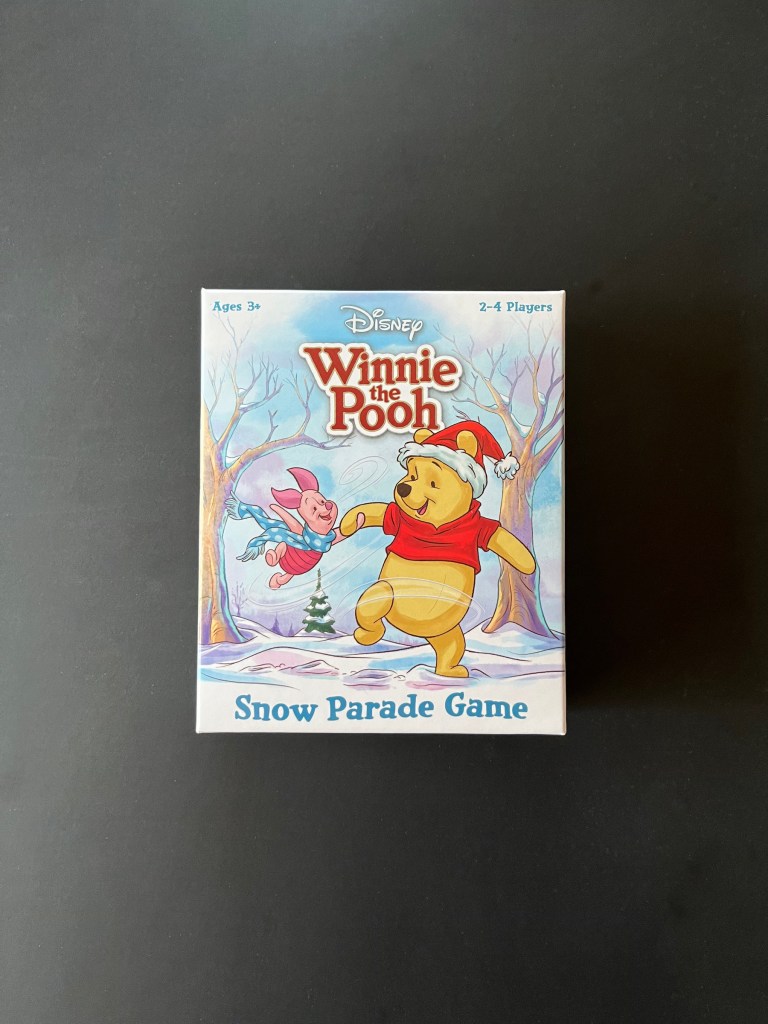
Part of the fun in raising Zoey is finding things that delight and educate her; I want to find fun, creative board games to play with her during our family game nights! This week we played Winnie the Pooh – Snow Parade Game for 2 to 4 players!
I purchased this game on a whim! I saw Winnie the Pooh and I saw the Christmas/Winter theme, and it piqued my curiosity! It was worth it! We enjoy that this game is cooperative, which is a nice departure from the competitive games we’ve been playing!
So let’s play!
IN THE BOX
Home tile
6 character tiles
6 parade tiles
40 cards
INSTRUCTIONS
This is a cooperative game, you will all win or lose together! Play cards to move or swap the order of the character tiles in the parade. If you can complete the goal number of parade tiles without running out of cards, you all win the game!
Easy – Complete 3 parade tiles
Medium – Complete 4 parade tiles.
Hard – Complete 5 parade tiles.
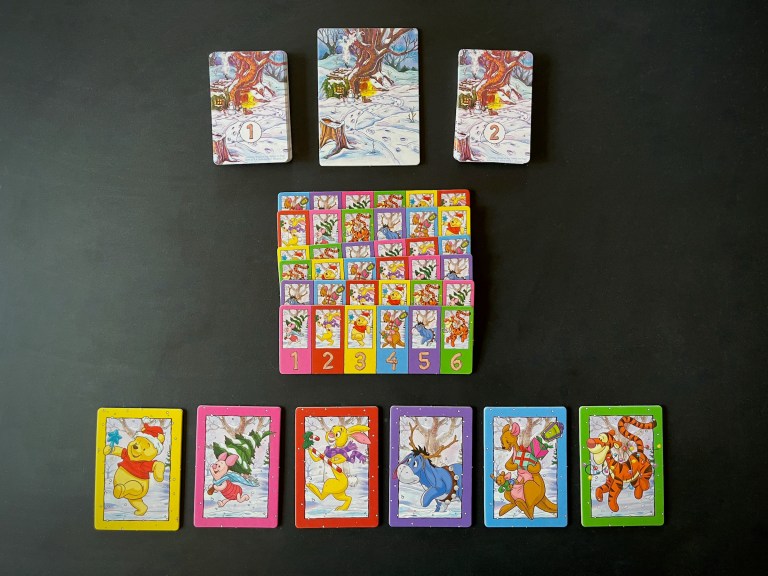
Place all the tiles in the middle, where everyone can reach them.
Place the six character tiles face up in a line to the right of the home tile in order from 1 to 6 (the numbers are on the backs). This is the parade!
Separate the cards into two piles by the numbers on the backs (1 or 2). Shuffle each pile.
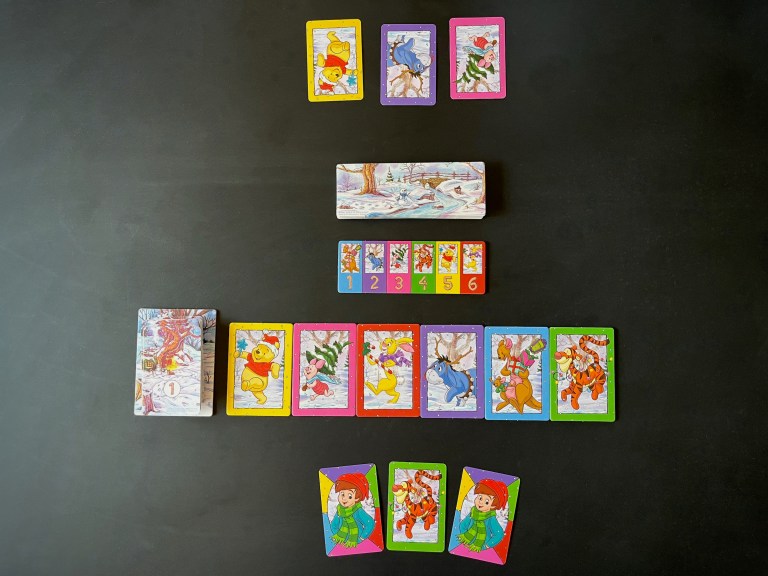
Place the number 1 pile of cards on top of the number 2 pile, then place this single deck on top of the home tile.
Each player draws a number of cards based on the number of players. Place your cards face up so all the players can see them.
2 players: 3 cards each
3 to 4 players: 2 cards each.
Mix the parade tiles and place them in a pile above the character tiles, face-down. Flip one tile face-up.
Starting with the youngest player and moving clockwise, you can do one of these 3 actions on your turn:
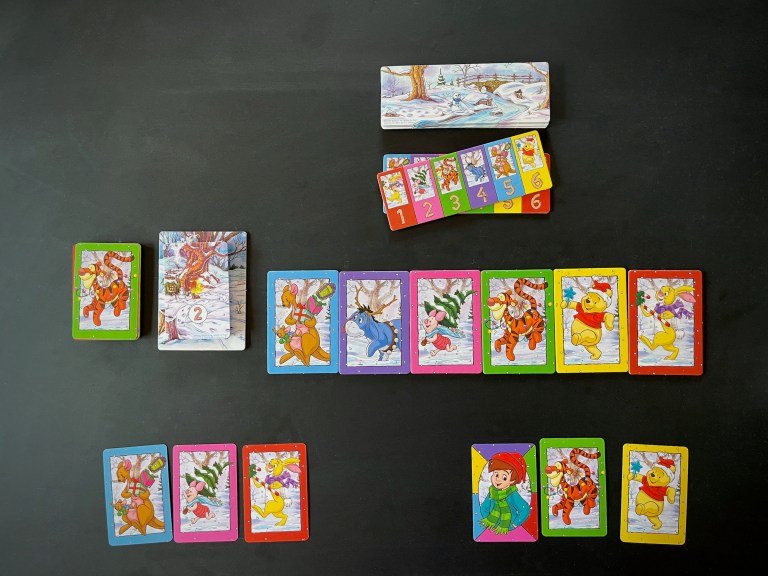
Move a character: Play a card to move the matching character tile forward or backward one spot in the parade. Character tiles at the front of the parade can only be moved backward and character tiles at the back of the parade can only be moved forward.
Swap: Play a card and choose another player to also play a card. Swap the spots of those two matching character tiles in the parade.
Discard: Discard your cards and draw all new cards from the deck.
Christopher Robin: The Christopher Robin card is wild and can be played as any character.
If all character tiles in the parade match the order on the current parade tile, you’ve completed it! Set it aside and flip the next parade tile over!
At the end of your turn, if you played a card, draw a new one from he deck. If another player helped you swap, you each draw a card.
If the deck runs out, keep taking turns until players have no cards left to play.
If you complete the goal number of parade tiles before you run out of cards to play, all the players win!
Have you ever been undecided on what to play next?
Should you buy that game? Should you install that game?
I’ve been there, and sometimes you just need to take a look at the graphics, hear the music, and learn a little about the plot to see if it resonates with you before taking the next step. I’m here to help! I am creating the first 30 to the first 60 minute videos of games; indie and mainstream, new and old!
This week let’s take a look at the first 60 minutes of Sea of Stars…
Have you ever been undecided on what to play next?
Should you buy that game? Should you install that game?
I’ve been there, and sometimes you just need to take a look at the graphics, hear the music, and learn a little about the plot to see if it resonates with you before taking the next step. I’m here to help! I am creating the first 30 to the first 60 minute videos of games; indie and mainstream, new and old!
This week let’s take a look at the first 30 minutes of Littlewood…
Welcome back friends! Do you crochet? I do! I feel calm and cozy when I’m crocheting, and fiercely proud whenever I complete a project.
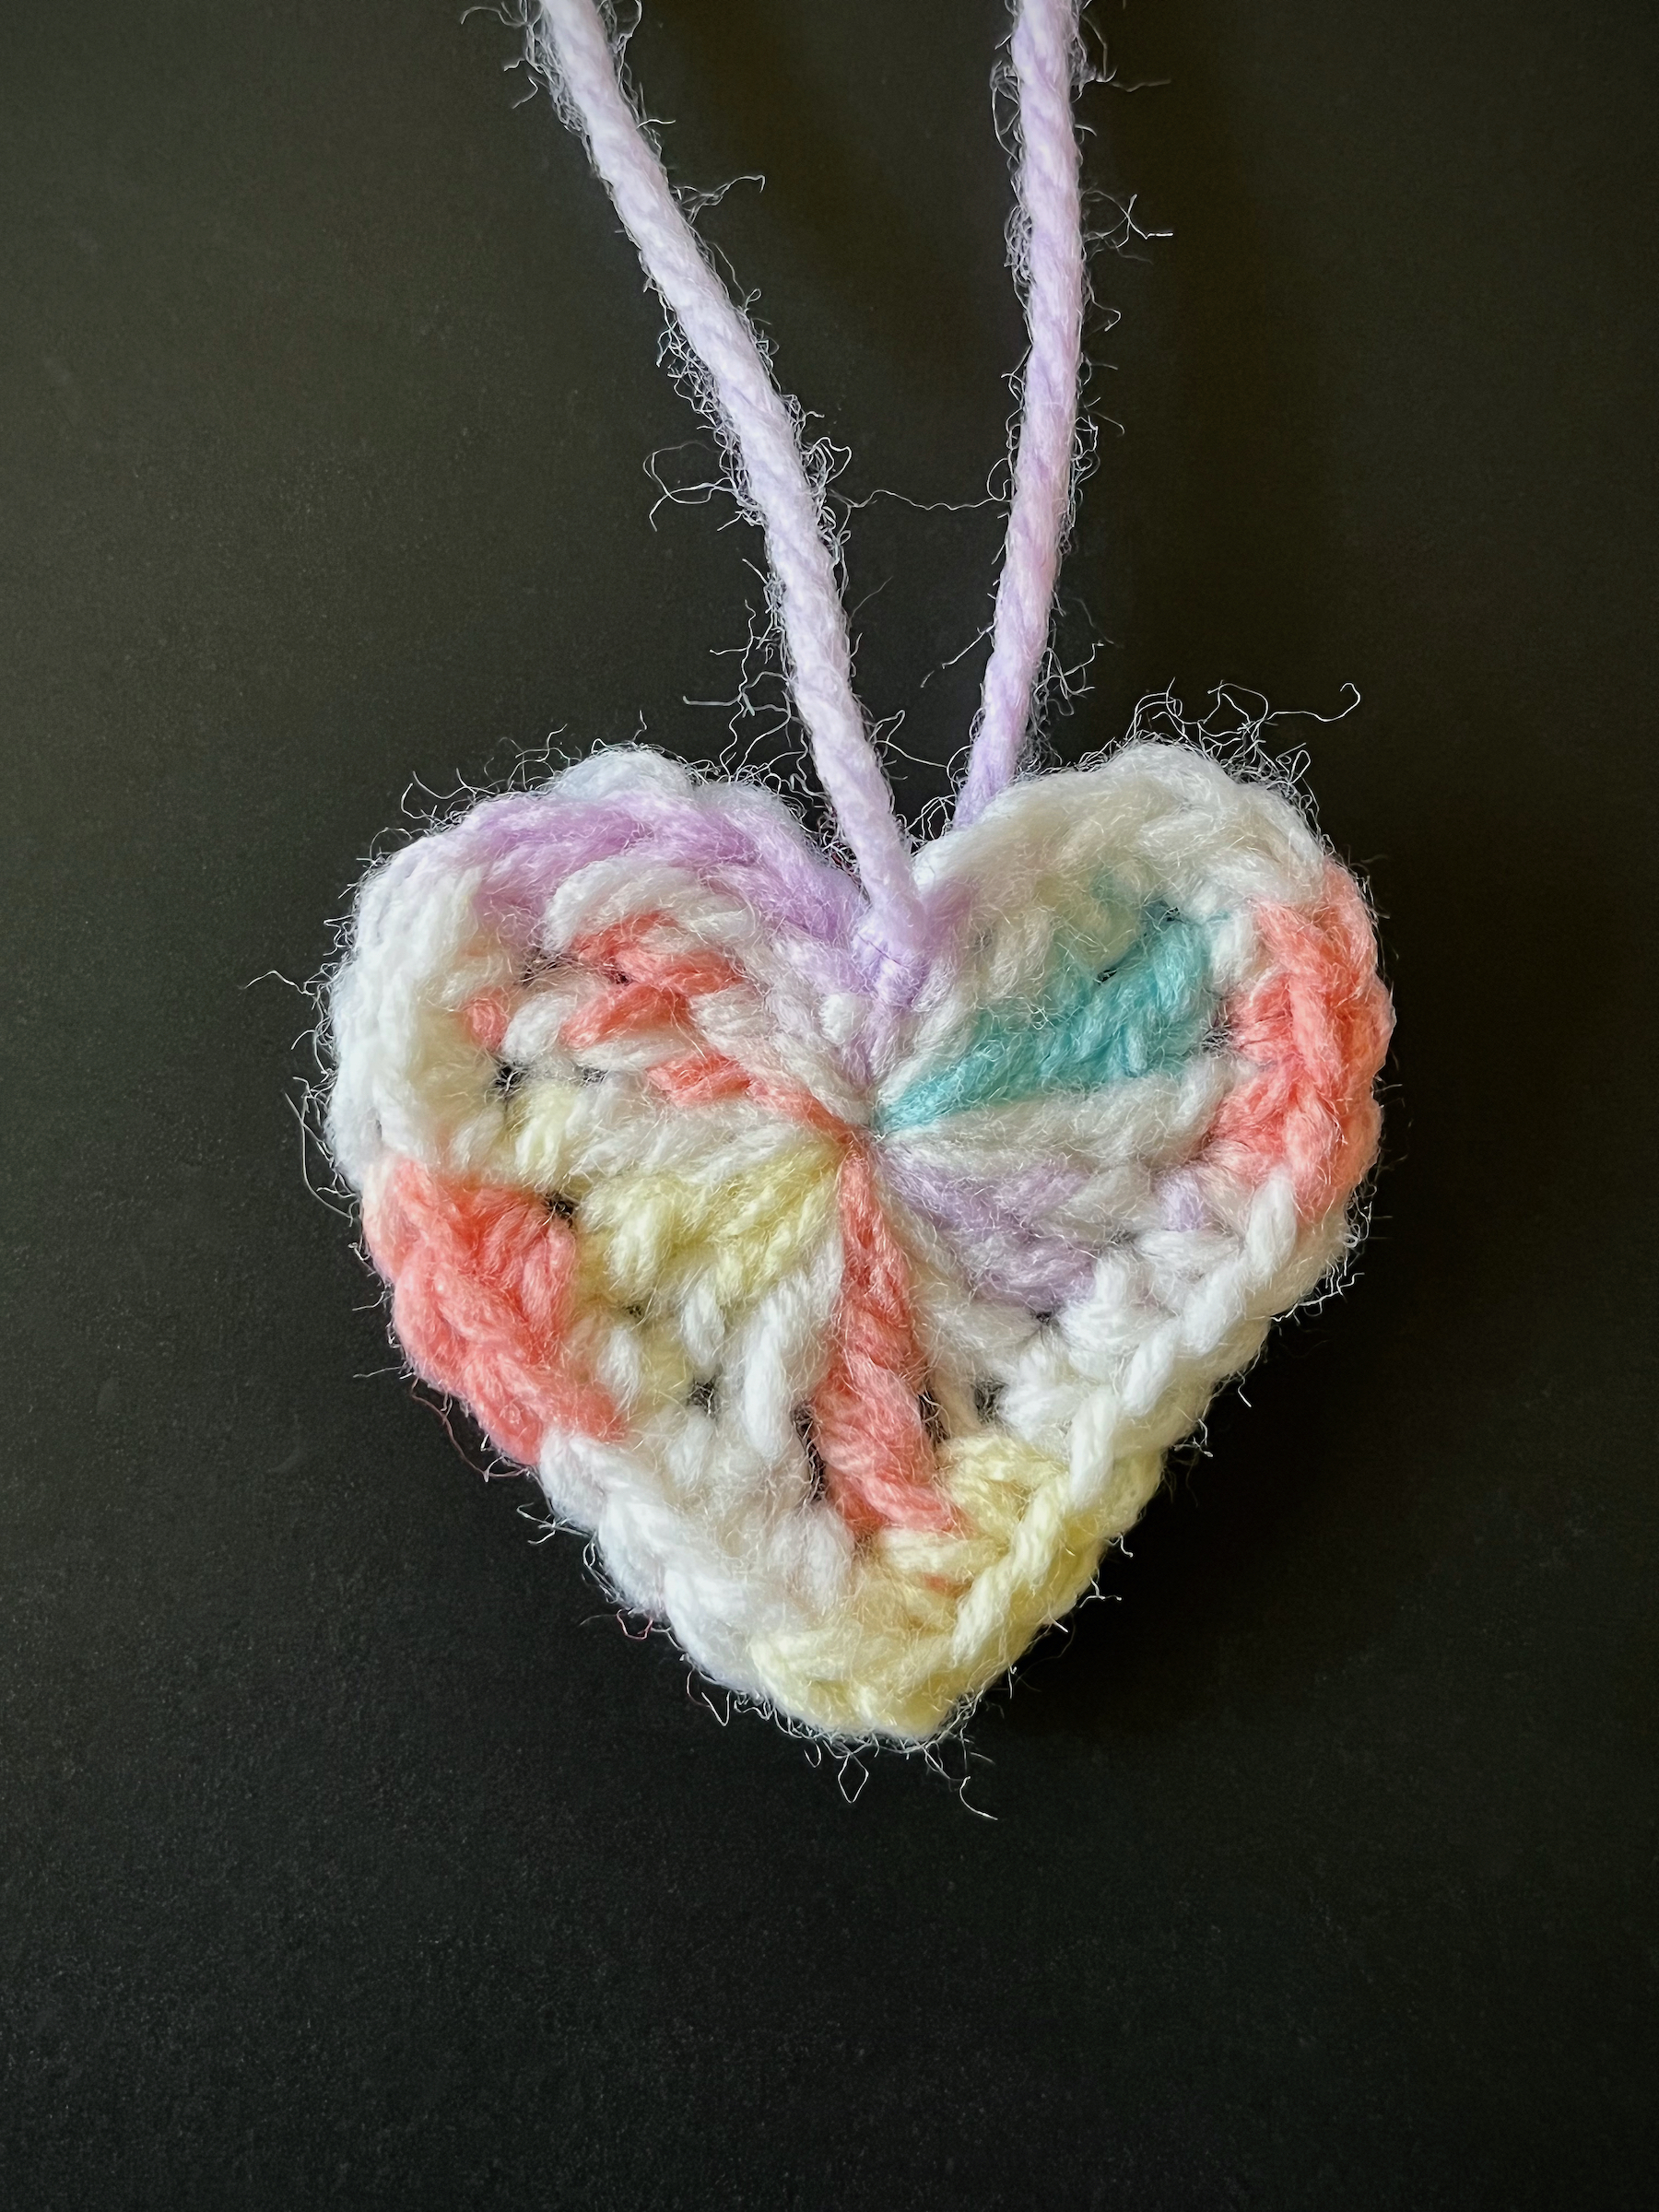
My daughter is entering Kindergarten this year and, while I’m sure she’ll love it, I believe she’ll need a little comfort while she’s away. Pocket hugs are a small token that can be tucked into a pocket to remind someone we love that we care for them, even if we’re apart. Zoey carries hers in a pocket of her backpack.
I created two different sized pocket hugs and when I held them together, I admired how much they looked like a cookie with frosting so I had the idea to attach them together. Et voila! Now we have a double pocket hug that looks like a cookie! You could use any color of yarn for this, the possibilities are endless!
Let’s get started!
SUPPLIES
Two different crochet hooks (I used sizes 3.75mm and 4.50mm)
Two different yarns (I used sizes 2 and 4)
Scissors
Yarn needle or small crochet hook
Hot glue gun
INSTRUCTIONS
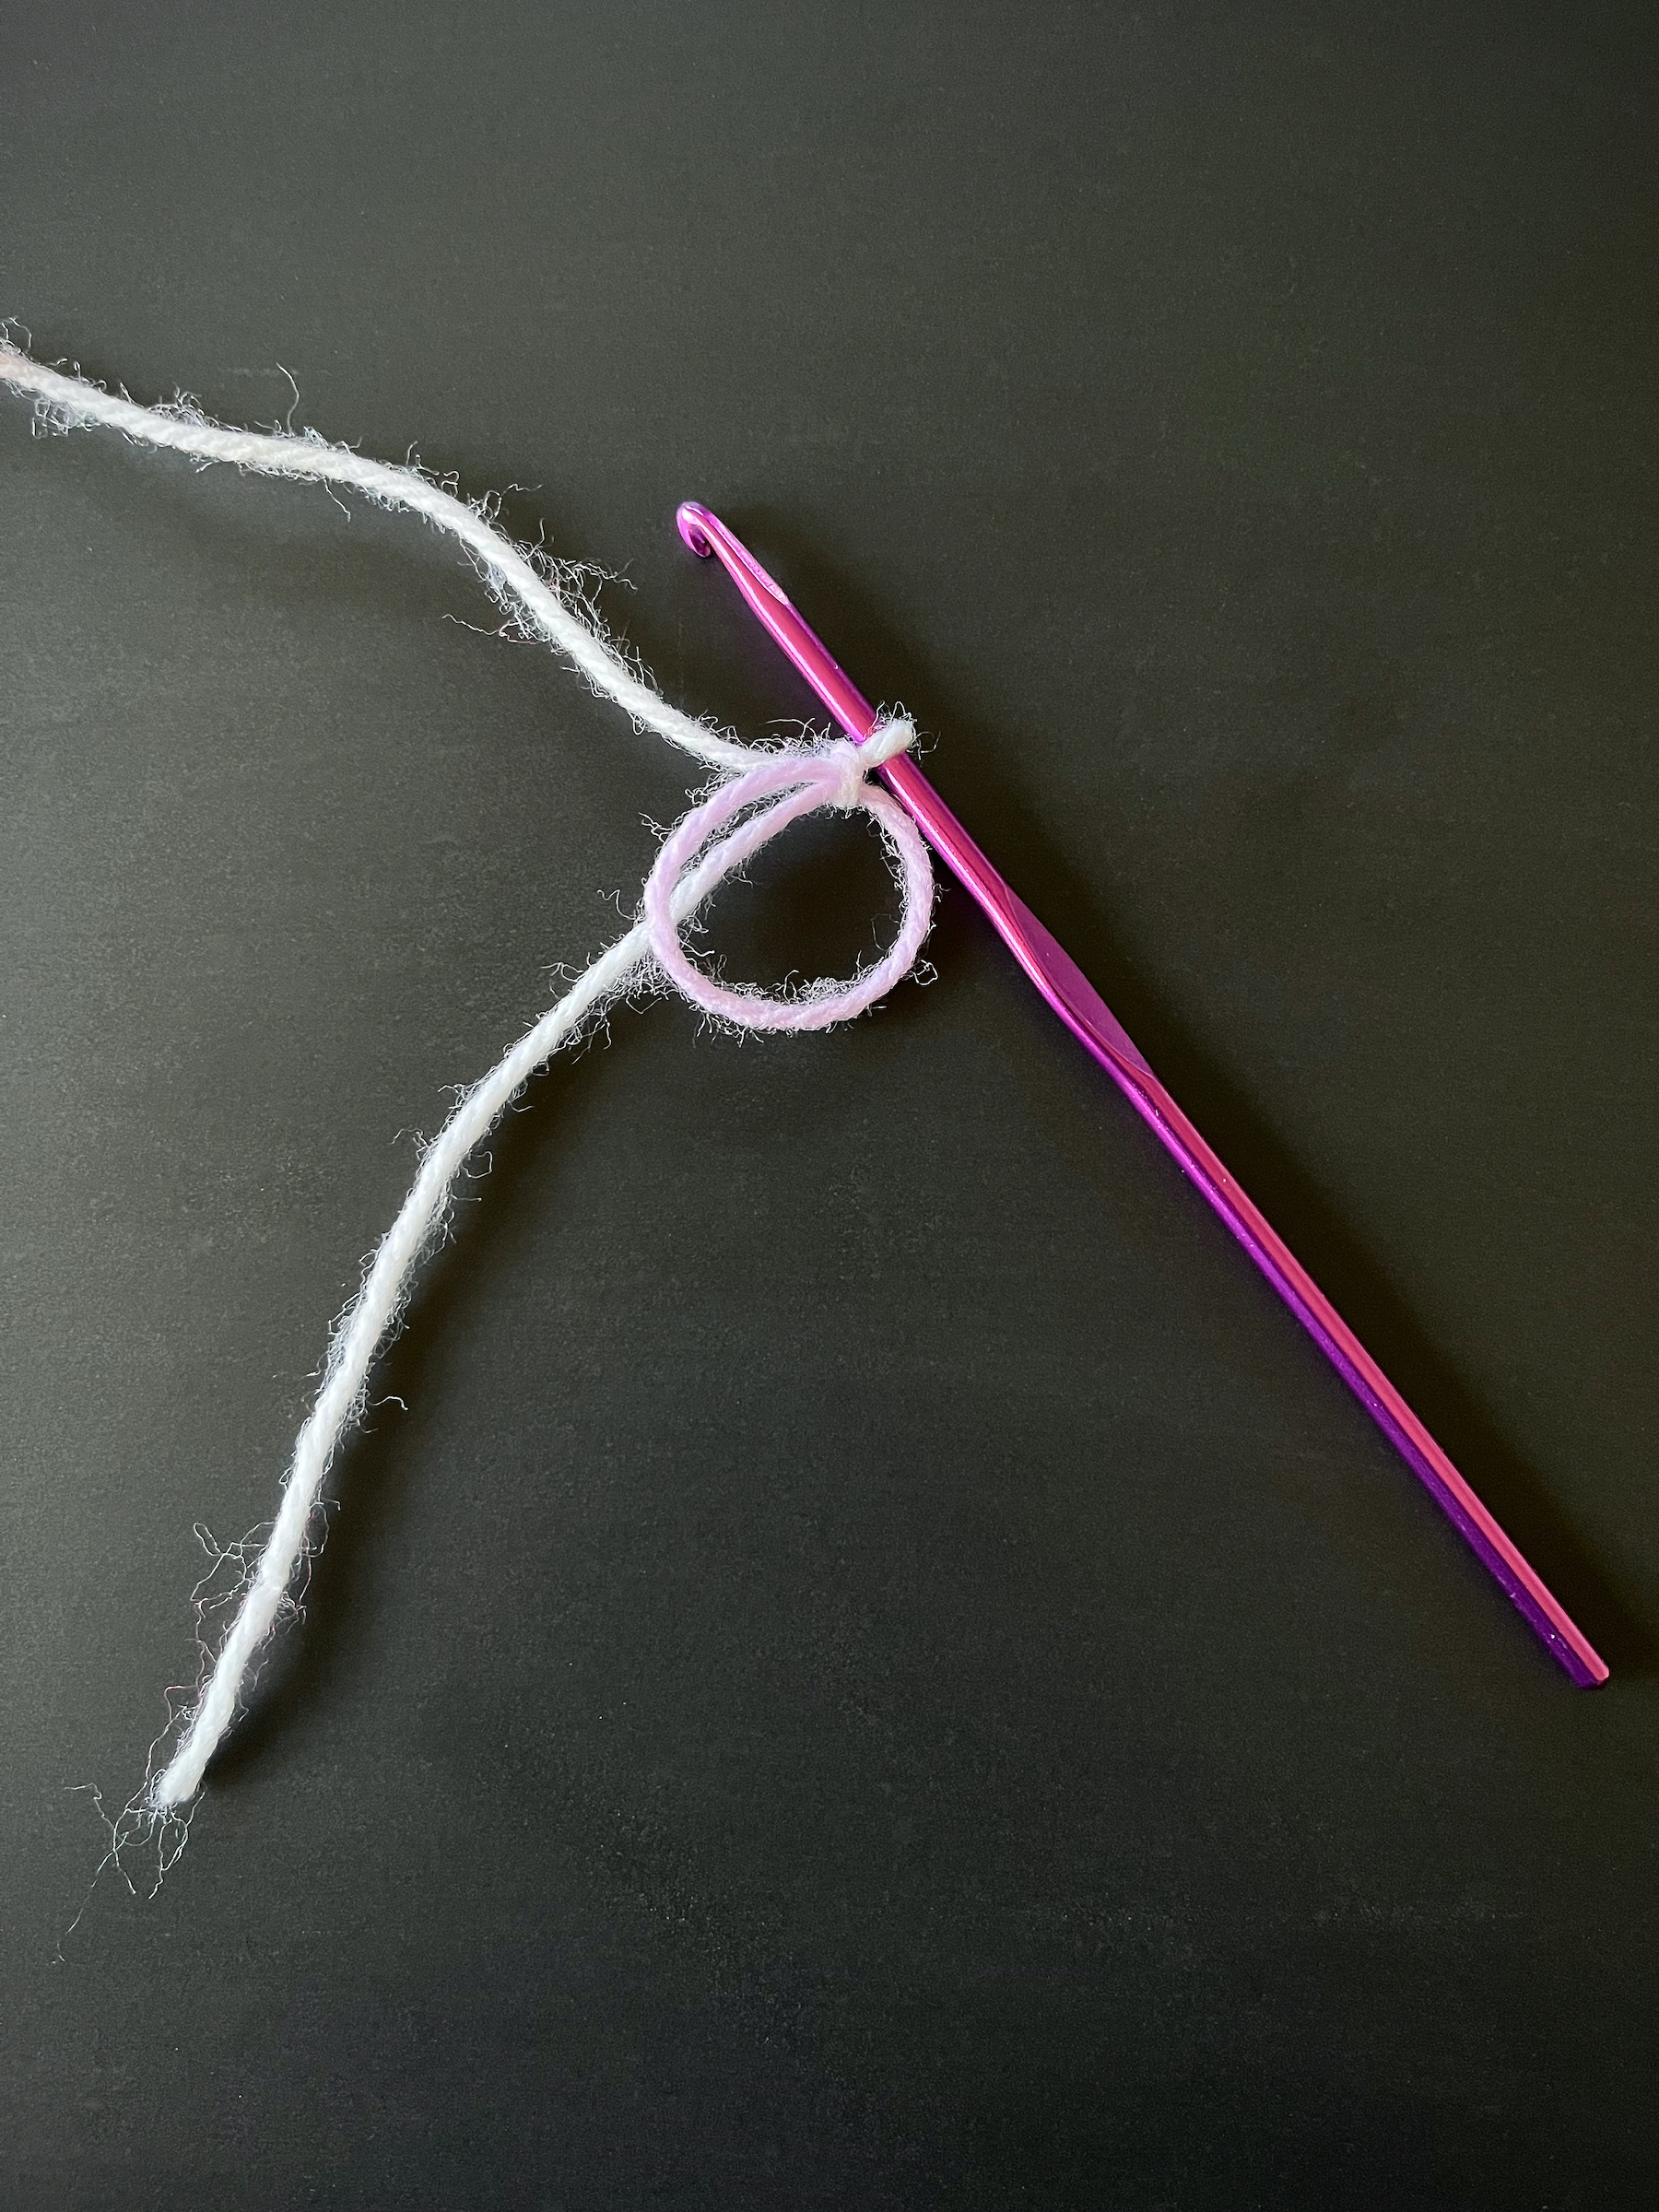
Using the smaller yarn and hook create a magic ring and chain two.
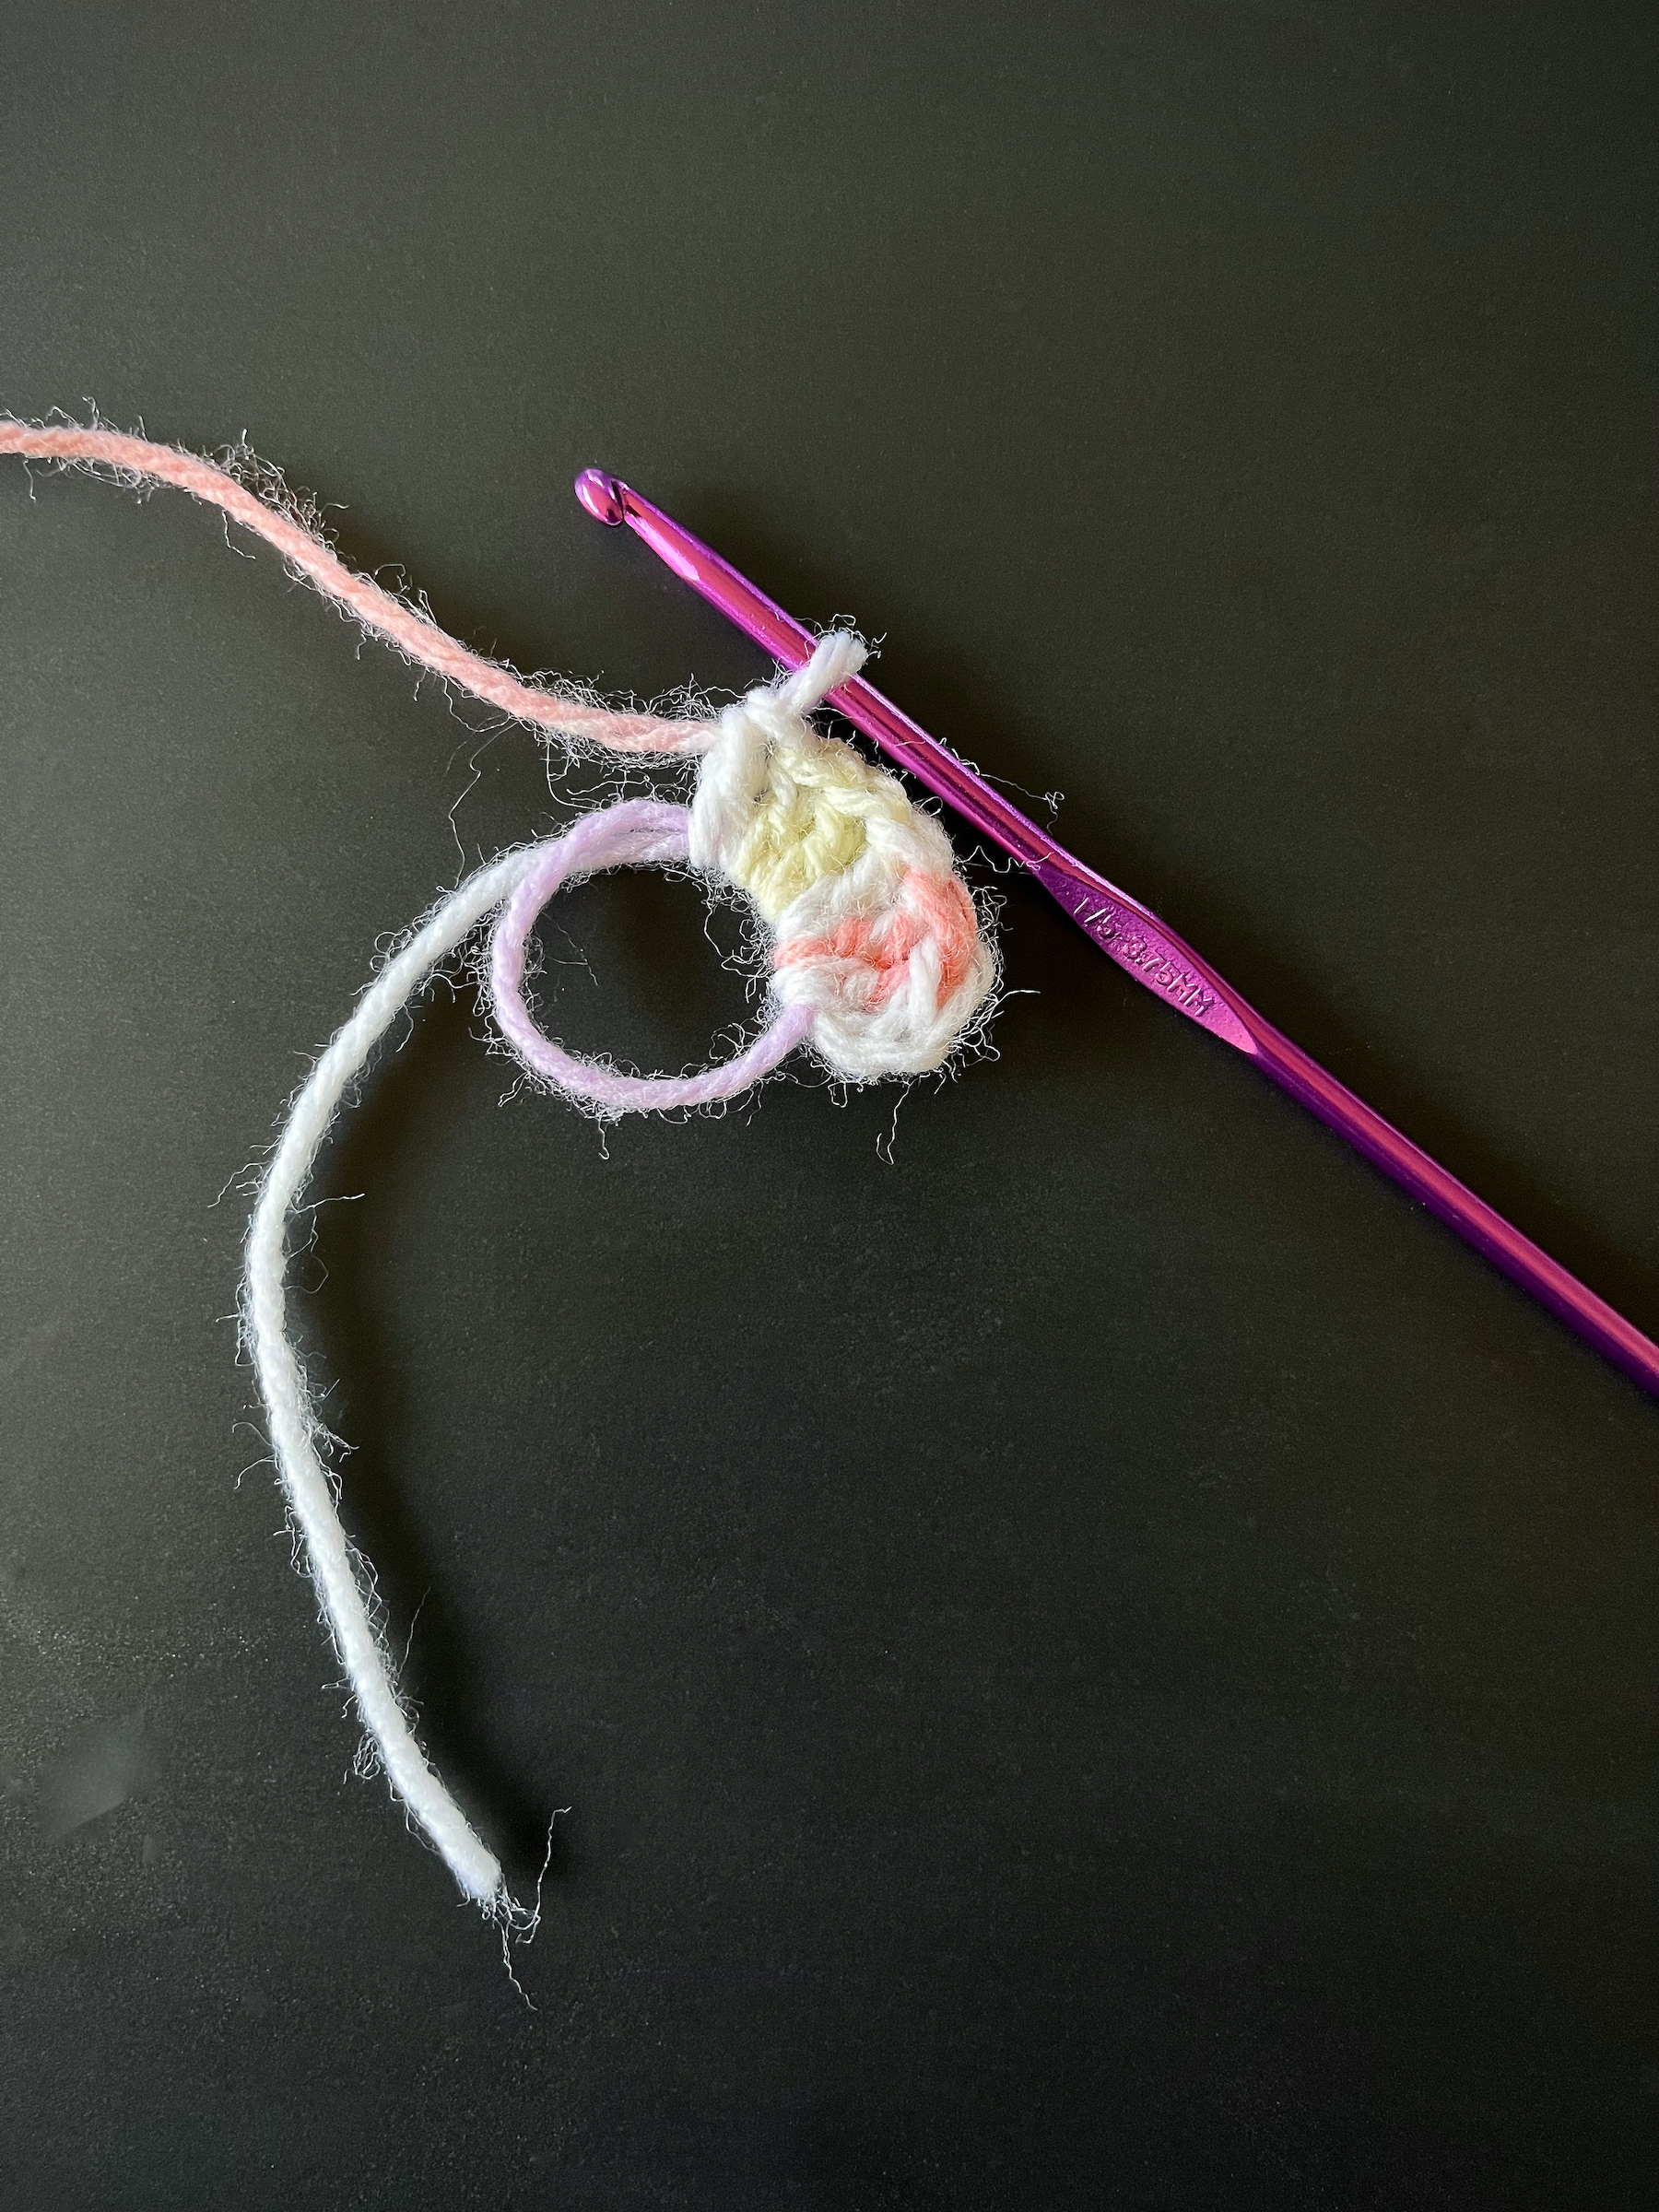
Stitch one triple crochet into the magic ring, then repeat twice more for a total of three triple crochets.
Stitch one double crochet into the magic ring, then repeat twice more for a total of three double crochets.
Chain one, then stitch one triple crochet into the magic ring for the heart’s point, then chain one again.
Stitch one double crochet into the magic ring, then repeat twice more for a total of three double crochets.
Stitch one triple crochet into the magic ring, then repeat twice more for a total of three triple crochets.
Chain three and slipstitch into the magic ring.
Slipstitch into the back loop of the beginning three chains of the heart.
Single crochet under both loops of the first triple crochet from the first round, then single crochet again into the same stitch.
Repeat step 9 on the second and third triple crochets of the first round.
Single crochet under both loops of the first double crochet of the first round.
Repeat step 11 on the second and third double crochets of the first round.
Single crochet under the chain.
Single crochet under both loops of the triple crochet, chain one and then single crochet back into the same stitch.
Single crochet under the chain
Single crochet under both loops of the double crochet.
Repeat step 16 on the next two double crochets of the first round.
Single crochet under both loops of the triple crochet from the first round, then single crochet again into the same stitch.
Repeat step 18 on the next two triple crochets of the first round.
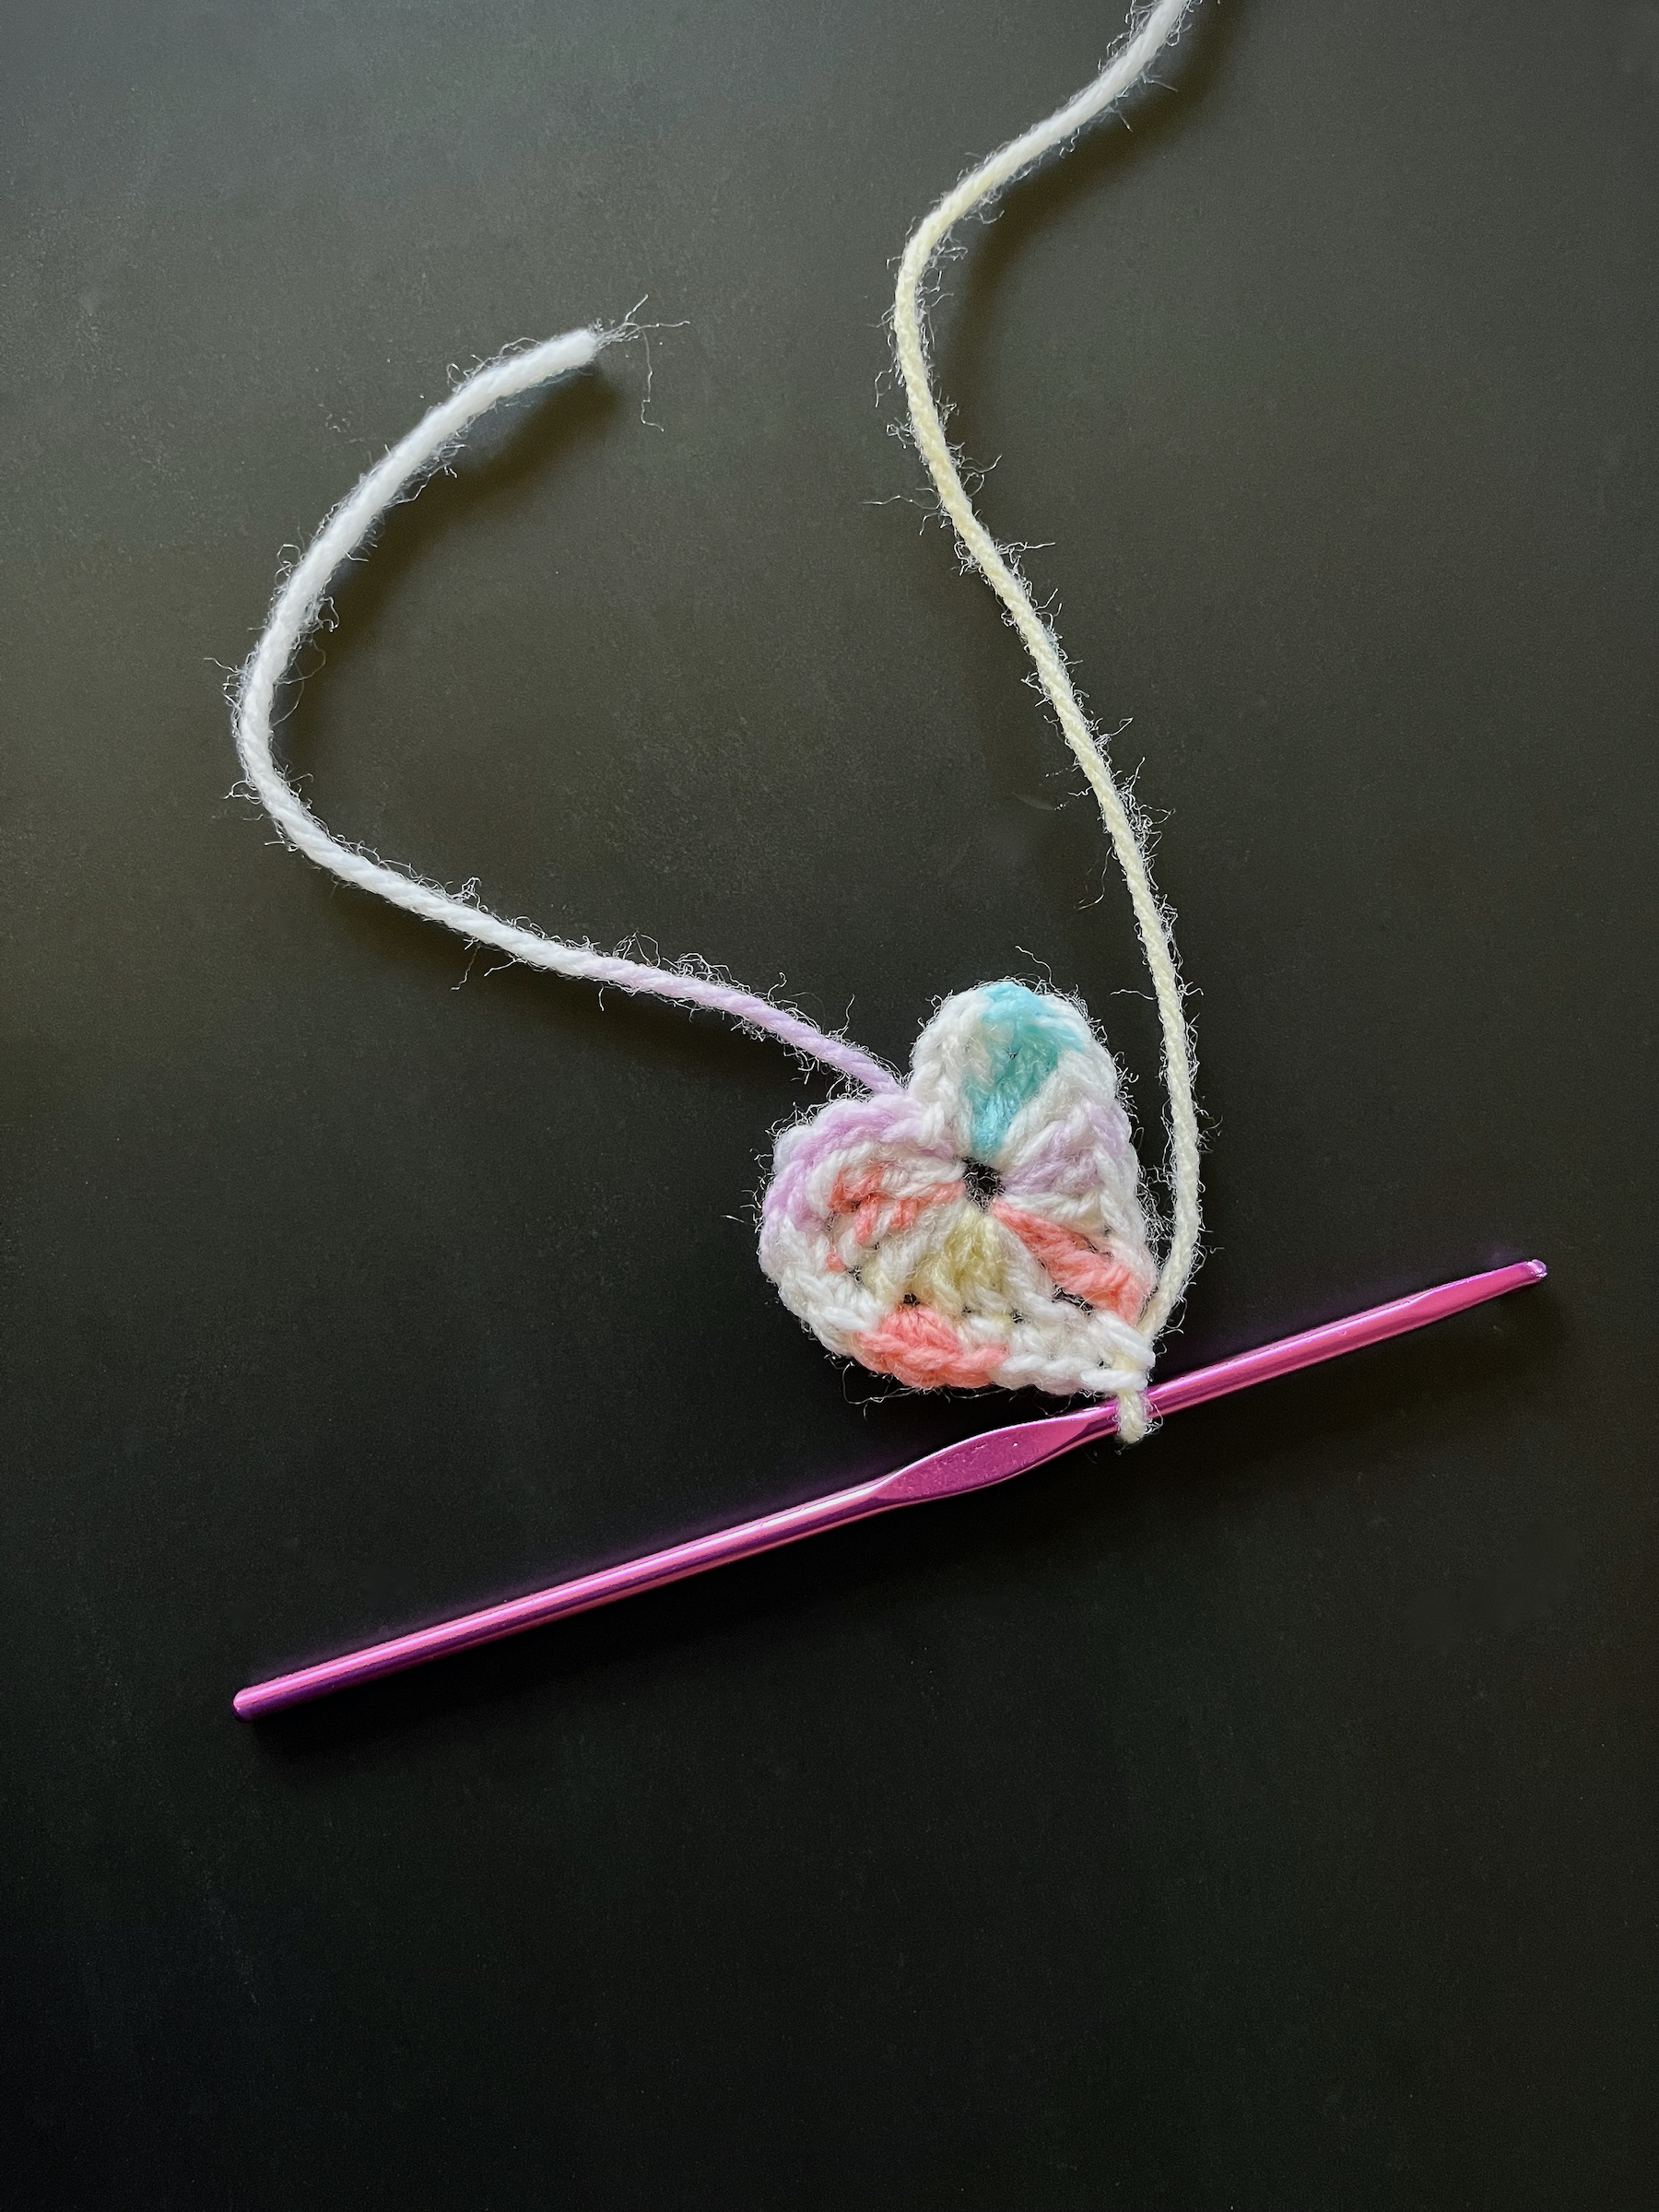
Slipstitch into the back loop of the ending three chains of the heart.
Slipstitch into the magic ring one more time, snip off the yarn and pull the loose end through the final stitch tightly to secure it.
Pull the loose end of the starting yarn to pull the center of the heart in tightly.
Using a smaller crochet hook, weave the starting yarn and ending yarn into the heart.
Repeat steps 1 through 23 again with the larger yarn and hook.
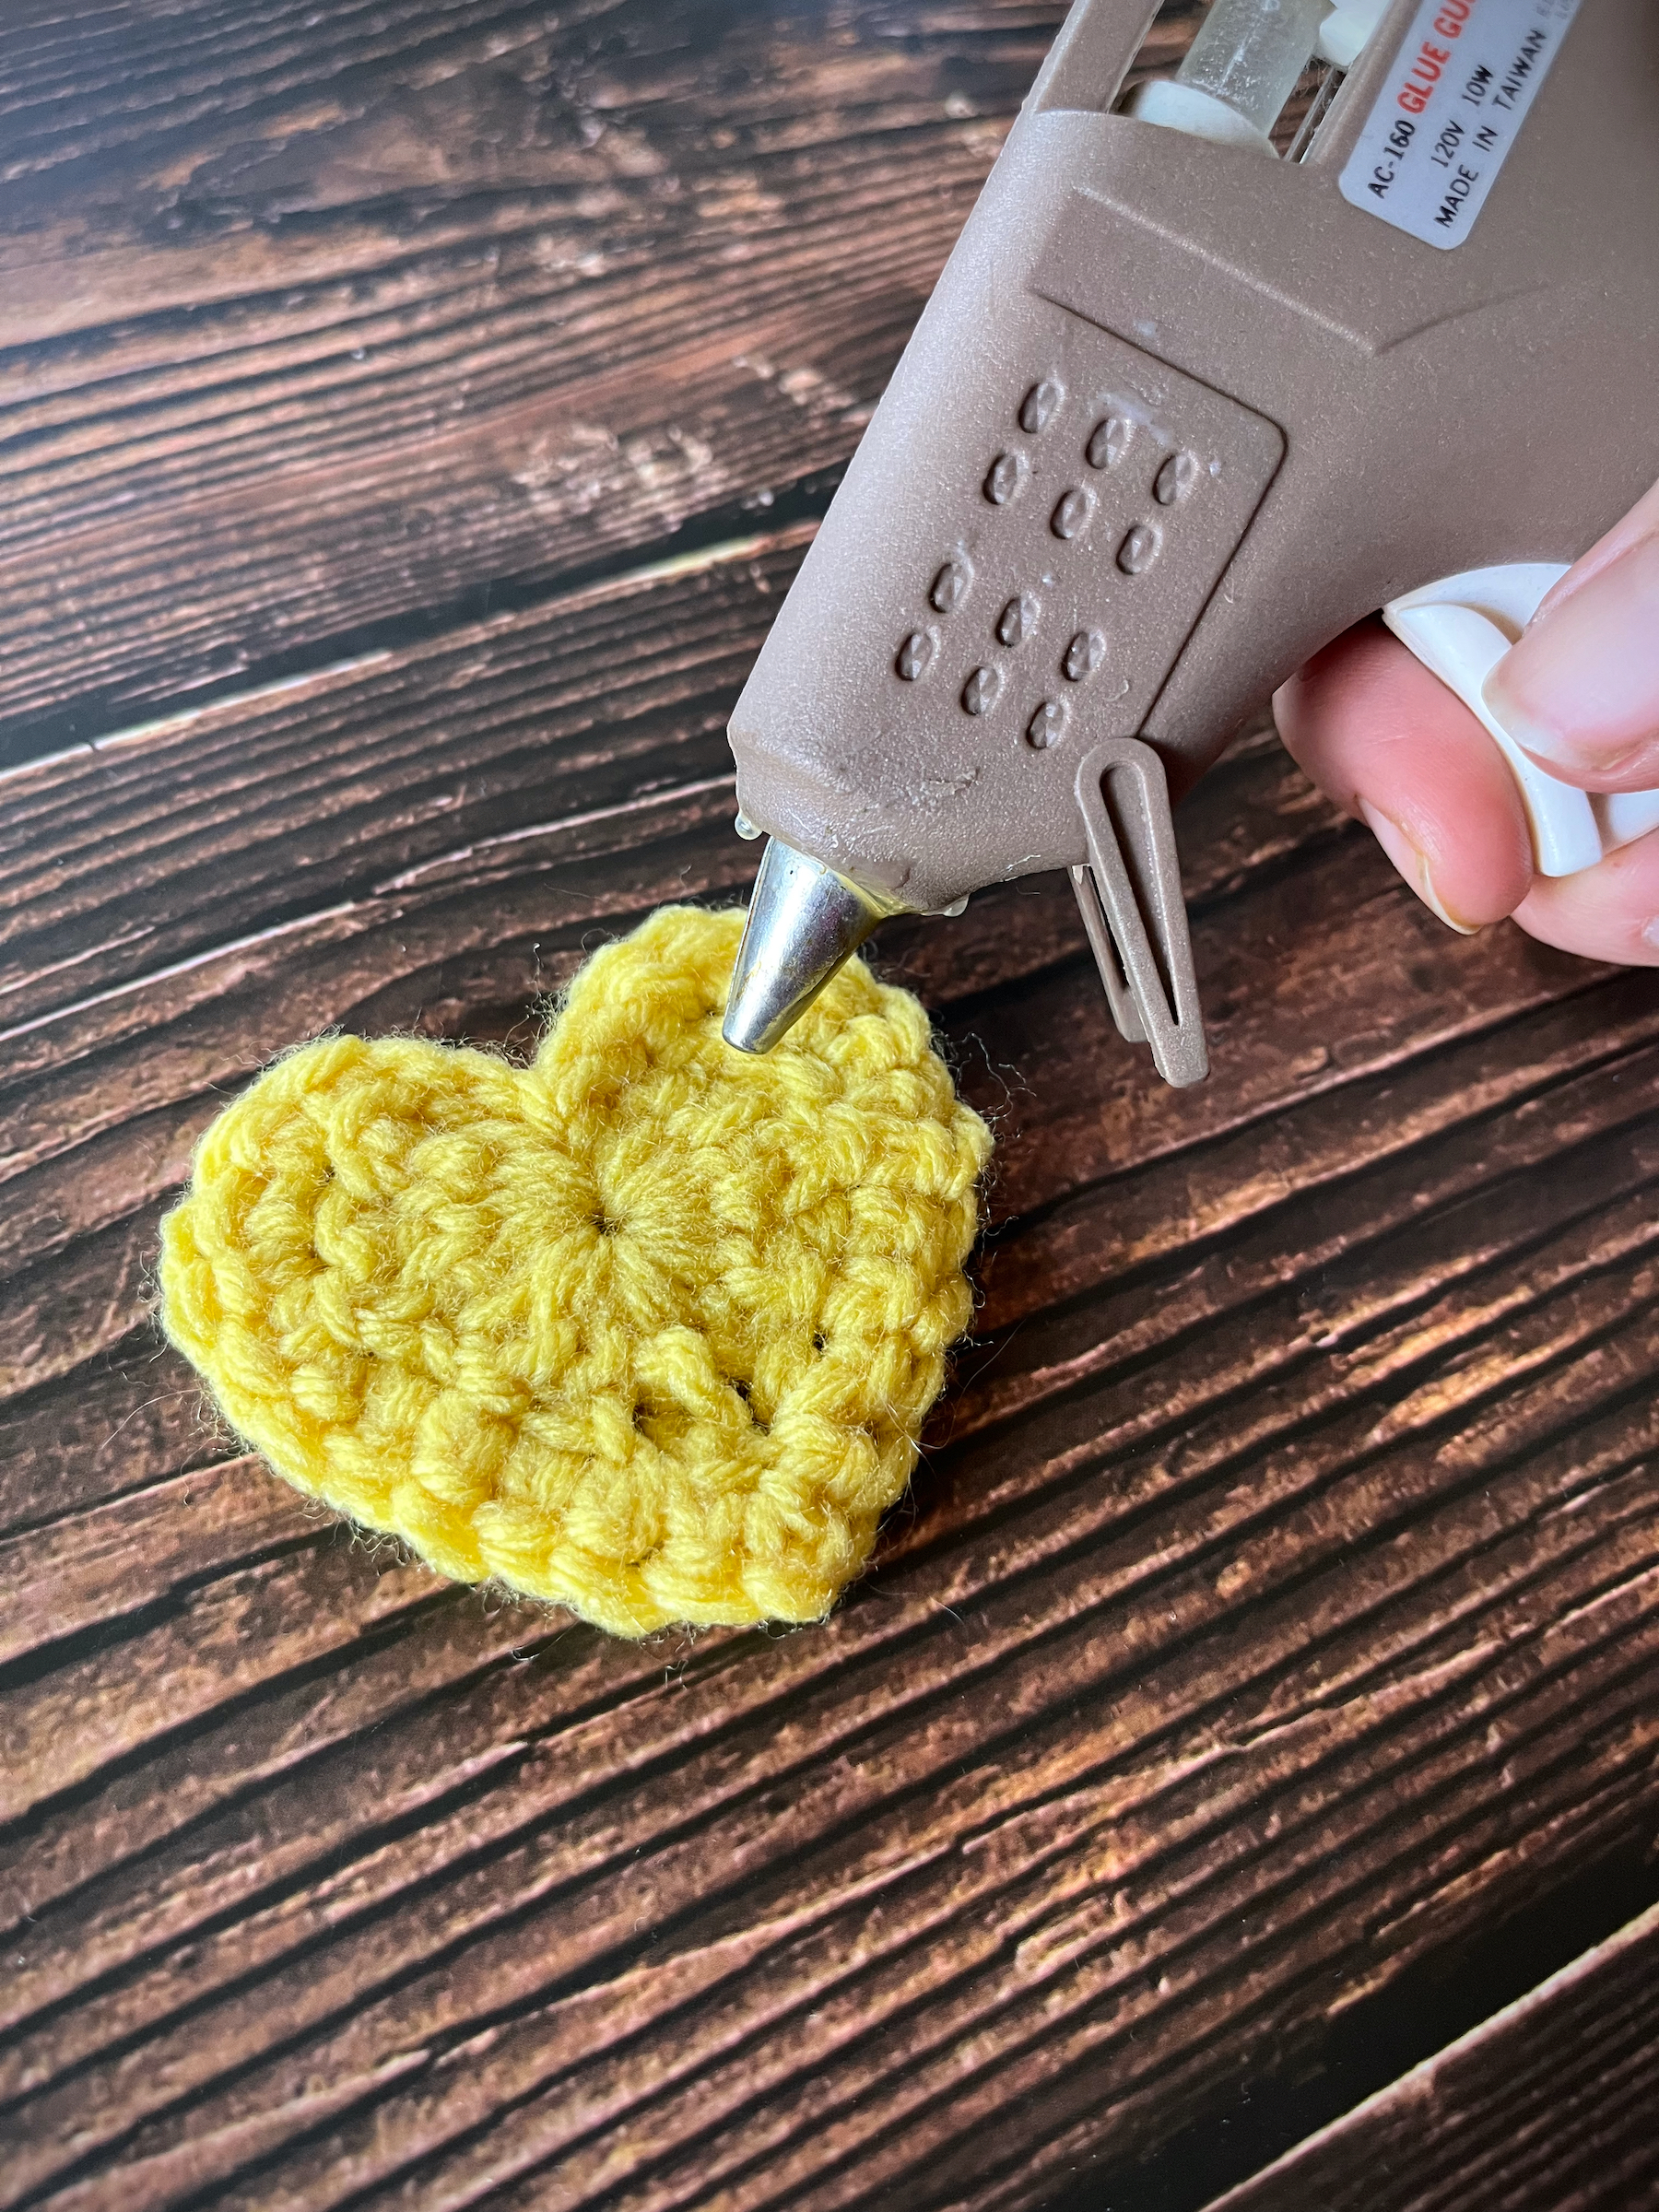
Once both hearts are done, heat up your glue gun and apply a steady amount of glue to the back of the larger heart, within the confines of where the smaller heart will lay, then press the back of the smaller heart to it. If there are any loose edges gently lift them up, apply glue underneath and press it back.
Once cool, give your pocket hug to someone who needs it!
Welcome back friends! Do you crochet? I do! I feel calm and cozy when I’m crocheting, and fiercely proud whenever I complete a project.
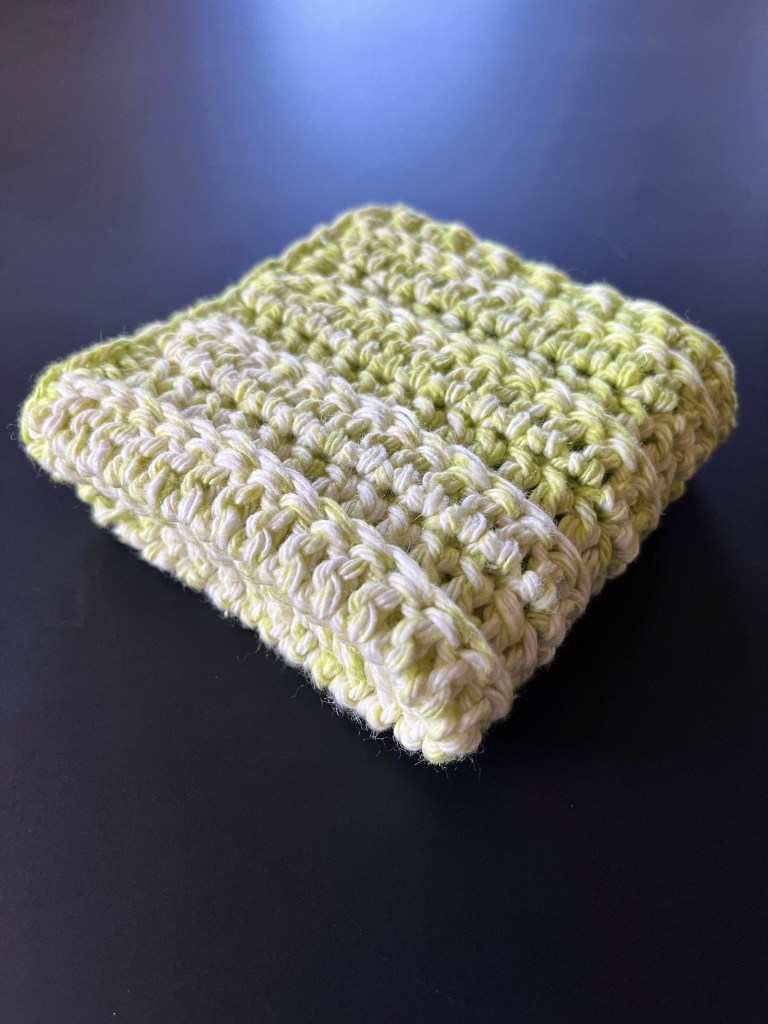
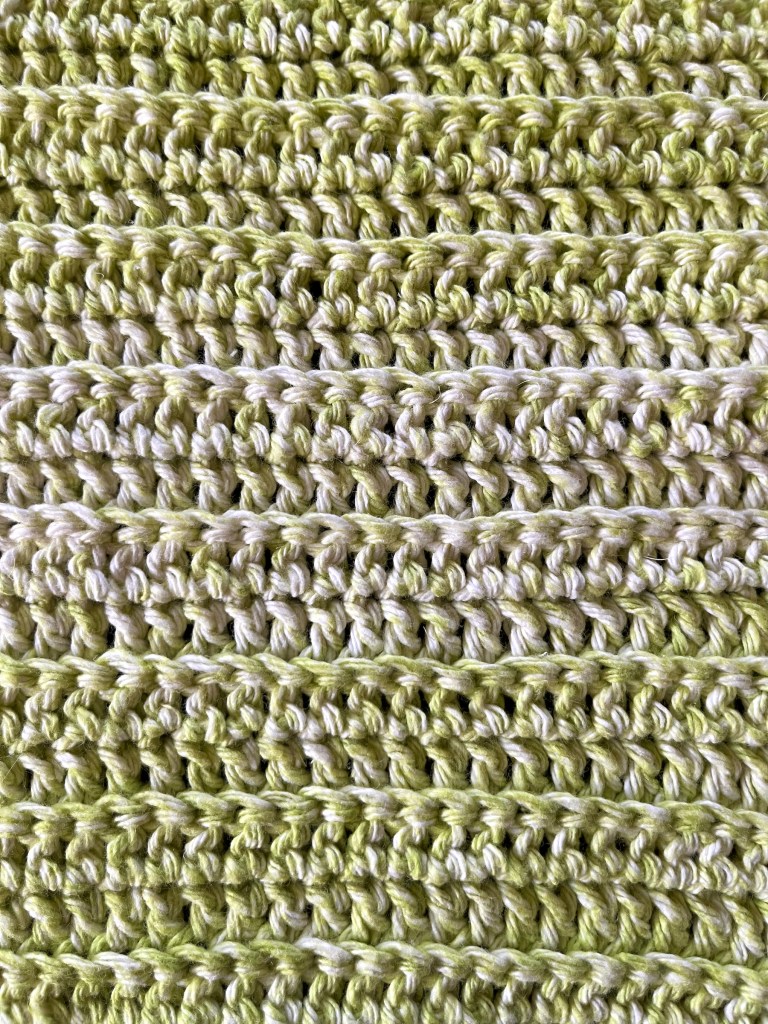
I’ve always wanted to crochet some of my own dish cloths and now is the perfect time! This pattern is simple, textured and ideal for any level of crocheter (beginners included)! Any cotton yarn can be used for this dish cloth.
Let’s get started!
SUPPLIES
Crochet hook (size 5 mm)
Cotton yarn
Scissors
Yarn needle or small crochet hook
INSTRUCTIONS
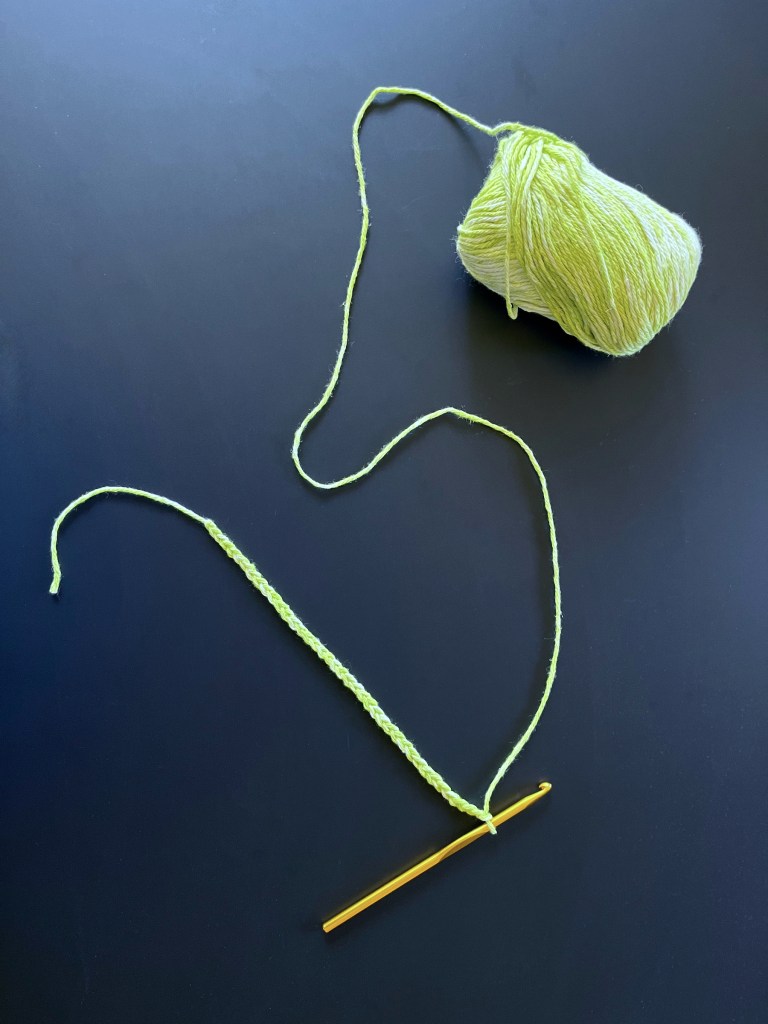
Create a slip knot and then 30 chain stitches.
Turn your chain around and double crochet (dc) into the third stitch from the hook, then continue to dc all the way across your chain.
Chain 2 and turn your work. Dc into the back loop of the third stitch from the hook, then continue to dc in the back loops of each stitch all the way across your project.
Repeat step 3 for the next fourteen rows for a total of 16 dc rows.
After the last dc of your last row, chain 1 and rotate the dish cloth 90 degrees to the right.
Single crochet across this side of the dish cloth to give it a more finished look. There will be no distinct loops to follow, but try to stitch in regular intervals, your hook will know where to go!
Chain 1 and rotate the dish cloth 90 degrees to the right again, lay the original tail along the original chain, then single crochet around it (to weave it in) as we single crochet all the way down the original chain.
Chain 1 and rotate the dish cloth 90 degrees to the right again, then single crochet across this side of the dish cloth to give it a more finished look. There will be no distinct loops to follow, but try to stitch in regular intervals, your hook will know where to go!
After the last single crochet, use the scissors to disconnect the yarn from the skein and pull the loose end in through your crochet loop.
Using the yarn needle, weave the loose end into the dish cloth and cut off any extra.
Welcome back friends! Do you crochet? I do! I feel calm and cozy when I’m crocheting, and fiercely proud whenever I complete a project.
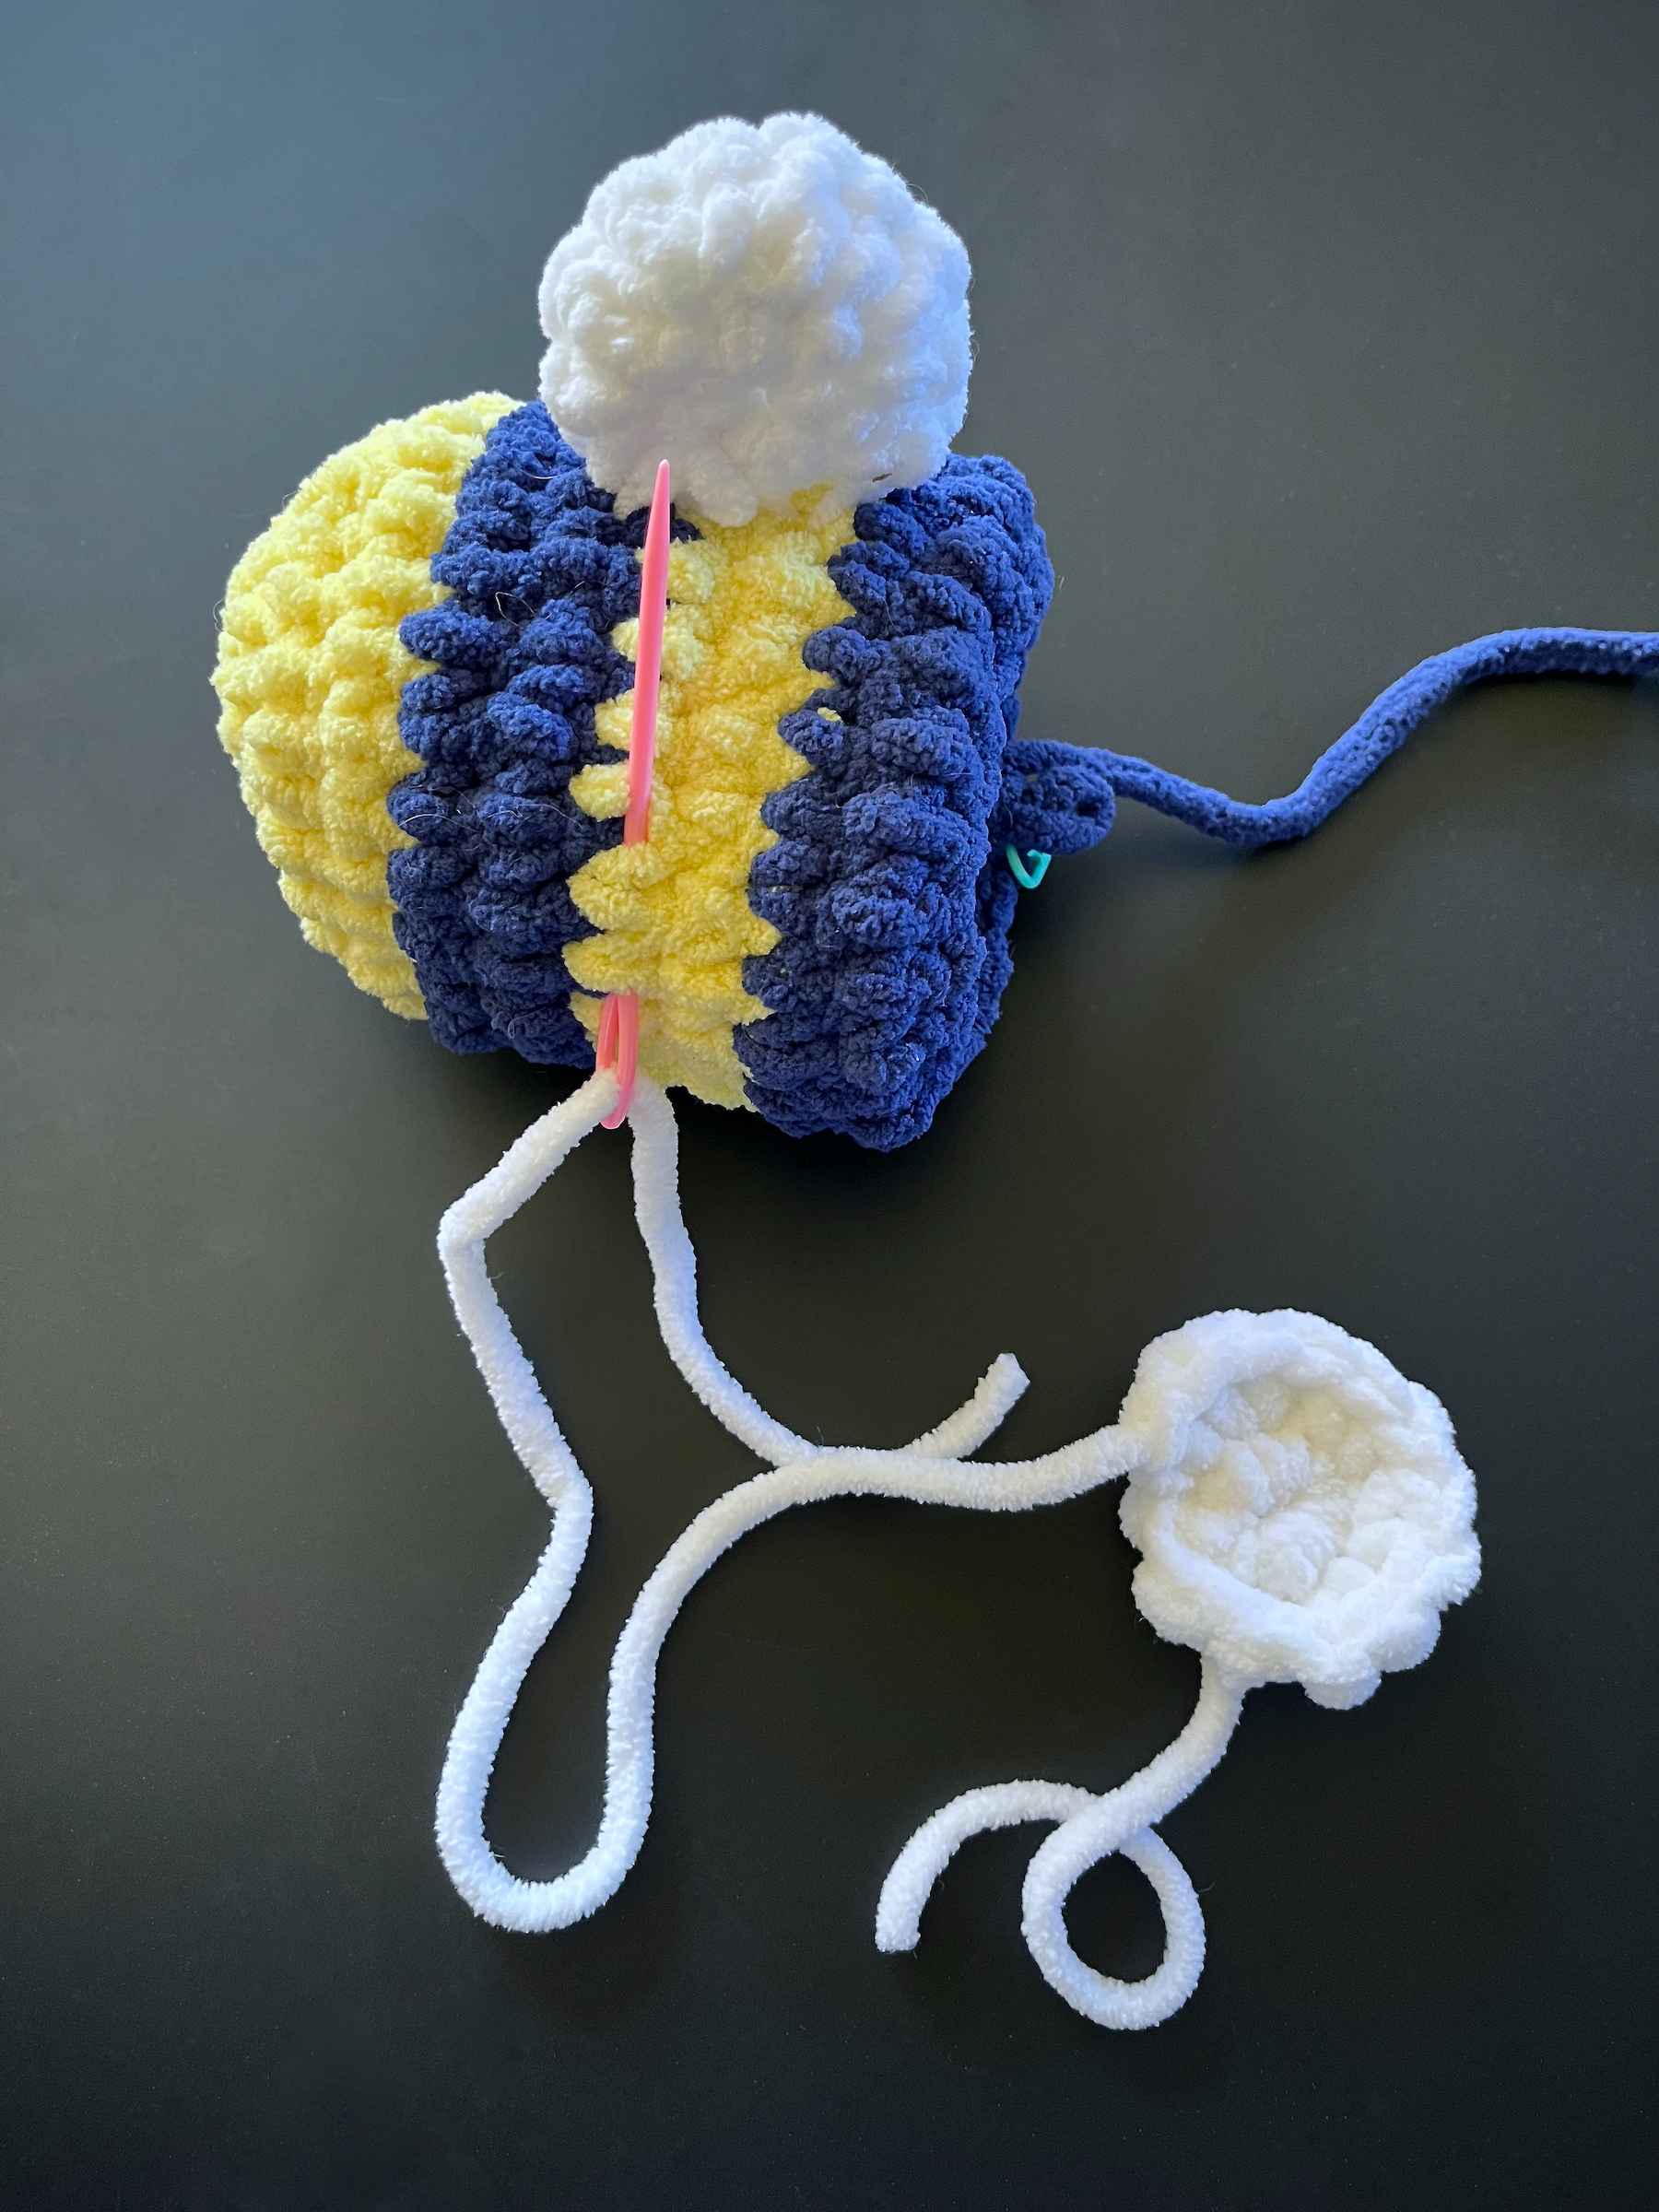
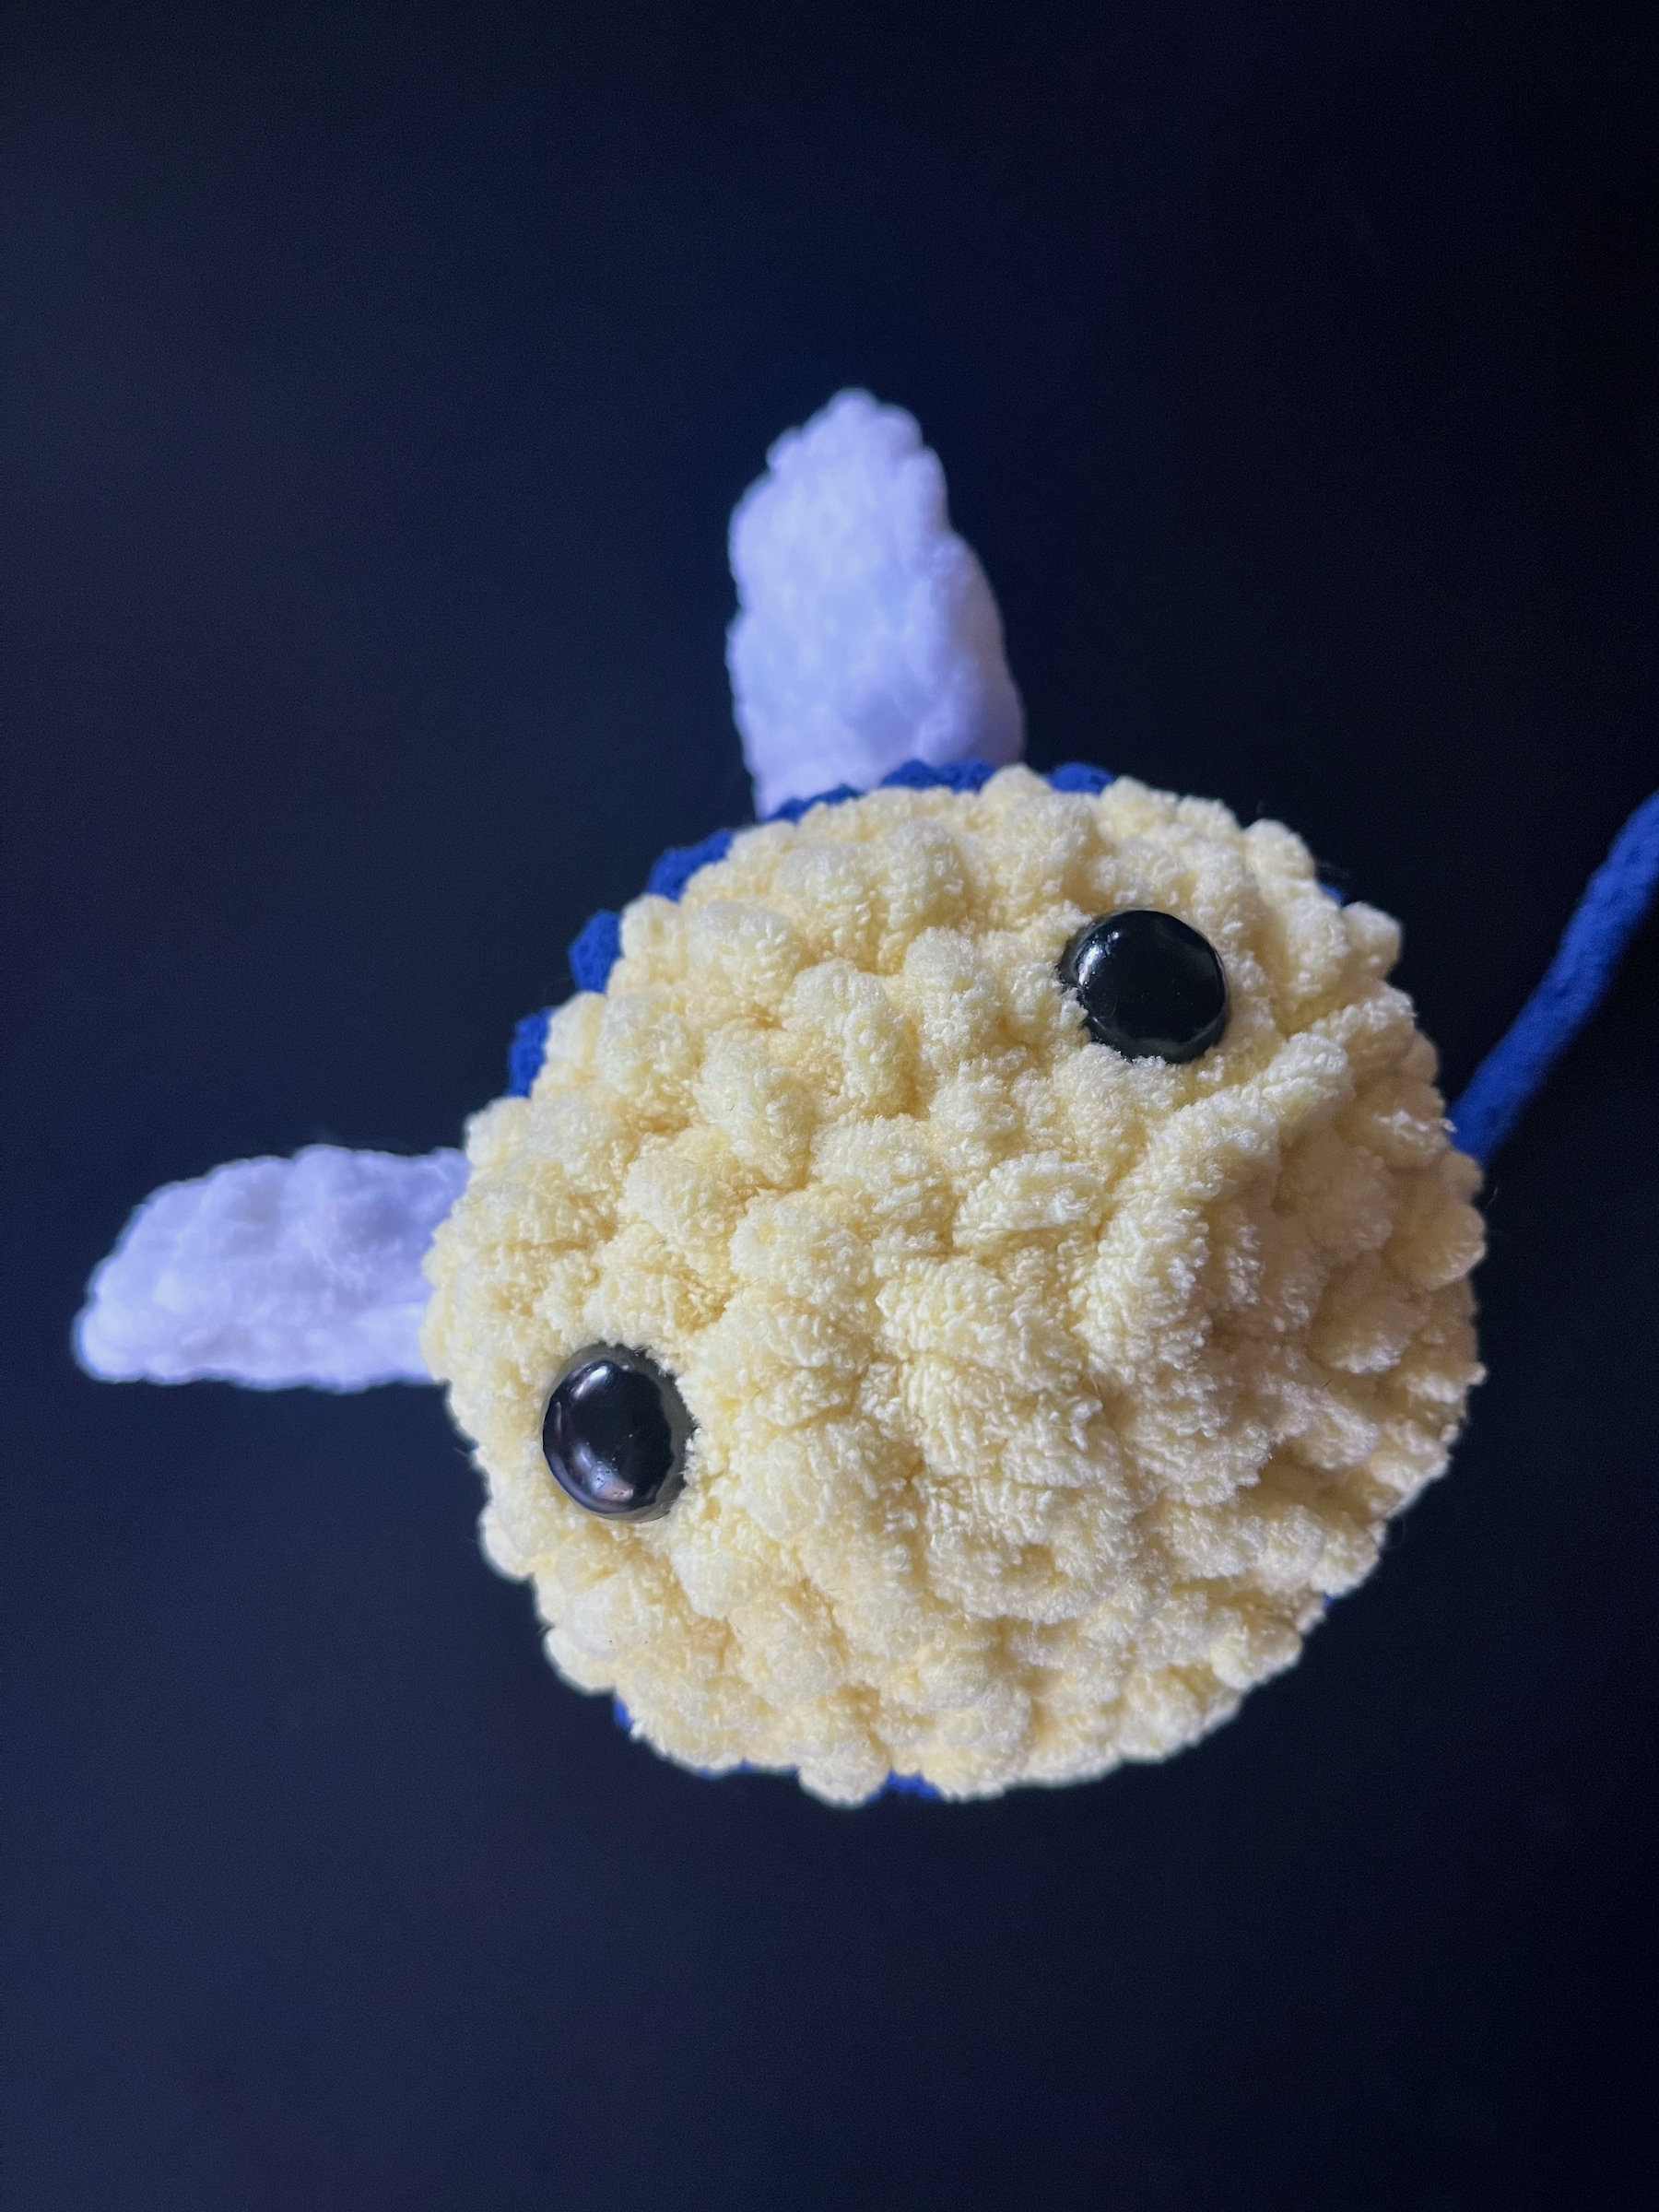
I’ve seen some adorable bee plushies in the animated shows my daughter watches, and I wanted to create one for her!
This bee is soft and cuddly! The pattern is easy, and ideal for any level of crocheter (beginners included)! Any size 6 chenille-style yarn can be used in this pattern, but I used Bernat Baby in buttercup yellow and lapis blue, and for the white of the wings. You can use whatever color combination you prefer!
Let’s get started!
SUPPLIES
Crochet hook (size 6.50 mm)
Chenille-style yarn (size 6)
Scissors
Yarn needle or small crochet hook
Fiber fill
INSTRUCTIONS
Round 1: With the yellow yarn, create a magic ring with 6 single crochets (total of 6 stitches). Place a stitch marker in the last stitch of this round.
Round 2: Increase in each stitch around (total of 12 stitches). Place a stitch marker in the last stitch of this round (henceforth remove it and move it up to the last stitch in each round after this one).
Round 3: 1 single crochet, 1 increase, alternating around the round (18).
Round 4: 2 single crochet, 1 increase, alternating around the round (24).
Round 5: Single crochet in each stitch around (24).
Round 6: Switch colors to blue (or whatever color you choose for the bee’s stripes), then single crochet in each stitch around (24).
To switch colors insert your hook into the first stitch, yarn over and pull through so there are two loops of yellow on your hook. Hook onto the blue and pull in through the two loops of yellow to create the first stitch of Round 6 (for extra security, bring the two loose ends together inside the project and double knot).
Round 7: Single crochet in each stitch around (24).
Round 8: Switch colors back to yellow then single crochet in each stitch around (24).
Round 9: Single crochet in each stitch around (24).
Round 10: Switch colors back to blue then single crochet in each stitch around (24).
Round 11: Single crochet in each stitch around (24).
Set the main body aside for now and begin the wings.
Wings Round 1: With the white yarn, create a magic ring with 6 single crochets (total of 6 stitches). Place a stitch marker in the last stitch of this round.
Wings Round 2: Increase in each stitch around (total of 12 stitches). Place a stitch marker in the last stitch of this round.
Cut the yarn about 8 to 10 inches from your hook and pull the loose end through the last stitch, then set it aside.
Repeat steps 13 through 15 to create a second wing.
Thread your yarn needle with the loose end of one wing, position it where you would like (somewhere on the band of yellow between the two black stripes), and insert your needle through one of the stitches. Pull through until the wing stops at the body of the bee. Position wing and stitch through the bottom of the wing where it comes into contact with the body of the bee. Repeat this stitching process along the bottom of the wing.
If there is a tail from creating the magic ring, conceal it by stitching it into the wing and/or into the body of the bee.
Repeat for the second wing.
Attach the safety eyes.
Body Round 12: Switch colors back to yellow, then 2 single crochet, 1 decrease, alternating around the round (18).
Body Round 13: 1 single crochet, 1 decrease, alternating around the round (12).
Begin stuffing the bee to your preference.
Body Round 14: 6 decreases around (6).
Cut the yarn off 8 to 10 inches from the project and pull it through the last stitch.
Stuff the bee a little more if necessary.
Thread the needle and insert the needle through each stitch, then pull tight.
Knot and sew the remaining tail of yarn into the yellow stitches around.
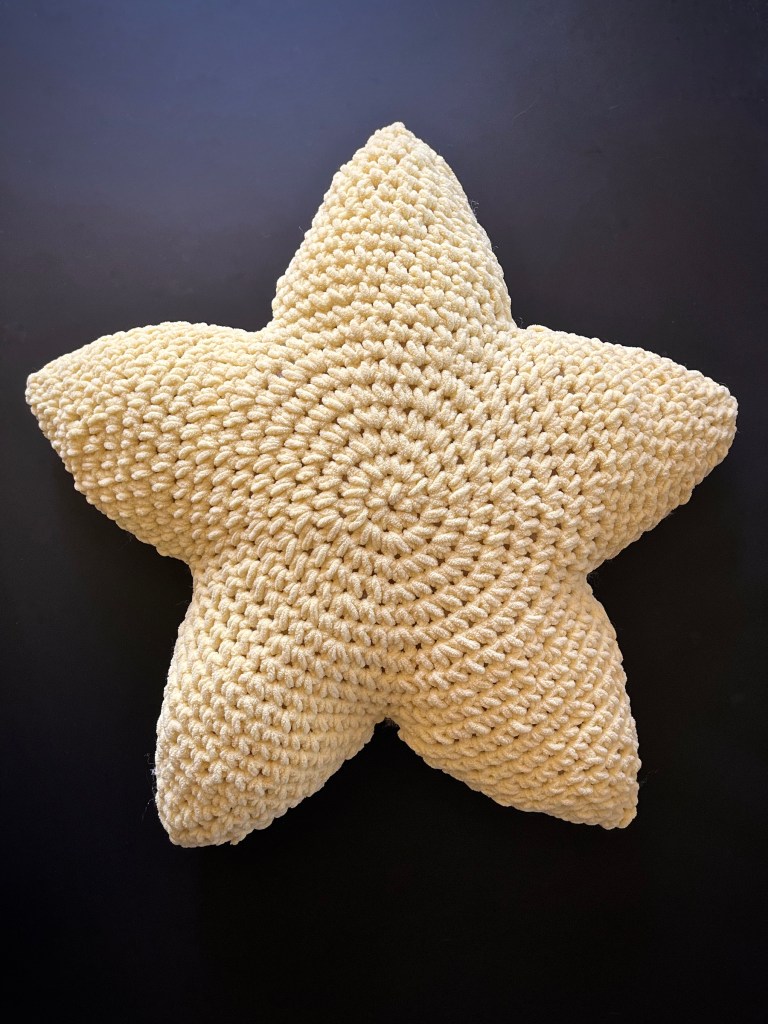
Welcome back friends! Do you crochet? I do! I feel calm and cozy when I’m crocheting, and fiercely proud whenever I complete a project.
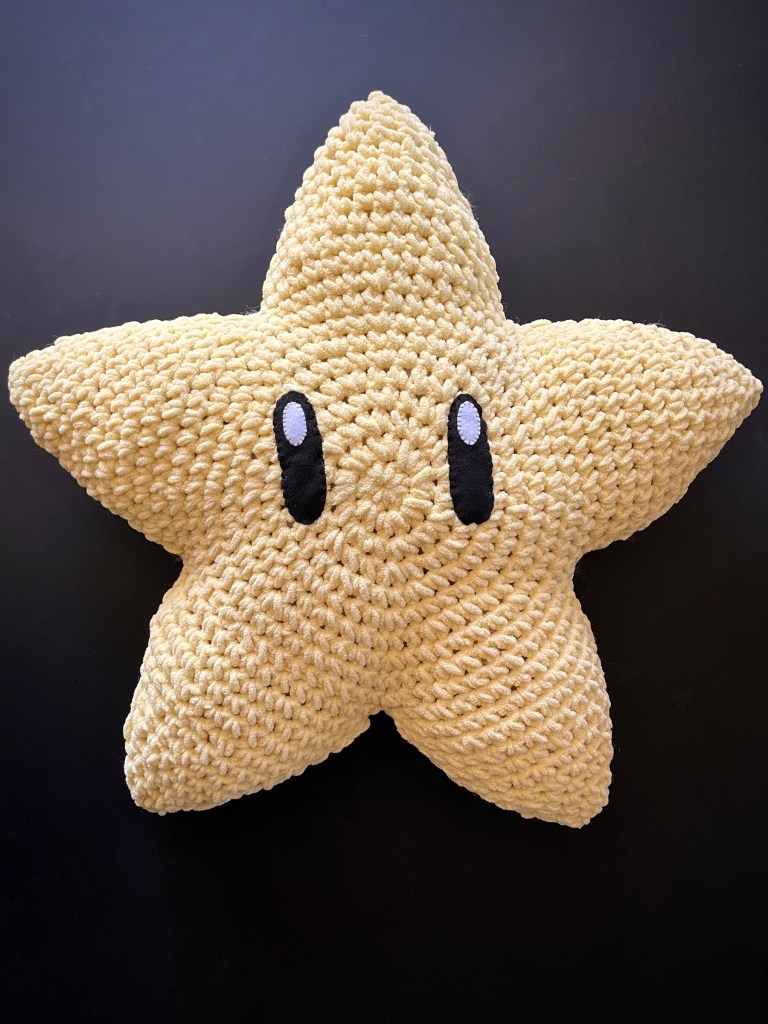
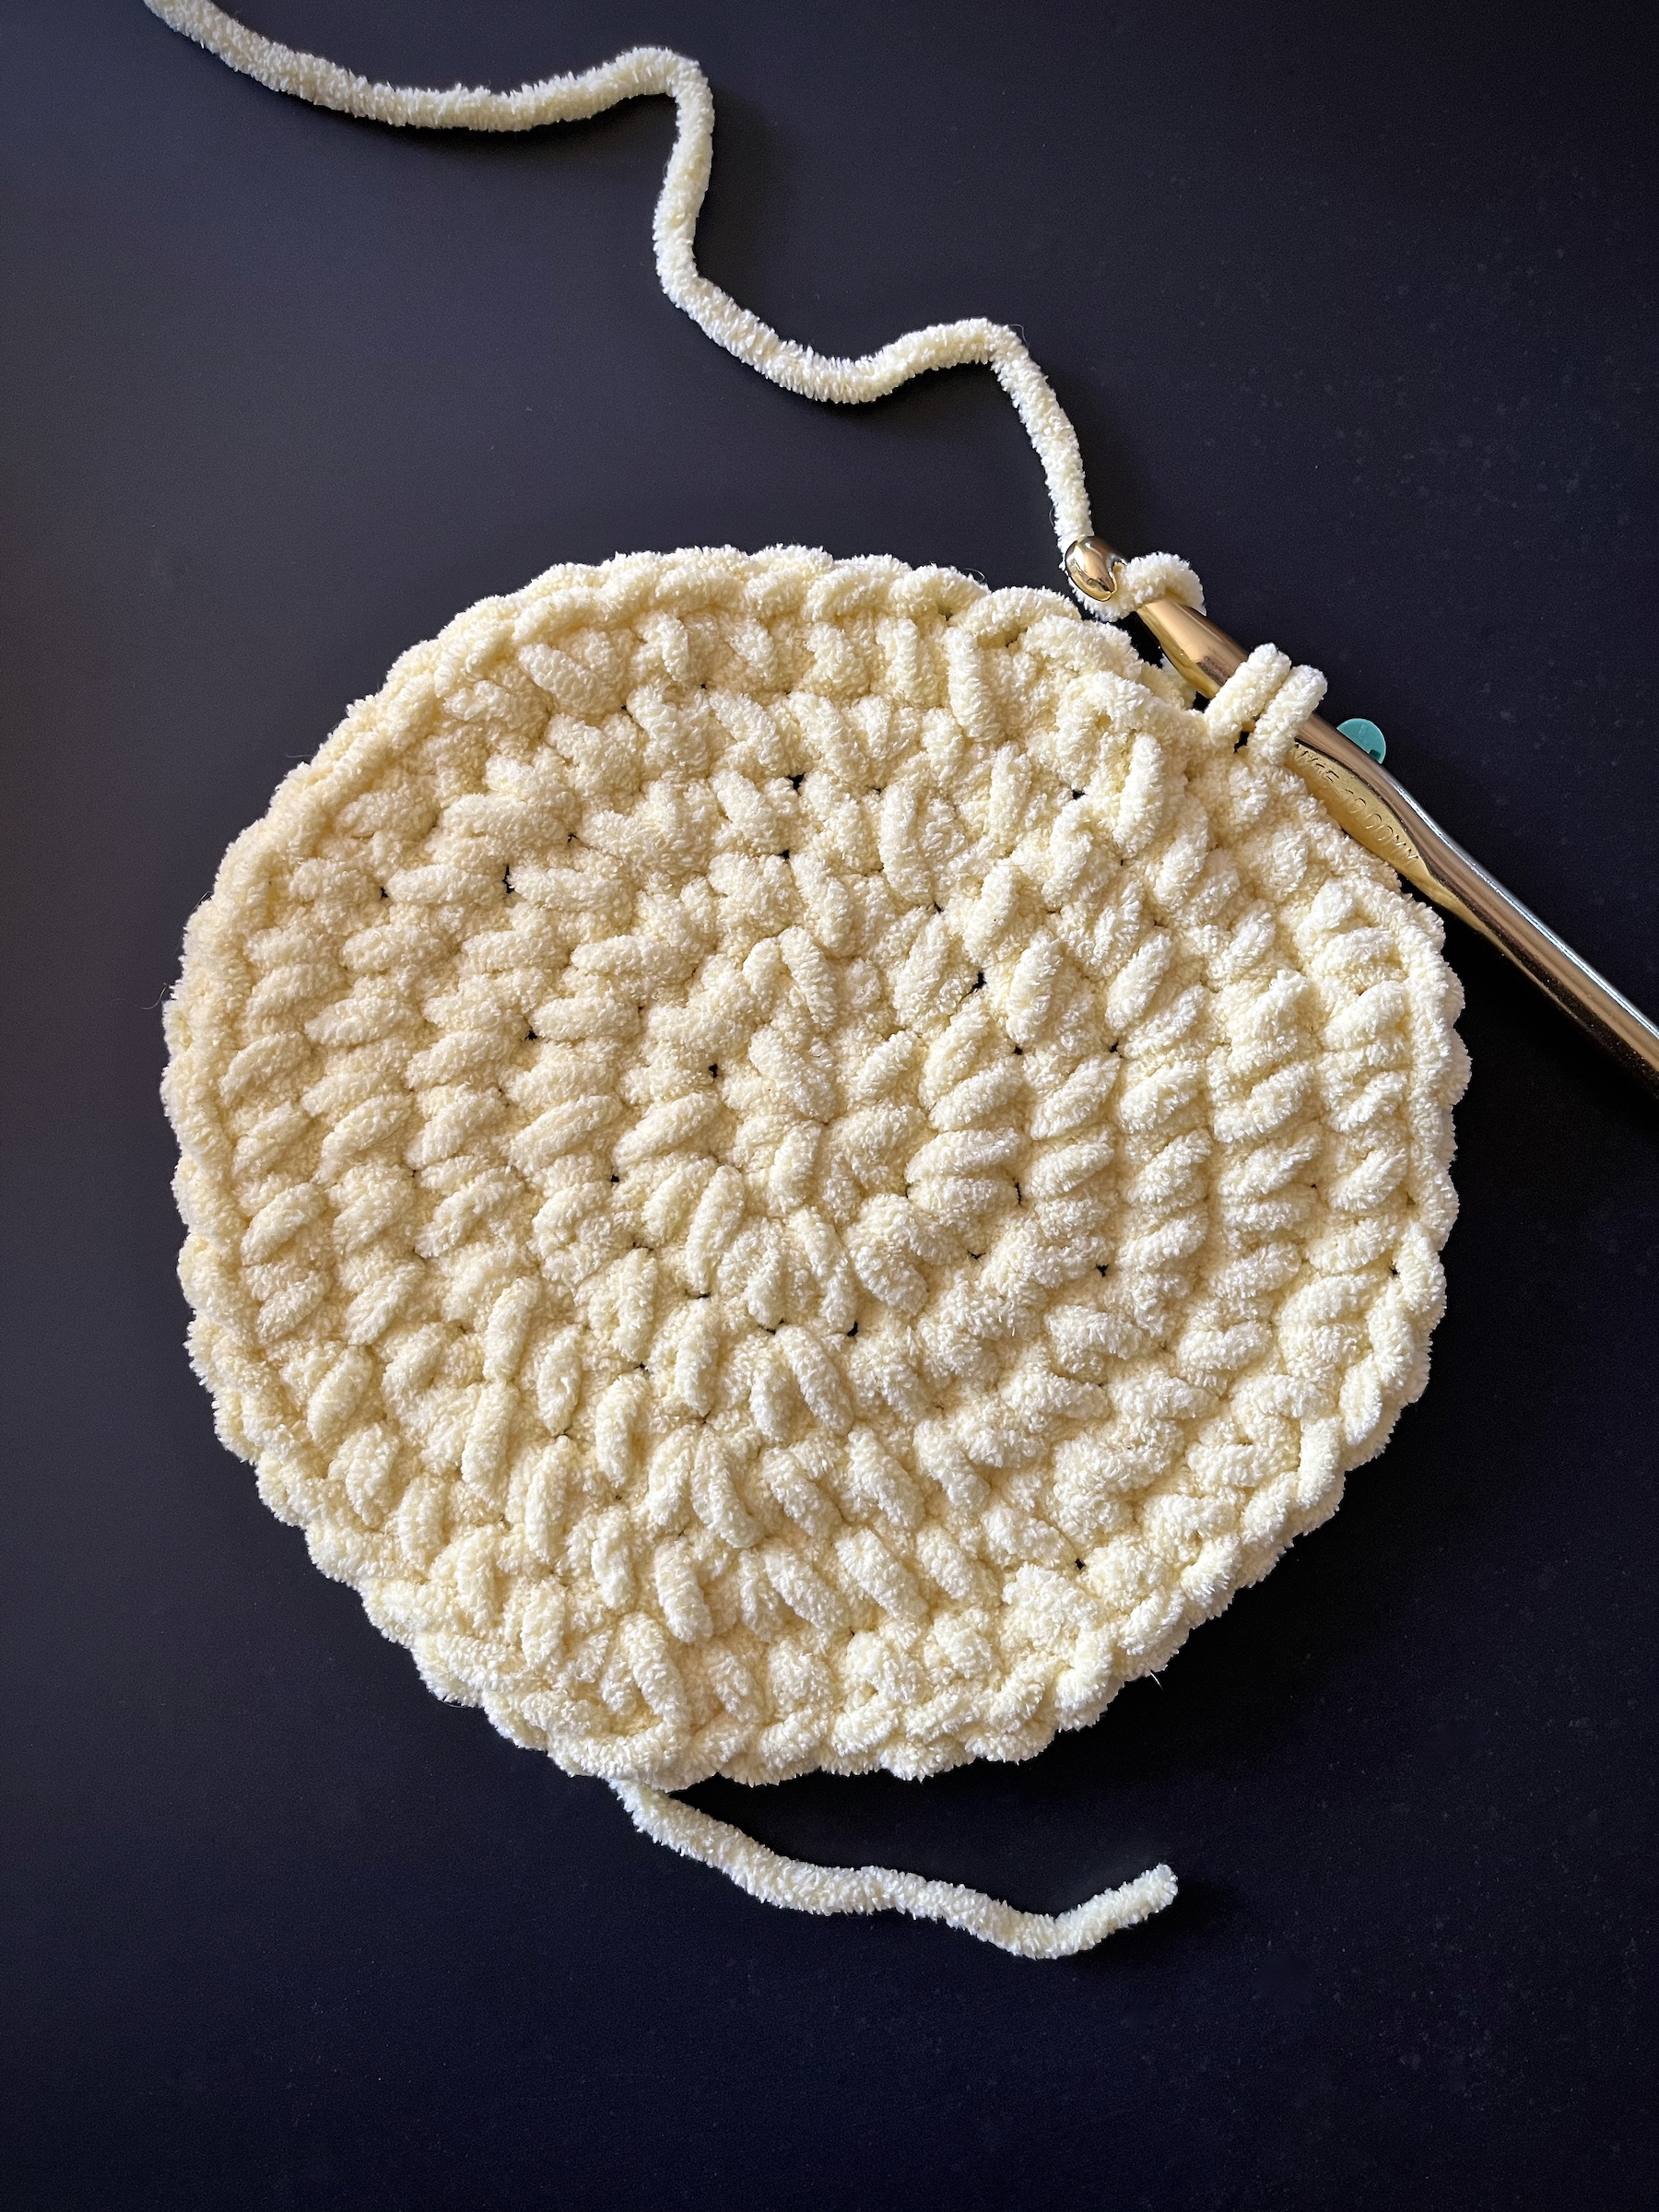
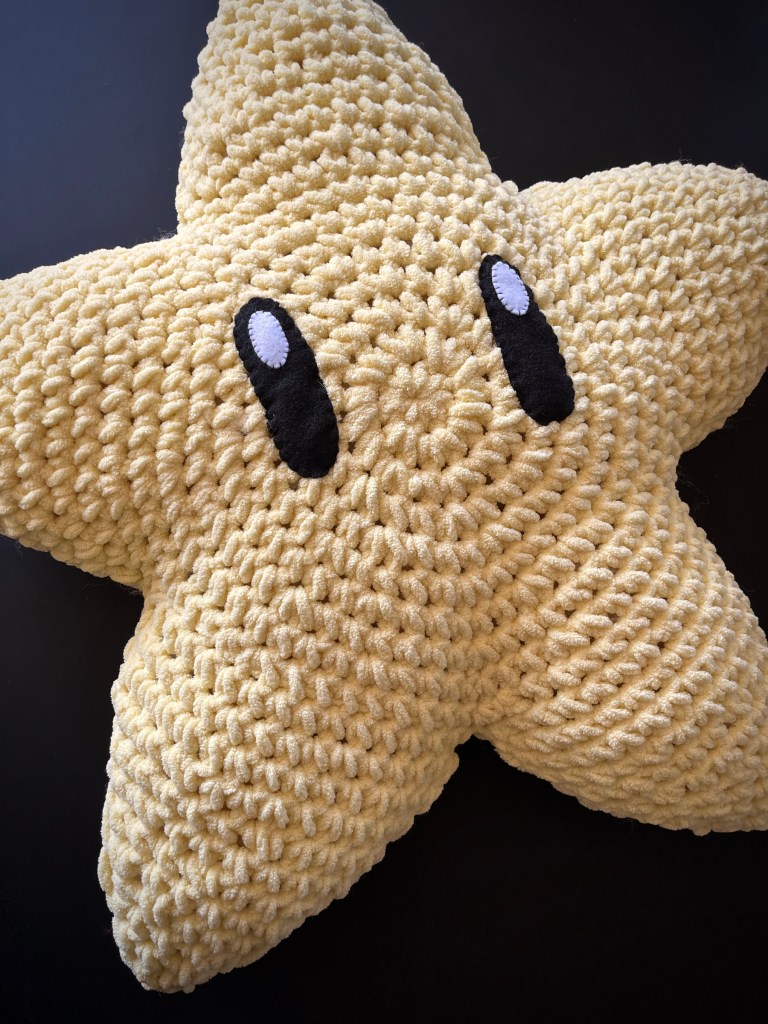
March 10th was Mario Day! In celebration I created this super soft and cuddly Super Star pillow! This pattern is intermediate and ideal for those who know their way around “magic rings”, “increases” and “decreases”. Any chenille-style yarn, size 6, can be used in this pattern, but for my example piece I used Bernat Baby Blanket Yarn in buttercup yellow.
Round 1: Create a magic ring with 8 single crochets (total of 8 stitches). Place a stitch marker in the last stitch of this round.
Round 2: Increase in each stitch around (total of 16 stitches). Place a stitch marker in the last stitch of this round (henceforth remove it and move it up to the last stitch in each round after this one).
Round 3: 1 single crochet, 1 increase, alternating around the round (24).
Round 4: 1 single crochet, 1 increase, 1 single crochet, alternating around the round (32).
Round 5: 3 single crochet, 1 increase, alternating around the round (40).
Round 6: 2 single crochet, 1 increase, 2 single crochet, alternating around the round (48).
Round 7: 5 single crochet, 1 increase, alternating around the round (56).
Round 8: 3 single crochet, 1 increase, 3 single crochet, alternating around the round (64).
Round 9: 7 single crochet, 1 increase, alternating around the round (72).
Round 10: 4 single crochet, 1 increase, 4 single crochet, alternating around the round (80).
Finish off the first center piece of the star by slip stitching into the next stitch, then cutting the yarn pulling the end through. Using a yarn needle, stitch the loose end of the yarn into the body of the center piece and set it aside.
Repeat steps 1 through 10 to create a second center piece of the star. This time, do not slip stitch, leave the yarn attached and move the stitch marker to the last stitch.
On this second center piece that we have not tied off, count 16 stitches from the marker on your last stitch from the round before and put a stitch marker through the 16th stitch. Count 16 stitches from this marker and place another marker through that stitch. Continue this around your center piece until you have 5 markers total.
Place the marked centerpiece over the tied-off centerpiece with the more textured sides both facing out, then re-pin the five markers through the aligned stitches of both centerpieces.
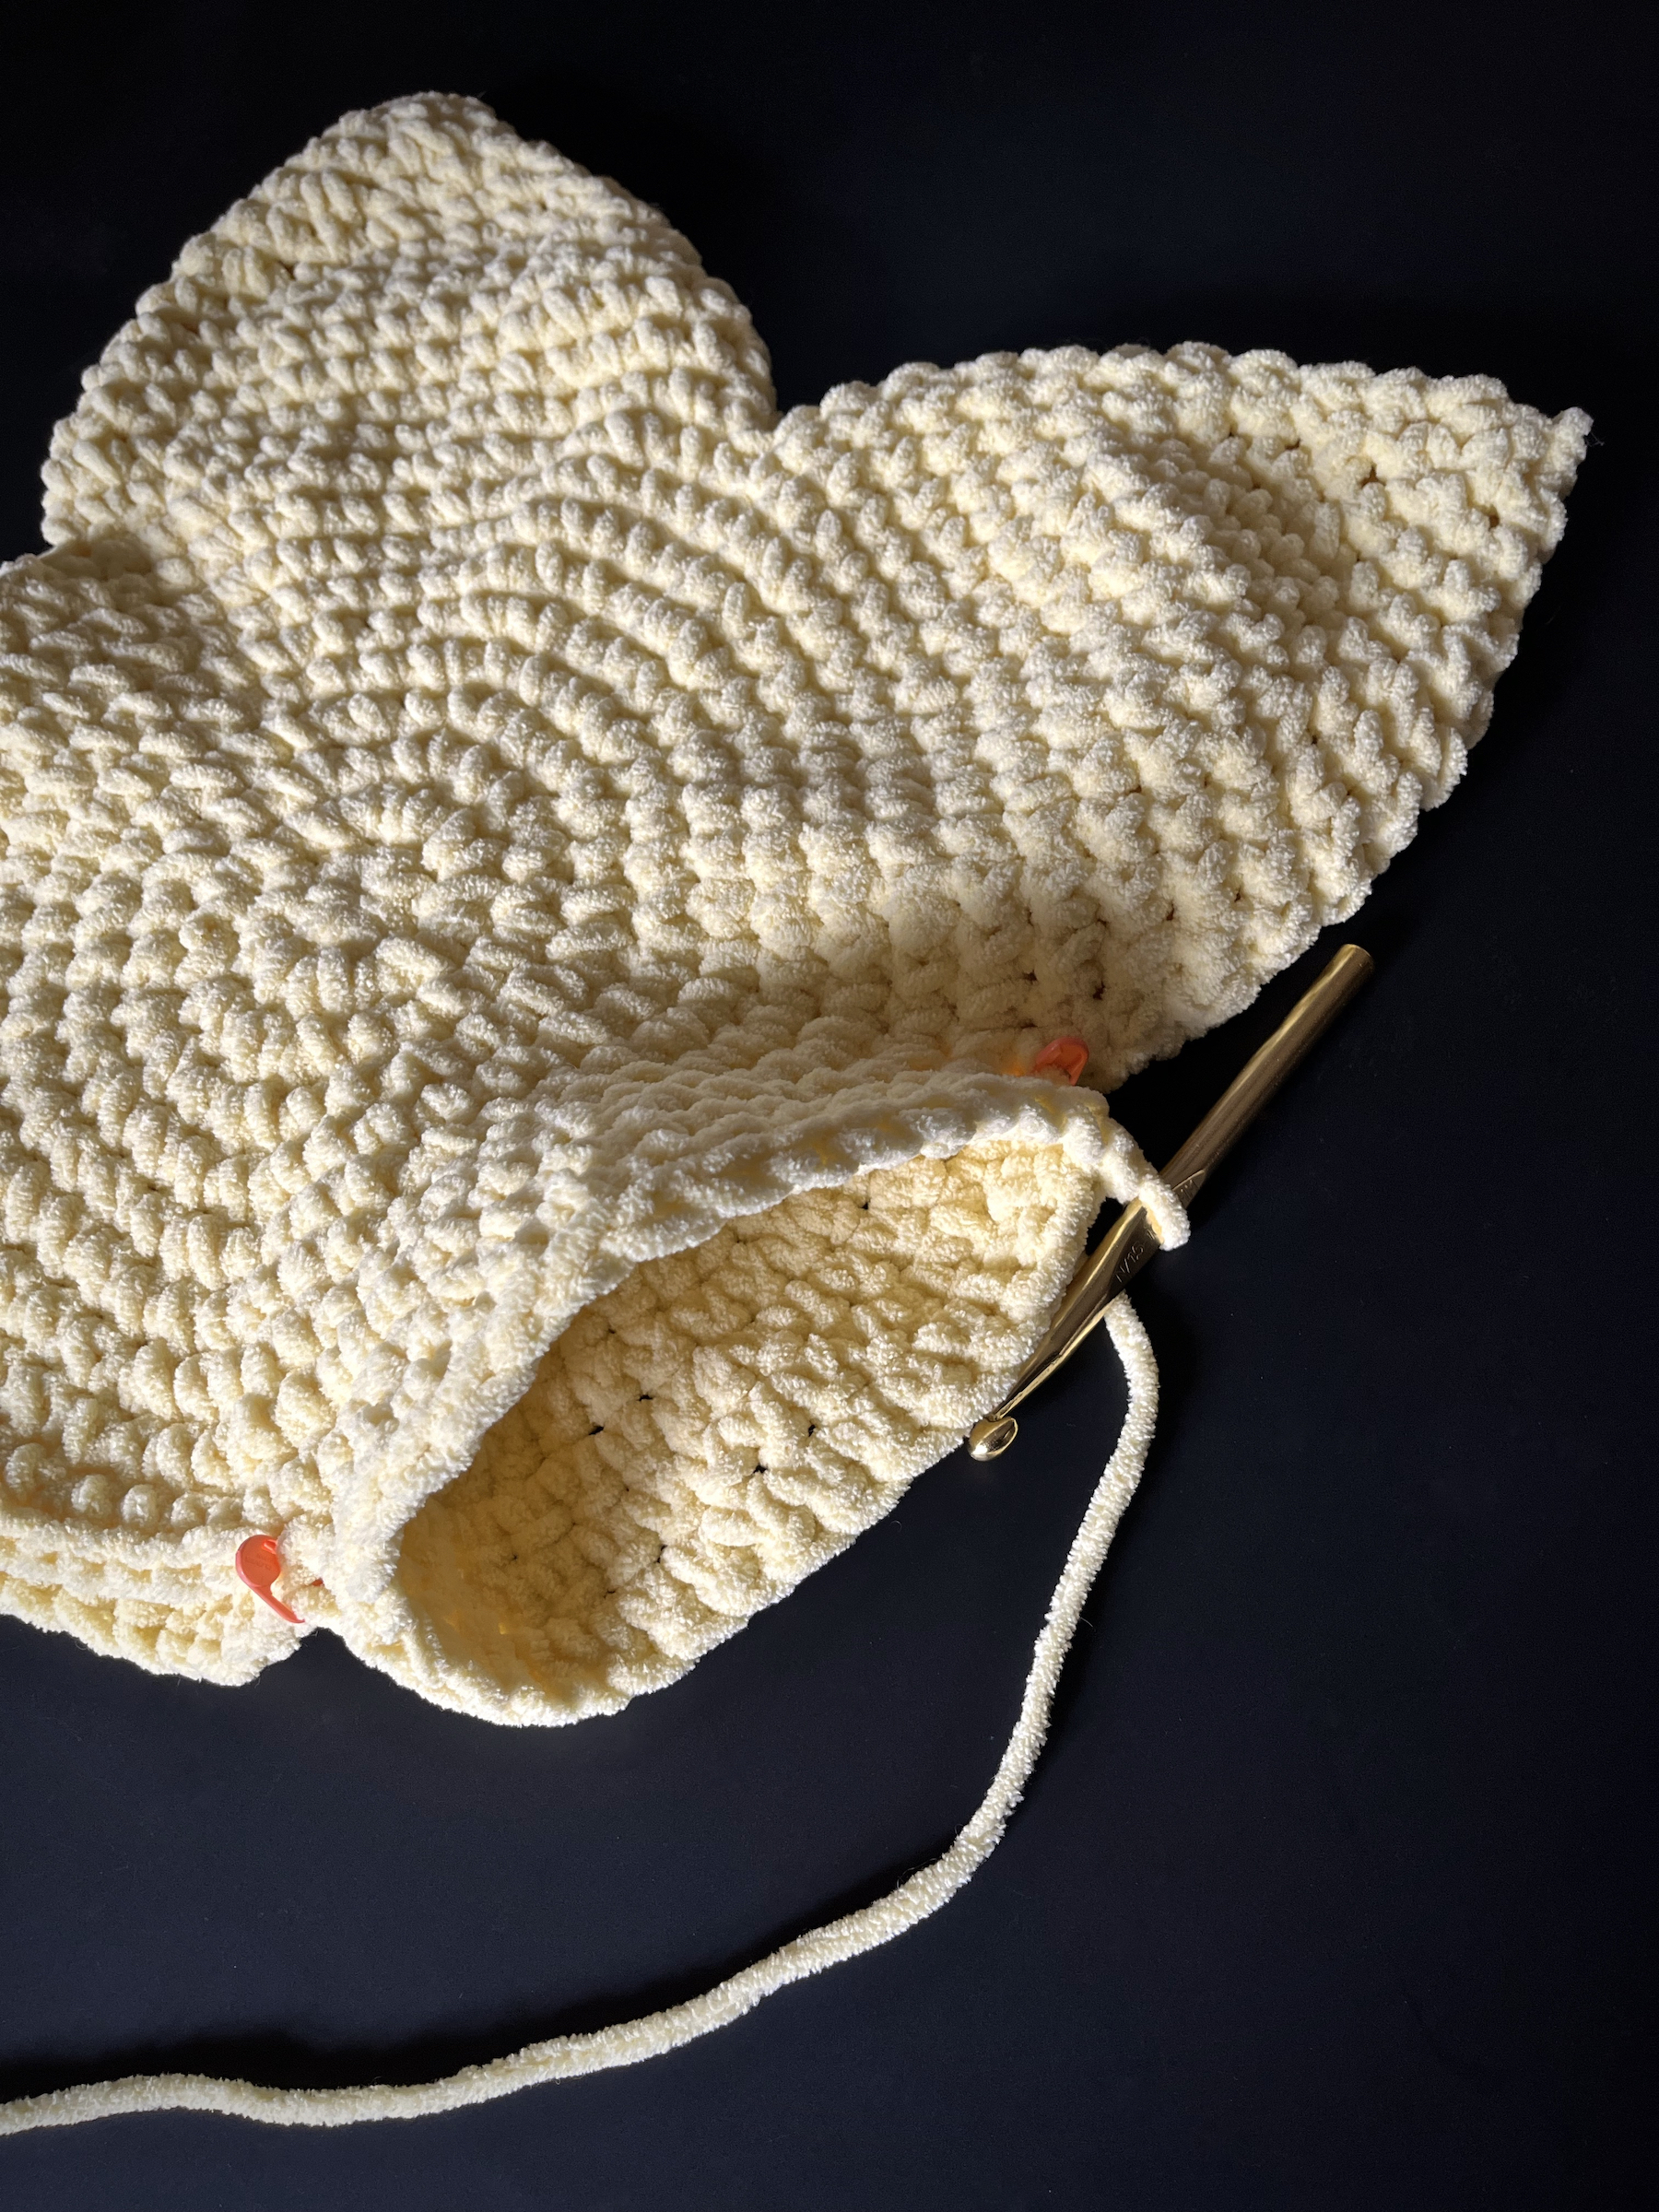
Point Round 1: 16 single crochet down one side of the pinned centerpieces from marker to marker with the 16th stitch bringing both sides together just inside the next marker. Then turn your work and do 16 single crochet up the other centerpiece side to reach your starting point (32). Place a stitch maker in the last stitch of this round, which also joins both sides together.
Point Round 2: Single crochet in each stitch around (32). Place a stitch marker in the last stitch of this round (henceforth remove it and move it up to the last stitch in each round after this one).
Point Round 3: 14 single crochet, 1 decline, turn the project around and then 14 single crochet and 1 decline (30).
Point Round 4: 4 single crochet, 1 decline, 4 single crochet, alternating around the point round (27).
Point Round 5: 7 single crochet, 1 decline, alternating around the point round (24).
Point Round 6: 3 single crochet, 1 decline, 3 single crochet, alternating around the point round (21).
Point Round 7: 5 single crochet, 1 decline, alternating around the point round (18).
Point Round 8: 2 single crochet, 1 decline, 2 single crochet, alternating around the point round (15).
Point Round 9: 3 single crochet, 1 decline, alternating around the point round (12).
Point Round 10: 1 single crochet, 1 decline, 1 single crochet, alternating around the point round (9).
Point Round 11: 1 single crochet, 1 decline, alternating around the point round (6).
Point Round 12: Decline 3 times (3).
Cut off your yarn with a little bit of a tail. Attach a yarn needle and insert your needle through the top 3 stitches of the point and pull them tight to make a sharper point. Then stitch the rest of the tail into the body.
To begin a new point with loose yarn, insert your hook into the first stitch, yarn over with your loose yarn and pull through, then complete the stitch by yarning over and pulling through this loop. This will anchor your loose yarn to the next point and mark the first stitch.
Repeat steps 15 through 27 to create the next point. If you’re feeling lost, remember to always count your stitches. At the end of each round the amount of stitches should match the number I’ve put into parenthesis for that round.
Continue repeating steps 15 through 27 until you have completed 4 points of the star, then stuff what you’ve completed. Do not worry about the holes at the base of each point, we will sew them up once we’ve completed the final point.
Begin the last point and stuff it a little at a time as you stitch upwards. Finish the stuffing with chopstick and tie off.
Once the star has been stuffed and completed with 5 points, use the same yarn and a yarn needle to sew up any holes, found at the base in between each point. Concealing any excess yarn by stitching it into the body of the star.
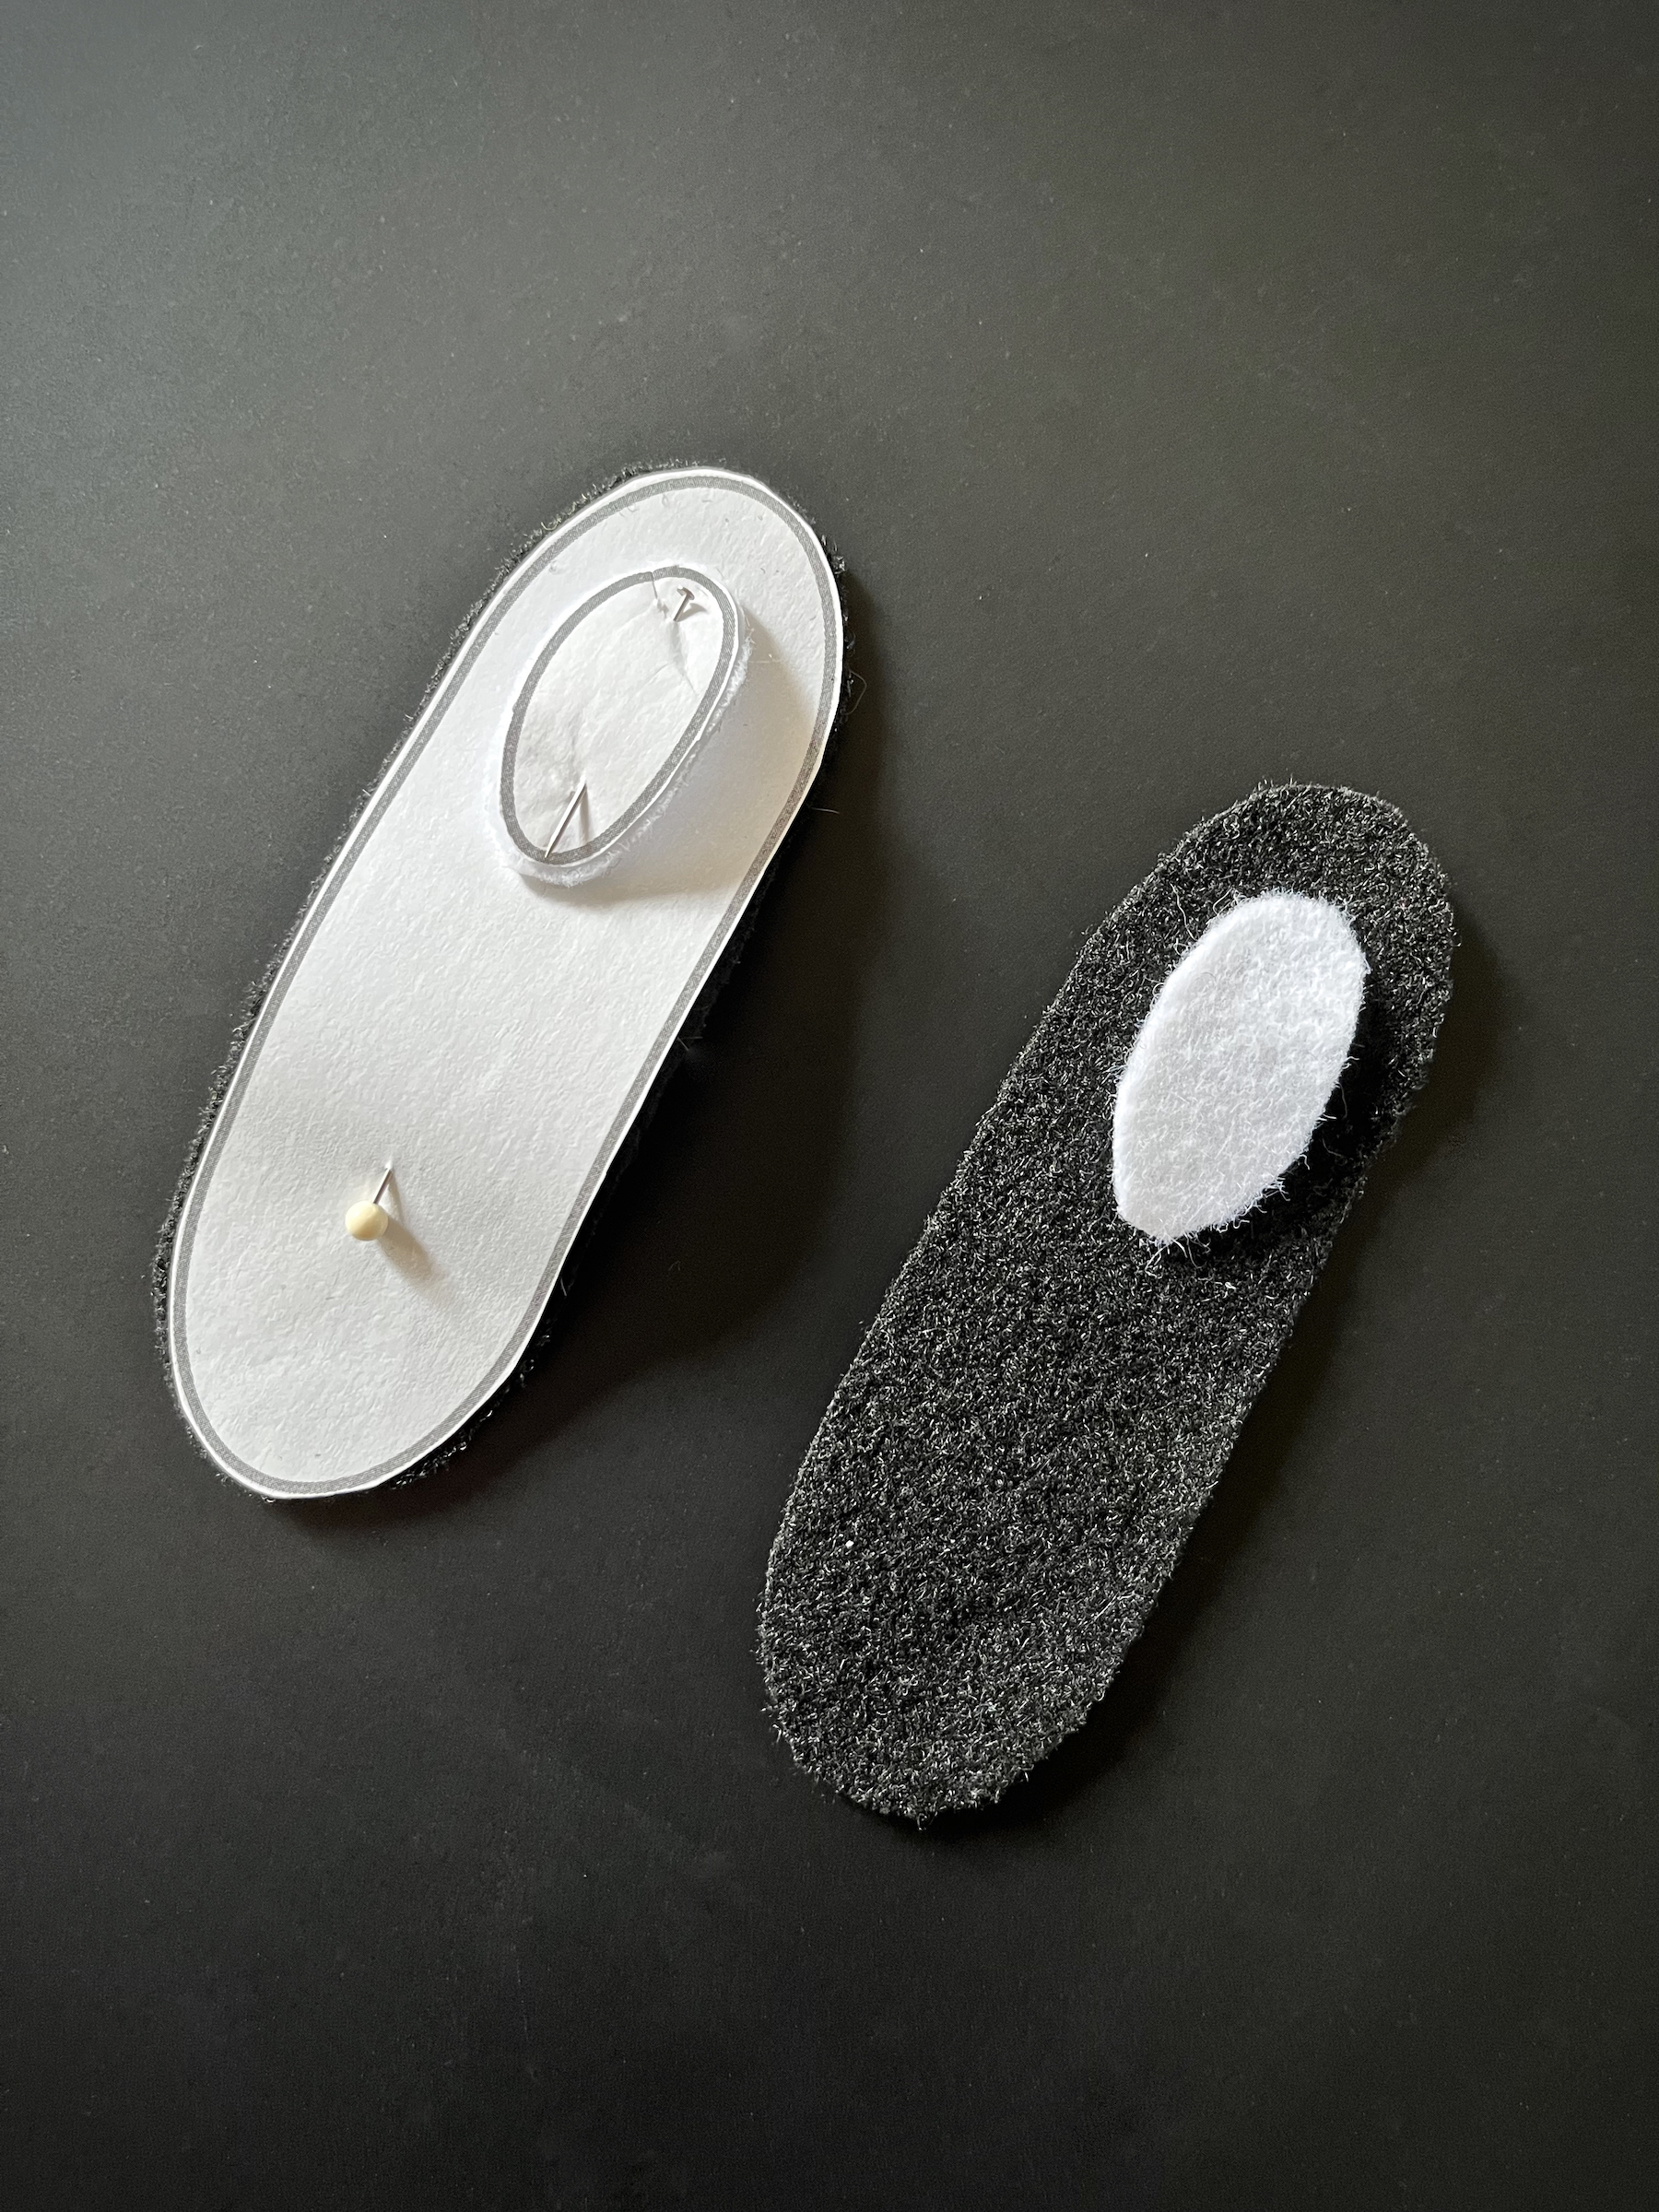
Once the star has been completed. Cut out the pieces for the felt eyes using the patterns I’ve provided, and the black and white felt.
Stitch the white highlights onto the black backgrounds, then stitch the eyes onto the pillow.
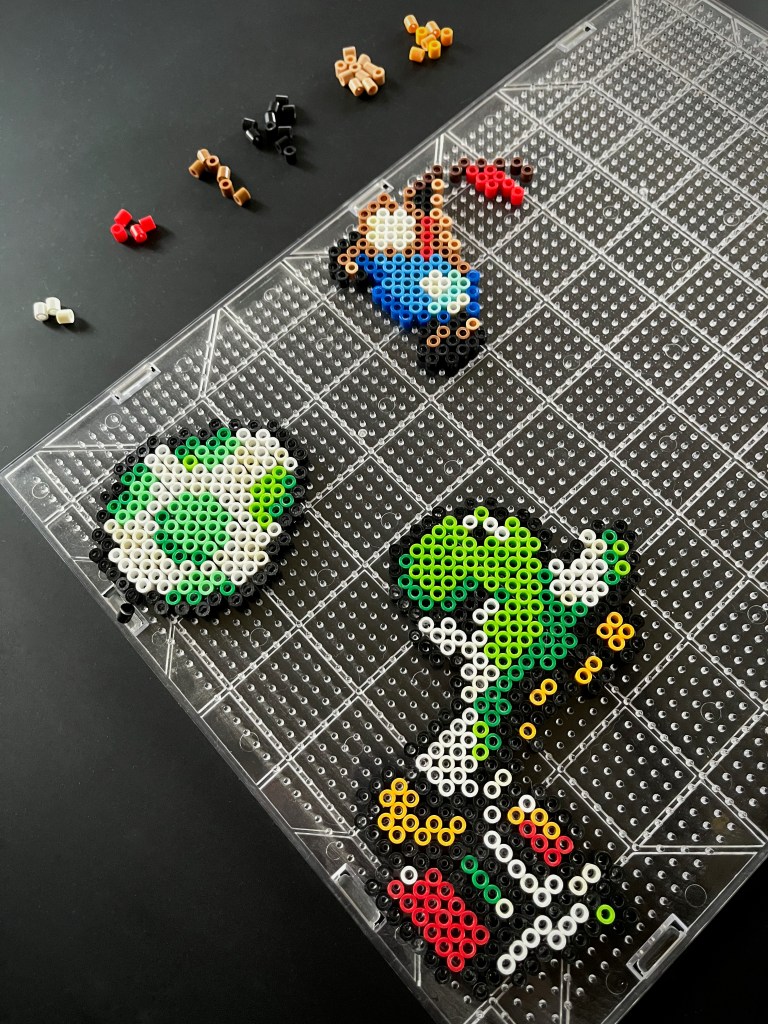
Welcome back friends! We bought a new refrigerator some time ago and I’ve been thinking it would be nice to decorate it with some Super Mario Bros. magnets! Also, March 10th is Mario Day!
Working with a limited amount of black and white perler beads, I chose a handful of characters / objects from Super Mario World to begin with, and more to come! I created (and the pictures of the patterns are included below) for small Mario, small Luigi, a coin, Yoshi’s egg and Yoshi.
The magnets turned out great! I left them a little less melted on outward facing side because I like the look, but you are always welcome to melt them more! Be careful with the iron, but don’t be afraid to make some mistakes! Mistakes happen for everyone, you may see two pieces of my Mario’s mustache that were over-melted from an unevenly heated iron, but if it’s not worth scrapping the whole piece, embrace it!
Let’s get started!
SUPPLIES
Fuse beads
Fuse bead pegboard
Parchment paper
Point tweezers (optional)
Painter’s tape
Seam ripper
Iron
Iron-safe surface
Peel and stick magnet discs
INSTRUCTIONS
If your beads did not come pre-sorted by color, sort them into the colors you need per character and/or object.
On your pegboard, begin laying out the appropriate colored beads for the character(s) and/or object(s) you’ve chosen. I recommend working on one character/object at a time, then moving on to the next.
If you are having a hard time placing beads into specific places, use pointed tweezers to pick up each bead and then insert it.
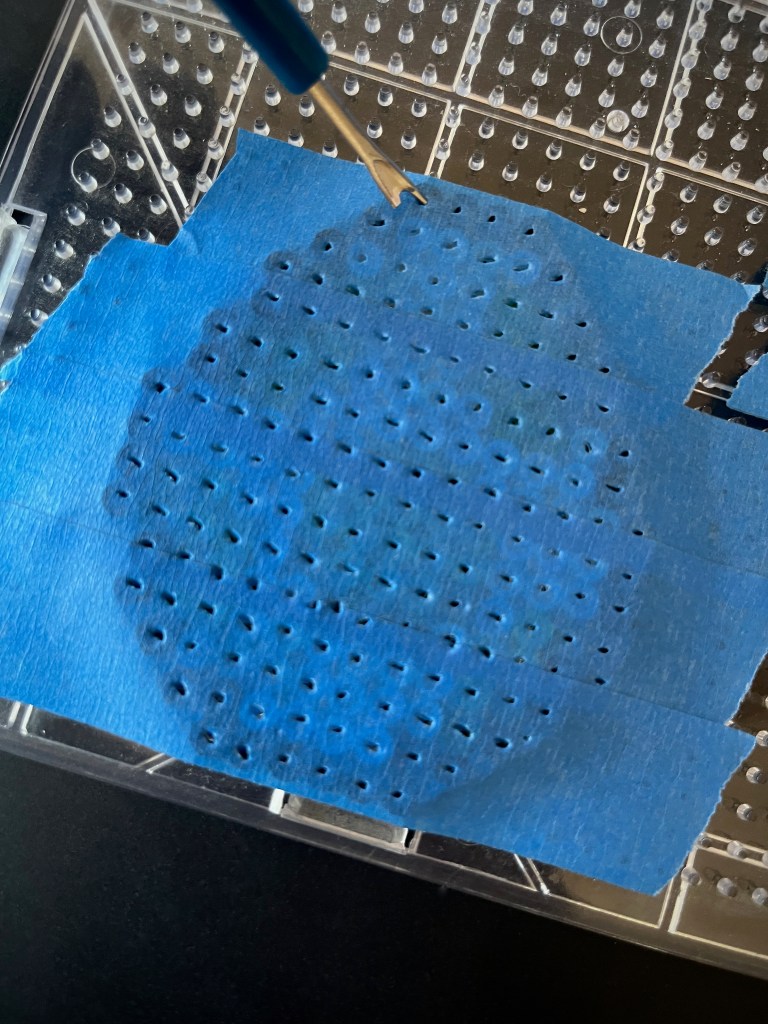
Once each character has been completed, take strips of painter’s tape and cover that character, slightly layering each piece of tape so it’s one connected piece.
Take a seam ripper (or other sharp pointed tool) and poke a small hole into the center of each fuse bead in the pattern. This allows built up heat to escape the tape when ironing.
Carefully remove the taped pattern from the peg board and place it tape-side down on an iron-safe surface. Then place parchment, wax, or ironing paper over it.
Heat a dry iron to a medium heat and as smoothly and evenly as you can, begin to iron the project in a circular motion. Do not press down. Beads take about 10 to 20 seconds per side to fuse evenly and some colors may fuse more quickly than others.
When the beads begin to fuse together you’ll see their colors more clearly through the paper and the center holes will shrink to a pinhole size. Lift the paper occasionally to see how the beads are fusing.
Let the design cool, placing a flat and heavy object over it to keep it from curling.
Remove the weight and paper and flip the project over. Peel off the tape and place the paper back on this side of the project.
Repeat step 7 through 9 on this side of the project. I chose to only lightly fuse the beads on this side because I prefer the look, but you are welcome to melt them more!
Remove the weight and paper and flip the project over.
Peel the back-liner off a magnet and attach it to the back of your project. For the smaller objects like the coin and egg, I used one magnet. For Mario and Luigi I used two, spread evenly. And for Yoshi, I used three magnets, spread evenly!
Stick to you refrigerator or other magnetic surface and enjoy!