DIY Frozen Mickey and Minnie Baby Treats using Candy Molds

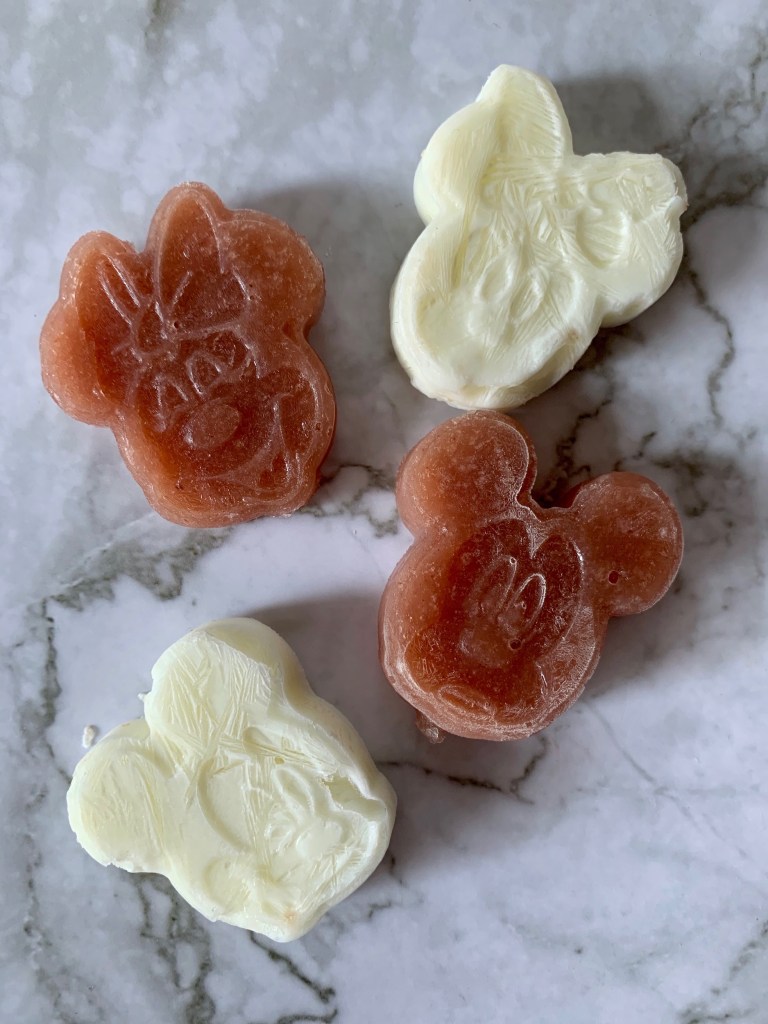
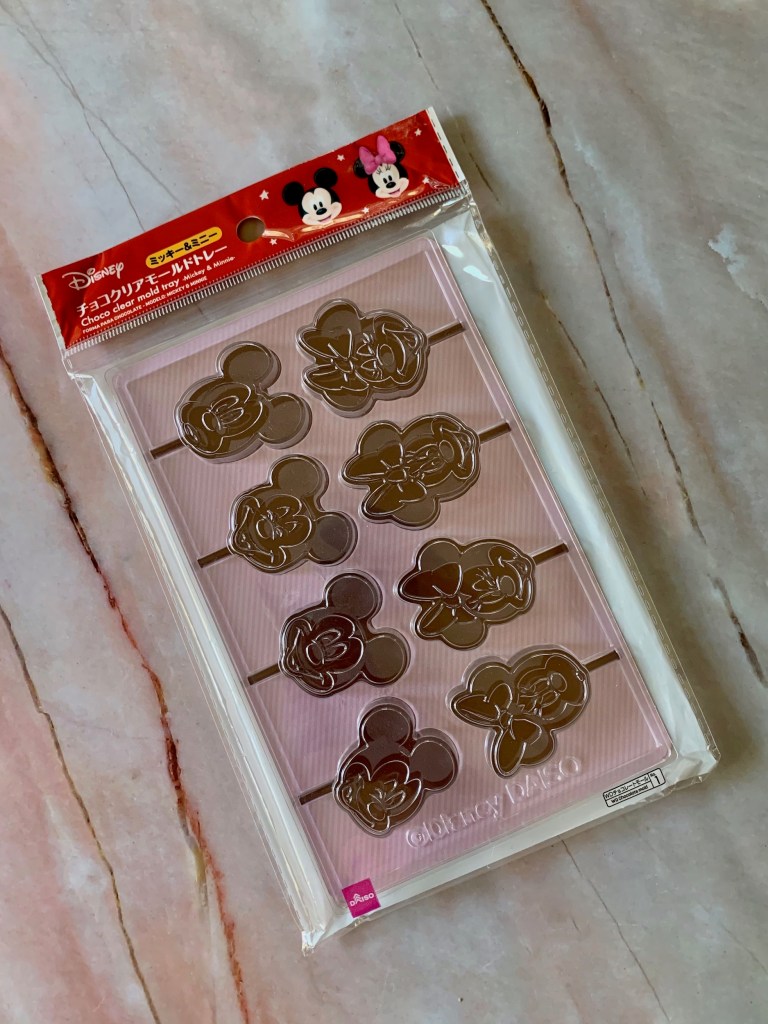
DIY Frozen Mickey and Minnie Baby Treats using Candy MoldsDuring these Summer months, and even into Fall, we get some pretty warm and sometimes uncomfortably hot days. To cool Zoey off and soothe her teething gums, I thought it would be fun and refreshing to make some frozen treats using the food she already eats and candy molds!
DIY Frozen Mickey and Minnie Baby Treats using Candy Molds

SUPPLIES
  • Candy mold of your choice (I used Mickey and Minnie)
  • Baby food
  • Yogurt (optional)
INSTRUCTIONS
  1. Wash and dry the candy mold.

    DIY Frozen Mickey and Minnie Baby Treats using Candy Molds
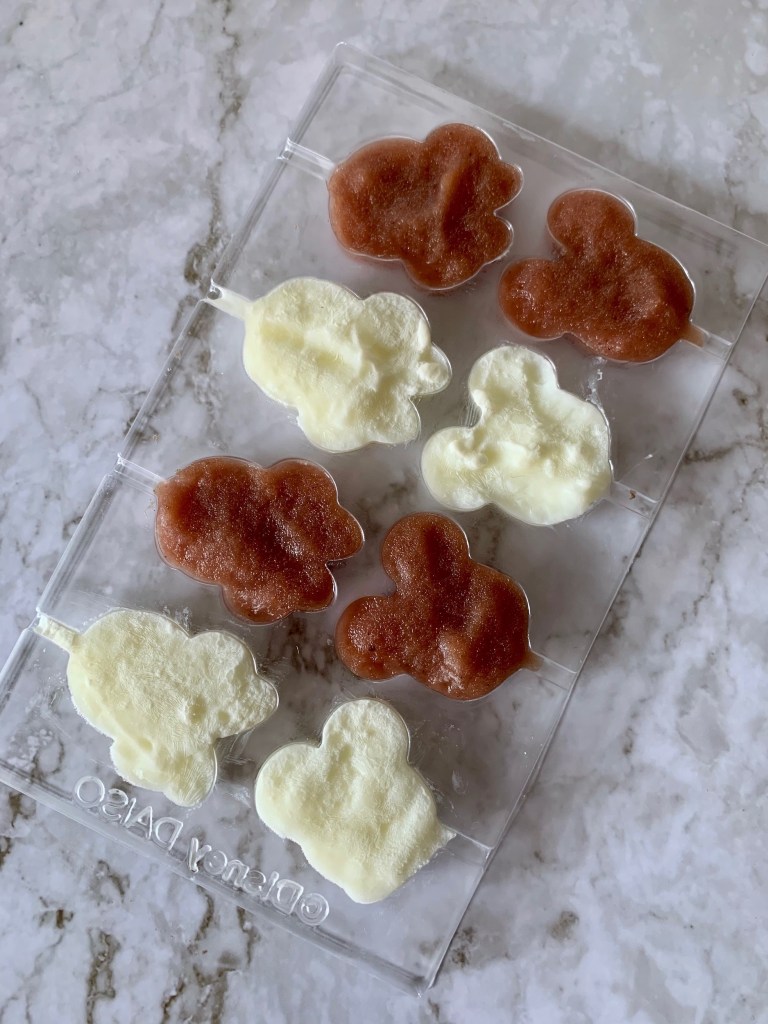
  2. Choose the flavor of baby food and/or yogurt you would like to freeze and spoon it into the candy molds until it’s even with the top of the mold. I wiped the top of my mold down to make it look better, but you do not need to do this.

    DIY Frozen Mickey and Minnie Baby Treats using Candy MoldsDIY Frozen Mickey and Minnie Baby Treats using Candy Molds
  3. Place the mold in the freezer for an hour or more until the contents are frozen.

    DIY Frozen Mickey and Minnie Baby Treats using Candy Molds
  4. Remove the mold from the freezer and pop out one or two frozen treats at a time for baby to enjoy!

    DIY Frozen Mickey and Minnie Baby Treats using Candy MoldsDIY Frozen Mickey and Minnie Baby Treats using Candy Molds

Tabletop Game – Let’s Play Blokus!

Tabletop Game Blokus by Mattel GamesI’m always on the look out for a fun, entertaining way to pass the time like a good tabletop game! Blokus was introduced to us by my husband’s parents and we enjoyed playing it so much we purchased it straightaway!

Tabletop Game Blokus by Mattel GamesBlokus is a two to four player strategy game that can be played with reckless abandon, or the studied care one would reserve for Chess or Checkers.

Players each choose a color and a corner, then decide who goes first; turns proceed clockwise around the board. To begin, each player must use their first turn to lay down a piece that covers their base corner’s square. Play then continues with each player placing one piece each turn that must touch the corner of one of their colored pieces, but only the corners! Full sides of the same color may not touch one another.

Tabletop Game Blokus by Mattel GamesWhen a player reaches a point where they cannot place another piece, they are done. The game ends when no player can place anymore pieces. Once the game ends the players count the number of squares in their unplayed pieces, the player with the lowest number of squares left, wins!

Tabletop Game Blokus by Mattel GamesMy only complaint is based on the packaging or storage. The version we purchased has no storage for the 84 colored pieces which is surprising and disappointing. I use four sandwich bags, one for each color to store them. This cuts down on the amount of time spent sifting through the pieces before starting each game!

Tabletop Game Blokus by Mattel GamesIf you’re looking for a fun, fresh take on a timeless strategy game that feels like a spiritual successor to Checkers and/or Chess, check out Blokus!
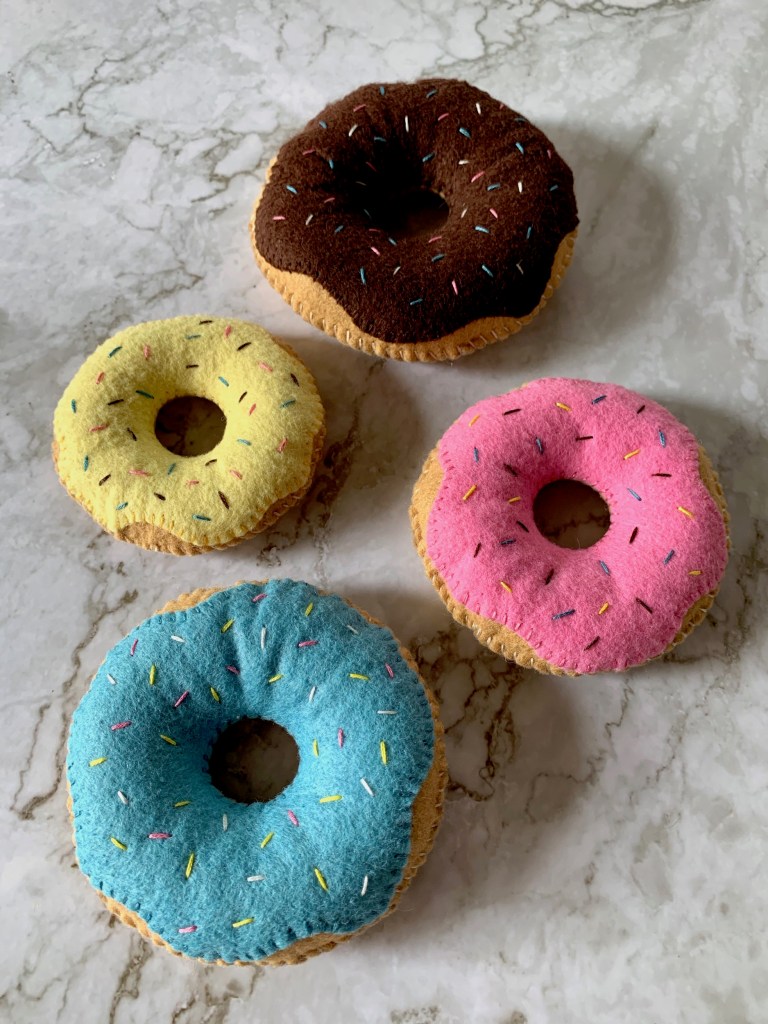
DIY Stacking Felt Doughnuts with Sprinkles!

DIY Felt Stacking or Stackable Doughnuts with SprinklesPart of the fun in raising Zoey is making things that teach and fascinate her. I’ve seen the stacking toy done in so many fun and creative ways, but I don’t believe I’ve seen a felt doughnut stacking toy yet, so let’s make one!
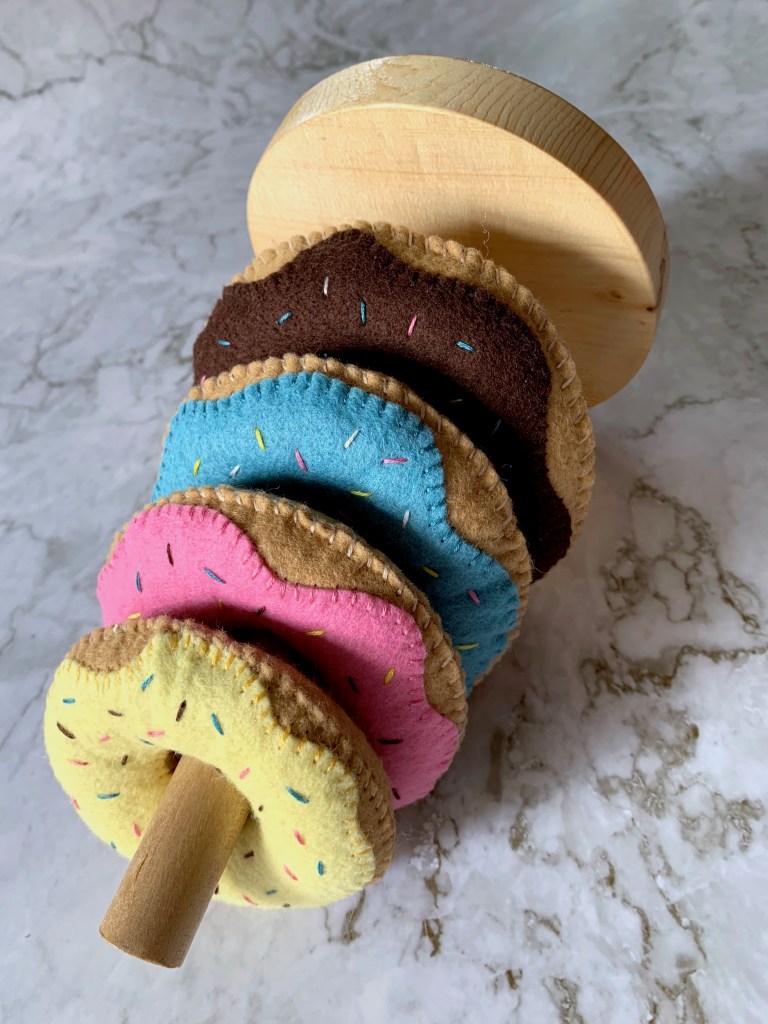
My Dad, Zoey’s Grandpa Kev, made the base of this toy. If you do not have access to a competent woodworker/carpenter to make a base, I would recommend using the base of another stacking toy. You can switch out between the rings that came with the toy and felt doughnuts!

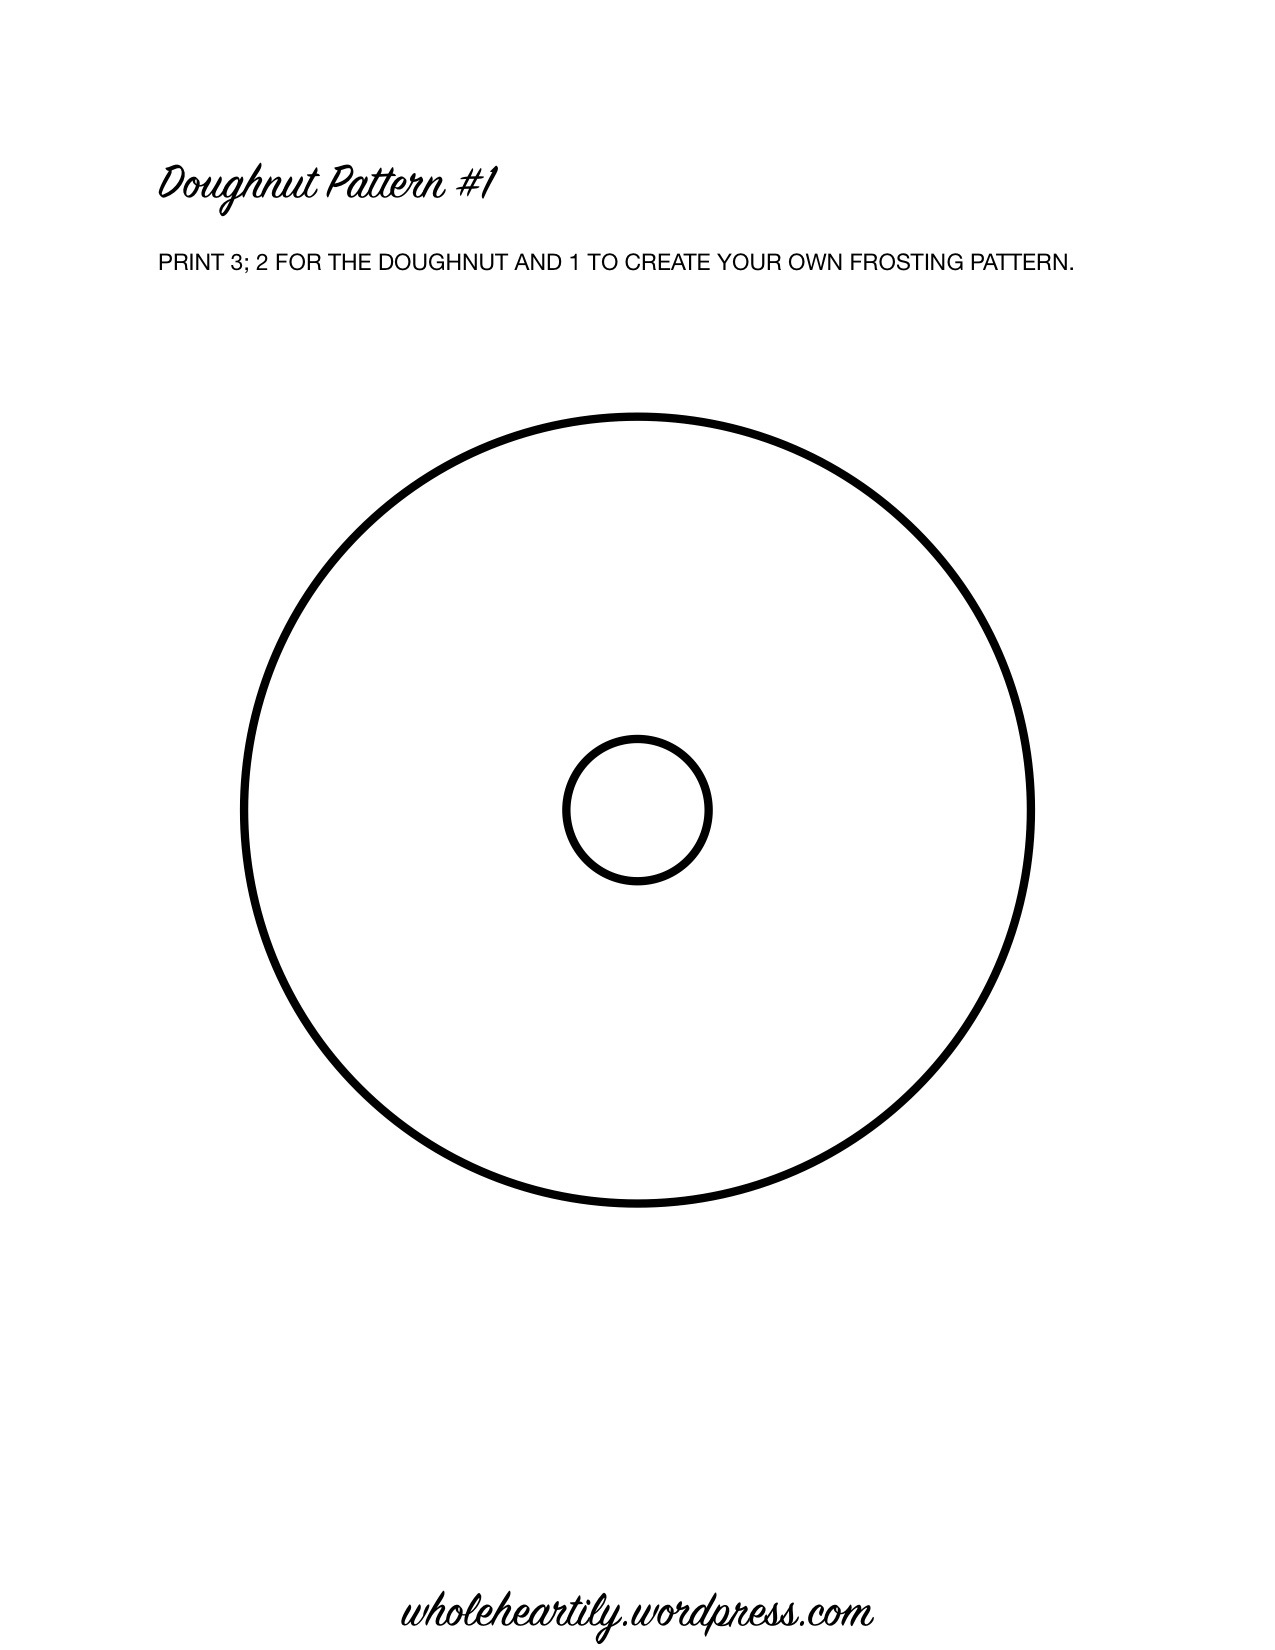
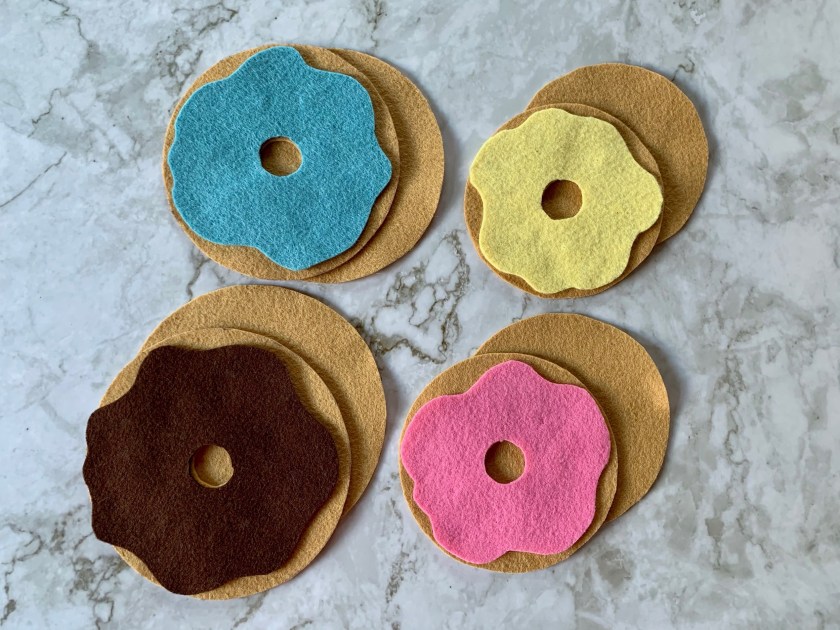
DIY Felt Stacking or Stackable Doughnuts with SprinklesI have provided the patterns I used to make the four different sizes of donuts for my stacking toy. You’re welcome to use them if the base of your toy closely resembles mine, or you can make them as play food without the base. Another option would be to create your own patterns using the measurements of your base and a compass.
Pattern for Felt Doughnuts
Doughnut Patterns

SUPPLIES
  • Doughnut and frosting patterns
  • Scissors
  • 4 sheets (9” x 12”) of a doughnut colored felt of your choice
  • A skein of closely matching doughnut colored embroidery thread
  • 4 sheets (9” x 12”) of frosting colored colored felt of your choice
  • 4 skeins of closely matching frosting colored embroidery thread
  • Embroidery needle
  • Fiber filling (stuffing)
INSTRUCTIONS
  1. Print 3 copies each of the two supplied pattern pages.
  2. Use the first two copies to cut out a pair of each size of circle, one for either side of the doughnut.
  3. Create your own wavy frosting pattern within each of the circles on the third pages, and cut those patterns out for your frosting.
  4. Lay the circular patterns on the felt you’ve chosen for you doughnuts and pin them in place.
  5. Lay the frosting patterns on the felt you’ve chosen for the frosting; these can be all the same color, or different colors.
  6. Cut around the patterns. You can do this directly or trace around the edges of the patterns with a pen, then remove the patterns and cut out each shape.

    DIY Felt Stacking or Stackable Doughnuts with Sprinkles
  7. Place the frosting for each doughnut on one of the doughnut halves, aligning the center holes, and pin them to keep them secure.
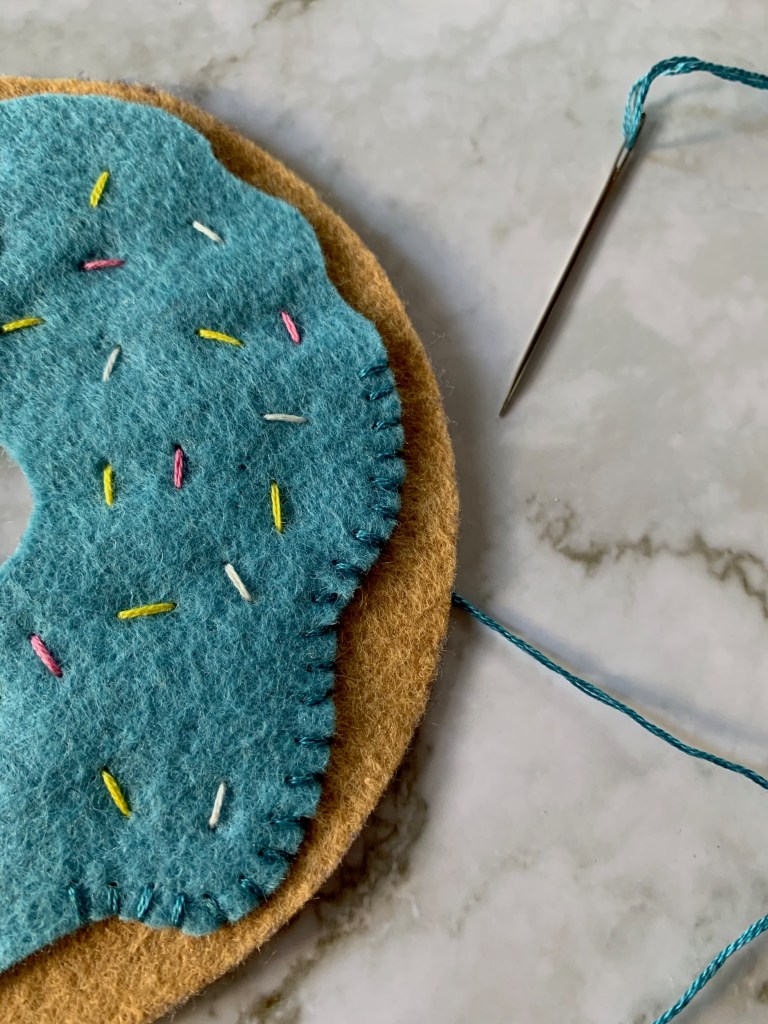
  8. Cut a length each of three different colored embroidery threads for the sprinkles; there are 6 strands in each embroidery thread, split them in half three by three and peel them apart.
  9. Thread the needle with your first sprinkle color, and poke the threaded needle up from the bottom of the top of the doughnut, emerging through the top of the frosting, and pull it through. Create a sprinkle size length in any direction you choose and poke the needle back down through the frosting to underneath the doughnut. Repeat this process all around the doughnut in a pattern you prefer and tie it off underneath.

    DIY Felt Stacking or Stackable Doughnuts with Sprinkles DIY Felt Stacking or Stackable Doughnuts with Sprinkles
  10. Remove the pins, repeat this process and create sprinkles in two more colors.
  11. Thread the needle with thread that matches the color of your frosting. Begin using neat whip stitches around the outside edges of the frosting starting with your knot underneath the top half of the doughnut.

    DIY Felt Stacking or Stackable Doughnuts with Sprinkles DIY Felt Stacking or Stackable Doughnuts with Sprinkles
  12. Using the same thread color as your frosting, align the bottom half of the doughnut to the top, frosted half and use neat whip stitches around the center hole. To hide your thread, knot it and pull it up through the bottom of the frosted layer to begin. When finished, poke the needle through the bottom doughnut layer, but only come through the middle in between the top and bottom of the doughnut to tie off your knot.
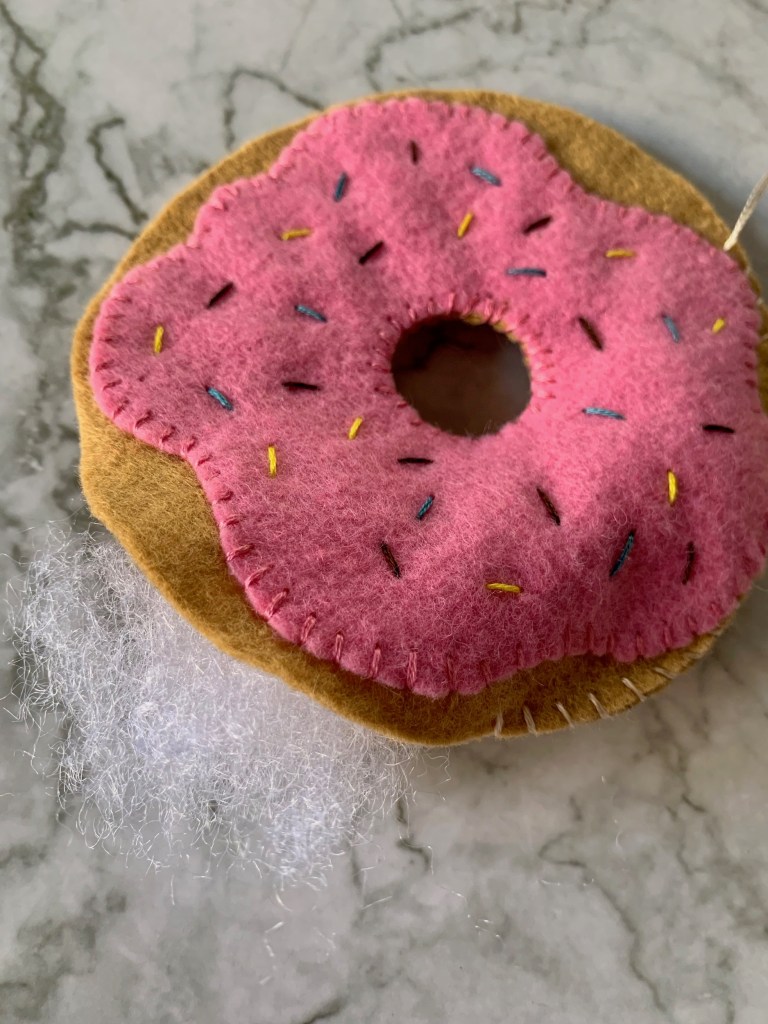
  13. Thread the needle with embroidery thread the color of your doughnut. Once again, use neat whip stitching along the outside edge of your doughnut, concealing the knot inside. About two thirds around, stop stitching and begin adding stuffing. Keep stitching and stuffing as space allows until you’ve made your doughnut whole.

    DIY Felt Stacking or Stackable Doughnuts with Sprinkles DIY Felt Stacking or Stackable Doughnuts with Sprinkles
  14. To conceal the knot, tie a knot at the base of your string still attached to the doughnut and pull it within the edges of the doughnut, going through the stuffing and coming out somewhere near he center hole, then trim this piece off.
  15. Repeat steps 7 through 10 to complete each size doughnut.

    DIY Felt Stacking or Stackable Doughnuts with Sprinkles
  16. Enjoy!

Concrete Genie – Genie Guide

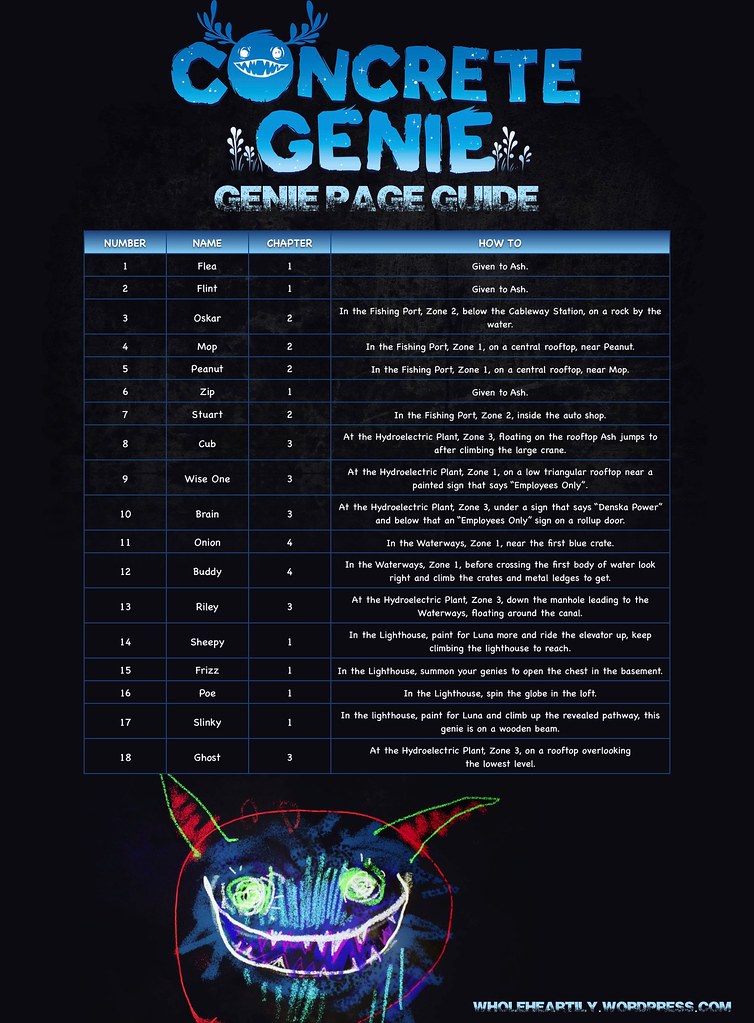
Concrete Genie Guide

If there’s one thing I do when I play a game (besides trying to relax and enjoy myself), it’s look up information. I get curious or stuck, and I find myself turning to the internet for answers. There are a lot of good guides out there that are super helpful, but what I don’t see are an abundance of simple and clean visual guides that lay out all the information in one place.

I finished playing Concrete Genie by Pixelopus as game number one of twenty for the year 2020. Before I began playing I knew I wanted to create a visual guide to help players, but once I started I was overwhelmed by the sheer number of collectibles! I decided to narrow my focus to a guide for finding all of 18 types of Genies in the game.

This infographic is organized by the Genie’s number in Ash’s sketchbook; I’ve provided each Genie’s number, name, chapter and location found.

Please let me know if you would like me to work on a guide for the other collectibles within Concrete Genie or if there are any games you would like to see visual information or guides for in the future! I love helping people, discussing games and organizing information!

“Try Everything” Lyric Page from Disney’s Zootopia

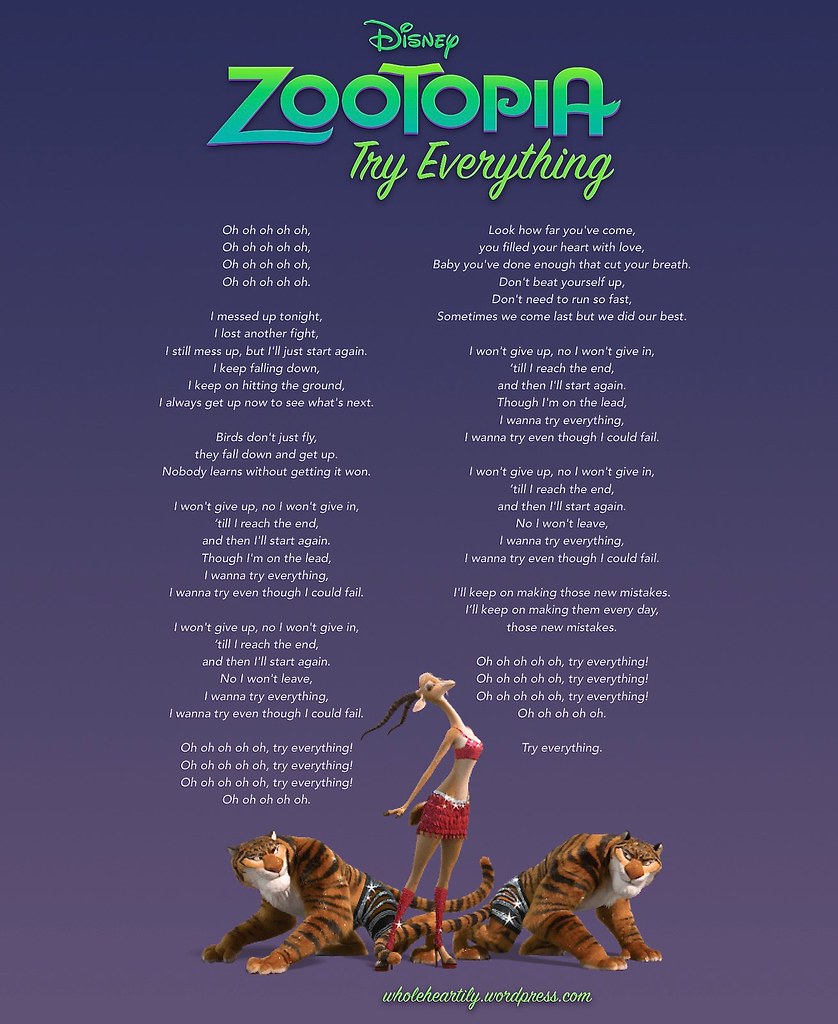
Try Everything Lyric Page

I love singing to Baby Zoey and she loves being sung to! This is also a song Zoey loves moving to or dare I say, dance to. She’s still learning to walk, so we do the dancing for her with her in our arms, but she laughs and squeals the whole time!

I used to know all the songs from Disney movies by heart, but I’m a little rusty. I’ve started making lyric pages to refresh my memory or teach me new songs I’ve never known! Feel free to save them to your phone for a quick reference, and please let me know if there are any songs you would like to see lyric pages for!

Nick and Fennec’s Pawpsicle Recipe (Zootopia)

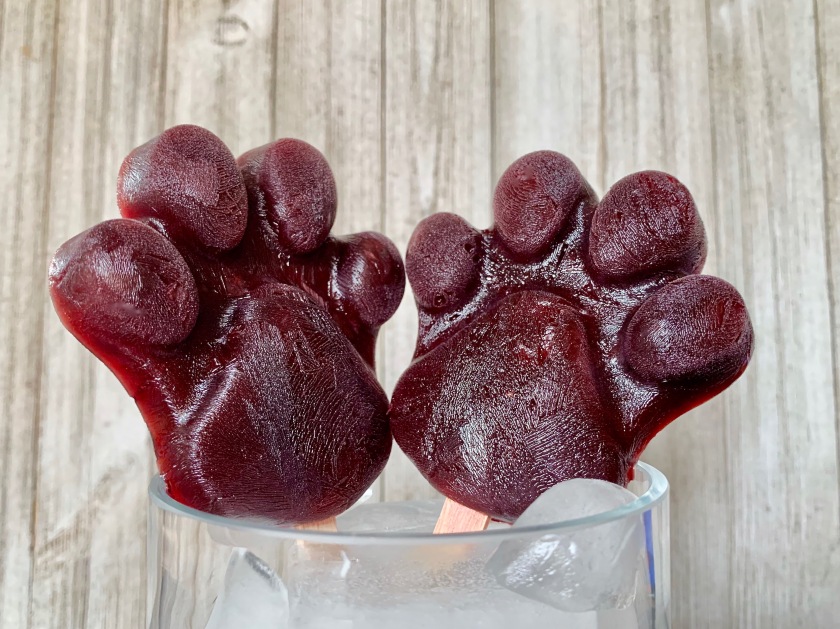
Nick and Fennec's Pawpsicle (Popsicle) Recipe from Disney's Zootopia.INTRODUCTION

Welcome back friends! This week we’ll be creating the pawpsicles (popsicles) the enterprising Nick Wilde and Fennec create and sell to the lemmings in Disney’s Zootopia.

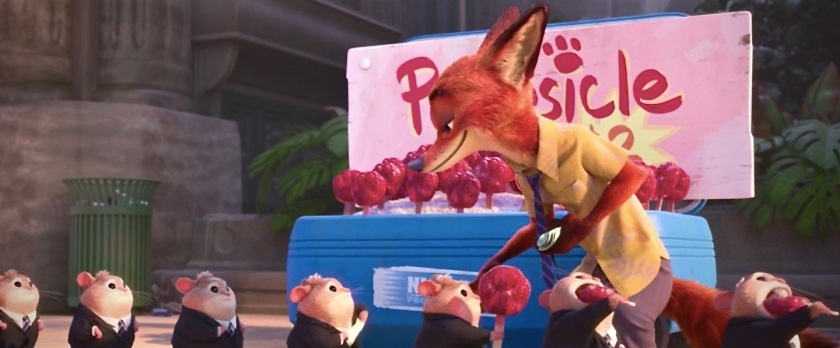
Nick and Fennec's Pawpsicle (Popsicle) Recipe from Disney's Zootopia.Pawpsicles are featured after Nick and Fennec hustle a jumbo-pop from Judy and Jumbeaux Cafe’s owner, then turn it into their own smaller pawpsicles to sell for a profit. 
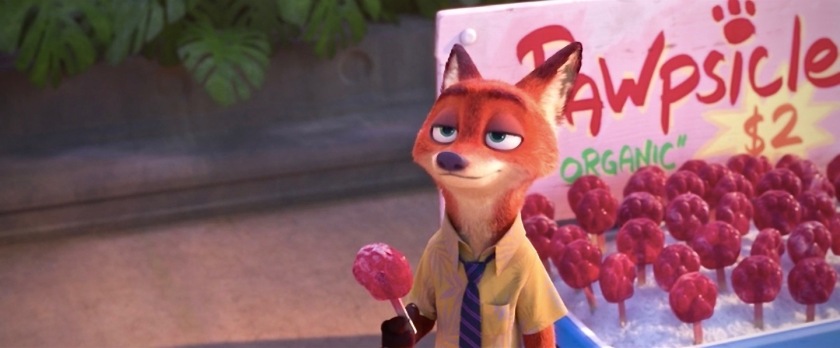
Nick and Fennec's Pawpsicle (Popsicle) Recipe from Disney's Zootopia. Nick and Fennec's Pawpsicle (Popsicle) Recipe from Disney's Zootopia.These are sweet, juicy and delicious, although they start to melt quickly so eat quickly! I wanted to use real fruit to make these with only minimal sugar added. Quite honestly, these probably would have been just as delicious without adding any sugar. I think I want to try that too!

Nick and Fennec's Pawpsicle (Popsicle) Recipe from Disney's Zootopia.PAWPSICLES
  • 1 cup of raspberries
  • 1 cup of strawberries, chopped
  • 1/2 cup of sugar, divided
  • 1 tablespoon of vanilla
  • 2 cups of cherry juice
  • Silicone paw print molds
  • Popsicle sticks
INSTRUCTIONS (PAWPSICLES)
  1. Preheat the oven to 350F and prepare a parchment lined sheet pan.
  2. Combine the raspberries, strawberries, vanilla and 1/4 cup of the sugar in a large bowl and stir to combine.
  3. Place the combined ingredients onto the parchment-lined sheet pan and place it in the oven. Roast for 20 minutes.
  4. In a saucepan, heat the cherry juice and 1/4 cup of sugar for about five minutes or until the sugar dissolves, then pour it into a bowl to cool.
  5. Once the fruit in the oven has roasted, add it into the bowl with the cherry juice, then place the bowl in the refrigerator to cool.
  6. Once cool, puree and pour the juice into the paw print molds and place in freezer for 5 or more hours.
  7. Serve and enjoy!

Zoey’s Bedtime Stories

Reading has always been very special to me. I remember my mom reading to me as a child and I believe it had a profound impact on my love for reading and books, not to mention my performance in school. I want to continue that tradition with Zoey. I want her to hear my voice, hear the diction and the pronunciation, see the beautiful images and eventually enjoy the stories.

Zoey’s Bedtime Story (#ZoeysBedtimeStory) is nighttime ritual I started in January of this year. Every night before her bedtime, I read Zoey a book (sometimes the books last two nights if they turn out to be too long). I can honestly say there are very few books that have captured her attention yet (when we started she was 5 months old, now she’s almost 10 months old). She’s more interested in just about everything else, but that doesn’t discourage me. I’ll keep going until she feels like paying attention and that’s when the real fun will begin!

Please come follow along on my Instagram where I post which book we’re reading each night in my story, and every book I’ve read to her has been saved to the highlights on my profile.

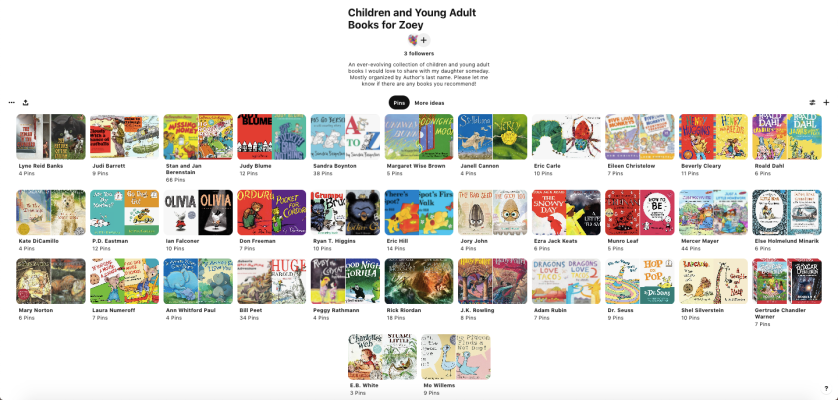
Children and Young Adult Books for Zoey.I’ve also started a Pinterest Board of all the books I would like to read to Zoey or share with her someday. Check it out to get inspired and please let me know if there are any children books you would recommend; we love sharing stories!

The Outer Worlds Visual Companions Guide

The Outer Worlds Companions

If there’s one thing I do when I play a game (besides trying to relax and enjoy myself), it’s look up information. I get curious or stuck, and I find myself turning to the internet for answers. There are a lot of good guides out there that are super helpful, but what I don’t see are an abundance of simple and clean visual guides that lay out all the information in one place.

While I was playing Obsidian’s The Outer Worlds and it occurred to me after talking to my brother-in-law and cousin that it may be useful to have a simple, one page infographic with some basic information about all the companions you can recruit and play with in the game. This graphic has a photograph of each companion with the location and quest they can be recruited from, the name of their personal quest-line, their special abilities and what player skill they boost by being in your party.

Please let me know if there are any games you would like to see visual information or guides for in the future! I love helping people, discussing games and organizing information!

DIY Ocean Wave Sensory Bottle

DIY Ocean Wave Sensory BottleWith Summer solstice right around the corner, I was thinking about the beach and got inspired to make an ocean wave sensory bottle (not to mention I had all the ingredients already on hand)! Part of the fun in raising Zoey is making things that teach and fascinate her. And, if I’m being completely honest, I find sensory bottles fascinating too, so let’s make one!

DIY Ocean Wave Sensory Bottle

SUPPLIES
  • 16 ounce clear, plastic bottle
  • Funnel
  • 8 ounces of water
  • Blue and green food coloring.
  • 8 ounces of baby oil
  • Glue

DIY Ocean Wave Sensory Bottle
DIY Ocean Wave Sensory Bottle DIY Ocean Wave Sensory Bottle

INSTRUCTIONS
  1. Place the funnel in the mouth of your bottle and use it to fill the bottle with 8 ounces of water.
  2. Remove the funnel and add several drops of blue and green food coloring until you reach your desired shade of ocean aqua. I used 8 drops of blue and 2 drops of green, as you can see that led to a very deep shade of blue green.
  3. Screw the lid back onto the bottle and shake the water until the food coloring is well incorporated, then remove the lid and replace the funnel.
  4. Add up to 8 ounces of baby oil.
  5. If your child is older and you worry about him/her undoing the lid, you can coat the inside of the lid with glue, then screw it back onto the bottle. This will secure the lid and make it harder for little ones to unscrew the lid and create a leak or spill the bottle’s contents. If you’re still concerned they may be able to get the lid off, please use cooking oil instead of baby oil.

Tabletop Game – Let’s Play Kanoodle!

Tabletop Game Let's Play KanoodleI’m always on the look-out for a fun, entertaining way to pass the time, like a good tabletop game! I purchased Kanoodle by educational insights, as a stocking stuffer for my husband and we ignored it for too long! This game is a great way to pass the time and a good way to stimulate your brain!

Tabletop Game Let's Play KanoodleKanoodle is a solitaire game for ages 7 and up, of two and three dimensional puzzles to solve using up to 12 puzzles pieces called “noodles”. You pick a puzzle from the included booklet, and put the intended number of noodles on the board as shown on the diagram. Do not move noodles that are already in position and solve each puzzle by filling up the empty space with the remaining noodles.

The first two levels, called “Pro” and “Super Pro”, are great for beginners with only one or two noodles needed to solve each puzzle. As the levels increase the puzzle’s difficulty does as well with larger empty spaces to fill with more noodles. The three dimensional puzzles are significantly more difficult so it’s best to start with the two dimensional puzzles and work your way up.

Tabletop Game Let's Play Kanoodle Tabletop Game Let's Play KanoodleI have completed all of the two dimensional puzzles, I am now working on the three dimensional puzzles and I intend to complete them all! Check it out!

  • Kanoodle – This looks like an updated version of the one I’m playing, with more puzzles!
  • Kanoodle Jr. – Beginner’s Kanoodle for little ones ages 4 through 7.
  • Kanoodle Extreme – Over 100 more puzzles than the original included from the start!
  • Kanoodle Genius – For those who have mastered the original Kanoodle or Kanoodle Extreme and are looking for more challenge.
  • Kanoodle Head to Head – A 2 player versus game.