Family Friendly Holiday Magic Playlist

Holiday Magic Playlist

Welcome to the cozy and magical month of December my friends!

My family and I have created a playlist of family friendly Christmas music for you and yours! Christmas may be celebrated a little differently this year, but that doesn’t mean we can’t kindle a little Christmas spirit!

This year we’ve decided to focus more on music from all our favorite Christmas children’s movies and specials, with a few other songs sprinkled in that fit the mood.

Please let us know if we missed or left out any of your family friendly Christmas favorites you feel should be included! We’d love to hear from you!

THE POLAR EXPRESS

  • Spirit of the Season
  • When Christmas Comes to Town
  • The Polar Express
  • Hot Chocolate
  • Suite from the Polar Express

RUDOLPH THE RED-NOSED REINDEER

  • A Holly Jolly Christmas
  • Jingle Jingle Jingle
  • We are Santa’s Elves
  • Silver and Gold
  • The Most Wonderful Day of the Year
  • Christmas Medley: The Night Before Christmas
  • Rudolph the Red-Nosed Reindeer
  • I Heard the Bells on Christmas Day
  • There’s Always Tomorrow

FROSTY THE SNOWMAN | Frosty the Snowman

THE LITTLE DRUMMER BOY | The Little Drummer Boy

OLAF’S FROZEN ADVENTURE

  • Ring in the Season
  • That Time of Year
  • When We’re Together

BEAUTY AND THE BEAST: THE ENCHANTED CHRISTMAS

  • Belle’s Magical Gift
  • As Long As There’s Christmas
  • A Cut Above The Rest
  • Deck the Halls
  • Do You Hear What I Hear?
  • O Christmas Tree
  • O Come, O Come Emmanuel / Joy To The World
  • Silent Night
  • The First Noel
  • The Twelve Days of Christmas
  • We Wish You a Merry Christmas
  • What Child Is This?

A MUPPET CHRISTMAS CAROL

  • Overture
  • Good King Wenceslas
  • It Feels Like Christmas
  • Thankful Heart
  • Bless Us All
  • Christmas Scat
  • Christmas Morning

THE NUTCRACKER BALLET

  • Overture
  • March
  • Waltz of the Snowflakes
  • Sugarplum Fairy
  • Hot Chocolate
  • Coffee
  • Tea
  • Candy Cane
  • Marzipan
  • Mother Ginger and Her Polichinelles
  • Waltz of the Flowers
  • Sugarplum Fairy and Cavalier Coda
  • Finale

BABES IN TOYLAND

  • Babes in Toyland Overture
  • Toy Land
  • March of the Toys

EMMET OTTER’S JUGBAND CHRISTMAS | Our World / Brothers

KERMIT THE FROG | Have Yourself a Merry Little Christmas

JOHN DENVER AND THE MUPPETS: CHRISTMAS TOGETHER

  • Deck the Halls
  • Christmas is Coming
  • Twelve Days of Christmas
  • We Wish you a Merry Christmas

MISS PIGGY | Santa Baby

A CHIPMUNK CHRISTMAS | Christmas Don’t Be Late

DISNEY’S FAMILY CHRISTMAS

  • Jingle Bells
  • Sleigh Ride
  • Here Comes Santa Claus
  • The Science of the Season

DISNEY’S MERRY LITTLE CHRISTMAS

  • Jingle Bell Rock
  • White Christmas
  • Over the River and Through the Woods

DISNEY HOLIDAY MAGIC

  • Jingle Bell Rock
  • Here Comes Santa Claus
  • From All of Us to All of You
  • Deck the Halls
  • The Twelve Days of Christmas

WINNIE THE POOH & TIGGER | Jingle Bells

HANNA BARBERA’S CHRISTMAS SING-A-LONG

  • Brand New Kind of Christmas Song
  • Hope
  • Comin’ Up Christmas Time

LOU MONTE | Dominick the Donkey

GAYLA PEEVEY | I Want a Hippopotamus for Christmas

A CHARLIE BROWN CHRISTMAS

  • Christmas is Coming
  • Skating
  • Linus and Lucy
  • Christmas Time is Here
  • Hark, The Herald Angels Sing
  • The Christmas Song
  • O Tannenbaum

ELF: BUDDY’S MUSICAL CHRISTMAS | Sparklejollytwinklejingley

ELF

  • Papa Elf
  • Buddy’s Journey
  • Christmas Medley 
Our New Thanksgiving Family Tradition

Have you ever intentionally created a family tradition? I haven’t, until now!

My family and I grew up watching the Charlie Brown/Peanuts holiday specials around this time every year with our parents; they all have a special place in my heart, but none more than It’s the Great Pumpkin Charlie Brown, A Charlie Brown Thanksgiving, and A Charlie Brown Christmas!

Continuing on with these good feelings and memories, embellishing it to make it our own, here is our new Thanksgiving tradition:

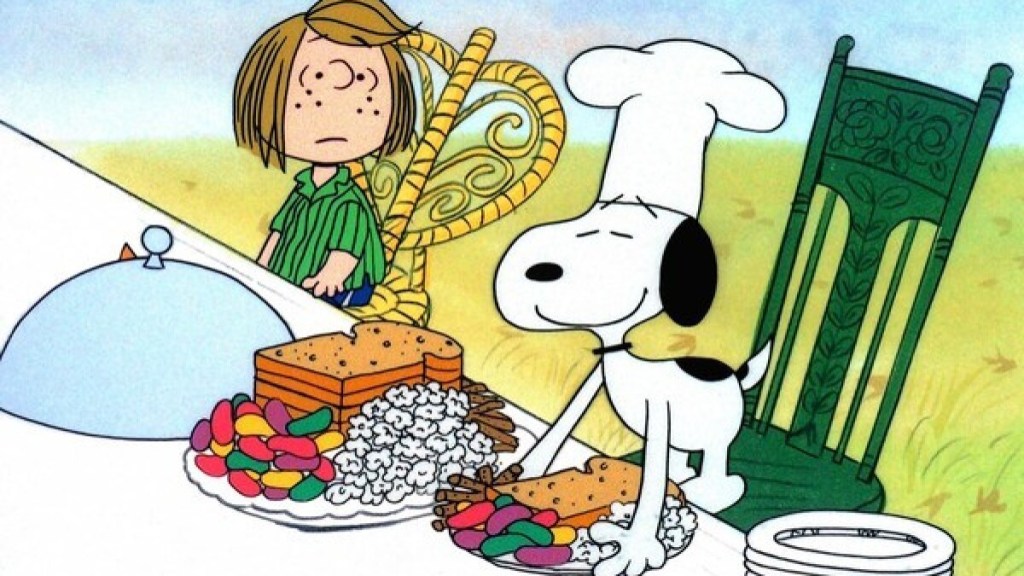
The Friday before Thanksgiving we will gather and/or create buttered toast, popcorn, pretzels and jelly beans, all the food the kid’s feast on in Thanksgiving Charlie Brown. We will snack on these treats while we watch A Charlie Brown Thanksgiving!

It’s simple, yet fun and heartfelt like any family tradition should be! Create happy feelings and the happy memories will follow! Feel free to use this idea for your own family tradition, or take it and change it to make it your own!

Tiana’s Beignet Recipe (The Princess and the Frog)

Tiana's Beignet Recipe
INTRODUCTION

Welcome back friends! This week we’ll be frying up Tiana’s Beignets from Disney’s The Princess and the Frog.

Tiana's Beignet Recipe

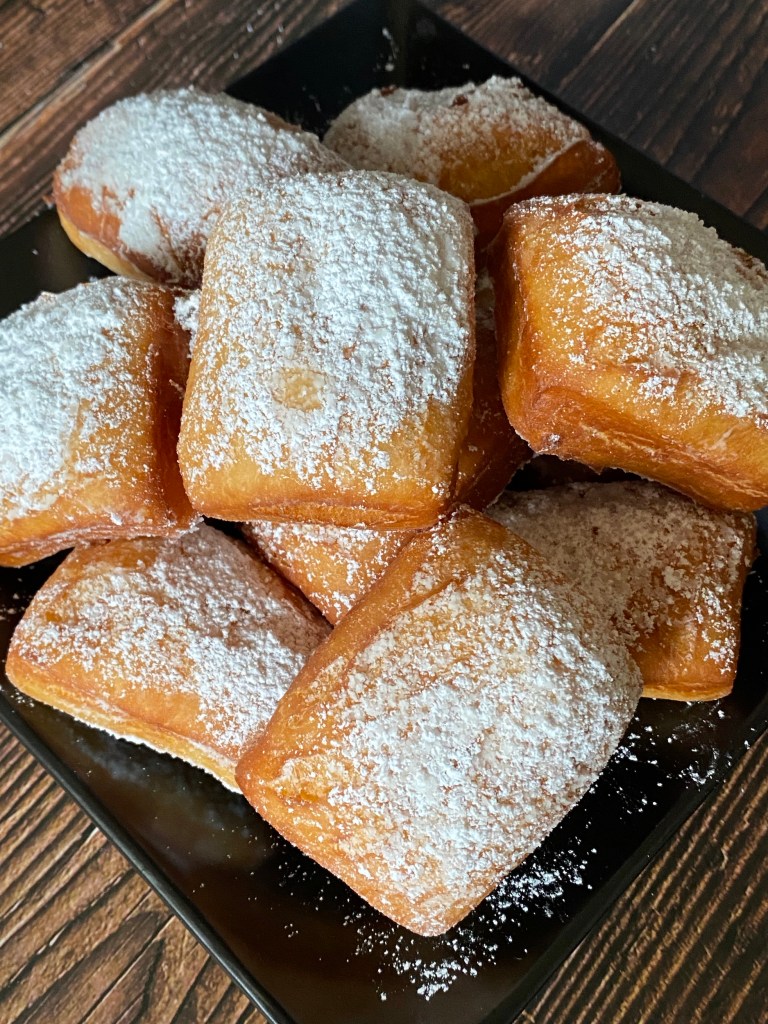
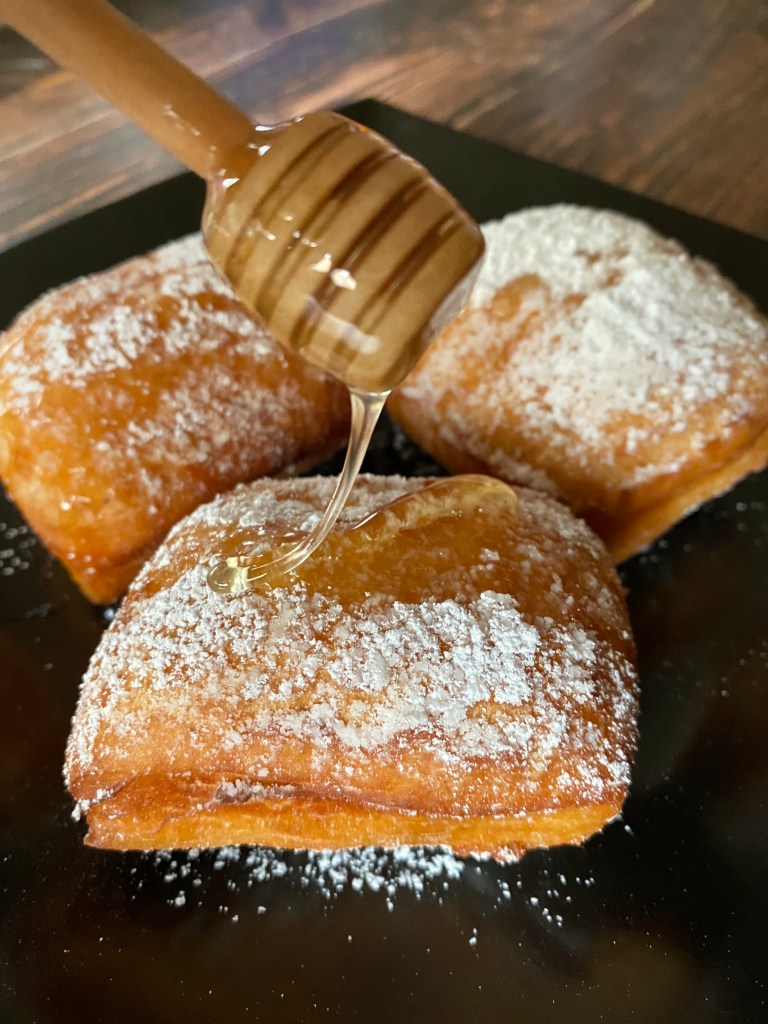
This recipe is featured several times as it is one of Tiana’s specialties, but the most memorable is when she’s preparing them in Duke’s Cafe. She is seen dusting a large batch with powdered sugar, then lightly drizzling them with honey. They look so good!

These Beignets are fluffy and delicious! The dusting of powdered sugar and drizzle of honey give a nice sweetness, without overload. I added nutmeg to the recipe because it was mentioned as Tiana’s secret ingredient in one of my daughter’s books!

Tiana's Beignet Recipe
TIANA’S BEIGNETS
  • 3 cups of flour, plus more for dusting
  • 3/4 teaspoons of kosher salt
  • 1/2 teaspoon of nutmeg
  • 3 tablespoons of sugar, divided
  • 1 cup of warm whole milk
  • 1 packet of active dry yeast
  • 1 large egg
  • 3 tablespoons of butter, melted
  • 1 1/2 to 2 quarts of vegetable oil
  • 2 cups of powdered sugar
  • Honey
INSTRUCTIONS
  1. Combine the flour, salt, nutmeg and 2 tablespoons of the sugar in a large bowl.
  2. In a separate medium bowl, combine the warm milk, 1 tablespoon of sugar and the yeast, then allow it to sit for about 5 minutes or until foamy.
  3. Beat the egg into the foamy mixture, then add it to the bowl of dry ingredients. 
  4. Mix by hand until until the dough comes together, then add the melted butter and keep mixing and kneading with your hand until well incorporated (the dough will be smooth and slightly tacky to the touch).
  5. Shape the dough into a ball and place it in a greased bowl.
  6. Cover the bowl with plastic and allow it rise until doubled in size (this could be 1 to 2 hours depending on the temperature of the room).
  7. Once the dough has risen, turn it out onto a floured surface and roll it out into a rectangular shape about 1/4 inch thick. Cut the dough into 12 rectangles, then cover them with a flour dusted towel to rest while you heat the oil.
  8. In a large heavy bottomed sauce pot (I use my dutch oven), slowly heat the oil to about 325F as read on a candy or deep fry thermometer.
  9. Place a cooling rack over a baking sheet next to the pot of oil and have tongs or a spider ready.
  10. Scoop the powdered sugar (about 1/3 cup at a time) into a sifter and set it next to the rack and the sheet pan. 
  11. Fry the beignets for about 90 seconds on each side, or until golden.
  12. Use your tongs or spider to lift the beignets out of the frying oil and place them on the cooling rack for at least a minute.
  13. While they are still hot sift powdered sugar over both sides, top and bottom, then drizzle with honey.
  14. Enjoy!
Tiana's Beignet Recipe

Our New Halloween Family Tradition

Halloween Tradition

Have you ever intentionally created a family tradition? I haven’t, until now!

My family and I grew up watching the Charlie Brown/Peanuts holiday specials around this time every year with our parents; they all have a special place in my heart, but none more than It’s the Great Pumpkin Charlie Brown, A Charlie Brown Thanksgiving, and A Charlie Brown Christmas!

Continuing on with these good feelings and memories, embellishing it to make it our own, here is our new Halloween tradition:

The night before Halloween (or a few nights before), we will carve our pumpkins and light them for the first time. After, we’ll sip on cold or warm apple cider (depending on the weather) and watch It’s the Great Pumpkin Charlie Brown!

It’s simple, yet fun and heartfelt like any family tradition should be! Create happy feelings and the happy memories will follow! Feel free to use this idea for your own family tradition, or take it and change it to make it your own!

Hen Wen’s Apple Porridge Recipe (The Black Cauldron)

Hen Wen's Apple Porridge Recipe
INTRODUCTION

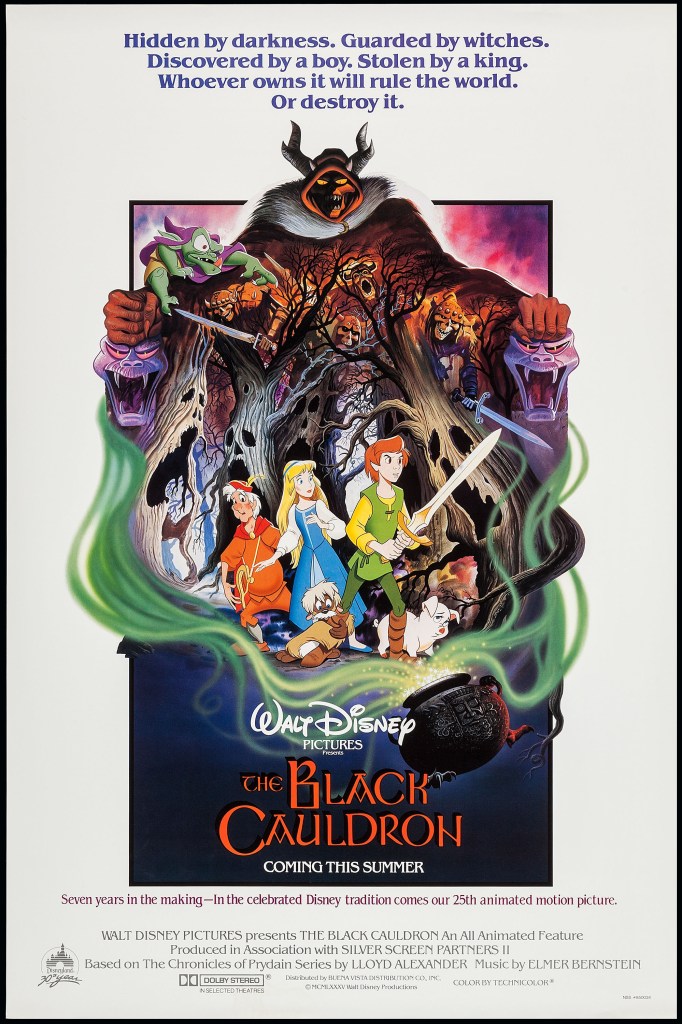
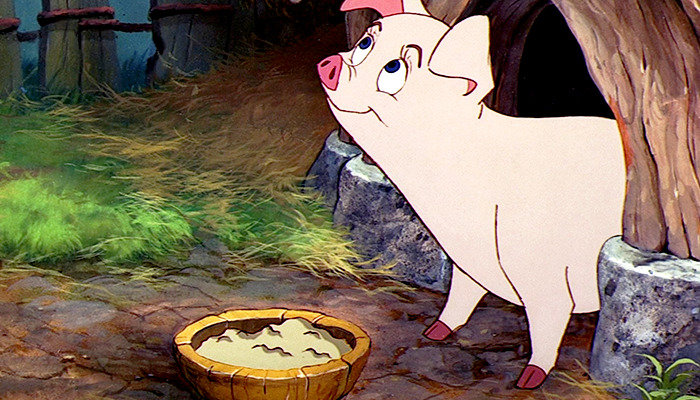
Welcome back friends! This week we’ll be cooking Hen Wen’s Apple Porridge from Disney’s The Black Cauldron.

The Black Cauldron Movie Poster
Hen Wen's Apple Porridge Recipe

This recipe is featured in the beginning of the film, when Caer Dallben asks Taran to feed Hen Wen the porridge he prepared for her. 

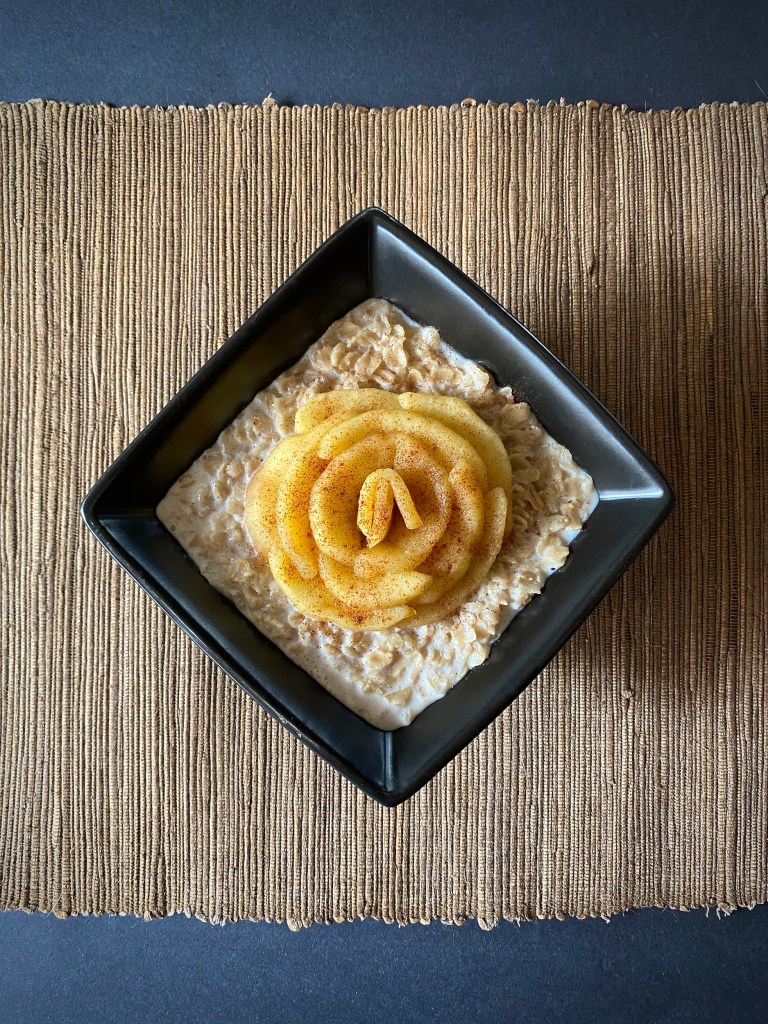
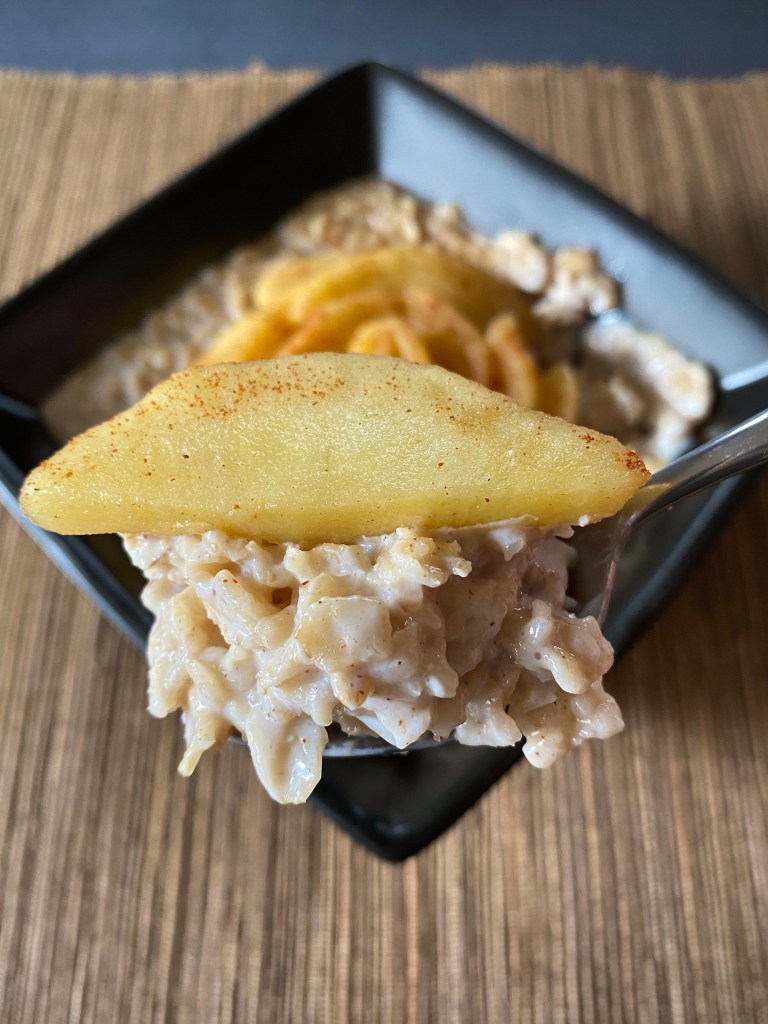
This porridge looks much more appetizing than the one in the film. I couldn’t help myself! I thought to myself, if I wanted to eat porridge with apples, I’d want the apples to be cooked separately to develop their flavor more and I’m sure Hen Wen would approve!

Hen Wen's Apple Porridge Recipe
HEN WEN’S APPLE PORRIDGE

APPLES

  • 2 apples, peeled and cut into slices
  • 1/3 cup of water
  • Cinnamon
  • Brown sugar

PORRIDGE

  • 1 cup of old fashioned oats
  • 1 3/4 cups of whole milk
  • 1/8 teaspoon of salt
  • Cinnamon
  • Brown sugar

INSTRUCTIONS (APPLES)

  1. Peel and cut the apples into slices.
  2. Pour the water into a small sauce pan, then add the apples.
  3. Sprinkle the desired amount of cinnamon and brown sugar onto the apples and stir to distribute.
  4. Cover and cook until tender, stirring occasionally to evenly coat and cook the apples.
  5. Once cooked, remove from the heat and set aside for the porridge (see below).

INSTRUCTIONS (PORRIDGE)

  1. In a medium saucepan, boil the milk with the salt.
  2. Stir in the oats.
  3. Cook the oats for about 5 minutes over medium heat; stirring occasionally.
  4. Remove the porridge from the heat and sprinkle with brown sugar and cinnamon, then stir to distribute.
  5. Spoon the porridge into two bowls and arrange the cooked apple slices (see above) on top. I arranged mine into the shape of a rose and I believe next time I’ll cover the porridge completely.
  6. Enjoy!
Hen Wen's Apple Porridge Recipe

Family Friendly Halloween Movies – PG Rated

Family Friendly Halloween PG Rated

Welcome to the spooky month of October my friends!

My family and I have created a list of family friendly Halloween movies and specials for you and yours! Halloween may be celebrated a little differently this year, but that doesn’t mean we can’t kindle a little Halloween spirit!

This year we’ve decided to focus on movies and specials that are rated PG for parental guidance suggested; some material may not be suitable for children. If you are looking for movies and specials that are rated G for general audience and good for all ages, please visit last year’s list – Family Friendly Halloween Movies and Specials Rated G.

Please let us know if we missed or left out any of your family friendly (PG-rated) halloween favorites you feel should be included! We’d love to hear from you!

Organized alphabetically by title:

Family Friendly Halloween Children’s Books – Ages 5 and Under

Family Friendly Halloween Books

Welcome to the boo-tiful month of October my friends!

To inspire you and your little ones into the Halloween mood, I’ve curated a list of Halloween-themed books for ages five and under! These selections are festive, without frights or scares that could upset a younger audience.

There are a handful of books on this list with a reading age that start under the age of five and peak at the age of 7 or 8.

If you have a favorite Halloween book for children ages 5 and under that you do not see here, please let me know! I would love to add it to this list!

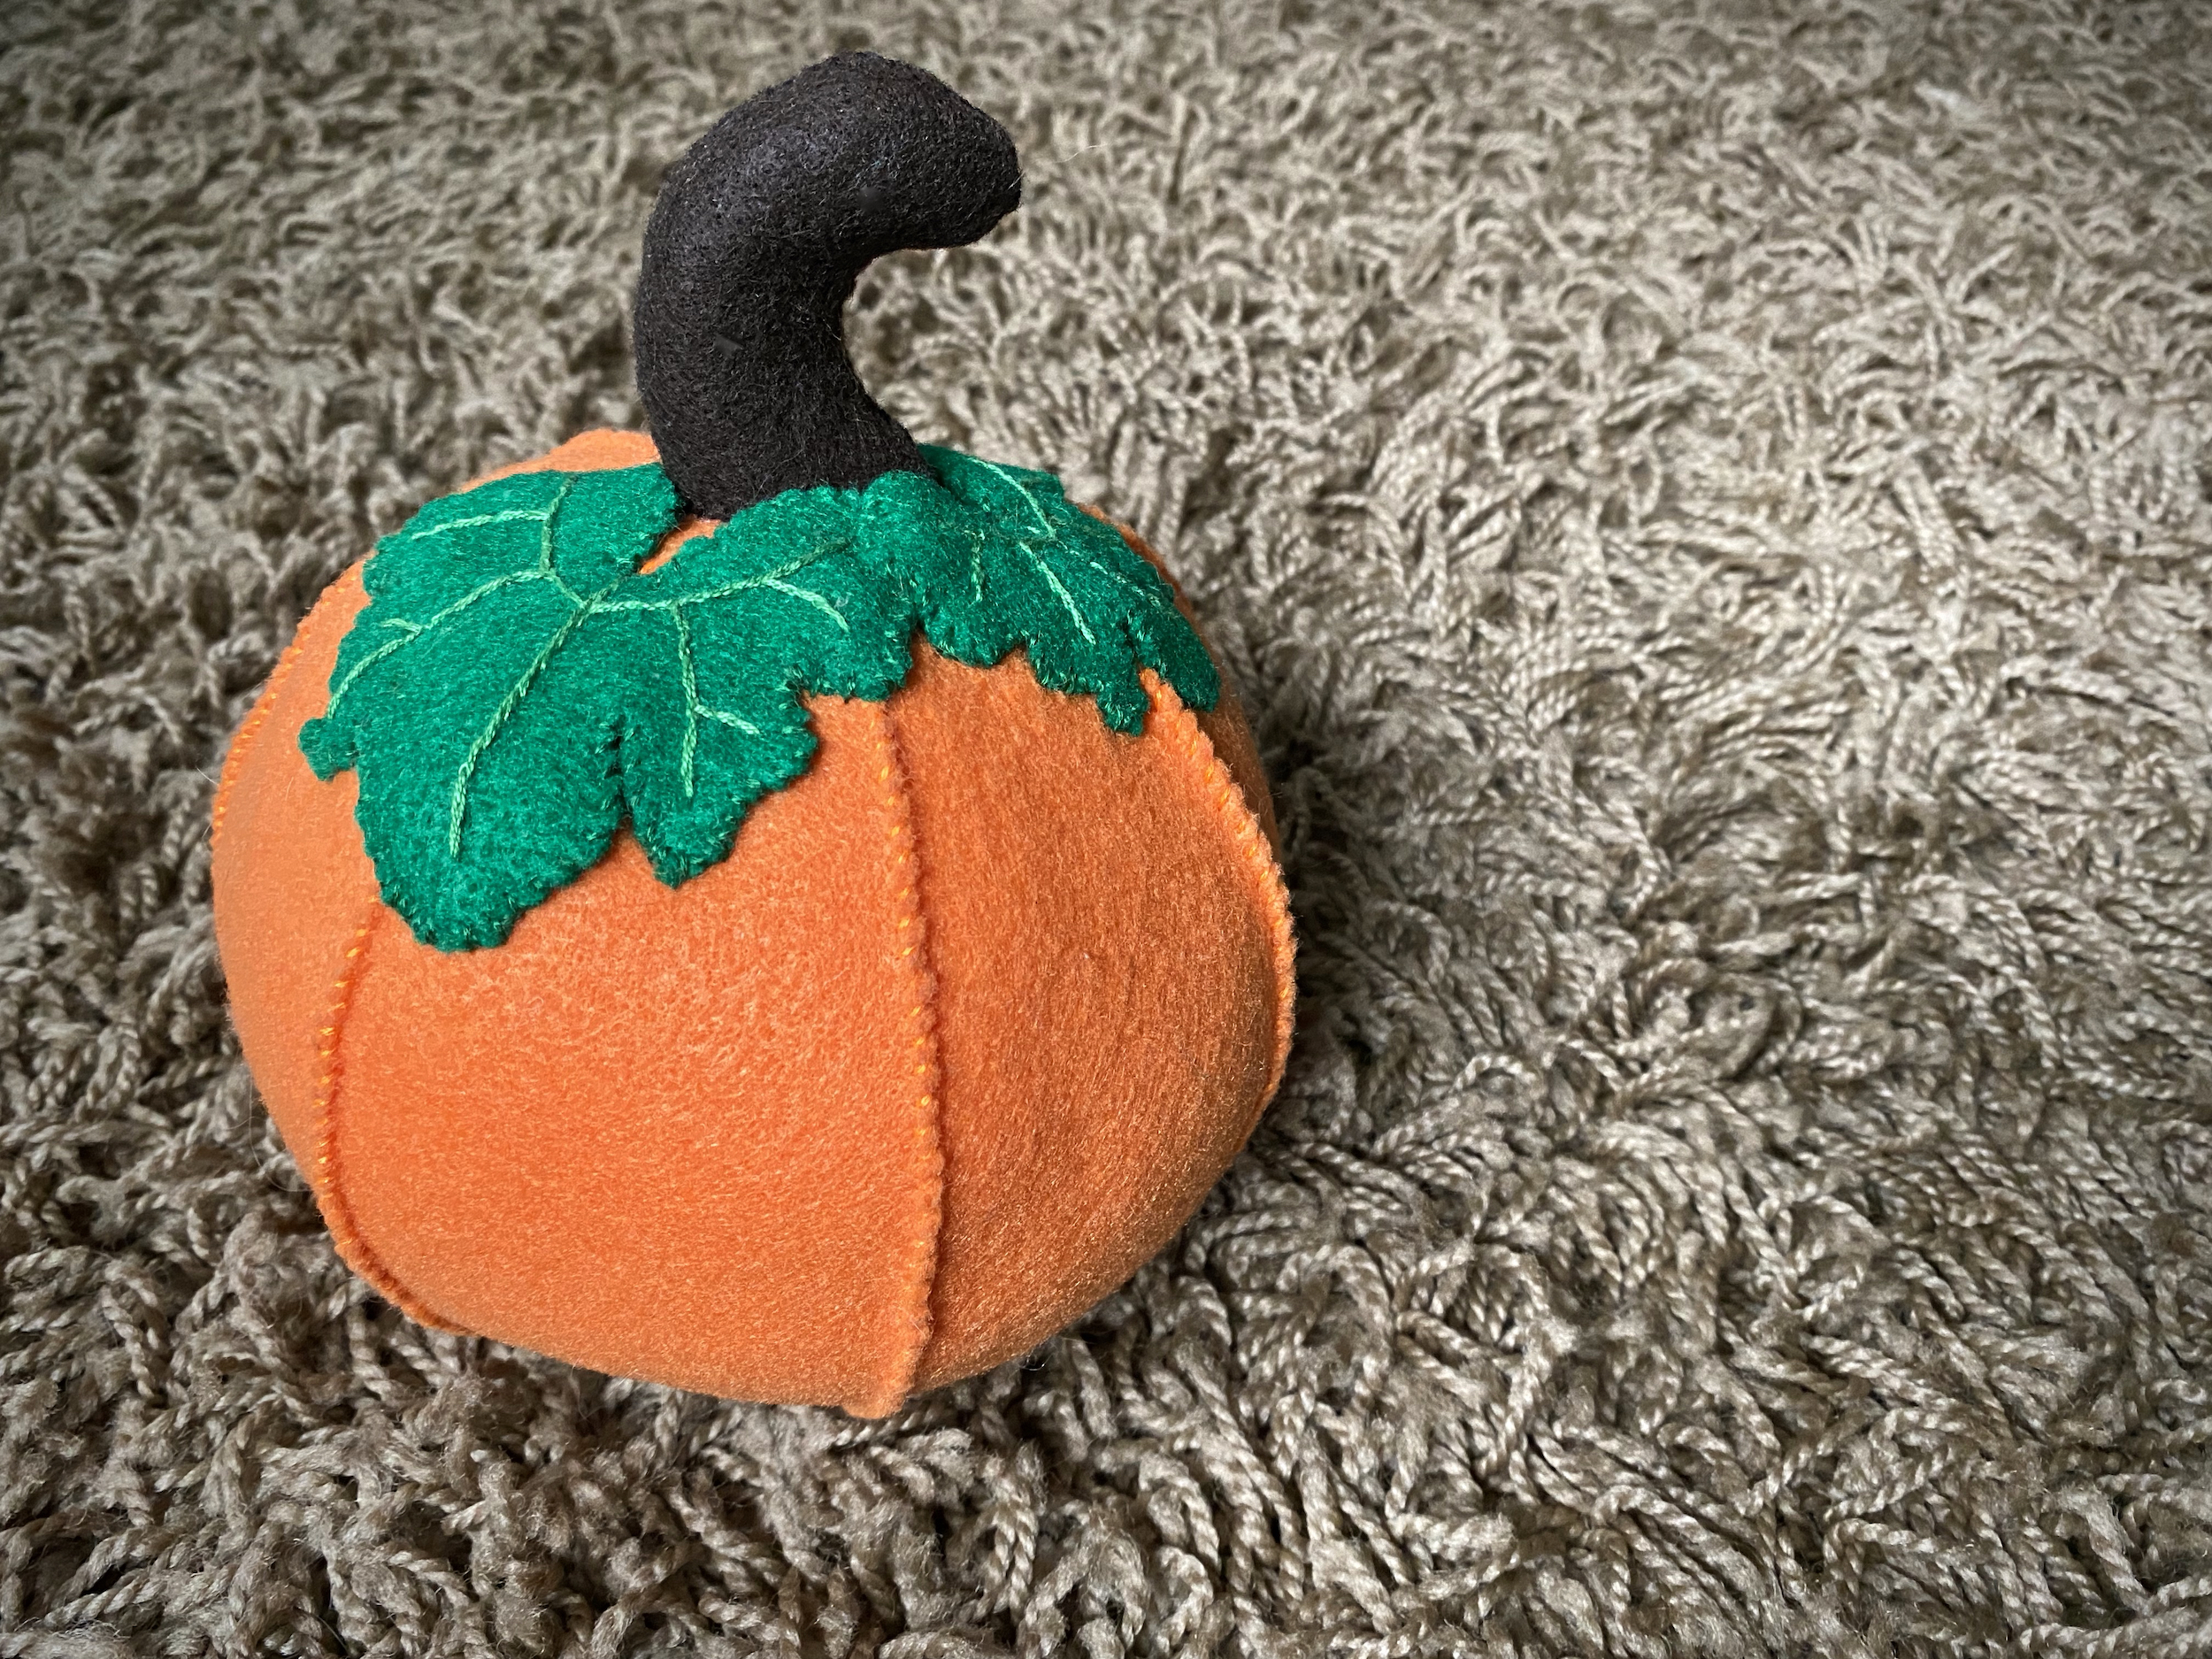
DIY Felt Pumpkin

It is Autumn, my favorite season of the year!

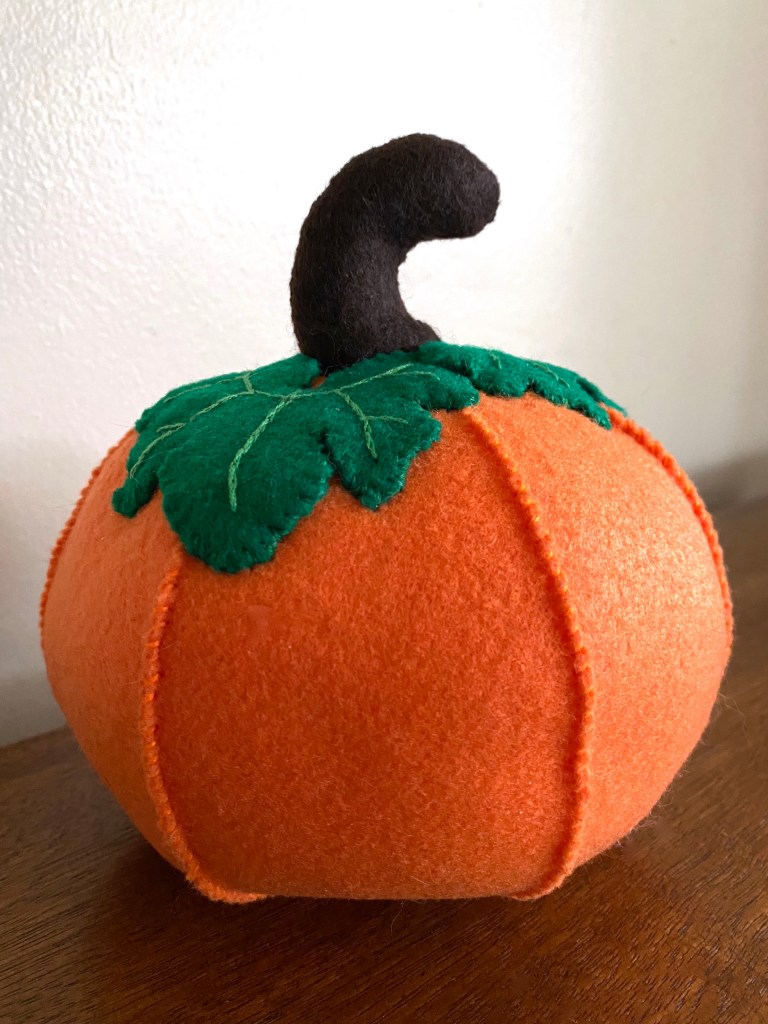
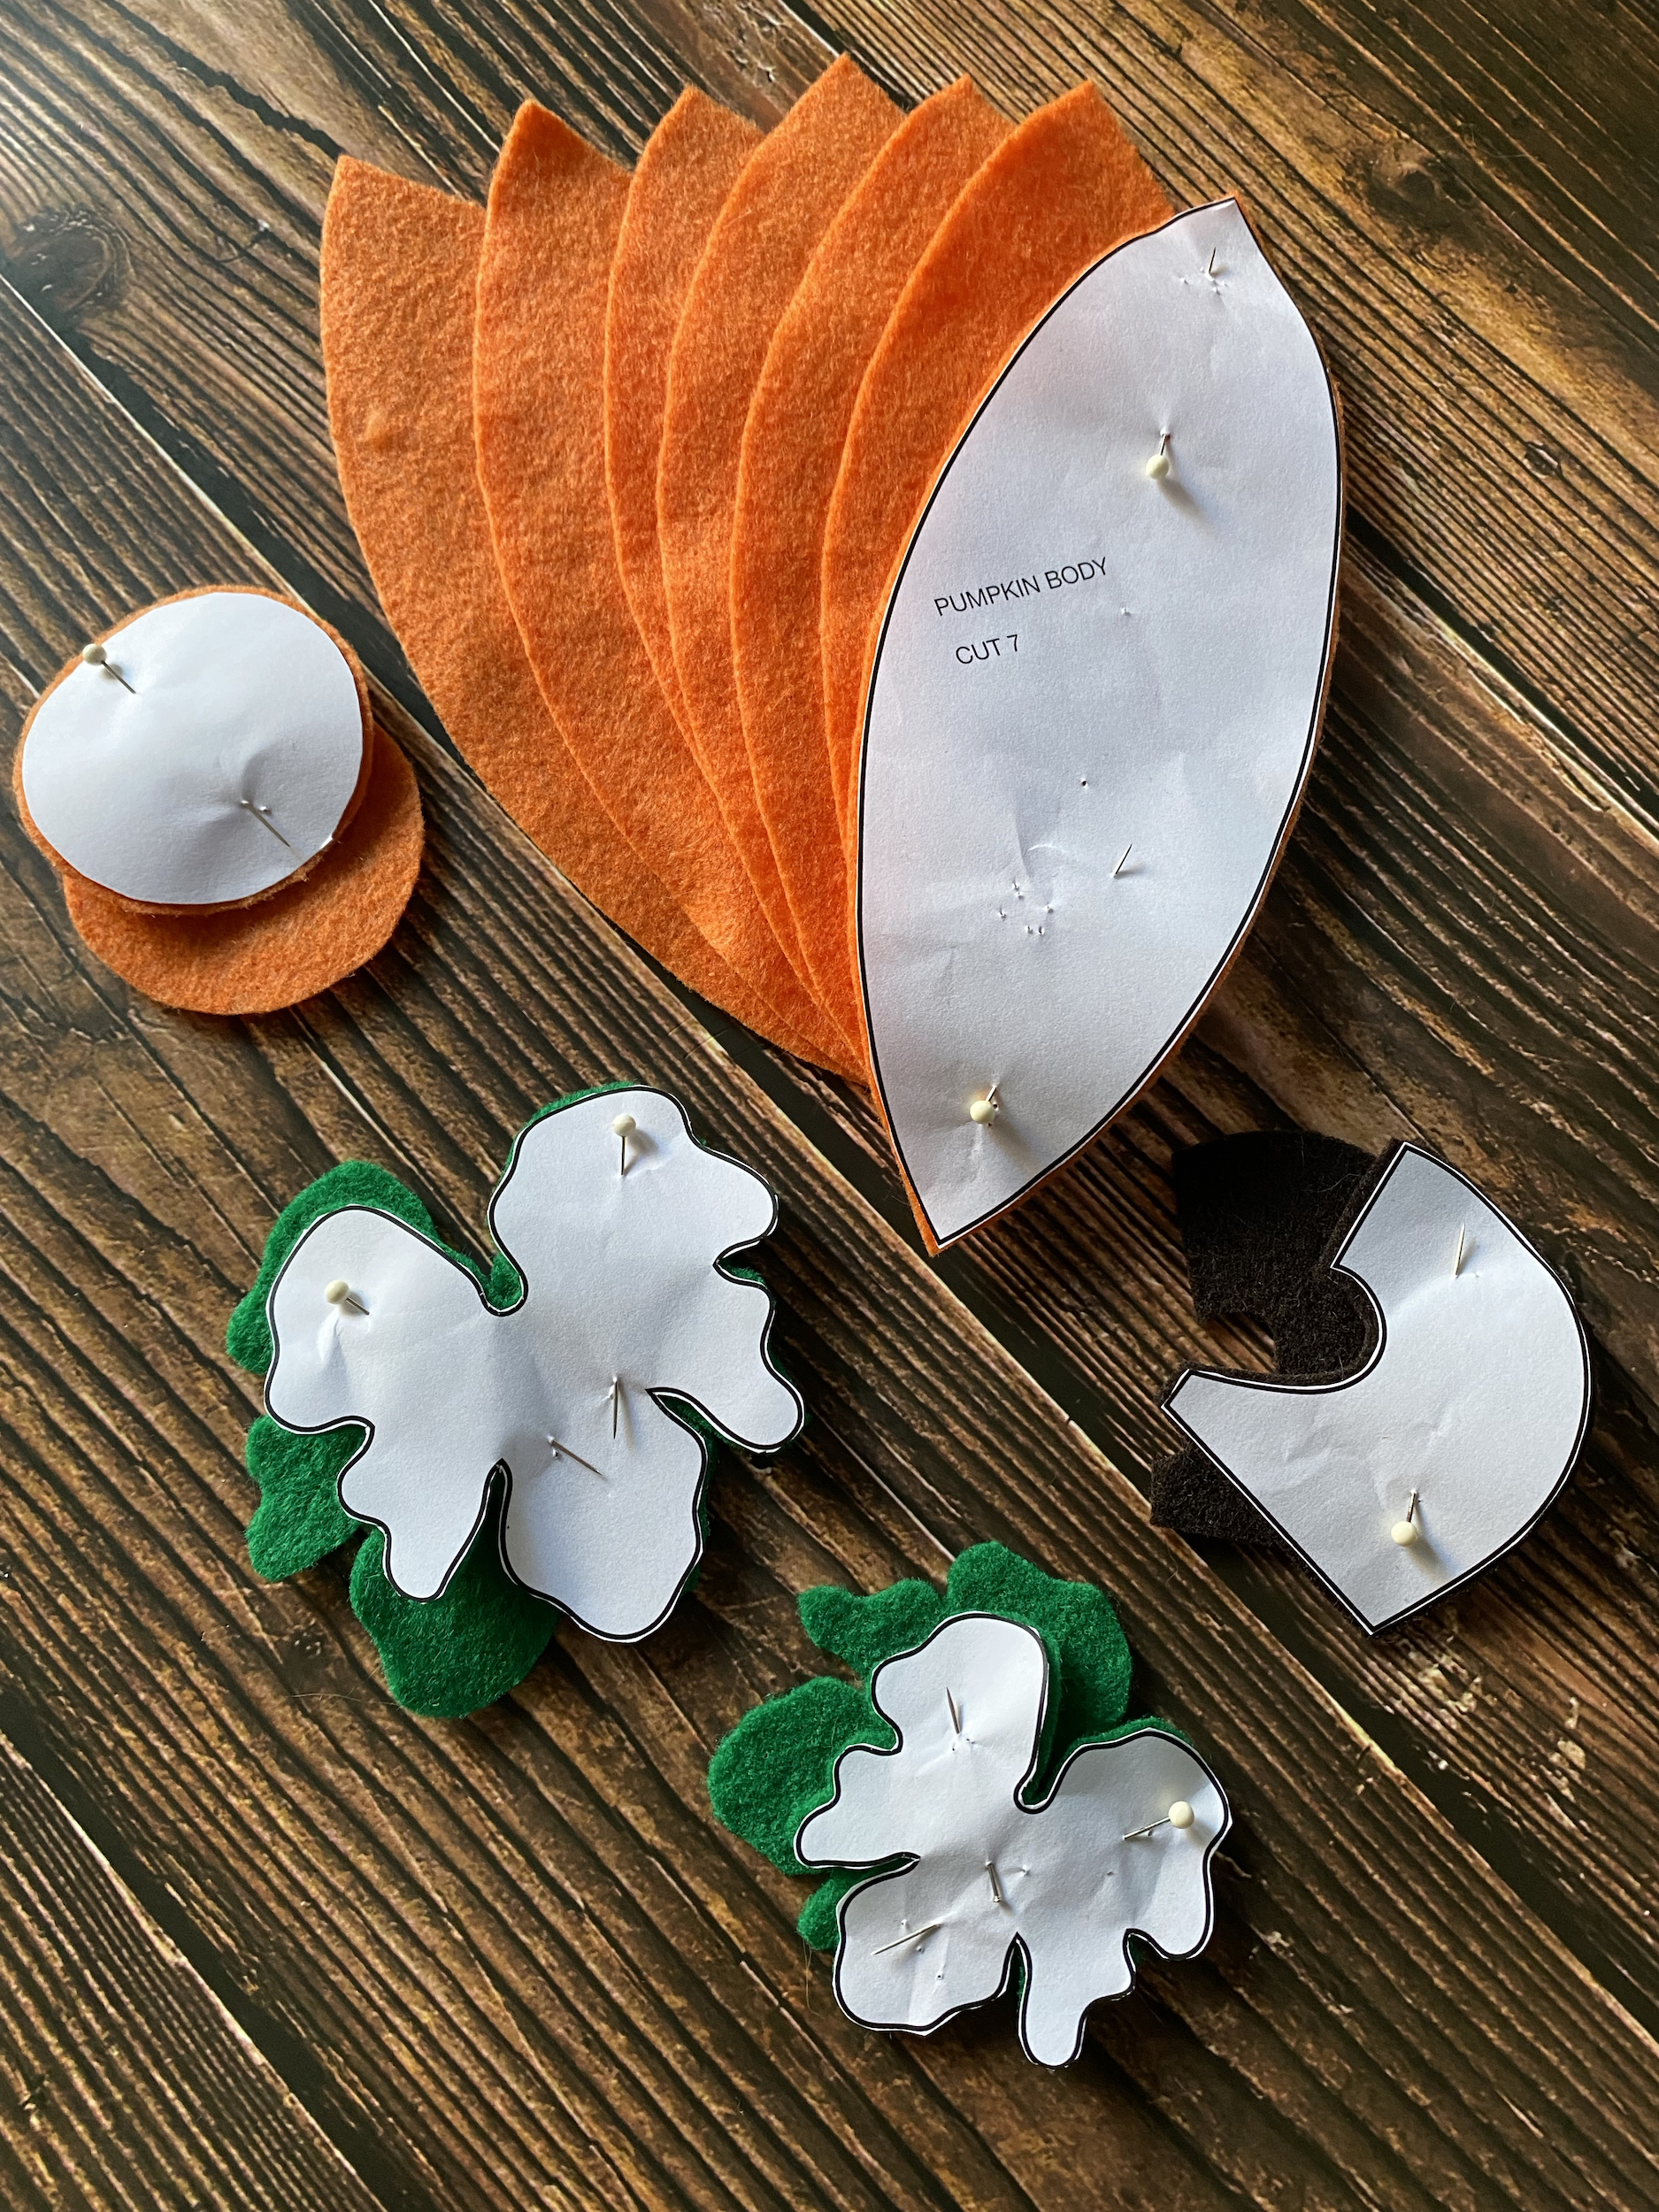
I want to begin creating well-made decorations that mean something to us and will last. What better way to start than by something that will go great with Halloween and Thanksgiving, pumpkins! I’ve created a pattern for fabric pumpkins and you’re welcome to use it to create your own! This will work to create either felt or regular fabric pumpkins, I’m excited to create a few different colors and sizes!

SUPPLIES
  • Pumpkin patterns (see above)
  • Paper scissors
  • Felt fabric
  • Sewing pins
  • Sewing scissors
  • Embroidery floss
  • Sewing needle
  • Stuffing
INSTRUCTIONS
  1. Print out the pumpkin patterns I’ve provided, then cut the patterns from the paper.
  2. Pin the patterns on the appropriate colored felt, then use sewing scissors to cut the felt.
  3. Thread orange embroidery floss onto your sewing needle.
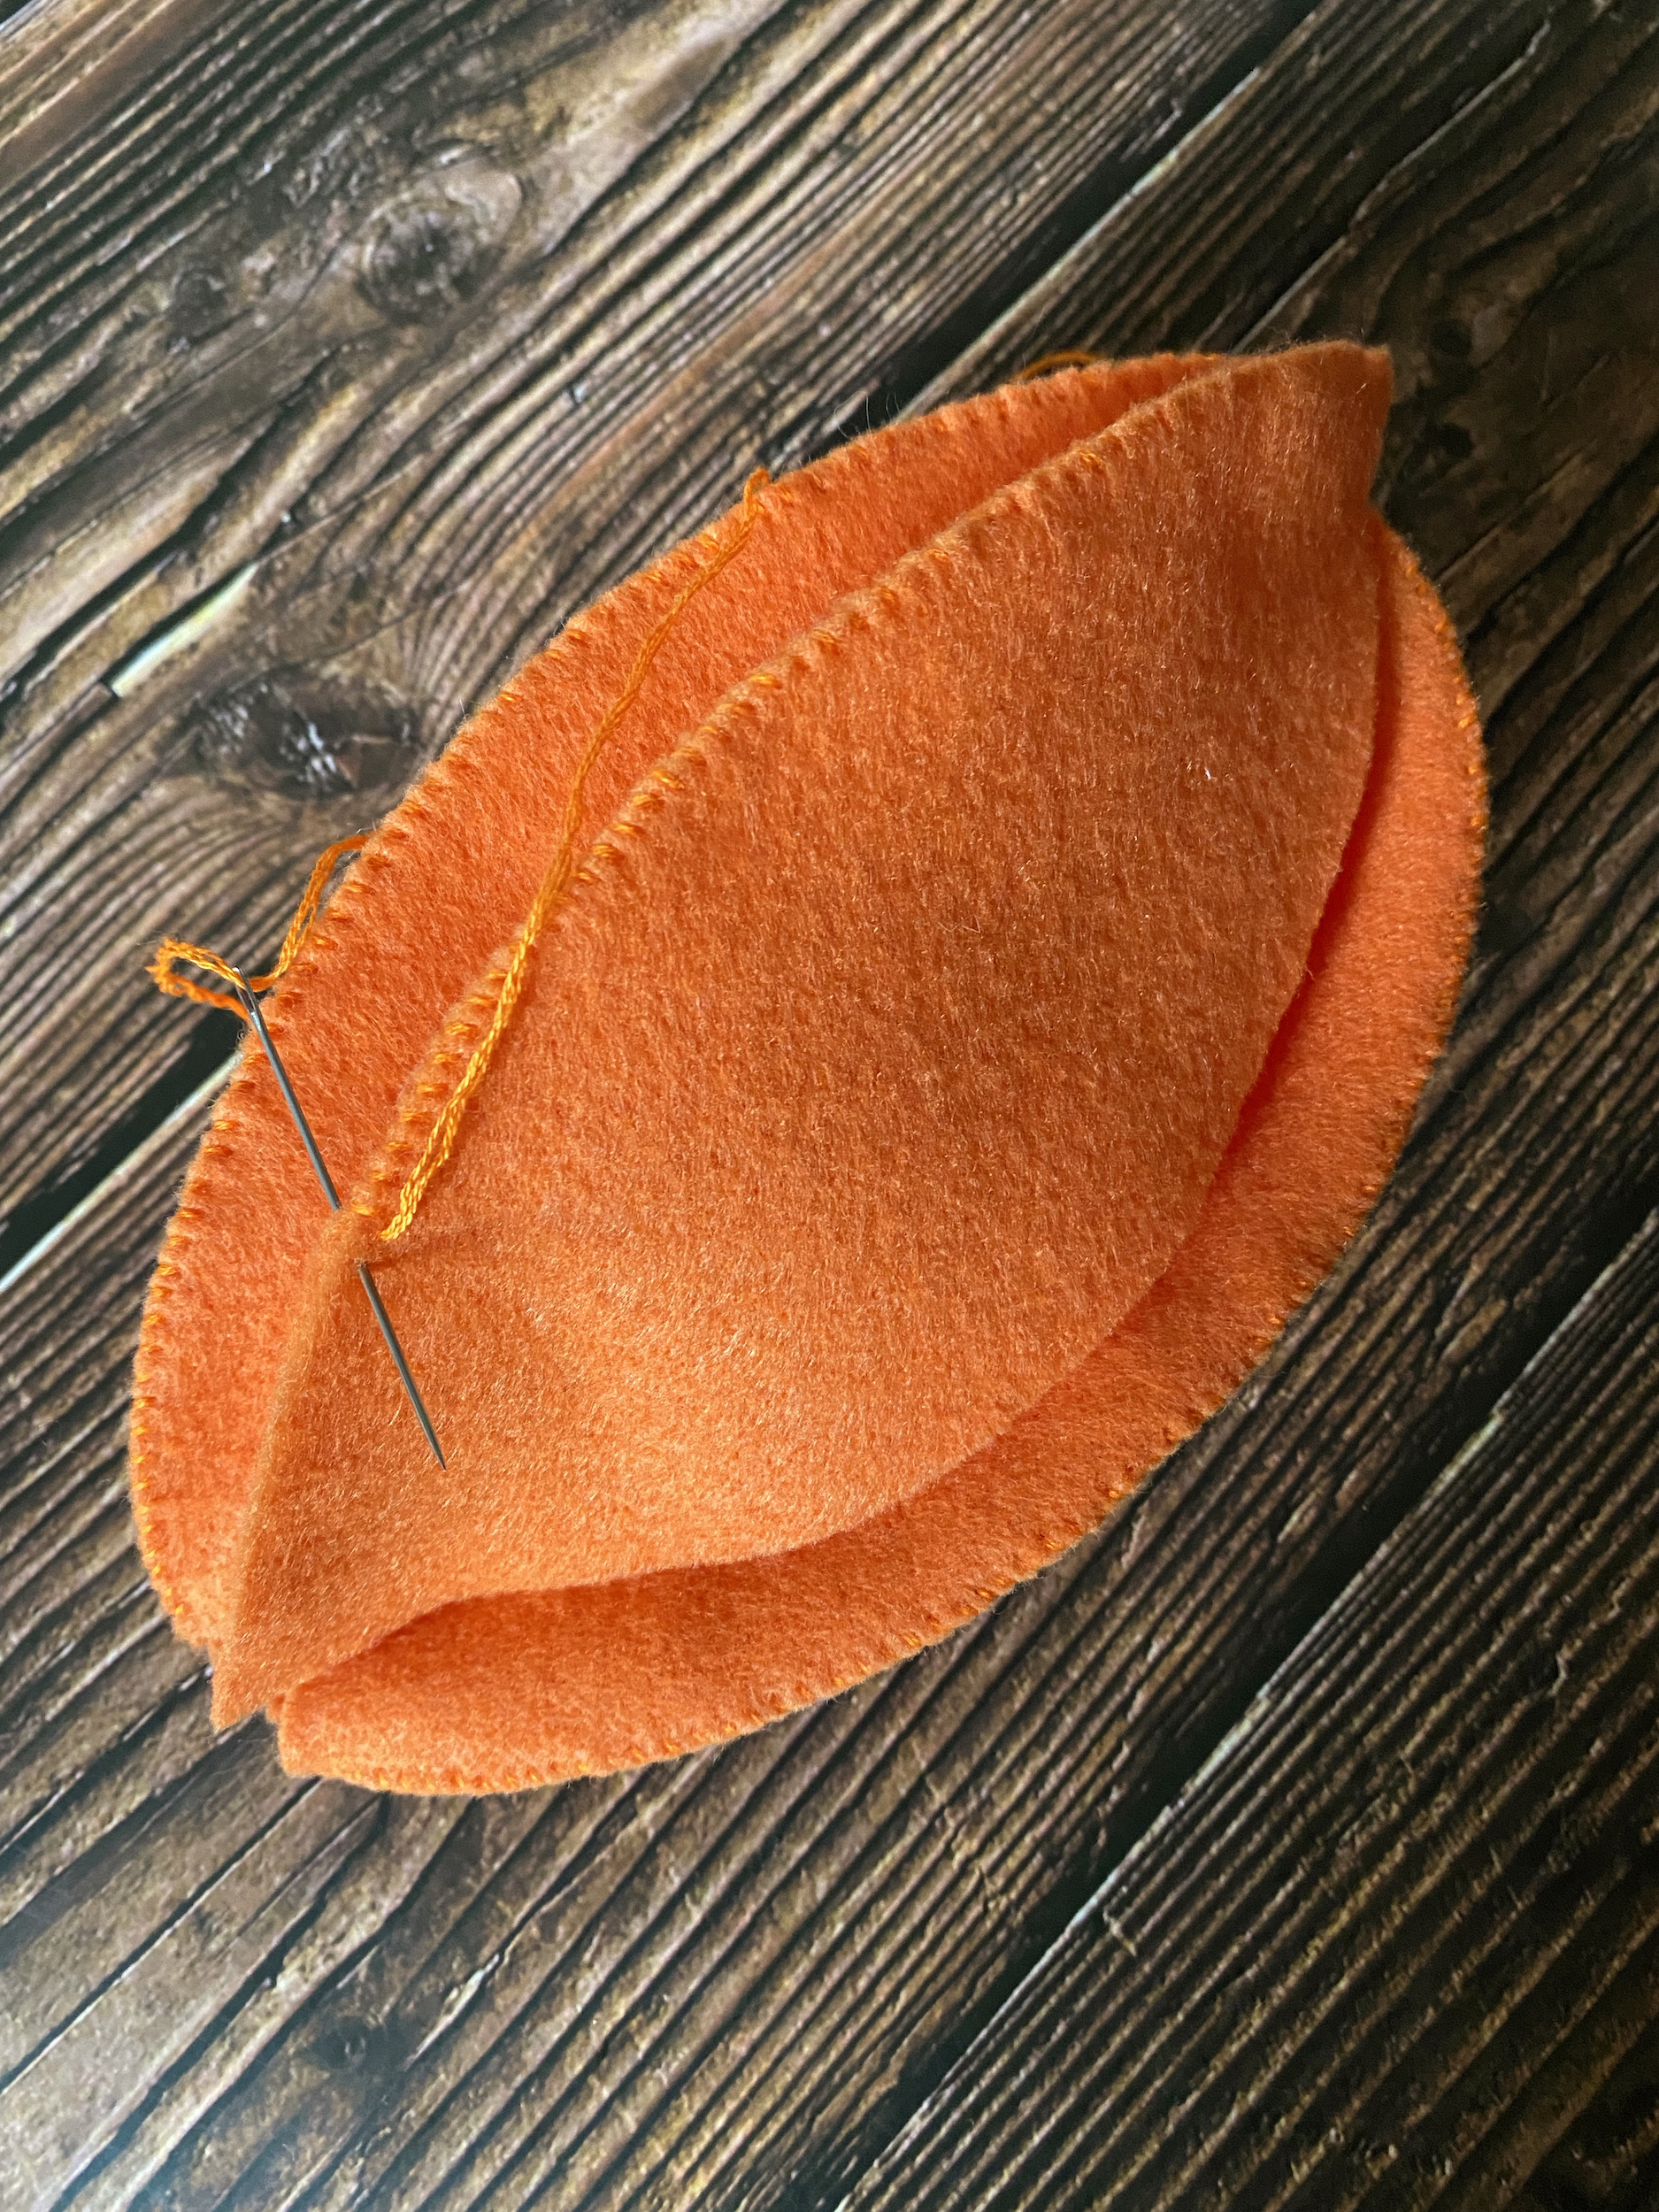
  4. Align two of the pumpkin pieces and whip stitch along one side, from one point to the next, concealing the first and ending knot underneath so that the stitching will be exposed.
  5. Repeat step 3 to continue adding pieces of the pumpkin.
  6. Once you’ve stitched the last piece on, join the two ends together with a whip stitch to complete the pumpkin body.
  7. Stuff the pumpkin, then place the circles on the top and bottom of the pumpkin and secure them with sewing pins.
  8. Using a whip stitch, attach the circles to the pumpkin, concealing the first and ending knots underneath. Then remove the sewing pins.
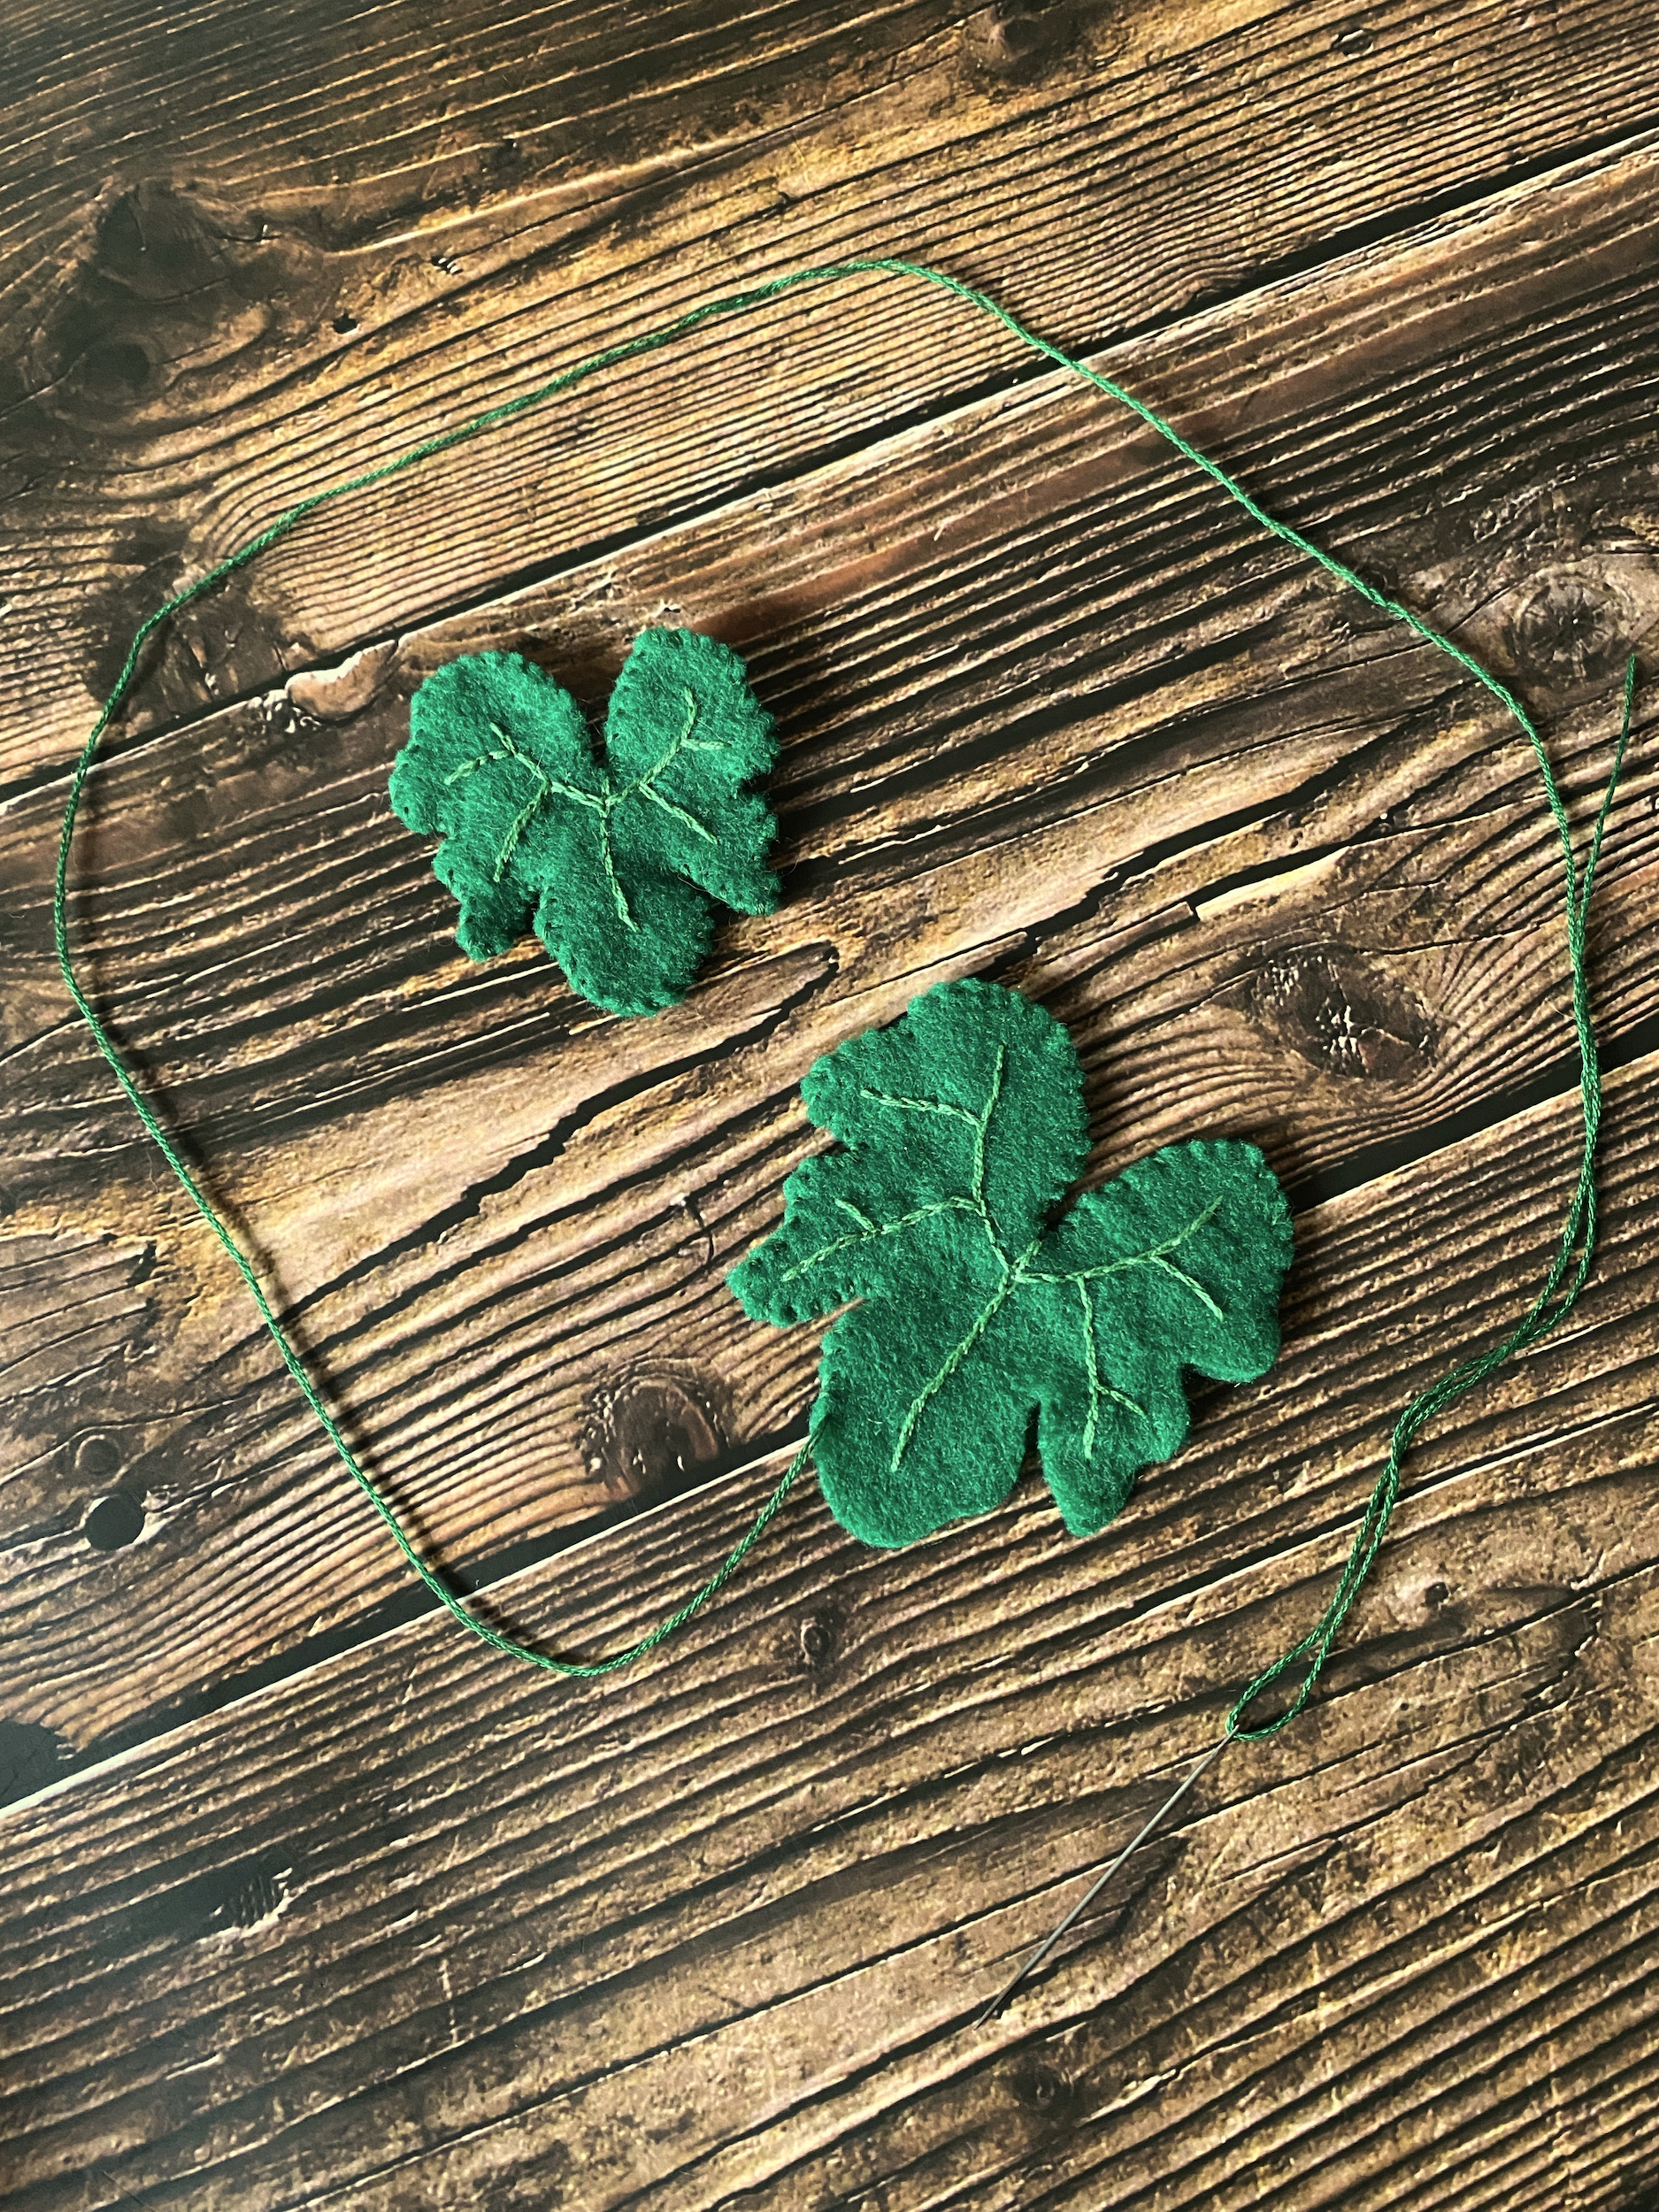
  9. Thread green embroidery floss on your sewing needle and stitch the veins onto one side of each leaf.
  10. Once done with the veins, align the two halves of each leaf (concealing the stitching in between) and whipstitch around the edges of the leaves to make them whole.
  11. Thread brown embroidery floss onto your sewing needle and whipstitch around the outside edges of the stem, leaving the bottom of the stem open. At this point you can leave the stem as it is or turn it around to conceal the stitching.
  12. Stuff the stem, then place it on top of the pumpkin and secure it with sewing pins. 
  13. Using a whip stitch, attach the stem to the body of the pumpkin.
  14. Enjoy!

Trigger’s Blackberry Pie Recipe (Robin Hood)

INTRODUCTION

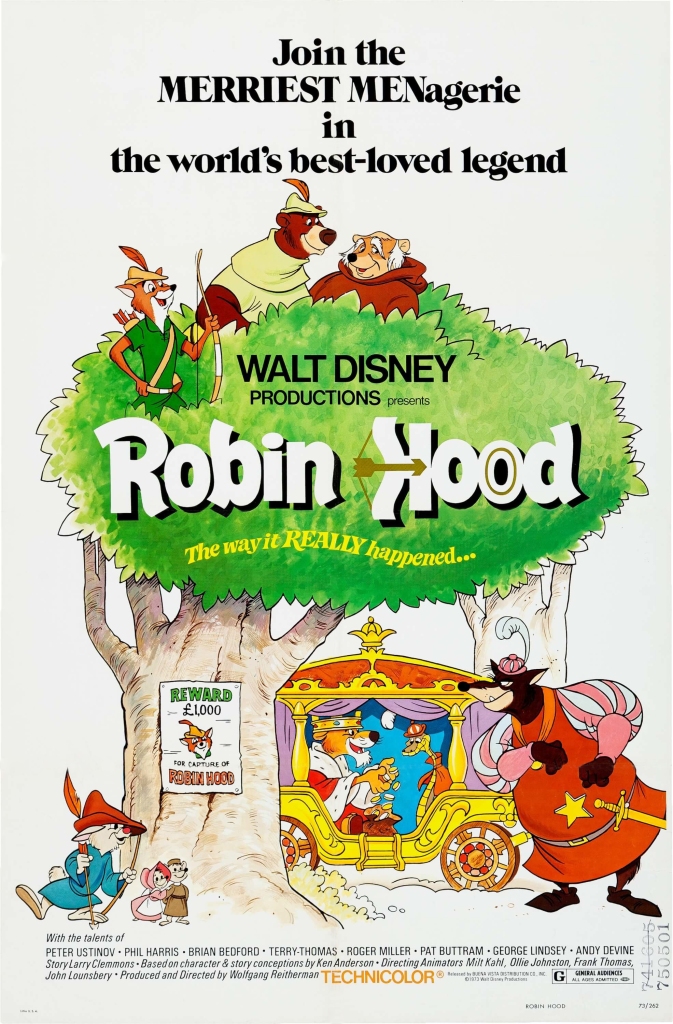
Welcome back friends! This week we’ll be baking Trigger’s Blackberry Pie from Disney’s Robin Hood!

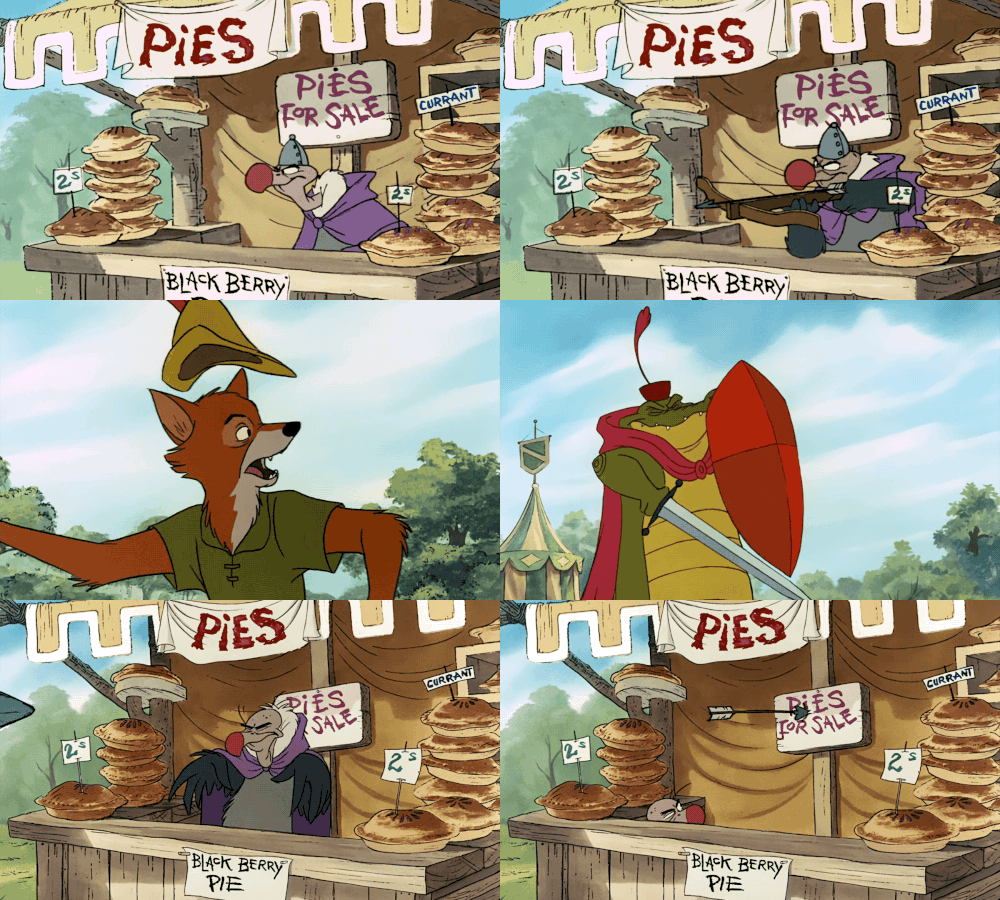
This recipe is featured when Robin Hood is discovered at Prince John’s archery competition and a fight ensues. One of the Sheriff of Nottingham’s henchmen, Trigger the vulture, is hiding out in a pie booth surrounded by these pies.

Note to self: Blackberries have seeds! This pie is sweet, tart and delicious, but there are seeds from the blackberries that startled me before I expected them! You could strain the seeds out by forcing the blackberries through a sieve. This recipe calls for whole berries, but you can adjust accordingly if the seeds throw off your groove!

TRIGGER’S BLACKBERRY PIE

CRUST

  • 2 1/2 cups of all-purpose flour
  • 1 teaspoon of kosher salt
  • 1 cup of unsalted butter, chilled
  • 6-8 tablespoons of water, chilled

FILLING

  • 1 cup of sugar
  • 1/2 cup of flour
  • 4-6 cups of fresh blackberries
INSTRUCTIONS (CRUST)
  • Add the flour and salt to a bowl and whisk to combine.
  • Cut the chilled butter into cubes and add the cubes to the bowl of flour and salt. Using a pastry cutter, cut the butter into the flour mixture until well combined.
  • Begin adding the tablespoons of chilled water one at a time and stirring well after each addition until the dough forms.
  • Turn the dough out onto a clean flat surface and work it into a ball. Cut this ball in half and plastic wrap each piece, then set inside the refrigerator to chill for at least 1 hour.
  • Bring out the first half of the dough and roll it out until it is about 1/4 inch thick and large enough to fit into your pie pan. 
  • Gently pick up the rolled out dough and place it gently into the bottom of your pie pan, then smooth it in and trim the edges.
INSTRUCTIONS (FILLING)
  1. Pre-heat the oven to 425 F.
  2. Wash the blackberries and add them to a bowl.
  3. Add the sugar and stir until well coated, then add the flour and stir until well coated.
  4. Pour the filling into the prepared pie crust.
  5. Bring out the second half of the dough and roll it out until it is about 1/4 inch thick and large enough to cover your pie.
  6. Gently pick up the rolled out dough and place it gently over the top of the pie, then trim the edges.
  7. Using a fork or your fingers, crimp or pinch the edges.
  8. Add 3 to 4 slits for venting while the pie bakes.
  9. Cover the edges of the pie with a 2 to 3 inch strip of foil to prevent excessive browning.
  10. Bake for 45-55 minutes or until the crust is golden brown and juice begins to bubble through the slits in crust, remove the foil for the last 15 minutes of baking. 
  11. Remove from the oven and allow it to cool on the rack at least 2 hours or more to allow the filling to thicken.
  12. Enjoy!

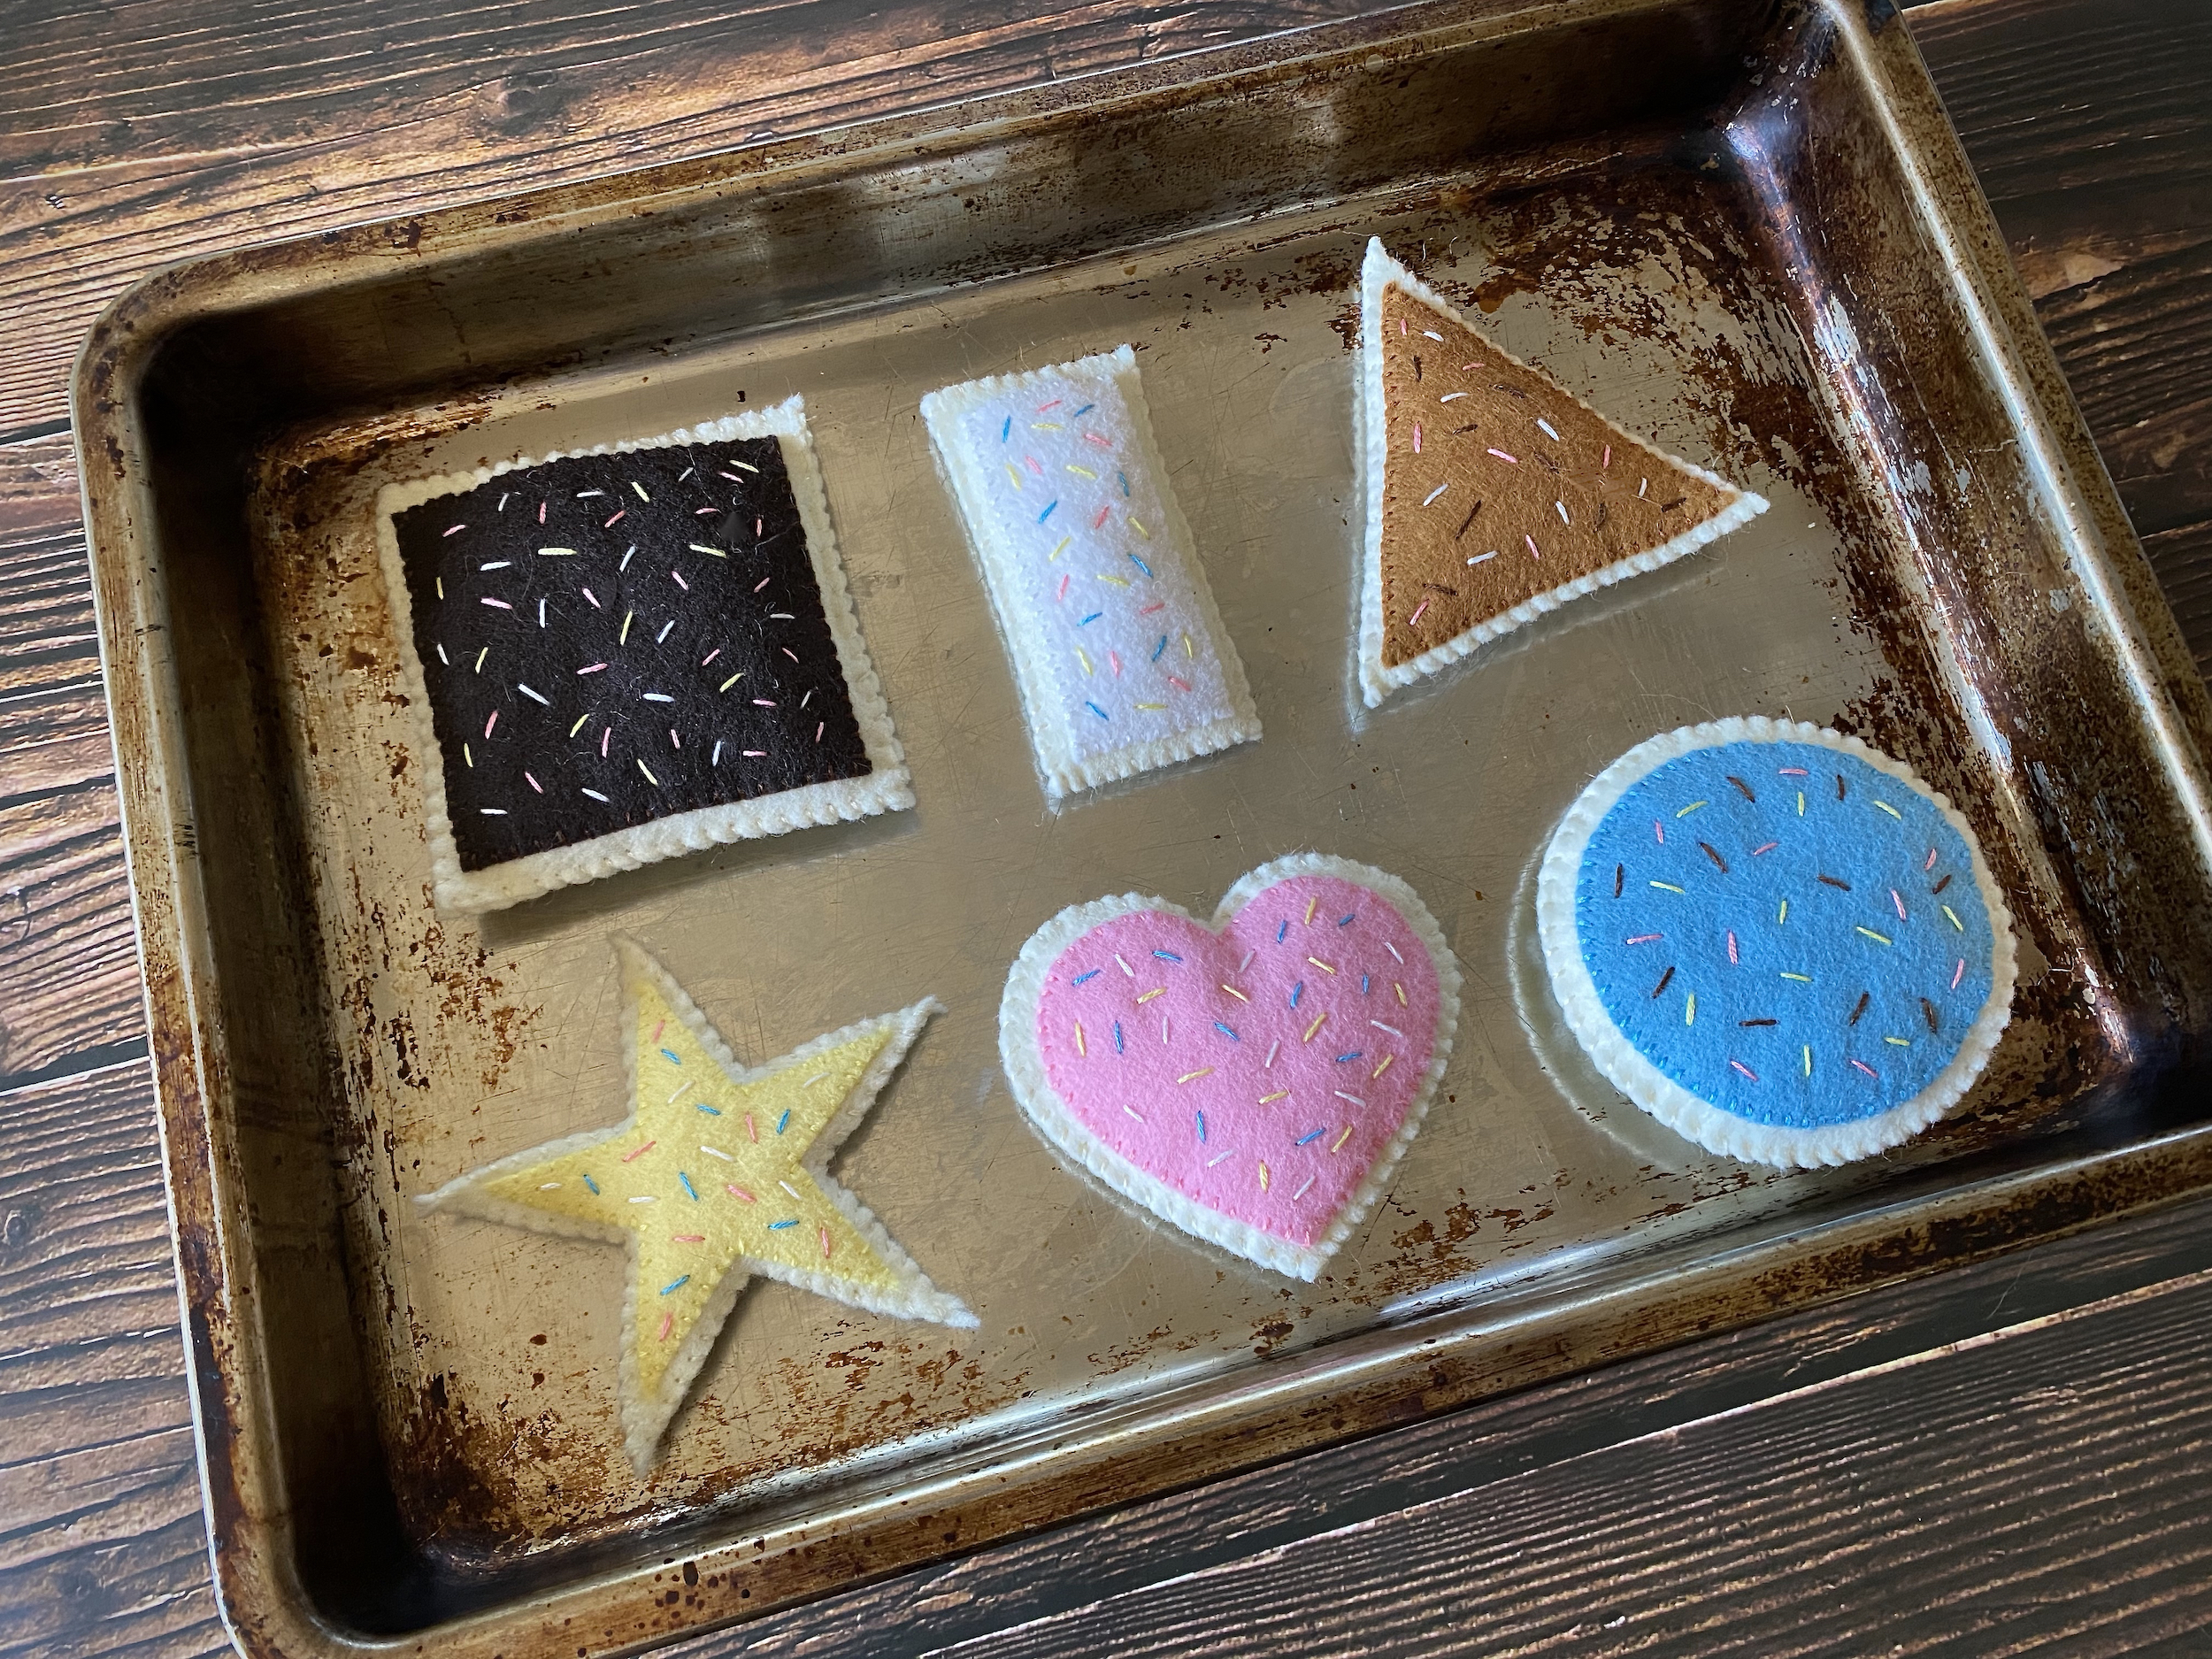
DIY – Felt Cookies

DIY Felt Cookies

What child (or inner child) doesn’t love preparing toy food in a play kitchen? 

I had a play kitchen when I was a little girl and loved baking cookies for myself, my sister and my parents. Now that I’m grown and have a daughter of my own, I want to make her some handcrafted play food so she can enjoy making meals for everyone during play, or while we cook in the kitchen next to her!

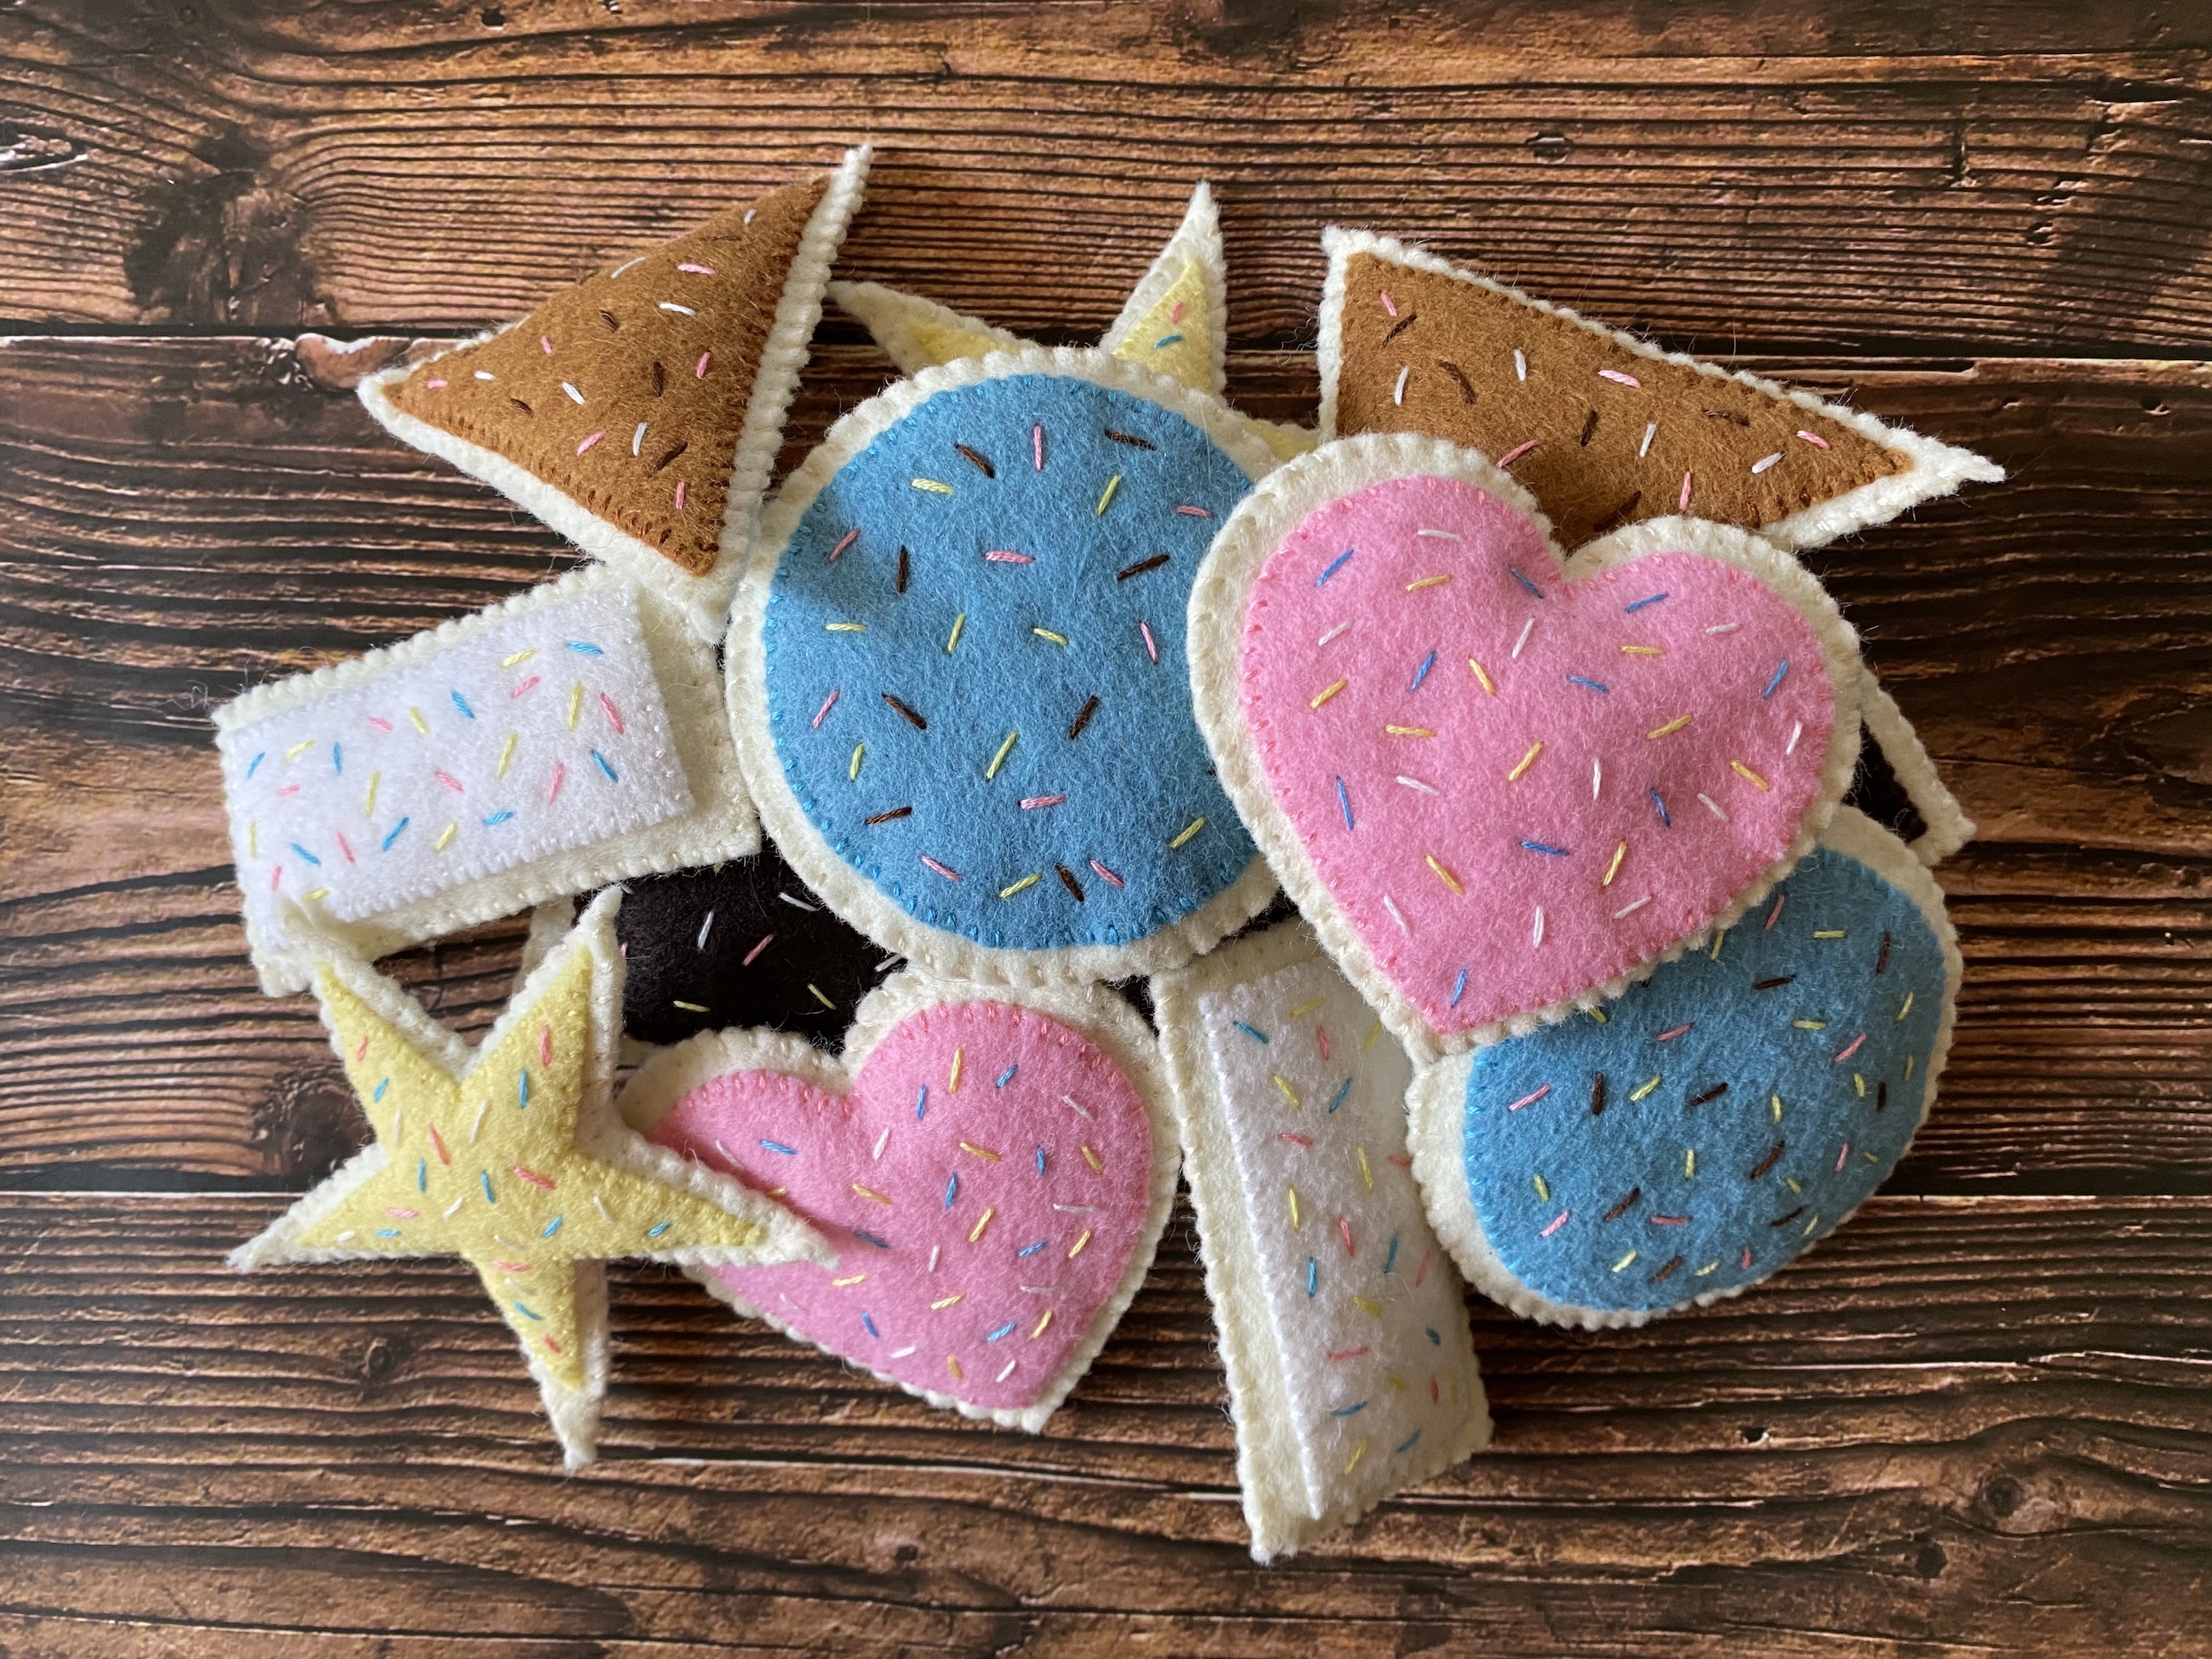
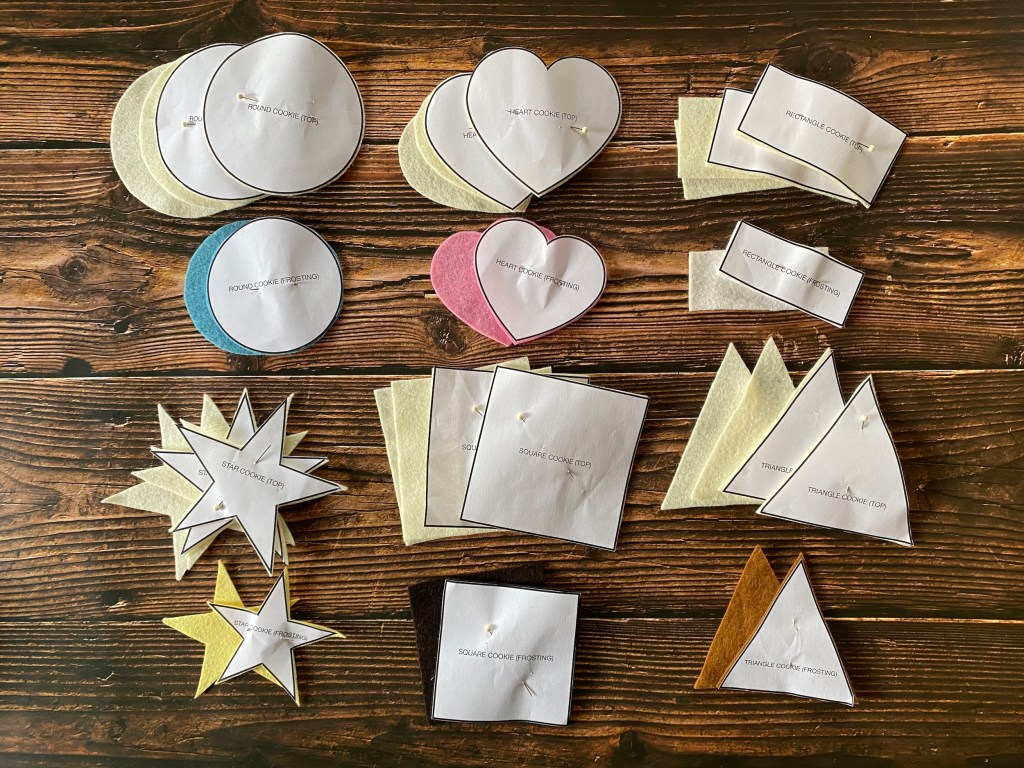
Please feel free to use these patterns to create some play food for you and yours! This pattern will make one circle cookie, one heart cookie, one star cookie, one triangle cookie, one square cookie and one rectangle cookie, each with frosting. I made one extra of each cookie shape so Zoey will have two of each. You can duplicate it as much as you want to make multiple pieces of each food!

SUPPLIES
  • Cookie patterns (see above) 
  • Paper scissors
  • Pale tan felt material
  • Pale blue felt material
  • Pale brown felt material
  • Dark brown felt material
  • Pale pink felt material
  • White felt material
  • Pale yellow felt material
  • Scissors
  • Pins
  • Embroidery floss (pale tan, pale blue, light brown, dark brown, pale pink, white)
  • Sewing needle
INSTRUCTIONS
  1. Print out the cookie pattern I’ve provided, then cut the patterns from the paper.
  2. Pin the patterns on the appropriate colored felt, then use sewing scissors to cut the felt.
  3. Align and pin the pale blue circle of frosting to one half of the circle of pale tan felt, then thread pale blue embroidery floss onto your sewing needle.
  4. Begin sewing around the outer edges of the frosting using a whipstitch, concealing the first and ending knots underneath the layer of cookie.
  5. One at a time, thread three of the other colors of embroidery floss onto your needle and create randomized stitches within the frosting to make sprinkles. Conceal the first and ending knots of each color underneath the layer of cookie.
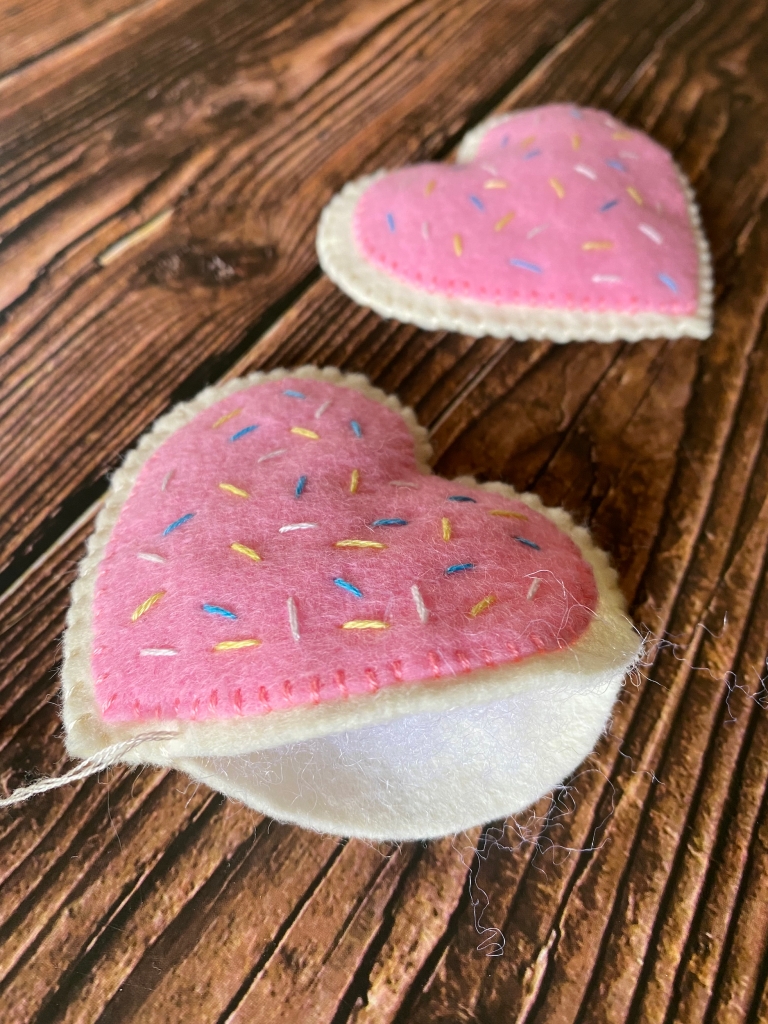
  6. Thread a sewing needle with pale tan embroidery floss and pin the bottom cookie layer over the stitching on the back of the frosted top half. 
  7. Using a whipstitch, begin sewing around the edges of the circle cookie, concealing the first knot and end knot in between the layers.
  8. Align and pin the pale pink heart of frosting to one half of the heart of pale tan felt, then thread pale pink embroidery floss onto your sewing needle.
  9. Begin sewing around the outer edges of the frosting using a whipstitch, concealing the first and ending knots underneath the layer of cookie.
  10. One at a time, thread three of the other colors of embroidery floss onto your needle and create randomized stitches within the frosting to make sprinkles. Conceal the first and ending knots of each color underneath the layer of cookie.
  11. Thread a sewing needle with pale tan embroidery floss and pin the bottom cookie layer over the stitching on the back of the frosted top half. 
  12. Using a whipstitch, begin sewing around the edges of the heart cookie, concealing the first knot and end knot in between the layers.
  13. Align and pin the pale yellow star of frosting to one half of the star of pale tan felt, then thread pale yellow embroidery floss onto your sewing needle.
  14. Begin sewing around the outer edges of the frosting using a whipstitch, concealing the first and ending knots underneath the layer of cookie.
  15. One at a time, thread three of the other colors of embroidery floss onto your needle and create randomized stitches within the frosting to make sprinkles. Conceal the first and ending knots of each color underneath the layer of cookie.
  16. Thread a sewing needle with pale tan embroidery floss and pin the bottom cookie layer over the stitching on the back of the frosted top half. 
  17. Using a whipstitch, begin sewing around the edges of the star cookie, concealing the first knot and end knot in between the layers.
  18. Align and pin the white triangle of frosting to one half of the triangle of pale tan felt, then thread white embroidery floss onto your sewing needle.
  19. Begin sewing around the outer edges of the frosting using a whipstitch, concealing the first and ending knots underneath the layer of cookie.
  20. One at a time, thread three of the other colors of embroidery floss onto your needle and create randomized stitches within the frosting to make sprinkles. Conceal the first and ending knots of each color underneath the layer of cookie.
  21. Thread a sewing needle with pale tan embroidery floss and pin the bottom cookie layer over the stitching on the back of the frosted top half. 
  22. Using a whipstitch, begin sewing around the edges of the triangle cookie, concealing the first knot and end knot in between the layers.
  23. Align and pin the dark brown square of frosting to one half of the square of pale tan felt, then thread dark brown embroidery floss onto your sewing needle.
  24. Begin sewing around the outer edges of the frosting using a whipstitch, concealing the first and ending knots underneath the layer of cookie.
  25. One at a time, thread three of the other colors of embroidery floss onto your needle and create randomized stitches within the frosting to make sprinkles. Conceal the first and ending knots of each color underneath the layer of cookie.
  26. Thread a sewing needle with pale tan embroidery floss and pin the bottom cookie layer over the stitching on the back of the frosted top half. 
  27. Using a whipstitch, begin sewing around the edges of the square cookie, concealing the first knot and end knot in between the layers.
  28. Align and pin the pale brown rectangle of frosting to one half of the rectangle of pale tan felt, then thread pale brown embroidery floss onto your sewing needle.
  29. Begin sewing around the outer edges of the frosting using a whipstitch, concealing the first and ending knots underneath the layer of cookie.
  30. One at a time, thread three of the other colors of embroidery floss onto your needle and create randomized stitches within the frosting to make sprinkles. Conceal the first and ending knots of each color underneath the layer of cookie.
  31. Thread a sewing needle with pale tan embroidery floss and pin the bottom cookie layer over the stitching on the back of the frosted top half. 
  32. Using a whipstitch, begin sewing around the edges of the rectangle cookie, concealing the first knot and end knot in between the layers.
  33. Enjoy!