Little John’s Beef Stew Recipe

Little John's Beef Stew Recipe from Disney's Robin Hood

INTRODUCTION

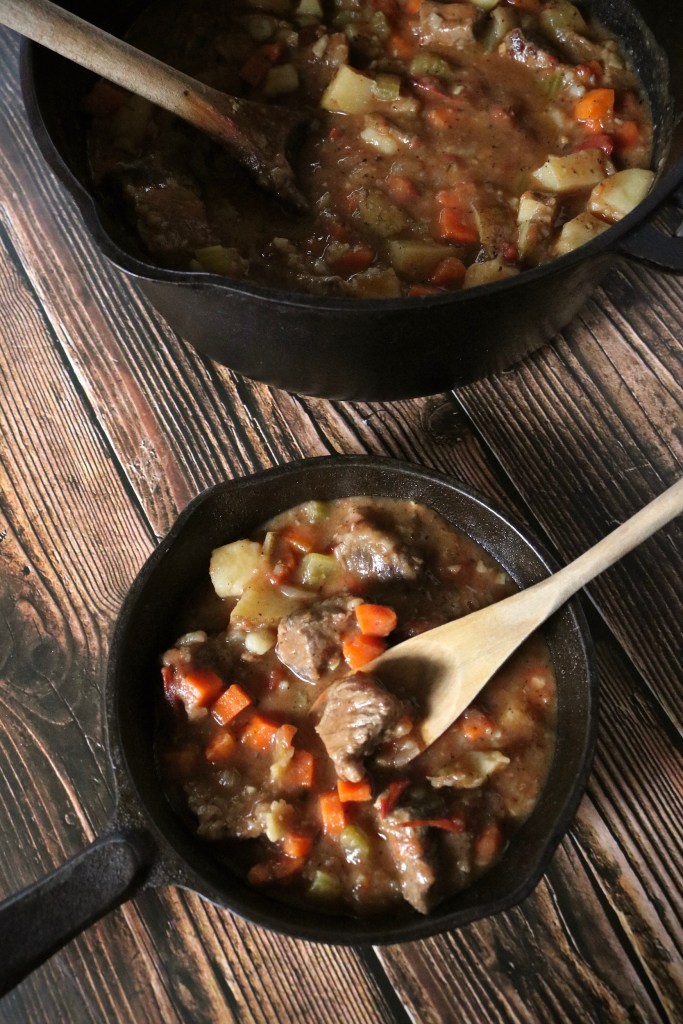
Welcome back friends! This week we’ll be cooking up Little John’s beef stew featured in Disney’s animated feature, Robin Hood!

Little John's Beef Stew Recipe from Disney's Robin Hood
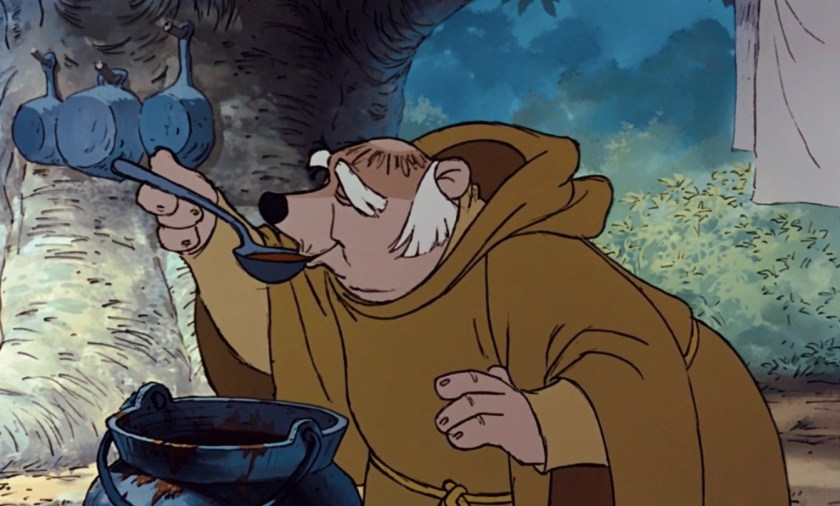
This recipe is featured when Robin Hood and Little John are taking a break in the woods. Unfortunately Little John leaves Robin to tend the stew, and Robin starts daydreaming, effectively burning the stew (don’t worry we won’t burn ours). Friar Tuck shows up while Little John is trying to salvage the food; he tries the stew, coughs a bit, and comments “well done, ain’t it?”

Little John's Beef Stew Recipe from Disney's Robin Hood

Little John's Beef Stew Recipe from Disney's Robin Hood

Little John's Beef Stew Recipe from Disney's Robin Hood
I love a good, hearty stew! I thought burning it would be in poor taste (#momjoke), so I kept an eye on it. I also feel like Little John takes pride in his cooking so I kept it simple based on ingredients they may have been able to obtain, but not so simple as to insult his enthusiasm.

Little John's Beef Stew Recipe from Disney's Robin Hood

Little John's Beef Stew Recipe from Disney's Robin Hood

BEEF STEW
  • 2 tablespoons of butter
  • 1 pound of beef stew meat, cubed
  • 1 large onion, diced
  • 1/2 teaspoon of basil
  • 1 teaspoon of black pepper (plus a few sprinkles more to season the meat)
  • 1/2 teaspoon of oregano
  • 1 teaspoon of rosemary
  • 1 1/2 teaspoons of salt (plus a few sprinkles more to season the meat)
  • 1 teaspoon of thyme
  • 3 cloves of garlic, minced
  • 3 ribs of celery, chopped
  • 1 cup of tomatoes, diced
  • 2 cups of water
  • 4 carrots, peeled and chopped
  • 4 potatoes, chopped
  • 2 tablespoons of flour
  • 1/4 cup of water (additional)
INSTRUCTIONS
  1. Melt the butter in a dutch oven or large pot on medium heat.
  2. Season the stew meat with a little salt and pepper, then add it to the pot and brown all sides.
  3. Once browned, remove the meat and allow it to rest on a plate with its juices.
  4. Add the onions, basil, black pepper, oregano, rosemary, salt, and thyme to the meat drippings within the dutch oven and sauté for about four or five minutes.
  5. Add the garlic and celery, then sauté for another two to three minutes.
  6. Deglaze the pan with a little water (enough to loosen up the food particles left behind from cooking the meat and aromatics) and stir, then allow everything to cook for another five minutes.
  7. Add the beef (and its accumulated juices) back into the pot, along with the diced tomatoes and two cups of water.
  8. Bring everything to a boil, then reduce to a simmer for about an hour to an hour and a half, or until the beef is fork tender.
  9. Add in the carrots and potatoes and bring the liquid back to a boil, then reduce to a simmer for another thirty to forty minutes or until the potatoes are fork tender.
  10. In a separate bowl, mix the flour into 1/4 cup of cold water and add it into the stew.
  11. Continue cooking and stirring the pot until the sauce has thickened (about 10 more minutes).
  12. Serve warm and enjoy!

Homemade Tinker Bell Smash Cake Recipe (No Added Sugar)

Disney Tinker Bell Smash Cake RecipeZoey, our little Tinker Bell, is one year old! This year has been an unusual one (understatement of the century), but it has flown by faster than I could have imagined and I have been fortunate enough to spend the majority of it at home with her; grateful for every moment.

Like many one year birthday boys and girls, Zoey has not been exposed to much sugar. Now I don’t mind a little sugar, but I did not want to sugar bomb her all at once so I created a homemade smash cake with frosting for her without adding extra sugar.

This Tinker Bell petal smash cake is a variation of a banana bread recipe my family has made for years without added sugar and a variation of cream cheese frosting without powdered sugar. I would consider the cake a tame banana flavor and the frosting a tangy cream cheese flavor, smoothed out with the addition of a natural sweetener (I used agave nectar). I purchased a used Disney Infinity Tinker Bell figurine off of Mercari, gave it a good cleaning, and used it as a cake topper with the obligatory “1” candle.

Disney Tinker Bell Smash Cake Recipe Disney Tinker Bell Smash Cake RecipeShe was very tentative about smashing  her smash cake, almost like she wasn’t sure if she was allowed to. Even with her audience coaxing her she only tasted a little bit of cake I broke off for her and mostly just played around in the frosting. Her favorite part of the cake was the Tinker Bell figurine up top and she ended up fixating on that. And what the hey, as long as she had fun!

So let’s make a smash cake for the little Tinker Bell in your life!

Disney Tinker Bell Smash Cake Recipe

BANANA SMASH CAKE
  • 3 bananas, overripe
  • 1/2 cup of butter, softened
  • 2 eggs
  • 1 1/4 cup of flour
  • 3/4 teaspoon of baking soda
  • 1/2 teaspoon of salt
INSTRUCTIONS (CAKE)
  1. Preheat the oven to 350F.
  2. Grease two 6-inch cake pans, or line them with parchment paper.
  3. Cream the butter and bananas together with a (hand) mixer.
  4. Add the eggs in one at a time, beating each in with the (hand) mixer.
  5. In a separate bowl, combine the flour, baking soda and salt.
  6. Add the dry ingredients to the wet ingredients a little at a time, mixing and scraping down the sides of the bowl in between each addition.
  7. Pour the mixed batter into the prepared cake pans about half to 3/4 of the way full.
  8. Bake for about 30 to 35 minutes until a toothpick inserted into the centers comes out clean. The timing may vary depending on your oven so keep an eye on them!
  9. Remove the cakes from the oven and allow them to cool in their pans for about 10 minutes, then remove them from the pans and allow them to cool completely on a wire rack.
  10. Mine were pretty flat. If yours do not turn out flat, cut the very tops off of the cakes to create flat tops for stacking and frosting.
  11. Frost your cake (see below).

Disney Tinker Bell Smash Cake Recipe

CREAM CHEESE FROSTING (NO ADDED SUGAR)
  • 5 tablespoons of butter, room temperature
  • 1 1/2 packs of cream cheese (8 ounce), room temperature
  • A pinch of salt
  • 2 to 3 tablespoons agave nectar, honey or maple syrup
  • 1 to 2 tablespoons whole milk
  • 2 teaspoons of vanilla extract
  • 1 to 2 tablespoons corn starch
  • Green food coloring
INSTRUCTIONS (FROSTING)

*You can make the frosting up to several days in advance and store it in the refrigerator. Bring it to room temperature before frosting.*

  1. Whip the butter and cream cheese together in a large bowl until well combined.
  2. Add the agave nectar (or sweetener of choice), milk, salt and vanilla extract. Whip again, scraping down the sides of the bowl as needed.
  3. Add 1 tablespoon of corn starch and whip until well incorporated. If at this point the consistency is right for you, you can move on to the next step. If not you can add cornstarch one teaspoon at a time until it reaches the desired thickness (careful not to exceed 2 tablespoons total).
  4. Divide the frosting four equal parts in separate bowls. Add green food coloring to each bowl of frosting, ranging from dark to light green. Put each shade of green frosting into a pastry bag.
  5. Pipe and smear frosting on the top of the first layer of cake and gently place the second layer on top of this.
  6. Begin the petals by piping a dollop of dark green frosting on the side of the cake at the base. Take a flat slender spatula or butter knife press gently into the dollop and smear it to the right. Pipe another dollop of dark green near the end of the smear and repeat all the way around the cake.
  7. Repeat this process with the next shade of green and repeat, but stop before you reach the lightest shade of green and the top of the cake.
  8. Pipe and smear a healthy dollop of the lightest green frosting onto the top of the cake and smooth it out with a flat spatula, then continue with the last layer of petals in the lightest shade of green around the top of the cake.
  9. Adorn your cake with decorations.
  10. Enjoy!

Disney Tinker Bell Smash Cake Recipe

Kingdom Hearts – Visual 101 Dalmatians Guide

Kingdom Hearts 101 Dalmatian Guide

If there’s one thing I do when I play a game (besides trying to relax and enjoy myself), it’s look up information. I get curious or stuck, and I find myself turning to the internet for answers. There are a lot of good guides out there that are super helpful, but what I don’t see are an abundance of simple and clean visual guides that lay out all the information in one place.

I’ve finished playing Kingdom Hearts as I work my way through the entire series and I’ve created a 101 Dalmatian guide for myself and those who may need it.

This infographic is organized by the dalmatian’s numbers, their locations and the ability needed to reach them. I’ve also included the rewards received per number of puppies returned at the top of the page.

Please let me know if you would like me to work on a guide for the other collectibles within Concrete Genie or if there are any games you would like to see visual information or guides for in the future! I love helping people, discussing games and organizing information!


DIY Peasant Belle Peg Doll

DIY Peasant Belle Peg Doll DIY Peasant Belle Peg Doll DIY Peasant Belle Peg DollPart of the fun in raising Zoey is making things that delight her; I want to create lasting, meaningful toys for her that are made with love and will be loved! Wooden toys are classic and beautiful, when created and treated right, they can last a lifetime; so let’s make some!

It’s no secret that Cameron and I love Disney. Zoey’s middle name was inspired by one of my favorite Disney princesses, Belle, and that Belle in her name has also led to another Disney nickname, Tinker Bell. I cannot wait to create a whole set of peg dolls for her, but these two characters hold the most significance until she begins watching the classics on her own.

We’ve created a Tinker Bell Peg Doll, check her out!

This week I’ll be sharing the steps I took to create a Belle peg doll in her blue peasant dress for Zoey.

DIY Peasant Belle Peg Doll

SUPPLIES
  • Blank peg doll (I used a “small angel” or “girl” shape/size)
  • Small, flat & fine tip paint brushes
  • Paint palette (or a tray for your paint)
  • Blue non-toxic acrylic paint
  • White non-toxic acrylic paint
  • Light blue non-toxic acrylic paint
  • Brown non-toxic acrylic paint
  • Dark brown non-toxic acrylic paint
  • Black non-toxic acrylic paint
  • Non-toxic varnish (I used Duraclear Ultra Matte Varnish)
INSTRUCTIONS

DIY Peasant Belle Peg Doll

DIY Peasant Belle Peg Doll

  1. With a pencil, lightly sketch Belle onto your blank peg doll. Belle wears a dress over a white blouse, I gave her sleeves so more of the blouse can be seen.
  2. Begin painting your peg doll with the base layers first. I started with the blue of her dress and hair bow, the white of her blouse and apron, and the brown of her hair. Allow this paint to dry before moving on to avoid smudging, then apply a few more layers of each until you’re happy with the colors and textures.
  3. Paint the very bottom and edges of the peg doll black to signify her shoes.
  4. After the base layers have dried, paint a border of light blue on the edges of her apron, shirt and hair bow. If you don’t have a lighter shade of blue, you can create some by adding a small amount of white paint to the original blue and blending.
  5. Paint dark brown accents on and around the hair, don’t forget her ponytail in the back!
  6. Taking something small and round (I used the opposite end of one of my smaller paint brushes) dip it in black paint and dot the two eyes. Using the finest tipped paintbrush you can find, give her an eyelash or two on each eye.
  7. Once the eye paint has dried, add a highlight dot to each eye with a fine tipped paintbrush and white paint.
  8. Using the same method as the eyes, dip the opposite end of a slightly larger paintbrush into light pink paint and dot the blush under each eye.
  9. With a little white paint, give her a few sparkles of pixie dust on the hem of her dress or wherever else you feel it will look right!
  10. Allow for all paint to completely dry, then apply a varnish and allow it to dry. You can apply as many coats as you want for the finish you want, just allow them to dry in between applications and before handing her over to your child.
  11. Voilà! Belle is done and ready to be played with! Enjoy!

DIY Peasant Belle Peg Doll DIY Peasant Belle Peg Doll

Jack Jack’s Num Num Cookie Recipe

Jack Jack's Num Num Cookie Recipe from Incredibles 2
INTRODUCTION

Welcome back friends! I hope this post finds you and your loved ones safe and healthy! This week we’ll be baking Jack Jack’s Num Num Chocolate Chip Cookies from Disney and Pixar’s Incredibles 2.

Jack Jack's Num Num Cookie Recipe from Incredibles 2This recipe is featured when Lucius Best (Frozone) checks in on Bob Parr (Mr. Incredible) in his new homemaking role. Bob is struggling with Jack Jack’s abundant powers, but has discovered he will temporarily settle down for cookies.

Jack Jack's Num Num Cookie Recipe from Incredibles 2These chocolate chip cookies are slender, soft and scrumptious. Pixar recently released an official recipe for Jack Jack’s cookies that looks and tastes absolutely fantastic, but the cookies come out much thicker-looking than the ones in the film so I decided to create my own independent recipe for the fun of it. I imagine Jack Jack wouldn’t discriminate!

Jack Jack's Num Num Cookie Recipe from Incredibles 2 Jack Jack's Num Num Cookie Recipe from Incredibles 2

JACK JACK’S NUM NUM COOKIES
  • 1 cup of butter, softened
  • 1 1/2 cups of packed brown sugar (I used dark)
  • 1 teaspoon of vanilla extract
  • 2 large eggs
  • 2 1/4 cups of cake flour
  • 1 teaspoon of baking soda
  • 1 teaspoon of salt
  • 2 cups of semi-sweet chocolate chips
INSTRUCTIONS (COOKIES)
  1. Using a mixer, cream the butter and brown sugar.
  2. Add the vanilla and then the eggs in one at a time, mixing after each egg.
  3. In a separate bowl, combine the cake flour, baking soda and salt with a whisk.
  4. Slowly add the dry ingredients to the wet, mixing well after each addition until a thick fluffy dough forms.
  5. Using a mixing spoon, fold in the 2 cups of semi-sweet chocolate chips until well-distributed throughout the dough.
  6. Cover the bowl and place it in the refrigerator for about 24 hours. This step is optional if you’re in a rush for the cookies, but they will spread a little less if chilled.
  7. After the dough has chilled, preheat the oven to 325F and prepare a baking sheet with parchment paper.
  8. Remove the dough from the refrigerator and using a small ice cream scoop or a regular spoon (I used a spoon), begin portioning out the dough into balls of cookie dough (about 1 1/4 to 1 1/2 inches in diameter), and placing them on the baking sheet.
  9. Place the baking sheet in the oven and bake for about 14 minutes. Baking time may vary depending on your oven so please keep an eye on the cookies and find a time that works for you.
  10. Remove the cookies from the oven when they are golden brown on the edges and allow them to cool on the pan for about 2 minutes. Then remove them from the pan and allow them to completely cool on a wire rack.
  11. Enjoy!

Kingdom Hearts – Visual Trinity Mark Guide

Kingdom Hearts Trinity Mark Guide

If there’s one thing I do when I play a game (besides trying to relax and enjoy myself), it’s look up information. I get curious or stuck, and I find myself turning to the internet for answers. There are a lot of good guides out there that are super helpful, but what I don’t see are an abundance of simple and clean visual guides that lay out all the information in one place.

I’ve finished playing Kingdom Hearts as I work my way through the entire series and I’ve created a Trinity mark guide for myself and those who may need it.

This infographic is organized by the trinity’s color, it’s location and the reward for triggering it in each world. I’ve also included how to unlock each trinity color at the top of the page.

Please let me know if you would like me to work on a guide for the other collectibles within Concrete Genie or if there are any games you would like to see visual information or guides for in the future! I love helping people, discussing games and organizing information!

DIY Tinker Bell Peg Doll

DIY Tinker Bell Peg DollDIY Tinker Bell Peg DollPart of the fun in raising Zoey is making things that delight her; I want to create lasting, meaningful toys for her that are made with love and will be loved! Wooden toys are classic and beautiful, when created and treated right, they can last a lifetime; so let’s make some!

It’s no secret that Cameron and I love Disney. Zoey’s middle name was inspired by one of my favorite Disney princesses, Belle, and that Belle in her name has also led to another Disney nickname, Tinker Bell. I cannot wait to create a whole set of peg dolls for her, but these two characters hold the most significance until she begins watching the classics on her own.

We’ve created a Peasant Belle Peg Doll, check her out!

This week I’ll be sharing the steps I took to create a Tinker Bell peg doll for Zoey.

DIY Tinker Bell Peg Doll

SUPPLIES
  • Blank peg doll (I used a “small angel” or “girl” shape/size)
  • Small, flat & fine tip paint brushes
  • Paint palette (or a tray for your paint)
  • Green non-toxic acrylic paint
  • Yellow non-toxic acrylic paint
  • Light brown non-toxic acrylic paint
  • Light blue non-toxic acrylic paint
  • Light pink non-toxic acrylic paint
  • White non-toxic acrylic paint
  • Black non-toxic acrylic paint
  • Non-toxic varnish (I used Duraclear Ultra Matte Varnish)
INSTRUCTIONS
  1. With a pencil, lightly sketch Tinker Bell onto your blank peg doll.

    DIY Tinker Bell Peg DollDIY Tinker Bell Peg Doll

  2. Begin painting your peg doll with the base layers first. I started with the green of her dress, the white of her wings and the yellow of her hair. Allow this paint to dry before moving on to avoid smudging, then apply a few more layers of each until you’re happy with the colors and textures.

    DIY Tinker Bell Peg DollDIY Tinker Bell Peg Doll

  3. Paint the very bottom and edges of the peg doll green to signify her slippers.
  4. After the base layers have dried, paint a border of darker green on the edges of her dress. If you don’t have a darker shade of green, you can create some by adding a small amount of black paint to the original green and blending.
  5. Paint an accent of lighter green on the inner layer of the dark green border of her dress. If you don’t have a lighter shade of green, you can create some by adding a small amount of white paint to the original green and blending.
  6. The wings can stay matte white, or you can add a pearly white finish to give them a sheen. Once the wings have dried, border and accent them with light blue paint.
  7. Paint light brown accents on and around the hair.
  8. Once the hair has dried, paint a small light blue ribbon around Tinker Bell’s bun.
  9. Taking something small and round (I used the opposite end of one of my smaller paint brushes) dip it in black paint and dot the two eyes. Using the finest tipped paintbrush you can find, give her an eyelash or two on each eye.
  10. Once the eye paint has dried, add a highlight dot to each eye with a fine tipped paintbrush and white paint.
  11. Using the same method as the eyes, dip the opposite end of a slightly larger paintbrush into light pink paint and dot the blush under each eye.
  12. With a little white paint, give her a few sparkles of pixie dust on the hem of her dress or wherever else you feel it will look right!
  13. Allow for all paint to completely dry, then apply a varnish and allow it to dry. You can apply as many coats as you want for the finish you want, just allow them to dry in between applications and before handing her over to your child.
  14. Voilà! Tinker Bell is done and ready to be played with! Enjoy!

DIY Tinker Bell Peg Doll DIY Tinker Bell Peg Doll

Randall’s Be My Pal Cupcake Recipe (Monster’s University)

Be My Pal Cupcake Recipe from Disney and Pixar's Monster's University

INTRODUCTION

Welcome back friends! This week we’ll be baking the cupcakes Randall bakes in the hope of making new friends at Monster’s University in Disney and Pixar’s Monster’s University.Be My Pal Cupcake Recipe from Disney and Pixar's Monster's University

These “Be My Pal” cupcakes are featured right before Randall leaves for a campus party. He’s baked them to impress members of the fraternity he’s trying to join and asks Mike to join him, but Mike declines to study instead.

Be My Pal Cupcake Recipe from Disney and Pixar's Monster's University Be My Pal Cupcake Recipe from Disney and Pixar's Monster's University

In all honesty, I feel a little guilty for not making the cupcake portion of this recipe from scratch. I am rationalizing it by an idea that a college student probably wouldn’t want to take the time to bake everything from scratch, but on the flip-side this is Randall we’re talking about; it could go either way! I look forward to revisiting this recipe in the future and re-creating it completely from scratch, but in the meantime, enjoy and substitute butter for a more homemade flavor!

Be My Pal Cupcake Recipe from Disney and Pixar's Monster's University Be My Pal Cupcake Recipe from Disney and Pixar's Monster's University

CUPCAKES
  • 1 box of Devil’s Food Cake Mix (I used Duncan Hines)
  • 1/3 cup butter (or vegetable oil)
  • 3 large eggs
  • 1 cup water
  • Cooking spray
INSTRUCTIONS (CUPCAKES)
  1. Preheat the oven to 350 F.
  2. Melt the butter in a small saucepan and set it aside to cool.
  3. Line a muffin/cupcake pan with cupcake liners and spray them lightly with cooking spray.
  4. Place the dry cake mix in a large bowl. In a separate bowl, combine the melted butter, eggs and water.
  5. Slowly add the combined wet ingredients to the dry cake mix a little at a time, mixing until smooth.
  6. Distribute the batter into the prepared cupcake liners, filling each liner about about 2/3 full (you can use an ice cream scoop or I used a small measuring cup).
  7. Bake the cupcakes for 18 to 21 minutes, until a toothpick poked into the center of each cupcake comes out clean.
  8. Remove them from the oven and allow them to cool completely before frosting.
FROSTING
  • 1 8 oz. package of cream cheese (room temperature)
  • 1 1/2 cups heavy whipping cream (cold)
  • 1 1/2 cups powdered confectioners sugar
  • 1/2 tsp. vanilla extract
INSTRUCTIONS (FROSTING)
  1. Refrigerate or freeze your mixing bowl and whisk attachment(s) for 10-15 minutes before using, then whip the heavy whipping cream on high speed for 1 to 2 minutes until it’s thick, fluffy and spreadable.
  2. In a second mixing bowl, beat the cream cheese and powdered sugar slowly until well incorporated, then add the vanilla extract.
  3. Fold the whipped cream into the cream cheese mixture.
  4. Separate out about a third of the frosting out into a small bowl and add red food coloring until it reaches the desired hue for the “Be My Pal” letters.
  5. Spread the white frosting on each cupcake using a butter knife.
  6. Place the red frosting into a piping bag and spell out “Be My Pal” onto 7 (or more) of the cupcakes.
  7. Enjoy!

DIY Frozen Mickey and Minnie Baby Treats using Candy Molds

DIY Frozen Mickey and Minnie Baby Treats using Candy MoldsDuring these Summer months, and even into Fall, we get some pretty warm and sometimes uncomfortably hot days. To cool Zoey off and soothe her teething gums, I thought it would be fun and refreshing to make some frozen treats using the food she already eats and candy molds!

DIY Frozen Mickey and Minnie Baby Treats using Candy Molds

SUPPLIES
  • Candy mold of your choice (I used Mickey and Minnie)
  • Baby food
  • Yogurt (optional)
INSTRUCTIONS
  1. Wash and dry the candy mold.

    DIY Frozen Mickey and Minnie Baby Treats using Candy Molds
  2. Choose the flavor of baby food and/or yogurt you would like to freeze and spoon it into the candy molds until it’s even with the top of the mold. I wiped the top of my mold down to make it look better, but you do not need to do this.

    DIY Frozen Mickey and Minnie Baby Treats using Candy MoldsDIY Frozen Mickey and Minnie Baby Treats using Candy Molds
  3. Place the mold in the freezer for an hour or more until the contents are frozen.

    DIY Frozen Mickey and Minnie Baby Treats using Candy Molds
  4. Remove the mold from the freezer and pop out one or two frozen treats at a time for baby to enjoy!

    DIY Frozen Mickey and Minnie Baby Treats using Candy MoldsDIY Frozen Mickey and Minnie Baby Treats using Candy Molds

“Try Everything” Lyric Page from Disney’s Zootopia

Try Everything Lyric Page

I love singing to Baby Zoey and she loves being sung to! This is also a song Zoey loves moving to or dare I say, dance to. She’s still learning to walk, so we do the dancing for her with her in our arms, but she laughs and squeals the whole time!

I used to know all the songs from Disney movies by heart, but I’m a little rusty. I’ve started making lyric pages to refresh my memory or teach me new songs I’ve never known! Feel free to save them to your phone for a quick reference, and please let me know if there are any songs you would like to see lyric pages for!