Kingdom Hearts – Visual Trinity Mark Guide

Kingdom Hearts Trinity Mark Guide

If there’s one thing I do when I play a game (besides trying to relax and enjoy myself), it’s look up information. I get curious or stuck, and I find myself turning to the internet for answers. There are a lot of good guides out there that are super helpful, but what I don’t see are an abundance of simple and clean visual guides that lay out all the information in one place.

I’ve finished playing Kingdom Hearts as I work my way through the entire series and I’ve created a Trinity mark guide for myself and those who may need it.

This infographic is organized by the trinity’s color, it’s location and the reward for triggering it in each world. I’ve also included how to unlock each trinity color at the top of the page.

Please let me know if you would like me to work on a guide for the other collectibles within Concrete Genie or if there are any games you would like to see visual information or guides for in the future! I love helping people, discussing games and organizing information!

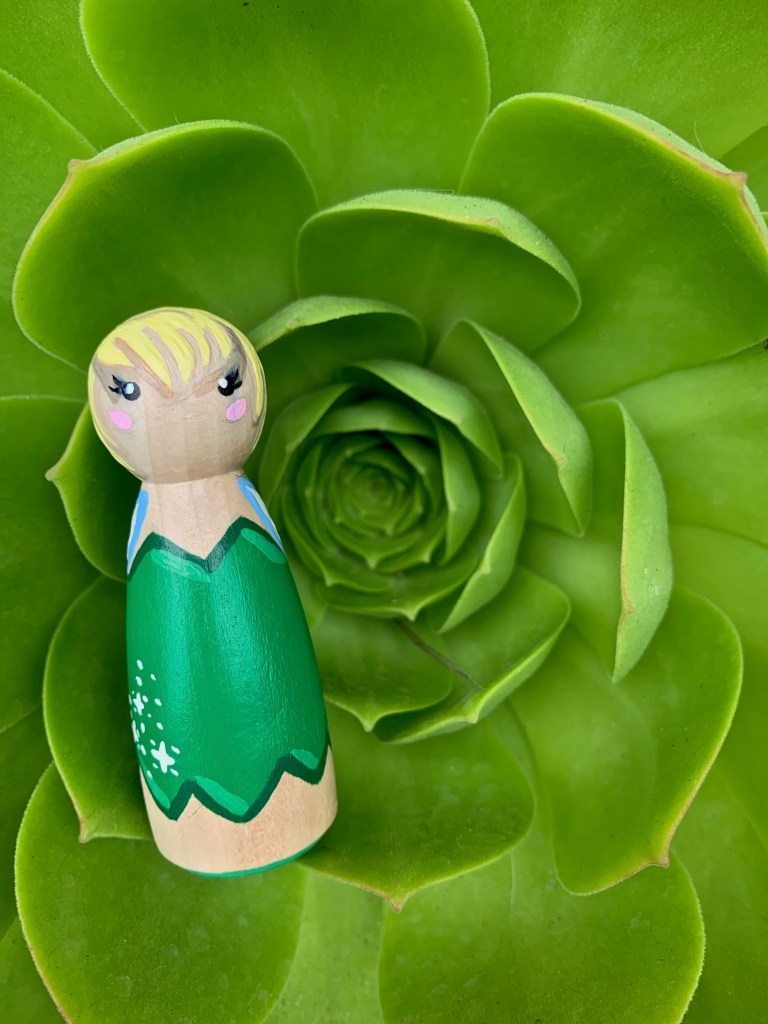
DIY Tinker Bell Peg Doll

DIY Tinker Bell Peg DollDIY Tinker Bell Peg DollPart of the fun in raising Zoey is making things that delight her; I want to create lasting, meaningful toys for her that are made with love and will be loved! Wooden toys are classic and beautiful, when created and treated right, they can last a lifetime; so let’s make some!
It’s no secret that Cameron and I love Disney. Zoey’s middle name was inspired by one of my favorite Disney princesses, Belle, and that Belle in her name has also led to another Disney nickname, Tinker Bell. I cannot wait to create a whole set of peg dolls for her, but these two characters hold the most significance until she begins watching the classics on her own.

We’ve created a Peasant Belle Peg Doll, check her out!

This week I’ll be sharing the steps I took to create a Tinker Bell peg doll for Zoey.

DIY Tinker Bell Peg Doll

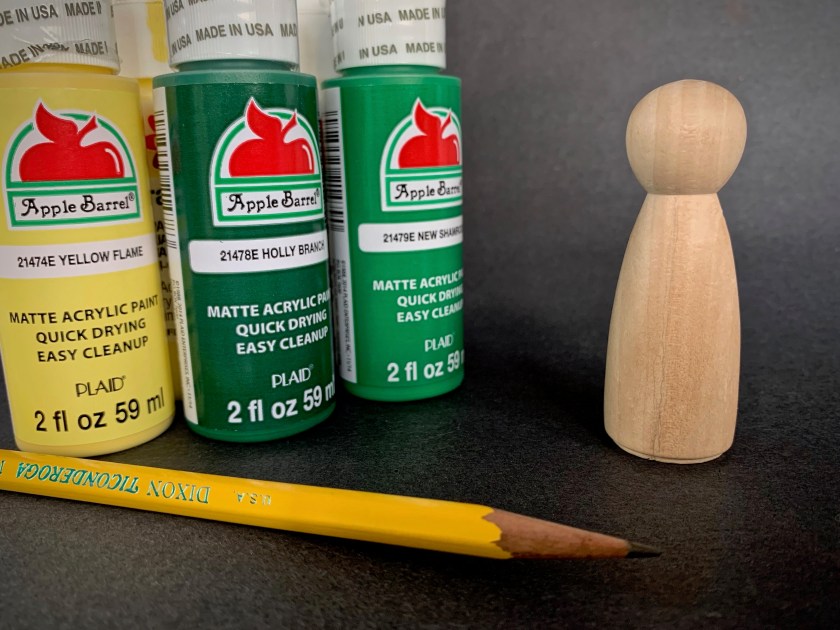
SUPPLIES
  • Blank peg doll (I used a “small angel” or “girl” shape/size)
  • Small, flat & fine tip paint brushes
  • Paint palette (or a tray for your paint)
  • Green non-toxic acrylic paint
  • Yellow non-toxic acrylic paint
  • Light brown non-toxic acrylic paint
  • Light blue non-toxic acrylic paint
  • Light pink non-toxic acrylic paint
  • White non-toxic acrylic paint
  • Black non-toxic acrylic paint
  • Non-toxic varnish (I used Duraclear Ultra Matte Varnish)
INSTRUCTIONS
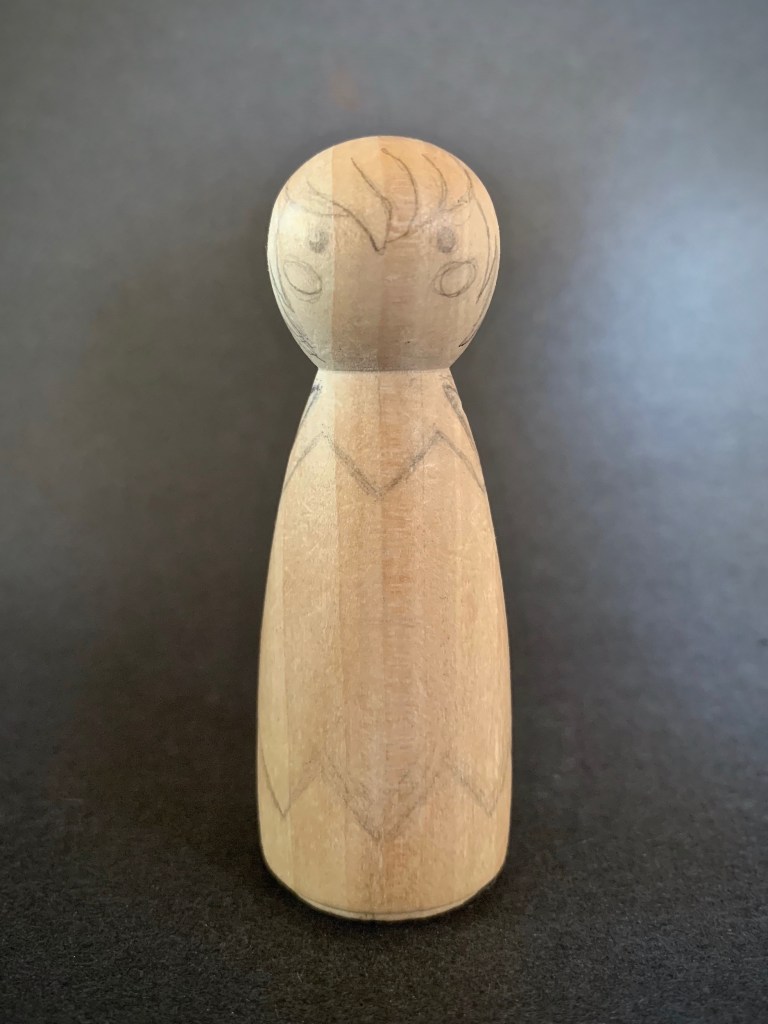
  1. With a pencil, lightly sketch Tinker Bell onto your blank peg doll.

    DIY Tinker Bell Peg DollDIY Tinker Bell Peg Doll

  2. Begin painting your peg doll with the base layers first. I started with the green of her dress, the white of her wings and the yellow of her hair. Allow this paint to dry before moving on to avoid smudging, then apply a few more layers of each until you’re happy with the colors and textures.

    DIY Tinker Bell Peg DollDIY Tinker Bell Peg Doll

  3. Paint the very bottom and edges of the peg doll green to signify her slippers.
  4. After the base layers have dried, paint a border of darker green on the edges of her dress. If you don’t have a darker shade of green, you can create some by adding a small amount of black paint to the original green and blending.
  5. Paint an accent of lighter green on the inner layer of the dark green border of her dress. If you don’t have a lighter shade of green, you can create some by adding a small amount of white paint to the original green and blending.
  6. The wings can stay matte white, or you can add a pearly white finish to give them a sheen. Once the wings have dried, border and accent them with light blue paint.
  7. Paint light brown accents on and around the hair.
  8. Once the hair has dried, paint a small light blue ribbon around Tinker Bell’s bun.
  9. Taking something small and round (I used the opposite end of one of my smaller paint brushes) dip it in black paint and dot the two eyes. Using the finest tipped paintbrush you can find, give her an eyelash or two on each eye.
  10. Once the eye paint has dried, add a highlight dot to each eye with a fine tipped paintbrush and white paint.
  11. Using the same method as the eyes, dip the opposite end of a slightly larger paintbrush into light pink paint and dot the blush under each eye.
  12. With a little white paint, give her a few sparkles of pixie dust on the hem of her dress or wherever else you feel it will look right!
  13. Allow for all paint to completely dry, then apply a varnish and allow it to dry. You can apply as many coats as you want for the finish you want, just allow them to dry in between applications and before handing her over to your child.
  14. Voilà! Tinker Bell is done and ready to be played with! Enjoy!

DIY Tinker Bell Peg Doll DIY Tinker Bell Peg Doll

The Night of the Rabbit – Sticker Location Guide

The Night of the Rabbit - Sticker Guide

If there’s one thing I do when I play a game (besides trying to relax and enjoy myself), it’s look up information. I get curious or stuck, and I find myself turning to the internet for answers. There are a lot of good guides out there that are super helpful, but what I don’t see are an abundance of simple and clean visual guides that lay out all the information in one place.

The Night of the Rabbit is a beautiful game with peaceful music and relaxingly-paced puzzle solving. There are four types of collectibles in the game; cards, dewdrops, stickers and stories. Last week we focused on a guide for the dewdrops, this week we’ll be focusing on the stickers!

This infographic will let you know what scene each of the 8 collectible stickers are located in, and where to look for them. All of the stickers are located in Mousewood, save for one in Jerry’s world at his home. To view the stickers you’ve collected, open to the game menu, click on bonus collections (the gift icon on the bottom right) and then stickers.

I do not currently have plans to create guides for the cards or stories, but if you would like that, please contact me and let me know! Please let me know if there are any other games you would like to see visual information or guides for in the future! I love helping people, discussing games and organizing information!

Homemade Teething Cookies Recipe

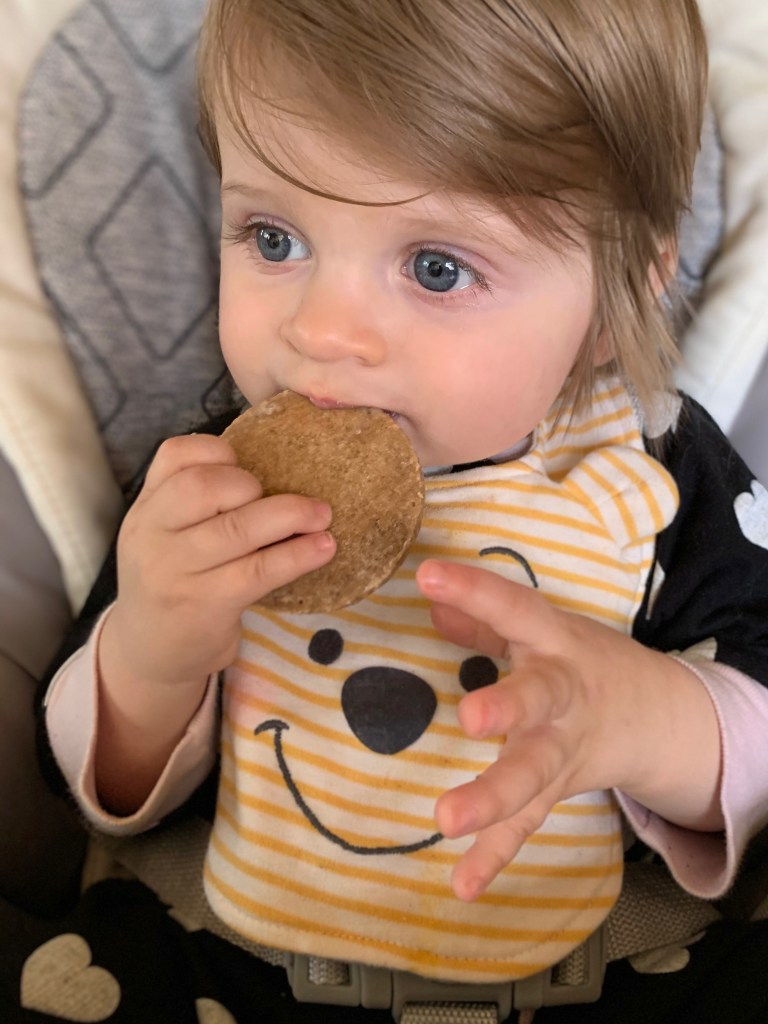
Homemade Teething Cookies RecipeLast week, we brought some of the beach to Zoey with edible “sand” made out of graham crackers and oatmeal. After she was done playing, I could not let good food go to waste so I made her some teething cookies with the remaining “sand”.

Not too sweet, but sweet enough to be called cookies instead of crackers, these treats are a hit! They are springy, yet firm enough to soothe her teething gums and she likes them!…Although so does my husband so I’m going to have to convince him not to eat all of them before she can knaw on a few.

Homemade Teething Cookies Recipe

INGREDIENTS
INSTRUCTIONS
  1. Grease a baking sheet and preheat the oven to 325 F.
  2. Combine the ingredients into a mixing bowl and stir them with a mixing spoon until a thick dough has formed. You may need to adjust the amount of water or coconut oil you add depending on how juicy your bananas are.
  3. Section the dough into smaller portions and (using a flat surface and a rolling pin) roll out your dough to 1/4 of an inch thick. You will need to use flour to keep the dough from sticking to the rolling pin and surfaces.
  4. With a circular cookie cutter or a drinking glass (I used a drinking glass), cut cookies out of the dough and place them onto the greased baking sheet.
  5. Cook each sheet of cookies for 12 to 15 minutes. Be careful they are hot! Use the spatula or a spoon to test their springiness. They should be firm yet springy when pressed as they are brought out of the oven.
  6. Allow the cookies to cool before serving. These can be stored in the refrigerator for a little more firmness.
  7. Serve and enjoy, but please watch your baby as they eat this to make sure they handle the texture well!

The Night of the Rabbit – Dewdrop Location Guide

The Night of the Rabbit - Dewdrop Guide

If there’s one thing I do when I play a game (besides trying to relax and enjoy myself), it’s look up information. I get curious or stuck, and I find myself turning to the internet for answers. There are a lot of good guides out there that are super helpful, but what I don’t see are an abundance of simple and clean visual guides that lay out all the information in one place.

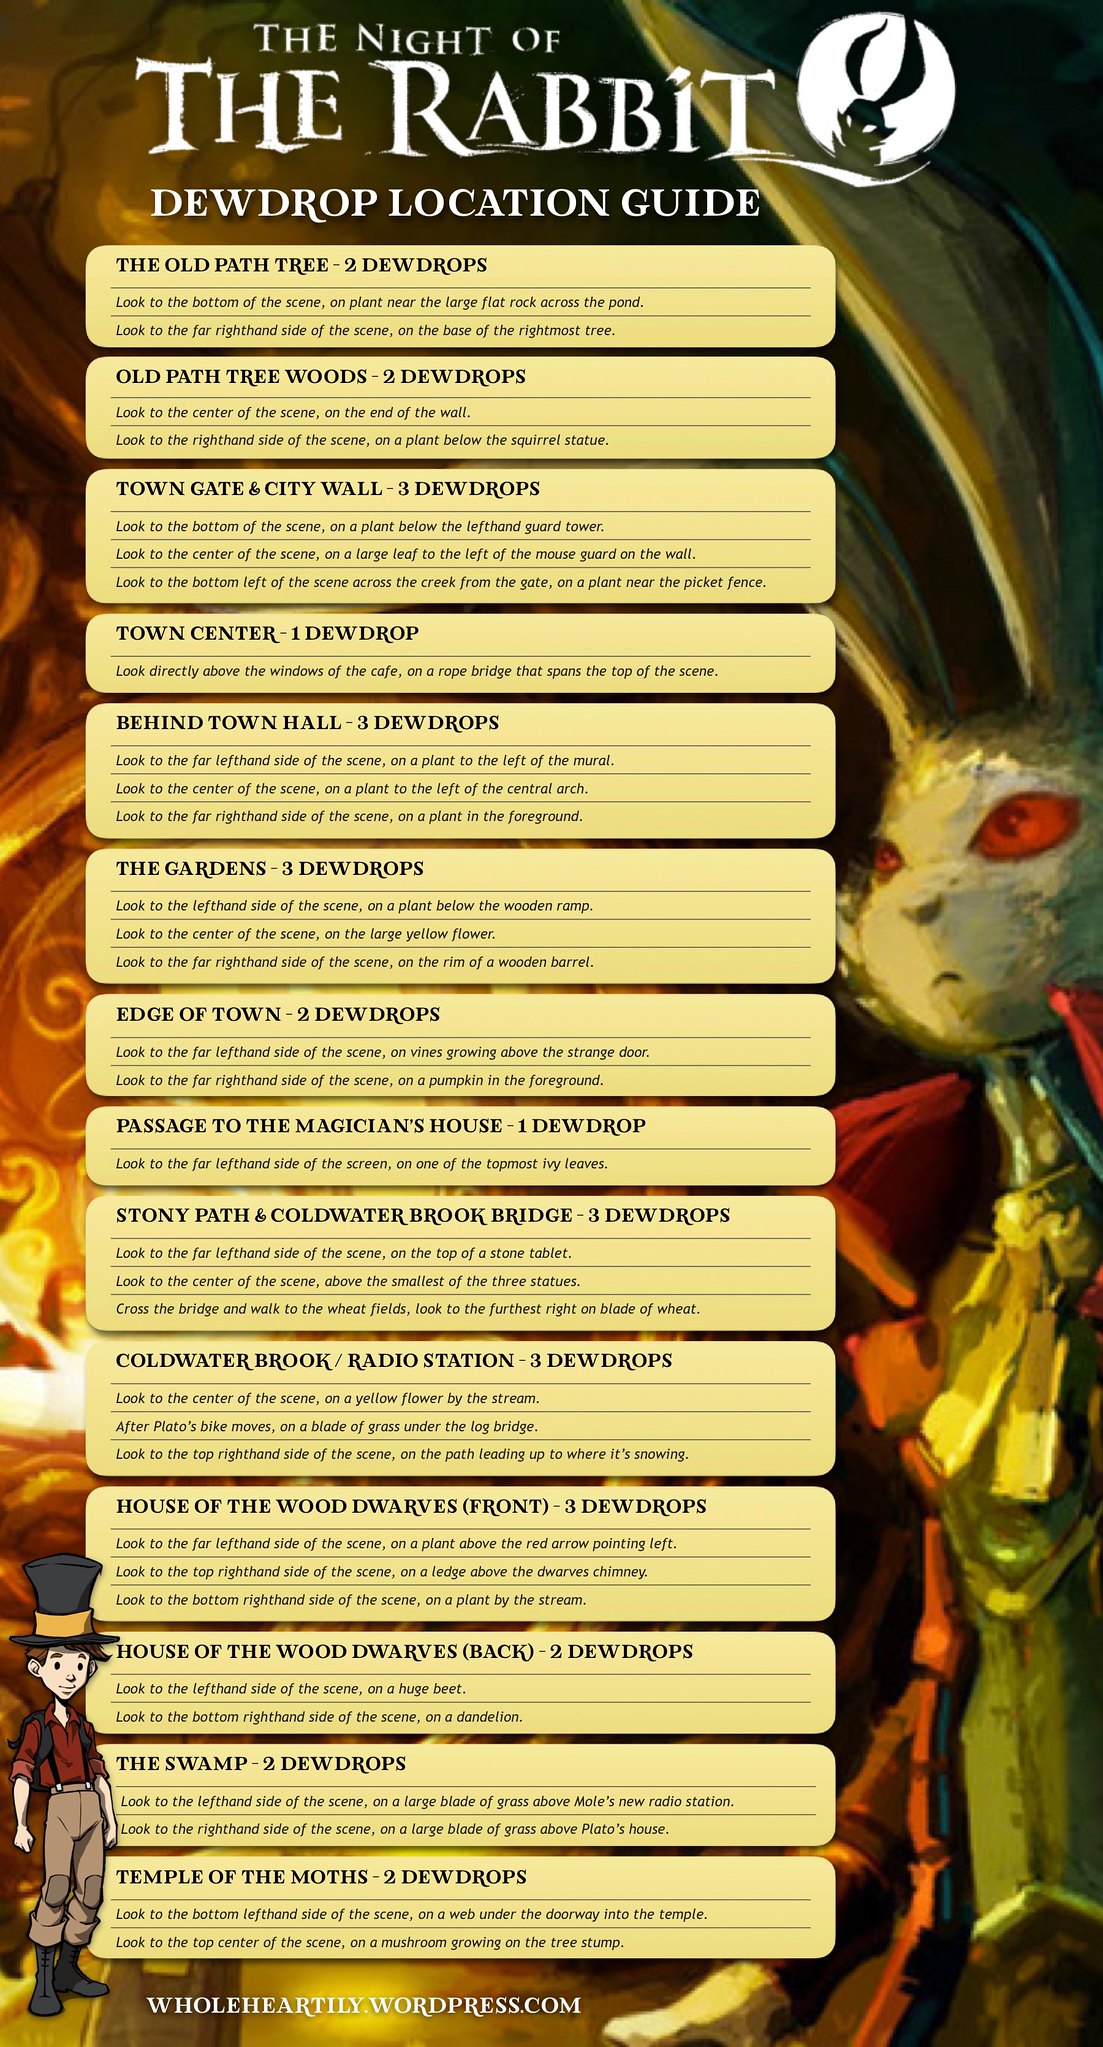
The Night of the Rabbit is a beautiful game, with peaceful music and relaxingly-paced puzzle solving. There are four types of collectibles in the game; cards, dewdrops, stickers and stories. This week we are focusing on a guide for the dewdrops, next week we’ll be focusing on a guide for the stickers!

There are two sorts of collectibles in the game, stickers and dewdrops. This week we’ll be focusing on the dewdrops, but check out my guide to the sticker locations!

Dewdrops can only be found in the world of Mousewood and only during daylight hours.This infographic will let you know how many dewdrops are in each scene and where to look for them. Once all the dewdrops are collected, travel back to the passage to the magicians house and click on the stone stele to reveal the portrait of the Marquis de Hoto’s apprentice, prior to Jeremiah.

Please let me know if there are any games you would like to see visual information or guides for in the future! I love helping people, discussing games and organizing information!

DIY Edible “Sand” for Sensory Playtime

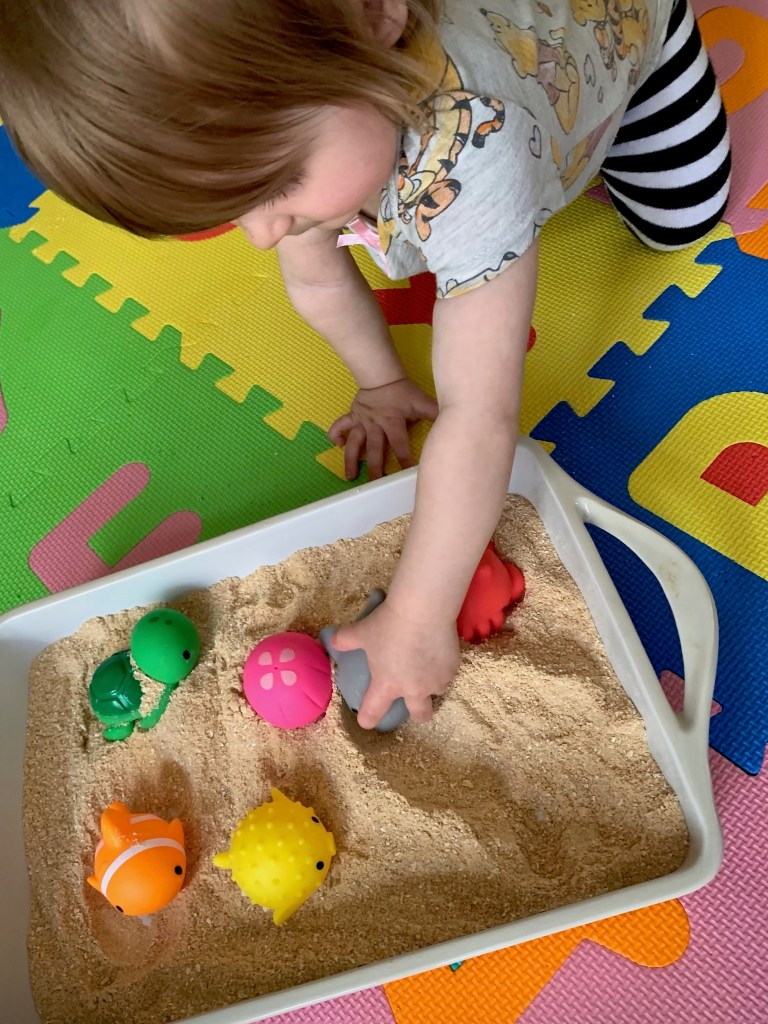
DIY Edible Sand for Sensory PlayIt’s the middle of Summer and I would love to take Zoey to the beach for the first time, but just about everything she picks up is quickly introduced to her mouth! I understand she’s figuring things out (and more power to her), but I’m not super enthusiastic about her ingesting beach sand. So, until she gets a little less eager to put everything in her mouth, why not bring a little beach experience to her?
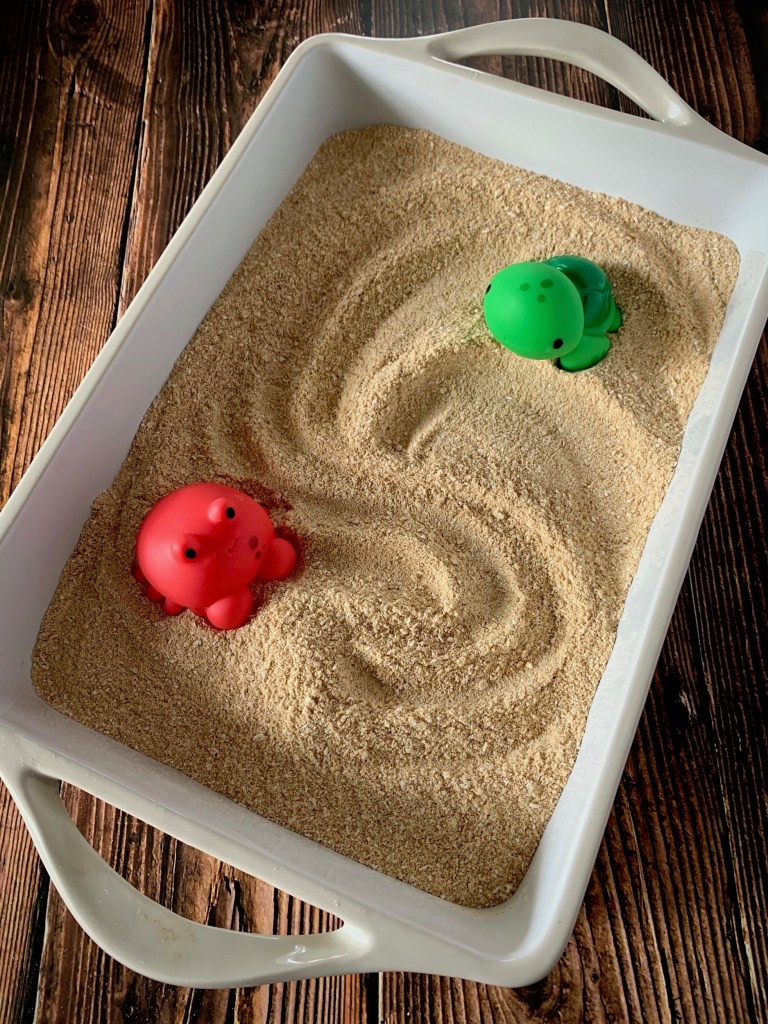
Part of the fun in raising Zoey is making things that teach and fascinate her. We can make edible “sand” that’s fun to play in and safe to eat out of graham crackers and oatmeal; let’s make it!

Check back next week for the homemade teething cookies I made with the remaining edible “sand”.

DIY Edible Sand for Sensory Play

SUPPLIES
  • 1 box of graham crackers.
  • 2 cups of oatmeal (I used whole grain old-fashioned oats)
  • A food processor
  • A mixing bowl
  • A mixing spoon
  • A container for playing in the “sand” (I used a heavy casserole dish)
  • Beach or ocean themed toys (optional)
INSTRUCTIONS
  1. Open the graham crackers and blend them in the food processor until they are a fine sand-like texture.
  2. Remove the graham crackers from the food processor and pour them into a mixing bowl.
  3. Measure the oatmeal into the food processor and blend it until it is also a fine sand-like texture.
  4. Remove the oatmeal from the food processor and add it to the mixing bowl with the graham crackers.
  5. Using a mixing spoon, stir the graham crackers and oatmeal together until well combined.
  6. Pour the edible “sand” into the container you’ve chosen for your baby to play in. I used a heavy casserole dish since Zoey’s not strong enough to flip it yet. You can always double or triple the graham cracker and oatmeal ratio if you want to fill a larger container.

    DIY Edible Sand for Sensory Play
  7. Arrange beach and/or ocean themed toys in the sand for your little one to play with (optional).

    DIY Edible Sand for Sensory Play
  8. Introduce the edible “sand” to your baby and enjoy!

    DIY Edible Sand for Sensory PlayDIY Edible Sand for Sensory Play DIY Edible Sand for Sensory Play

Randall’s Be My Pal Cupcake Recipe (Monster’s University)

Be My Pal Cupcake Recipe from Disney and Pixar's Monster's University

INTRODUCTION

Welcome back friends! This week we’ll be baking the cupcakes Randall bakes in the hope of making new friends at Monster’s University in Disney and Pixar’s Monster’s University.Be My Pal Cupcake Recipe from Disney and Pixar's Monster's University

These “Be My Pal” cupcakes are featured right before Randall leaves for a campus party. He’s baked them to impress members of the fraternity he’s trying to join and asks Mike to join him, but Mike declines to study instead.

Be My Pal Cupcake Recipe from Disney and Pixar's Monster's University Be My Pal Cupcake Recipe from Disney and Pixar's Monster's University

In all honesty, I feel a little guilty for not making the cupcake portion of this recipe from scratch. I am rationalizing it by an idea that a college student probably wouldn’t want to take the time to bake everything from scratch, but on the flip-side this is Randall we’re talking about; it could go either way! I look forward to revisiting this recipe in the future and re-creating it completely from scratch, but in the meantime, enjoy and substitute butter for a more homemade flavor!

Be My Pal Cupcake Recipe from Disney and Pixar's Monster's University Be My Pal Cupcake Recipe from Disney and Pixar's Monster's University

CUPCAKES
  • 1 box of Devil’s Food Cake Mix (I used Duncan Hines)
  • 1/3 cup butter (or vegetable oil)
  • 3 large eggs
  • 1 cup water
  • Cooking spray
INSTRUCTIONS (CUPCAKES)
  1. Preheat the oven to 350 F.
  2. Melt the butter in a small saucepan and set it aside to cool.
  3. Line a muffin/cupcake pan with cupcake liners and spray them lightly with cooking spray.
  4. Place the dry cake mix in a large bowl. In a separate bowl, combine the melted butter, eggs and water.
  5. Slowly add the combined wet ingredients to the dry cake mix a little at a time, mixing until smooth.
  6. Distribute the batter into the prepared cupcake liners, filling each liner about about 2/3 full (you can use an ice cream scoop or I used a small measuring cup).
  7. Bake the cupcakes for 18 to 21 minutes, until a toothpick poked into the center of each cupcake comes out clean.
  8. Remove them from the oven and allow them to cool completely before frosting.
FROSTING
  • 1 8 oz. package of cream cheese (room temperature)
  • 1 1/2 cups heavy whipping cream (cold)
  • 1 1/2 cups powdered confectioners sugar
  • 1/2 tsp. vanilla extract
INSTRUCTIONS (FROSTING)
  1. Refrigerate or freeze your mixing bowl and whisk attachment(s) for 10-15 minutes before using, then whip the heavy whipping cream on high speed for 1 to 2 minutes until it’s thick, fluffy and spreadable.
  2. In a second mixing bowl, beat the cream cheese and powdered sugar slowly until well incorporated, then add the vanilla extract.
  3. Fold the whipped cream into the cream cheese mixture.
  4. Separate out about a third of the frosting out into a small bowl and add red food coloring until it reaches the desired hue for the “Be My Pal” letters.
  5. Spread the white frosting on each cupcake using a butter knife.
  6. Place the red frosting into a piping bag and spell out “Be My Pal” onto 7 (or more) of the cupcakes.
  7. Enjoy!

Chrono Trigger – Sealed Chest and Door Guide

Chrono Trigger Sealed Chest and Door Guide

If there’s one thing I do when I play a game (besides trying to relax and enjoy myself), it’s look up information. I get curious or stuck, and I find myself turning to the internet for answers. There are a lot of good guides out there that are super helpful, but what I don’t see are an abundance of simple and clean visual guides that lay out all the information in one place.

Earlier this year, I participated in playing Chrono Trigger with The MinnMax Show’s Deepest Dive. I had heard so many good things about this game over the years. I’d started it, but never finished, until now!

Everything I’d heard about it was true, it’s a wonderful nostalgic game! My only mistake was opening all the sealed chests in the wrong order and missing out on better and/or extra loot. To counter that, I made this infographic to help players figure out where and when all the sealed chests and doors are located, if they’re upgradeable, and what’s in them. There’s a note at the top with instructions on what to do to receive the upgraded loot.

Please let me know if there are any games you would like to see visual information or guides for in the future! I love helping people, discussing games and organizing information!

DIY Frozen Mickey and Minnie Baby Treats using Candy Molds

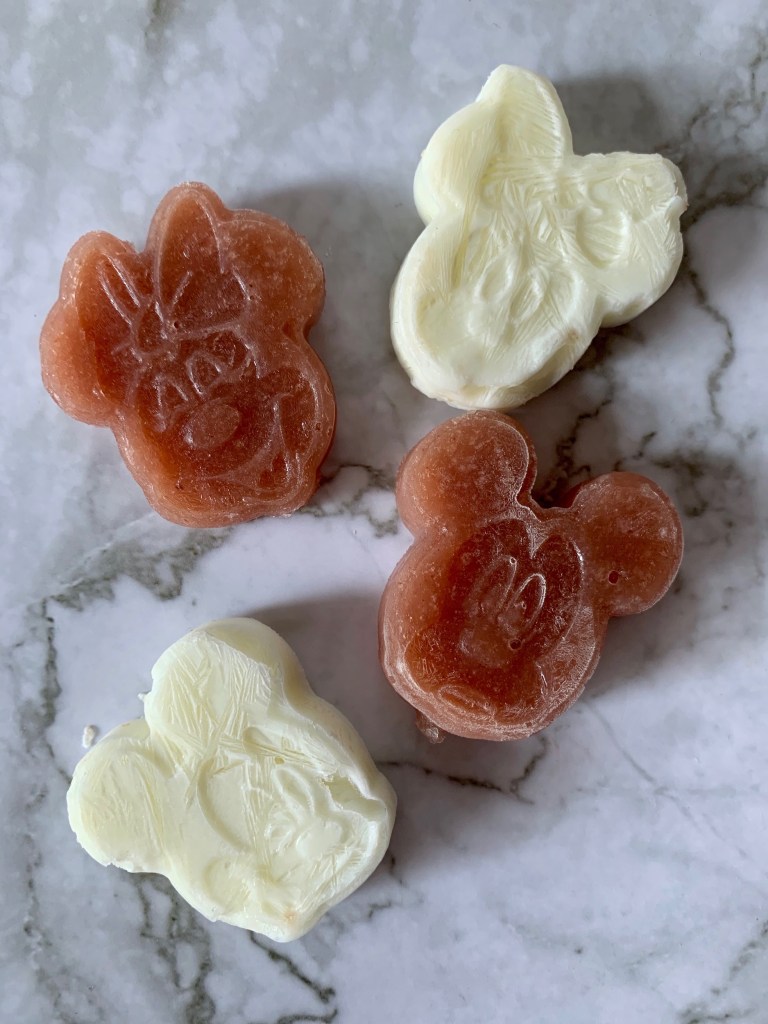
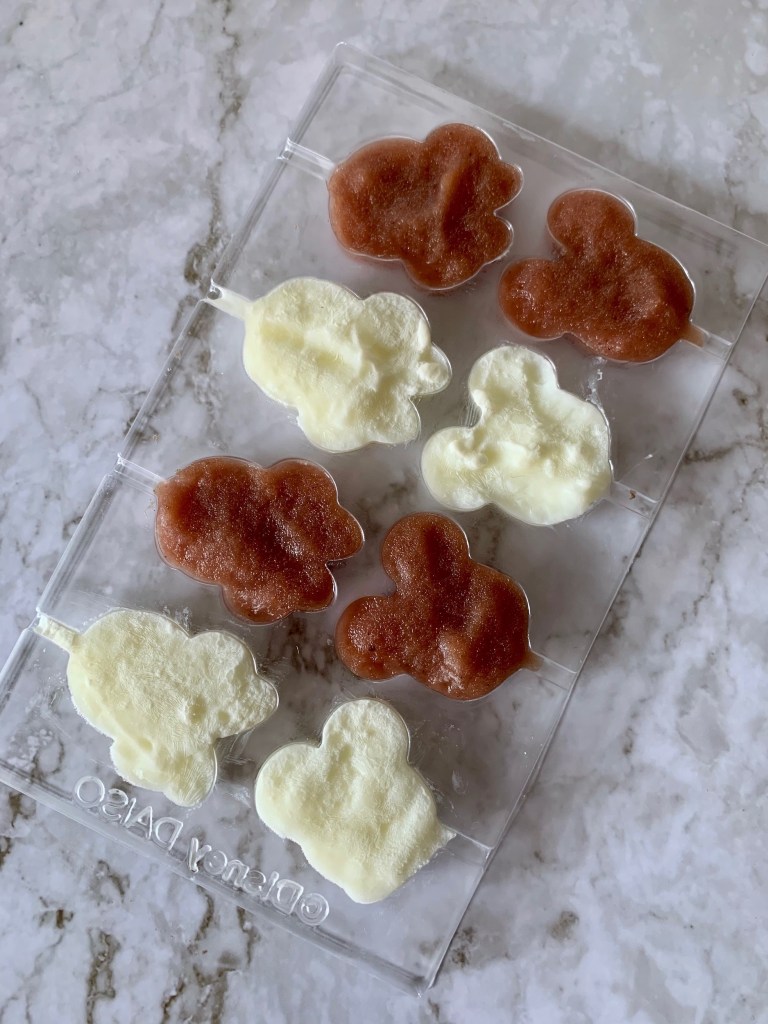
DIY Frozen Mickey and Minnie Baby Treats using Candy MoldsDuring these Summer months, and even into Fall, we get some pretty warm and sometimes uncomfortably hot days. To cool Zoey off and soothe her teething gums, I thought it would be fun and refreshing to make some frozen treats using the food she already eats and candy molds!
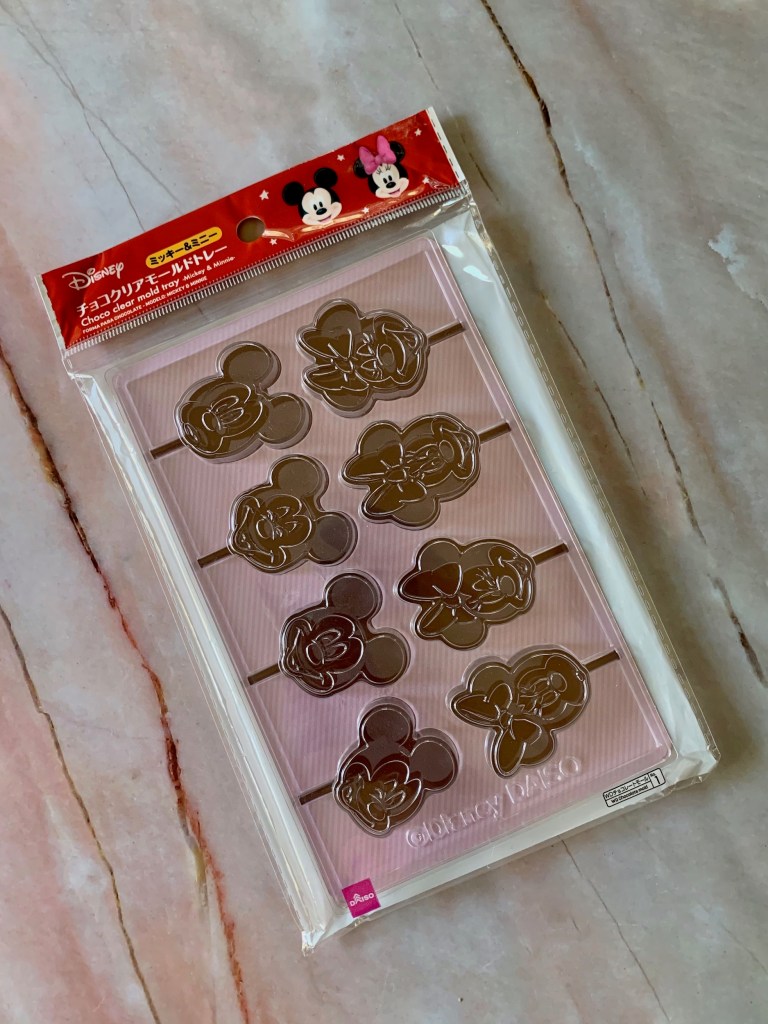
DIY Frozen Mickey and Minnie Baby Treats using Candy Molds

SUPPLIES
  • Candy mold of your choice (I used Mickey and Minnie)
  • Baby food
  • Yogurt (optional)
INSTRUCTIONS
  1. Wash and dry the candy mold.

    DIY Frozen Mickey and Minnie Baby Treats using Candy Molds
  2. Choose the flavor of baby food and/or yogurt you would like to freeze and spoon it into the candy molds until it’s even with the top of the mold. I wiped the top of my mold down to make it look better, but you do not need to do this.

    DIY Frozen Mickey and Minnie Baby Treats using Candy MoldsDIY Frozen Mickey and Minnie Baby Treats using Candy Molds
  3. Place the mold in the freezer for an hour or more until the contents are frozen.

    DIY Frozen Mickey and Minnie Baby Treats using Candy Molds
  4. Remove the mold from the freezer and pop out one or two frozen treats at a time for baby to enjoy!

    DIY Frozen Mickey and Minnie Baby Treats using Candy MoldsDIY Frozen Mickey and Minnie Baby Treats using Candy Molds

Tabletop Game – Let’s Play Blokus!

Tabletop Game Blokus by Mattel GamesI’m always on the look out for a fun, entertaining way to pass the time like a good tabletop game! Blokus was introduced to us by my husband’s parents and we enjoyed playing it so much we purchased it straightaway!

Tabletop Game Blokus by Mattel GamesBlokus is a two to four player strategy game that can be played with reckless abandon, or the studied care one would reserve for Chess or Checkers.

Players each choose a color and a corner, then decide who goes first; turns proceed clockwise around the board. To begin, each player must use their first turn to lay down a piece that covers their base corner’s square. Play then continues with each player placing one piece each turn that must touch the corner of one of their colored pieces, but only the corners! Full sides of the same color may not touch one another.

Tabletop Game Blokus by Mattel GamesWhen a player reaches a point where they cannot place another piece, they are done. The game ends when no player can place anymore pieces. Once the game ends the players count the number of squares in their unplayed pieces, the player with the lowest number of squares left, wins!

Tabletop Game Blokus by Mattel GamesMy only complaint is based on the packaging or storage. The version we purchased has no storage for the 84 colored pieces which is surprising and disappointing. I use four sandwich bags, one for each color to store them. This cuts down on the amount of time spent sifting through the pieces before starting each game!

Tabletop Game Blokus by Mattel GamesIf you’re looking for a fun, fresh take on a timeless strategy game that feels like a spiritual successor to Checkers and/or Chess, check out Blokus!